
Considering Van Life? 6 Tips for Van Life Success
Vanlife, trucklife, bikelife, tentlife... all of them have their pros and cons, but the most important aspect is understanding why you do it in the first place. From the outside, a simple life can look like the dream, but there is also a reality that living on the road can be mundane, lonely, and scary. On the flip side, the highs are very high.
Vanlife, trucklife, bikelife, tentlife... all of them have their pros and cons, but the most important aspect is understanding why you do it in the first place. From the outside, a simple life can look like the dream, but there is also a reality that living on the road can be mundane, lonely, and scary. On the flip side, the highs are very high.
If you are considering living on the road for a night, a week, months, forever... Here are a few tips:
1) know why you are doing it
If you can understand why you want to live on the road, then the hours spent alone, wandering, wont hurt as badly. To use an example here, if you have the opportunity to understand your why then you can never get lost. How is that so? Well, if you are feeling lost—which all who live on the road do from time to time—you can circle around to your why and continue on the path. If, at some point, you realize your why is incorrect, that will hurt, but better now than later!
While on a rock climbing road trip to Joshua Tree National Park in California, Kristin enjoys her morning cup of coffee in her Four Wheel Camper adventure mobile. Photograph by Dalton Johnson.
2) find a community
Community is the saving grace. Luckily, almost every gypsy-like outing has a following of some kind. From climbing to kiting to under-water basket weaving, there is a group for you. Heck, just type that into Facebook, I’m sure you can find a group. Even better, I’m sure if you typed in, “Your Favorite Activity around Nearest Largest City” you will find something.
3) make sure to laugh everyday
Have fun! We can definitely get serious, focus a little to much, and get lost in the drive to be on the road. Especially when money gets tight. If you are feeling the pressure of finances, take a step back, take a deep breath, and acknowledge yourself for where you are at. If you don’t like it, start making changes today.
4) allow yourself to be a bit dirty
You are living on the road and most likely are not showering everyday, heck maybe not even once a week! Learn to enjoy this! Please, don’t be stinky while working next to me at a coffee shop, but really, enjoy your time as a digital nomad. Be free of the office, allow yourself to get a little dirty, wear a shirt a few times. Heck, learn how to do the smell check. If a shirt is in question, maybe toss it in the hamper—or get your partner to give it a sniff ;-)
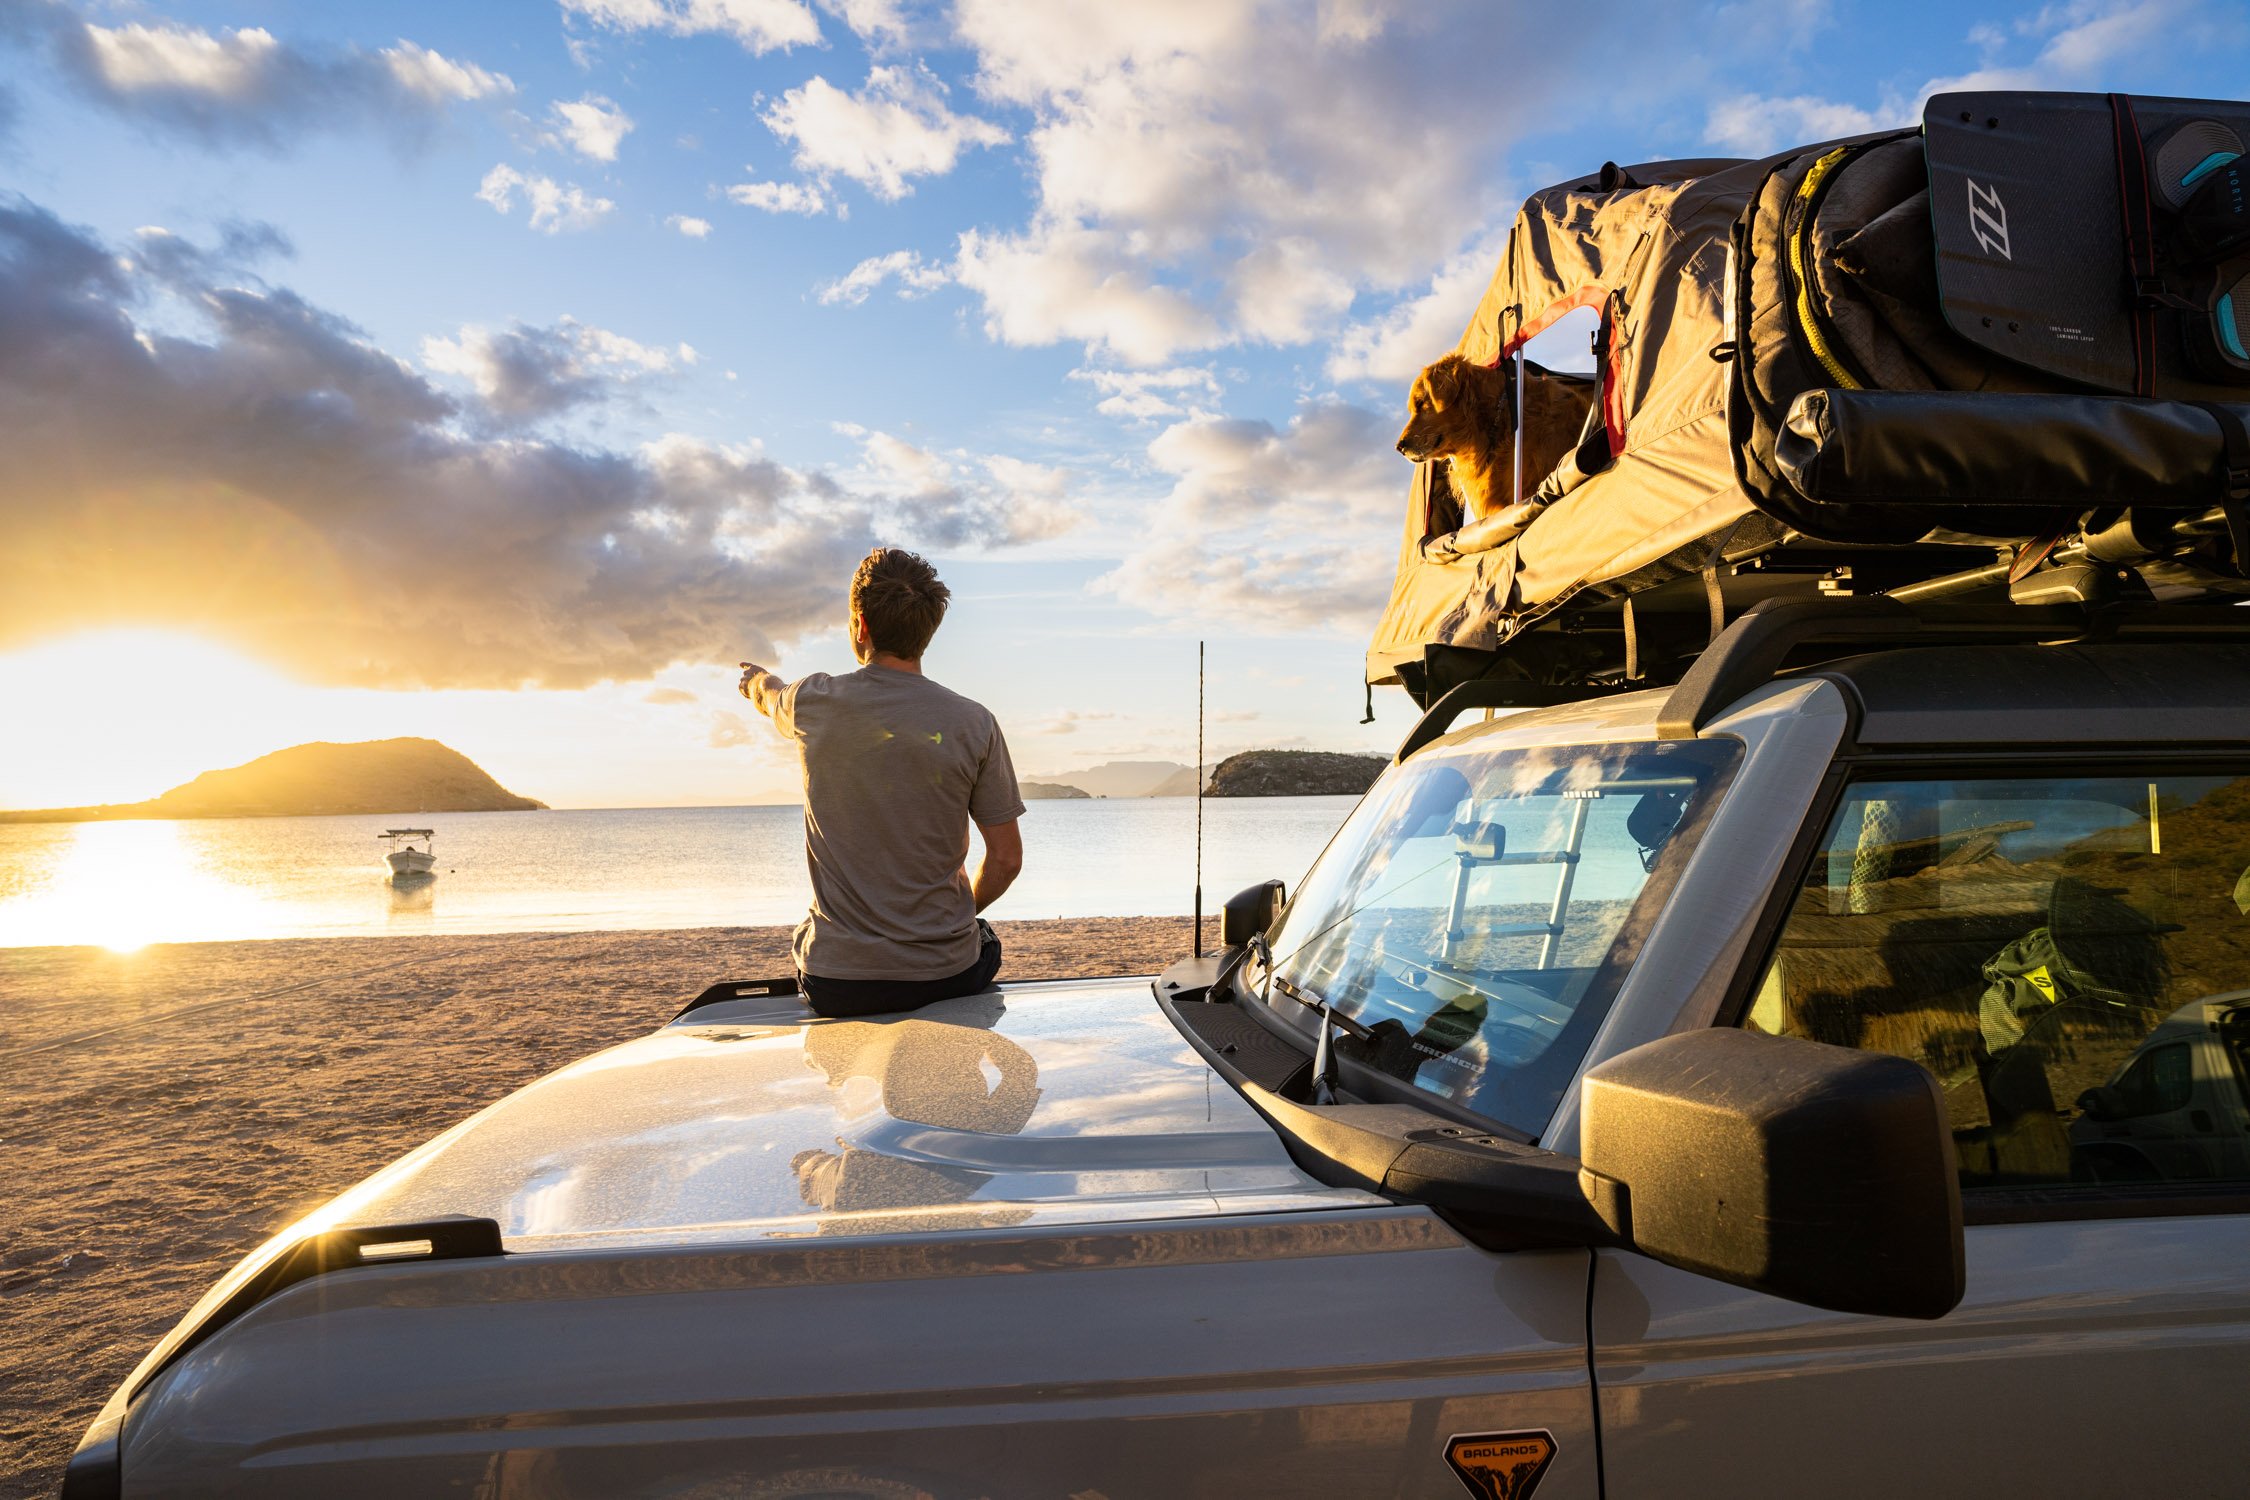
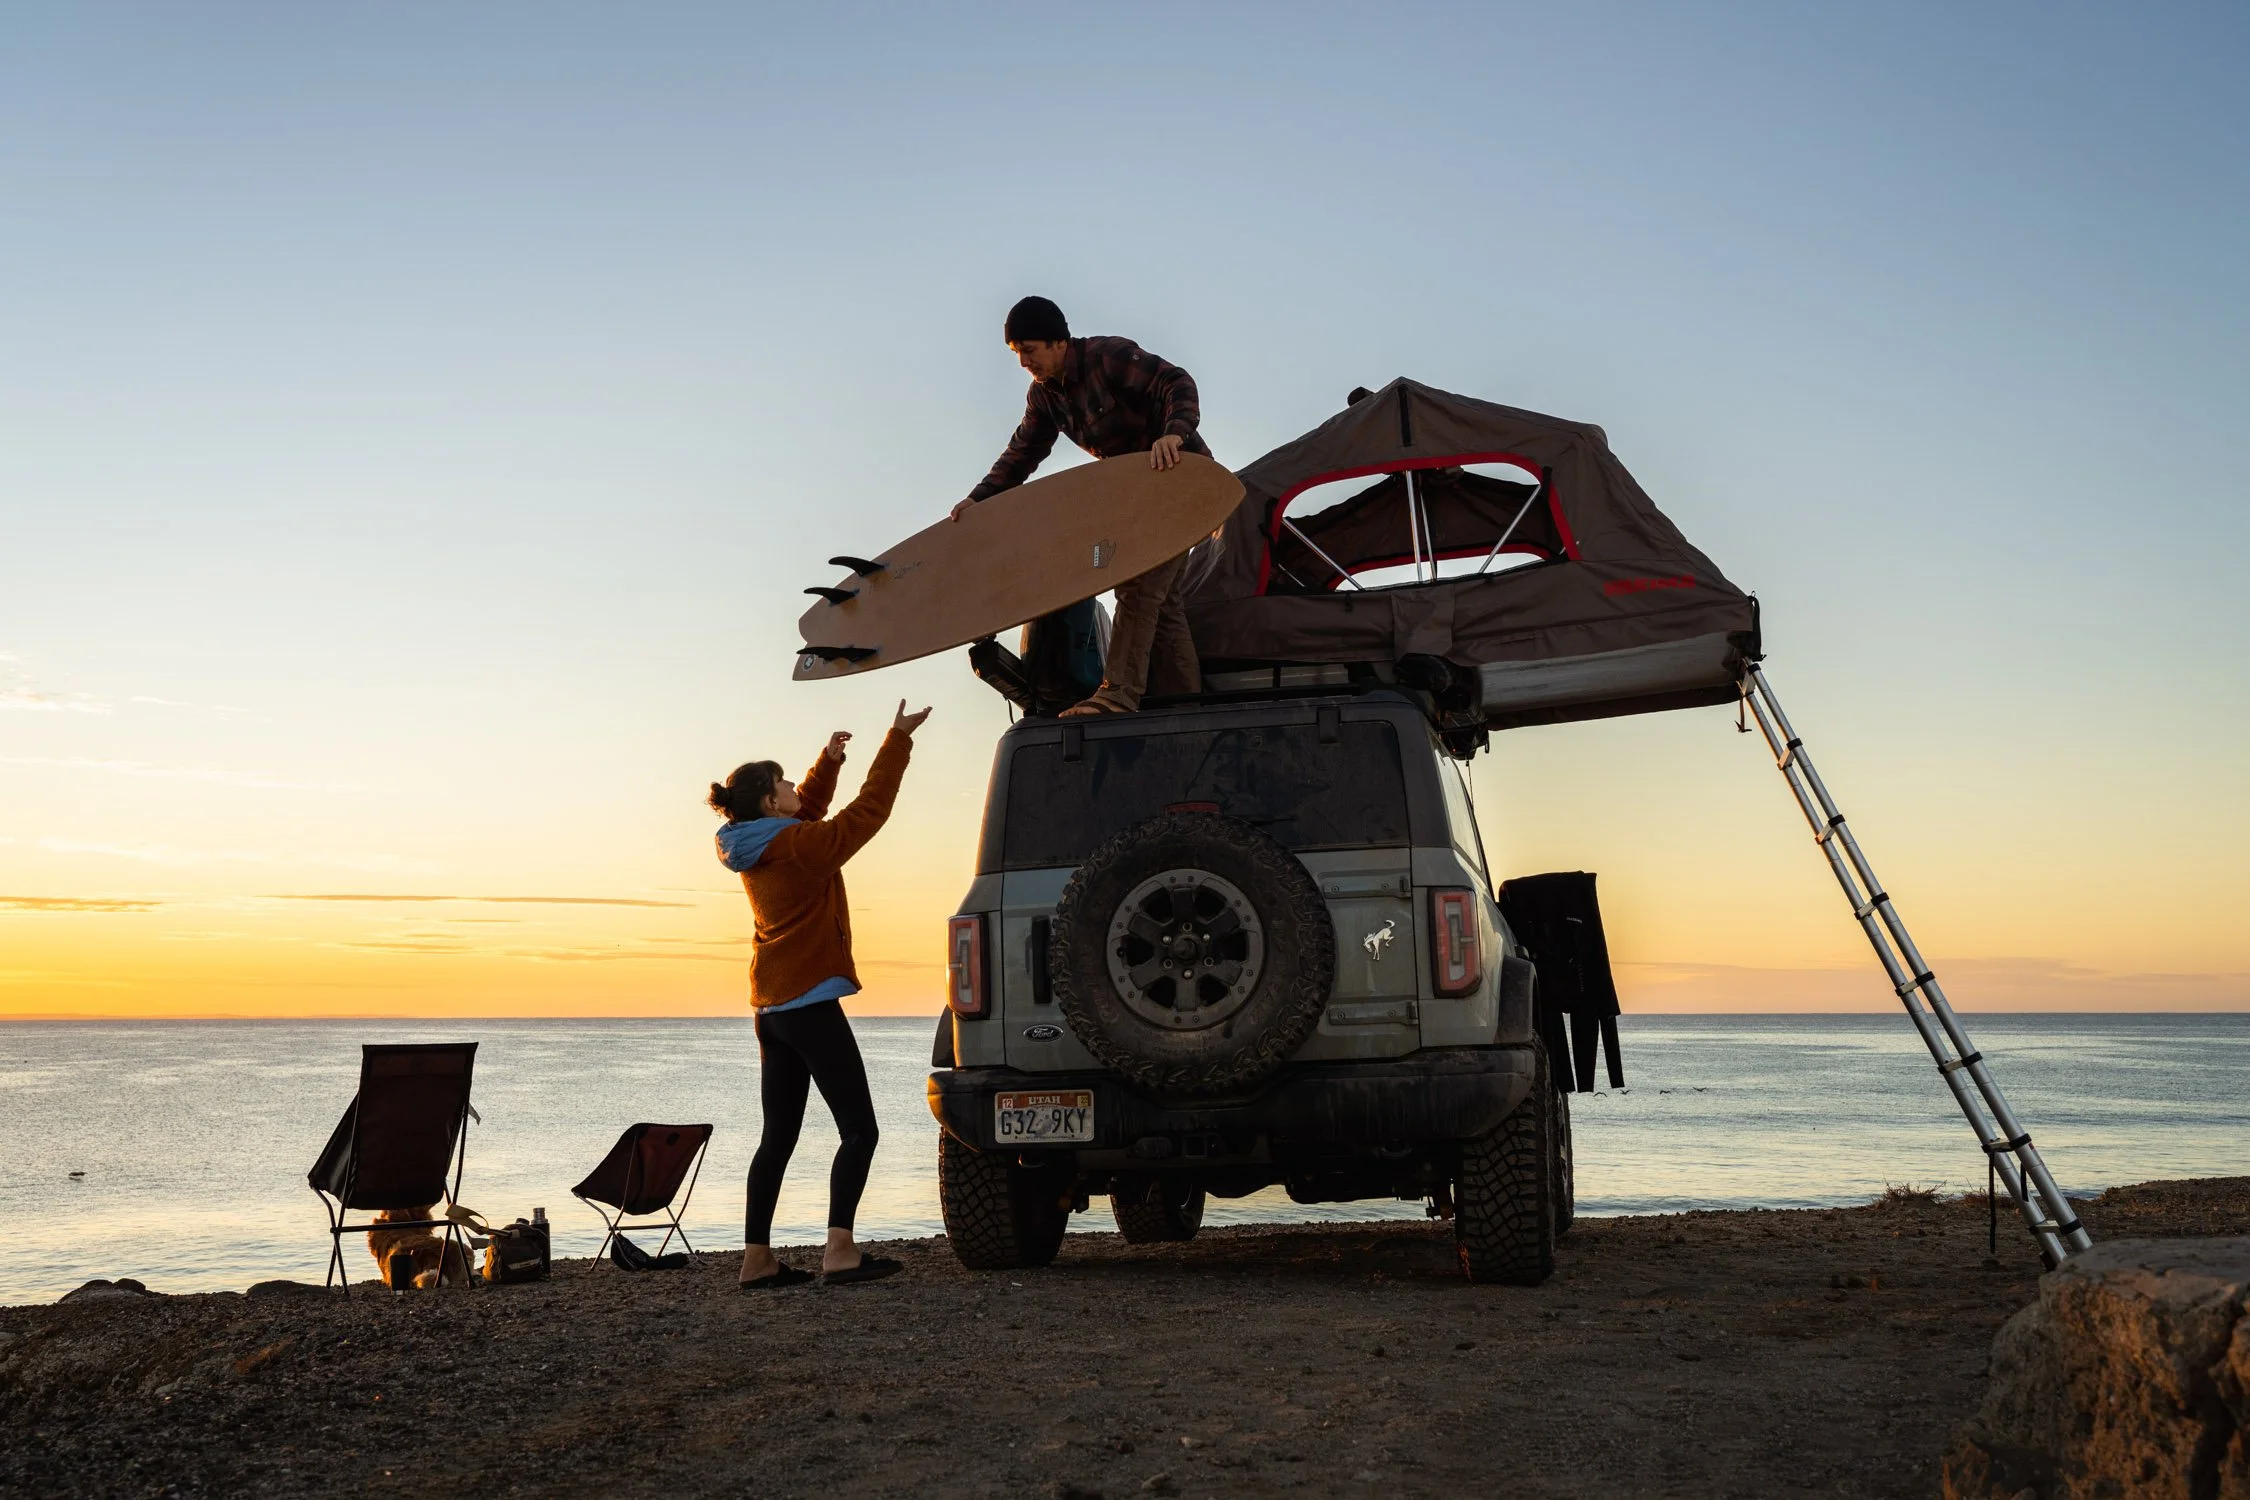
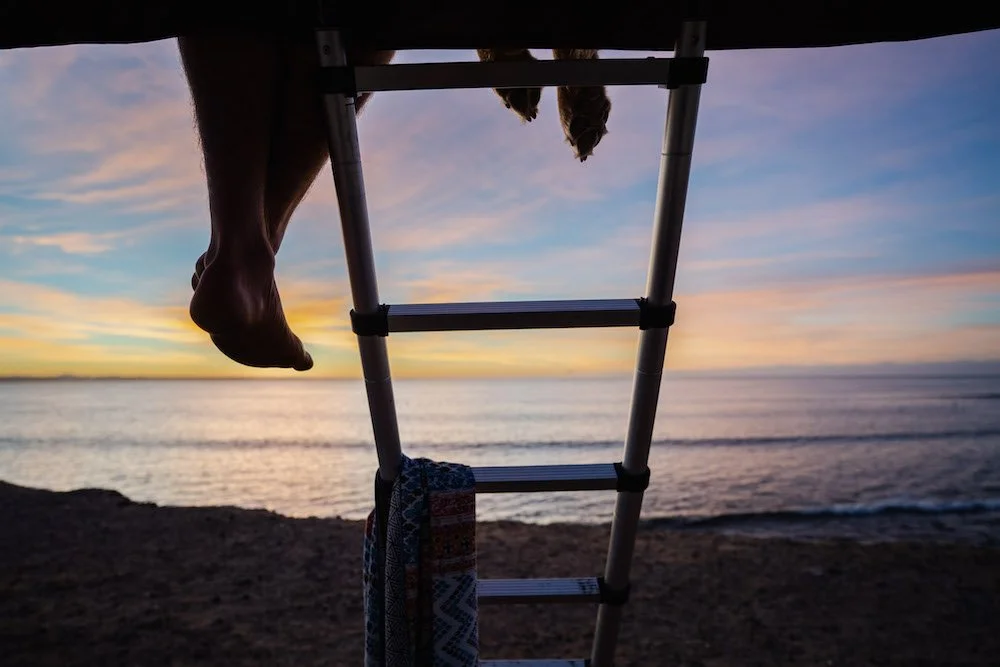
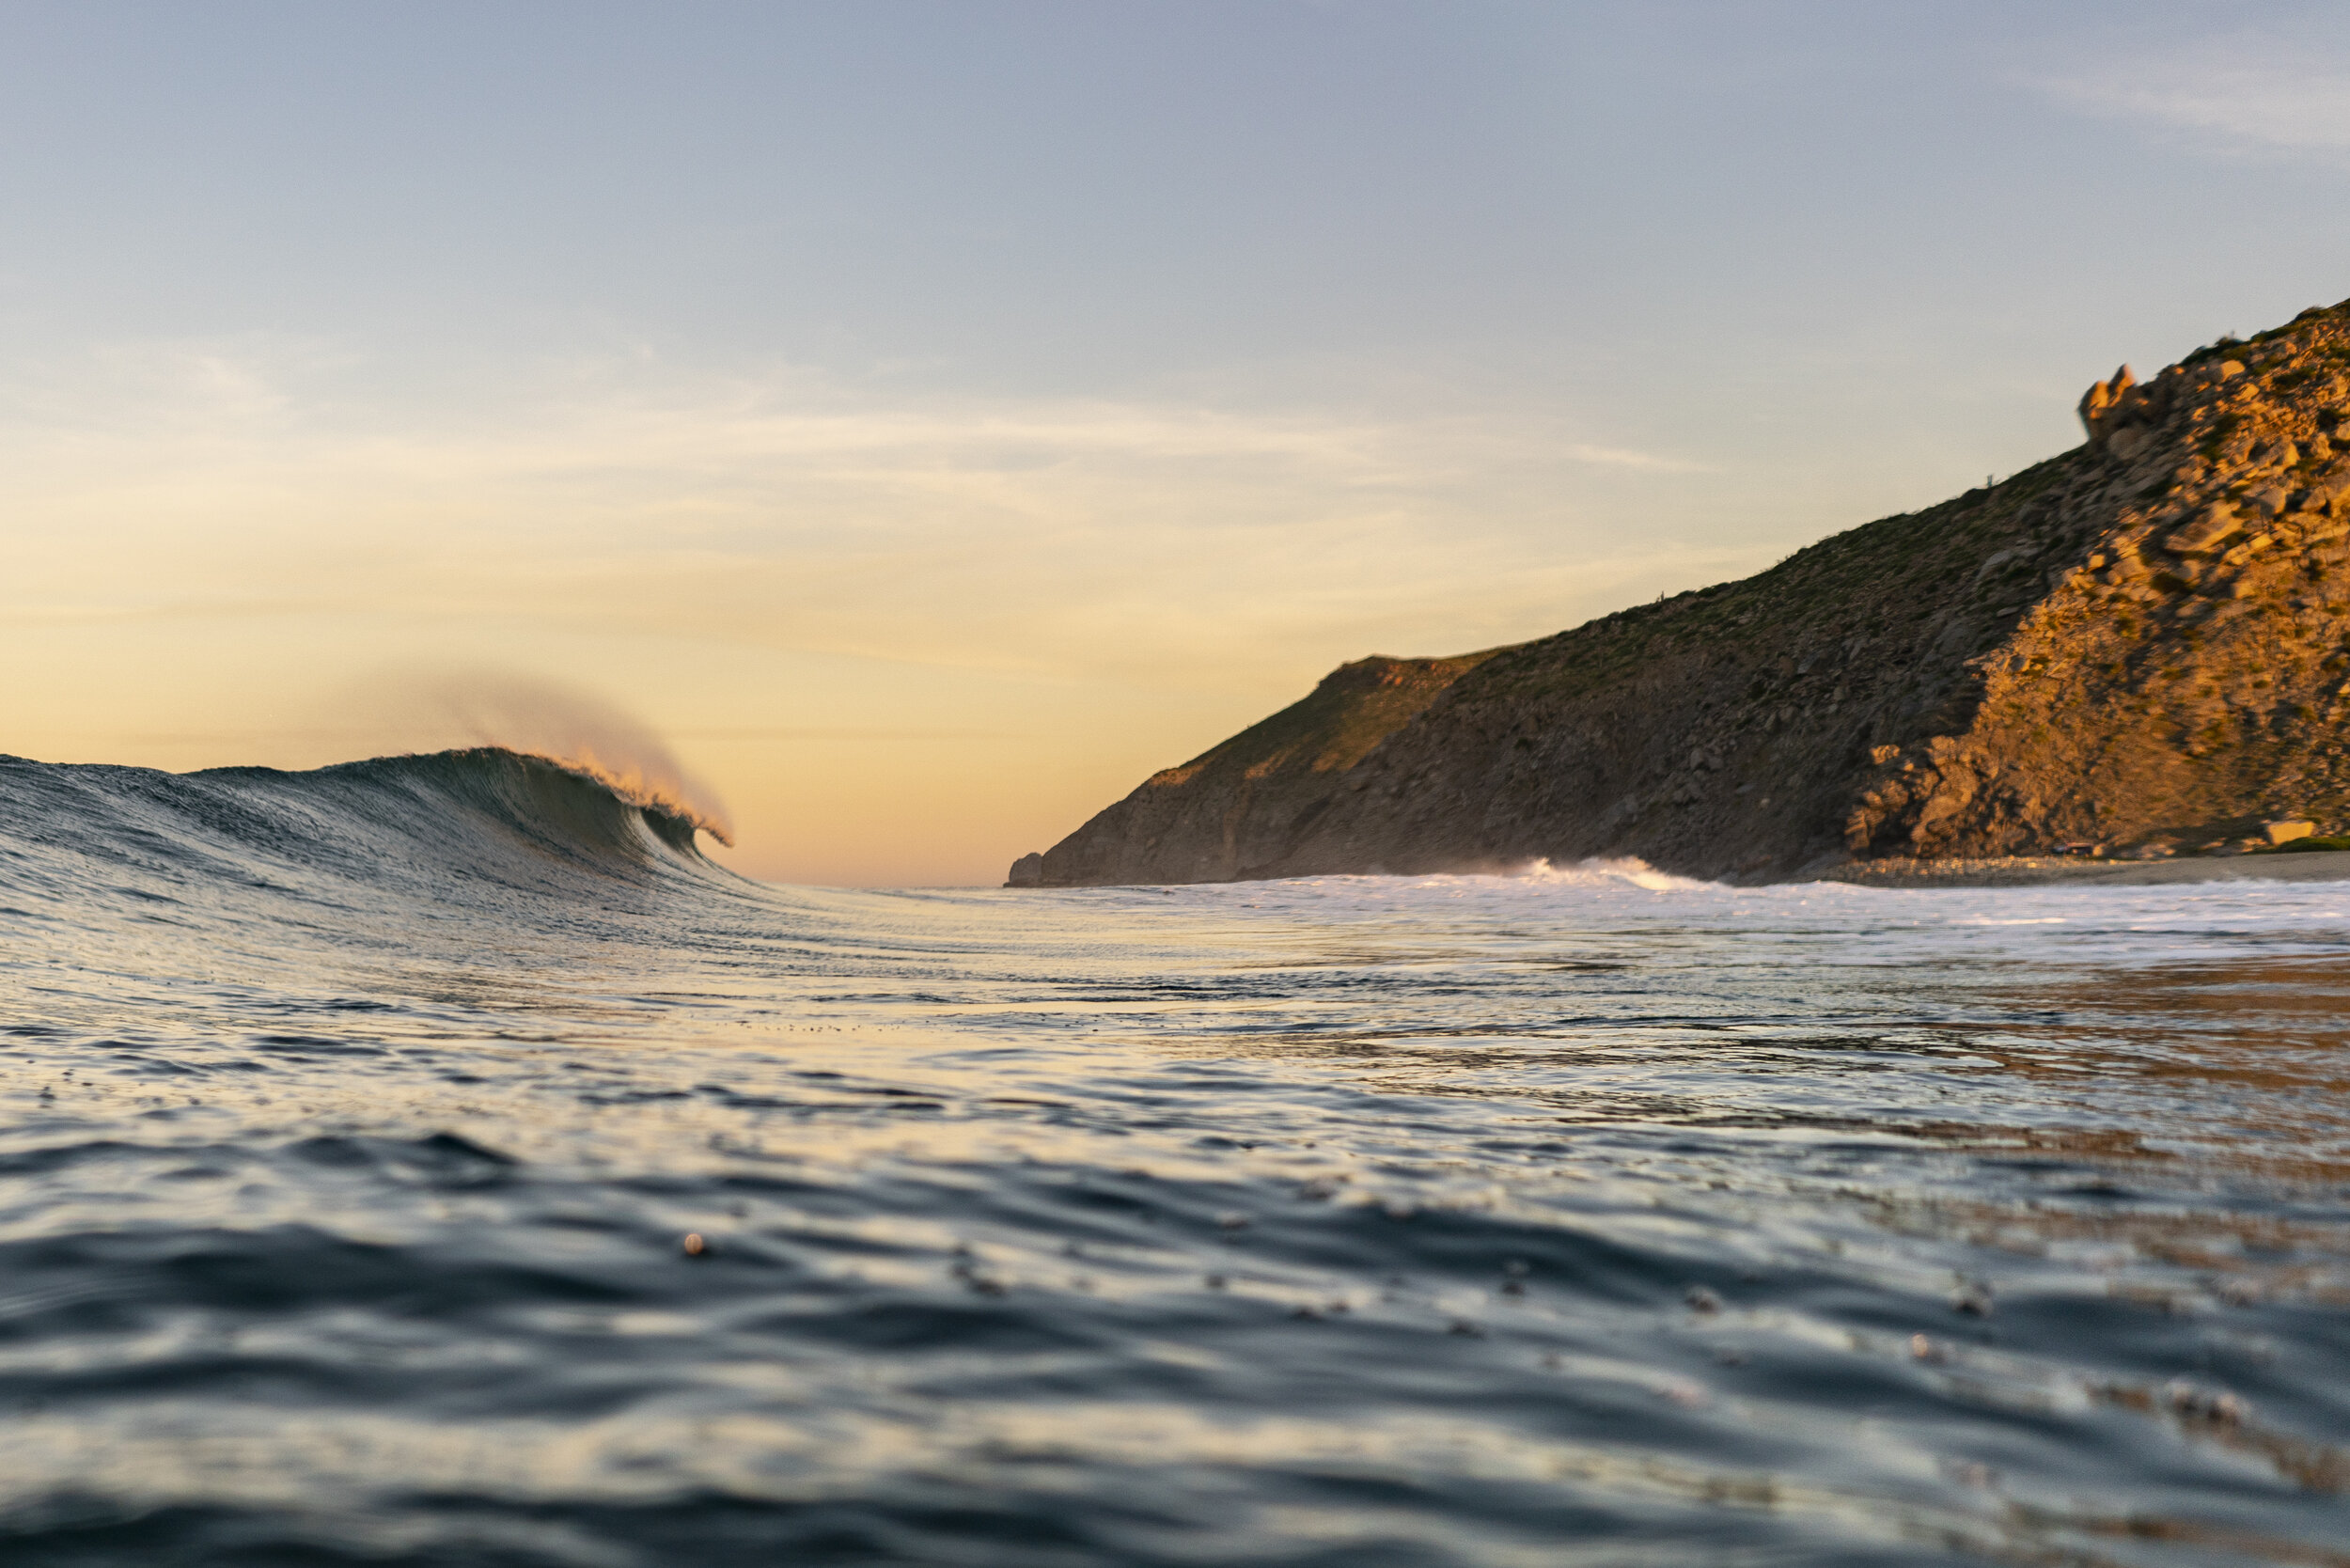
With the backdoors open to ocean, Kristin enjoys the luxury of vanlife living while on a road trip through Baja, Mexico. Photograph by Dalton Johnson
5) always keep an eye on your water
Running out of drinking water is not a good feeling and I do not wish that upon anyone. Water is necessary for us to survive and let’s be honest, most Americans are not resourceful enough to seek out, purify, and store our own water. There are some of us. If you live on the road, you might want to figure out how to do this! But, for most of us, there isn’t a need, so don’t worry about it… until the zombie apocalypse occurs.
For myself, the rule of thumb I have for water is, once I have hit my last five gallons, I look to fill up. Five gallons lasts me roughly two, maybe three days. Usually, I can find a spring or public hose to fill up by that time. If not, there is always the water stations at a grocery store you can use to fill up a jug with water.
6) learn to poop in the woods
Call me crazy if you would like, but this is a skill all those living in a van, in a car, on the road, should be able to do. Now, I am not going to dive into the variety of tactics, nor the poop rating system that outdoor educators use while on course (this is an inside joke for any of you who work for NOLS or Outward Bound), but I will provide some good etiquette:
bring a shovel
dig a hole at least 6 inches deep
burry your poop
put a rock on top of it… if you would like, this is optional
Conclusion
Regardless of your road life vehicle, the freedom associated with living on the road is unparalleled. While times can be difficult, eventually you will find your stride. If you are considering moving into a vehicle, start slow. Consider doing a few weekend car camping trips with friends at first. Eventually, go for a longer road trip solo, or with a loved one. Once you have those under your belt, consider how you will make money to sustain the lifestyle, and then hit the road!
If you have any questions or comments, please reach out via DM on Instagram or through my contact sheet.
Discover more Van life Tips and Tricks
Backpacking Kearsarge Pass
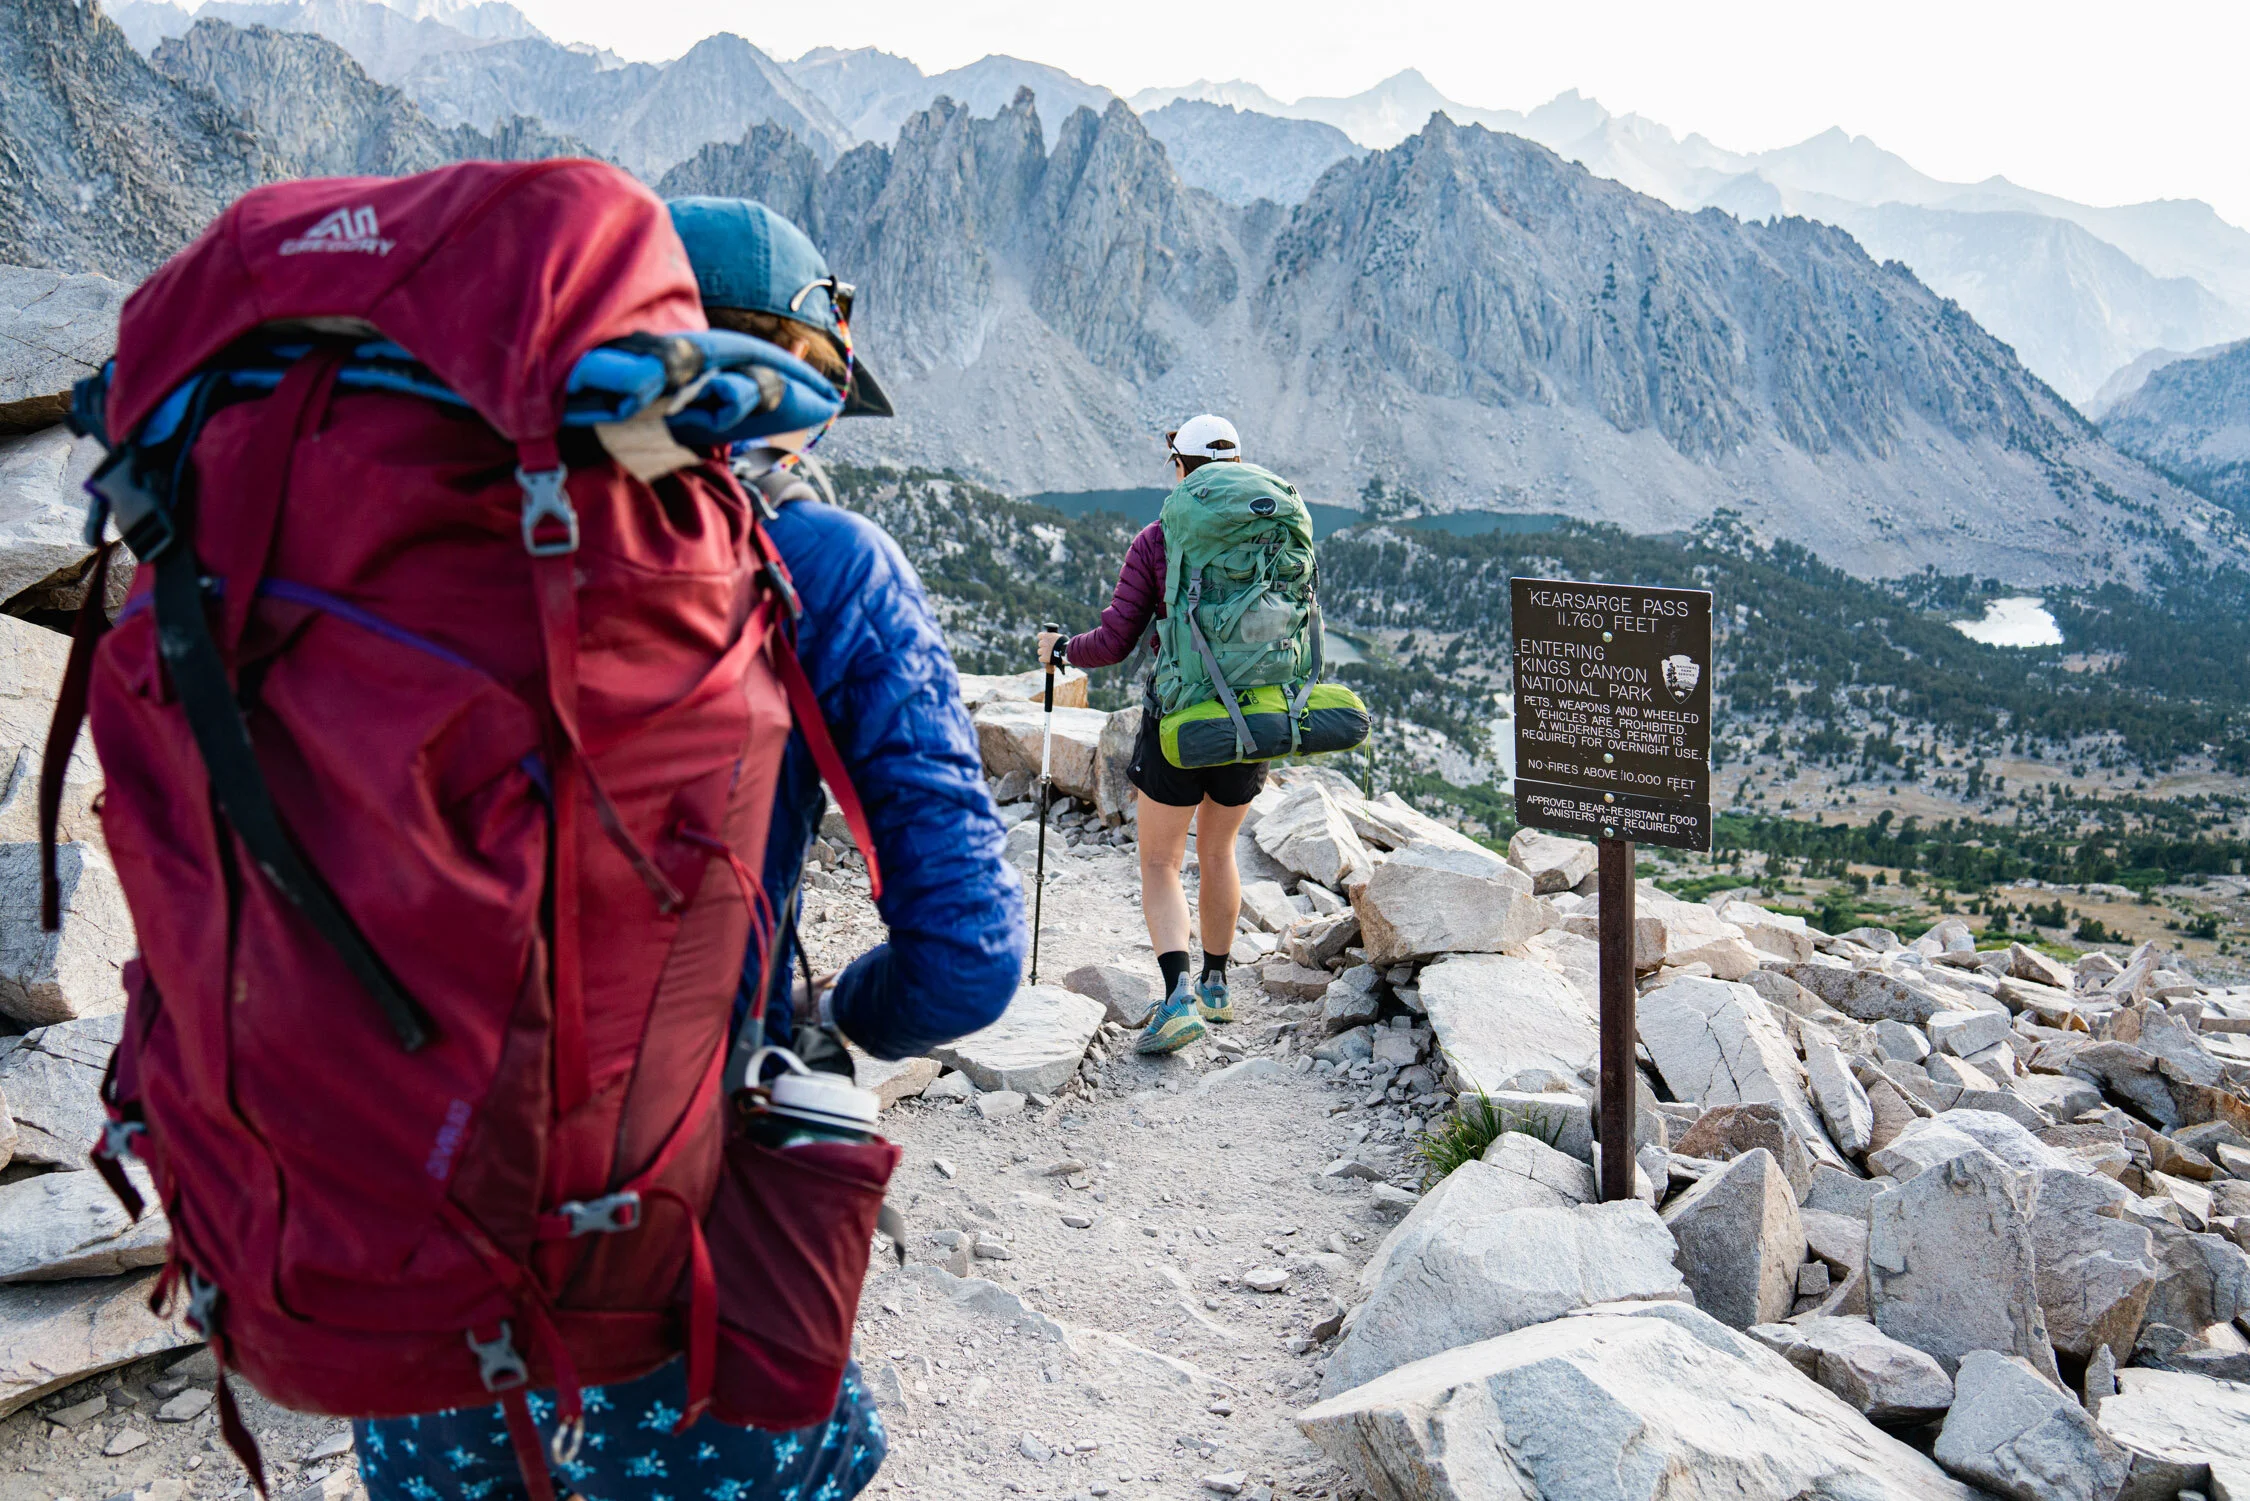
Our thighs were burning as we tromped up Keasarge Pass to gain our first view into Kings Canyon. All three of us have explored different sections of the Eastern Sierra and JMT, but none of us had been to this area. To avoid the burn, we diverted our attention to the "What do you think is over there” game, trying to see who could paint a better picture of what was on the other side of the pass. Turns out, we were all wrong.
Our thighs were burning as we tromped up Keasarge Pass to gain our first view into Kings Canyon. All three of us have explored different sections of the Eastern Sierra and JMT, but none of us had been to this area. To avoid the burn, we diverted our attention to the "What do you think is over there” game, trying to see who could paint a better picture of what was on the other side of the pass. Turns out, we were all wrong.
The route, for those of you curious to do it yourself:
https://www.alltrails.com/trail/us/california/kearsarge-pass-trail-to-kearsarge-lakes
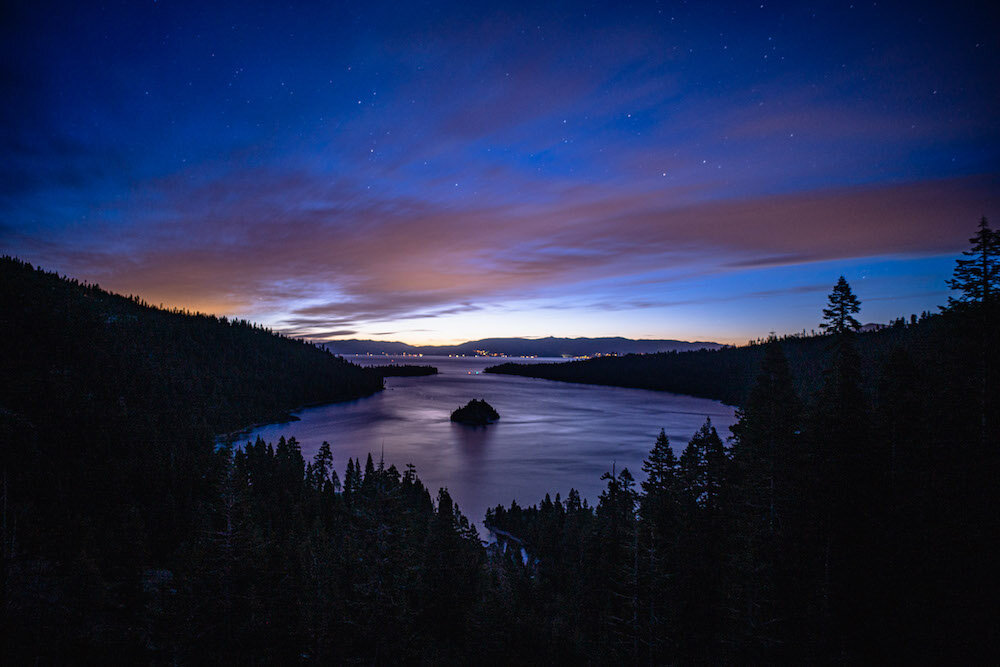
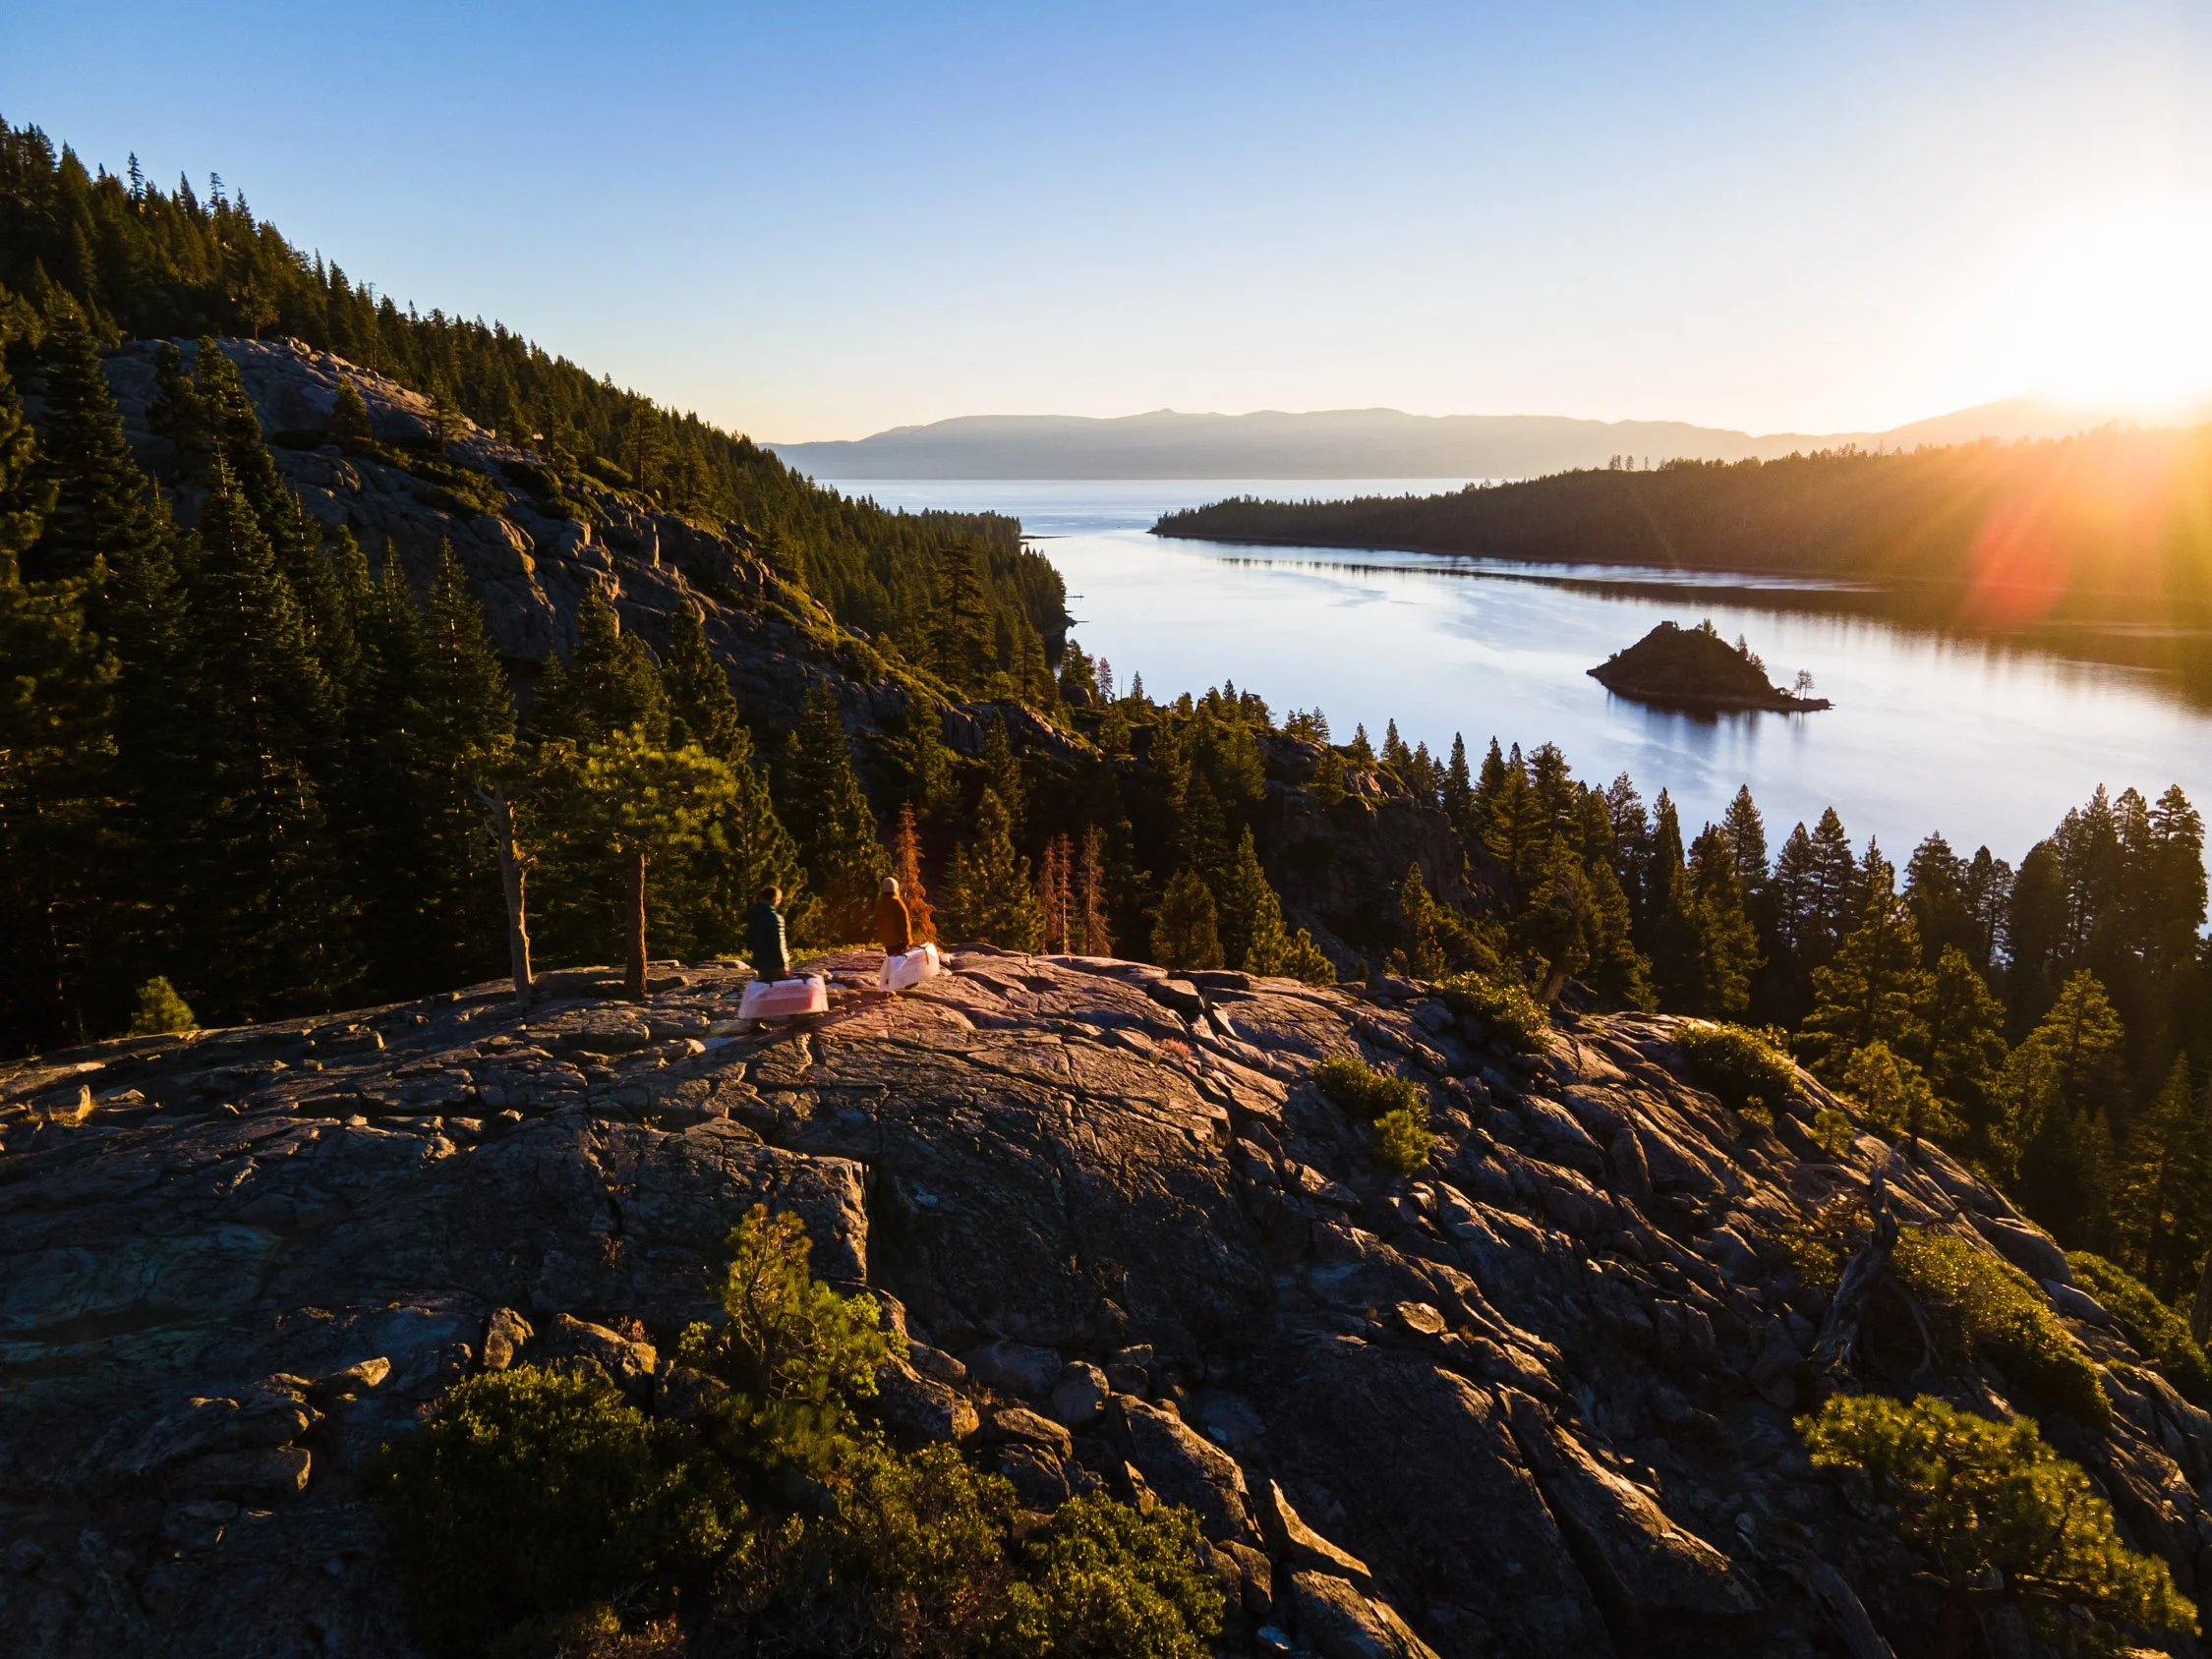
Timelapse: Sunrise over Emerald Bay in Lake Tahoe, CA
In 1969 Emerald Bay was recognized as a National Landmark, preserving the land for future generations. Within the bay, the only island in Lake Tahoe exists, Fannette Island. Which harbors the “tea house” on the island. For most, sitting on the bluff of Eagle Falls is the closests they will ever come to the tea house. Regardless, this national landmark is an emerald for us all to marvel at.
In 1969 Emerald Bay was recognized as a National Landmark, preserving the land for future generations. Within the bay, the only island in Lake Tahoe exists, Fannette Island. Which harbors the “tea house” on the island. For most, sitting on the bluff of Eagle Falls is the closests they will ever come to the tea house. Regardless, this national landmark is an emerald for us all to marvel at.
Why Visit Conception Bay in Baja Mexico
Conception Bay in Baja is a mind blowing combination of calm, warm water and an adult playground. Offering access to dozens of beaches Bahia Concepcion, as it is called in Spanish, directly translate to Bay of Concepcion, but most ex-Pats and travelers call this area Conception Bay. This absolute must stop when you travel to Baja is a long, narrow bay that stretches over thirty miles from the Sea of Cortez. Mountains encased the bay both sides with only narrow openings at the northern end. Located between Mulege and Loreto along the Sea of Cortez, Bahia Concepcion offers access to outstanding beach camping, each with their own spectacular views and reasons to visit.
Conception Bay in Baja is a mind blowing combination of calm, warm water and an adult playground. Offering access to dozens of beaches Bahia Concepcion, as it is called in Spanish, directly translate to Bay of Concepcion, but most ex-Pats and travelers call this area Conception Bay. This absolute must stop when you travel to Baja is a long, narrow bay that stretches over thirty miles from the Sea of Cortez. Mountains encased the bay both sides with only narrow openings at the northern end. Located between Mulege and Loreto along the Sea of Cortez, Bahia Concepcion offers access to outstanding beach camping, each with their own spectacular views and reasons to visit.
A guide to visiting Bahia de Concepcion in Baja California Sur including how to get to Conception Bay, activites, and the best beaches to camp at. This article covers why this giant bay, within the Sea of Cortez, offers travelers a close up of what “The Real Baja” is all about.
Read on to discover where to beach camp, how to find cell service, activities to do, and so much more!
A sunrise over Bahia Concepcion in Baja Sur while camping on the beach. Photograph by Dalton Johnson
WHY SHOULD I VISIT CONCEPTION BAY?
Bahía Concepción is one of Baja's favored spots for beach camping, kayaking, relaxation, those with RVs and vans, travelers, and anyone who loves beautiful beaches and quiet coves. The bay is especially good for novice kayakers and snorkelers as it is usually quite glassy with light winds and not much in the way of strong currents.
Relaxation and gorgeous views
Sailing
Snorkeling
Paddle-boarding
Long walks on the beach
Tranquility
Where is Conception Bay in Baja?
Located between Mulege and Loreto along the Sea of Cortez, Bahia Concepcion offers access to nearly a dozen beaches, each with their own spectacular views and reasons to visit.
IS CONCEPTION BAY VAN LIFE FRIENDLY?
Conception Bay was made for van life and RV travelers alike. The shoreline is predictable, so you can park just above the high tide line, pull out some chairs, and post up until you run out of water. If you are looking for amenities, there are a few paid camping places (I think $5/night) that have a guard, a palapa, and toilets. If that isn’t your jam, take a few of the back roads and explore the secluded beaches Bahia Concepcion has to offer.
Beach camping in a van at Conception Bay in Baja. Photograph by Dalton Johnson
Best places to Beach camp in Conception Bay?
Conception Bay is very large with hidden gems throughout, so make sure you keep an eye out for an arroyo that could take you to the water. Over the past few years, a few beach camping spots have become “developed” and require payment. This has fluctuated by the cost is usually in the $5-10/night range. For that, you get a toilet and a guard. If you are not keen on paying to sleep on a beach, keep driving, there are tons of beaches are free to camp directly on the beach.
Los Cocos*
El Coyote*
El Requeson*
Playa Armenta
Playa La Perla
Buenaventura
Playa El Burro
*These are my top three places to camp while in Bahia Concepcion
IS THERE SURFING AT CONCEPTION BAY?
Bahia Concepcion is not a place to surf. The bay is long, making the water flat and protected from the elements. However, in these safe waters you will find several other amazing water sports like kayaking, stand up paddle-boarding, and snorkeling, just to name a few. Additionally, this bay often has sailboats moored offshore, enjoying the safe waters.
Is there Cell Phone Service in Conception Bay?
Depending on the service provide and the beach you are at in Conception Bay will determine if you will have cell phone service. Not every beach, nor provider, serves Conception Bay. With that said, if you have an RV satellite, you will be able to get a signal anywhere in the bay. Additionally, there are a few restaurants that have slow wifi that comes free with a meal, or you can pay to use the wifi.
Stand Up Paddle-boarding in Conception Bay
Conception Bay is one of the best places to stand up paddle-board in all of Baja. The waters are calm and the scenery is dumbfounding, making the paddle truly unique. As you paddle across the clear waters, make sure to look down at the fish and aquatic life below you.
While staying in Conception Bay I had the craziest experience! A red tide was going on and I was able to SUP at night in the bioluminescence. Every paddle stroke was greeted with the water turning an amazingly bright blue glow. My girlfriend and I were shocked this was happening and spent several hours swimming and paddling on the water!
WHAT ELSE CAN I DO AT CONCEPTION BAY?
Snorkeling
Open water swimming
Fishing
Glass boat bottom rides
Stand Up Paddle-boarding
Stand Up Paddle-boarding in Conception Bay, Baja at sunset. Photograph by Dalton Johnson
Now that you have discovered where to beach camp, how to find cell service, and activities to do in Bahia Concepcion it is your turn to get outside and explore this incredible bay. Please, drop a comment below with any additional information that could/would be helpful to other members of this community.
Discover More of Baja Mexico
Watching the Sunset in Davenport, CA
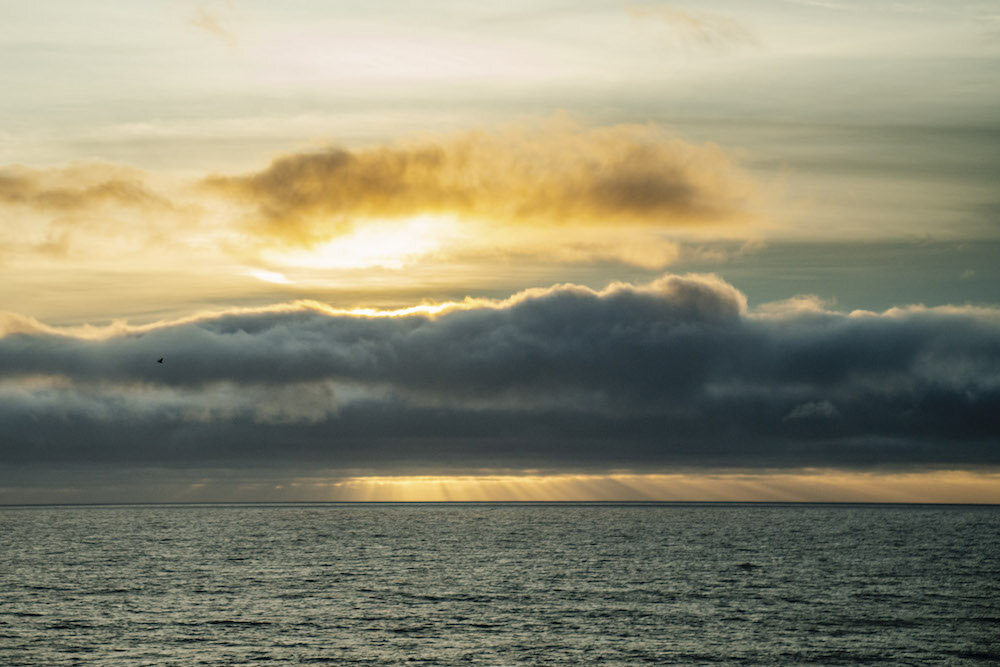
Along the coast of California, an unassuming evening turned into an elegant evening blessed with a light show for sunset. The clouds moved overhead with the constant wind barraging the cliffs. I decided to grab my camera and go for a walk along the cliffs. Delighted to find several others along the same walking trail as me. We all smiled at each other and nodded towards the setting sun.
February 12th, 2021
Along the coast of California, an unassuming evening turned into an elegant evening blessed with a light show for sunset. The clouds moved overhead with the constant wind barraging the cliffs. I decided to grab my camera and go for a walk along the cliffs. Delighted to find several others along the same walking trail as me. We all smiled at each other and nodded towards the setting sun.
Sneaking behind the clouds over the Pacific Ocean, the sun hid. I dreamed of being one of the birds soaring overhead or in the distance. Their view must have been better, however, these gusts of winds might have forced their focus away from the golden light beams jutting out the bottom of the clouds. As this thought processed in my head, I decided I was happier to be atop the cliffs.
Walking around the grassy top, I found nooks and crannies that held blooming flowers. In Davenport, the feeling of spring was omnipresent. How long would it be until the yellow and pink flowers bloomed? This I don’t know and I won’t be around long enough to discover. Maybe another year I will find out. For now, the white and green sprinkles of spring bring joy to me every day.
Why Visit San Juanico in Baja Mexico
San Juanico is a small fishing village with a large surfing problem. Myth and legends are told among the surfing community of a mile-long ride from third point to first. Some have even gone on and said the link-up has been done from fourth peak… insane! The best part of this sleepy town, other than the surfing, is the beach camping.
Myth and legends are told among the surfing community of a mile-long ride from third point to first. Some have even gone on and said the link-up has been done from fourth peak… insane! But, where are these legends coming from? The town of San Juanico in Baja is a small fishing village with a large surfing problem. The best part of this sleepy town, other than the surfing, is the beach camping.
San Juanico, better known as Scorpion Bay, is a small fishing village on the Pacific side of the Baja peninsula that has made a name for itself in the surfing world. However, San Junaico offers more than just good surf, this Baja surf spot has some of the best beach camping, hiking, fishing, and so much more!
Read on to discover what to do, where to get wifi/cell service, places to surf, and so much more!
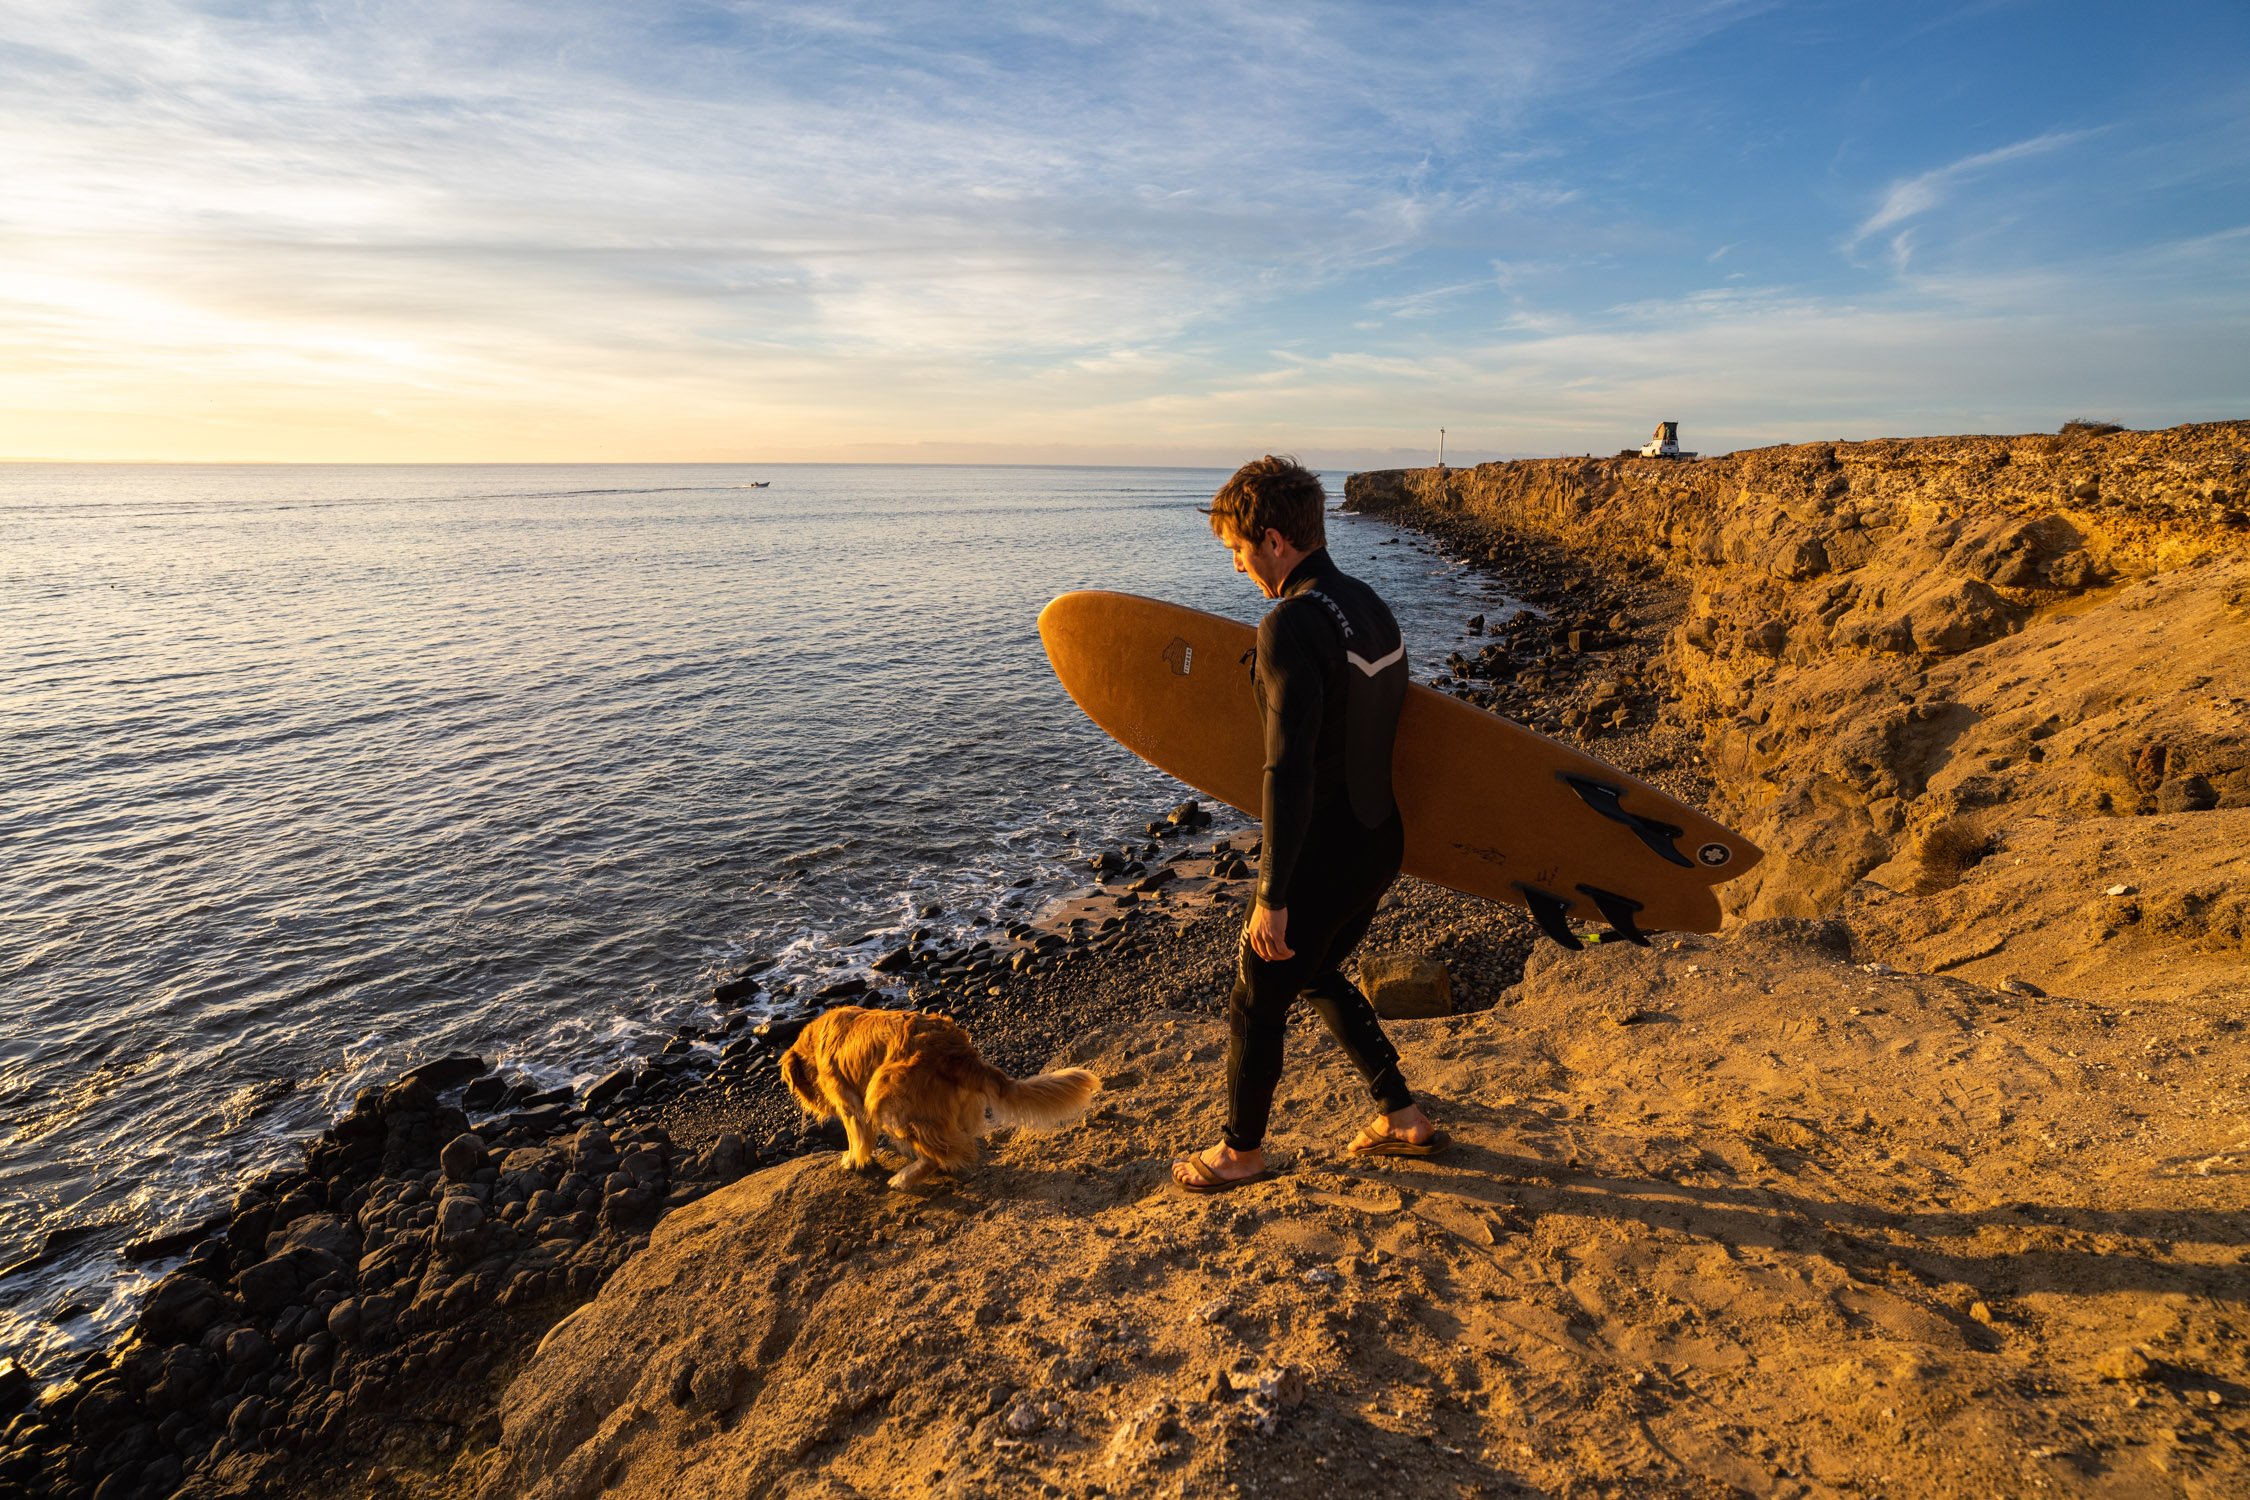
Enjoying a crisp morning while camping on the beach in San Juanico. Photograph by Dalton Johnson
WHY SHOULD I VISIT SAN JUANICO?
Park on the cliffs and overlooking the surf breaks of San Juanico you want to surf. The catch? Well, if you want to sleep around the main points, you’ll have to pay… I think $2/day to the cantina. If you are looking for free beach camping, just head down the way, not but a couple of miles on a friendly dirt road. If this isn’t your jam, then head down to the marina and take the beach for as far as you want. I’ve made it 20 miles!
Free beach camping
World class surfing
Great food, make sure to check out the pizza joint (it’s owned by an ex-NFL player… so I am told)
Meet the locals, they might take you fishing
There is a weekly farmers market where you can get all of your produce! Go to it!
Where is San Juanico?
San Juanico can feel like a tricky town to get to for a vacation because it is 3 hours from the closest airport, but visiting San Juanico is worth it. Below are some of your options for getting to San Juanico:
Click here for driving directions to San Juanico in Baja Mexico
Fly into La Paz airport, drive or take a shuttle from there
Fly into San Jose del Cabo, drive or take a shuttle from there
IS SAN JUANICO VAN LIFE FRIENDLY?
San Juanico is a vanlife-friendly town. Heck, San Juanico is a great place for any road trippers. In town, you can find a carwash, water, a farmers market with fresh produce, and so much more. At first, this town seems far off the beaten path, but trust me, if you have a week to stay, the camping is well worth it.
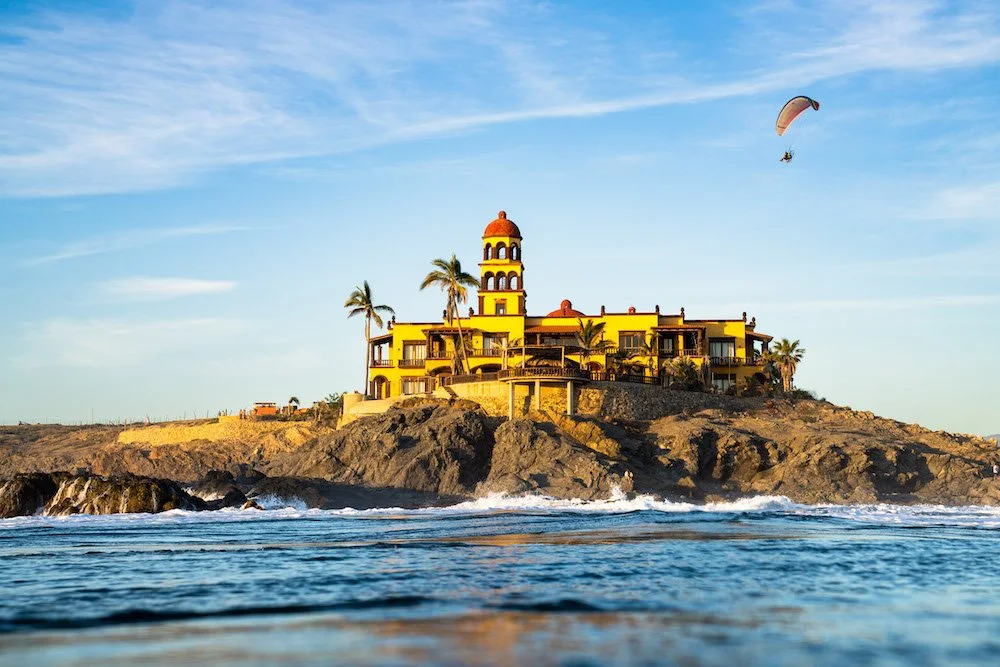
Paragliding above the cliffs near San Juanico in Baja, Mexico. Photograph by Dalton Johnson
My Experience Visiting San Juanico
Bumping down the highway towards San Juanico, I was building upon the myths and legends I had heard about this Baja surf destination, often called Scorpion Bay. With a long board and short board in my van, I was ready for whatever waves came my way, but San Juanico was more than I expected.
After what felt like an eternity, which was most likely an hour, of bumping down the road we turned left and headed down the main street of San Juanico straight to the beach. As the pavement ended and the rocky cliff began we searched for a spot to park. Luckily we were early and the swell had not yet come, so there was plenty of parking.
Finding a flat spot, we set up camp, unloaded the van, and got the lay of the land. First peak was to our left and we could see second peak. Third peak was around the corner and fourth peak was far off in the distance. Scorpion Bay was new to me, so I took my time understanding where everything was, but one thing was certain, my belly needed food!
After a quick bite to eat at the San Juanico Cantina (a main staple for any all surfers) I got into my wetsuit and headed out for a sunset surf at second peak. WOW! The waves were small, but dang it was fun. Gliding over the shallow waters, I could see boils with reef underneath me, but to my surprise I flew just overtop of them all. Pelicans flew overhead and the sunset exploded into a deep red.
My first night in San Juanico was off to a great start!
For several more days I built upon the same routine; wake up surf, make a small breakfast, do a little bit of computer work, eat at the cantina, sunset surf. Life couldn’t get any better. At least that is what I thought.
As the swell passed and the cliff became empty once again, my routine was no longer possible. At first, I wanted to leave, but something told me to stay longer. So, I just hung out.
Little did I know that by sticking around I would get in with the local fisherman and have the opportunity to join them one cold morning with my camera. Loaded up in a boat, there were four of us, lobster pots, and squid pots. Heading out onto the Pacific Ocean in this little panga was crazy! I mean, the four of us worked around each other all day long as we pulled in lobster and squid. Working to keep the boat balanced, we reeled in lobster pots. Some were empty and some were full.
As the day went on, we began our journey back to shore with a few lines in the water. To my surprise, we ended up catching a few fish and the captain, Nico, sliced up some fish and we ate some sashimi.
All I can say is, if you have the time, visit San Juanico.
Fisherman enjoying the crisp morning while watching the birds circle in at sunrise before heading out on the Pacific Ocean. Photograph by Dalton Johnson
IS THERE SURFING AT SAN JUANICO?
San Juanico is a world-class surfing destination. While the bay is great for all swells, the best waves come with a south swell. Scorpion Bay in Baja Sur is an exposed point break that has fairly inconsistent surf but when it's on it can be World Class. Really long rides are possible.
A while back, Surfer Magazine ranked it the 36th best wave in the world while Long Board Mag ranked it in the top ten. Summer offers the best conditions for surfing here. Groundswells are more frequent than windswells and the best swell direction is from the south southwest. Hazards include urchins and rocks.
Be aware, during a solid stretch of good swell, several locals and travelers will come to San Juanico to surf the never-ending right.
The ocean temperature in San Juanico ranges from 65f - 75f. This wide range in temperatures means you might need a wetsuit during the cold months and nothing at all during the warm months.
Is there cell phone service in San Juanico?
San Juanico does not have a strong cell service on any provider, however all of the restaurants and cafes in town have strong wifi. Additionally, many RV satellites can pick up a strong signal at the beach and in town as there are no trees to block your satellites view of the sky.
WHAT ELSE CAN I DO AT SAN JUANICO?
Watch the Baja 1000 in San Juanico
Beginning in October, Baja 1000 teams will begin training and practicing the course, often stopping in San Juanico. Because of this, the town will grow in size for a few weeks until the race teams leave town. If you are interested in watching the Baja 1000, the race blasts through the town and onto the open beaches. This is a crazy spectacle to watch as the trophy trucks will be cruising at speeds between 80-120mph. That is crazy!
If you are interested in learning about the Baja 1000 you can check out the race info here.
Open water swims in San Juanico
One of my favorite activities to do in San Juanico is an open water swim. When the waves are small, or I don’t feel like surfing, I put on my swim suit, goggles, and hit the water. Diving into the waters, I hug the shoreline, often covering a mile in one direction, then turning back to where I began my open water swim. If I am feeling more ambitious, I will push myself to a total of 3, maybe 4 miles, but if you wanted to, you could swim the entire length of the surf beach and cover 8 to 10 miles without question.
The water is safe and I have not seen anything under the water beside small fish, reef, and beauty.
Fishing with Locals in San Juanico
If you head down to the marina in the early morning, you will find several commercial fisherman launching their boats into the surf to make their living. This small town still relies on the steady income stream from lobster and squid fishing. However, a few of the fishermen are also willing to hire their boats out to take you fishing. Half-day trips are the most common, costing between $50-100 USD/per person. You must bring your own gear, food and any drinks, remember to bring something along for the captain, as well.
Skim-boarding in San Juanico
Most tourist who make their way to San Juanico either enjoy being in the water, or on-top of it. So, if you are interested in skimming your way down the beach and into the water, San Juanico has several sandy beach breaks that you can skim board on. Most of the skim boarding is located south of town, along the long sandy strip that goes on for as long as eye can see. However, there are two sandy beaches in town, near first peak, that you can skim board on.
Snorkeling in San Juanico
San Juanico has an interesting ecosystem just below the surface of the water. I wasn’t totally sure what I would see if I headed out into the water with a snorkel, but to my surprise I saw a good amount. Around the marina and first peak, there is not much to see. However, once you make your way towards second, third, and fourth peak you will find a diverse underwater world. You will find lobster, small fish, edible fish, coral, rocks, algae, and so much more.
If you are curious to discover what is under the surface of the water, I encourage you to grab a mask and some fins, then head out beyond the surf break and dive below the surface of the water.
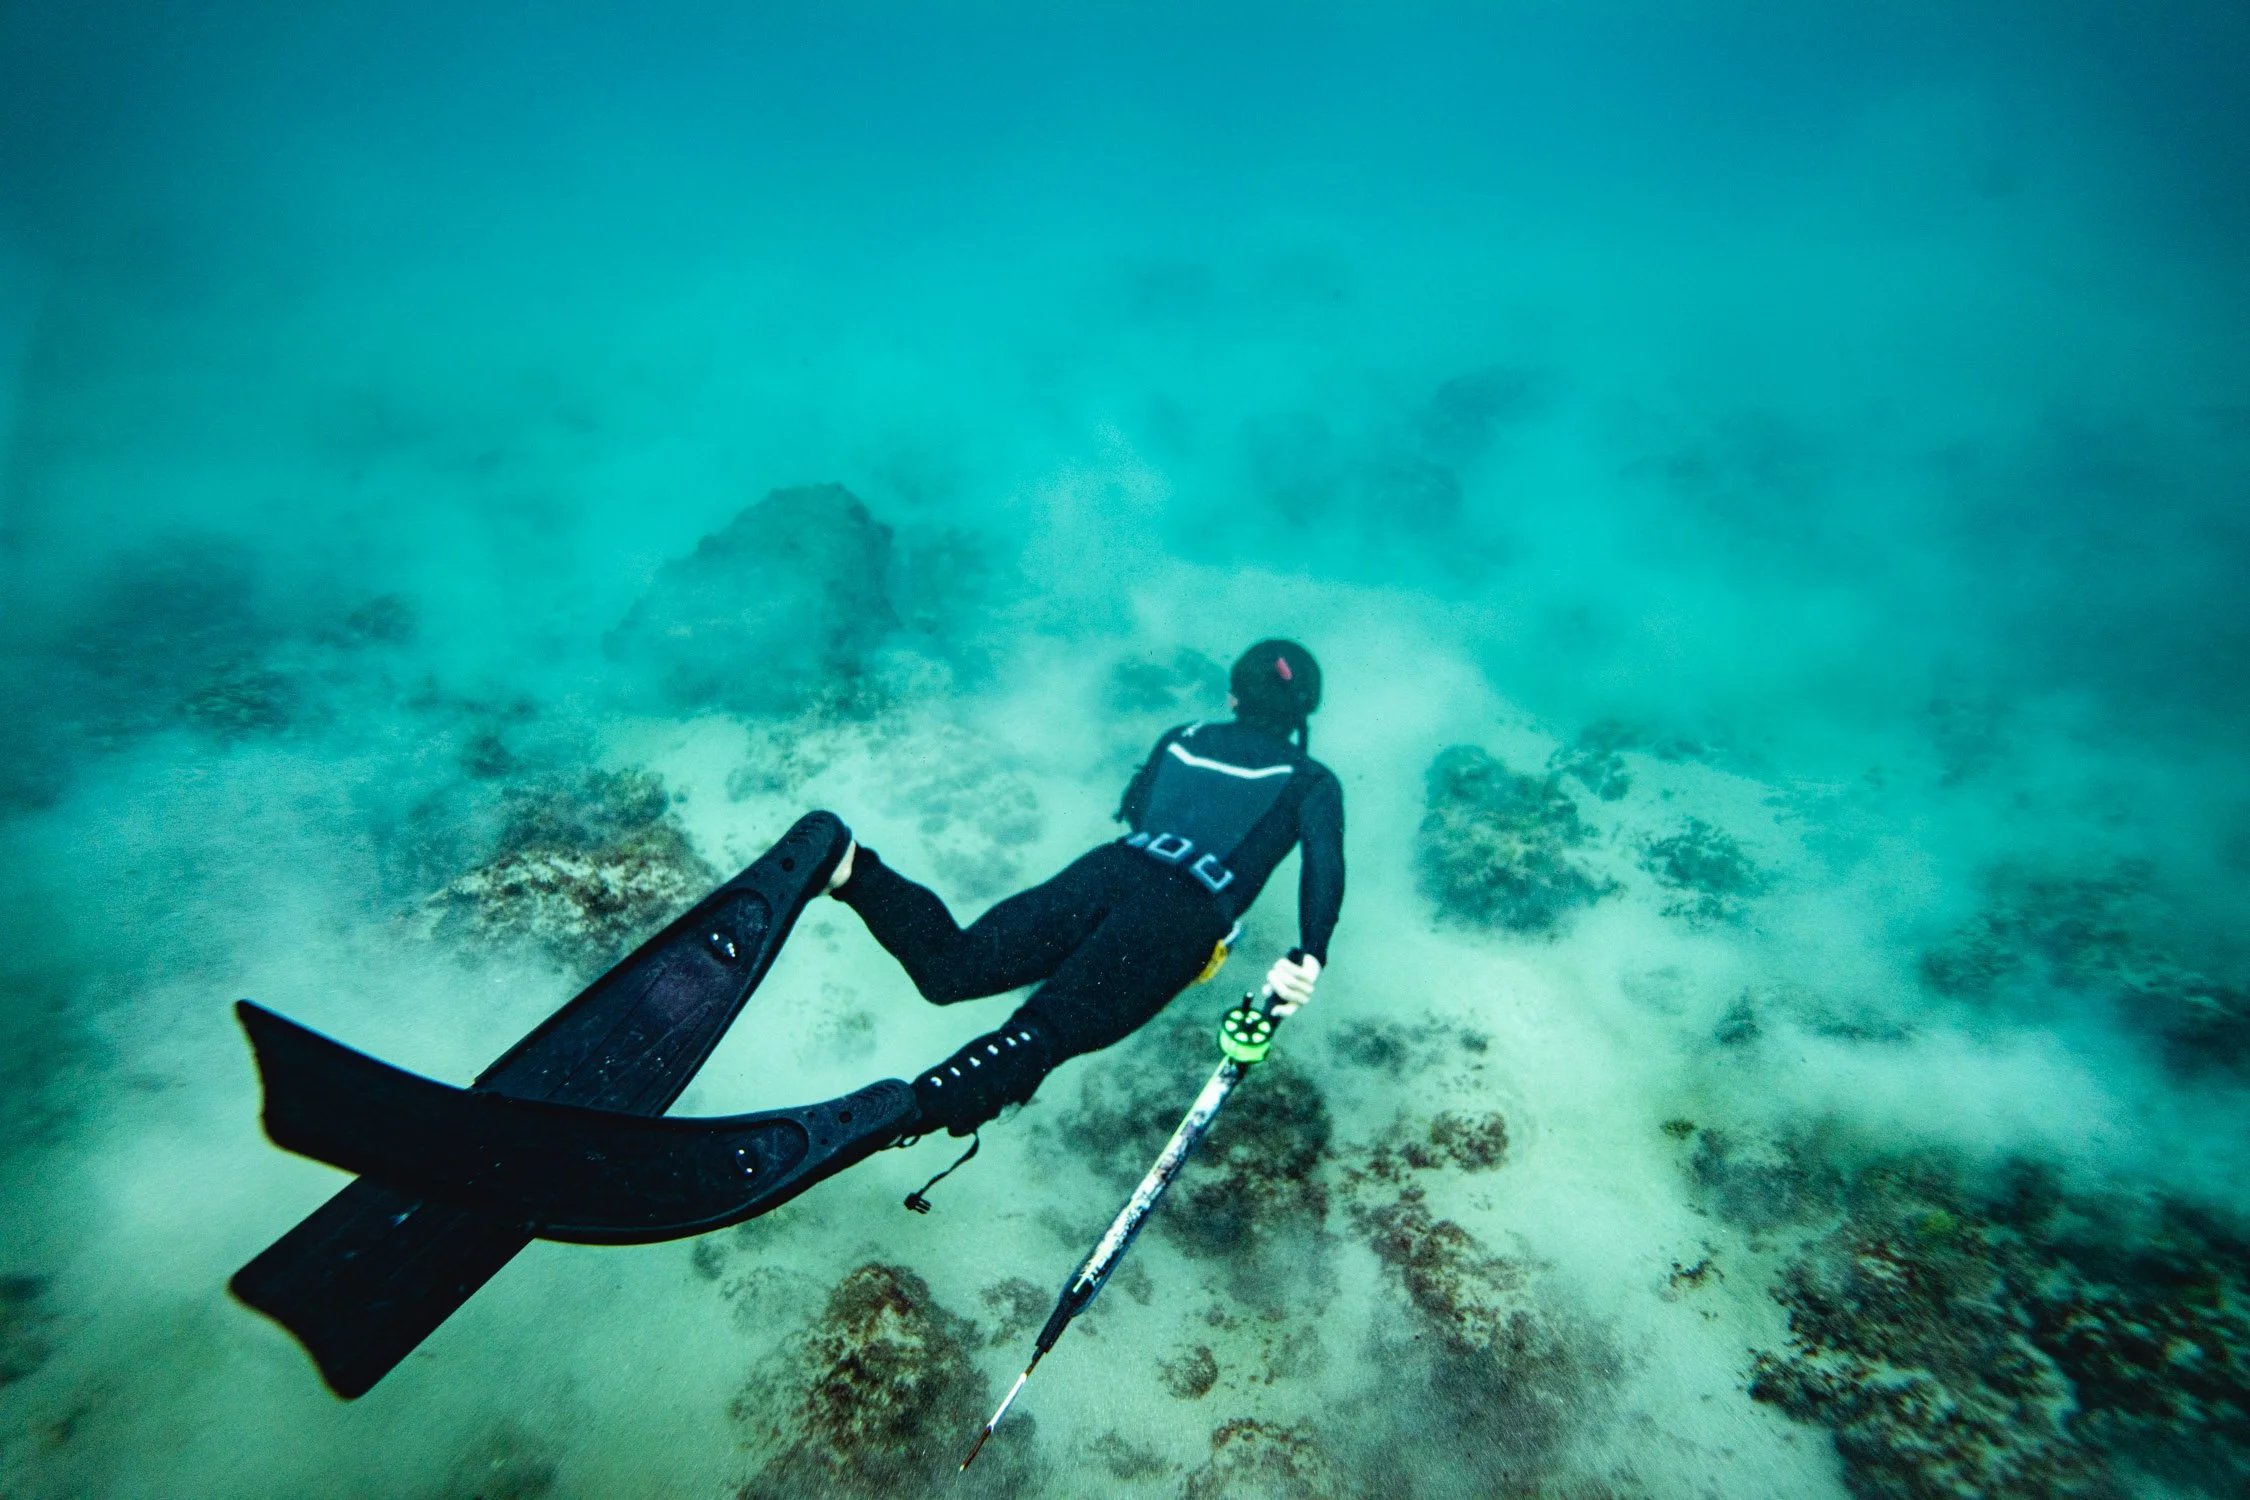
Note, if you decide to spearfish in San Juanico do not take any lobster and abide by the rules Baja has in place. If you want to learn more about spearfishing in Baja, I wrote a full article on it that you can read here.
The stoke is high during an epic sunset while surfing in San Juanico. Photograph by Dalton Johnson
Now that you have discovered what to do, where to get wifi/cell service, and places to surf in San Juanico, it is your turn to get out and explore this fantastic town in Baja. Please, drop a comment below with any additional information that could/would be helpful for the community visiting San Juanico.
Discover More of Baja Mexico


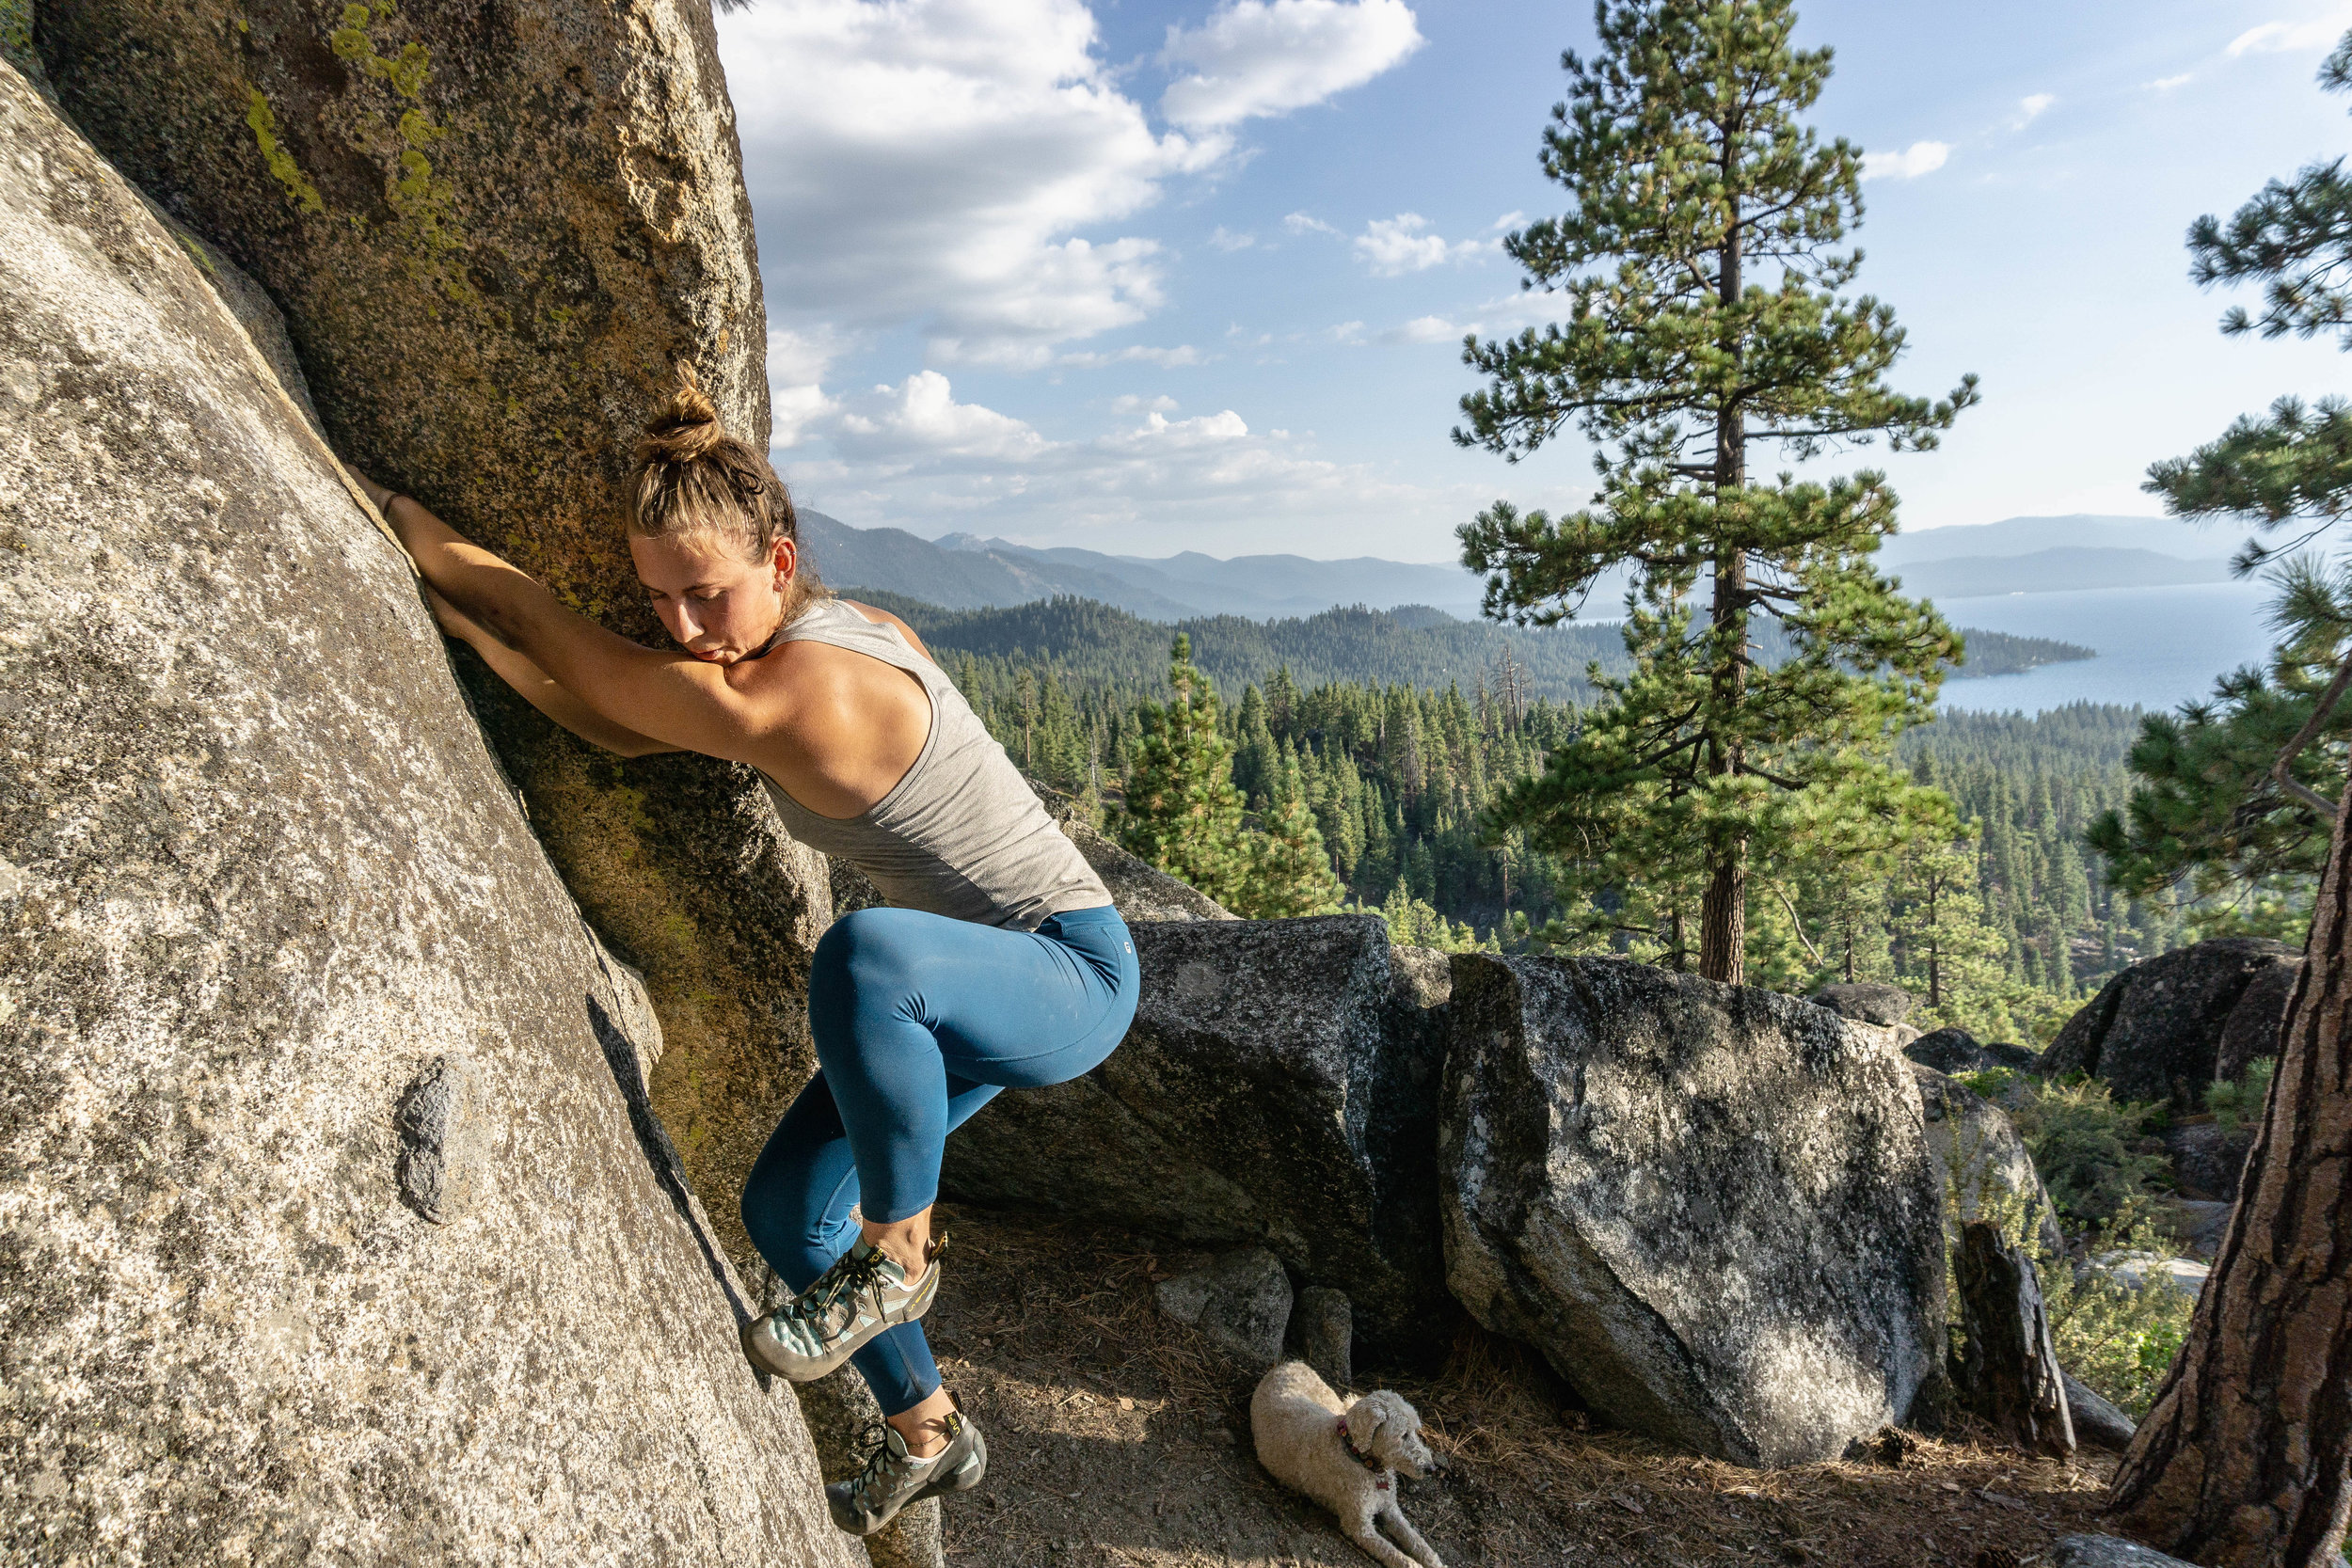
Five Enjoyable Challenge Hikes Around Lake Tahoe
Lake Tahoe, which borders the states Nevada and California, is known as an outdoor hub for those who love to ski, hike, climb, mountain bike, SUP, wake-board, backpack, and so much more! The endless opportunities for adventures draw weekend crowds that can double and even 10x the residential population. So, it is important to know where you are going and what you are looking for when you head towards this magical place. If you are looking for hiking suggestions, here are FIVE enjoyable yet challenging hikes for you!
Lake Tahoe, which borders the states Nevada and California, is known as an outdoor hub for those who love to ski, hike, climb, mountain bike, SUP, wake-board, backpack, and so much more! The endless opportunities for adventures draw weekend crowds that can double and even 10x the residential population. So, it is important to know where you are going and what you are looking for when you head towards this magical place. If you are looking for hiking suggestions, here are FIVE enjoyable yet challenging hikes for you!
Mount Tallac
Distance: 10.2 miles
Elevation Gain: 3,290 feet
Time: 4-6 hours
Water: a few seasonal streams
Trail Head: Mount Tallac TH
Thoughts: Hiking to the top of Mount Tallac is a wonderful day hike with spectacular views. The trail is friendly and there are people along the way regardless of the time of day or year. A south lake Tahoe classic hike! If you want to climb this with friends or alone, this will walk in the woods will be a great adventure. You follow a trail to the top, but for those of you without any experience walking over rocks, you may find a few areas to be challenging. Make sure to look over your shoulder at the views of Lake Tahoe!
Resources:
https://www.alltrails.com/trail/us/california/mt-tallac-trail
Mount Rose
Distance: 11.8 miles
Elevation Gain: 2388 feet
Time: 4-6 hours
Water: one stream roughly in the middle
Trail Head: Mount Rose TH
Thoughts: Located on the north-east side of the lake, hiking Mount Rose is a fantastic way to gain a different perspective on Lake Tahoe. The hike starts flat, but be ready to walk uphill! Mount Rose is a friendly mountain to climb for all those who want to earn a view. Most can do this in a single day, often perfect for those seeking their nature fix, post-work, who commute between Carson City and Incline Village. This hike is often packed with others, so be ready to share the trail and chat with those passing you.
Resources:
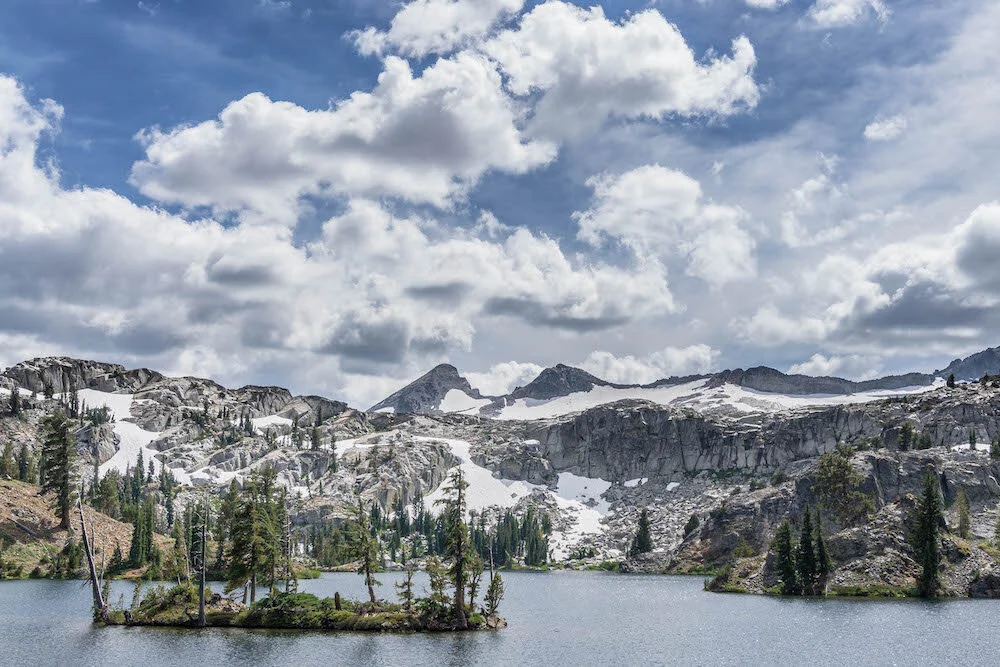
Lake Aloha
Distance: 13 miles
Elevation Gain: 1889 feet
Time: 5-10 hours
Water: Lots
Trail Head: Lake Aloha TH (At Echo Lake)
Thoughts: If you want beauty, a good hike, and to swim in those alpine lakes, this hike is for you! Hiking through the chain of lakes in Desolation Wilderness called Lake Aloha is a magical time. You might want to turn this day hike into an overnight trip and sleep near a lake. The water is clear and clean. The lakes are surrounded by mountains. Best of all, the amount of people for such an accessible hike is manageable!
Resources:
https://www.alltrails.com/trail/us/california/lake-aloha-trail
Tahoe Rim Trail


Distance: 165 miles
Elevation Gain: 26,578 feet
Time: 7-12 days
Water: prepare ahead
Trail Head: Traditional start is Tahoe City, but there are several TH to choose from
Thoughts: If you have the time, this hike is a must! Not because it is the easiest way to stroke your ego by telling all of your friends you circumnavigated Lake Tahoe along its rim. Not because you’ll have endless images to share with your friends and family. This trail is a must because it is challenging, the hills are serious, the landscapes change constantly, and the number of alpine lakes you can swim in feel endless!
Resources:
https://www.alltrails.com/trail/us/california/tahoe-rim-trail-trt-complete-loop
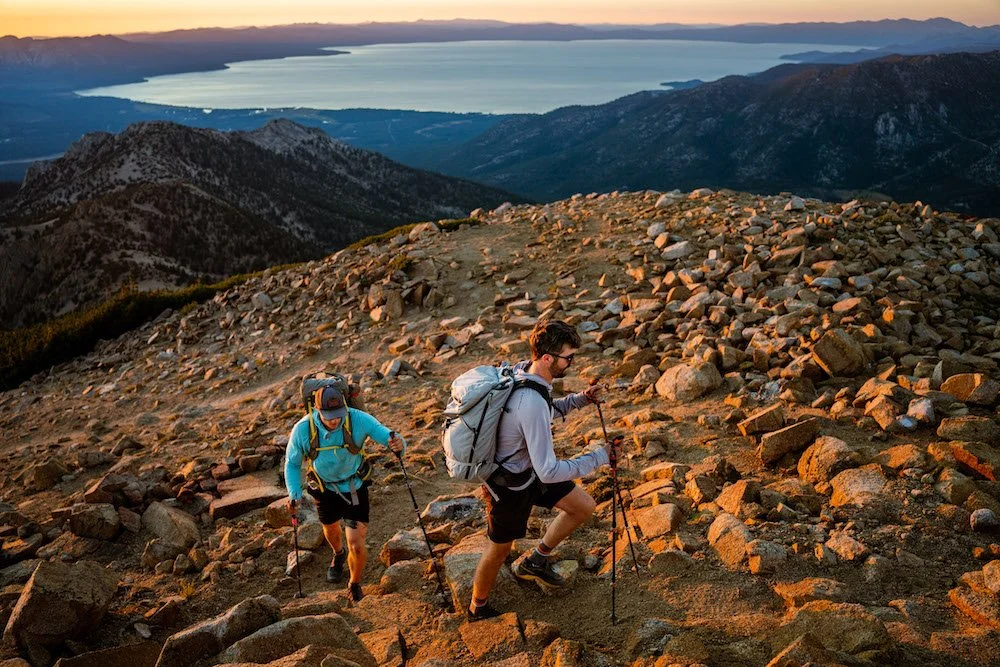
The Three Sisters (Freel-Jobs-Jobs Sister)
Distance: 11.4 miles
Elevation Gain: 3,825 feet
Time: 4-6 hours
Water: none
Trail Head: Fire road off Luther’s Path, see “Getting There” details in the resource below
Thoughts: This is my personal favorite and typically do this once or twice a year. The views, especially from Freel, are outstanding. Freel is the tallest peak in the area, so that means you get to see 360 degrees with nothing obstructing your view. Could you ask for anything better? Well, if not, let me tell you it does get better. You get to wander off the trail and do some route finding, which will help prepare you to head further south in the Eastern Sierra. There isn’t much water, so make sure to bring plenty. Long story short, if you want a challenge, go for this!
Resources:
https://www.alltrails.com/trail/us/california/freel-peak-jobs-sister-jobs-peak-loop

Winter Camping in Yosemite National Park
Leaving behind my basecamp, I swung my boots out of the tent, buckled up my snow shoes, and shlepped my day pack over my shoulder. Filled with excitement and a good amount of fear—the winter and myself have not mixed well—I was on a photo mission. What was I trying to capture? A frozen Merced Lake reflection in the Yosemite wilderness.

Winter Camping in Little Yosemite Valley
Leaving behind my basecamp, I swung my boots out of the tent, buckled up my snow shoes, and shlepped my day pack over my shoulder. Filled with excitement and a good amount of fear—the winter and myself have not mixed well—I was on a photo mission. What was I trying to capture? A frozen Merced Lake reflection in the Yosemite wilderness.
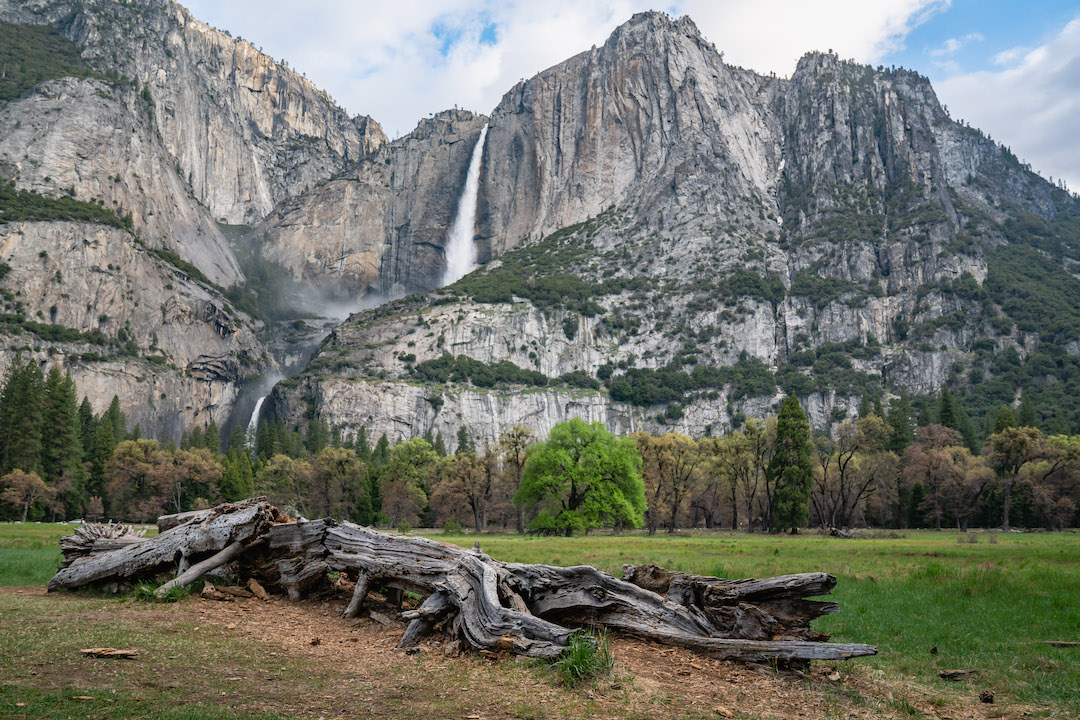
Vernal Falls frozen during the cold winter in Yosemite National Park. Photograph by Dalton Johnson
Image Specs
Location: Nevada Falls, Yosemite National Park
Aperture: f/16
Exposure: 1/3
Focal Length: 33 mm
Learning to Winter Camp
A few years prior to this outing, I had passed this lake and its gorgeous reflection in the late spring. Slightly frozen at the time, I told myself that I would come back and see what this place looked like during the winter. Maybe I was crazy, but curiosity had gotten this cat. I wanted to experience snow surrounding the frozen lake all to myself in a winter wonderland. But, when would I go? I needed to get better at winter camping. But, how do you prepare for winer camping?
For the next few years, I developed my ability to winter camp, going on small trips whenever I could. There was so much to learn that I had never done before like:
Walking in snowshoes
Cooking during the winter
Melting snow into water
Layering clothing correctly as to not overheat and sweat while carrying a heavy backpack
Learning how to prevent your water bottles from freezing
Understanding sleeping systems while winter camping
The list seemingly goes on and on for the learning curve to winter camp, but I was dedicated to the experience.
No Time like the Present
The time had come to find out if my practice trips had paid off, so I loaded my car and head to Yosemite Valley for a solo, winter backpacking trip into Little Yosemite Valley. As I pulled into the winter wonderland, I immediately noticed the lack of humans in Yosemite Valley. As I had never been to Yosemite in the heart of the winter, I was used to crowds of humans walking around the streets and stopping traffic to take a photograph. This was different. Everything was white, people were bundled up, and nobody was stopping traffic.
I knew that I needed a wilderness permit to go backpacking in Yosemite, but I didn’t expect the encounter that I did when getting my permit. It kinda went like this:
“Hey there, can I get a wilderness permit?”
“Who are you going with and what is your route?” the ranger responded
“I’ll be going alone and headed to Merced Lake for a few days to take photographs.”
“You are going alone? What experience do you have with winter camping?” the ranger questioned, highly sceptical.
“I have done a few practice runs and yes, I will be going alone.” I repeated with confidence.
Taking a long pause, the range looked me up and down, “We are short staffed right now, so if something is to happen to you, please understand there is a good chance we wont be able to get to you for several days. Make sure you have extra fuel and food. Will you be bringing skis?”
I got my permit.
Walking out of the range station with my head high, I grabbed my bag and headed down the trail.
A rushing river coated with snow while winter camping in Yosemite National Park. Photograph by Dalton Johnson
Reaching Snow and Beginning the Jounrey
Audible crunches from under the snow shoes, bringing me closer to the lake, as I make each step. My pack is heavy with camera gear, so I balance myself with my hiking poles. Keeping balance is now a core exercise, while moving at a pace so that I don’t sweat, yet reach my destination is the newest task.
Up and up and up I went to climb out of Yosemite Valley into the Yosemite wilderness. Snow was everywhere, I was nervous. Outside of snow crunching under my feet, the snow dampens all sounds, so the world is extra quiet. I’ll be honest, I am not sure I am ready to have this much quiet. Alone, me and my thoughts, wandering though the snowy white world.
As I continued to walk, the trail slipped away. There was too much snow. I was officially on my own now. In a slight chuckle to myself, I say outloud, “I can see why the ranger said it might take them a few days to come get me.” Nerves were getting me.
Actually, my nerves were getting me so bad, I had to sit down and re-evaluate if I wanted to try to pull this thing off. I mean, what if I died out here?
These thoughts persisted as I continued to trump along the snowy banks of rivers, staring up at the granite walls of Little Yosemite Valley, coated in snow.
Hours passed. I was still walking, but I was ready to sleep.
Making it to Merced Lake
Waking up, the inside of my tent was frozen from my breath. “Maybe I should invest in a -20f bag” I thought to myself as I struggled to find the second zipper. Since I don’t own a -20f bag, I combine two sleeping bags for a warmer night sleep. Placing one semi frozen boot on, then the next, I crawled out of my tent. It was still dark outside.
The long nights of winter make for a lot of time to reflect and it makes snapping sunrise photographs pretty dang easy!
Putting on all of my layers and strapping into my snow shoes, I wandered around trying to find a composition for a sunrise photograph.
“THE SKY IS EXPLODING!” I shout to the frozen world. SNAP. SNAP. SNAP.
For this camping trip I have one camera body and one lens. A sony mirrorless camera and a 24-70 f/2.8 all around lens to document the journey.
After photographing the sunrise, I packed my bag and continued the rest of the way to Merced Lake. A couple of hours of tromping through the snow and I was there.
Making it to Merced Lake, the skies were overcast and the frozen lake was too frozen to show off the reflection, I had miss judged the timing. I had dreams of clear blue, or partially cloudy, skies so the icy reflection would shimmer. But that wasn’t the case. While, in the moment I was a bit unhappy, this trip was a blast for me. Why? I had prove to myself that I could go winter camping. I had accepted the challenge, set a goal, and achieved it, sort of. Wandering around the lake, I found several other cool images but nothing to write home about.
Several hours past as I snapped images and walked around the lake, it was time to go back to camp.
Wandering back to camp, the sky had cleared and I my view down Little Yosemite Valley was gorgeous! Taken away by the beauty, I sat down and observed. Happy that I could make the time to get out here. Happy that I made this trip. Happy to be out there alone. Happy to be with my camera, snapping images of a beautiful place.
A frozen Merced Lake in Little Yosemite Valley while winter camping. Photograph by Dalton Johnson
Winter Camping Tips
1) Plan, Plan, Plan
Understand your limitations by planning the trip in advance. While going on a spontaneous trip is a hoot, for the most part, this can lead to unwanted adventures, especially while winter camping. If you are new to winter camping, mapping your route, selecting your gear, having an adventure buddy, planning your food to bring, and being willing to turn back is a must. Snow is cold and humans have not adapted to live in the winter without adequate gear and knowledge. So, planning is your guide to success.
2) Know Your Gear
In this section, I am not going to provide gear options, but I am going to highlight the importance of knowing your gear. So, what does that mean? If you know your gear, you can fix it when it breaks, you know its limits and limitations (especially your sleeping bag), and you’re comfortable using it. So, how do you do this? PRACTICE! Yup, this may seem and feel silly, but practicing is the key to success. What do I mean?
Set up your tent, ideally do this 10 times before leaving on your trip
Know how to layer your clothing, to avoid sweating through your layers. Go for training hikes!
Go on “practice runs” in your backyard, or nearby green space, to test your systems
PLEASE, PLEASE, PLEASE make sure you can fix your stove! Not all stoves are created equal and a broken stove winter camping can lead a rescue operation.
Zippers break in the cold, make sure you can fix them!
3) Bring Extra Food
While packing light can save you from having a heavy load, the extra weight of food can save your life, or at least keep the morale HIGH. I suggest bringing an extra meal for every three days your are out. That means, every three days pack for four. Why?
If weather rolls in and you get stuck in a storm, you may need to wait it out
You might run a calorie deficit if you are breaking through heavy snow
There is nothing worse than food stress in the backcountry!
Little Yosemite Valley coated in snow while winter camping in Yosemite. Photograph by Dalton Johnson
4) Have Fun by Staying Dry
During the winter, getting wet can mean death. You need to find that balance of working hard, but not sweating through your gear. However, if you do get wet, this isn’t the end of the world. Here are solutions to drying things:
Wet socks? Sleep with them (not on), or hike with them on your shoulders to dry them out
Fell into a river/lake? This is serious! Set up your tent, strip your layers down, get the stove going. Warm yourself FIRST, then start drying out your layers
Too wet to dry? Rarely does this ever happen, but if a layer gets soaked and freezes, carry an extra plastic bag to put this in, stuff it in the bottom of your pack, and cut your loss. NOTE, this should ONLY be done if you have adequate layers and there is no hope of drying the layer you are sacrificing
Snow covered granite walls during a winter camping trip in Yosemite National Park. Photograph by Dalton Johnson
Photography Tips for Winter Camping
Buy Lenses that are weather sealed
Lenses have excellent weather sealant, making them very durable in extreme conditions. So, you can still shoot while it is snowing outside, just make sure to wear gloves!
Early morning light over the high country of Yosemite National park with winter camping. Photograph by Dalton Johnson
How to prevent your lens from Fogging in cold weather
To prevent your lenses from fogging in cold weather, keep them the same temperature as the ambient temperature. Trust me, these lenses can handle the cold! I've taken mine into -20f situations.
How to Save Camera Batteries in the Cold
When the temperatures are at, or well below freezing, keep your batteries in a chest pocket, or near a hand warmer, so the power isn't zapped before getting to use the battery.
Always bring a zoom lens
If the light is good, but you don't see a composition in the immediate foreground, put on an ultra zoom lens (ideally something in the range between 150 and 400) then scour the landscape. Something unique will pop up that your naked eye could not see before.
Have your camera ready to shoot at all times
When on an expedition, personal trip, or making a documentary, always have your camera at your side and take more images than you think you need, a story will unveil itself to you over the duration of the trip. Memory is cheap and it is most likely impossible to recreate the moments you experience on a mountain.
How to tell a story using photographs
When telling a story with photographs, create images in three categories; details, what your eye naturally sees, and from 10,000 feet. The details are the little things you often overlook, but give context to the photo essay. What your eye naturally sees are often grand images and landscapes. Images from 10,000 feet can be taken from a long ways away or a vantage point or, if you are lucky, a plane.
Explore More of Yosemite National Park

Dawn Patrol
My alarm went off at 5:00 am. At first, I groan, hit the snooze button, and rolled over. Then my mind took over, Are you going to waste this morning? Are you going to be lazy, or are you going to get up and get wet? Throwing back the sheets, the cold steals my comfort. Sitting on the edge of my bed with my head in my hands, stand up in three, two…

Sunrise at a local break near Todos Santos, Baja Sur.
My alarm went off at 5:00 am. At first, I groan, hit the snooze button, and rolled over. Then my mind took over, Are you going to waste this morning? Are you going to be lazy, or are you going to get up and get wet? Throwing back the sheets, the cold steals my comfort. Sitting on the edge of my bed with my head in my hands, stand up in three, two…
The night before, I packed my wetsuit and placed my board near the door. I was ready to step into the darkness for the fun-size swell. The report predicted the kind of waves that get your heart thumping as you race over the face. No coffee needed. I prefer to surf on an empty stomach. I hopped in the car and head north.

Carlos on a morning ride.
Stepping over a few bushes, my feet finally squish into the sand. If anyone else was here, they would be making fun of me for the ear-to-ear grin. Only the foam from the crashing waves is visible through the nighttime blanket. I know this spot well, so I’m not afraid of the paddle out. The bottom is sand until the reef point, the waves are easy to duck-dive, and this was the break I caught my first wave. Memories flood me as I toss my board in the water and begin the paddle. I was 8 years old on my first paddle out. The sun was hot, I had a blue rash guard on, and I was eager to catch the biggest wave possible. After that surf, I went to bed watching the replay of Pipeline’s webcam. Ha! I didn’t even know what Pipeline was when I was downloading it. Diving under my second wave, I was almost outside of the break.
Surfing gave me a different perspective on life. Growing up, I played sports that were individual and time-centric. My goal was to get faster every day. The improvements were apparent; a shorter time from wall to wall equaled success. Surfing wasn’t and still isn’t about that for me. Surfing is an escape. Surfing is a surrender. Surfing is awareness. The only control is how I perform on the wave that is given to me. Poseidon sends waves to the beach like the pulse of the earth's heart. That is what I am trying to ride. Transitioning from the controlled race atmosphere to the uncontrollable open-ocean captured the heart of this eight-year-old.
First light breaks through the clouds and I’m ready for that sunrise wave. Sitting atop my board, my feet move through the water. My hands are disturbing the glassy surface. My eyes are gazing towards the abyss, searching for the wave to come. Staring into the changing light, I see what I want to see. A bump on the horizon. Scooting back to turn my board, I get ready for my morning performance. Laying down, I paddle. The wave catches the back of my board and I’m accelerating. Looking down the face, I know I’ll go airborne as I try to stand. My feet land on the back of the board. Cutting hard right, I’m up. I got out of bed. I paddle out. I’m present.

Hiking and Climbing Trees in Wilder Ranch
Santa Cruz, CA is known for its would class surfing along the Pacific Coast Highway, but to those non-locals, few know that there is more to offer than the beach. Driving over Highway 17 into Santa Cruz, you are crossing the Santa Cruz Mountains. These intercostals house redwood forests, oak trees perfect for climbing, rolling hills of grass, and miles of hiking trails. If you pack a picnic and head out for a walk, you can find your own slice of heaven, just go looking.
Few things are better than meeting up with friends, going for a hike, and enjoying an ocean view from a treetop
Santa Cruz, CA is known for its would class surfing along the Pacific Coast Highway, but to those non-locals, few know that there is more to offer than the beach. Driving over Highway 17 into Santa Cruz, you are crossing the Santa Cruz Mountains. These intercostals house redwood forests, oak trees perfect for climbing, rolling hills of grass, and miles of hiking trails. If you pack a picnic and head out for a walk, you can find your own slice of heaven, just go looking.
Best Places to Climb Trees in Wilder Ranch
Before heading out to Wilder Ranch to climb trees, please be safe! Throughout the State Park, you can access both Redwoods and Oaks to climb. Personally, I find oaks easier to climb, but the view is never as good as the leaves block out the ocean view. Either way, scaling these trees is fun, so go enjoy yourself!
If you are an UCSC student, make the walk from campus to the ocean, along the UCSC TO THE SEA hike. Be prepared for a full day if you plan to hike there and back, especially if you want to scale as many trees along the way!
If you are an oak tree explorer, park your car at the pull out along the road, or pay for parking in the lot, and head towards the mountain, across the bridge, and take a left, you will be on ENGLESMAN LOOP. For myself, this trail has one of the highest concentrations of climbable oak trees.
If you are an avid redwood scrambler, you will need to go deep into Wilder State Park as the redwoods are further in. You can access fun trees to climb via ENGLESMAN LOOP or PACIFIC TO REDWOODS LOOP


5 Additional Hiking Trails of Wilder Ranch to Explore
Old Landing Cove Trail (All-Trails Link)
Pacific to Redwoods Loop (All-Trails Link)
Enchanted Trail Loop (All-Trails Link)
Wilder Ranch Loop (All-Trails Link)
UCSC to the Sea (All-Trails Link)
For a complete guide of hiking trails in Wilder Ranch, CLICK HERE.
Final thoughts
Hopefully, this will help you find the trails and trees you are looking to climb. Please, be safe, respect these places, and pick up any trash that you might come across. Wilder Ranch is a beautiful place to explore and recreate, let’s do our best to continually make it better!
The Best Way to Experience the Auburn Quarry
The Auburn Quarry and the confluence is packed with more adventures than you have days! This area has a little something for everyone; paddlers, rock climbers, hikers, photographers, bikers, nature observers, and those looking to relax. In this article, I try my best to paint the picture of just how many options there really are out here, but, quite honestly, the list feels endless!
Introduction
The Auburn Quarry and the confluence is packed with more adventures than you have days! This area has a little something for everyone; paddlers, rock climbers, hikers, photographers, bikers, nature observers, and those looking to relax. In this article, I try my best to paint the picture of just how many options there really are out here, but, quite honestly, the list feels endless!
Climbing
Some of the most accessible sport climbing only an hour from Sacramento
Access to outdoor climbing around the Sacramento area is a bit spotty, unless you are willing to make the trek to Lake Tahoe. However, for those of you looking to fill your itch without breaking the bank filling your tank with gas, the Auburn Quarry is a wonderful limestone sport climbing spot. The crag has several walls, the upper section is closed during the raptor mating season, and a wide variety of climbs. From short, three bolt wonders to longer, fore-arm bursting endurance climbs, this climbing area is a great resource. In addition, the grades vary widely, giving beginners and strong climbers (up to 5.13) a place to play around. Lastly, if you are new, Scale Wall is a great place to set up a top-rope!
The Most Popular Climbs in the Area:


Hiking
While the climbing in the limestone quarry is an attraction to most adventure goers, there are still many adventures to have surrounding the Auburn Quarry. The hike into the quarry itself is a gorgeous, river-side, outing that is great for kids! If you are willing to broaden your scope of area, the hiking around here is a wonderful place to explore many miles—and one trail that will take you Lake Tahoe— and get away from the crowds at the river.
Five Hikes to Check Out
River Goers… safely!
If you are a paddler or a human looking to dip their feet in the water after a long week, this is the spot for you. However, as the confluence becomes overcrowded, the time has come for you to adventure deeper, towards the quarry, for new sandy beaches. The river is a delight and during those hot summer days, a midday soak is often needed. If you know were to look, there are also quite a few cliffs you can find to jump off of, just make sure to check the water depth before making the leap!
*Please, be aware that the river is cold and moves quickly, so make sure you are safe while around the confluence. A confluence is the merging of two rivers, which means there is a lot of water coming together and can be dangerous for all those who enter the water. Be diligent and have a good time!
Bike is Life Gang (Road and Mountain)
The bike scene in Auburn has been booming over the last few years. Road cycling has had a strong presence for as long as I can remember because of the challenging climbs combined with the light traffic has made Auburn Confluence a destination for cyclists. Not to mention the fact that there are a few bike races that come through town! If road life isn’t for you, there are endless trails to chose from as well. Here is a short list of bike ideas for you all:
Mammoth Bar
Fire Roads starting at river confluence
Downhill from the Forest Hill Bridge
Road out and back Auburn Bike Works to Confluence and back
For Photographers
If you are a photographer, your options are endless out here. From action sports to lifestyle, you have the possibility to shoot anything your mind can come up with. Take you camera while you are hiking, who knows you might see an eagle or a beautiful sunset. Here is short list of ideas:
Rock Climbing
Portrait and Elopement at the confluence, utilizing the river
Hiking and/or trail running
Wildlife
Landscapes with the Forest Hill Bridge
No Hands Bridge is a MUST
Conclusion
What did I tell you? This place has a little bit for everyone! How many other places do you know that have cycling, rock climbing, hiking, river adventures, and a place to relax near water? The Auburn Quarry is is well known gem in Auburn, but not so much by those in the surrounding area. As the population increases and people are looking for new places to explore, this area is growing in popularity, which is great! All are welcomed! Please, be respectful of this space and clean up after yourself. Heck, maybe go the extra mile and pick up some trash you find while out as well.
P.S. Shout out to my mom who came to see me, grabbed my camera, and snapped these shots of me on top-rope solo!


Trip Report: Mt. Langley
Details:
Peak: Mt. Langley
Rank: 9 in CA
Date: 10/19/18
Start: 07:00
Return: 18:15
Elevation Change: about 7442 ft
Distance: about 18 miles
Route: North East Chute
Class: 2-3
Description:
Start at the trailhead of Tuttle Creek (my van wouldn’t make the entire dirt road, so walked an extra mile to the TH) and follow the trail until it crosses a creek, heading north to Ashram.
Turn south and begin route finding to the chute. You can see a “waterfall” in the distance, which is the base of the chute. The route finding is so so, for people have cairned the way but often intersecting with other paths.
As you begin ascending the chute, which you are not totally aware of doing, you quickly realize you have met the mental crux, a long sandy ascent. Keeping a rock cliff on your left, the east, and the “waterfall” on the right, the west, keep ascending. Once the foliage stops you, cross the spring and continue up and over the rib. Now you are in the chute. Work your way west until you find the dry river bed.
Take the dry river bed up. This is really not a river bed, but water runoff for snowmelt during the spring.
You will come upon a bench, head for the saddle and brave the sand! Continue pushing your way up the chute to the top of the chute.
Congratulations! You are ready to push. You have a nice long walk and can see the summit of Langley. Walk to Diaz Pass trending northwest gradually.
You have two options, Diaz pass or the rocky slope. Both get you to the south slopes. I would suggest Diaz pass unless you are comfortable with class 3+/4 scrambling because the rocky slope sets you up perfectly to send a not-so-obvious route to the summit. From Diaz pass continue walking west until you find a scramble you want to tackle, class 2-4 depending on your choice.
From here work your way to the summit, sign your name in the registry, eat lunch, and head home! Remember, you are only halfway!
The Story (the humanized version of the journey)
Waking up to my alarm at 02:00, I realized that 5 hours of darkness and my insecurity in route finding was not a combination I wished to endure. Resetting my alarm for 04:00 I would begin walking around 05:00 and have 2 hours of headlamp journey.
Turns out I forgot to turn ON my old alarm clock. But the time was correctly set. I awoke to first light around 06:30. Quickly, gargling down my thermos of tea and consuming my overnight oats, I had one last decision, bring the thermos of tea or no? The debate was rooted in the desire for more liquid versus the weight of the 40 oz Hydroflask. I decided to leave the extra liquid and do with my 48 oz of water in my bladder.
Excited to hit the trail, yet burning up in my wardrobe after walking a mile I stripped naked at the TH and work only pants and a sun hoodie in the shaded 40ish degree morning. Now it was send time!
Seeing the Ashram from the trail below I wanted to detour to see a piece of climbing history, but knew I was behind schedule, so I passed.
Now, for all of the trip reports and guide books that say follow the obvious chute, I’ve gotta give you all the middle finger! Yes, the chute is obvious, but that is when there isn’t towering foliage clocking your view of seeing the obvious chute. Route finding is frustrating. Sliding down the hill with each step in the sand, I realize my work is cut out for me. Tired of the sand, I scramble some class 3 slopes to the high point so I can see where I am at. To my surprise, I am headed in the right direction and have made decent progress, despite the copious, conflicting cairns sending all over hill-and-dale! Down-climbing and finding the line I am happy to say I’m ascending the river bed.
The ground was finally solid and I began moving quickly. So quickly I began losing my breath and could feel my heart pulsing through my ears. Taking a seat I caught my breath, allowing my heart rate to decrease. Continually making forward progress, the river bed gave way to sandy slopes. These slopes were the mental crux of the route.
As the sun peaked over the western ridge I headed for the trees to avoid the ever-increasing wind. That was a navigational error! On the bright side, I got a magnificent view of the Comb Ridge. Taking my breath away, I hung out for a bit. So, I guess it was worth it.
Making my way back to the chute, I ascended the second bench. Langley’s summit comes into view. Hunkering behind a boulder and out of the wind I check the time, 10:05.
“Not bad. I’m making progress!” my little pep-talk.
The soil was delightfully packed down, making the mile or so walk along the gat ridge quick. Not to mention a herd of 14 Big Horn sheep prancing ahead of me, their white butts all lined up as they ascended the ridge with Langley’s summit in sight. An image one should endure at some point in their life. Once again I headed a bit far north, this time on purpose to get another view of Comb Ridge. Striking is the size of these four peaks shooting out of the ground.
From here I had to decide. Ascend the ridge to Diaz pass or take the rock scramble in front of me. Greatly disliking the of descending a wee bit to the summit through Dias pass, I headed up. Stopping regularly to catch my breath, this climb might have been the most physically demanding on the route. My hands were clawing up and my jaw was clenching as the cold set in. Reaching the top, I sheltered myself from the wind in order to put on underwear, a fleece top, gloves, and a windbreaker. Noticing to summit form my location I would have to find a line along the south slopes to the summit. Cold and mentally exhausted, I decided to walk west until I could find an obvious line that would go at class 2. It worked! Soon I was on the summit eating lunch and signing the registry.
The descent went quickly, especially down the sandy slopes! The cry creek bed was rough on the knees, but the spring water refill was much needed! I actually finished that second 1.5 L by the timeI reached the ashram. Thankfully I had enough daylight to spare and relished in this modest, rock-building that supposedly housed Warren Harding’s “Low Sierra Eating, Drinking, and Farcing Society”!
Food, tea, and falling asleep by 19:15.
Time log:
07:00 Left van
07:25 Trail Head
07:55 Ashram
10:05 Second Bench (summit in sight)
13:40 Summit
14:10 Left Summit
18:55 Trail Head
18:15 Return to van

Rock Climbing Road Trip to South Lake Tahoe
“Hey! You coming with us this weekend right?” I asked my best buddy on the phone. Our plan was to road trip to South Lake Tahoe for a long weekend of rock climbing. Even though I grew up in the Lake Tahoe area, my childhood was mostly spent swimming in a pool, chasing a dream of college sports. Since graduating, I left the pool behind and picked up rock climbing. Now, I am not very good, but gym climbing is quite boring to me, so getting outside for multi-pitch rock climbing itches my adventure needs.
From rope stretching goodness to some gorgeous landscapes
When the fingers are sore and the laughs are plenty, it must be a rest day. Photo by Dalton Johnson
The Story
“Hey! You coming with us this weekend right?” I asked my best buddy on the phone. Our plan was to road trip to South Lake Tahoe for a long weekend of rock climbing. Even though I grew up in the Lake Tahoe area, my childhood was mostly spent swimming in a pool, chasing a dream of college sports. Since graduating, I left the pool behind and picked up rock climbing. Now, I am not very good, but gym climbing is quite boring to me, so getting outside for multi-pitch rock climbing itches my adventure needs.
“Yeah man! I am running a bit behind, work kept me late, but I’ll meet you all up there.”
Stoked to know we would have a small group, we made our way to Lake Tahoe in due time. At this moment in my life, I was living in a van (but not the van life dreams most would associate) and worked part time as a substitute teacher while building my career as a photographer and writer. My days were quite boring; wake up pre-sunrise to photograph surfing for an hour, go teach (aka edit what I shot that morning), shoot some more surfing until sunset, then go to a rock climbing gym. While boring, these days were laying the foundation for the work ethic needed as an adventure photographer.
Frothing to be outside, we made it to South Lake Tahoe in record time from the Bay Area. While it was night, we pulled out the South Lake Tahoe Rock Climbing Guidebook and started to plan the next few days. My focus was on Lover’s Leap and Phantom Spire. Both places looked like an adventure and the rock was gorgeous. Taking a pull, I asked the group who would be interested. Scott and Marie said yes. Most of the group enjoyed bouldering over roped climbing.
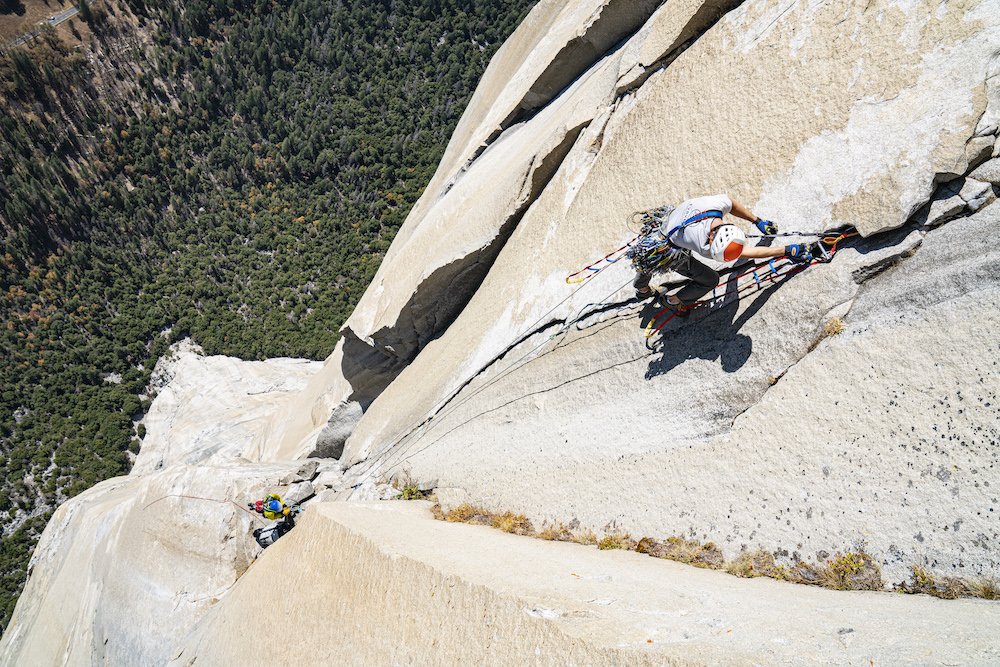
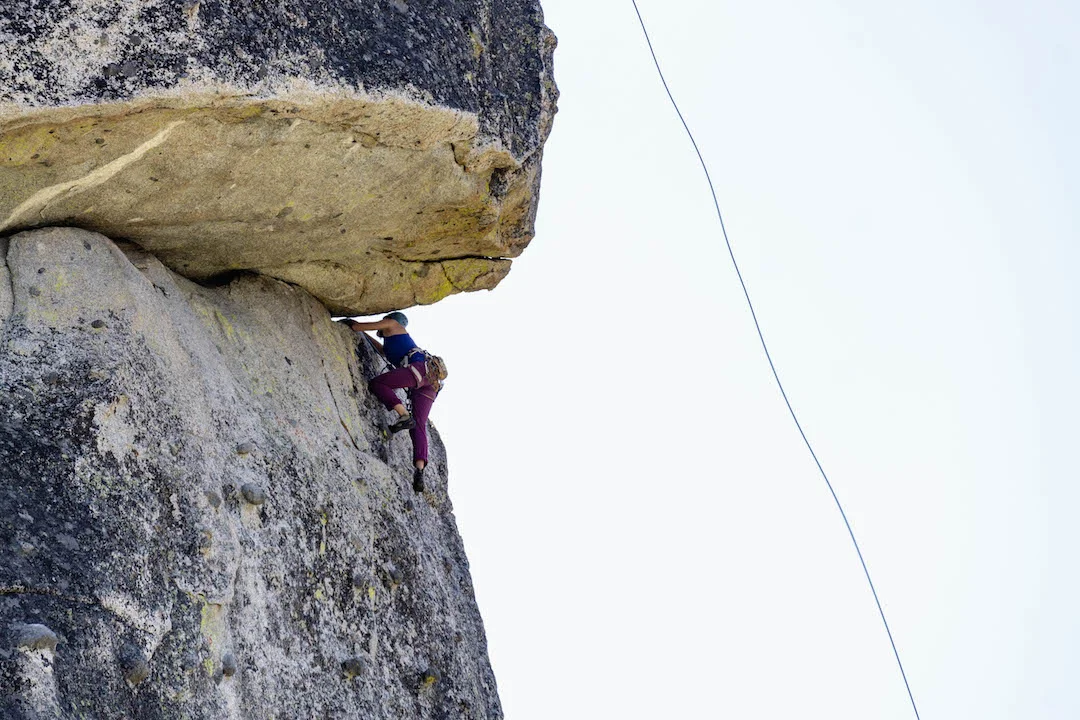
Rock climbing at Lover’s Leap on the Direct Start to Surrealistic Pillar (5.10b). Photo by Dalton Johnson
In the morning, we all went our separate ways. Scott and I left early to beat the heat and get a full day of multipitch rock climbing under our belts. We were both new to climbing, so speed was not something we had on our side. Hopeful to climb several pitches, we racked our gear in the lot, packed lunch in a backpack (that we would stash), and started down the trail for Surrealistic Pillar.
Our goal was to climb:
All in a single day. With our work cut out for us, we started up the first pitch of Surrealistic Pillar. Within that first pitch, we realized our goal was going to be ambitious. In the moment, I thought to myself, “Regardless of success, today’s going to be a fun day.” And I was correct. As the hours passed, so did the pitches. We didn’t complete our goal, but we wandered back into camp a bit haggard, laughing, and with stories to tell.
The good news and the bad news, we still had two more days of rock climbing in South Lake Tahoe. “What are we going to do?” I thought to myself. “Should we go finish up the last few routes, or should we do something new?” Unsure where I stood, I put the option out to Scott.
“I’m bouldering tomorrow.” He said quickly.
“I’d love to rope up tomorrow.” Marie’s voice chimed in after hearing Scott turn me down.
“Cool, where do you want to go?” I asked.
“Phantom Spires looks cool!”
The decision was made and we headed to Phantom Spires for another day of rock climbing in South Lake Tahoe. Excited to see a new spot, Marie and I poured over the guide book and ear-marked several single pitch traditional climbs.
Marie on her first outdoor traditional lead climb at Phantom Spires in South Lake Tahoe, CA. Photo by Dalton Johnson
The day at Phantom Spires was fun, exciting, and a relaxing counter to the day before. Marie got in her first lead climb and I got to play with the crag dogs, life was good! Worn out and ready to head back to camp, we hopped in the van and drove back to the group.
Upon returning, we all exchanged stories from our day. The bouldering group had a long day, looking for hidden boulders and getting lost along the way, they had an adventure. While their goal was to walk the least amount as possible, they ended up walking for hours. With a full belly and a camp fire burning, Marie and I shared the story from our day of rock climbing at Phantom Spires. The excitement was through the roof to hear that Marie had lead her first traditional route! We all cheered with s’mores.
With one day left, I bit the bullet and decided to go bouldering with the crew. To my surprise, I had a wonderful time! The location, Pie Shop, was pretty. Also, the boulders were hard! Maybe that is because I am quite bad at bouldering, but reaching the top of a v2 felt like an accomplishment.

Scott on a boulder in Pie Shop. Photo by Dalton Johnson
Rock Climbing Areas
Free Places to Camp (in a van or car)
BLM
National Forest
Phantom Spire Gallery


South Lake Tahoe Bouldering
The coarse granite erratics that surround South Lake Tahoe make for a rock climbers dream. Positioned with views few could dream up, when you climb on the boulders of around Lake Tahoe, you are left breathless from the views and thin air. Not to mention a few cuts into your skin as you discover the gorgeous boulders bite back, viciously, as you work your way to the top. One of the best parts, the temps. As late spring rolls around and the snow melts, the boulders come alive and the project is perfect until the next snow.
The coarse granite erratics that surround South Lake Tahoe make for a rock climbers dream. Positioned with views few could dream up, when you climb on the boulders of around Lake Tahoe, you are left breathless from the views and thin air. Not to mention a few cuts into your skin as you discover the gorgeous boulders bite back, viciously, as you work your way to the top. One of the best parts, the temps. As late spring rolls around and the snow melts, the boulders come alive and the project is perfect until the next snow.
South Lake Tahoe is home to over 200 bouldering projects with more being developed seasonally. Along the I-50 corridor there are several spots you can sneak into the national forest and boulder for a lifetime. If you are looking for hard boulders, head to Pie Shop and give Big Z (V16) a try. Because of the ideal temperatures, ample free camping, and quality of boulders, South Lake Tahoe is quickly becoming a destination boulder spot for California climbers looking to escape the heat.
Read on to learn where to go bouldering, read a personal adventure, and the best boulders in South Lake Tahoe.
Elliot working on a “highball” V2 in the Pie Shop area of South Lake Tahoe, CA. Photo by Dalton Johnson
Best Boulders in South Lake Tahoe:
Deciding what the best boulders are in Lake Tahoe is not something easy to do, especially since I haven’t climbed them all (i’m weak AF), so below is a list of solid boulders that should tickle your fancy:
South Lake Tahoe offers untapped bouldering potential for rock climbers of all levels
A Road Trip with Friends
Yup, I am a broke dirtbag living out of a beat up 1998 Dodge Ram 1500. The transmission went out and while I’m “stuck” in the Lake Tahoe area waiting for a paycheck, bouldering is my best way to pass time. Quite honestly, bouldering is bane of my existence. Growing up as a long-distance swimmer, a sprint just didn’t seem to be in my blood. However, here I am, crimping down and giving everything I have for a few seconds, in hopes of reaching the top of a boulder. Hell, I could just walk around the back, but for reason, I enjoy the contrived ethics of rock climbing.
My magical van under the stars, not broken down in Joshua Tree NP, CA.
Luckily, I grew up not far from Lake Tahoe, so this place doesn’t seem foreign while I wait, bit this also means I have “friends” who have moved here since high school. A couple of them rock climb throughout South Lake Tahoe on the weekends, as most live on the north shore, but few boulder. Luckily, bouldering doesn’t require much; a bouldering pad, some chalk, and climbing shoes. Some would argue that you don’t need all of that, but call me soft, I prefer to not break an ankle.
As a substitute teacher, I get a paycheck once a month, on the 10th. It’s the 5th. So, I have a few days to boulder, journal, stare at the sky, and dip in the lake. Not a bad life. I might be broke, but does it really matter? I don’t worry about much beside scary falls while bouldering. Truly, I don’t want to break an ankle. Reaching out to friends, during the week, most are busy, so I load up my pad and walk around Pie Shop looking for boulders to flail on. While in rock climbing area called Pie Shop, I take some time to notice the rock. It’s course. Tearing my fingertips as I try to crimp. If I plan to climb for the next 5-10 days, I can’t be crimping on this stuff. I think to myself. After the day is done and I’m a bit tired, I pull out the South Lake Tahoe Bouldering Guide Book to find a new place to go.
My van drives, but not well. It is ready to explode. So, I pick the next closest area for my next day; The Zephyrs. While in the guidebook, this place is not (well it wasn’t at the time of writing) on Mountain Project. I guess there is just that much rock to explore climbing on in Lake Tahoe. A bit confused by the map in the guide book, I made my way to boulders. DAMN! The view of Lake Tahoe from this spot is better than I have experienced before. A stunning place to climb, read, journal, and relax! Heck, even if I didn’t climb, I would hike up here just to sit on a boulder and watch the sunset.
Two days of bouldering alone was fun, but I definitely wanted some company. Thankfully, a few friends from Santa Cruz, CA were coming north to boulder! Of all the places and activities they could do, bouldering in South Lake Tahoe is where they came. Uber excited to show them around, we spent three days as a group four, with dogs, bouldering. My belly was hungry, but full of laughs, what a treat!
My check was deposited to my bank account, the van putted into the transmission shop, and within a day’s time, I was back on the road… headed to go teach some more, as I surely had no money for gas or food now.
Bouldering Areas of South Lake Tahoe:
South Lake Tahoe has more areas than I can count with my fingers and toes, so to make things easy, below are four of the better bouldering areas in South Lake Tahoe that offers problem for everyone, of every level.
Pie Shop - With some of the hardest lines and easiest lines, Pie Shop is the place where all levels can come to enjoy bouldering. The rock here is very sharp and unforgiving, so be aware of your skin. The walk in is short, but this is a big area, so navigating it can be a challenge for first timers.
Ice House - Somewhat out of the way and off the beaten path, Ice House provides a diverse selection of problems in the V3-6 range. Out here you wont find crowds, so come, chill, and enjoy the bouldering.
The Secrets - The name says it all. The Secrets are a trek and 4WD is needed, but trust me, you should make the trip out there. Over the last few years there has been a lot of development in this area, but the guide books are trying to keep up. I love this area because you can just wander the woods for more boulders and you can camp next to the boulders you want to climb on.
The Zephyrs - Growing in popularity, this is one of the most aesthetically pleasing places to boulder in Lake Tahoe. The sunset views from the main boulders overlook the entire lake, gorgeous! Just be ready to hike as the boulders are about 1.5-2 miles from the parking lot. Also note, there isn’t much parking.
A Photo Gallery of bouldering Areas in South Lake Tahoe:


Now that you have discovered where to go bouldering, read a personal adventure, and the best boulders in South Lake Tahoe, it’s time to grab your shoes and pads and head for the boulders. Enjoy tearing up your skin, soak in the views, and leave a comment below with any additional information that you think would be helpful for other climbers in the area.
Discover More of Lake Tahoe
Backpacking the Grand Canyon of the Tuolumne River
Yosemite National Park’s high country has fewer people exploring and the further you go, the more secluded your trip will become. So, make the trip up Tioga Pass and drop into Tuolumne Meadows to snag your backpacking permit for the Grand Canyon of the Tuolumne River. Below, you will find a wide variety of information on backpacking the Grand Tuolumne River as well other options for when you visit Yosemite National Park.
A four day trek, just under 40 miles, endless river swimming, a calf destroying climb, a momma bear with a cub, and a relaxing river. Oh, not to mention the whole things was a bit smoky!
So, you want to experience more than Yosemite Valley on the visit to Yosemite National Park? Well, I have the perfect idea for you! Yosemite National Park’s high country has fewer people exploring and the further you go, the more secluded your trip will become. So, make the trip up Tioga Pass and drop into Tuolumne Meadows to snag your backpacking permit for the Grand Canyon of the Tuolumne River. Below, you will find a wide variety of information on backpacking the Grand Tuolumne River as well other options for when you visit Yosemite National Park.
Trip Details… The Data
The Route: Glen Aulin to White Wolf (reversible)
Length: 30.8 miles
Elevation Change: 5,774 feet
Season: Late Summer
Days: Three nights, four days
The headwaters to the Grand Canyon of Tuolumne in Yosemite National Park, CA.
Backpacking Story
Day One:
After a long wait to acquire our backpacking permits and filling our bear bins we headed down the relatively flat Glen Aulin trailhead. Scott was my trail buddy for this trip and it was also his first backpacking trip! Stopping to adjust our packs, fill water in the creeks, and take a couple of dips, we eventually made it the Glen Aulin high sierra camp. This would be our home for the night.
Over the past several years, I have made a trip out the Glen Aulin with my Mom, friends, and alone. This place is magical! If you are ever passing through here, make sure to take the time to swim in the water fall!
Day Two:
As we did this route “backwards” Scott and I had headed downhill for the majority of the trip. While I am not sure if I would recommend this, as the last day is a B#$% of a climb, it is pleasant to walk downhill for two days. Scott and I were not in rush, so we took two days to walk the Grand Canyon. Along the steep cliffs and pools of water, we stripped down and swam in the river pools. The water was cold, so make sure you are ready to cool down before getting in. Day two was a solid hike, but the best part was calling it early, setting up camp, and reading our books next to the river as we sipped our tea. As the tea lost flavor, we crawled into our sleeping bags, the night didn’t call for a tent.
Day Three:
Waking up with crusty eyes and a little bit of a sore throat—there was a fire in the area and the smoke settled into the canyon over night—we made a quick breakfast and headed out. Walking down hill along the river, the cliffs grew steep and consequential if you fell. Excited about the opportunity to cross the canyon and head to Harding lake, there was still a good amount of trail ahead of us. Playing trail games while backpacking is a great way to pass time. My favorite is posing this question, “What does your ideal 24 hours look like if you can teleport and time-travel?” Gosh, the answers for this are incredible.
I have to note, Scott was crushing this backpacking trip and it was his first time! No complaints, no whining, no hot spots! Impressive.
On our thigh burning ascent, Scott and I decided to take the scenic route and stay out, under the stars one final night. As we made the right hand turn to Harding Lake, we crossed path with a cub and its mom… scary, but also amazing! As all four of us observed each other, I snapped a couple photographs of these two (see the top image). Eventually, they decided we didn’t matter and wandered off into the woods.
Scott and I made our way to the lake, set up camp, and, of course, made afternoon tea.
Day Four:
Knowing that we were going to need to hitch-hike back to our car, Scott and I woke up early, broke down our tent, and hit the trail. Backpacking is one of those great activities because you can move slow, or fast, and this morning was a “fast” morning. Getting out of camp around 8:00am we were at the trailhead with our thumbs out by 10:00 am. Personally, I pick up hitch hikers, which I think gives me good karma as we both got picked up by our second car. The man was kind and fun, giving us information for Mount Tyndall, which we climbed a few days later.
By the end of the trip, our legs were sore. We made some tea and headed to HWY 395 for a little climbing and some more mountain fun!
Leave No Trace Principles
Principle One: Plan Ahead and Prepare
Principle Two: Travel & Camp on Durable Surfaces
Principle Three: Dispose of Waste Properly
Principle Four: Leave What You Find
Principle Five: Minimize Campfire Impacts
Principle Six: Respect Wildlife
Principle Seven: Be Considerate of Others
If you want to leave more, check out LNT’s Website


