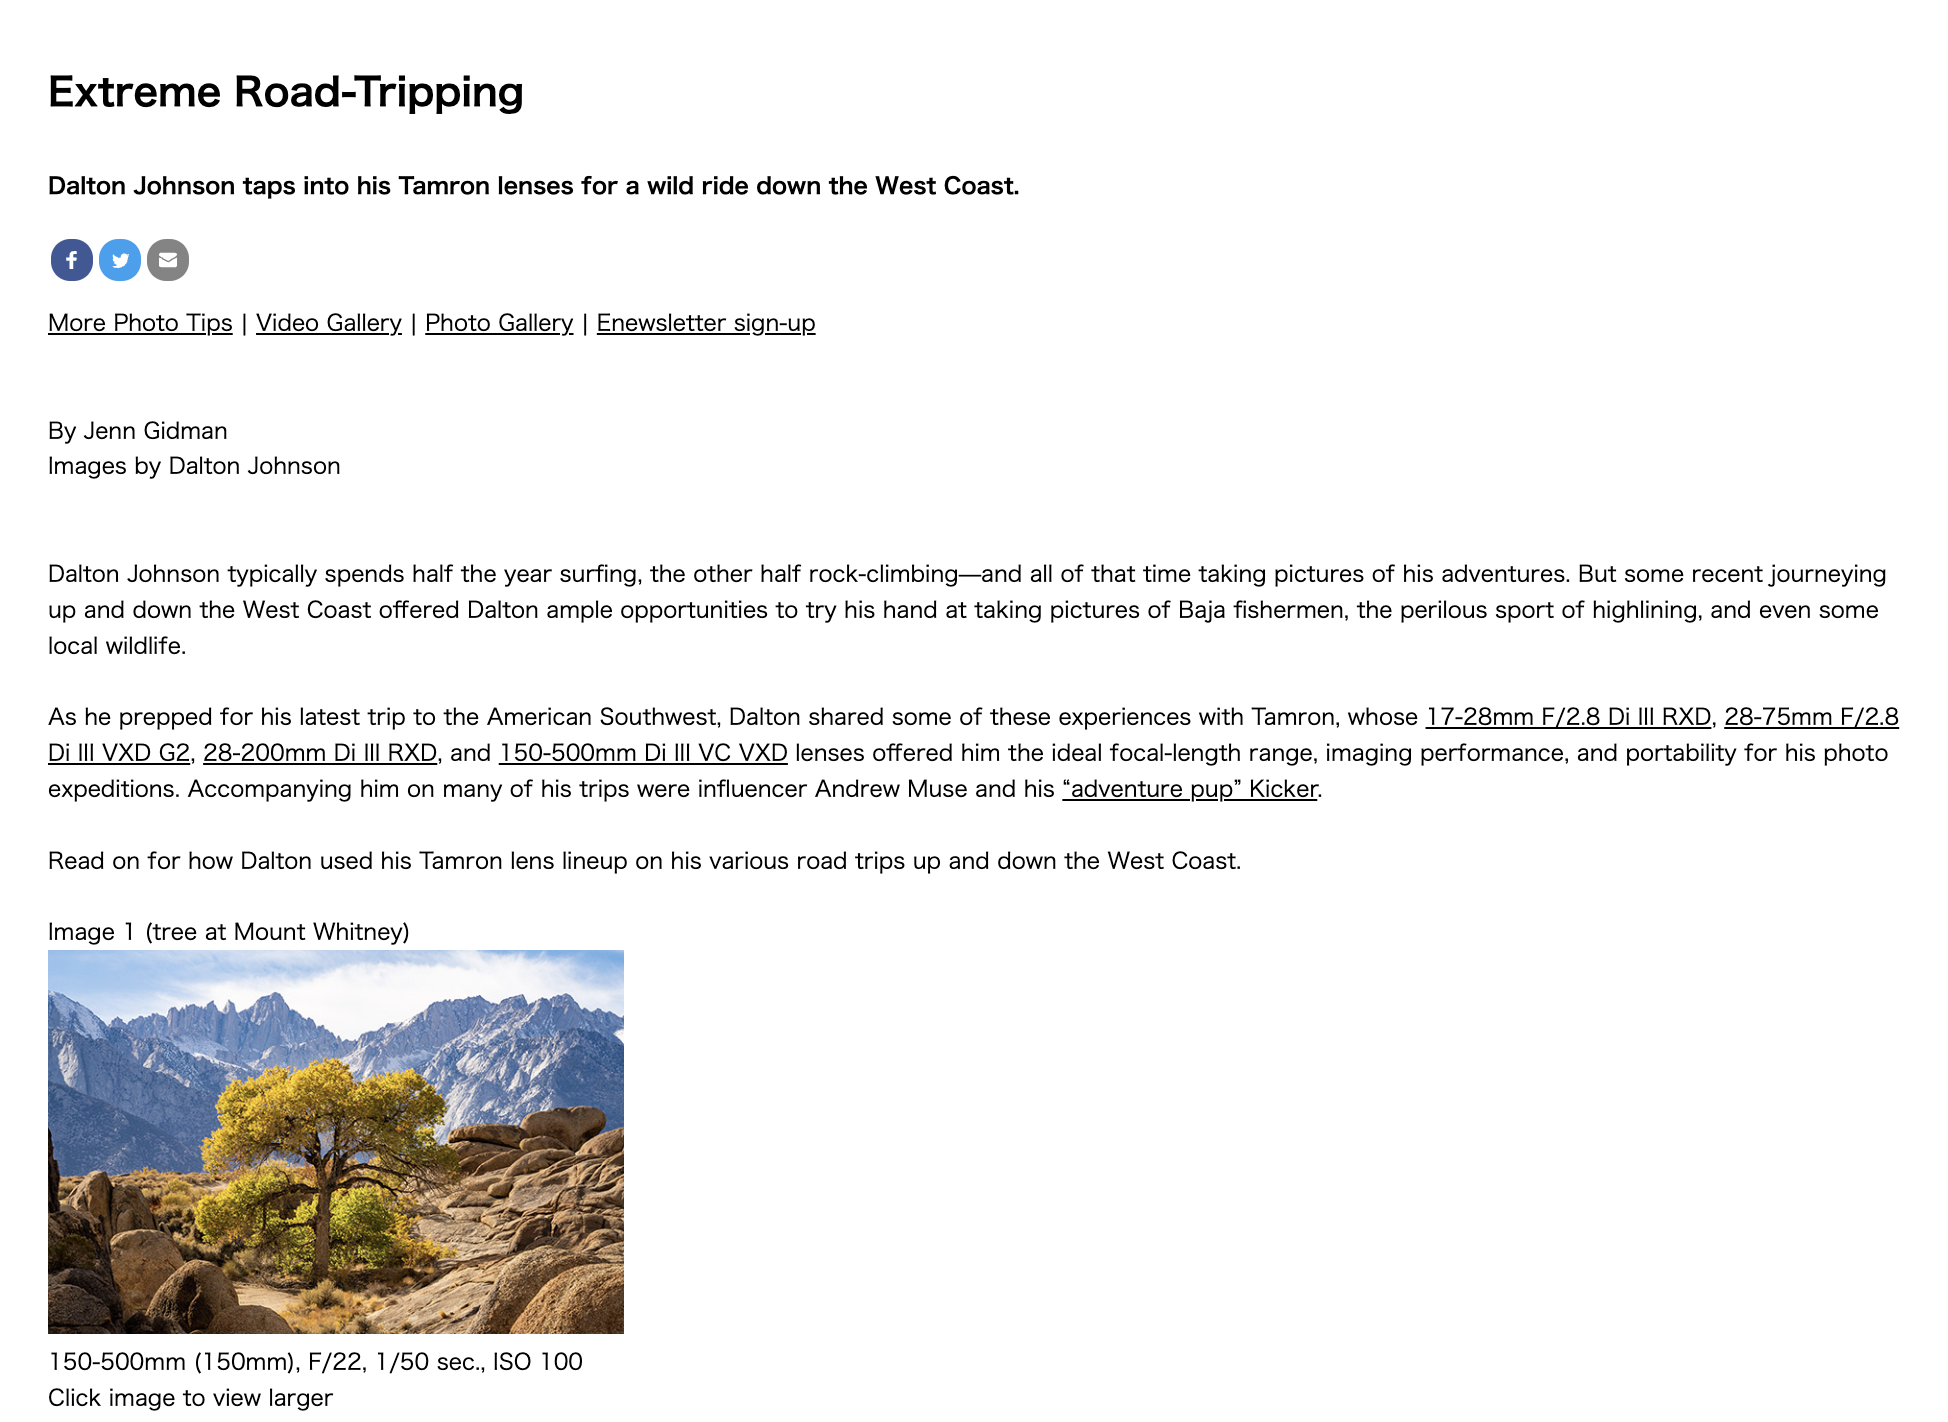
The Dirty Secrets of Being a Travel Photographer
From the outside looking in, travel photography is a dream. As a travel photographer, you get to hang out in cool places, do all the adventurous things, and see the world… for free. Right? Well, not exactly. The reality is, if something is happening, you have your camera to your face photographing. If nothing is happening, you are jocking for position to get the next shot, or, you are importing content, cleaning gear, etc. Yes, you get to be in the places, but you rarely have the opportunity to do the activities. For example, this was a 40(ish) day shoot. In the end, I got to play (surf, rock climb, snorkel, etc.) for six of them. That is less than if I worked a 9-5 job!

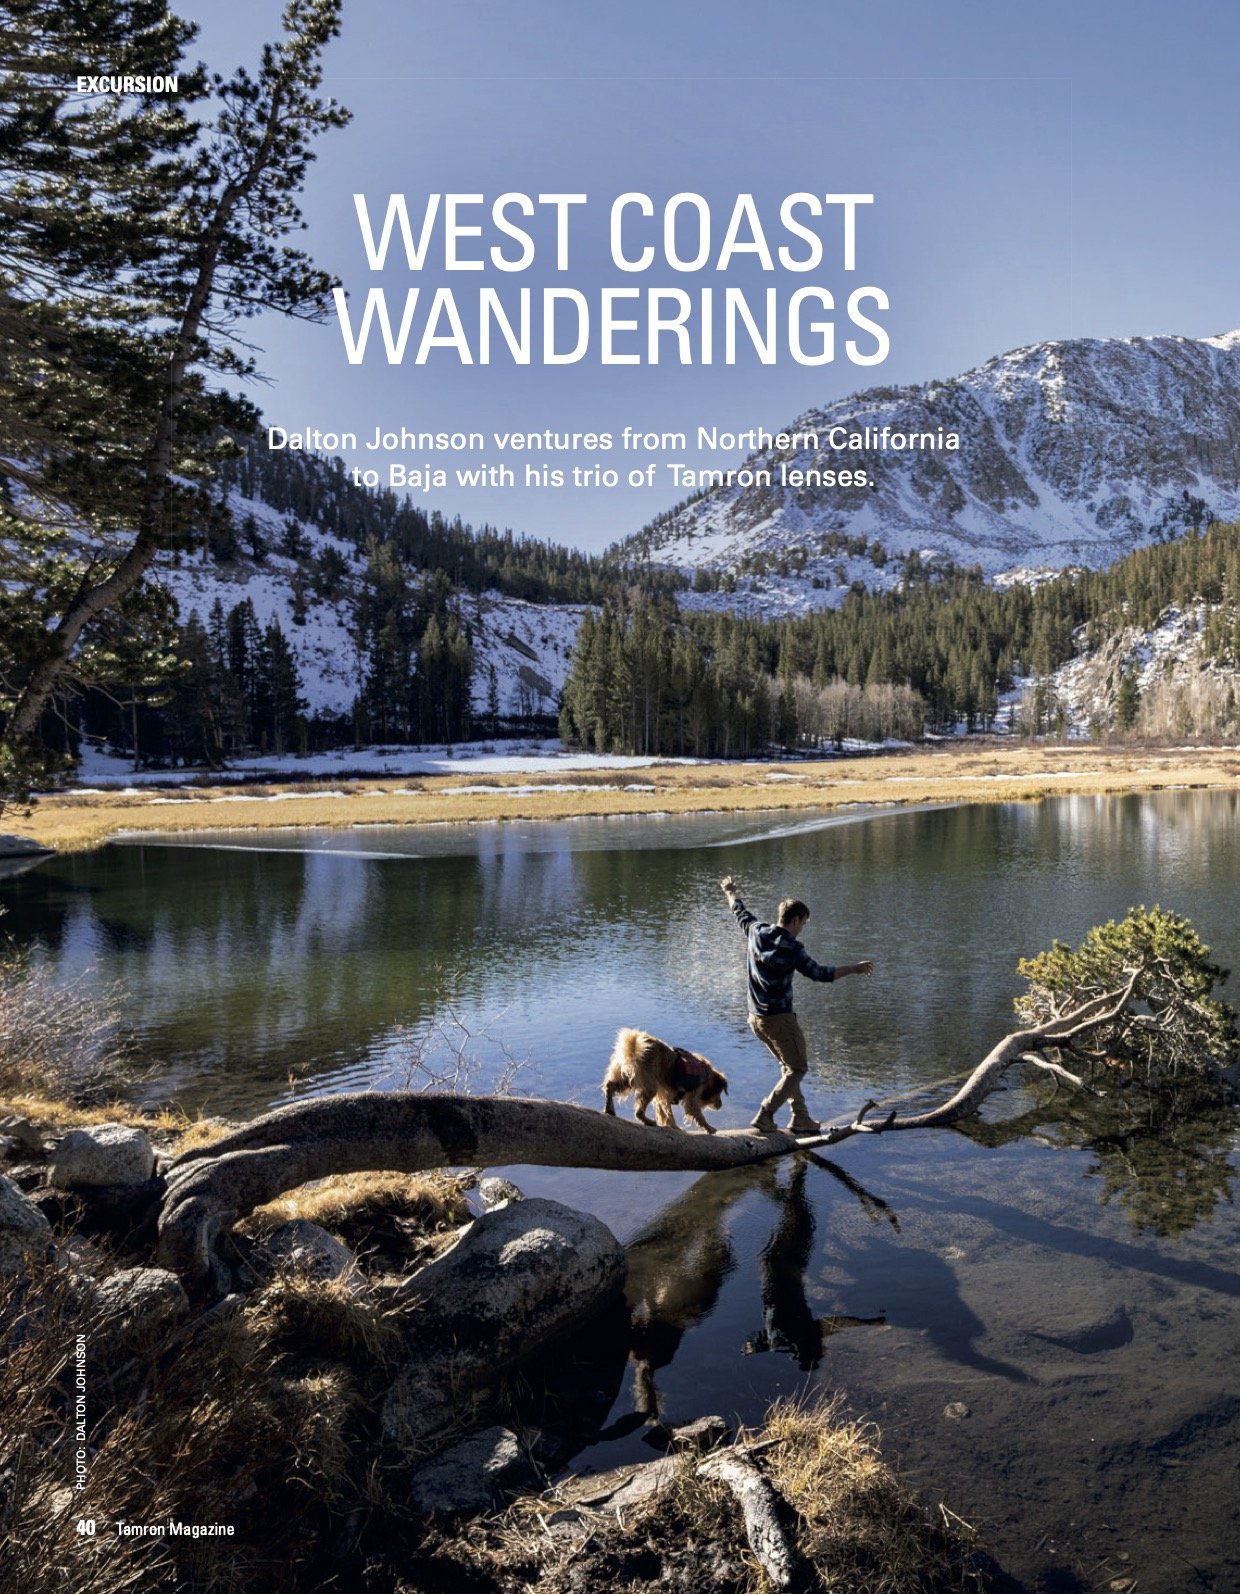
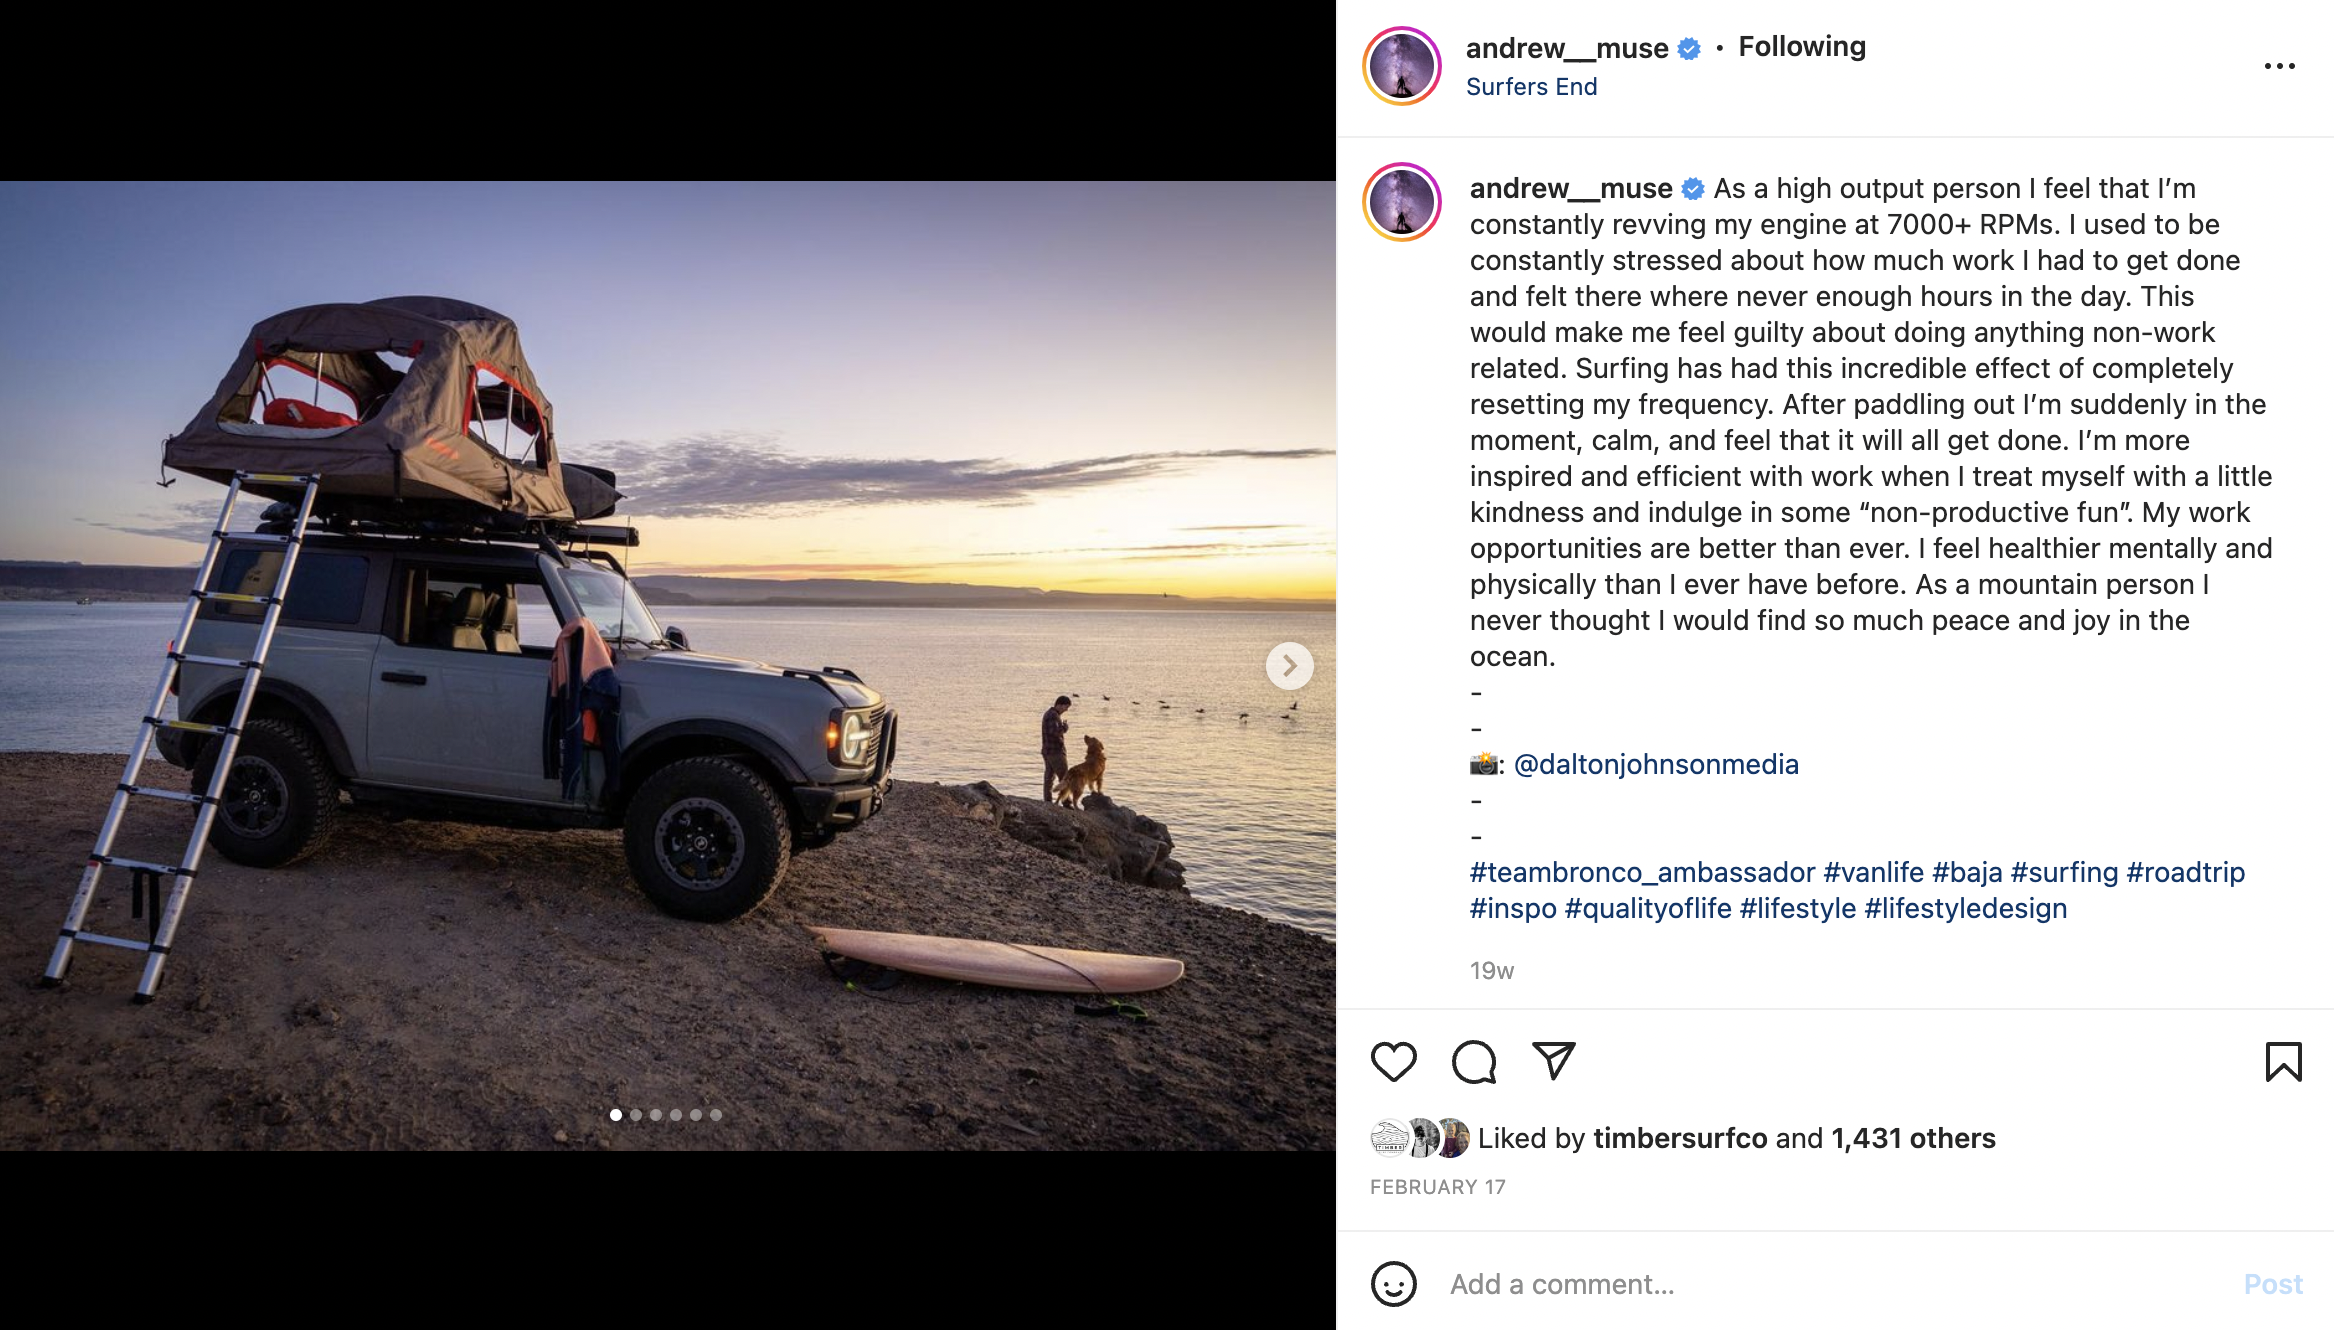
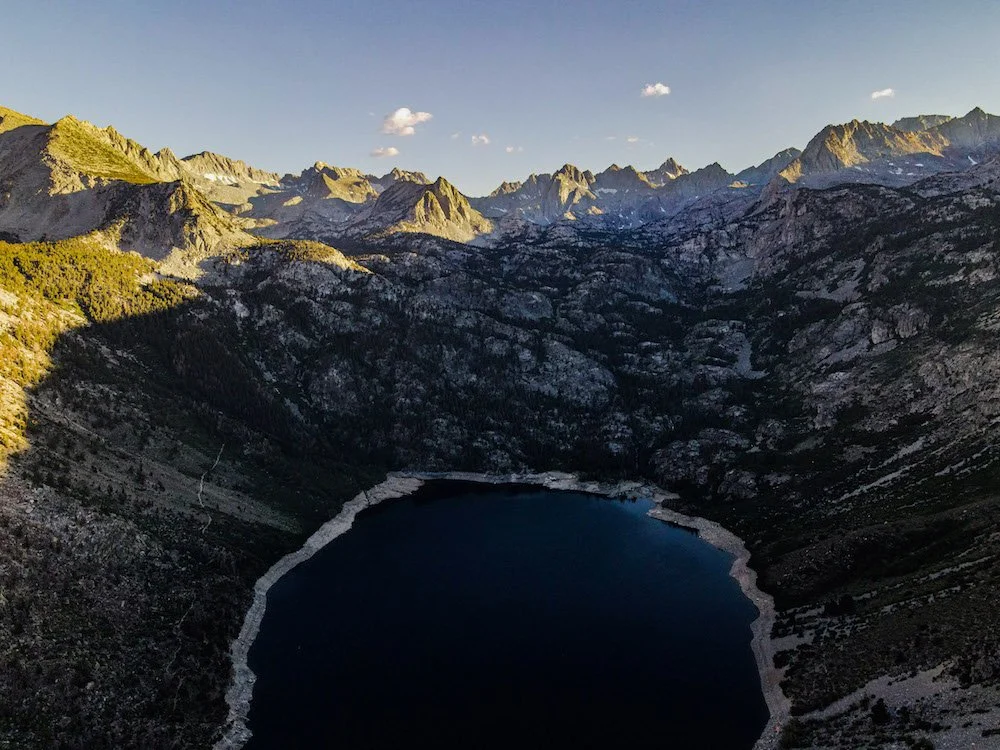
Dreaming of a road trip from Northern California down the Baja Peninsula, the winter of 2021 was the year. At least for myself. Surfing, spearfishing, saturated sunsets, wild coyote spotting, and cactus… lots of cactus. Looking back, this assignment was a dream come true. Why? Who can beat chasing waves, eating tacos, and swamped motors? Okay, we could have gone without the swamped motors, but this trip was surely one for the books. A huge thank you to the plethora of companies for making this dream a reality.
The Route:
Choosing a ridiculous route, our team—Andrew Muse, Kristin Riegel, and myself—started in San Diego, made a HUGE circle back to San Diego, and then departed the United States for Mexico’s iconic Baja Peninsula. Our loop looked a little something like this:

Exploring Highway One on a vanlife road trip. Photo by Dalton Johnson
San Diego to Bishop
Bishop to Lake Tahoe
Lake Tahoe to Santa Cruz
Santa Cruz to San Diego
San Diego to Cabo
Cabo to San Diego
If you are looking for an epic road trip, this route offered everything from mountains to surfing, river to lakes, and everything in-between. If you have the time, the vehicle, and finances to make this happen… you should do it!
What was the project?
This project was multi-faceted to say the least. Embarking on this road trip, the list of deliverables were piling up and the days were dauntingly long. At first, the team had some hesitations around the size of the project, especially since wifi was a huge unknown. Thankfully, the wifi throughout Baja was sustainable and capable of sending files… occasionally. The end result was a variety of photographs and videos for a multitude of brands:
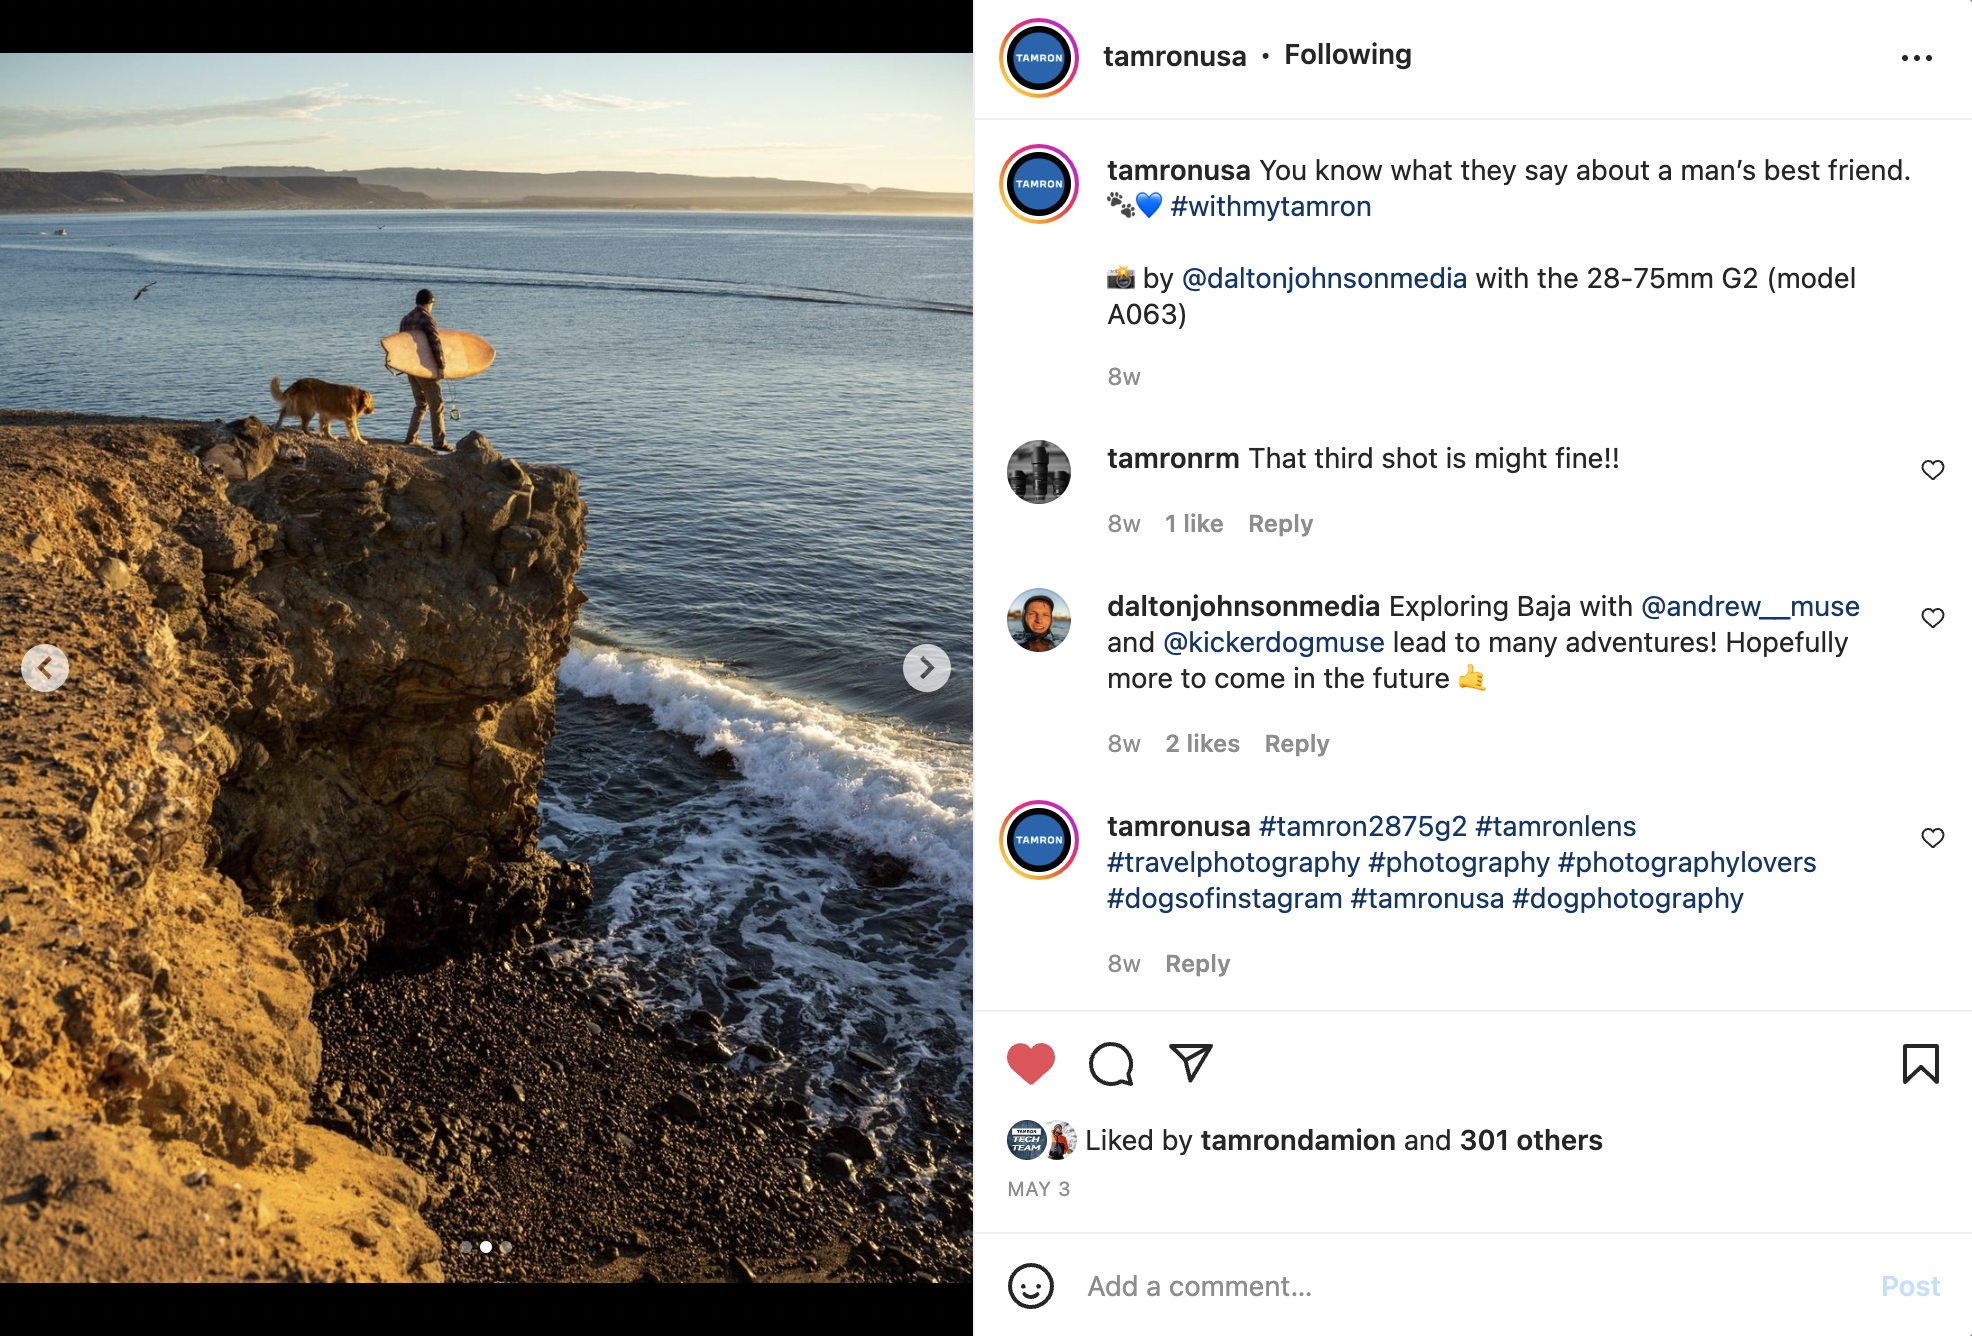
Tamron Lenses
Ford
Peak Refuel
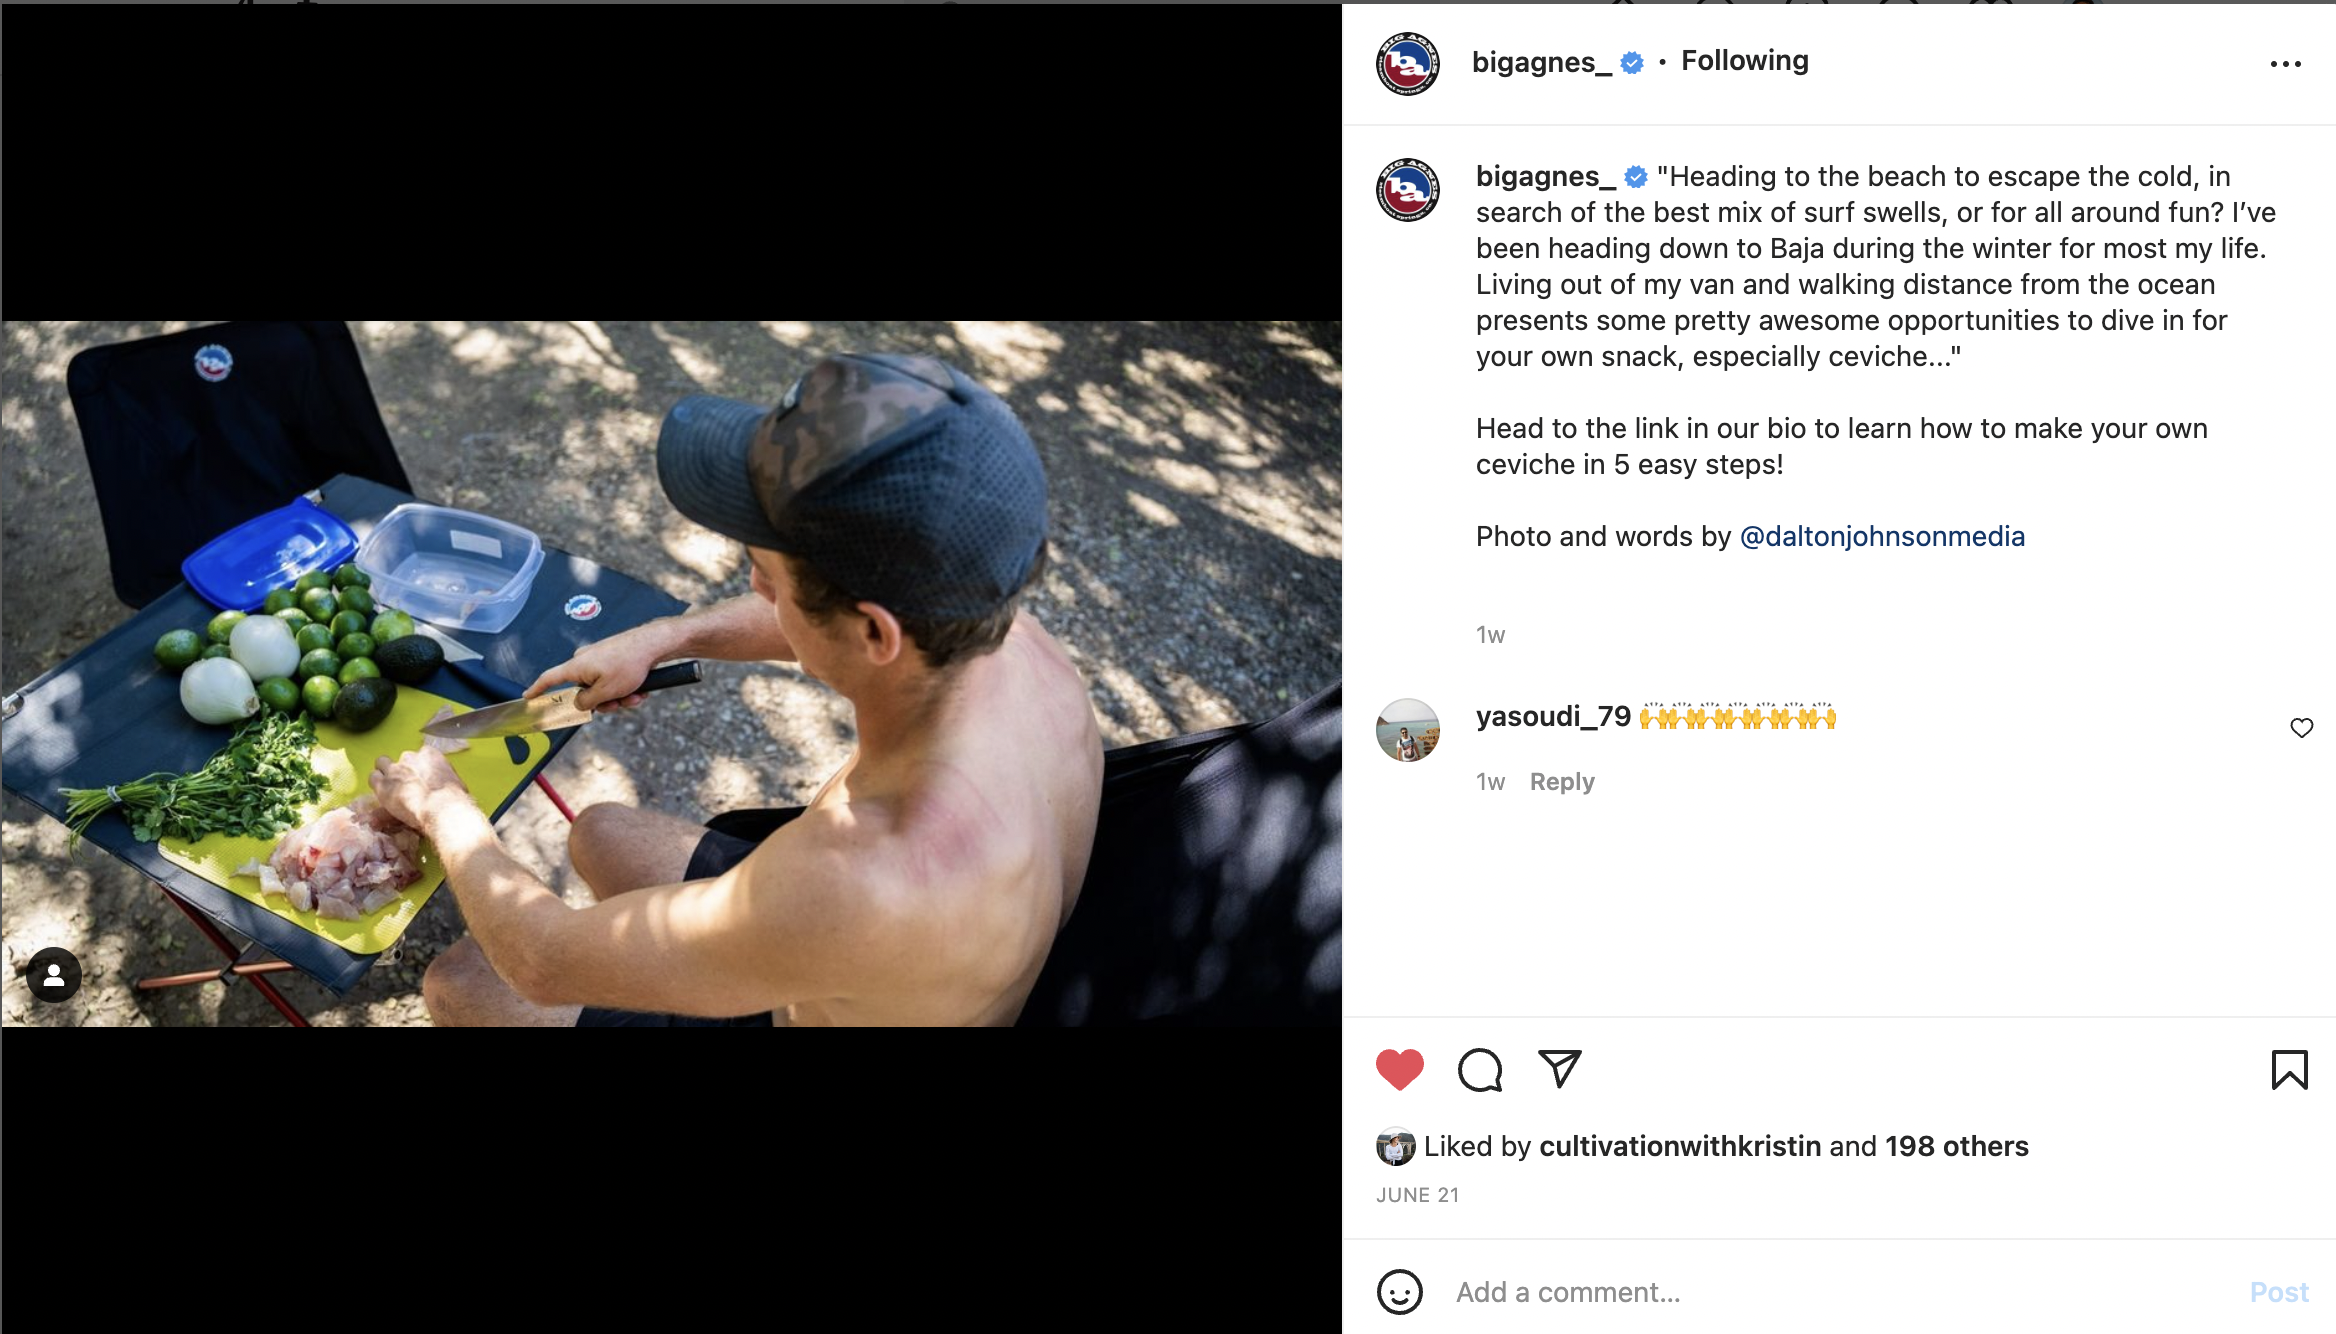
Big Agnes
Timber Surfboard Co.
Lux Pro
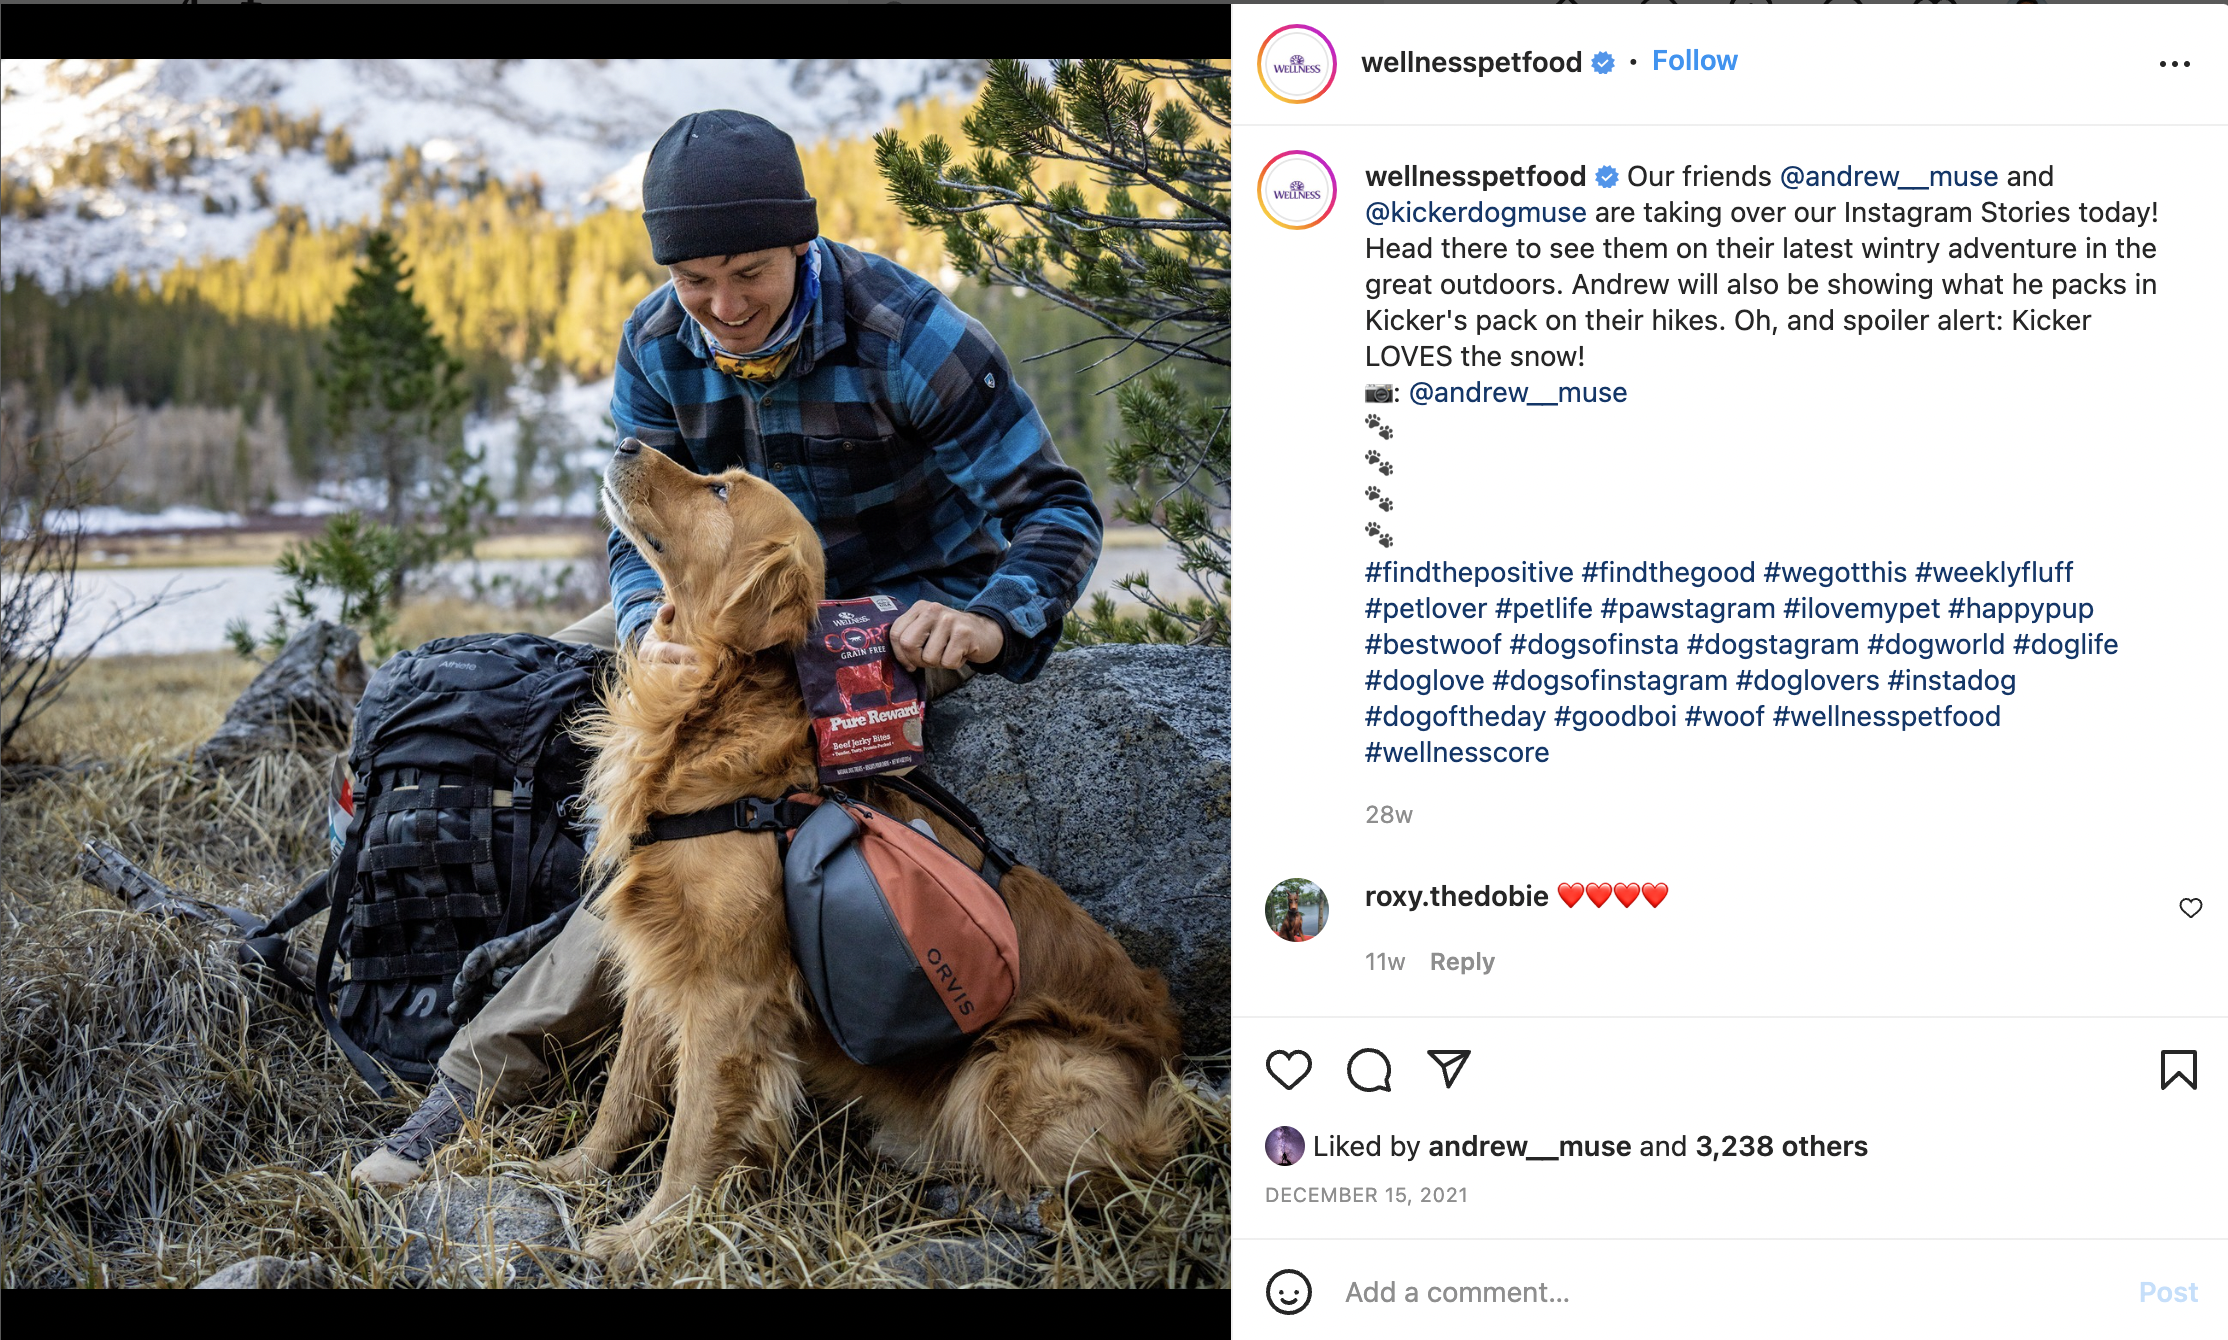
Wellness Dog Food
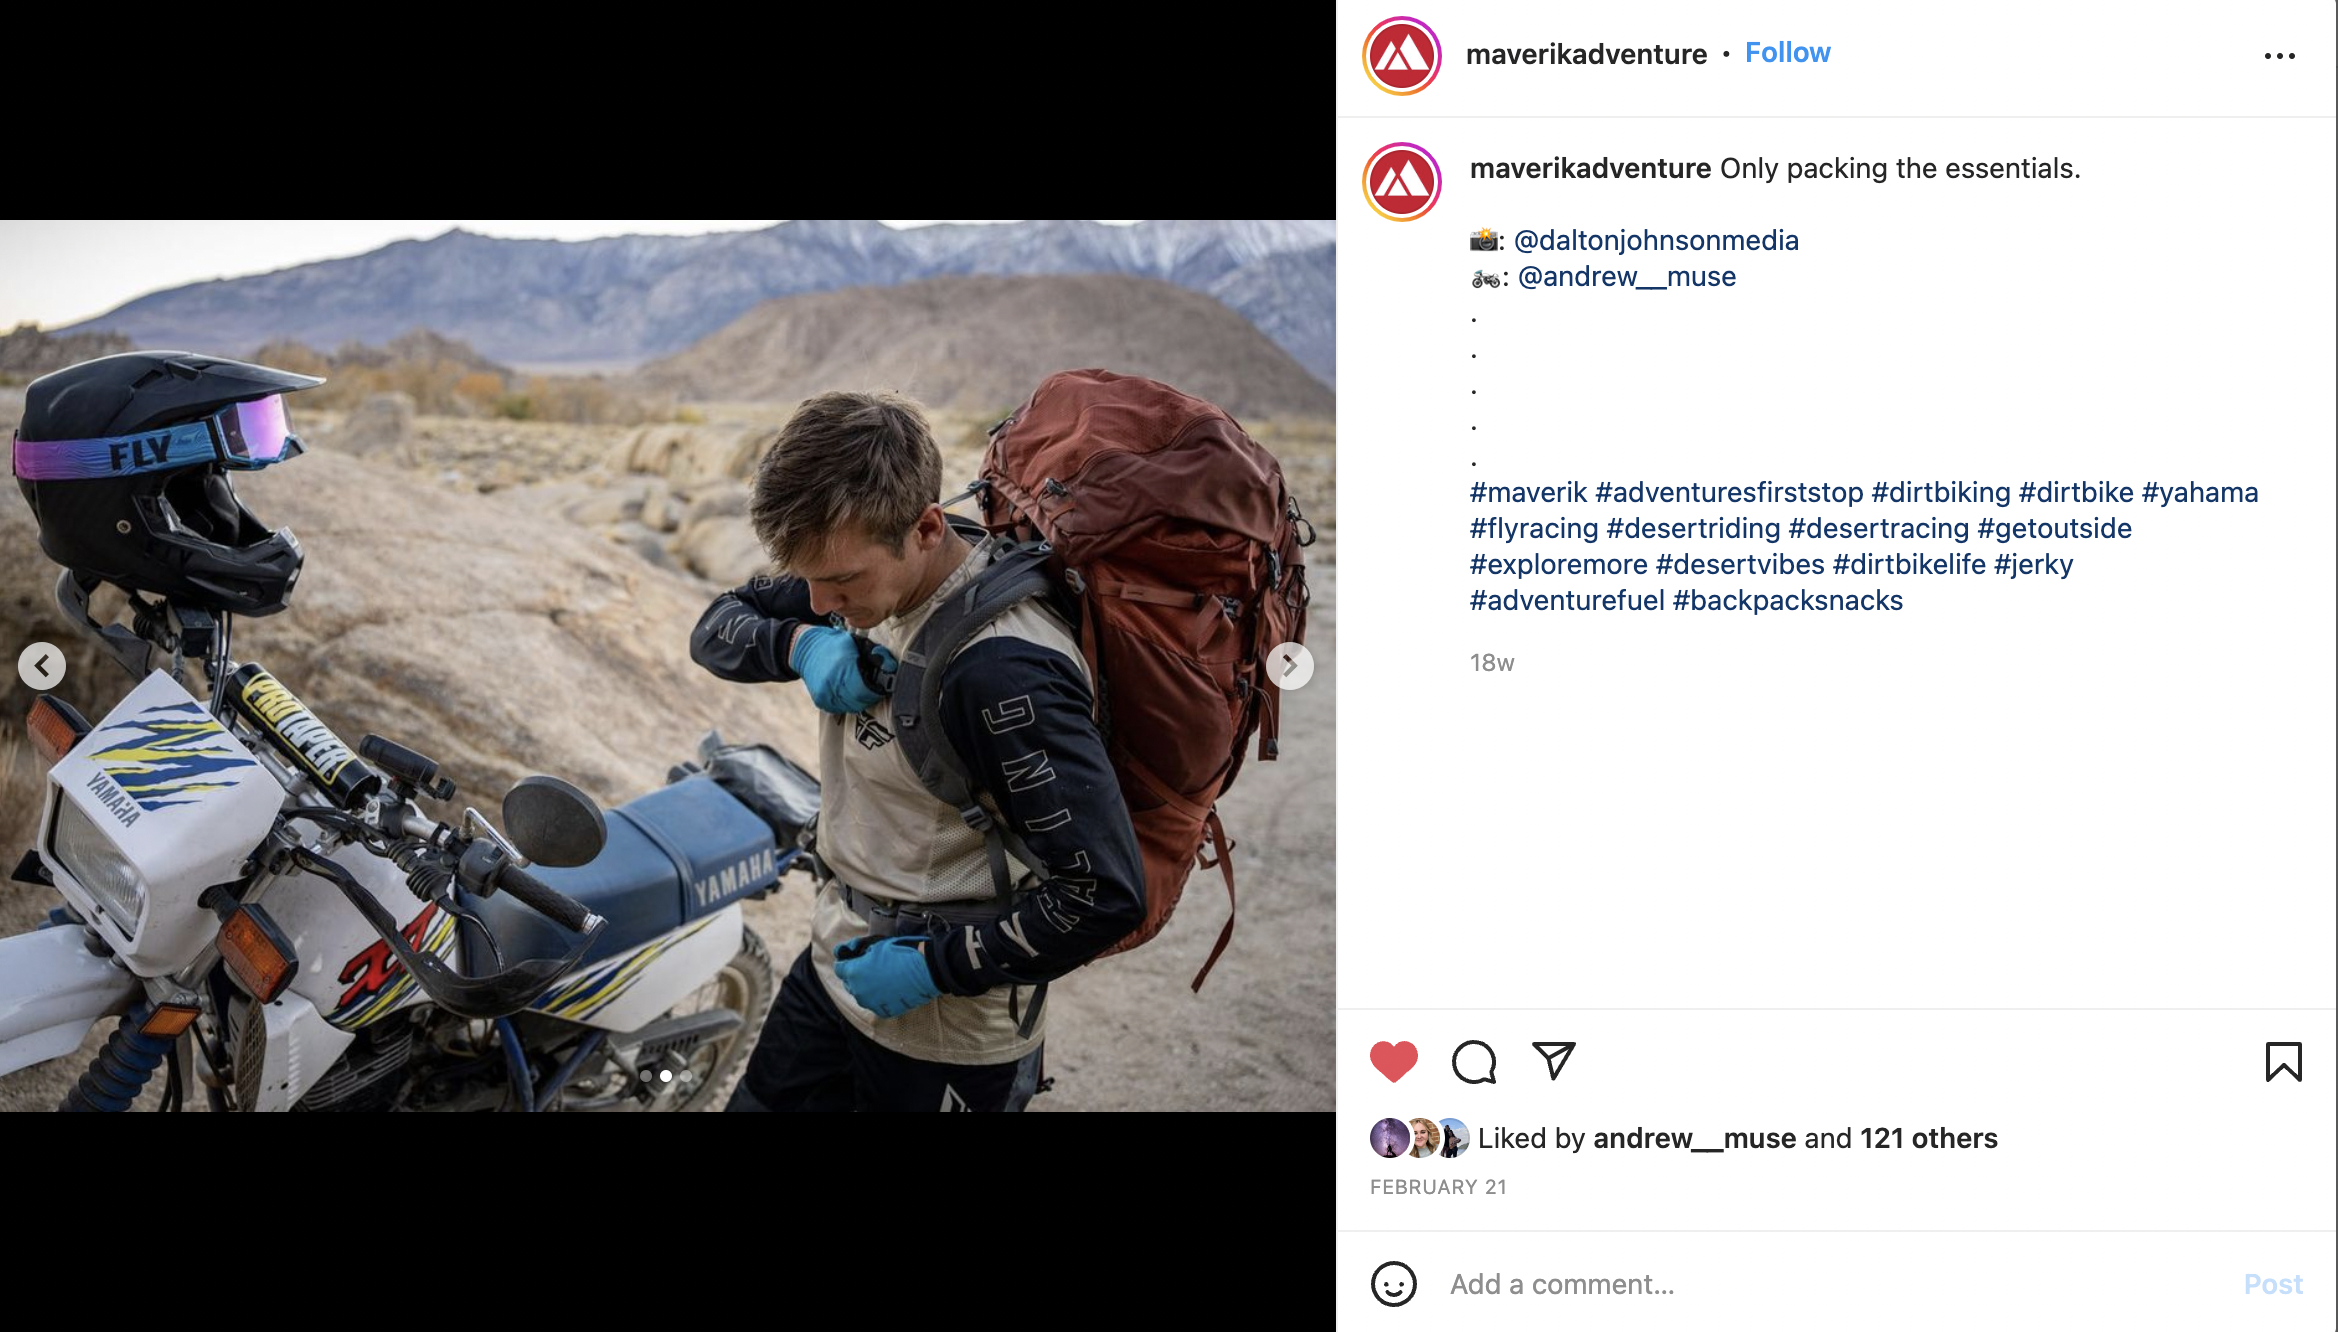
Maverik Gas Station
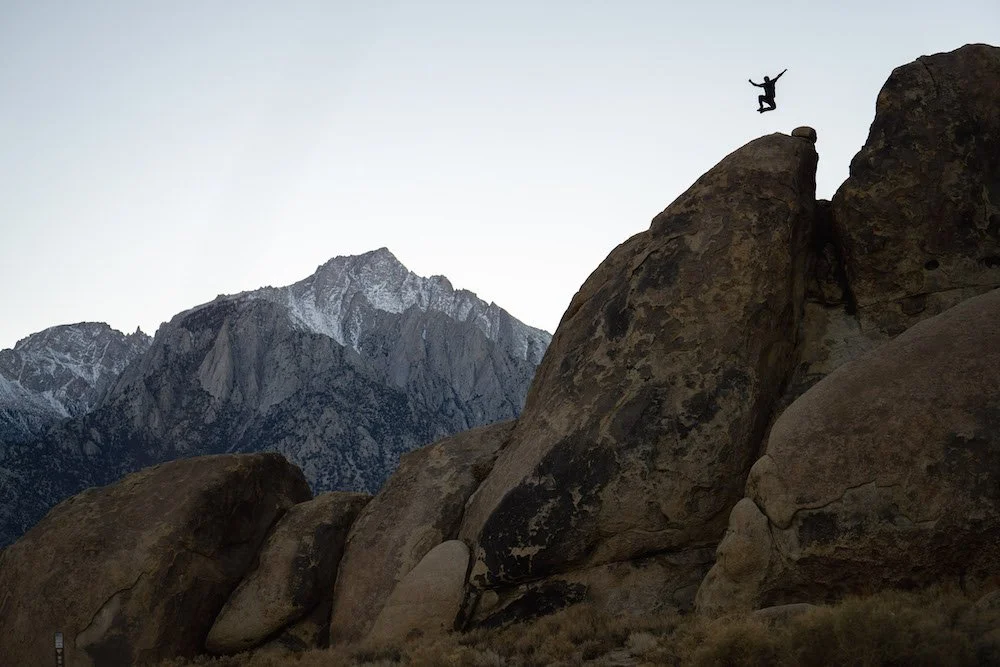
Taking full advantage of any and all light with Andrew Muse in Lone Pine, CA. Photo by Dalton Johnson
What I learned along the way:
It takes a village, otherwise logistics become a nightmare
The core group of this project was three; Andrew, Kristin, and myself. With that said, the outside help was uncountable. Everything from local help, my parents (shout out and a huge thank you), to friends made this trip possible. The smallest details, like your entry FMM to enter Mexico or vehicle insurance can easily slip through your fingertips!
Travel photography looks like a vacation, but you are ALWAYS working
From the outside looking in, travel photography is a dream. As a travel photographer, you get to hang out in cool places, do all the adventurous things, and see the world… for free. Right? Well, not exactly. The reality is, if something is happening, you have your camera to your face photographing. If nothing is happening, you are jocking for position to get the next shot, or, you are importing content, cleaning gear, etc. Yes, you get to be in the places, but you rarely have the opportunity to do the activities. For example, this was a 40(ish) day shoot. In the end, I got to play (surf, rock climb, snorkel, etc.) for six of them. That is less than if I worked a 9-5 job!
Additionally, our days were long enough that I fell asleep at the computer working 5% of the nights we were on the road. Take a second to think about that…
Editing on the road is harder than it seems
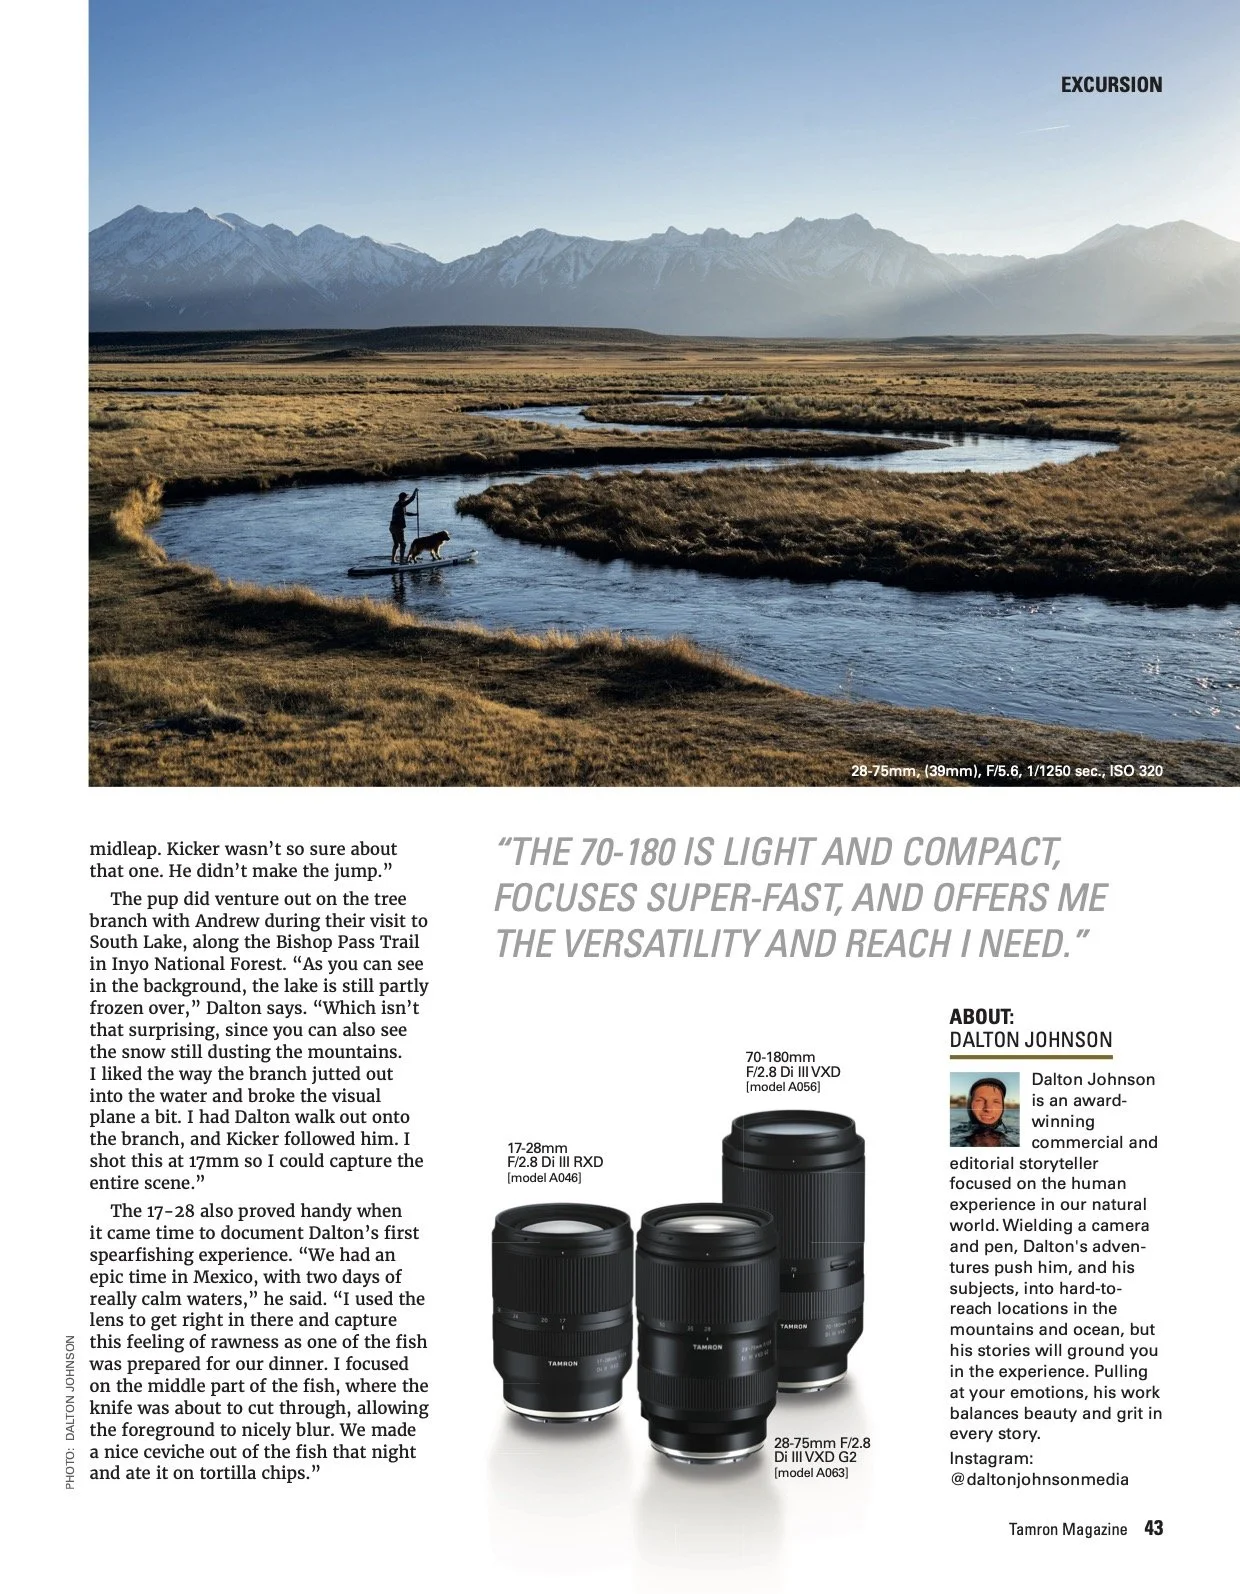
Paddleboarding on the Owen River along Highway 395 in California. Photograph by Dalton Johnson
To start, I thought we were going to be able to edit the majority of the project while on the road. I am writing this article in July, six months later, and am still editing images/cutting videos from the trip. Now, all of the client work was delivered long ago, but the remaining work that will go into my archive for future license, social media, etc. is just about finished. Was I naïveté? I’d prefer to say ambitious. However, for projects like this in the future, I will utilize an editor and a digi-tech.
NOTE: I have done two larger projects to date and the use of an editor and digi-tech make life manageable! If you are a content creator for large projects, do yourself a favor and do this!!
You need down days
This might be obvious, but how do you manage weighing the opportunities of the here and now, versus the opportunities of tomorrow? You just can’t, especially on a traveling project where weather, swells, etc. determine the outcome of a project. With that said, down days, or really down hours, are critical for the crews sanity
Vanlife and Photography mix well
My favorite take away (obviously I am biased) is that the ever growing #vanlife and #photograherlife mix very well. For the past five years, I have been living on the road, building a career as a photographer. Overall, making money has been sustainable, however the shoots are a production, start to finish in one to five days. Typically, these shoots are totally curated and finishing off with restaurant meals and hotel rooms. Baja wasn’t that. In fact, this project was a 40(ish) day marathon of daily content creation. We shot 24/7, often with multiple cameras, racking up the GB’s (gigabytes).
Now that the project is done, I can honestly say that I do think the blend works well and for those van-curious creators, I would suggest it! Just remember, editing is going to be a pain! So, go get yourself an editor.

Kristin sipping tea during the sunset while road tripping along the Pacific Coast Highway. Photograph by Dalton Johnson
The Published Project:


Sneaking Milk and Cookies
The childhood delight of oven baked cookies, warm, and aromatic. As if you could taste the melted sugar in the air that would soon be dipped in milk. Breath in those cookies and taste them, imagine your childhood home, and close your eyes. Now imagine…
Enjoying a glass of milk with a few cookies on a pull-off along the Pacific Coast Highway in California. Photo by Dalton Johnson
The Story
The childhood delight of oven baked cookies, warm, and aromatic. As if you could taste the melted sugar in the air that would soon be dipped in milk. Breath in those cookies and taste them, imagine your childhood home, and close your eyes. Now imagine…
Crawling down the four steps from my bedroom, I peak around the corner and lay flat across the wall. I don’t see mom. Looking around, to my left, then to my right. I still don’t see her. Quickly, I slide across the tile floor under a table. I feel like a spy; my mission, to sneak two cookies.
Making my way out from under the table, for I had not heard any foot-steps, I start to tip-toe. But, I hear her singing not far away. Mom, was not far away. She is the enemy, the one preventing me from my cookies. I want them, badly. Sliding back under the table, I wait out her singing, for her routine is the same; sing for a little while, so that the cookies cool down, then she will nibble on one while sitting on the couch in the living room. While she is in the living room, that will be my chance, so I wait.
Swoosh. She drops into the couch, the time is now. I crawl out from under the table and quickly peak around the corner, she is reading a book with her cookie on the side table. Yes, my plan is working, these cookies are mine. Quietly, I round the corner and step into the dining room. I am only one room away. If I make a false movement now, I am done for. Holding in a giggle, I reach for a cookie atop the table. They smell so sweet, but I don’t have any milk. Shoot, I need some milk!
Hmmm, the kitchen opens directly towards the kitchen, that was be a suicide mission, so I must be clever. Grabbing two cookies, I smash them into my pocket and retreat to my room. Across the hall and up the stairs, sliding back into my room. Once there, the temptation is almost too great, I want shovel the cookies into my mouth, but I can’t without milk. But, I have a plan.
I consulted with Sargent Teddy Bear and they agreed, the time was now. It was my duty to my belly, so I must go. Off I went, running down the stairs, almost falling over with excitement, “Mom! Mom! Can I have a cookie?” I asked her on the couch, interrupting her from her book.
“Nope.”
“Mom! UGH! Why not?”
“They are for desert tonight.”
“Fine,” I pout and cross my arms, “can I have a glass of milk then?”
“Go ahead honey.”
The plan is working perfectly. I pour my glass of milk and head upstairs. Not a peep from comes from the couch. I devour the cookies and lay on my bed victorious. Excited for round two after dinner.
“Okay everyone, guess what’s for dessert?” My mom asks the family, as if we all didn’t already know.
“COOKIES!” I shout. “I am excited!” Thrilled for round two.
“Not so fast honey. Everyone but my little spy gets a cookie, for you almost got me earlier today when you grabbed your milk. You’ve already had two, haven’t you?” She questions with a smirk.
“Busted!” My brother laughs as he dunks his cookies in his milk.
“At least mine were still warm.” I respond as I sit back in my chair, cover blown, but my belly is happy.
…allow those childhood memories to flood back. Allow yourself to be a kid once more, as if you are sneaking two cookies from the cookie jar. You are innocent, you play games and have an imagination, you strategize with stuffed animals, you laugh, you are fun! Being a kid is fun, being you right now is fun. You still play, it just looks different. You still laugh, just at different jokes. You still have an imagination, you still play with toys, you still strategize in life, it’s all just a little bit different. And the best part of all, you still get your milk and cookies!
About the Story
This is a fiction piece that I came up with as I sat in my van, enjoying milk and cookies with my van door wide open. I am a lover of cookies, chocolate chip and oreos to be specific. If I can dip them in a cold glass of whole milk, I am in heaven. While enjoying the California sunset, I played through and imagined myself, as a little kid, sneaking a cookie. At first, this was just a find idea that made me laugh. I had no plan to write it down, but for some reason I couldn’t resist. Laughing to myself at the thought, I penned this piece.
Being a creative has its pros and cons, but often I forget that I can do whatever I would like and share whatever I would like. Identifying as a photographer first and a writer second, I find I often skip over the writing portion for the sake of time and fear of judgement (mostly for myself for writing and sharing something silly). Yes, I do have walls up and, yes, I do get insecure. A trait of mine I am working to overcome.
Something I noticed: Reading this flash fiction story is alright, but if you can have somebody read the story aloud to you, it is even better.
In the end, I did try to connect the dots and apply some meaning to the story. The take away is simple, but hard to do. Hell, often my friends and family tell me that I am too serious. For the most part, I am a single-tasker, only capable of focusing on one task at a time, so when somebody catches me working, they feel a little put off by my reaction if they interrupt me. An area of growth for myself, no doubt.
Journal Questions:
Where are you overly serious in your daily life?
When was the last time you had a good belly laugh? How did it happen?
Who brings out the “fun” you in your life?
Find Your Beyond
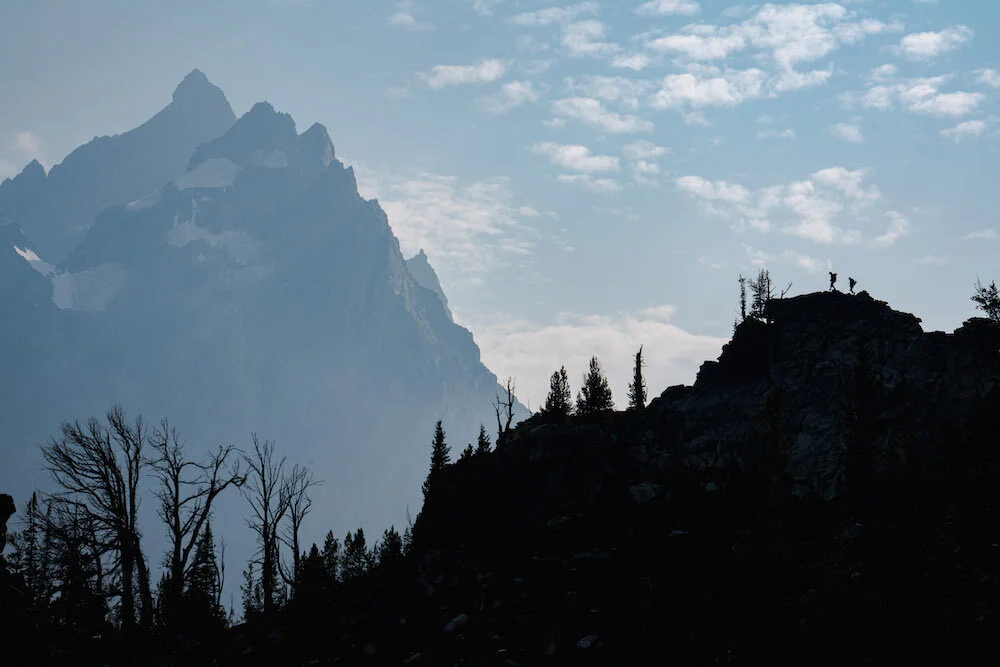
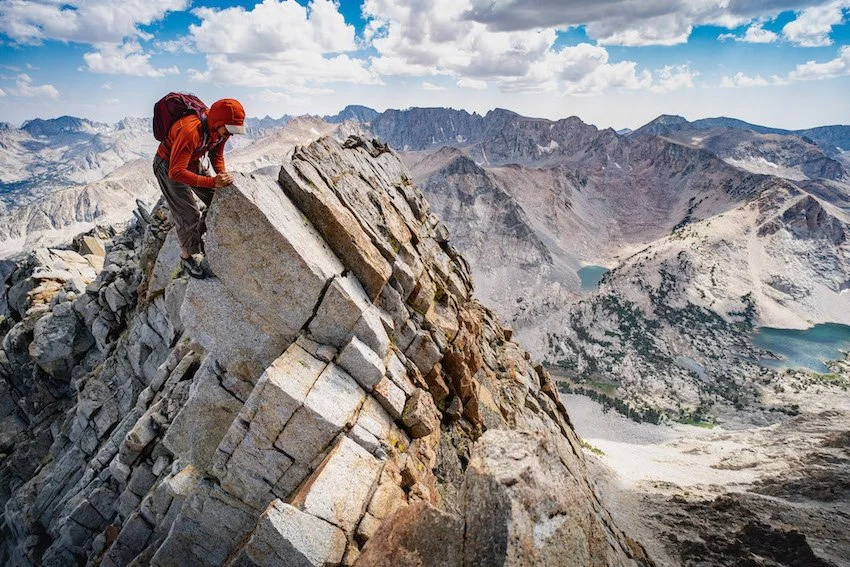
Rewinding one calendar year, to September 2020, I was slouched and red-eyed, staring at google earth dreaming up ideas, such as climbing notable peaks in a single season in three different mountain ranges like the High Sierra, the Tetons, and the Cascades. All of these ranges have a lifetime of climbing within them, so I knew I would be a guest, cherry-picking the classics, but I still wanted to give this a try. So, I started training. As the plans for the trip developed and I connected with past climbing partners, like Luan, Beau, and Kristin. I started to get psyched, but felt a void.
Rewinding one calendar year, to September 2020, I was slouched and red-eyed, staring at google earth dreaming up ideas, such as climbing notable peaks in a single season in three different mountain ranges like the High Sierra, the Tetons, and the Cascades. All of these ranges have a lifetime of climbing within them, so I knew I would be a guest, cherry-picking the classics, but I still wanted to give this a try. So, I started training. As the plans for the trip developed and I connected with past climbing partners, like Luan, Beau, and Kristin. I started to get psyched, but felt a void.
As I bouldered in the Buttermilks just outside of Bishop, CA, my gut struggled to comprehend why I wanted to make this trip happen. Questioning my intentions, I desired a trip with more meaning. So, I started looking in all the wrong places like at harder routes, more committing routes, and played with the idea of trying to solo all the routes to give myself that extra little bit of risk. Luckily, reality and the fear of gravity winning overtook me as I slipped off my warm-up boulder.
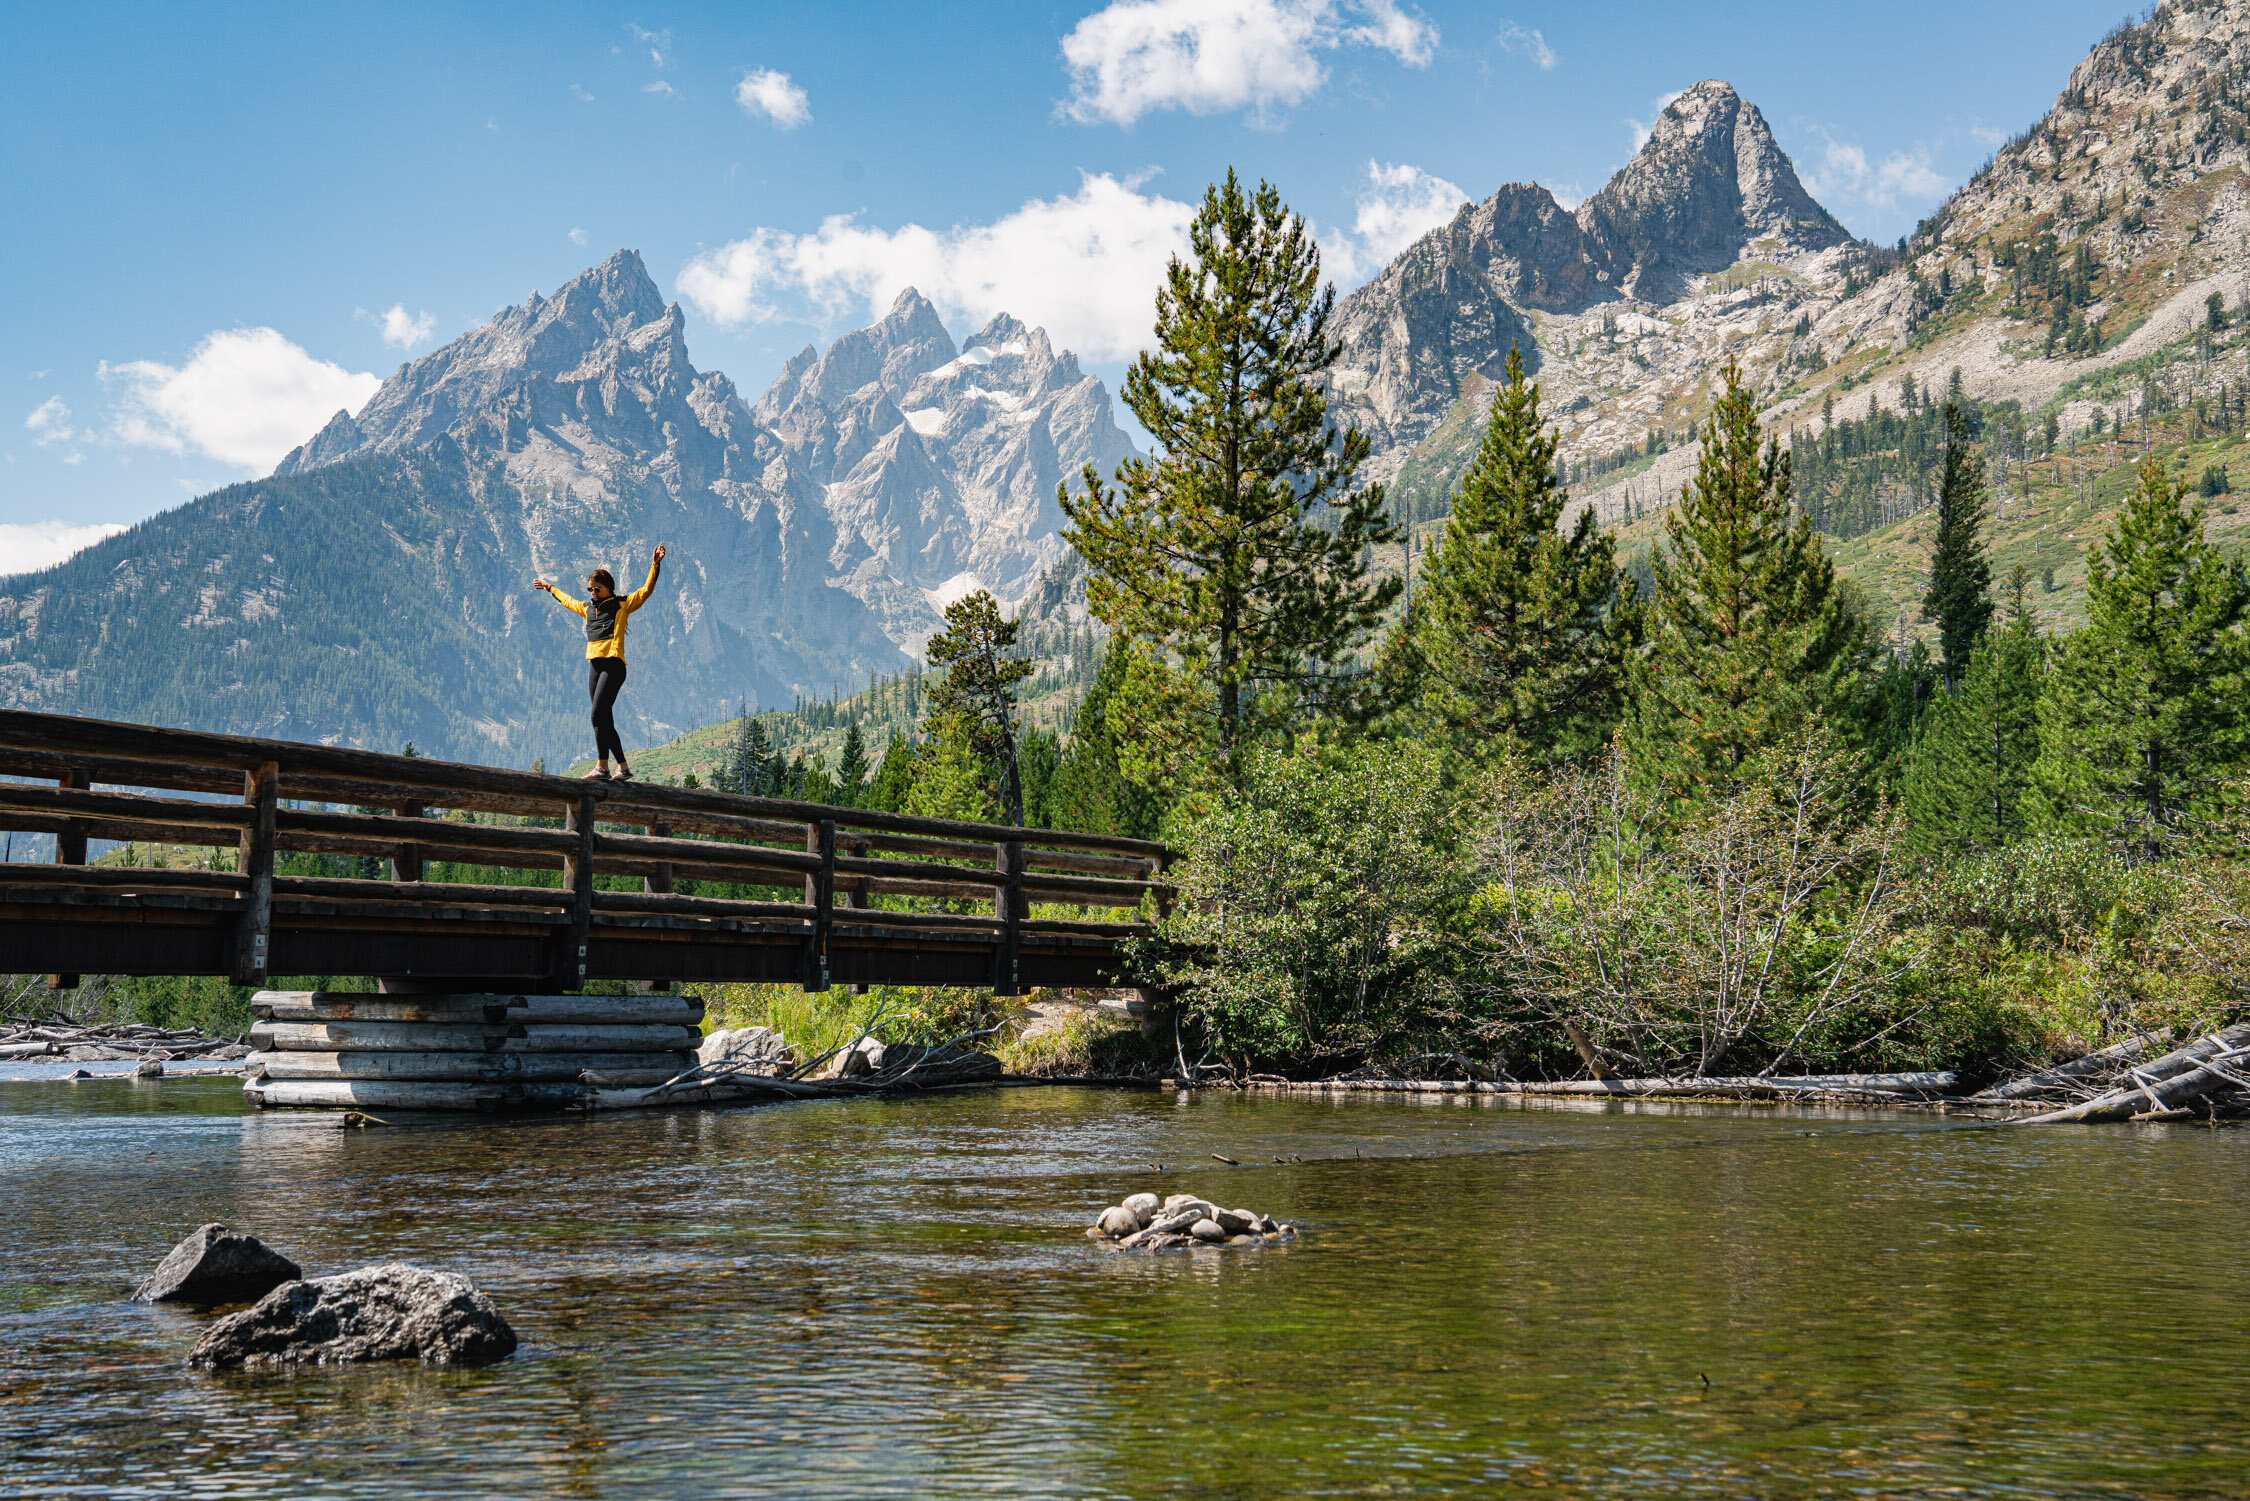
Kristin walks the bridge rail on String Lake in Grand Teton National Park, WY. Photo by Dalton Johnson
Sitting on my crash-pad, I received an email from a friend asking me if I had heard about Adventure Scientist - I had not. Adventure Scientist is a non-profit based out of Bozeman, Montana whose mission is to equip partners with data collected by leveraging the skills of the outdoor community that is critical to addressing environmental and human health challenges.
Fully invested in my rabbit hole with two bars of service, I sent off an introduction email with the idea of collaborating on the trip of the three ranges. To myself, I thought, “how cool would it be if I could summit a peak and collect water samples on my way down?” Needless to say, I was overeager and naive, but they responded politely and walked me through the requirements for data collecting… I didn’t fit the bill.
Data collection takes a very small commitment, the ability to return to a place over a couple of months. Since I was moving around, this didn’t work and I was gutted. Staring at the sky from my pad, I questioned what these last five years had been about, then it hit me. I flipped the script and asked if I could utilize my skills with a camera to create a piece for them, highlighting a few of their all-star volunteers. The door was opened and my training now had a purpose.

Kristin embraces the light as she takes in the magnificent view of the Teton Range in Jackson, WY. Photo by Dalton Johnson
As mid-July rolled around, the time to test my training had come, as did my ability to create with purpose. Three months on the road, shooting and climbing every day I could. Coordinating with Adventure Scientist, climbing partners, and reaching summits became my focus.
Watching the sunset from my van’s roof, sleeping in roadside pullouts, swollen knees, dust-filled camera sensors, hot spring star-gazing, and huddling soaking wet under a tree during a thunderstorm at the base of a climb have become my reality.
If you are interested in joining Adventure Scientist the process is streamlined! Head over to https://www.adventurescientists.org, decide if you are a scientist or adventurer, then go through the application process. In total, be prepared to spend two hours learning how to correctly collect and record data. Don’t let the idea of two hours hold you back! Instead of binge watching your next Netflix show, drop into the application so you can help preserve our planet’s natural spaces.
This article was originally written for and published by Oros Apparel. Read the original article at this link: https://www.orosapparel.com/blogs/journal/find-your-beyond-dalton-johnson
How to Take Photography from Passion to Career
Photography is one of those passions with a low barrier to entry with today’s phones. However, turning that afternoon photograph, while on a hike with friends, into a part-time, or full-time job, is another story. If you are here, reading this article, you already have taken the most important step, becoming aware of the fact that you want to make money from taking photographs. The steps laid out below are building blocks for you to see and understand how to become a professional, but what is not there are the thousands of hours of work that this will take. Becoming a photographer is the second hardest job to maintain, just below becoming a rock star! So, what does this mean? Well, once you read this article, start getting to work. If you are persistent, in a few years, you will switching over from your current job to being photographer.
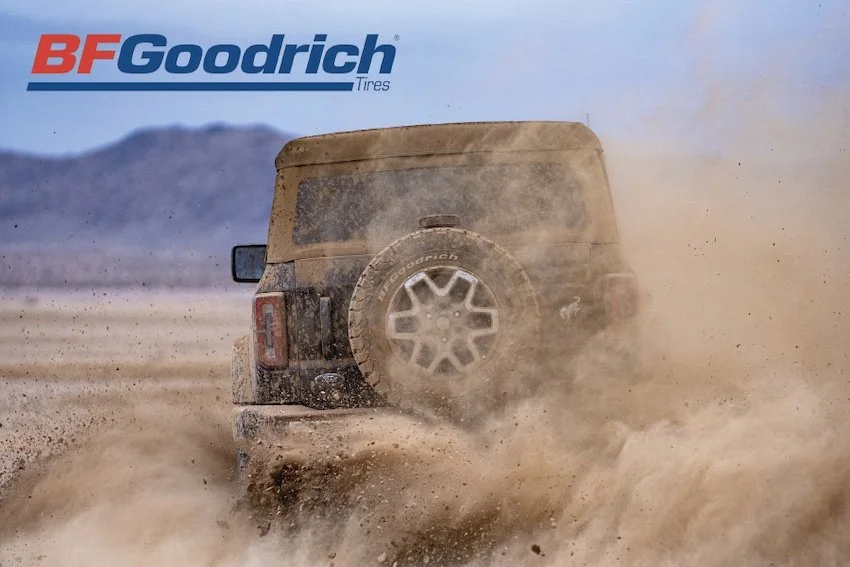
A Ford Bronco spraying dirt with BF Goodrich tires, created for BF Goodrich. Photograph by Dalton Johnson.
Photography is one of those passions with a low barrier to entry with today's phones. However, turning that afternoon photograph while on a hike with friends into a part-time or full-time job is another story. If you are here, reading this article, you already have taken the most important step, becoming aware of the fact that you want to make money from taking photographs. The steps laid out below are building blocks for you to see and understand how to become a professional, but what is not there are the thousands of hours of work that this will take. Becoming a photographer is the second hardest job to maintain, just below becoming a rock star! So, what does this mean? Well, once you read this article, start getting to work. If you are persistent, in a few years, you will switch over from your current job to being a photographer.
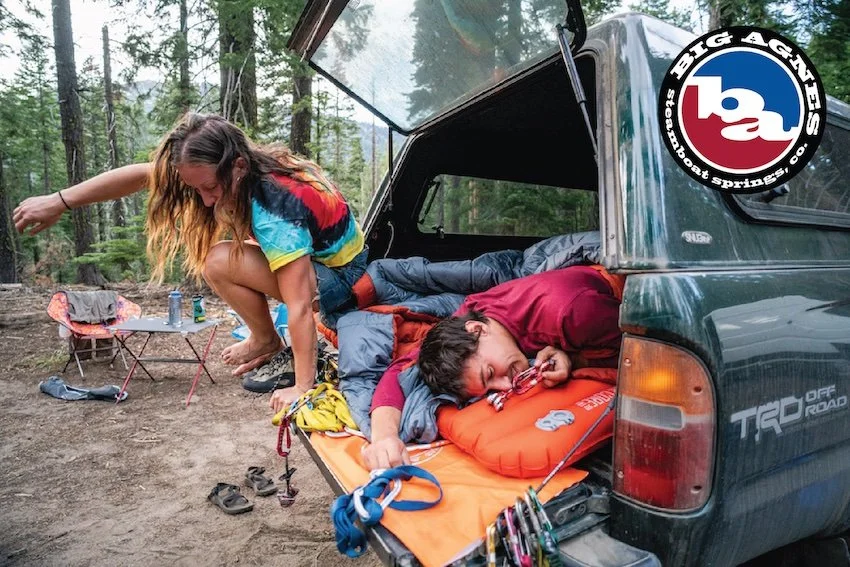
Big Agnes has become one of my most consistent clients because our styles of real, authentic moments pair well together. Photograph by Dalton Johnson.
Build a portfolio
The first step is to build a portfolio. Now, what the heck is a portfolio (check mine out here)? Well, this is a grouping of images, that you have taken, put together in a presentable manner to showcase the type of work you can create, recreate, and be hired to photograph. Typically, these images are grouped into categories, but as you progress into your career of shooting, you will update this with more recent work for others to see. A couple of key take-aways:
Only show the type of work you want to be hired to create
Make it easy to consume
Have your portfolio live somewhere besides your phone… aka social media, a website, a printed copy, etc.
Most Importantly, even if you have not photographed for very long, put your fifteen best images together. Once you shoot a better one, replace one of the fifteen. At some point you’ll realize fifteen is an arbitrary number, once you reach that point, share what feels correct.
Addtional Resources for building a portfolio:
Learn Learn Learn
When you first start out, I suggest going out and shooting. Go, be playful, and don’t allow society to weigh you down. In the beginning, you will feel silly, you will feel awkward, you will feel like an imposter, but, if you get out and shoot, you are already doing the verb to the noun you want to be—that’s a fancy a way of saying you are working on your craft. As you progress and build a habit of shooting daily, the next step is going to be learning. Well, what do you need to learn? Here is a short list of all the things you will learn along the way:
Escape Campervans had me shoot a surf project for them, pairing their van with the surf community. Photo by Dalton Johnson
Editing (lightroom, photoshop, etc.)
File Management
How to create, build, source, and finance projects
What is the “best gear” for your work? (note: gear is a trap in the beginning, but there will be a threshold where gear is needed to complete a job)
How and where to sell your work
How to market your work
How to improve your craft
What are industry standards and how can you break them
How to diversify your revenue streams
People skills! This might be number one most important
Learning is a career-long endeavor. You do not need to learn all of these things before landing your first client, but you will learn these along the way.
Identify your client
Once you build a portfolio, you will have a task to do. This task will be to objectively look at your work and try to understand what it is that you are selling. Do all of your photos have people? Are they action sports, cars, landscapes, etc? You will need to put a label on your work, so that you can identify who your client could be. Now, a label here is not to diminish your work. A label here is a tool you will learn to use. For example, I am an outdoor-lifestyle photographer. Let’s break this down:
Outdoor-lifestyle photographer = related to the outdoor industry or pertain to the outdoors AND have to do with people.
Now, you identify your client by linking what you photograph to who their demographics are. Let’s take three examples:
Becoming a fine art gallery photographer: My work would belong in a space with landscapes, wildlife, or location specific gallery.
Becoming a commercial photographer: My work would belong with any company that wants to highlight surf, climbing, travel, and/or adventure lifestyle. That’s a lot of companies!
Becoming a portrait photographer: My work would fit any individual who is interested in having portrait session outdoors.
For myself, I went down the path of commercial work because this fit my lifestyle, my needs, and I enjoyed the challenge of connecting with large brands. Oftentimes, medium-large brands can take 8-10 months of courting. To dive into the Fortune 500 and 100 companies, these are all connection based shoots.
Selling prints is a great additional revenue stream to commercial work. Currently, I have three main revenue streams; commercial work, image licensing, and prints. Check out all prints HERE by Dalton Johnson
Shop your work
Here comes the tricky part! Once you have photographed enough to build a portfolio, you have learned enough to feel comfortable that you can shoot a project without flopping, you have identified your client, now, you have to shop your work. If you never tell people that you are available for work, then you will pretty much never get a job. So, how do you do this? There is no recipe, but there are a few tips:
Recognize all clients are people, talk with them like they are another human
Share your work and let them know you can be hired
Shoot a project that pertains to them, then try to sell a similar job to them
Build a relationship, even they don’t hire you, them might share your name around
Build a project, share via email, social media, ect.
To provide some perspectives: I used to have a mantra I would recite as I shopped my work that went like this:
“At worst, they don’t respond. Hopefully, they say no. At best, they say yes."
MOST IMPORTANTLY: Know, understand, and believe in the product you are selling!
As an outdoor lifestyle photographer, my job is to highlight products in use outdoors. I love the challenge this can present, like making socks look fun! I photographed the release of the National Park release for Swiftwick Socks. Photo by Dalton Johnson
Sell your product
The time has come! Sound the dramatic music, the horns blasting, the day is here! You are heading into a meeting, well prepared, and ready to sell your product. This is your first one that you are going to land and you are very excited. You have been manifesting this, you have visualized this meeting before going to bed every night, you can see how this project is going to be executed. Congratulations! Now, just don’t screw it up! A few important notes to understand:
If this person doesn’t take the job, there will be another one who will
No’s just mean this wasn’t a good fit
If you get a yes, or a no, you will learn from this process
I have built jobs and projects that have never been funded. I have self funded and then sold images via “speculation work.” This career is difficult and you’ll need to learn that being told no is a good thing.
Additional Resources for :
Some of my favorite shoots have been those done in my backyard with friends. Here is a shot from a MiiR campaign shot for the release of their Pint Cup. Photograph by Dalton Johnson
Conclusion
All of the above information has come from what I have learned over these last few years grinding my teeth trying to make a career in photography work. Along the way you will have small wins, accept them. Overnight success are often 10 years in the making. While my first job with Ford Motor Company came in my third year of business, I had been photographing for five years almost daily (rarely making any money) and had build a foundation of relationships that made that opportunity happen.
Like I mentioned in the introduction, becoming a photographer is the second most difficult career in the world to sustain. Above are the steps that I still partake in everyday. Yes, I still shop new work. Yes, I am told no often. Yes, I revamp my portfolio almost yearly. Yes, I often feel as though I am failing. Yes, I forget to celebrate my small successes. Please, be kind to yourself along this journey, find what makes you happy, and have fun playing with a camera!
Discover the Photographer’s Journey For Yourself

Three Most Important Life Lessons I’ve Learned To Date
In 2016 I took a leap of faith, bought a plane ticket to New Zealand as a graduation gift to myself for finishing college, and cycled around the South Island of NZ. Without a plan of action, all I knew was that I needed some time to sit with my thoughts and process as much as I could during that time. Sixty-two days is a long time without music, internet, social media, etc. but I can say, 62 days went quickly and wasn’t enough time to unpack the 24 years of living I had experienced. Getting caught up in the social conditioning of America is a road map to safety. Well, being safe isn’t living, and I wanted to live. While pedaling through rainstorms, almost sliding off roads, and sharing cookies and tea with strangers, I started to feel alive.
In 2016 I took a leap of faith, bought a plane ticket to New Zealand as a graduation gift to myself for finishing college, and cycled around the South Island of NZ. Without a plan of action, all I knew was that I needed some time to sit with my thoughts and process as much as I could during that time. Sixty-two days is a long time without music, internet, social media, etc. but I can say, 62 days went quickly and wasn’t enough time to unpack the 24 years of living I had experienced. Getting caught up in the social conditioning of America is a road map to safety. Well, being safe isn’t living, and I wanted to live. While pedaling through rainstorms, almost sliding off roads, and sharing cookies and tea with strangers, I started to feel alive.
I knew returning to the US would be a challenge to keep the stoke alive, but I did my best, ending up in a wide variety of seasonal jobs while launching a career in photography and writing. Now, six years have passed and I seem to be moving along quite well, so I wanted to share three of the most important life lessons I’ve learned to date. Check them out below:
1) Focus on long-term growth, meanwhile, recognize to grow over time you need to have a direction and perspective.
In a data-driven world, I’ve found the daily obsession around views, likes, follows, clicks, etc. to be intoxicating. In many ways, getting data drunk has been an obsession of mine. If data can’t show what’s going on, why even do it? Well, that is the wrong approach. Yes, day-to-day metrics show improvements and errors, but for a sustainable life, it is the trending slopes up, or down, that make the difference. Every day doesn’t need to be positive, and when there is a dip in the data, that’s an opportunity for growth. If a trend is upward, then you are growing. If the trend is down, zoom out, is it still down?
A view from Glacier Point of little Yosemite Valley in Yosemite National Park, CA
In the hopes of understanding long-term growth better, I have started to look at data in sets of a week, month, and year. A week is the smallest time frame because that is all that matters. If I go viral, that is a great hype for a day, but that isn’t long-term. Yes, I will analyze what made that video go viral, but what’s going to matter more is consistently showing up, day in and day out, dedicated to your direction.
A quick note, goals are the tasks required for you to continue in your direction. In many ways, a goal is simply a step, hop, or jump in your direction. Each time you achieve a goal, you take one step further down your path, towards your north star. Now, in the end, we are all just racing towards the end of our lives, so make sure the path you are walking is one that you enjoy! If it isn’t, then start rethinking, you only live this life once.
Perspective matters. When it comes to data trends, I focus on the average low. When I say that, I mean, I am focused on raising my bottom line. For example, I had a goal, back in 2017, for my website to have zero days with zero visits. At the time, I didn’t offer much and my blog was complete trash, so I wasn’t surprised that I was getting zero views, but that focus made me improve. All I wanted was a minimum of one view a day. Fast forward to 2018, my goal was to raise that bar to a minimum of 20 views a day. That is an upward trend. That is raising the minimum bar over time. On the flip side, the spikes feel great! They raise the average and make the numbers better for sales purposes, but they are short-lived.
Okay, okay, I have shared enough on business—because it is tangible—, let’s get back to what matters, the soft skills. As a human, we have an obligation to ourselves to always strive to do our best. Some days, our best is better than others, but the key is that when we look back on any day, we gave 100% of what we had that day to that day. I have stayed away from this example because there is no data, so now is the time to get touchy-feely. Long-term growth as a human means that we become a better person, this you can/will only be able to define for yourself. Do you need to improve your relationships, your love life, your focus, your…? The list can go on and on, but the key here is to pick a few goals so that you take the steps towards your direction. One of the best, and most morbid, ways to understand your direction, is to write your ideal obituary. Once you have this down, check-in as to where you are at, identify the gap, and get to work. As you do the work, your path will change, that is okay, but if you don’t start, you won’t know the current path isn’t for yourself. So, get started!
To wrap up this life lesson, if you manage your perspective and follow your direction, you’ll be in good shape. In today’s world, it is easy to get lost among the numbers, but, at the end of the day, what matters is that you are enjoying your time in harmony, trending upwards over time, and trying your best not to get caught up in the rat race! Work towards you might change, more on this in Life Lesson Three, but that is okay. Start working on yourself now and, over time, you will be on the correct path.
Journal Topic:
-Write your ideal obituary/how you wish people to remember you. If this is too morbid, write down four adjectives you want to be remembered as.
-Once you know how you want to be remembered, objectively write out where/who you are today.
-Lastly, compare the two, then start making changes (you might be surprised to find out you are already on your way!).

Enjoy the journey, but also make this life count!
2) Invest your time into projects with a shelf-life.
I was told this by a couple of established photographers, especially around the concept of a portfolio-building road trip, but the lesson did not sink in for many years. At first, I shook my head and agreed thinking to myself, “Of course, you want to invest in projects with a shelf-life, I mean who doesn’t want to create something that lasts?” Then I headed off on a trip to climb all of California’s 14,000-foot peaks in a single push with a buddy. We summited roughly half, gave many more an attempt, but ultimately this was a learning trip. Once done, I had to head back to some seasonal work, at the time this was substitute teaching, to make enough money to survive. While teaching, I edited, wrote, and submitted images. Nothing.
A tip to making work last is to shoot a “timeless” photograph, such as this one.
One month, two months, six months passed and there wasn’t much of a bite. I had heard back from Patagonia, they archived some images, but that was all. The images I had edited found their place on my social media feed and in a few blogs, but nothing to generate cash. A bit disappointed, I photographed surfing every day after teaching and took the day off if the swell was good. As time continued to pass, I submitted more surfing images, met some of the local pros, and tried to keep my head high. Occasionally, I would get the odd photo job, sometimes a yoga portrait session, sell a print, shoot a video job, or write some copy for somebody just to keep the dream alive. It was hard! Then, almost a year later, things started to pop!
That trip I went on, started to get some traction. A magazine submission came back and was accepted, with 12 images and an essay. That was real validation. I received some money and had several spreads. Another month later, Patagonia licensed an image, then another. During that time, I had posted some of my favorite landscape images from that trip on my website as prints, those started to sell. That trip went from costing me a couple of thousand dollars to now being a profitable trip. As wild as it sounds, five years later, I am still licensing images from that trip. I am still selling prints. I am still writing digital articles with those images, about that trip.
So, while I didn’t understand what it meant to invest in projects that have a shelf-life at the moment, I was lucky enough to make my first trip count. While I didn’t know how to sell a project upfront, I did come to realize that there are ways to sell a trip once you finish. Honestly, I have grown to love creating projects and selling the work later. This kind of trip allows me to maintain the full creative license, but, this means there is a lot of self-disciplined work that has to be done following the trip.
Now, outside of photography, what does it mean to invest in a project with a shelf-life? The easiest way to express this is through a term called Mailbox Money. This means money comes in once the work is done. So, I will give some examples:
-Writing a Blog, if you can have advertisements on your blog, you are making money as people read your posts.
-Rental Properties, I agree, this might seem far-fetched for some, and I don’t have any rental properties, but if you are receiving rent each month, that is mailbox money… even if the rent is covering your mortgage ie building equity for yourself.
-Stock Dividends, once you own the stocks that pay a dividend, sick back and wait for your check. At first, this might be small, but over time this can grow if you invest correctly
-YouTube channel, once you publish the video, YouTube pays you after a certain amount of views. Find your niche and create videos, over time this will pay off!
-Books, online classes, print sales, NFT, all of these are great ways to generate income over time. You just need to create the asset first, then fulfill the request once purchased.
Journal Topic:
-List out 15 things you do that make you happy.
-Look at the list, and search each one on Google and YouTube, this will give you an example of the blogs and YouTube channels that exist, could you do that?
-Map out the process for you to start, then start taking steps! This will be your side hustle :-)
Not everything can be clear, so embrace the blurry side of life! Revist and revise along the way.
3) Revisit, revise, and update along the journey.
How often have you done something 100% right the first time? I don’t think I have ever done that! Heck, I am on my fourth version of this blog, second edit of this version, and still finding errors. Once we have started with a direction and recognized the important projects to focus on, the next step is revision. Refining our process, converting bad habits into good ones, and revisiting our compass to make sure we are headed in the correct direction along our journey. Let’s be real, that shiny thing over there is cool and I want it too. Heck, who doesn’t want that shiny thing over there? And, if we fall into our curiosity of that shinny thing, we should enjoy it. Recognize you might be off-course but start working your way back.
Andrew Muse enjoying the last bits of light after a full day of riding motorcycles along HWY 395 in CA.
Here is the dirty secret, starting is just that, starting. Once you begin, you will quickly recognize if what you started is for you. If it feels good, continue. If it doesn’t serve you, stop and revise. As you experiment with many different things, find the common thread of the ideas, actions, inactions to find the root of the path. Your path is unique to you, and you will never find it in the form of a blueprint. What you will find are emotions, feelings, intuitions, and data points all pushing/pulling you in a direction. As you wander that path, you are saying yes with each step. Each step forward is into the unknown, but that unknown will be filled with feelings. If the feelings are off, revise. Take a step back. Sit with the idea, flesh out new paths, then proceed.
This has been relatively meta, so let me break this down in a more concrete manner with a personal example. Once I returned from my bike trip to New Zealand, I was a bit lost and wandered for two(ish) years. The seasonal jobs allowed me freedom but did not pay much. Along the way, an Art Director, at Outward Bound, told me I should pursue a career in photography. At the time, I only shot for fun, but I took his advice and began developing my craft. I limited my time surfing and rock climbing so that I could photograph surfing and rock climbing. As I developed “my style” I realized I am not much of an action sports photographer, but more of a lifestyle shooter who conveyed the concept of fun. I was getting some jobs, but not much. A bit defeated, I started going back to the drawing board and re-found my love for writing (which was showing up in daily journaling practice as well as blog writing). At some point, I just offered to write a blog with photos to a client to tell the story. They said, “YES,” enthusiastically and immediately. That gave me the courage to offer this more often. I think the year was 2019, or 2020, but I went from one to two jobs a year to one job a month of photos and a blog. As that developed, I started to write two a month and now I am often writing/shooting 6-10 pieces a month! Kinda crazy!
I think this example directly sums up the power of these three life lessons. With direction and growth over time, I was able to develop a craft. At some point a few projects I invested in circled back around months later after a small revision in my approach. Then, BOOM! I started to thrive.
Journal Topic:
-List TEN things, both positive and negative, that you are currently doing that brings up emotions.
-Once ten are listed for both types of emotions, think of ways you could revise your position for the ten negative and think of ways you could deepen for the positive.
Life can feel overwhelming like wandering through the dunes of Death Valley.
Conclusion
Hopefully, there are a few nuggets of goodness in this for you, or at least these lessons got you thinking about your position in life. Please, take the time to dive into the journaling topics, reach out if you have any questions, and let me know what resonated with you. In the end, the goal of sharing my journey and my path is to provide some clarity for others that it is possible if you have a direction, invest in long-term projects, and revise along the way. You have the ability and the power within yourself to live a life of happiness. Go live that life!

How to become an Ocean Photographer
Taking photographs in the water sounds impossible, right? I mean, a camera isn’t water proof! While the list of questions begins to trickle in, I wanted to put a quick pin here and note what you will learn in this article:
-Story behind one of my favorite images to date
-Logistics of photographing in the water
-Some gear recommendations
-Important safety checks
Do you want to blend your love for the ocean and photography? If so, you should think about becoming an ocean photographer. You will get to swim in the ocean everyday, holding a camera and taking images. While at first glance, the job of ocean photography sounds easy, but there is more to it than meets the eye. So, how do you become and Ocean Photographer?
Back in 2016, I ask myself the question, “How do I become an Ocean Photographer?” Fast forward six years, I am now a full time Ocean Photographer making my living on photographing in the ocean. How did I do it? To become an Ocean Photographer, you will need to have access to the ocean, develop the skill of swimming while holding a camera in the ocean, build a portfolio of images that you can share with potential commercial clients, and set up an online shop to sell ocean prints.
Taking photographs in the water sounds impossible, right? I mean, a camera isn’t water proof! While the list of questions begin to trickle in, I wanted to put a quick pin here and note what you will learn in this article:
What you will learn in the article:
a) Story behind one of my favorite photographs to date
b) Logistics of photographing in the water
c) Some gear recommendations
d) Important safety checks
Creating "Moving Ice"
The Story
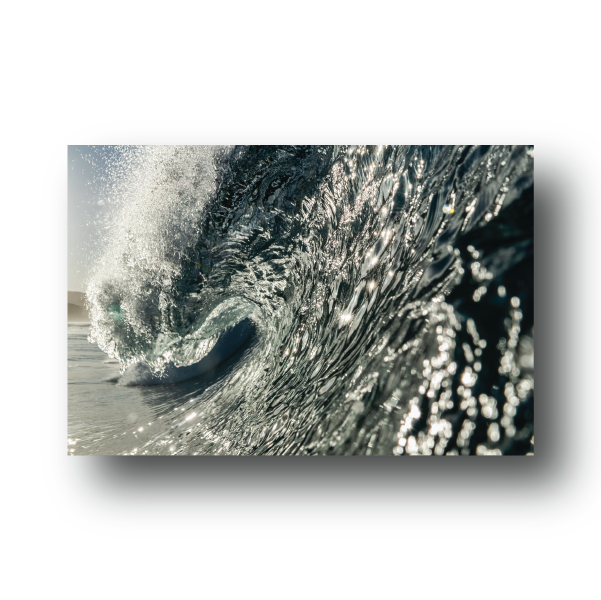
Background: In January of 2021 I was visiting family near Todos Santos in Baja Sur, MX, which is just about an hour north of the famous party city of Cabo San Lucas. For those who are not familiar with surf spots of Baja, one of the well known breaks is Cerritos Beach. This beach has two breaks, a point and a beach-break. Depending on your style, experience, and what you like, there is a wave for you! I am not just saying that, Cerritos beach is a wonderful spot to learn and on the flip its a great place to drop into stand-up barrels when swell is pumping.
Now, the day I photographed “Moving Ice” was an epic day in the water. The swell had been strong for multiple days and the peak was coming this morning. Waking up extra early, I loaded my camera into the housing and headed for the beach. Looking to the east, first light shone over the Sierra de la Laguna, the colors would soon pop, but the tide was high. Slipping into my wetsuit, I headed for a swim, starting at the break break, trying to get a photograph of a breaking wave.
With my camera in hand, flippers making me look like a duck, I swam. The waves were large, pushing me around. Worried that my water housing could slip out of my hand and wack me on the head, I held tight as I ducked under waves. The roar and spit of the waves forced a focus I have only experienced a few times before. Whenever I could get into position, I would snap frame after frame. Passing through waves and almost taking the smashing plummet over the falls, I constantly collected myself. These waves are powerful.
As the tide went out, the sun rose higher in the sky, and surfers populated the beach—adding a layer of danger— I continued to snap frames, becoming more and more bold. Finding myself sequestered in barrels, I had found my favorite spot to shoot the beach break. With my finger on the trigger, I snapped. The wave tossed, a barrel formed, and I popped out the other side of the wave. I had just snapped “Moving Ice” without fully knowing.
Thirty more minutes would pass, continually shooting more waves, dodging surfers, and playing in the ocean. Eventually I returned to the terrestrial world. Walking back to see the family, I scrolled through the images. Catching my first glimpse of “Moving Ice”, I was excited! Once back, I started to upload and put some soft touches to the image, then called the family over to check out the photograph.
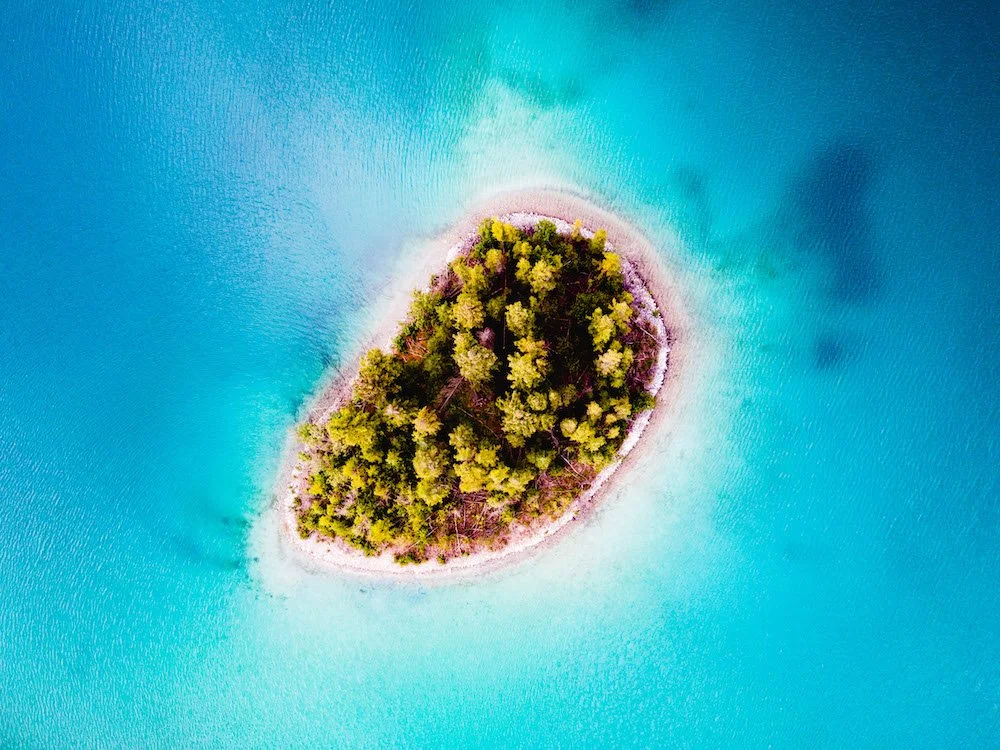
Personal connection to Baja Sur: Between swimming in the ocean and surfing in waves, the spot which holds a spot in my heart is this break, Cerritos Beach in Baja Sur, Mexico. It is here where I learned how to stand on a foam surfboard in the backwash 20 years ago. The wave here is magical as you can be surfing on a longboard, riding 2-foot waves off of a point break one day, then, the next, you can be tucking into overhead barrels on a beach break. The water is warm and clear. The locals are friendly. If you decide to visit, tread lightly and be kind in the line-up.
To date, “Moving Ice” is one of my favorite because it looks as though the water, reflecting the light, is a gigantic piece of ice frozen in space. Maybe these are just my eyes thinking this, maybe not. But, I’ve to admit, this photo from early 2021 remains one of my favorites.
Photographing in the Ocean

An unridden, open barrel at California’s big wave surfing mecca Maverick’s in Half Moon Bay, CA.
Logistics of photographing in the water
Photographing in the water has its challenges. Luckily, this skill, and the gear, has been refined by many over the last 15 years. Before hoping in the water with a camera, here is a list answers to key questions you’ll need to understand:
How do I swim out into the break safely?
If this is a surf break, which is usually a good sign that there will be waves, watch how the surfers get out. For the most part you will follow their lead, just dive under the wave as it comes at you.
If this isn’t a surf break, be careful and pay close attention to the surroundings. If there is a wave breaking, this means there is something happening under the water to create a build up of energy, creating a wave. This could be a rock, a reef, a log, a sand bar, and so much more. To know this, go on a “small” day, or a day with little swell. If you can, bring goggles with you and dive under the water. Avoid the crashing of the wave until you know what is underneath you.
Where do waves break?
Waves break when there is a build up of energy, usually created by an uplift in the ocean floor. This could be an underwater canyon, a reef, or even a wind swell that makes the water move. Now, if you are new to photographing waves, your best bet in getting “the shot” will be a surf break or a beach break. Now, beach breaks can be dangerous and often have a rip current you’ll need to watch out for, so you don’t get sucked out to the ocean.
If you are photographing where surfers are, be sure not to get in their way! A fin, or board, to the face can/will be fatal. To seek out these waves, just go on Surfline or Magic Seaweed, both are good resources to find waves.
How do I protect my camera?
Since camera’s are not water proof, you’ll need to protect it. The good news is protecting your camera is simple these days, but the hard part is choosing the correct water housing for yourself. Almost water housings fit the bill now, however others are better. At first, I used an affordable water housing, to find out if I was interested in shooting in the water. As time went on, I invested in an AquaTech Housing, designed to take a beating from waves and allowed for me to use a wider selection of lenses that I own.
Am I fit enough?
While the topic of fitness can be a mixed bag, this is an important one to check in with yourself. As fitness level’s go, swimming endurance and breath hold time are the two metric some of the most important to maintain. Swimming in the ocean with a camera to photograph waves is similar to climbing mountains, once you get out there and shoot, you’re only half-way done. You still have to get back to shore. At first, this may not seem like a big deal, but image photographing Mavericks from the water, that is 1 mile of swimming just to get there and back, not considering the push/pull of the swell, having a camera, etc. So, please, make sure you’re honest with yourself and your abilities.

When photographing in the ocean, there are more than just waves, make sure to look around and let the beauty sink in! Photographed in Todos Santos, Baja Sur.

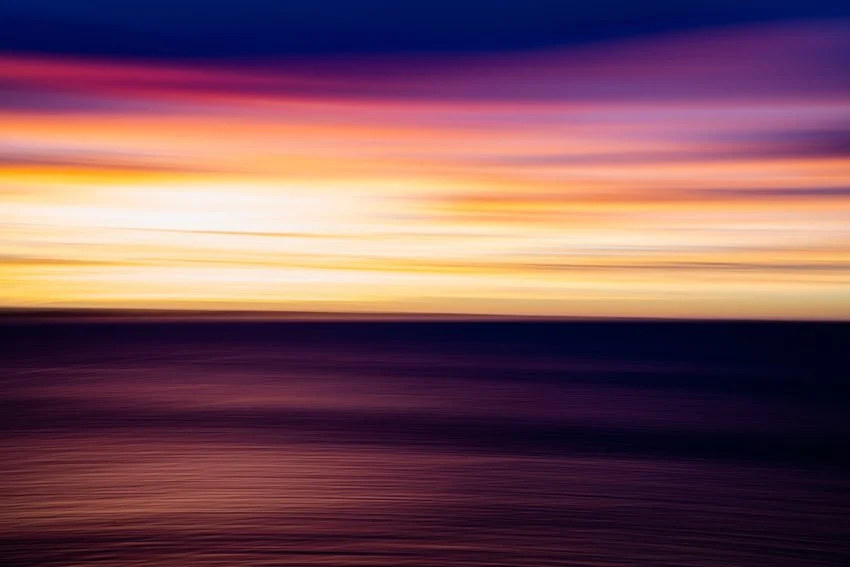
A golden sunrise barrel shot with a slow shutter-speed from Baja, Mexico.
Important safety checks
-What are the objective hazards before getting in?
Make sure to understand what and where the objective hazards are before you get in the water.
-Is your camera completely sealed?
You only need to make this mistake once. Double check your seals, they can break. Double check your latches, they can rust. Double check your lens port, they can wiggle loose.
-What is your exit strategy?
Once you are finished, you need to know how you are going to get out. If you jump off a cliff to get into the water, or catch a ride on a jet ski, how the heck are you going to get back to safety?
Conclusion
Photographing in the ocean can be dangerous, so please be careful. On the flip side, the images you can create inside and around the ocean are different, they can take your work to the next level, and you can find your own niche. Weight the risks and reap the rewards. Enjoy the process of learning to shoot in the water along with the experience of floating. Seek out warm water locations as well as cold water. Dive under the water, but also enjoy the surface, this world is your oyster.
If you have any success stories or images you want to share, send me an email, or drop a comment below.

Has Black and White Landscape Photography Died?
Throughout this article, I would like to look at a couple of examples of black and white photos I’ve taken over this past year and dive deep into if they are “good enough” for social media. Understandable, this is my opinion, these are my images, and social media is only a testing ground for me. For an added layer, I will also toss in other possible uses for the images, like this blog.
Introduction
In the age of Instagram’s over-saturation and eye-popping imagery to catch the attention and double taps, is there still room for black and white landscapes? My hopes and dreams shout, “YES,” however the likes and comments say otherwise. Now, we could all say that engagement doesn’t matter, but to a certain extent, it does. As social creatures, it’s nice to have validation from those around us to keep the motivation high, especially if you are at a low.
Throughout this article, I would like to look at a couple of examples of black and white photos I’ve taken over this past year and dive deep into if they are “good enough” for social media. Understandable, this is my opinion, these are my images, and social media is only a testing ground for me. For an added layer, I will also toss in other possible uses for the images, like this blog.
Photo Examples

Mountains
Mountains are the quintessential black and white image. Okay, well, maybe portraits are but in terms of landscape images, mountains are the cream of the crop. The mountains have the opportunity to humble and place us in the state of AWE that we can not get in many other landscapes. Please, don’t get me wrong here, awe does occur in every landscape, but the mountains are the most consistent.
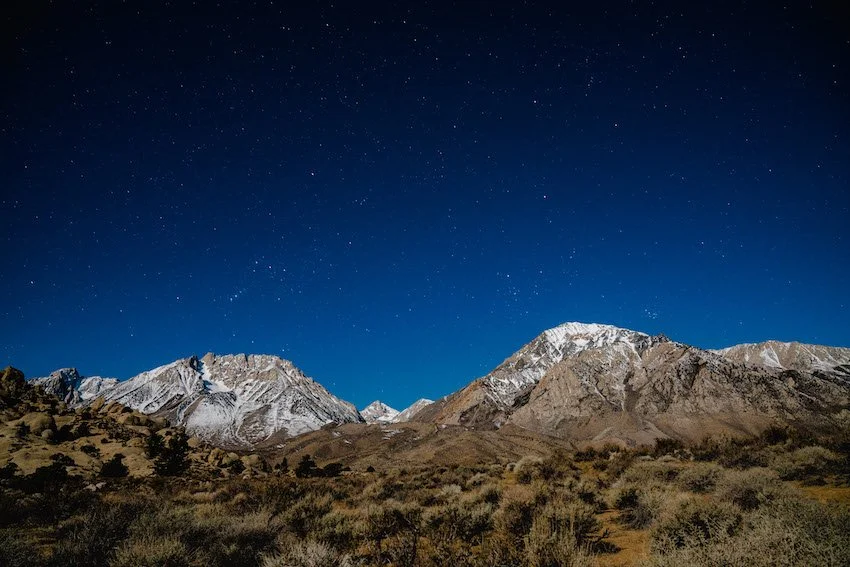
Mount Whitney, an icon of the Eastern Sierra mountains, HWY 395, and the highest point in the lower 48, is a massif well documented by the greats and the not-so-greats. Regardless of skill, what matters here is the attempt to capture the grandeur this peak exudes. I would say most days this is difficult, however, if you live around the area for a couple of seasons you’ll find the day.
I have not dedicated seasons of looking at this peak daily, hoping to get the shot. While I do believe this image above is solid, an 8 out of 10, it could be much better. One of the many challenges of shooting in black and white is always looking for the best opportunity for contrasting light. What does this mean? Well, to improve this shot, I need more weather, ideally a clearing storm, sunrise light (instead of the sunset), and a little bit more snow. All-in-all the photograph of Mount Whitney is still a solid image that I am happy to have in my archive.
Potential Uses
Is it worthy of a print? Yeah. I would hang this one on my wall. Why? Well, this is a classic landscape that still has a little bit of a flare with the clouds in the top left, as well as a really good contrast level with the lighting.
Could this be used for commercial purposes? It totally could, but most likely the client would look for that 10 out of 10 images assuming they have the time and resources to hand-select an image from Ansel Adams or other great photographers.
Would this image do well on social media? Probably not. Why? Well, this location is photographed hundreds of times a day, so people want to see the pop in color. I would make the argument that very few landscape shots, of popular places, will perform well in black and white.

Forest
One of the most difficult landscapes to photograph in black and white because of the contrasting light and minimal amount of “good” light. The thick canopy makes for a dark layer full of broad leaves with a vibrant green color, but a black and white photograph doesn’t show that!
Potential Uses
Yup, this one is a social media banger. Why? Well, the solar flare through the trees will immediately catch the eye of the viewer scrolling. Once they register that the image is of a forest, if they are a nature lover, they will appreciate it for a split second, double-tap, and head on down their feed.
Meanwhile, this image would be great for commercial use for a client that wants to highlight cleanliness blended with old fashion. Why? Well, at the bottom of this image, you can add text and a little bit of graphics, maybe with some color, to make the extra little pop. Put this in a magazine, people will stop and stare, then be delighted.
In terms of prints, I would say if this was a small piece to accent something larger, this would be great. However, this image wouldn’t hold up over time as a centerpiece.

River
Now, I enjoy this image! There are TONS of elements here in the black and white space that pop, mainly because of the contrast with the clouds. Let’s break this image down:
There are three layers:
The foreground of the river and the peninsula. Using the foliage at the very bottom of the image to the treetops of the peninsula, this first layer has a lot of depth and chaos. Because of this chaos, most people do not even look at that to start, which doesn’t help this image. However, if you look long enough, these details keep your eye wandering.
The mid-ground is the first clouds bank to the mountain tops. This space is where my eye looks first, which I would assume yours does as well, but I could be wrong. This layer holds the weight of the image and gives the context of a storm clearing in the mountainous woods. Pretty cool.
In the background are the storm clouds looming over the entire image. These are great and moody, but not much can be said besides, “They are moody.”
Potential Uses
Could this be licensed commercially? Yeah, this image has the potential for those clients looking for a PNW image that is in black and white.
For prints, this is a solid black and white image that could hang on a cabin wall, especially if they are from the Pacific Northwest.
For social media, this image would be a hit-or-miss because it is so chaotic. Some people would double-tap away, and others would scroll directly over it because there was no color.

Aerial
This image is rad and that landscape is cool, especially with the layers in the sediment which create horizontal lines, and the spines of the plateau seemly melting away make for a composition that catches the eye of the viewer. Sadly, I would say that Black and White does NOT do this image justice. Why?
In the color version, this sediment is a rusted red. The color absolutely pops and adds to the composition. So, in this case, if I were to share this only as a black and white, I would be shorting myself.
Potential Uses
As a print, again, the color is the way to go... CLICK HERE
For commercial use, once again, the color would be the best option.
For social, no thank you.

Clouds
High in the sky, these fantasy-filled bundles of ice have fascinated me for years. What’s even crazier than the possibility of water to be floating, is its ability to hold color. Just think about those amazing sunsets that are so beautiful from the beach while sitting atop a blanket you just “have to grab your phone”. While these images never do that cloud view justice, the memory will forever stay.
In terms of clouds images, most are best with color, however, there are a couple of classic images that have stood the test of time in black and white. Can you still make these images today? Yes! If you end up in the right place at the right time, you can snag those images of a storm breaking, or looming over a mountain range or city. The possibilities are endless, you just need to time it correctly, or get lucky.
For this example, I just so happened to be in the right place at the right time for some crazy clouds. Since this was shot mid-day, the colors were… meh, hence black and white. These lenticular clouds are typically the sign of an oncoming storm, which, for those who know this, makes the image more daunting. Oftentimes, the more knowledge you have of a subject, the better one can appreciate, to a certain point. Sadly, I was driving along a highway and there wasn’t anything obvious that I could/should have placed under these clouds to be the subject, so I decided to shoot the clouds themselves.
How to Use:
Now, is this image good for social? Maybe. Some people will like this and think it is cool, but most would scroll over it.
Is this image a good print? No. There is way too much chaos and the addition to a room would be unwanted.
Could this photo be licensed commercially? I would be hard-pressed to think you could find an opportunity, but anything could happen. That was my long-winded way of saying... No.
So, if these are all no’s, why did I pull out my camera? Well, I liked the moment, was impressed by it, and took some photos because it is what I do for fun as well as for work. Now, I can stumble upon this image from time to time and smile, recalling a fun drive home to see my parents.
Final Thoughts
Overall, there is room for black and white photographs on social media but be prepared for low engagement. However, don’t let low engagement hold you back from sharing those black and white stunners from time to time. Remember, social media is as much, if not more, for you as it is for your followers. To be a successful black and white photograph on social media, it needs to be something special. Packing a punch on the gram is the minimum bar, hence the high saturation or jaw-dropping stories which draw you deeper into the app. So, share those jaw-dropping black and white images with the world!
Lastly, remember social media isn’t the end-all-be-all. Just because your Instagram feed might not be the place for black and white landscape photographs doesn’t mean it doesn’t belong in your portfolio, on somebody's wall, on your wall, in a magazine, or, hell, on a billboard as an advertisement for a Fortune 100 company.

Portfolio Story: Shooting for Gregory Mountain Packs
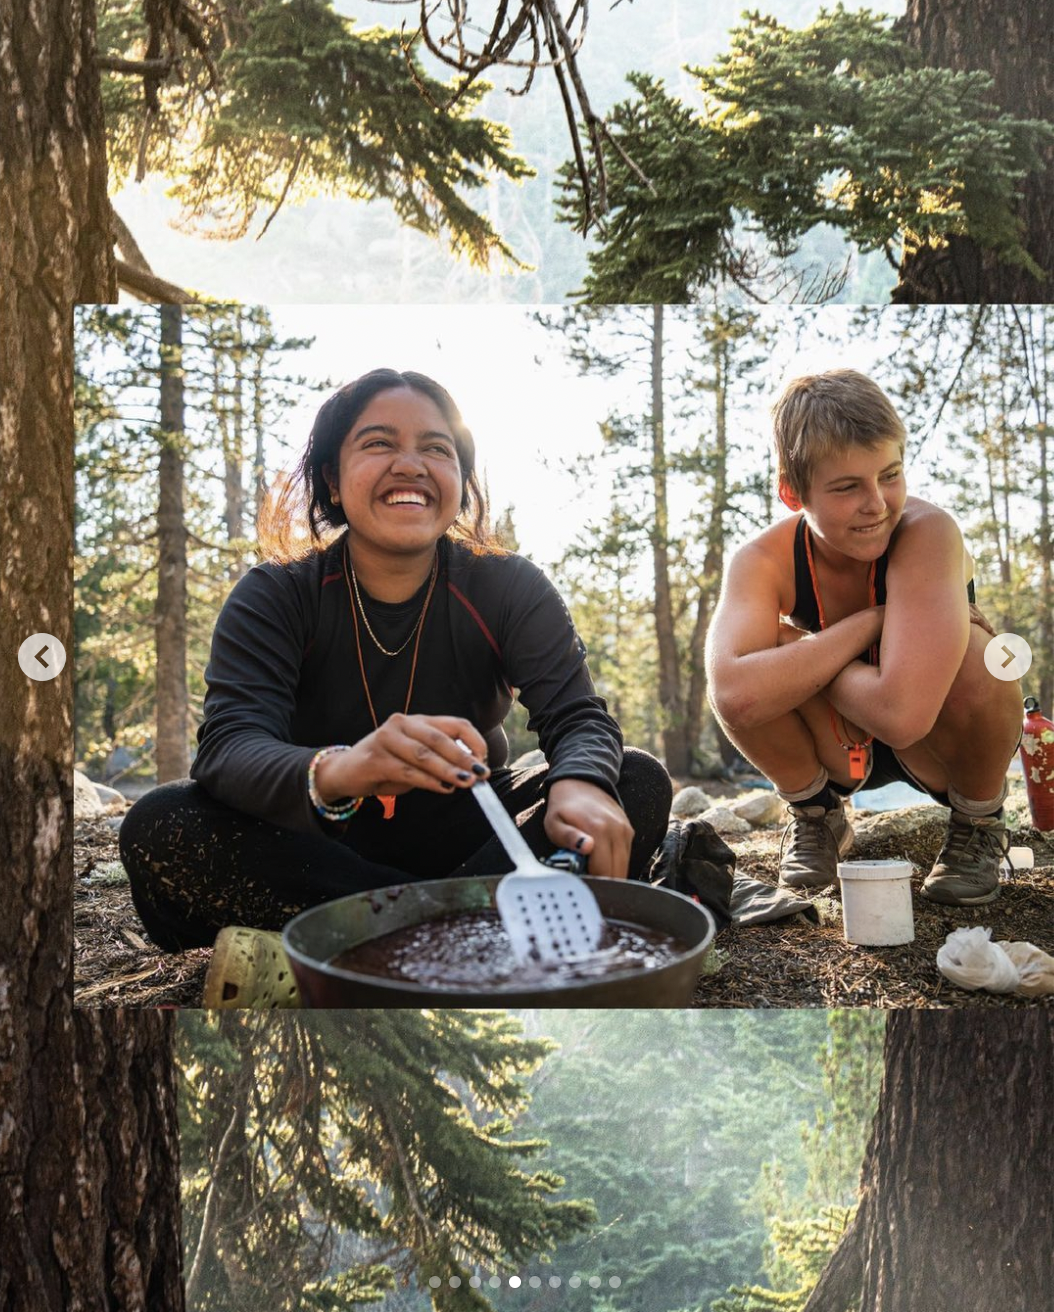
Gregory Packs and I had been talking for a few months about creating some content together. They were looking for some fun, light-hearted content that matched their campaign, "Make Time". Throughout the months we were chatting, we settled on the location of Lake Tahoe, for its versatility of activities, and the set deliverables of one blog and 8 images.
Gregory Packs and I had been talking for a few months about creating some content together. They were looking for some fun, light-hearted content that matched their campaign, "Make Time". Throughout the months we were chatting, we settled on the location of Lake Tahoe, for its versatility of activities, and the set deliverables of one blog and 8 images.
The creative was open-ended, but guided with a mood-board to showcase the desired color pallet. The rest was up to me. Sourcing the talent, the location, the activities, the set design, everything. The longer I shoot, the more I enjoy the process of designing a story and building a shot list. Keeping in mind the mood-board, I headed out for the two days of shooting.
With three activities, four locations, and a working title of "Make Time for Friends" the goal was to tell a story of friends having a good time together in nature. We would climb, paddle-board, and hike around Lake Tahoe, showing off the views and unique opportunities it provides. From blue water to granite walls, Lake Tahoe is a dream location.
The final blog title ended up being, "Mmm What’s That Cooking? Four Ways to Make Time for Dinner with Friends" with a focus on eating in nature with friends. I mean, COME ON, who doesn't love a good bite to eat with friends, out in the wild?! You can read the article on Gregory's Blog:
Also, a proud moment for myself once the set of images were delivered... they requested double the amount of images. My guess says they were happy with the end result :-)
Thank you @lindzmalone and @jojanna19 for giving me the opportunity to shoot with you all!
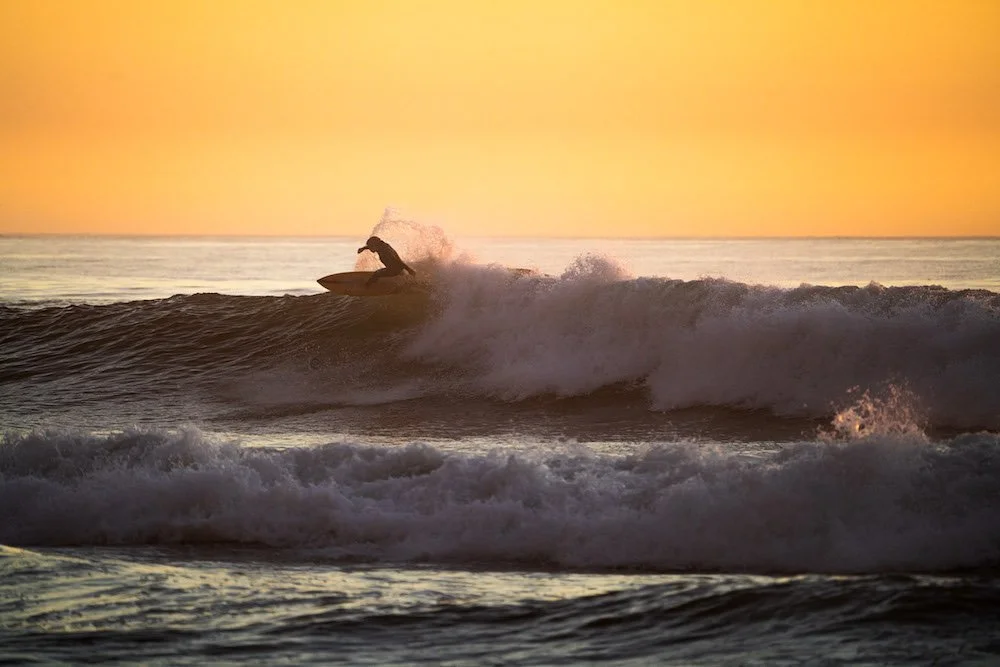
Three Tips for Taking Better Silhouette Photographs
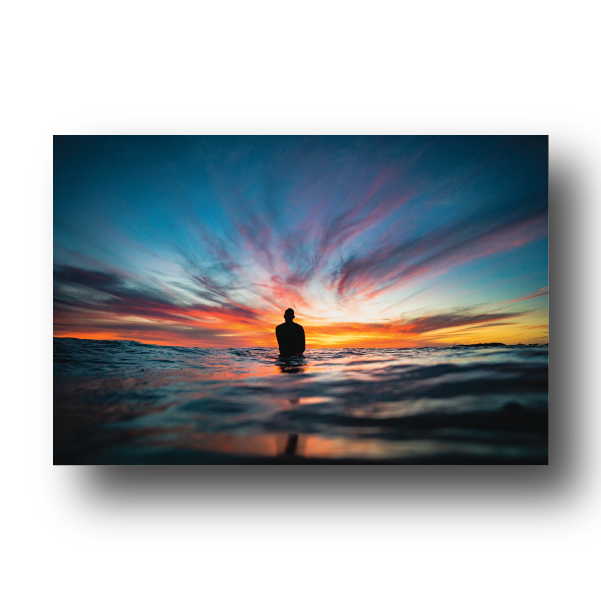
Imagine, it's a Friday night and you want to go hang with your buddies for an afternoon surf, but can't get in the water. This doesn't mean you can't have a good time. Heck, you might even be able to have more fun. Well, this is kinda the situation that I was in, but still wanted to hang out, so what did I do? Well, I grabbed my camera and headed to the beach.

Video Link at the BOTTOM for visual learners
Imagine, it's a Friday night and you want to go hang with your buddies for an afternoon surf, but can't get in the water. This doesn't mean you can't have a good time. Heck, you might even be able to have more fun. Well, this is kinda the situation that I was in, but still wanted to hang out, so what did I do? Well, I grabbed my camera and headed to the beach.
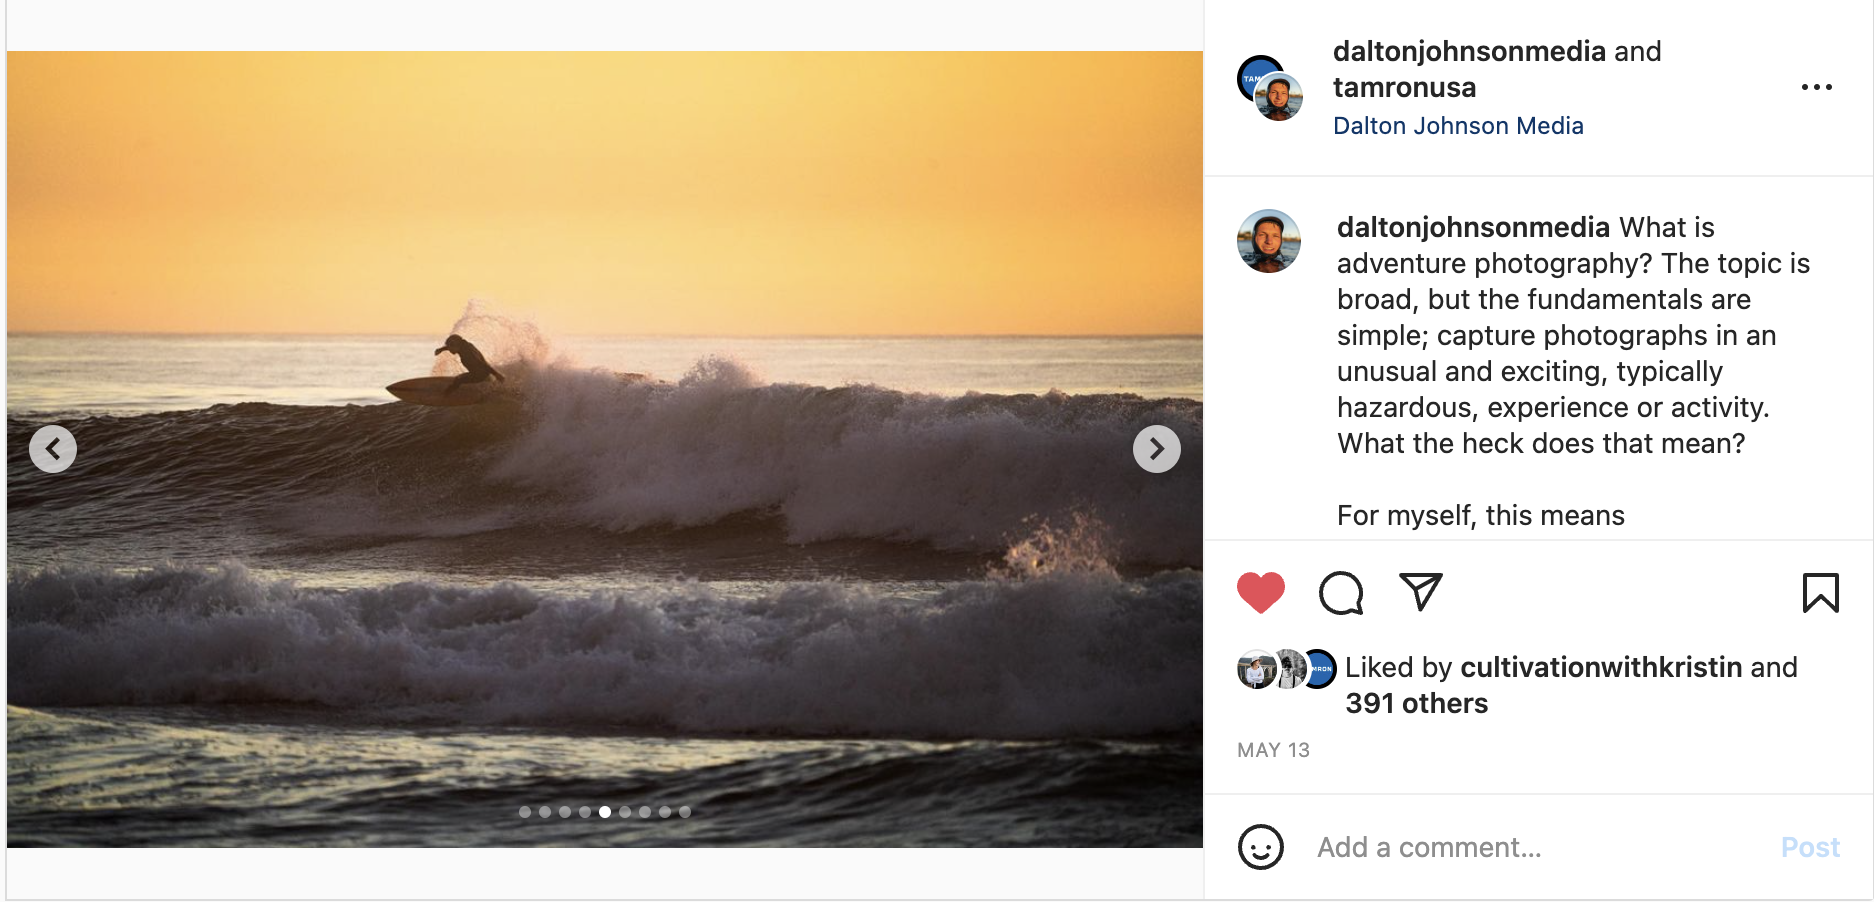
Locked and loaded with the 150-500mm lens, I joined in the action in my way, from behind the lens. Photographing @andrew__muse and @kickerdogmuse during a surf session. My goal was to shoot a little story about going to beach, focused on silhouette to create a timeless feel. Here are a few tips I focus on to get create silhouette images:
First, face subject into the sun:
While counterintuitive and breaking the "rules" of photography 101, shooting into the sun to make the subject backlit.
Second, place the subject just above the horizon:
This means, get your body on the ground if you have to. Heck, you will often find me rolling in the dirt to make this happen! Pro tip, don't wear your Sunday best while shooting.
Third, have a clean background:
The key is to have the background be simple, clean, and bright. Sunset or sunrise works best for this. You can shoot midday, but shadows become complicated!
Summary
Well, there you have it, this is how I focus on shooting silhouettes.
But remember, this is was more about joining in the fun with friends, even though you might not be able to get in the water for a surf. So, how do I do that? Well, as a photographer one of the best gifts I can give are images of my friends. So, I hook them up with some of the frames from that day and we get to laugh at some of the bloopers and crashes, meanwhile gawking at the images which capture them riding waves!
Long story short, there is almost always a good way for you to join your friends on an adventure, so get out there and live!

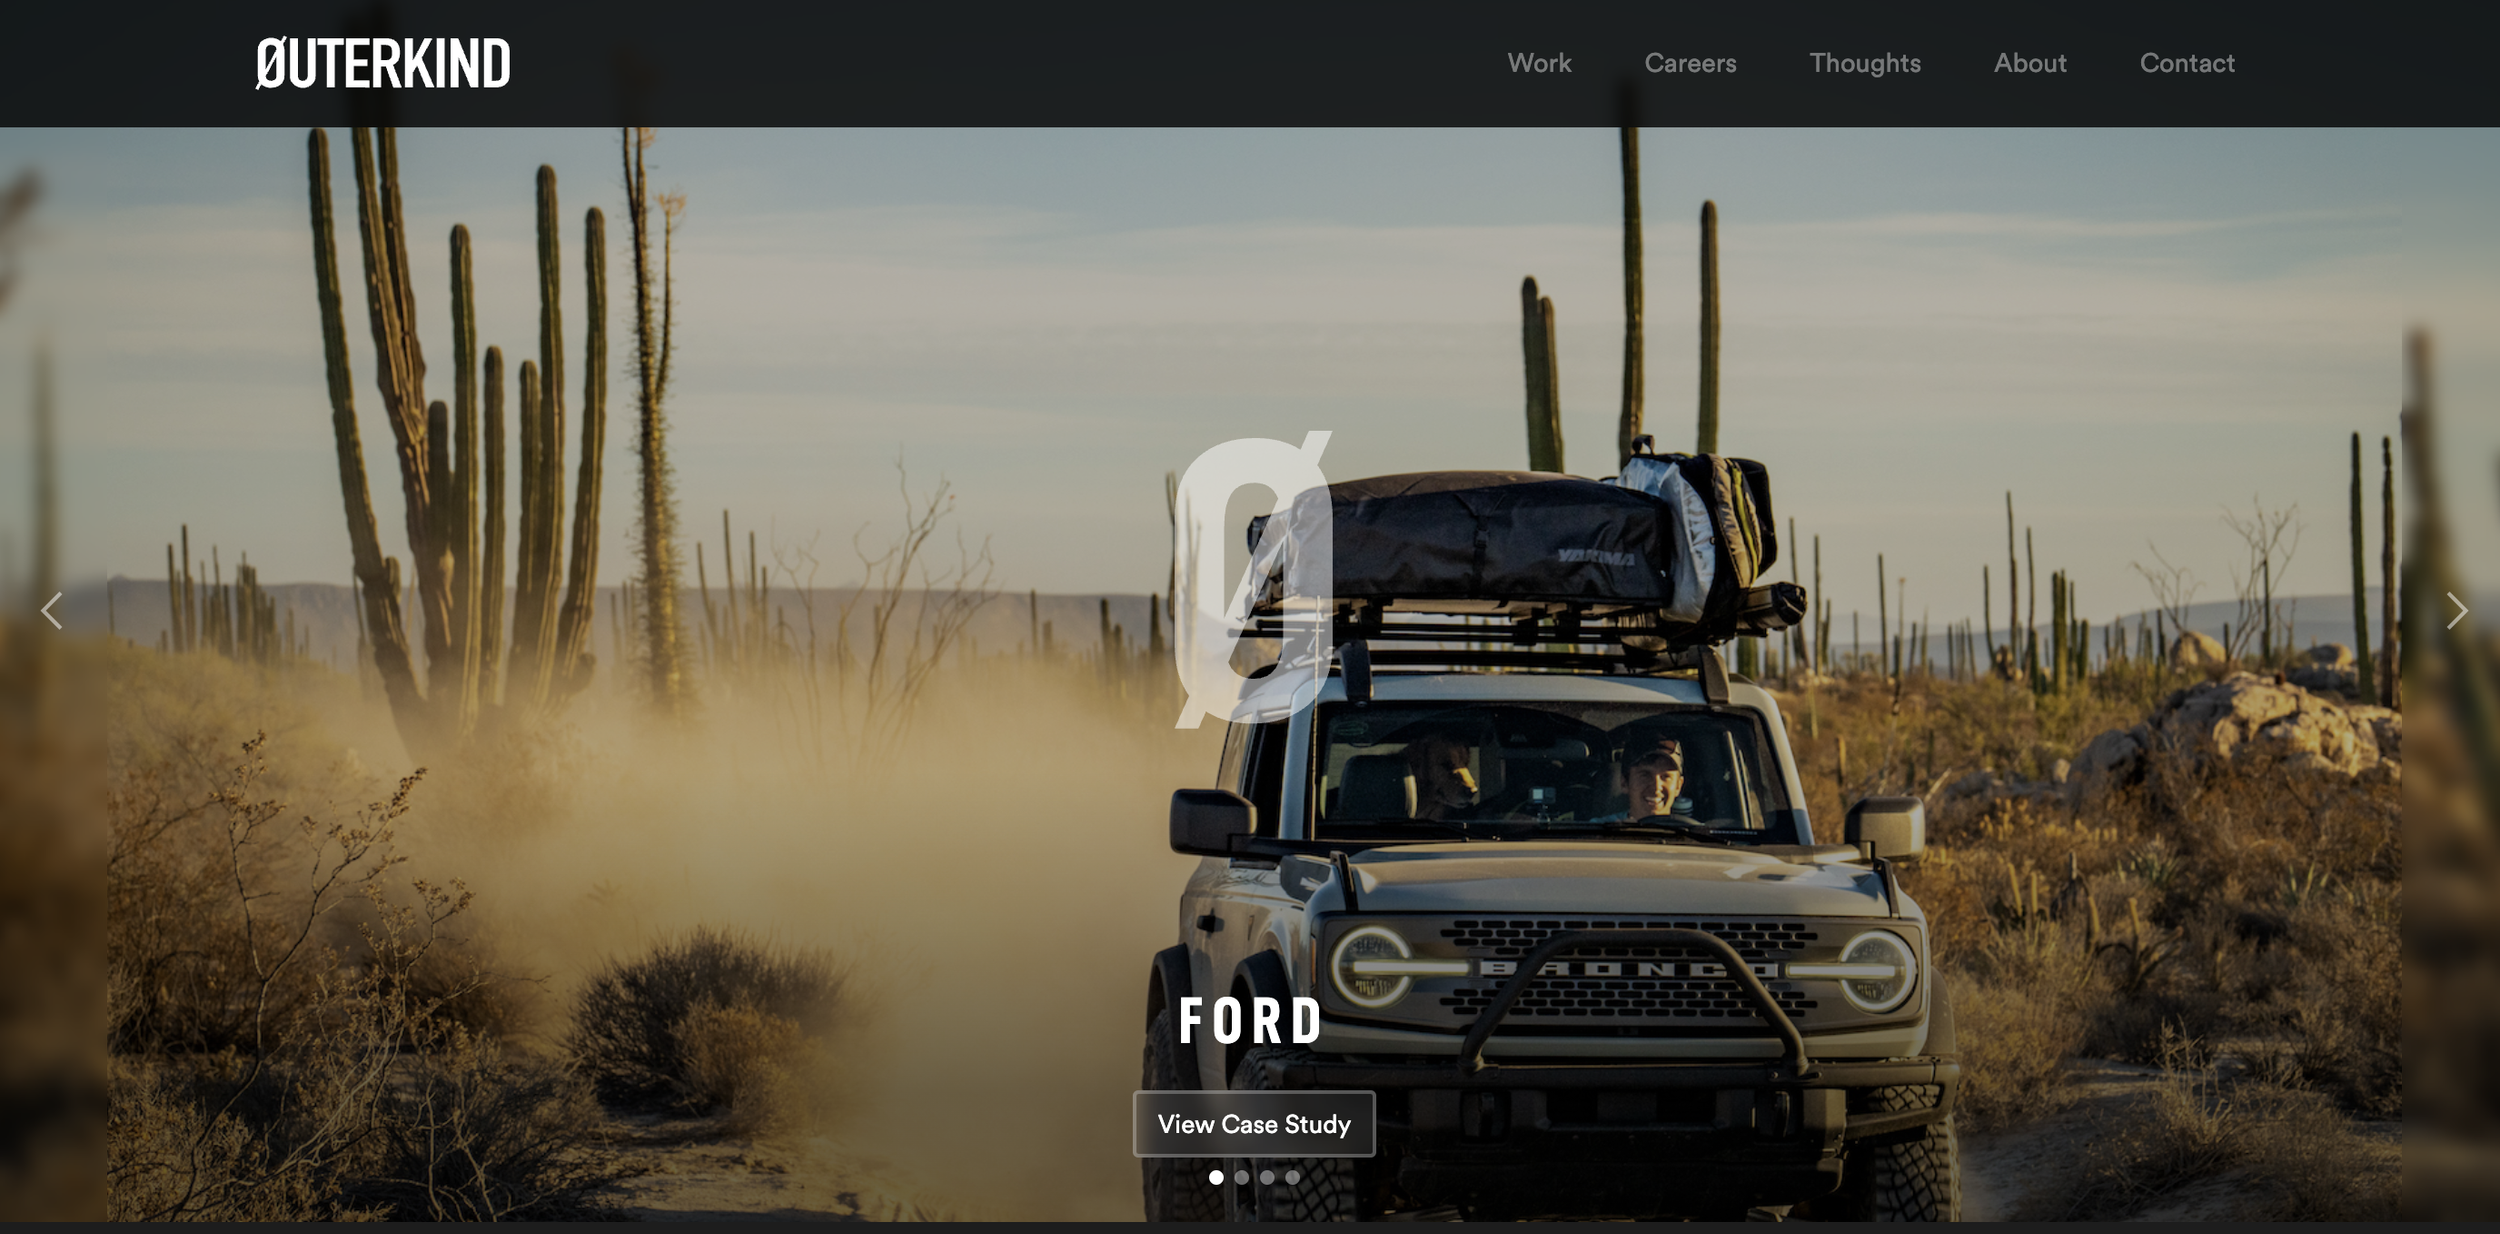
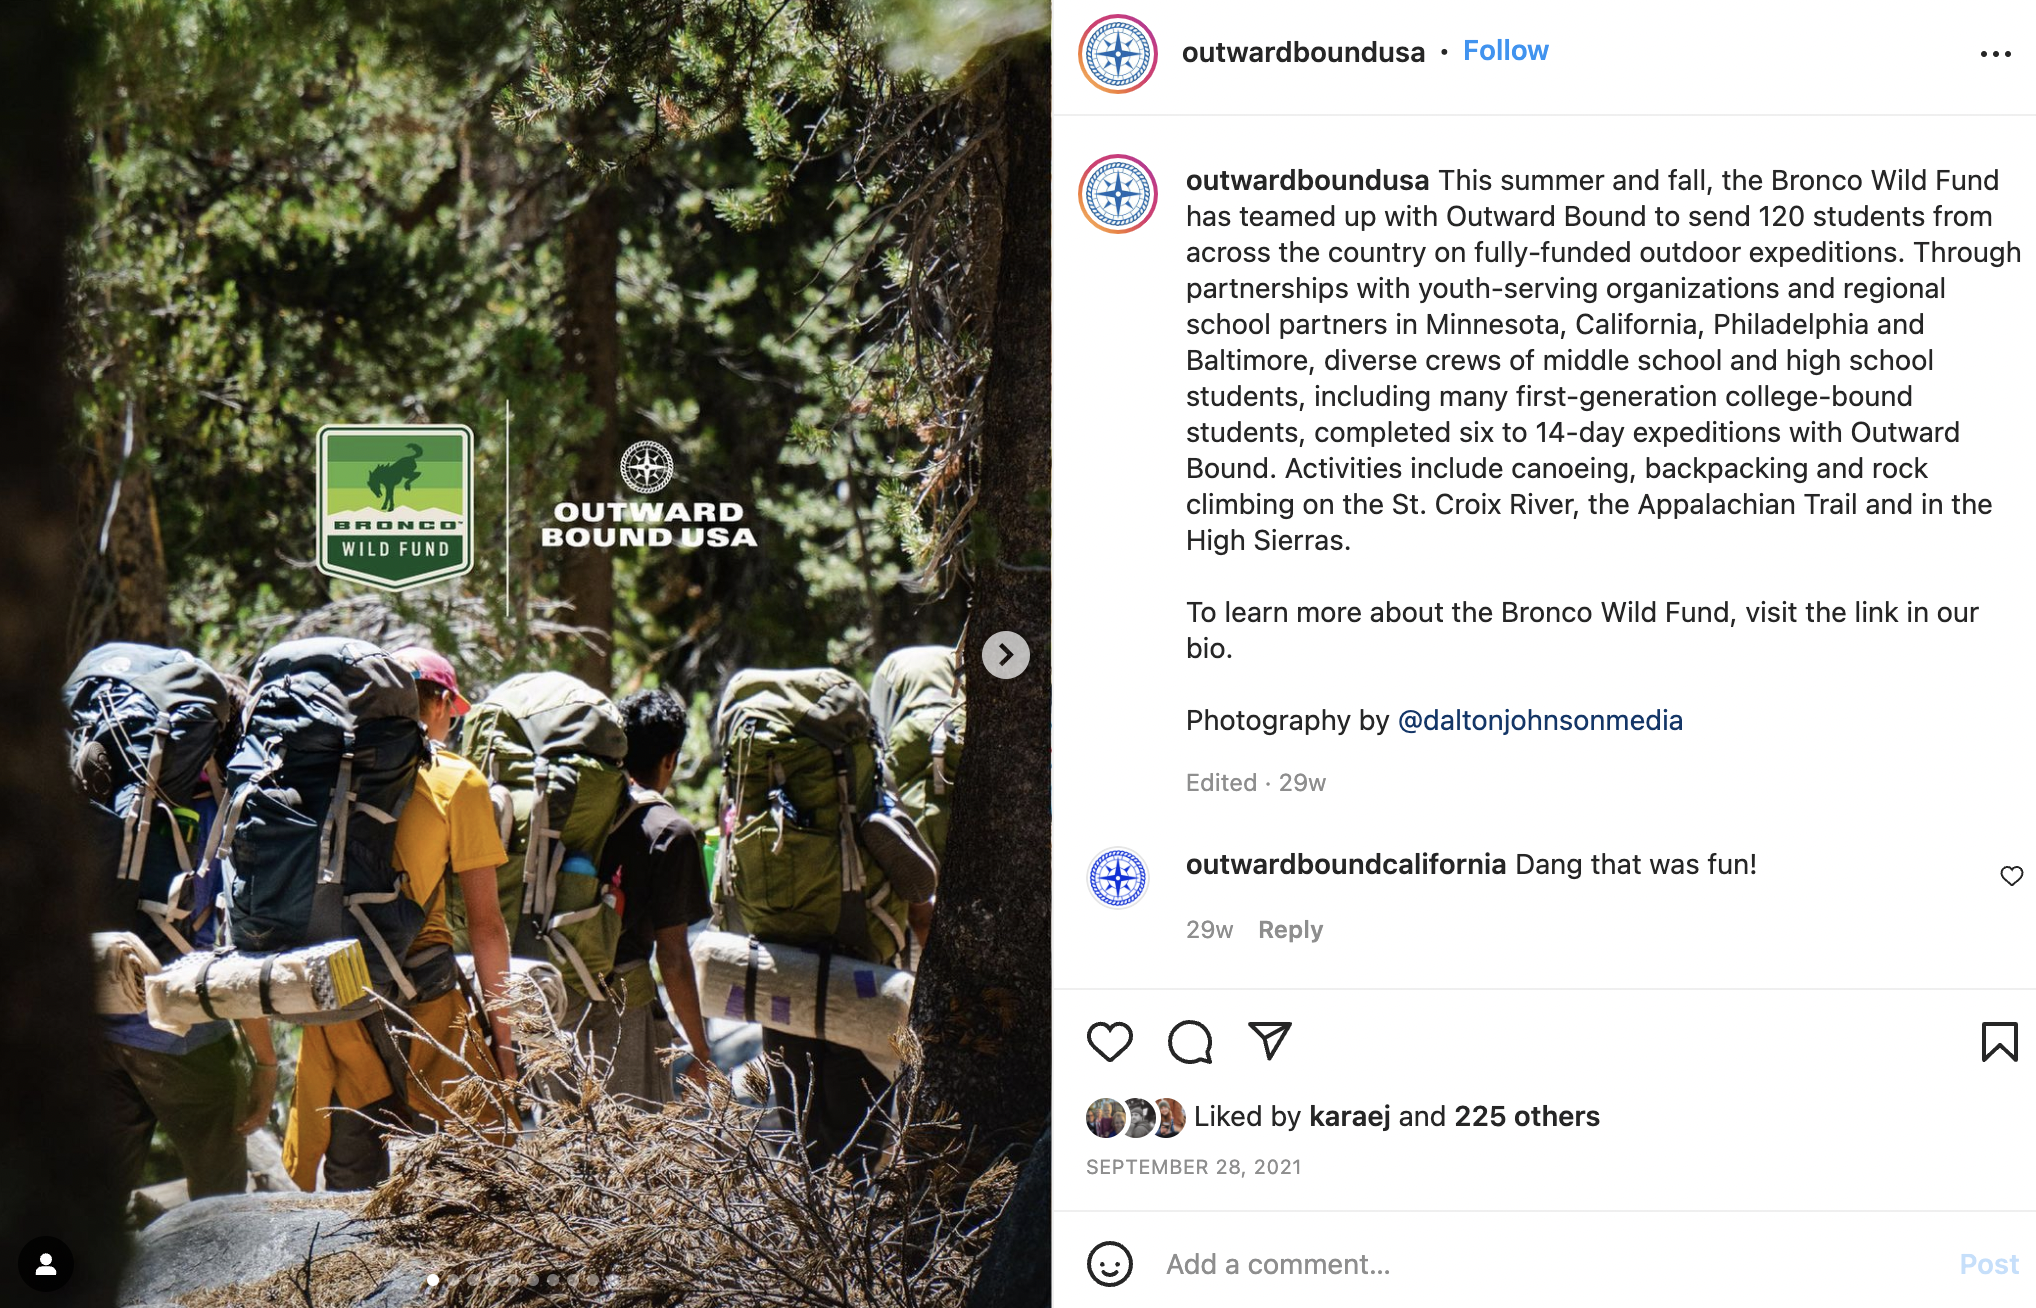
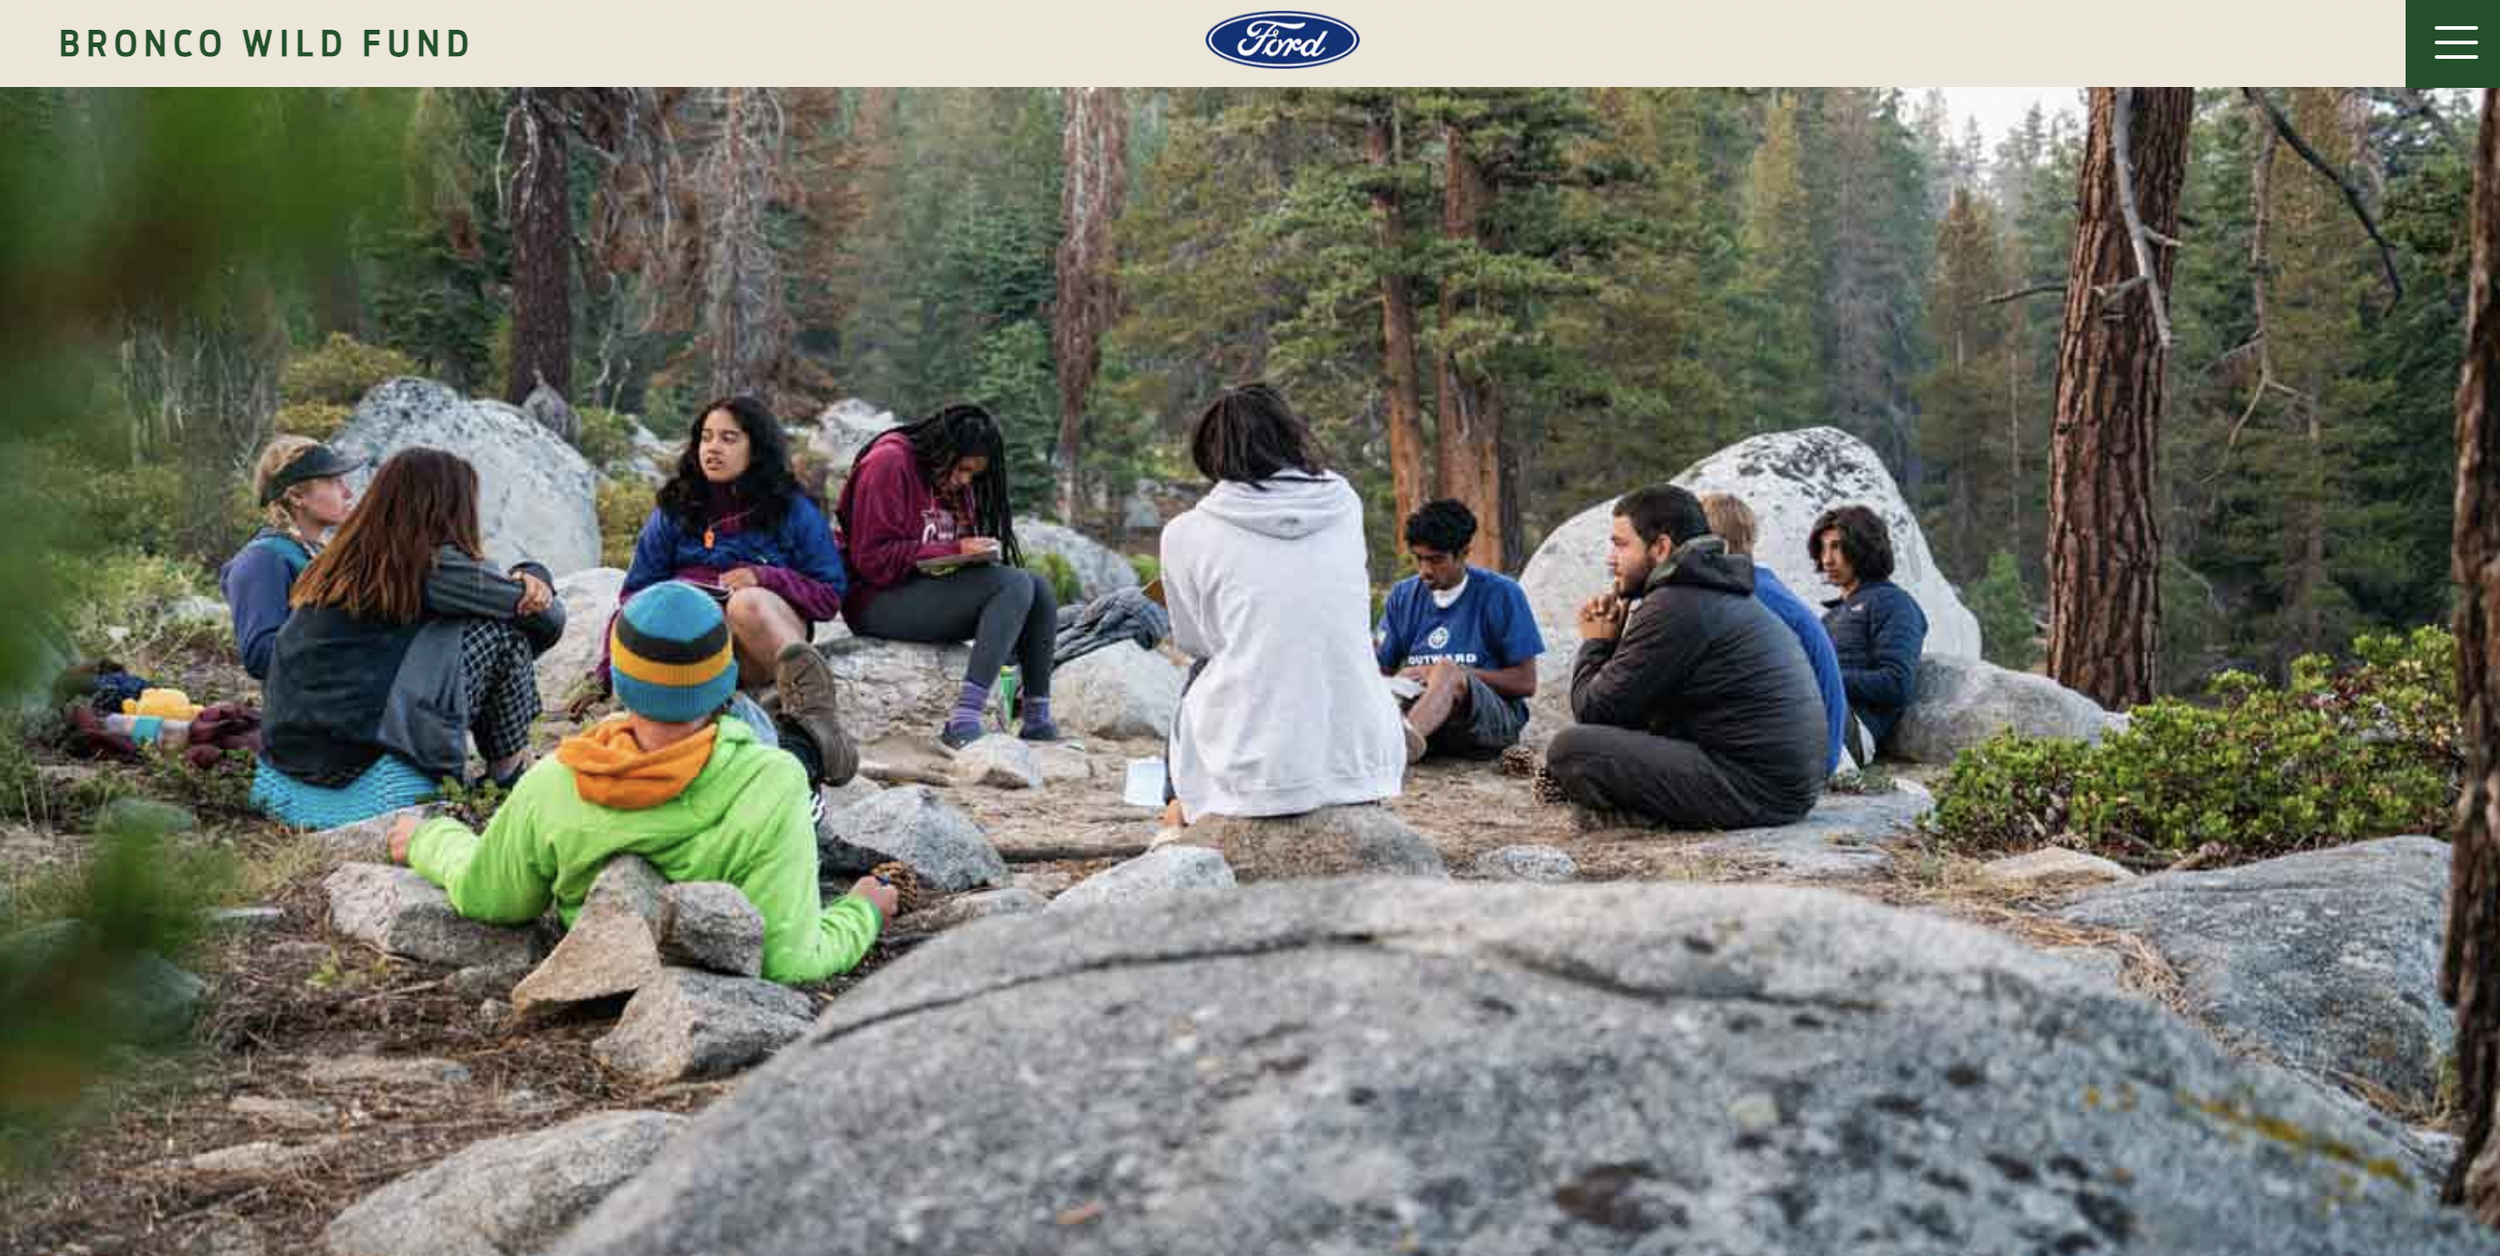
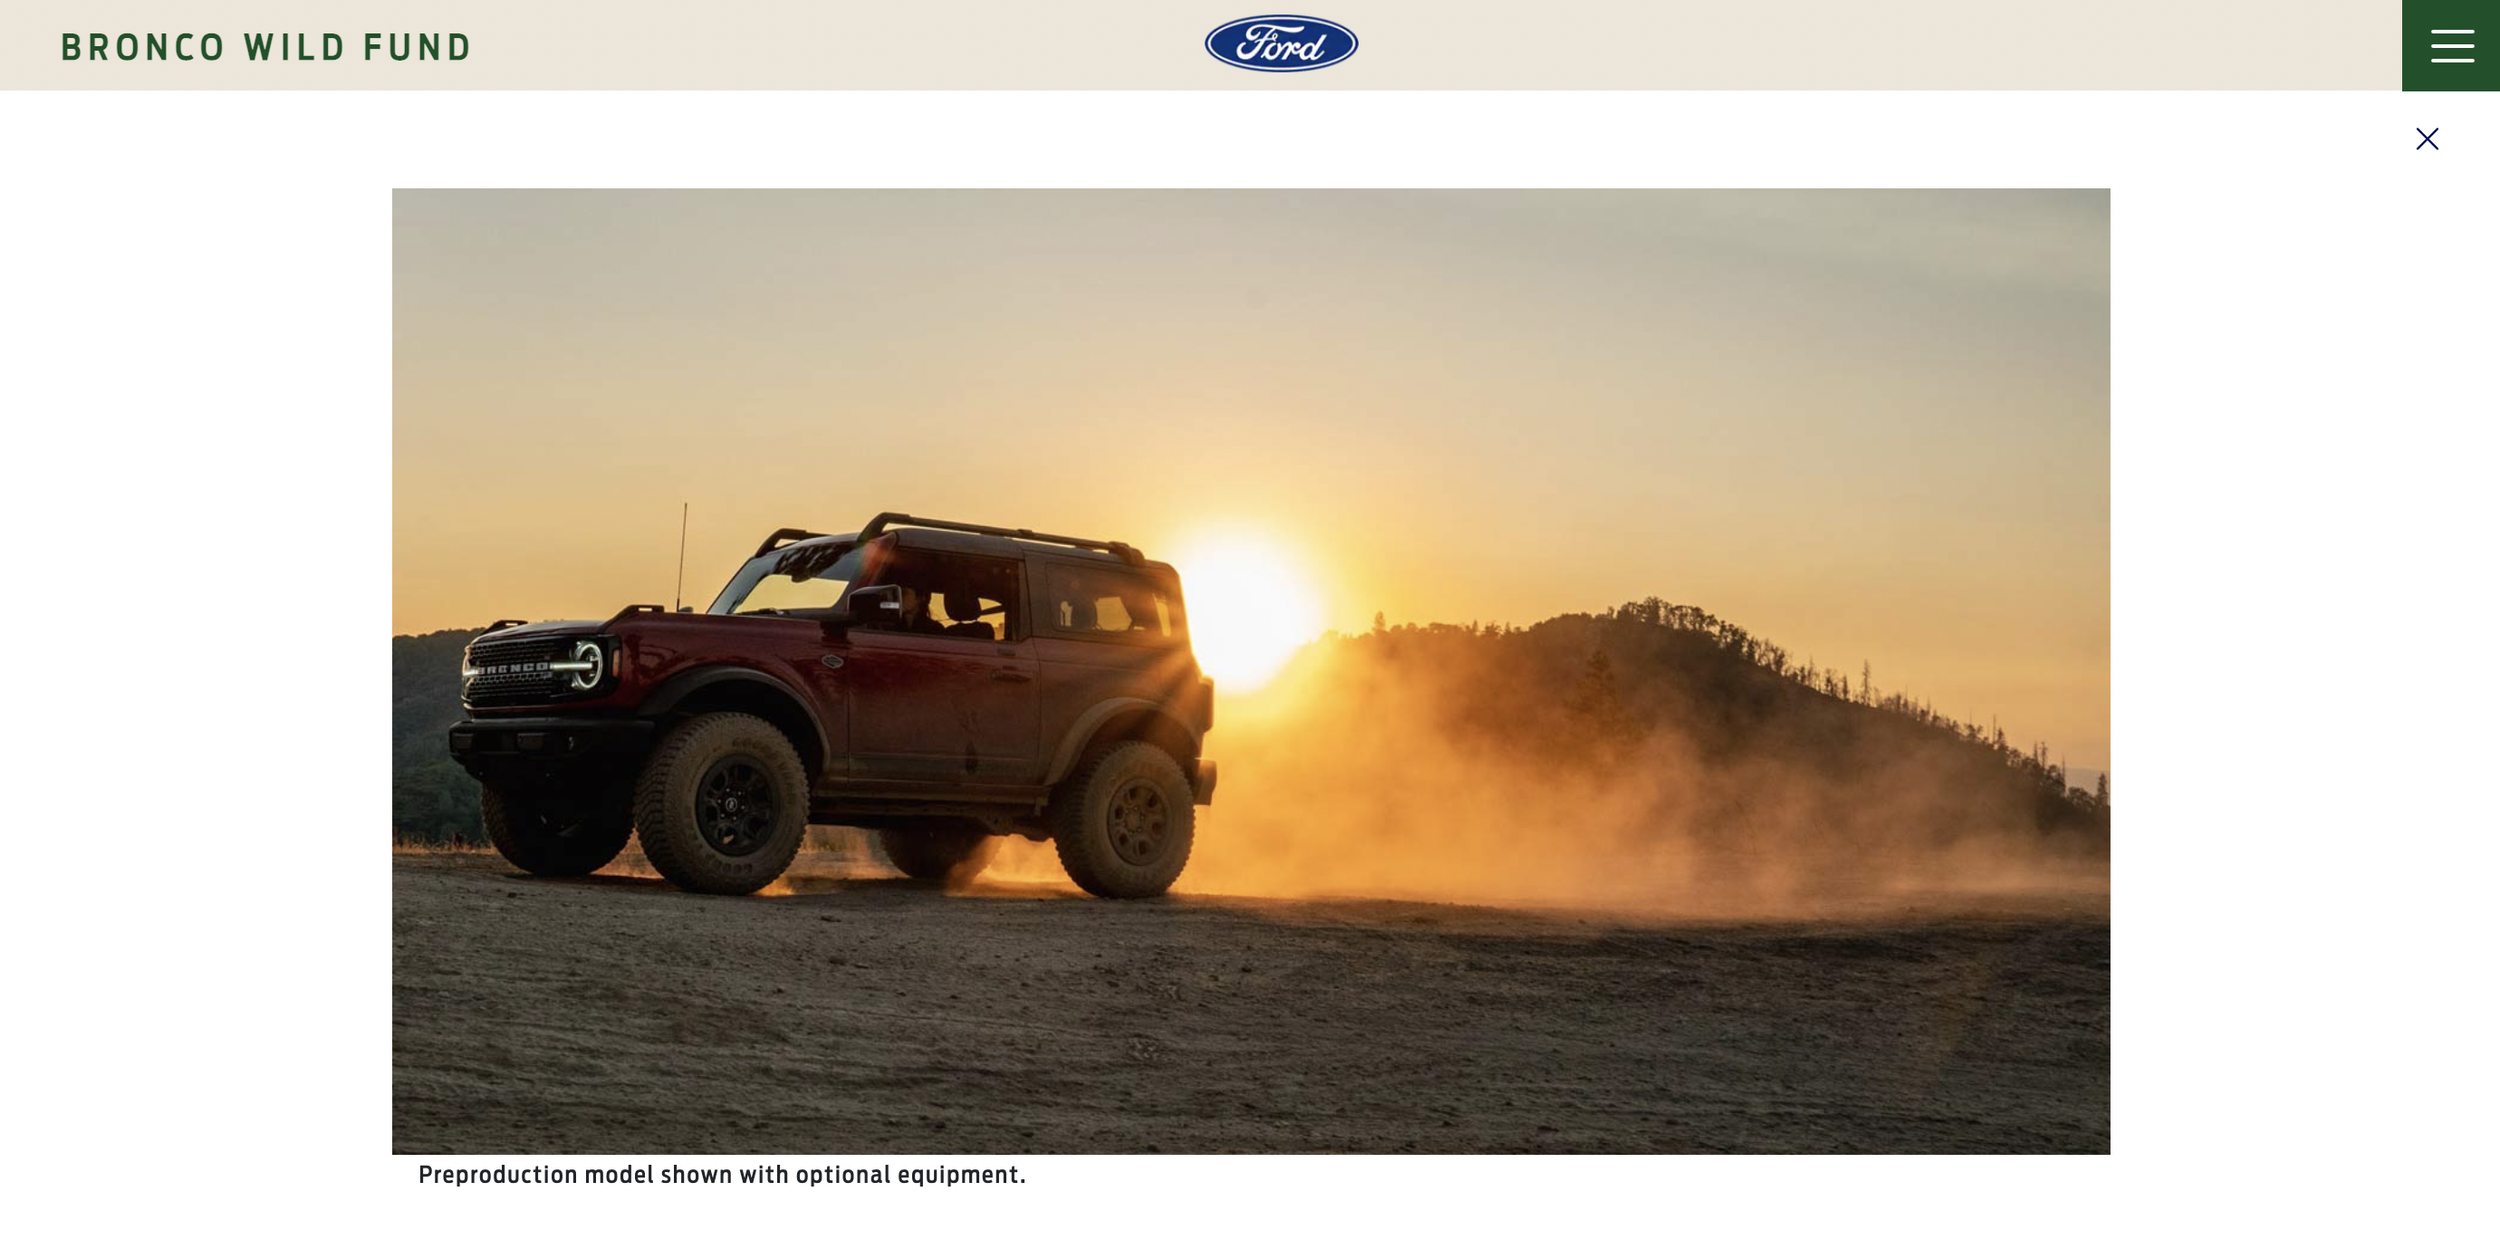
Creating Content for the Ford Bronco
Quite honestly, I would not have guessed when I made my business official (aka got a business license and started paying taxes under the business name "Dalton Johnson Media") roughly three years ago, that I would be photographing a campaign for @fordbronco or @outwardboundusa anytime soon. Realistically, I just wanted to pay my way by shooting odd jobs here and there to fuel my adventures. I really never had a list of dream clients, nor did I care to reach out to clients. While some of that has changed, my focus remains the same. I am here to live my life in accordance to my own view of success.
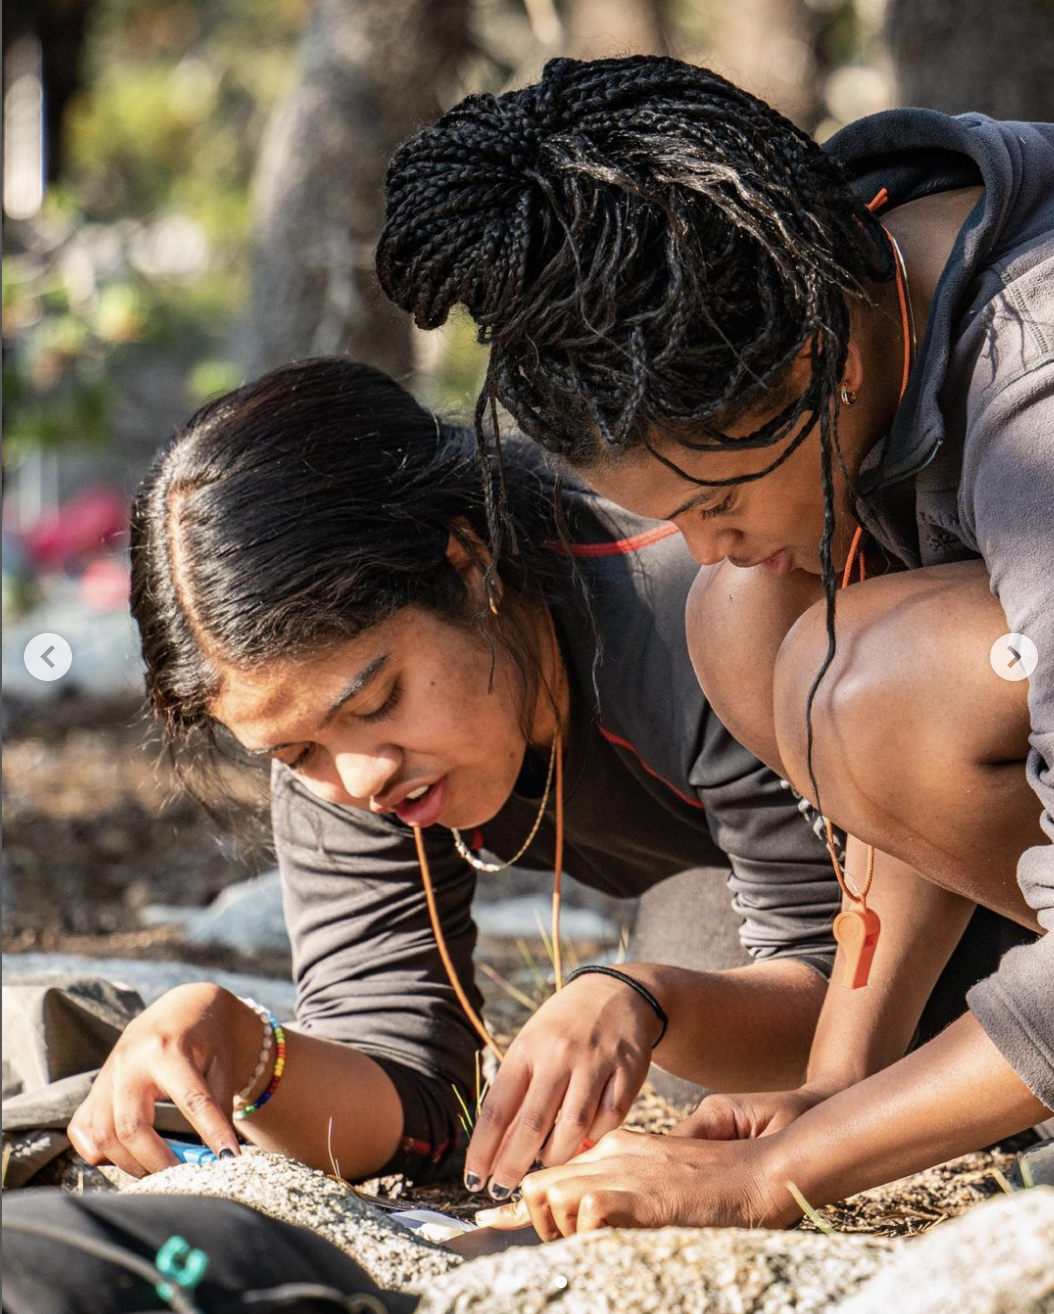
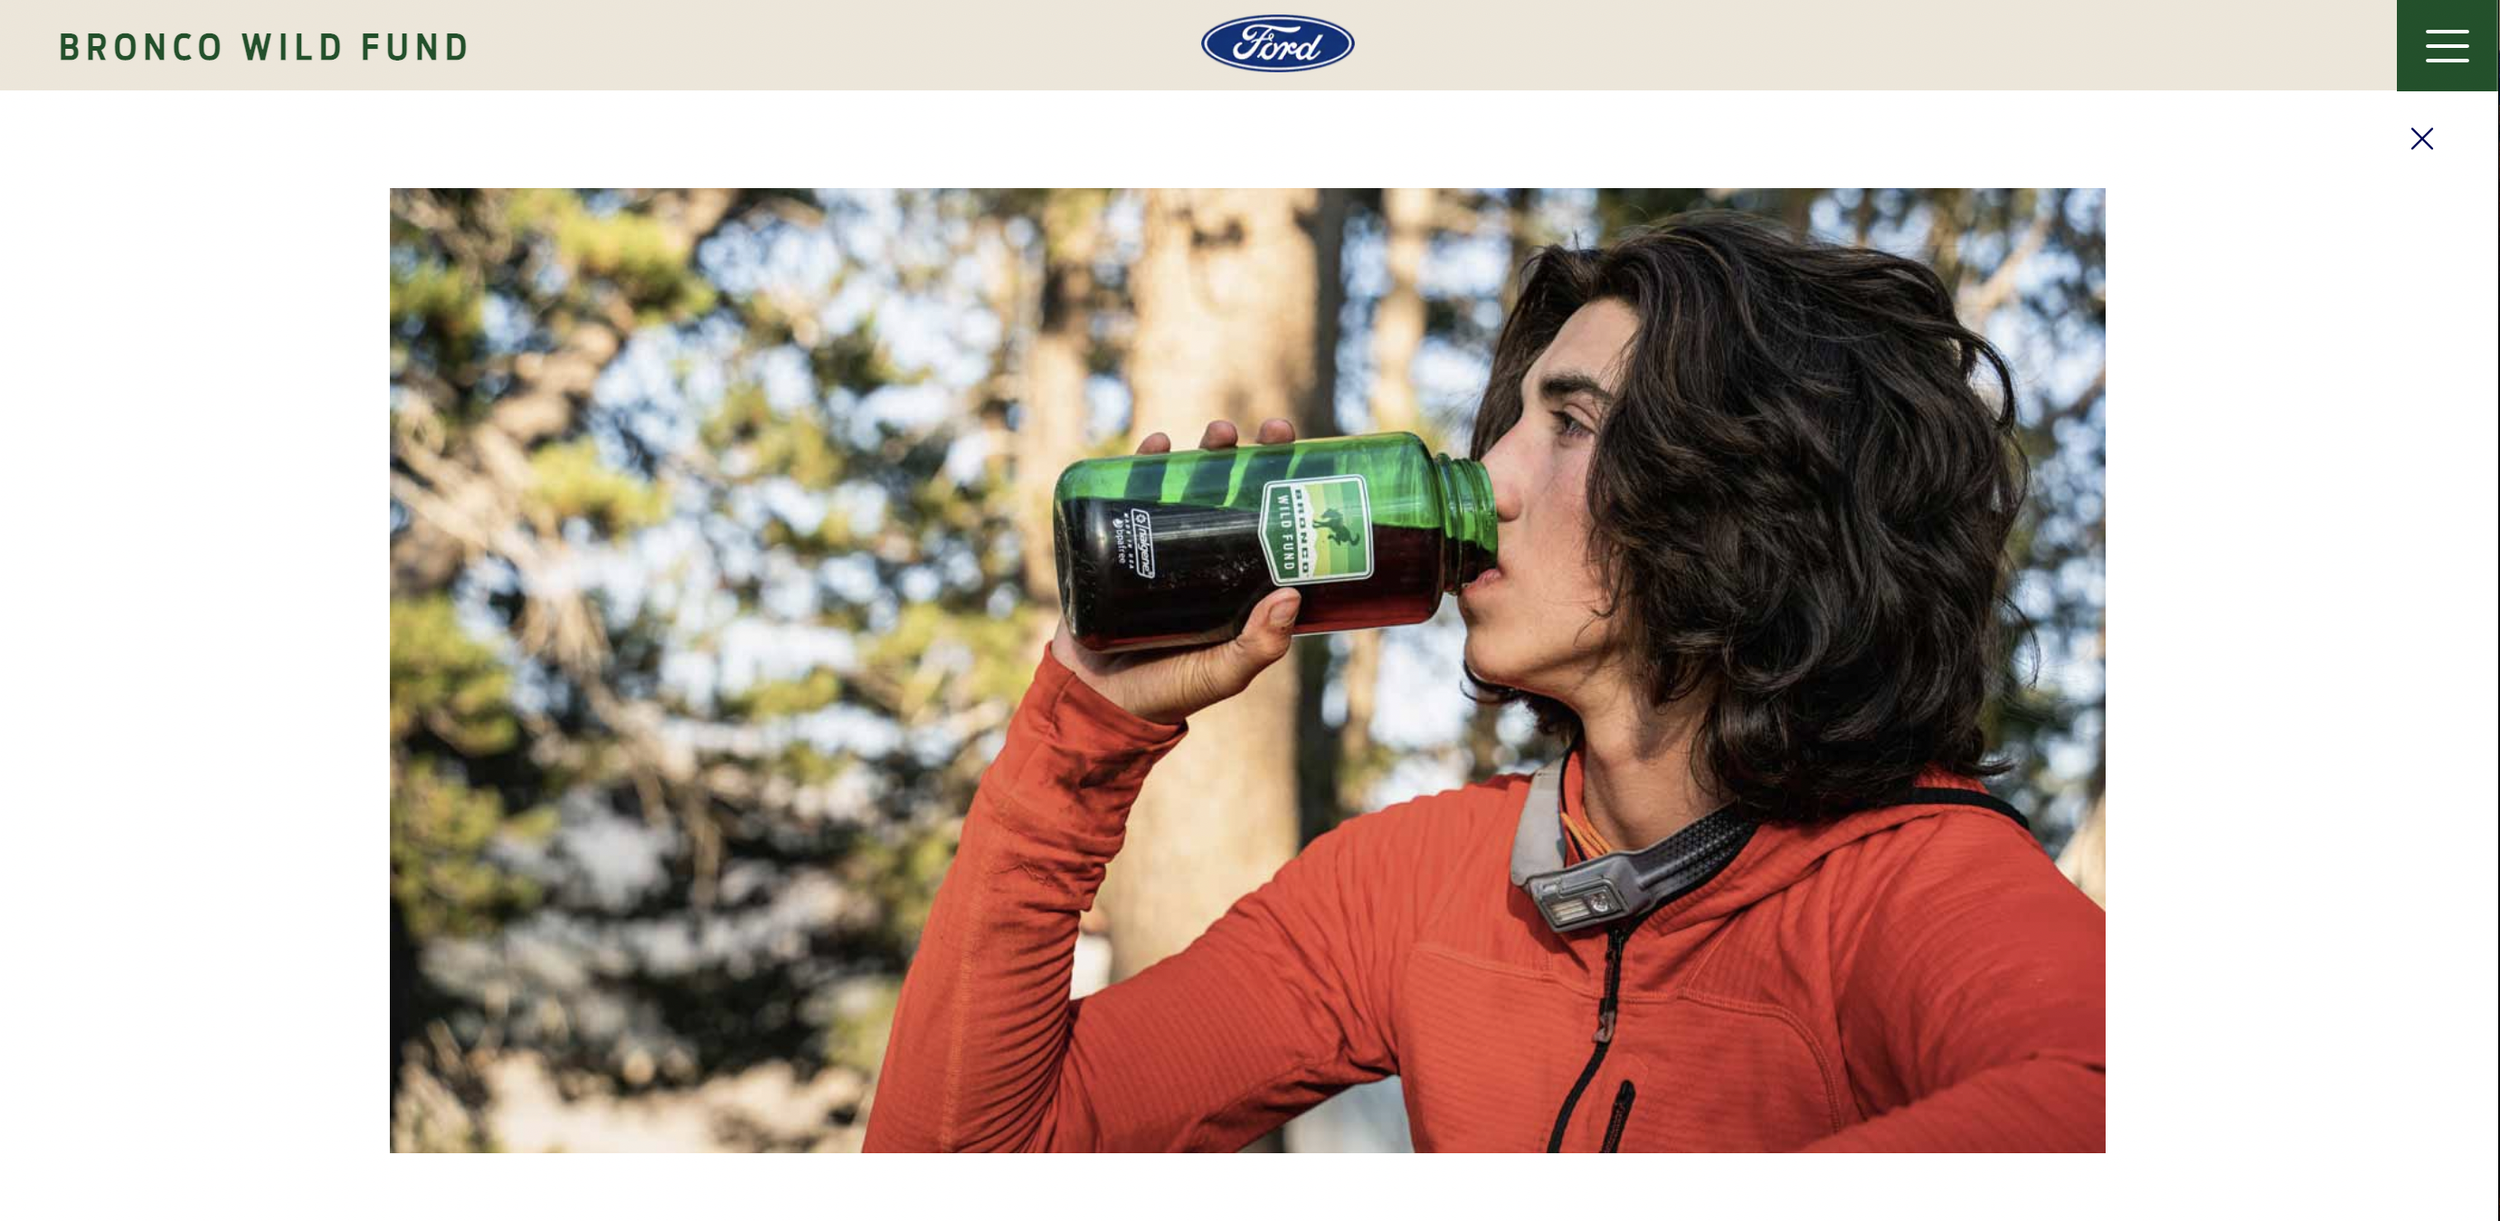
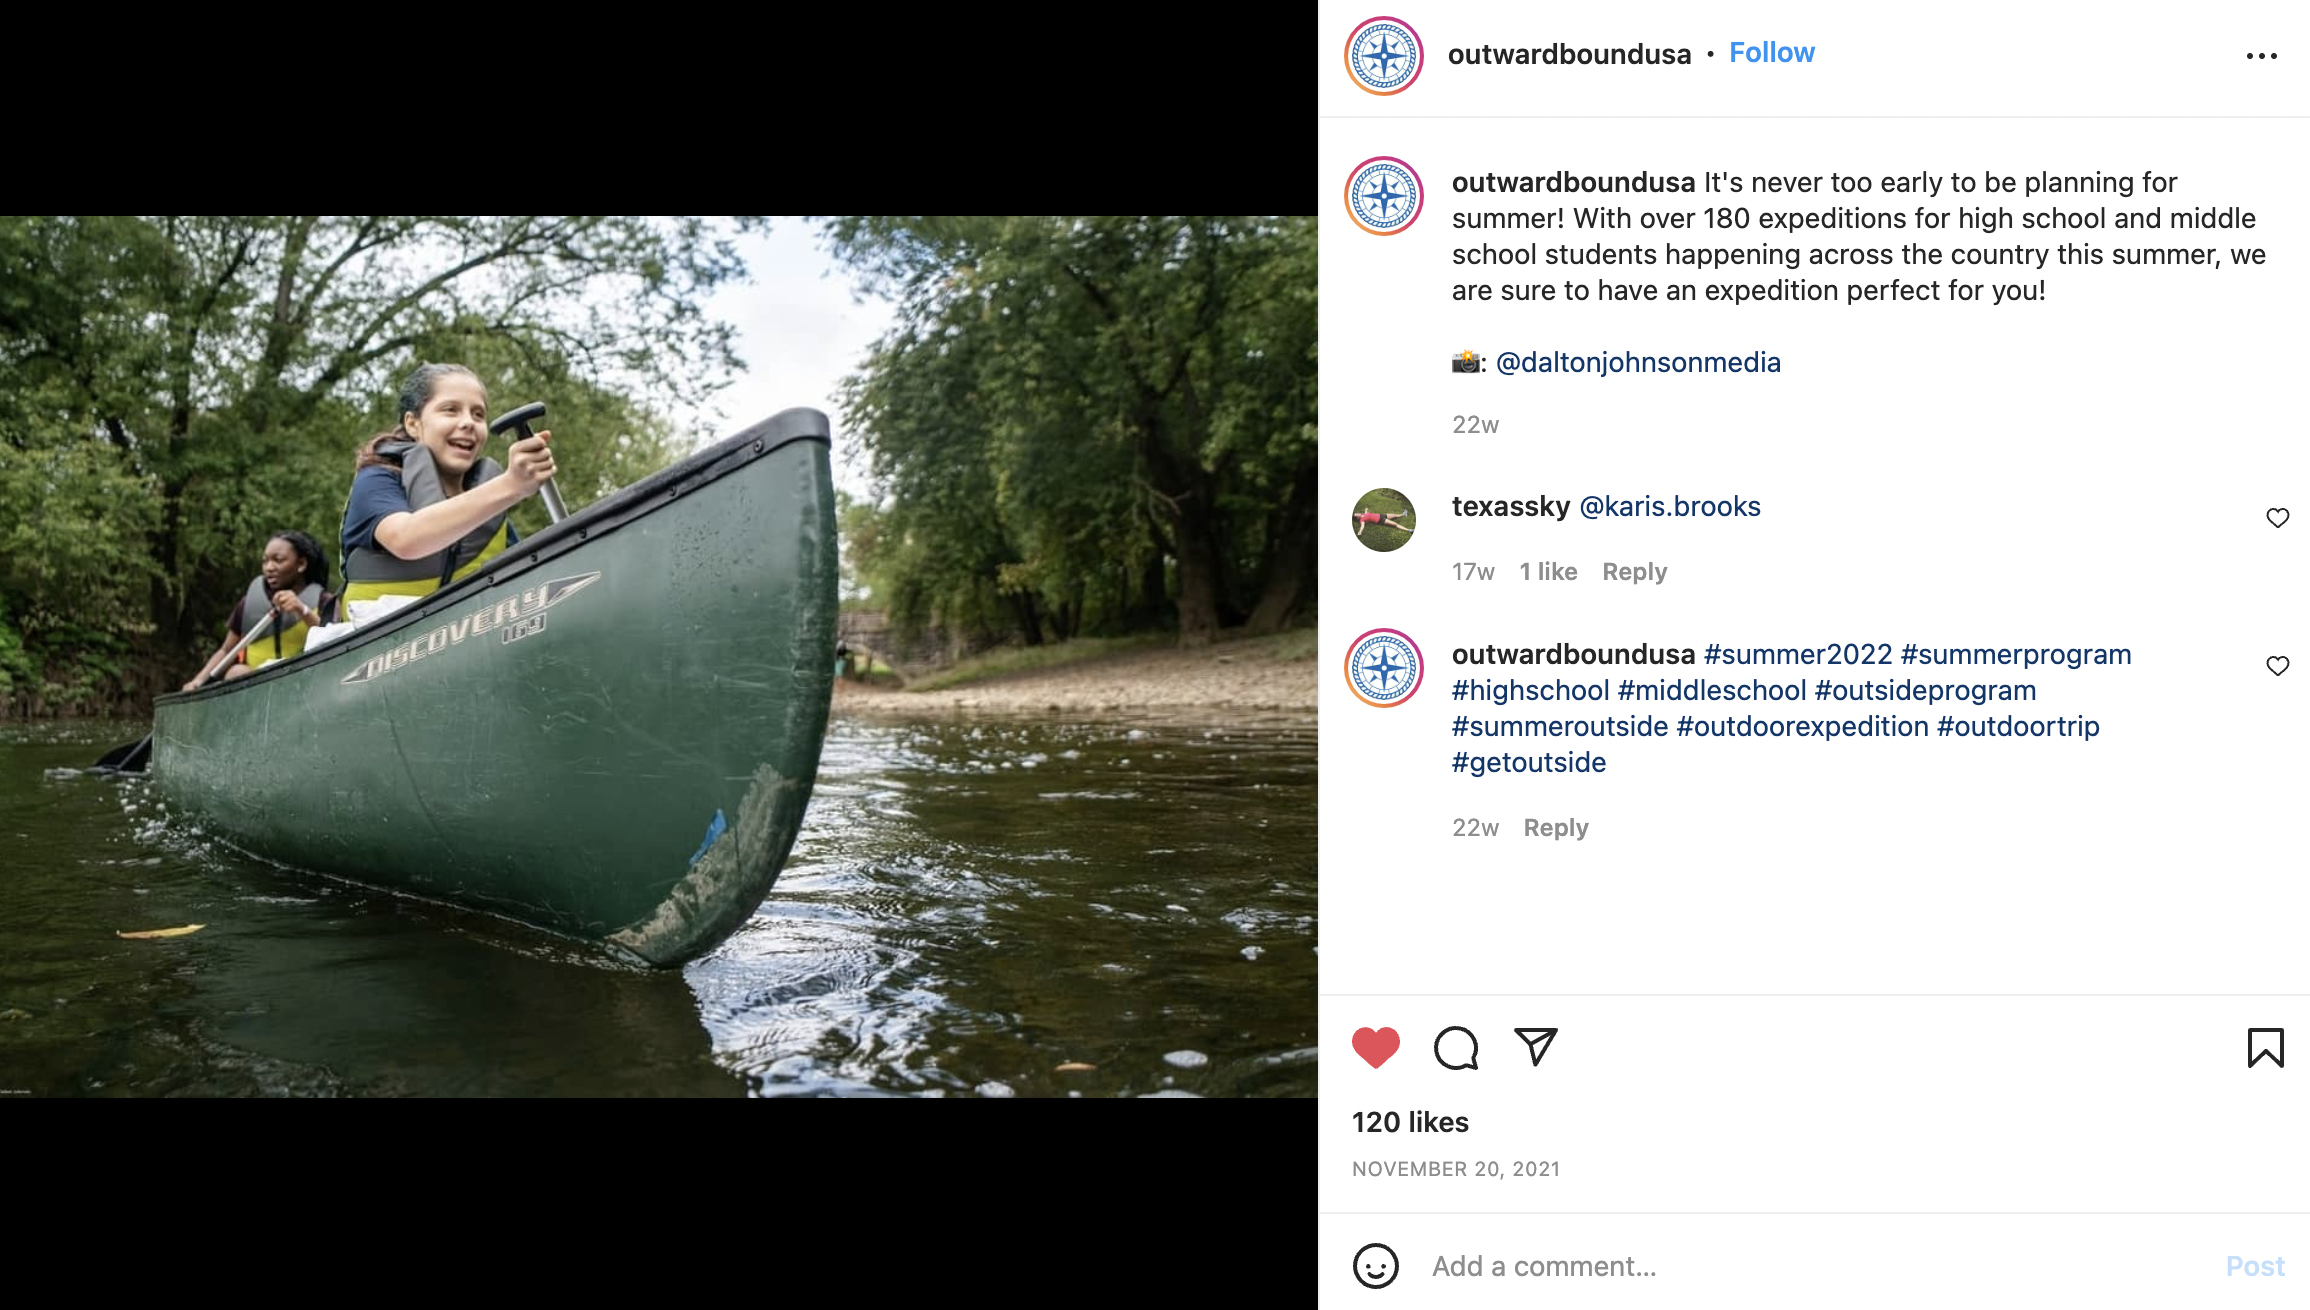
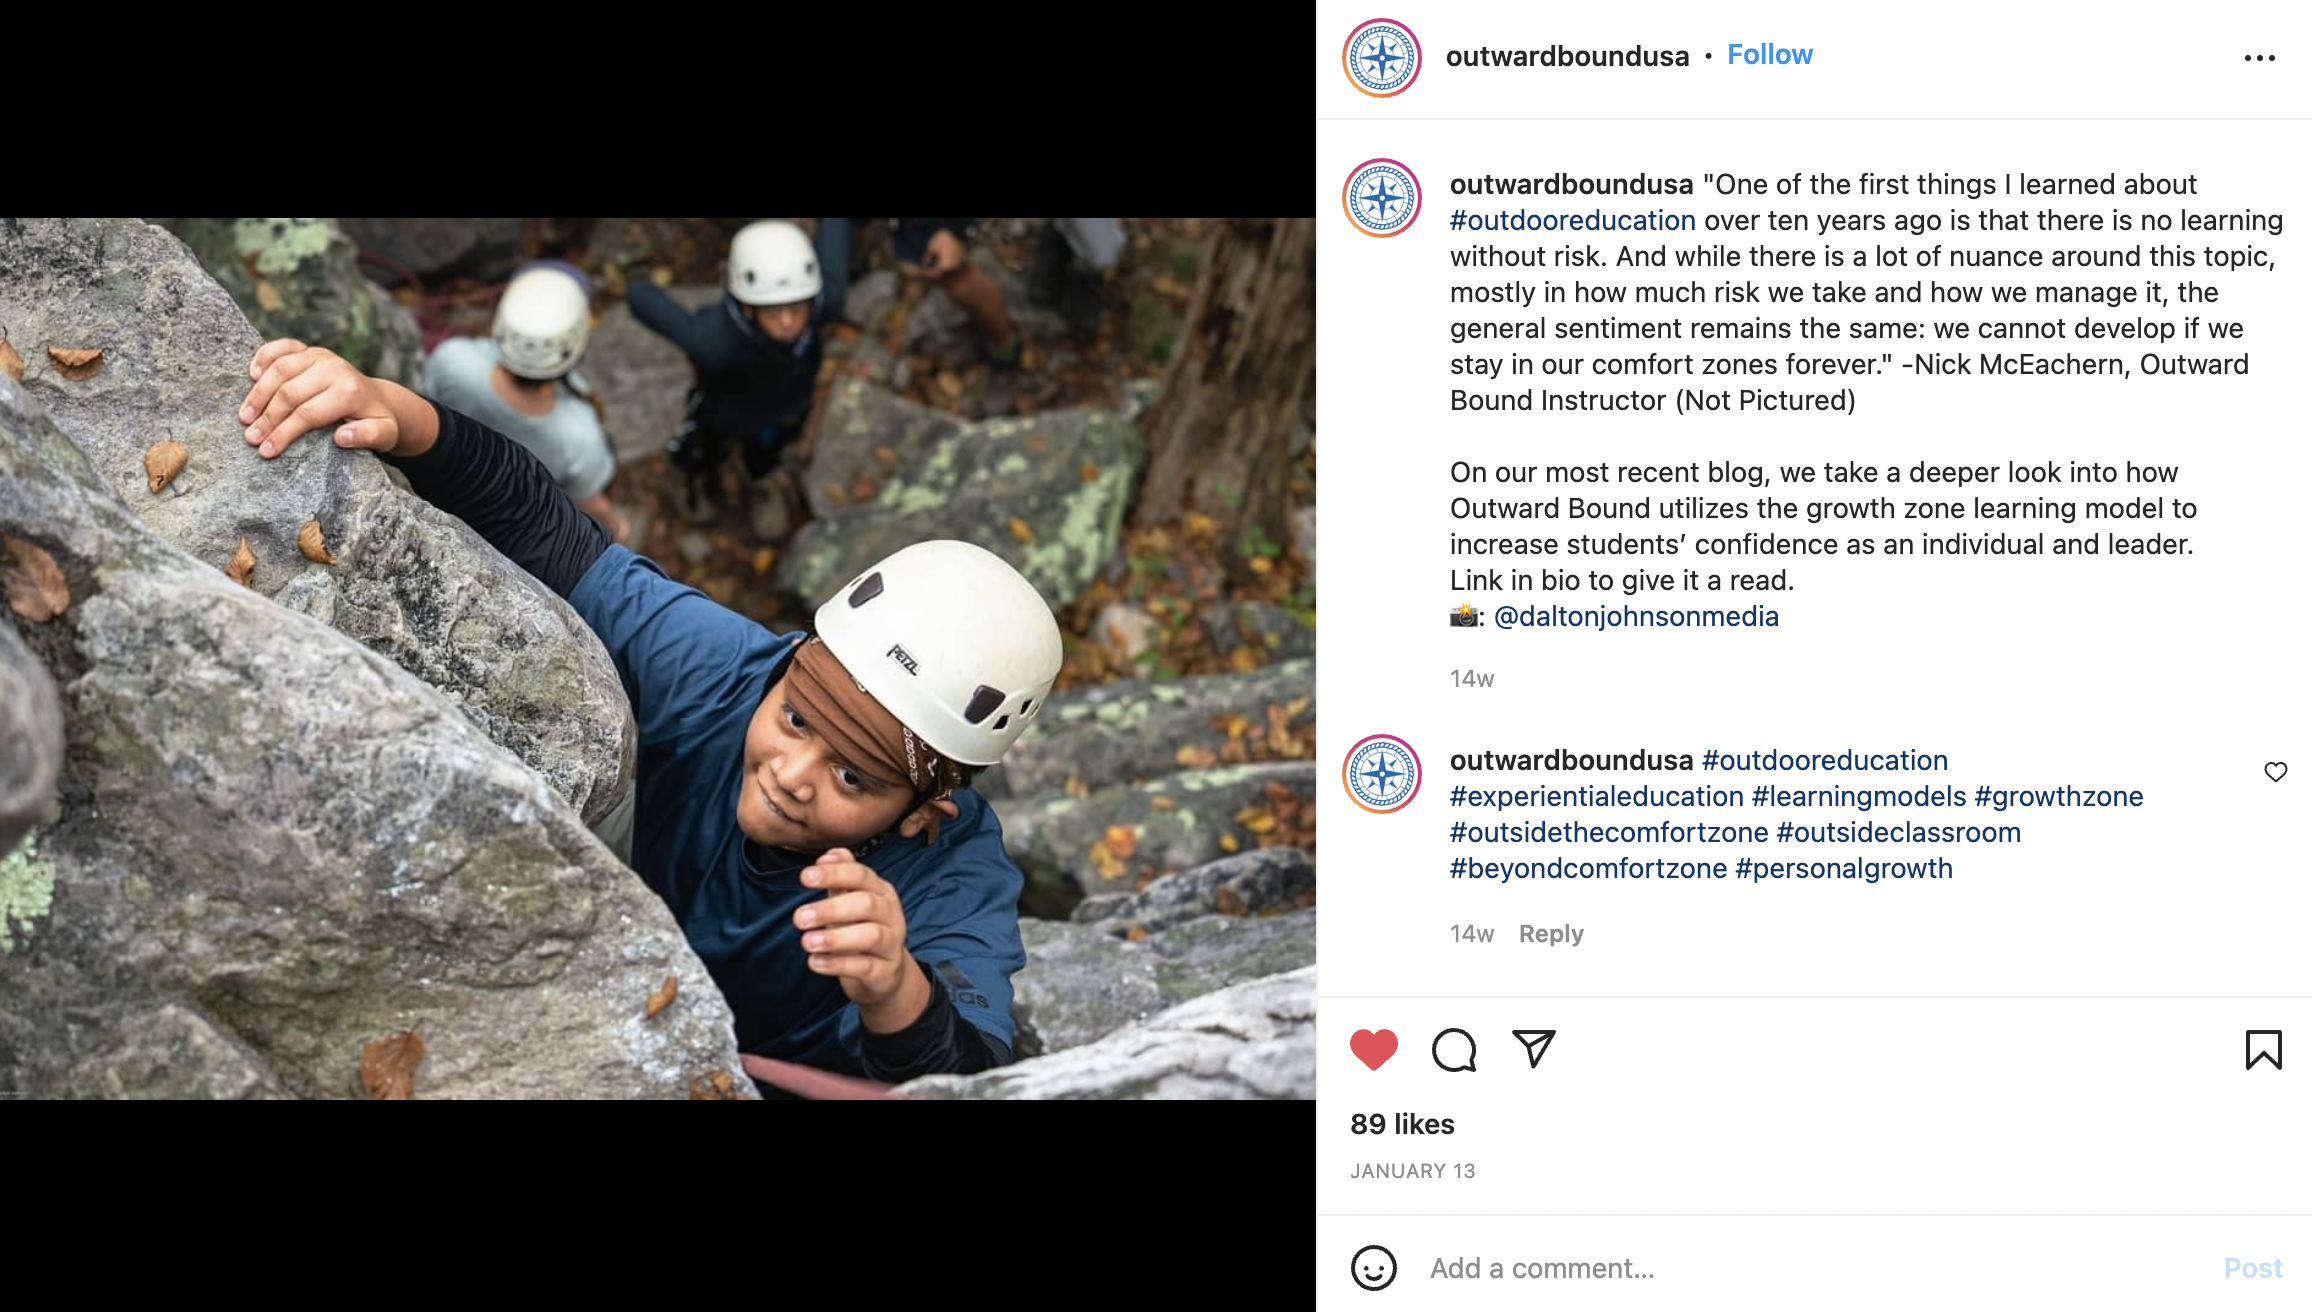
Throughout 2021, I was responsible to two major contributions to Ford Motor’s release of the Ford Bronco; the ambassador program with Andrew Muse and the Bronco Wild Fund collaboration with Outward Bound.
Ford Bronco x Andrew Muse Ambassador Program
Bronco Wild Fund x Outward Bound


Quite honestly, I would not have guessed when I made my business official (aka got a business license and started paying taxes under the business name "Dalton Johnson Media") roughly three years ago, that I would be photographing a campaign for @fordbronco or @outwardboundusa anytime soon. Realistically, I just wanted to pay my way by shooting odd jobs here and there to fuel my adventures. I really never had a list of dream clients, nor did I care to reach out to clients. While some of that has changed, my focus remains the same. I am here to live my life in accordance to my own view of success.
At first, I thought success meant scraping by, then I thought it meant making tons of money. I would hopefully say that I have matured a little bit since starting this journey, but one thing I am excited about are the opportunities that are opening up along the way.
I am ready for what is to come in this life, big and small :-)
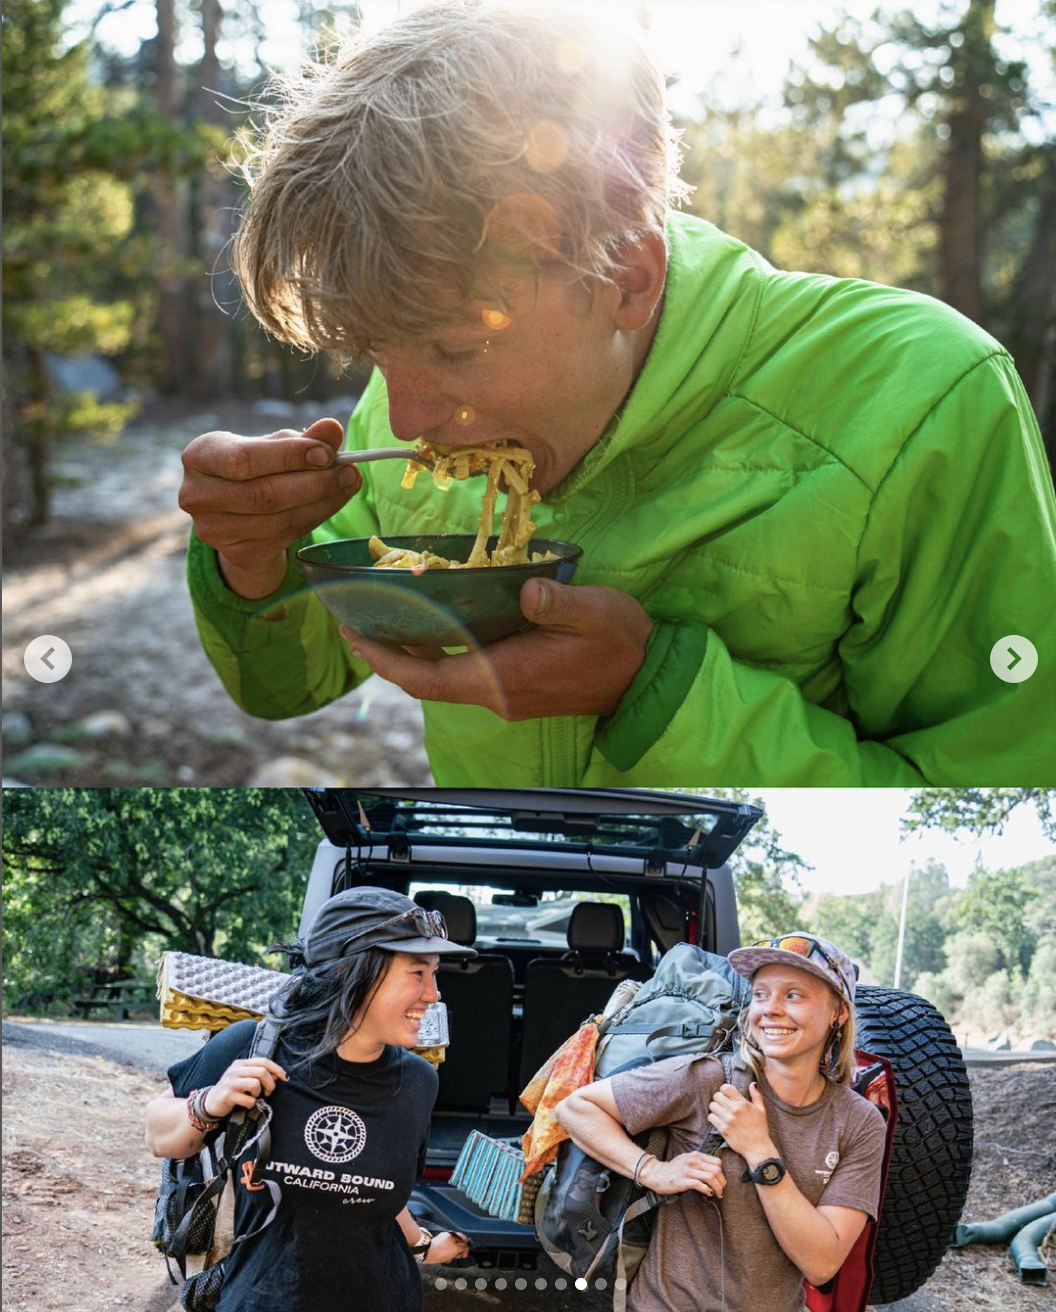
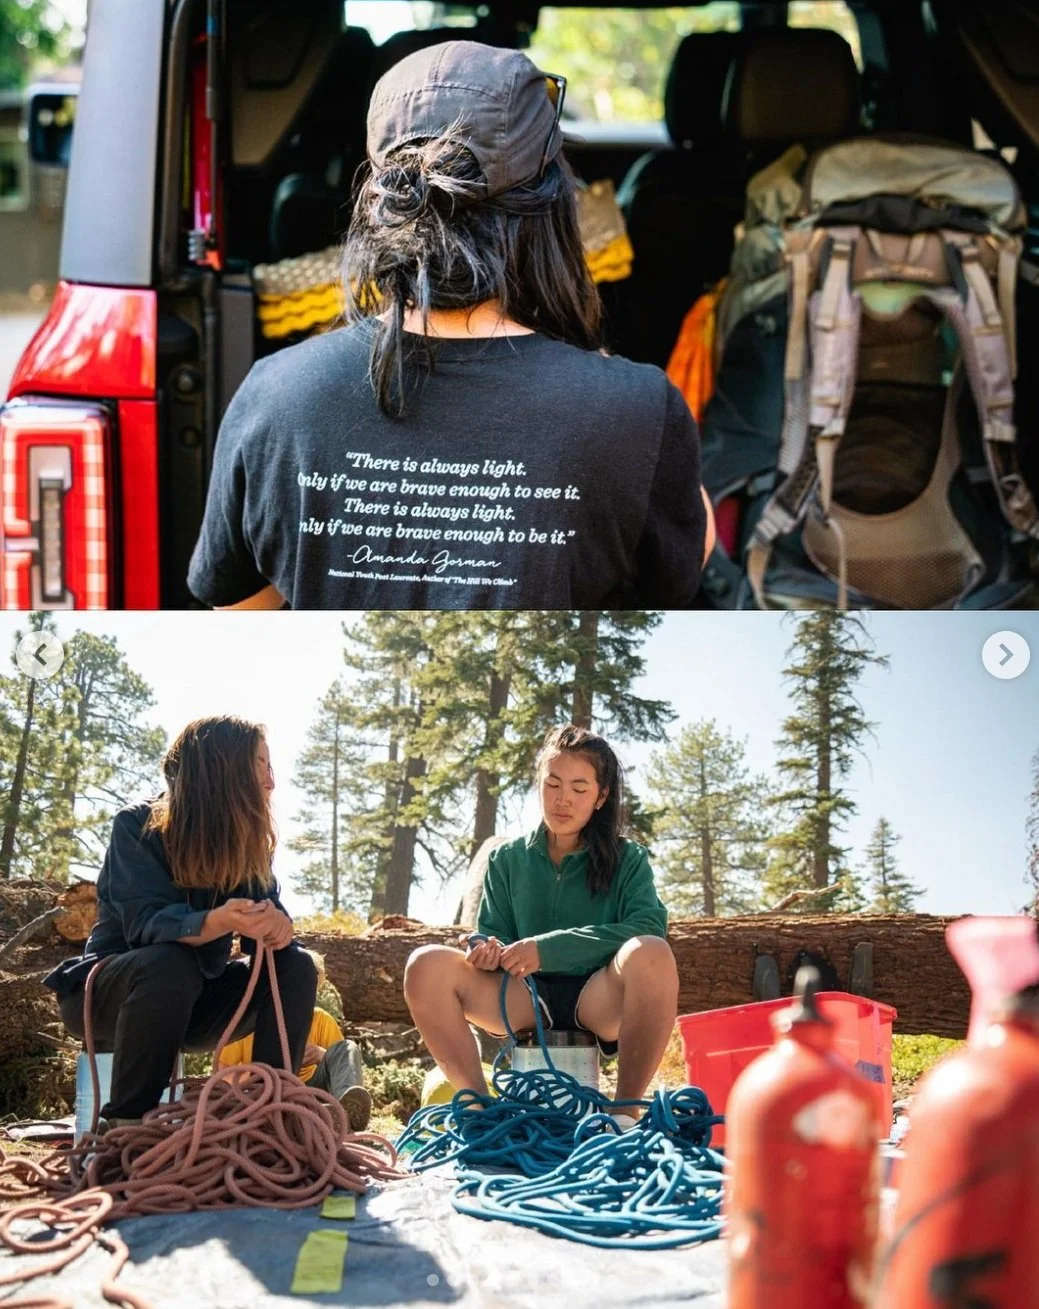
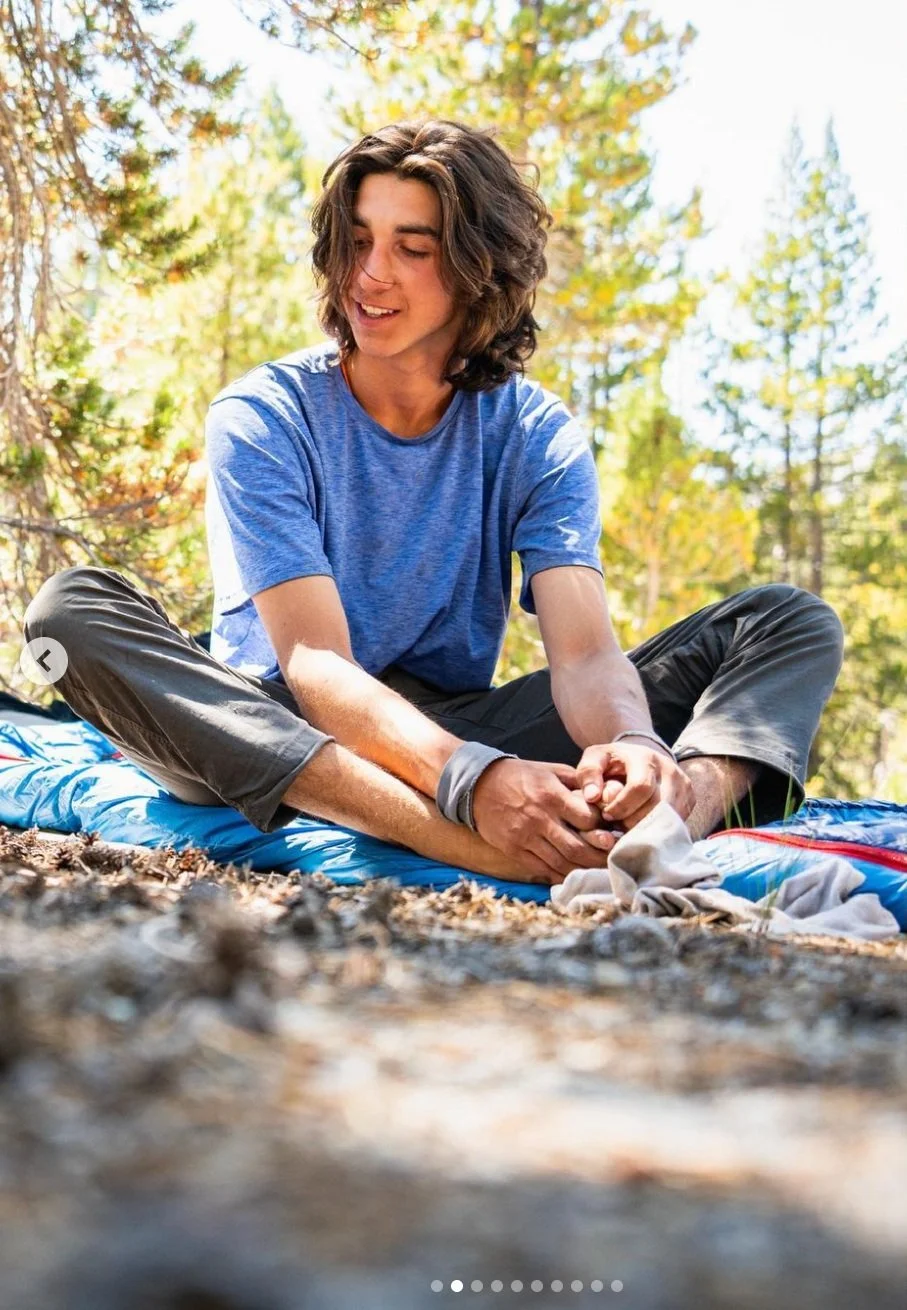
Photo Gallery


Enjoying the Meaningless
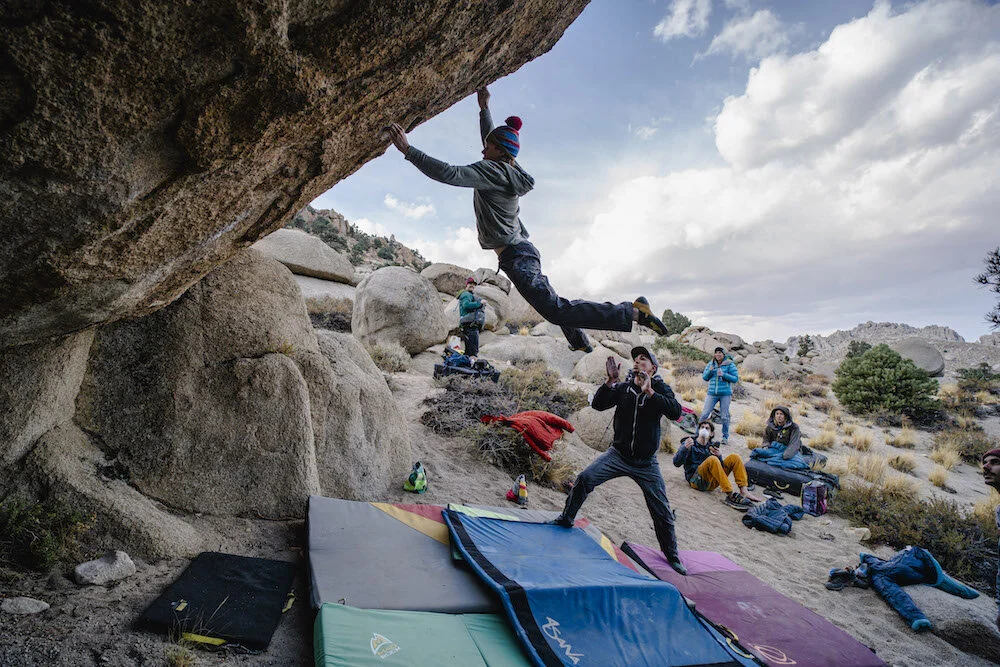
Over the last year, I have focused on climbing more than ever before. Taking trips from Joshua Tree to the Tetons to the Buttermilks to Yosemite. Throughout that time, I have been able to meet tons of people who've showed me what dedication to a craft truly looks like. For the most part, climbing is a selfish pursuit, but a pursuit that is totally meaningless. Quite honestly, nobody cares who gets to the top of a boulder, crack, mountain. Sure, we may highlight the story within a community, but there really isn't much to be said about playing on rocks.

Over the last year, I have focused on climbing more than ever before. Taking trips from Joshua Tree to the Tetons to the Buttermilks to Yosemite. Throughout that time, I have been able to meet tons of people who've showed me what dedication to a craft truly looks like. For the most part, climbing is a selfish pursuit, but a pursuit that is totally meaningless. Quite honestly, nobody cares who gets to the top of a boulder, crack, mountain. Sure, we may highlight the story within a community, but there really isn't much to be said about playing on rocks.
Now, don't get me wrong, climbing is amazing and I truly think everyone should try it. Also, the lifestyle is admirable to me. For those who "give up their lives" to pursue something they care about are truly inspiring and motivate me, behind the lens, to push my craft and perfect my meaningless pursuit. Hell, it looks like we all are in the pursuit of meaningless things 😂
Please note, this is not meant to be pessimistic. I actually love the fact and find comfort in reassuring myself that taking photographs is meaningless in the moment, just like climbing a rock. However, it is what you do once the rock is climbed, or the photograph is taken, when meaning comes into play.
As my archive continues to grow, I am currently working through the idea/narrative I have built to understand where and what meaning can be found in these images. Where that will go, I am unsure. However, I am happy to see where that can go!

Find your Ikigai to make your mission statement
At the chance of sounding like a self-help book, “Are you wandering, feeling a bit lost, and looking for a solution?” Well, I have the cure, just pay me $500… LOL! In reality, I was feeling like the above statement and was truly wandering, without much direction, until I was introduced to the concept of Ikigai. Now, I will be totally honest with you, I am not sure if Ikigai is a way-of-life, a philosophy, a concept, a practical guide to life, etc. Ikigai was introduced to me by a Jesuit Priest as he was reflecting upon his own life. While out at lunch, he shared his perspective and encouraged me to look into it for myself.
Introduction
At the chance of sounding like a self-help book, “Are you wandering, feeling a bit lost, and looking for a solution?” Well, I have the cure, just pay me $500… LOL! In reality, I was feeling like the above statement and was truly wandering, without much direction, until I was introduced to the concept of Ikigai. Now, I will be totally honest with you, I am not sure if Ikigai is a way-of-life, a philosophy, a concept, a practical guide to life, etc. Ikigai was introduced to me by a Jesuit Priest as he was reflecting upon his own life. While out at lunch, he shared his perspective and encouraged me to look into it for myself.
I get this sounds totally crazy, a Jesuit Priest introducing me to a word—that I am unsure if I can pronounce correctly—causing a spiral of events for myself after spending a few hours reading, listening, and learning about this word. Now, I am no expert on the subject, but I have dedicated at least 10-12 hours learning about the subject and more than I would like to admit thinking about the topic while wandering through the High Sierra in California.
Before this intro starts to drag,
Learning to Understand This Mysterious Word
After getting an introduction to the word, the first step was to understand. So, let’s dive into the word.
How do you say Ikigai?
As a westerner, I have no idea how to say this word! From the online translations, there is a general consensus the word should come out something like EE-KEY-GUY. That is the best I can do for you all. There is also a really solid Ted Talk on Ikigai where the speaker pronounces the word several times.
What is Ikigai?
Ikigai (ee-key-guy) is a Japanese concept that combines the terms iki, meaning “alive” or “life,” and gai, meaning “benefit” or “worth.”
Also, Ikigai can be loosely translated to “the reason for living.”
Why should you care—aka why keep reading?
If you are curious and want to learn how to look at this world through another lens, then this is an option. Ikigai can be another tool for yourself to become more self-aware. Also, if you are feeling off, the process to “find” your Ikigai is grounding as you will ask yourself a serious of questions and make lists about yourself, your skillset, and more.
Now, if you are skeptical because you feel great about yourself, then maybe this isn’t for you. However, I would make the argument that any opportunity to learn about yourself is worth the time. Heck you may learn something about yourself that unlocks that next step towards a long-term goal. At the worst, you wasted a couple more minutes of your life. Now, if you are Jeff Bezos, that would be expensive, but for most of us, this should be a fun activity.

How do YOU find YOUR Ikigai?
To “find” your Ikigai, you must put in some work. Well, actually a good amount of work. There is a process, so hopefully you have a journal, or something to write with, so that you can take notes and dive into yourself.
Learn about yourself by:
a) Making a list of what you love.
This list should include people, concepts, ideas, things, etc.
b) Make a list of what you can be paid for.
This list does not have be the things that you already are making money from, this could be a theory as well. For example, say you make sea-glass jewelry for yourself as a hobby… well maybe people would buy these and you could become a jewelry maker instead of an accountant.
c) Make a list of what are you good at.
Try not to overthink this one. What are you good at doing, making, sharing, connecting, etc. Don’t short yourself, we all know you are great at something!
d) Make a list of what the world needs.
What does this world need? What have you observed throughout your life that the world needs more of, make the list!
Ask the Following Questions:
-Where are the overlaps?
-What are the outliers?
-Is there anything that overlaps in all four categories; love, good at, world needs, and paid for?
-How does your heart differ from the voices in your head?
How I found mine and made a mission statement
Over the last couple of years, I have been working on this. Now, I will admit my attention has not been 100% given to this for years. Heck, I have given this the old college try, but the process has been helpful. Over that time, I took notes, journaled about these questions and made many lists. Eventually, I sat down and hashed out the final details. This is what it has turned out as:
“I would create a consistent message, with practical tactics, to motivate and awaken others from life's entrapments through photography and writing about adventure, nature, travel, and open ended questions.”
Now, I decided to take the step of turning my Ikigia into a mission statement. This might be a very western approach, but, none-the-less, this was a helpful opportunity for myself.
Conclusion
I hope you found this helpful, informative, or, at the very least, got something out of skimming this blog post. In the end, this is your life and you should live it as you please. There shouldn’t be anyone else taking control of you, your actions, or anything else. Be yourself and be happy with that! Be who you are supposed to be and contribute to the world as you feel you can.
What is Escapism?
Let go, allow yourself to flow and see where your feet, your thoughts, your life can take you. Free yourself of social normalities and let go. Allow yourself the space to think without criticism and fear of judgement. Be alone, be with others, that does is choice. Walk away, turn off your phone, or plug directly into the internet. What matters most is your ability to move beyond marketers grasp and free yourself from the entrapments holding you down, so you can be who you wish to be.
Free yourself
Let go, enter the flow state, and observe
your steps, your thoughts, where your actions are taking you.
Disregard social expectations and free yourself from a mental jail.
Find the space to think, without criticism or fear of judgement.
Be alone. Be with others. Be yourself.
Walk away, turn off your phone, seek boredom
For that is where your life begins.
Soar beyond marketers grasp and unshackle yourself from the consumeristic entrapments holding you down,
so you can be
who you wish to be.
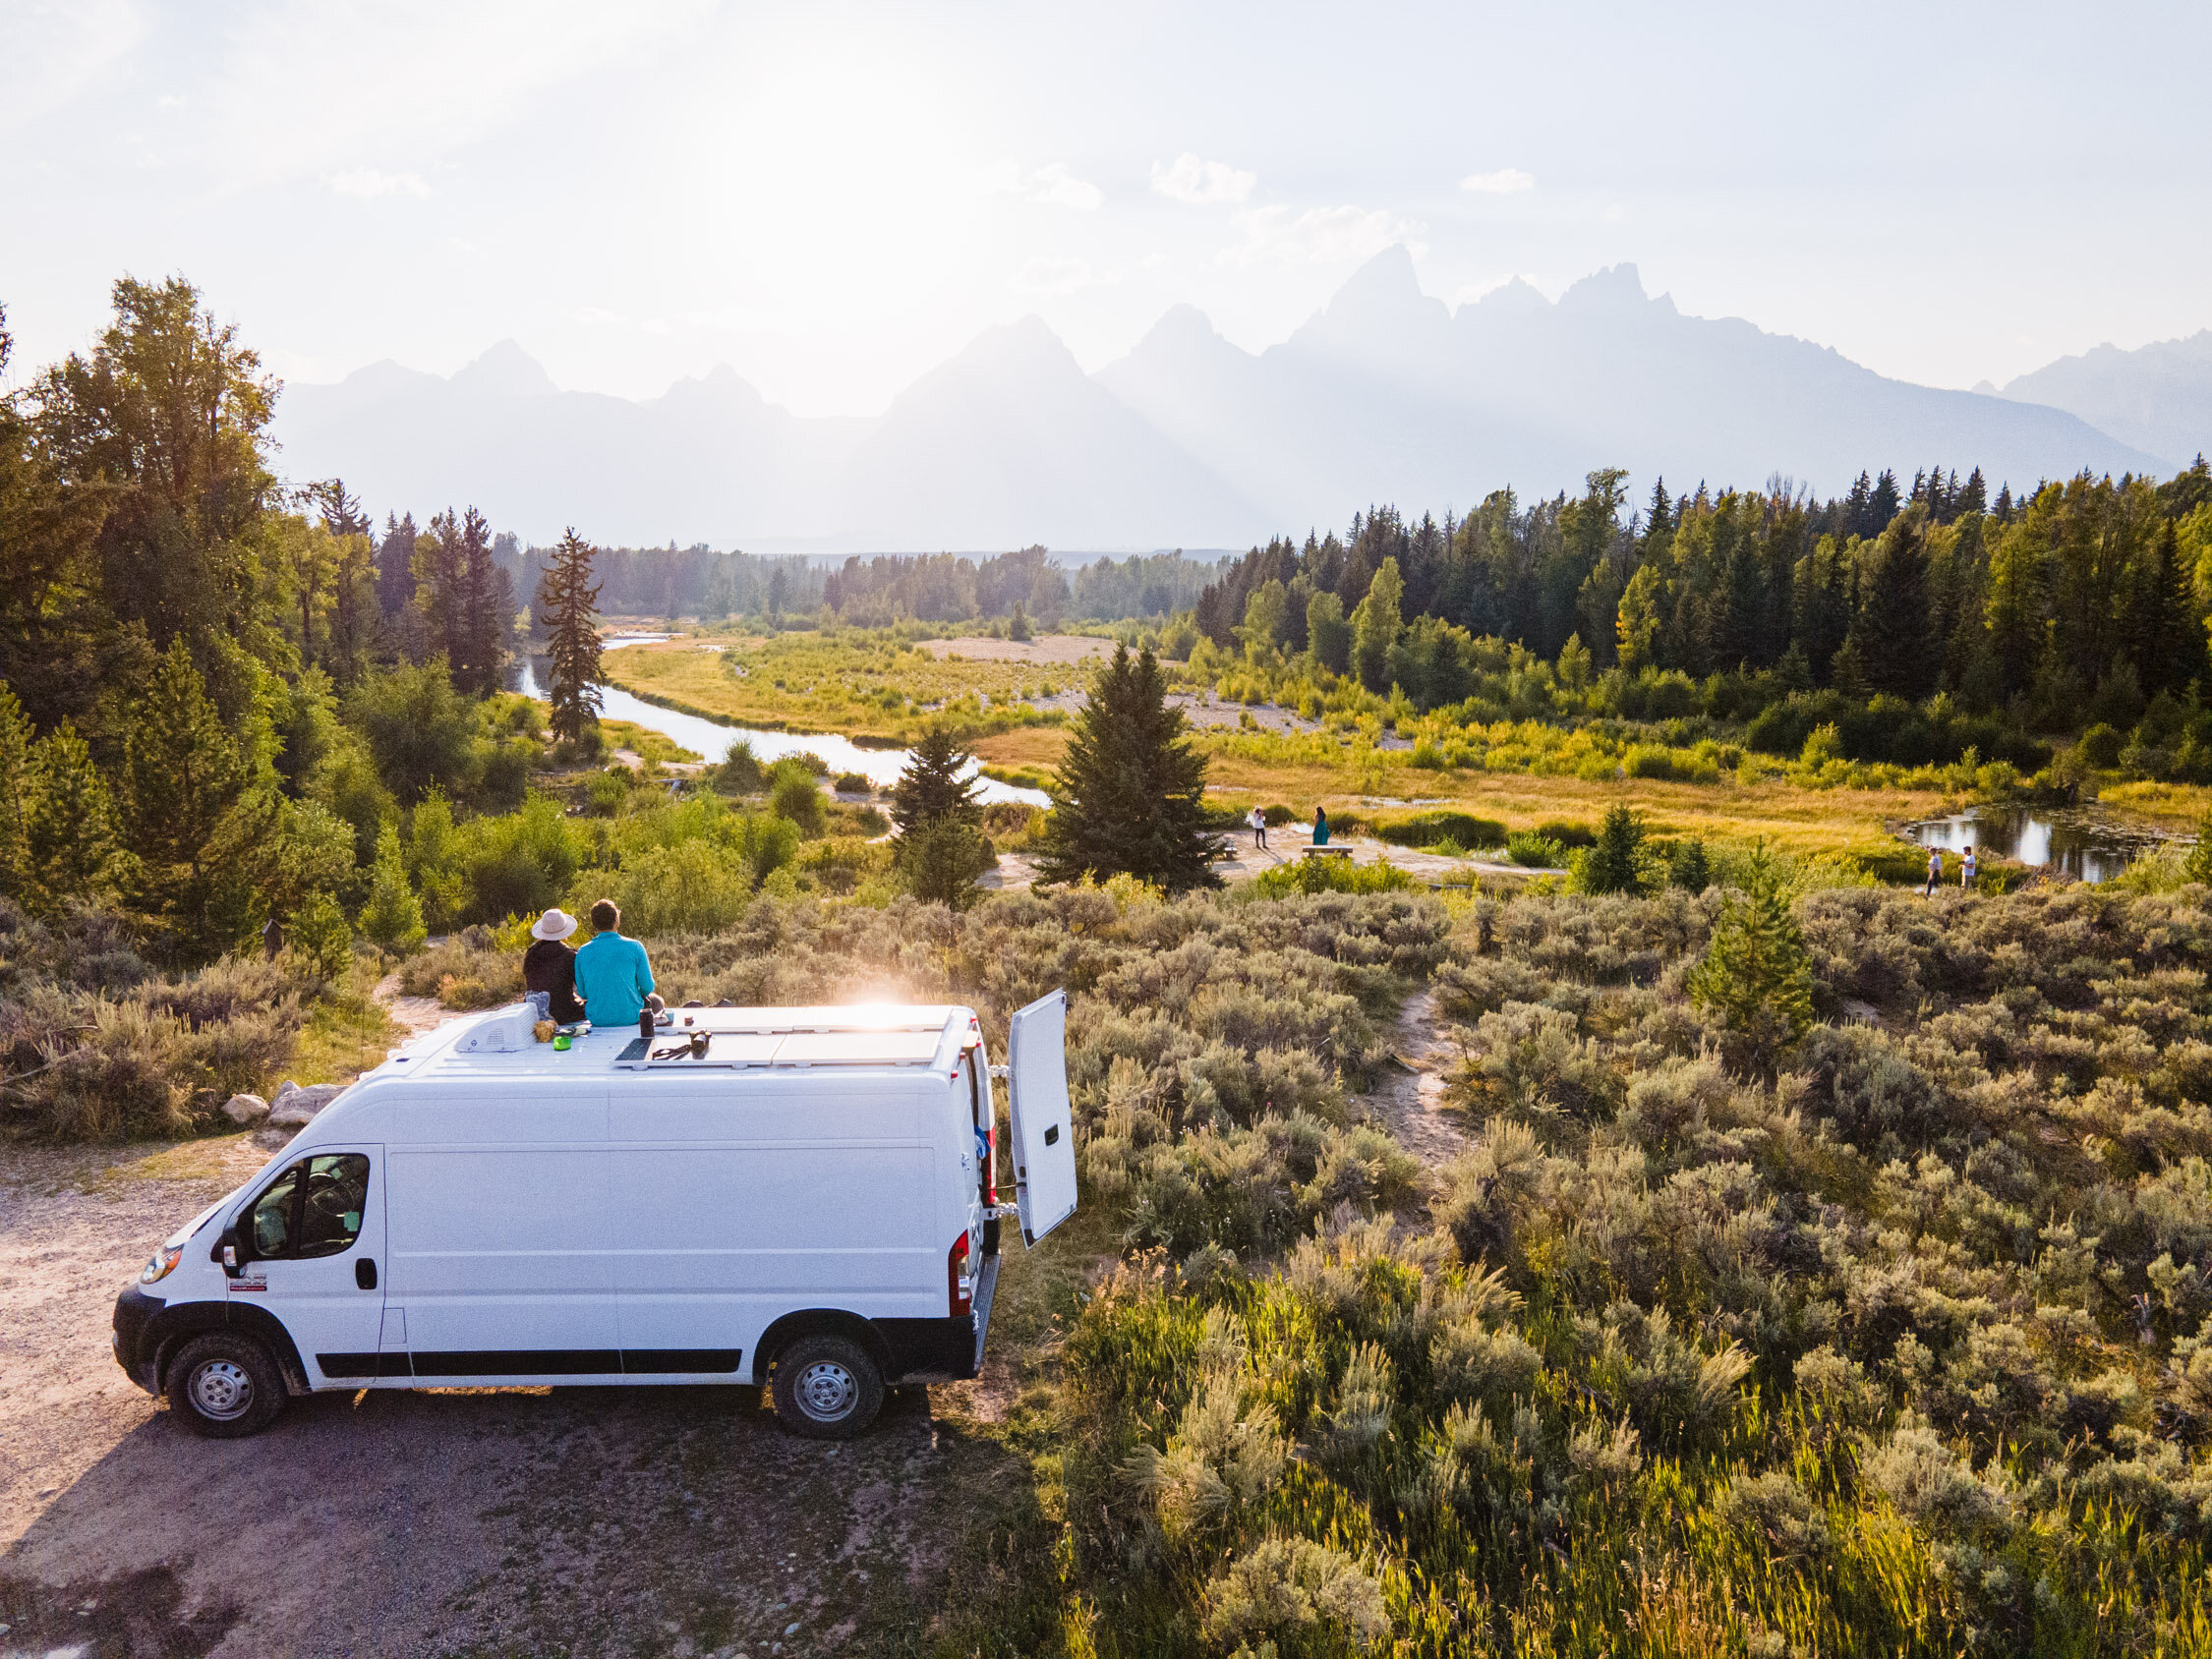
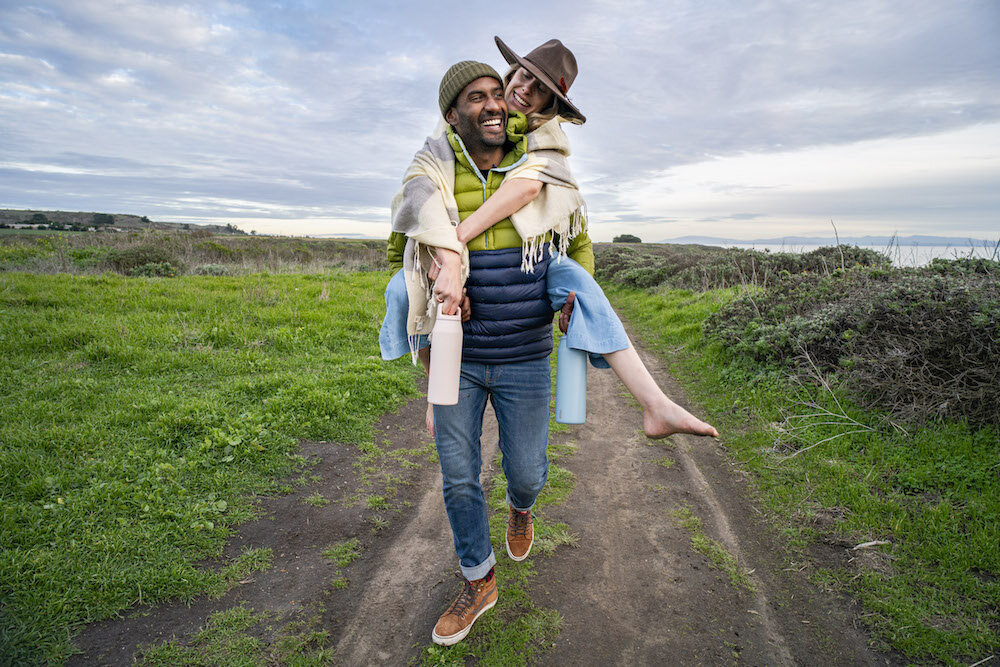
A couple enjoying the view of the Grand Tetons during a van life trip to escape their work life. Photograph by Dalton Johnson
This poem is about utilizing escapism so one can find their true self. Overall, this poem is a creative piece that looks at and criticize the modern society we have of hustle culture and the deep wounds American society has stemming from a lack of identity. As a melting pot, we have “everything” and “accept” everything according to some. However, I do not feel this to be true. Hence the reason for escapism in our individualized society. Maybe this poem will speak to somebody and they will begin down the path of finding themselves.
What is “escapism”?
The traditional definition of escapism is a mental diversion from unpleasant or boring aspects of daily life, typically through activities involving imagination or entertainment. However, with the onslaught of the digital world, escapism is now trending towards a lifestyle that avoids the digital world or transplants you into another world (literally or philosophically).
Types of Escapism:
Escapism comes in several shapes and sizes, but most involve an activity or reality distortion like the following:
van life
vacation
reading a book
watching a movie
playing video games
Discover More Creative Works by Dalton

How to overcome the fear of failing as a photographer
Earlier this year, I had the opportunity to photograph a project for MiiR. The concepts were a bit broad and sounded a little something like, “we are releasing new colors to our classic bottle and want to showcase them in a lifestyle manner. We like your work and want you to just do what you do.” Now, when I receive assignments with directions that parallel this, I am usually at a loss. The wide open instructions for a photographic assignment often intimidates me for two reasons…
Everyday we have the opportunity to chose who we surround ourselves with, so chose spending time with those who make you feel loved, build you up, and fill your cup.

Earlier this year, I had the opportunity to photograph a project for MiiR. The concepts were a bit broad and sounded a little something like, “we are releasing new colors to our classic bottle and want to showcase them in a lifestyle manner. We like your work and want you to just do what you do.” Now, when I receive assignments with directions that parallel this, I am usually at a loss. The wide-open instructions for a photographic assignment often intimidates me for two reasons:
I never know if what I am shooting is what the client wants, even-though I am following their instructions
The measure of success is a complete unknown, so does that many everything is a success?
The way I counteract this intimidation is to logically move through the process of the shoot. Which kinda looks like this:
First, set an intention.
Whenever I pick up my camera, I set an intention. This can be as simple as a word, a feeling, a thing, or a statement. From my experience, if the intention is simple, you can use it like a mantra throughout your time shooting, which in turn keeps you focused. Often, I like to select a feeling. For this shoot with MiiR, the intention was love.
Second, concept the final product.
If you know where you are going, then all you have to do is get there. However, when you are given an open-ended photography assignment, the look and feel of the final product can be worrisome. This is where a mood board can play into the equation. A mood-board is a collection of colors, images, textures, designs, words that provide direction for the final product. Once you nail this down, you’ll know what the end result should look like!
Third, work backwards.
Once the concept is finished, I start to ask myself a million questions. When I say a million, that might now be an exaggeration. I want to flesh out all of the details that I can so that I can visualize the entire shoot. From the smallest details like what will the air feel like when clicking the shutter button to the logistical nightmares like acquiring location permits. The importance here, however, is to work backward from your final product concept. This process helps illuminate the fear of failing and is very loosely outlined below:
Final product is deliver to client
How do I save my finished files?
How do I edit my images?
How do I import and backup my files from the shoot?
How do I shoot this project? (this step will require at least 200 questions)
What does the final product look like?
Finally, let go and flow.
Once I have laid the foundation, the final step is to shoot. For myself, the best way I can do this is to share everything I have prepared with the team, have a pre-production meeting so we are all on the same page, and then let go. By letting go, I allow myself to be free of critique at the moment, I can trust everyone is doing their part, and I can have fun with the project.
To Wrap Up
Anytime I receive a commercial photography assignment, I am excited for the opportunity to push my limits as a photographer. Each opportunity can be stressful, especially if the creative is ambiguous, but trusting the process you develop for yourself will help alleviate that fear of failing, or letting down a client. In the beginning, it is important to allow yourself the space, time, and freedom to make mistakes without putting yourself down. Be hard on yourself, but only in a constructive manner. Hold yourself to the highest level, but allow yourself to flow. Most importantly, enjoy the process!

Dear Baja: A see-you-later letter to my best friend
As tears run down my face and stain this paper I write to you on, I smile knowing you are chasing a deer through bushes, surfing an endless countertop filled with bread, and having your ears pet as you rest your head on lap after lap. A few months have past since I watched you laying on that mat, with an IV, holding your paw as you moved beyond this world. Since then, you have filled my dreams, often we are swimming in the lake or you are pulling me on my skateboard, but all dreams end the same way, your belly to the sky between my legs, your tongue halfway out, and your curls overwhelming my hands as I rub your belly.
Dear Baja,
As tears run down my face and stain this paper I write to you on, I smile knowing you are chasing a deer through bushes, surfing an endless countertop filled with bread, and having your ears pet as you rest your head on lap after lap. A few months have past since I watched you laying on that mat, with an IV, holding your paw as you moved beyond this world. Since then, you have filled my dreams, often we are swimming in the lake or you are pulling me on my skateboard, but all dreams end the same way, your belly to the sky between my legs, your tongue halfway out, and your curls overwhelming my hands as I rub your belly.
I wanted to thank you for the lifetime of wet nose wedges, chasing balls and sticks or whatever I threw for you, and, most of all, thank you for being my desert lover. Outside of our last three months together on the windy cliffs of Big Sur and cuddling on the beach, we kept in touch through the winds. Often I would dream of “wrestling” with you at Mom and Dad’s house, or at the river. When I went off to college, a large part of me pain for us to lay on the floor to watch a movie together, or simply go for a walk—I probably wouldn’t have gotten in as much trouble with your wisdom by my side. For six(ish) years we were apart, but time was irrelevant for us. Anytime we would reunite, the cuddles, runs, and hikes picked up right where they had left off and became all the more sweet.
At eight weeks, as a wavy ball of fur, you came home and slept in my bed. Rubbing our noses together that night, you trampled my face as you tried to find a comfortable spot on my pillow. For years to come, that would lay the foundation for our love affair. Every night we had, I would watch for your ears to perk up during pillow talks, your tail would thump, and you would army crawl your way to my side. Once beside me, I would attack you with my hands rubbing you from nose to tail, sometimes getting you so excited you would have the zoomies on the bed.
Gosh, you were such a strong swimmer! Do you recall the time, of which you hated me for a few days afterwards, that we swam across the lake? You wouldn’t leave my side and escaped the backyard, chasing me down the road as I headed off to the lake. In the review mirror, I watched you gallop down the middle of the road after me. I was supposed to meet Mom and Dad for dinner, across the lake, and thought it would be nice to swim there. After you caught me on the road, I couldn’t leave you behind. Panting in the seat next to me, your long tongue hanging out the side of your mouth and a smile on your face we headed toward the water. As I slipped into my speedo and started off, you followed. Whimpering the whole way, you made it with only a few rests. If I remember correctly, the scare on my right forearm was from your toenail that day. You slept so well that night and I’m pretty sure I was in a lot of trouble from Mom and Dad. But, I knew you could do it!
My life with you was full. You watched out for me when we slept under the stars as we shivered together through many nights. You supporting me as I cried in your fur through rough days. Our backyard adventures spiked my curiosity for what else this world offered. You taught me how to be patient and gave me responsibility. Life was no longer just about me, but it was about the two of us. You built my confidence outside of the pool deck. Heck, you even attracted a few people which lead to phone numbers. In your later years, sharing a bed was uncommon—as Mom and Dad spoiled you by giving you Brandan’s bed—but we still had our pillow talks. Your tail would thump as I came into “your room” to cuddle and I would hear about the lizards you chased up a tree or under the deck that day.
I love you pretty girl!
Your Boy
P.S. I’m sorry for the day we went fishing and I caught your tail instead of a fish! Thank you to the random fireman on the beach who taught me how to cut a barb off a hook.
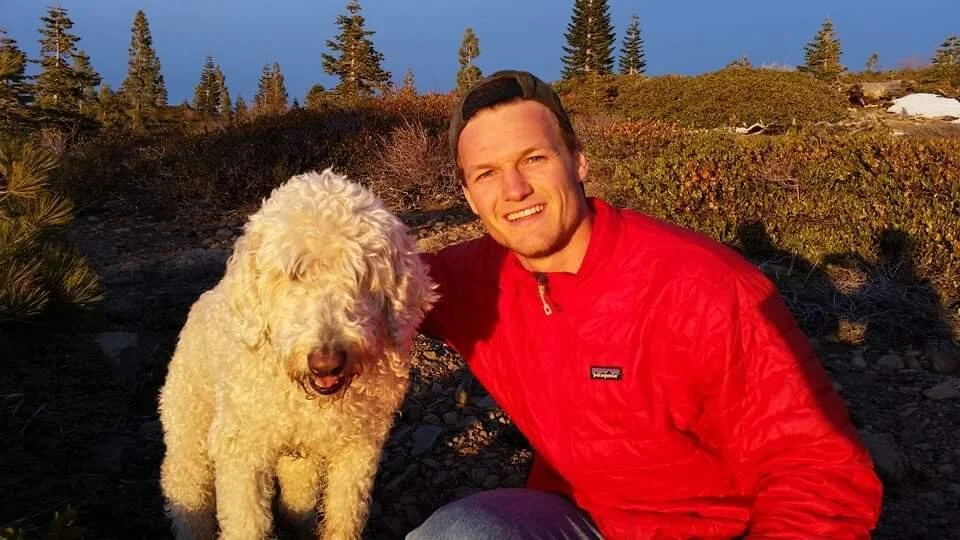


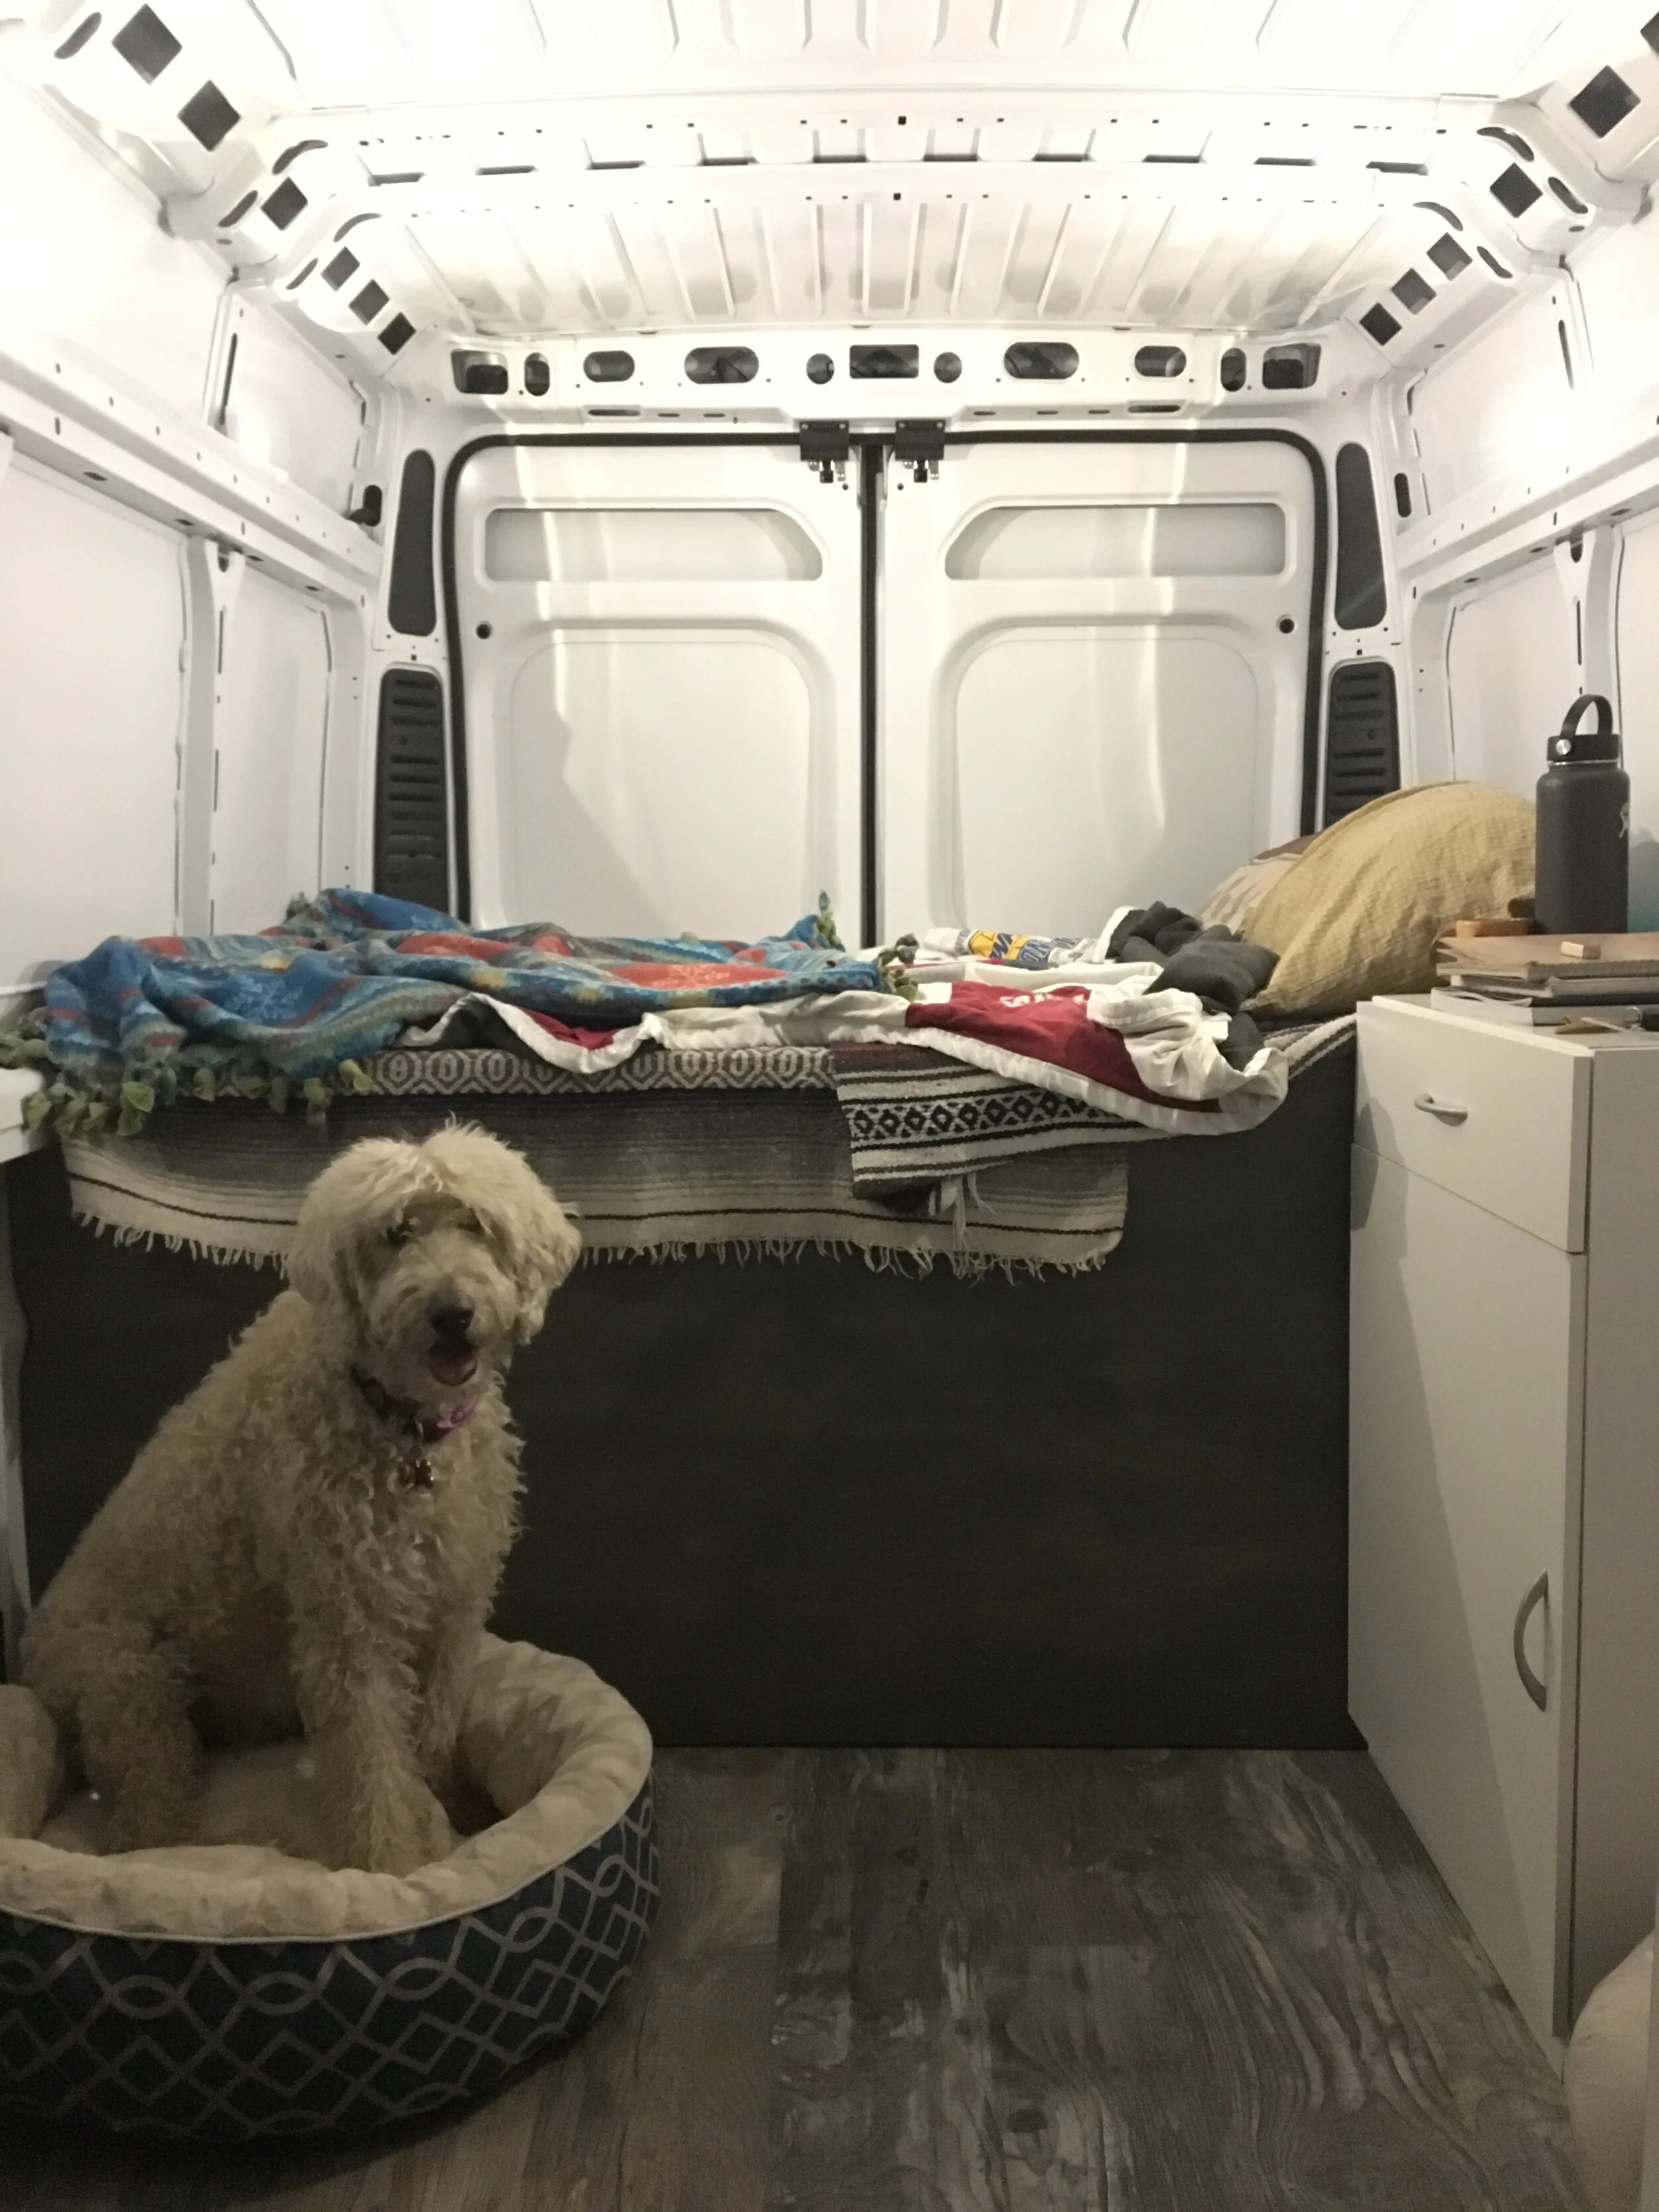


8 Must Visit places to create Timelapses in Yosemite valley
Tuolumne Meadows sits at 8,619 feet and is home to the Purple Webber lupin, a rare wildflower for California. This sub-alpine meadow is apart of Yosemite National Park and hosts ample climbing, hiking, and backpacking opportunities. Enjoy this sunset timelapse shot from the meadow.
Yosemite National Park is a magnificent natural wonderland that attracts millions of visitors every year. With its towering granite cliffs, lush forests, and meandering rivers, it offers an endless supply of photographic opportunities, including stunning time-lapse footage. If you're a photographer or videographer looking to capture the beauty of Yosemite in a time-lapse, here are some of the best places to shoot.
Discover the best places to create stunning time-lapse footage in Yosemite National Park. From iconic viewpoints like Tunnel View and Glacier Point to lesser-known spots like Olmsted Point and El Capitan Meadow, there are plenty of locations to capture the park's natural beauty. Whether you're shooting the sunrise, the sunset, or the stars, Yosemite's breathtaking landscapes offer endless opportunities for photographers and videographers alike.
Read on to learn more about the best places to create time-lapses in Yosemite National Park.
Tunnel View
Tunnel View is the quintessential Yosemite viewpoint, and for good reason. The sweeping vista of El Capitan, Half Dome, and Bridalveil Fall is one of the most iconic views in the world, and it's the perfect place to capture a time-lapse. Whether you want to shoot the sunrise or the sunset, Tunnel View offers unparalleled views of Yosemite's most famous landmarks.
Glacier Point
Another popular viewpoint in Yosemite, Glacier Point offers a similar but slightly different view to Tunnel View. From here, you can capture stunning views of Half Dome and the Yosemite Valley. This spot is especially great for sunset time-lapses, as the sun sets behind the mountains and casts a warm glow on the valley below.
Want to learn more about photographing at Glacier Point? Check out this full article on Photographing at Glacier Point
Sentinel Dome
Sentinel Dome is a relatively easy hike that rewards you with breathtaking views of Yosemite Valley, Half Dome, and the surrounding mountains. The dome itself makes a great foreground element for your time-lapse, and you can capture the changing light as the sun sets behind Half Dome.
Taft Point
Taft Point is a dramatic overlook that offers views of Yosemite Valley and the surrounding mountains. It's also a great spot to capture the Milky Way, as there's minimal light pollution here. If you're looking for a unique time-lapse, try shooting the stars as they move across the sky over Yosemite Valley.
Tuolumne Meadows
Tuolumne Meadows sits at 8,619 feet and is home to the Purple Webber lupin, a rare wildflower for California. This sub-alpine meadow is apart of Yosemite National Park and hosts ample climbing, hiking, and backpacking opportunities. Enjoy this sunset timelapse shot from the meadow.
Yosemite Falls
Yosemite Falls is one of the tallest waterfalls in North America, and it's a popular spot for photographers and videographers alike. Whether you want to capture the falls in full flow or frozen in winter, Yosemite Falls is a great spot for a time-lapse.
Want to learn more about Yosemite Falls? Check out this full article on everything you need to know about Yosemite Falls
Olmsted Point
Olmsted Point is a lesser-known viewpoint in Yosemite, but it's no less beautiful than its more popular counterparts. From here, you can capture views of Tenaya Lake, Clouds Rest, and Half Dome. The changing light as the sun sets over the mountains makes for a great time-lapse.
El Capitan Meadow
El Capitan Meadow is a peaceful spot with stunning views of El Capitan and the surrounding mountains. It's a great place to capture the changing light as the sun sets behind the mountains, and you can also shoot the stars as they move across the sky.


Timelapse Gear
Creating a time-lapse requires a few essential pieces of gear to ensure you capture the best footage possible. Here's a list of recommended gear for creating a time-lapse:
Camera: Any camera that allows for manual controls can work for creating a time-lapse. However, a camera with interchangeable lenses and a high-resolution sensor will give you more flexibility in post-processing.
Tripod: A sturdy tripod is essential for keeping your camera steady and minimizing shake or vibrations. Look for a tripod with a ball head that allows for smooth and precise adjustments.
Intervalometer: An intervalometer is a device that allows you to set the time interval between each photo during a time-lapse sequence. Some cameras have this feature built-in, but if yours doesn't, you can purchase an intervalometer as a separate device.
ND Filters: Neutral density filters reduce the amount of light entering your camera and allow you to use slower shutter speeds, which is ideal for capturing motion blur in a time-lapse. They also help to prevent overexposure when shooting in bright light.
Extra Batteries and Memory Cards: Creating a time-lapse can be a time-consuming process, and you don't want to run out of battery or storage space mid-shoot. Always bring extra batteries and memory cards with you.
Laptop and Editing Software: Once you've captured your time-lapse footage, you'll need a computer and editing software to stitch the images together and create the final video. Programs like Adobe Premiere Pro, LRTimelapse, and Final Cut Pro X are popular options for time-lapse editing.
Headlamp or Flashlight: Shooting a time-lapse can sometimes take hours, and it's important to have a light source to help you navigate in the dark, especially if you plan on capturing the Milky Way.
By having the right gear, you can create stunning time-lapse footage that showcases the beauty of Yosemite National Park.
Me soaking in the afternoon sun while on a winter trip in Yosemite to create time-lapses. Photograph by Dalton Johnson
Yosemite National Park is an incredible destination for photographers and videographers, and these spots are some of the best places to capture stunning time-lapse footage. Whether you're shooting the sunrise, the sunset, or the stars, Yosemite's beauty will not disappoint. Just remember to check the weather and be prepared for changing conditions, and you're sure to capture some incredible footage.
Discover more of Yosemite National Park
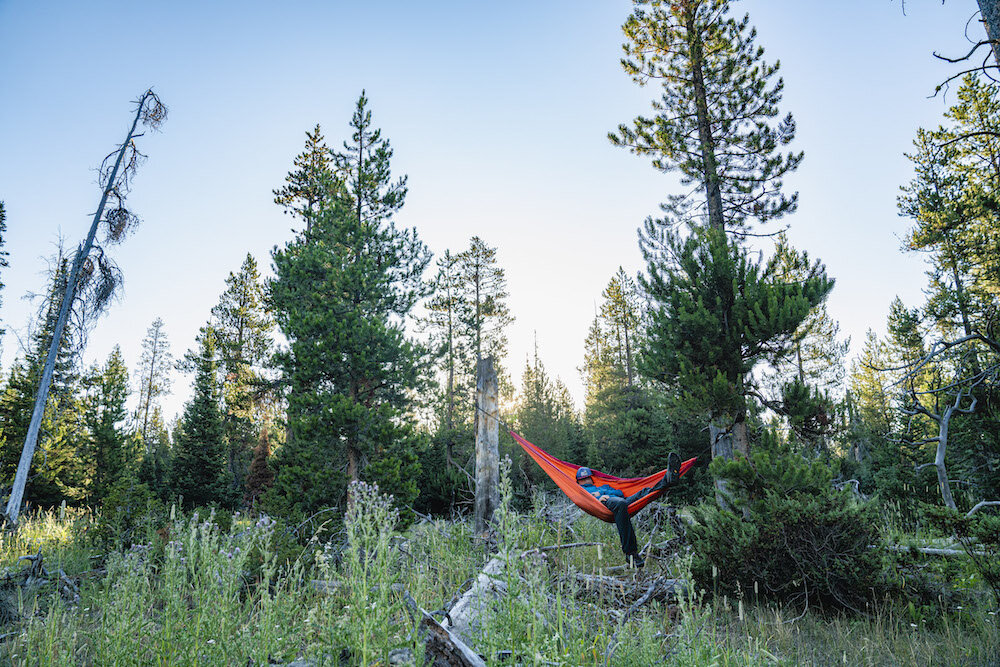
Four Must-Chill Hammock Spots
The real question is, “When was the last time you were upset after relaxing in a hammock?” As summer approaches and daylight extends well beyond that of a 9-5 job, what better way to spend your evening than in a hammock, maybe with a book or journal. For myself, living on the road my work hours are all over the map, but whenever I can find a place to hang a hammock and take in the view, I am in my happy place. Below are four of my favorite spots that I have hung a hammock.
The real question is, “When was the last time you were upset after relaxing in a hammock?” As summer approaches and daylight extends well beyond that of a 9-5 job, what better way to spend your evening than in a hammock, maybe with a book or journal. For myself, living on the road my work hours are all over the map, but whenever I can find a place to hang a hammock and take in the view, I am in my happy place. Below are four of my favorite spots that I have hung a hammock.
#1 GRAND TETON NATIONAL PARK, WY
Not far from the trailhead that provides access to the Grand Teton you will find a river and a few groves of evergreens. After a long day of climbing, trail running, and snapping photos, I found this spot, hung my hammock, and, as you can see, didn’t do much work. But that might have been the goal.
Location: https://goo.gl/maps/EhpmtxRhMCJcagnB9
#2 BIG COTTONWOOD CANYON, UT
Sometimes life is most enjoyed when you remember that you are always a kid. While visiting Salt Lake City I found myself climbing in Big and Little Cottonwood. On a rest day from rock climbing, I went for a fun hike to Donut Falls (check this place out if you have the chance) and then headed out on a run with a pack filled with my journal and hammock. At first, I thought I was going to dig deep into the psyche, but realistically I ended up swinging in the hammock, falling on my face a few times, and laughing at myself.
Location: https://goo.gl/maps/XE2XvySGViWFA34T9
Finding a perfect spot to hang a hammock in Colorado during the summer. Photograph by Dalton Johnson
#3 LEMON RESERVOIR, CO
Lemon reservoir has a small rock climbing crag where you can easily climb with friends, or top-rope solo if you are alone, in the morning and evening. During the day, it’s quite hot, so I escaped the heat among the aspen groves of Colorado, swinging in a hammock, with a book, and my legs kicked up. I’ll probably have a bite to eat as well, applesauce with granola has been my current snack of choice.
Location: https://goo.gl/maps/k9DuUe8tvDRfcQgE7
#4 LAKE TAHOE, CA
Growing up just outside this adult playground, Lake Tahoe’s coastline is lined with perfect places to hang a hammock and journal. The blue water will put you in a trance as you stare, so watch out if you are on a timeline. Better yet, let go of your timeline and learning to take in the environment this earth has to offer.
Location: https://goo.gl/maps/HN8pjnMcNs8uAbWP9
Discover more Adventures


Lake Sabrina | Nature Poem, Water Rights, Eastern Sierra
While hiking around Lake Sabrina—just outside of the city of Bishop, CA— in the winter, I sat down to watch the sun poke out from behind the range in the distance. As the wind picked up, I hunkered behind a rock to write this poem. Lake Sabrina is a summer destination that keeps holds water for Los Angeles. In this poem, I review an internal dialogue I have with myself about the human race.
Lake Sabrina
Green and tall, you stand above the blanket of white, frozen to the earth.
I forget, you are to thank for my breath of air, and
Do not consider you on this walk.
My hands are cold and I want the sun to crest
Shining those warming rays of light upon my bundled body
Which resides next to the clear water of Lake Sabrina.
Damned to make power and supply water
So a desert can be an oasis
A few hundred miles away
Crunching under my feet, I leave a trail in the snow
Showing my past
But you can’t tell how I held myself with each step.
Cold and worried, I would have been hunched over. Maybe,
I was proud of my human brothers for thinking ahead
But then again, I might have been ashamed of their greed.
Unable to support myself, I recognize the need
For comfort, grocery store meats and veggies, and tap water.
But, I dream of sustaining myself and a family, one day.
For now, I will continue to breath and look around
Bask in the sun’s warmth and
Consider these evergreens spotted across the landscape.
What is this poem about?
While hiking around Lake Sabrina—just outside of the city of Bishop, CA— in the winter, I sat down to watch the sun poke out from behind the range in the distance. As the wind picked up, I hunkered behind a rock to write this poem. Lake Sabrina is a summer destination that keeps holds water for Los Angeles.
In this poem, I review an internal dialogue I have with myself about the human race. What has been our role in sustaining society, yet relocating the natural resources of this planet. In terms of global warming, how far are we willing to go before we will realize our impact? Are we greedy, or, are we uneducated about the long term impacts of our actions?
Let me know what you think in the comments below. This piece is made as art, which means it is meant to be a conversation starter.