
Here's The Difference Between Backpacking and Camping
The allure of the great outdoors, with its untamed beauty and serenity, beckons adventure enthusiasts to seek solace beyond the urban hustle. Amidst the vast array of outdoor activities, backpacking and camping stand out as two distinct yet equally captivating choices. Both promise a rendezvous with nature, but their approaches, equipment requirements, and overall experiences set them apart. In this comprehensive guide, we will explore the nuances of backpacking and camping, helping you decipher the ideal outdoor adventure tailored to your preferences.
The great outdoors offers a perfect escape from city life, with backpacking and camping as two popular ways to experience it. While both bring you closer to nature, they each offer different experiences, gear needs, and approaches. This guide breaks down the key differences between backpacking and camping to help you choose the adventure that’s right for you.
Feeling small while backpacking in the High Sierra. Photo by Dalton Johnson
What is Backpacking?
Backpacking is an adventurous way to explore the outdoors by carrying everything you need in a single pack and journeying across remote landscapes. Unlike traditional camping, which often focuses on staying in one location, backpacking is about movement and discovery, challenging you to cover longer distances while relying on minimal gear. This section covers the core aspects of backpacking, from the necessary equipment and fitness requirements to the sense of adventure and skill it demands.
Adventure and Exploration: Backpacking encapsulates the thrill of venturing into the unknown. It involves strapping on a loaded backpack and setting off on a journey through the woods, desert, or mountains. The emphasis is on covering substantial distances (8 to 20 miles a day), embracing a nomadic lifestyle while immersed within nature, and reconnecting oneself in the raw beauty of nature.
Gear and Equipment: "Travel light, travel far" is the mantra of backpacking. Lightweight and compact gear are the staples, carefully chosen to prioritize functionality without compromising mobility. What we look for in backpacking gear is determined by where we are going and the needs of the trip, but a minimalist approach ensures every piece of equipment serves a purpose, facilitating endurance during long treks.
A few pieces of gear we love and use while backpacking:
High Above hip pack; perfect for day hiking around after setting up camp
Big Agnes Flycreek 2p; our favorite tent
Duration of Stay: Characterized by backpacking’s transient nature, backpacking involves continuous movement, covering significant distances over several days or weeks. The journey itself becomes an integral part of the adventure, with each day presenting new landscapes and challenges. Sometimes you hike 5-10 miles a day, other trips you spend 20-30 miles a day. That is your choice.
Skill Level and Fitness Requirements: Backpacking demands a higher level of fitness and outdoor skills than camping. Navigating challenging terrains, unpredictable weather conditions, and carrying a loaded backpack require physical endurance, survival skills, and a certain level of outdoor proficiency.
Comfort and Pace: Emphasizing a faster pace and a nomadic lifestyle, especially when doing a thru-hike like the Tahoe Rim Trail, backpacking encourages adventurers to explore new territories and adapt to the challenges of the trail.

Using a van to camp on BLM in Sedona, AZ. Photo by Dalton Johnson
What is Camping?
Camping is a way to connect with nature at a more relaxed pace, allowing you to set up a base camp and settle into a single area. Unlike backpacking, which involves covering long distances, camping provides the opportunity to enjoy a chosen spot and make it your own, often with more comfortable gear and amenities. This section will cover the essentials of camping, from setting up a cozy campsite to the accessibility and ease it offers for all kinds of outdoor enthusiasts, whether you're a beginner, family camper, or seasoned nature lover.
Adventure and Exploration: While camping also offers adventure, it often provides a more localized experience. Campers can establish a base camp, allowing for day hikes and exploration around a specific area. The focus is on enjoying the immediate surroundings with the option for shorter excursions. Some of the top adventures while camping include surfing, mountain biking, rock climbing, hiking, and photography.
Gear and Equipment: Campers enjoy the luxury of bringing larger and more comfortable gear, as they don't have to carry it over long distances. This includes spacious tents, comfortable sleeping pads, and more elaborate cooking setups, emphasizing a comfortable and enjoyable campsite for an extended stay.
A few pieces of gear we love and use while camping:
High Above hip pack; perfect for day hiking or mountain biking around your campsite
Solo Stove, great for campfires anywhere
DoD camping king; perfect for cooking meals while camping
Duration of Stay: Camping can range from a single overnight stay to an extended period, depending on the type of camping chosen. Campers have the flexibility to decide the duration of their stay, allowing for a more leisurely experience.
Skill Level and Accessibility: While camping also requires basic outdoor skills, it may be more accessible for individuals with varying fitness levels. Car camping, in particular, provides a comfortable experience without the physical demands of backpacking, making it suitable for families and beginners.
Comfort and Pace: Offering a slower pace and a more relaxed environment, camping allows individuals to set up a base camp, providing a comfortable space to unwind, enjoy nature, and engage in various activities without the need for constant movement.

Sleeping in a tent while on a backpacking trip around Lake Tahoe, CA. Photo by Dalton Johnson
What’s The Difference between Backpacking and Camping:
Adventure and Exploration:
Backpacking and camping offer distinct outdoor adventures, each with a unique approach to exploration. Backpacking is ideal for those seeking a more intense, dynamic experience, where the journey involves trekking through challenging, often remote terrains, embracing the thrill of distance and discovery along the way. On the other hand, camping provides a more localized adventure, allowing you to set up a base camp and explore nearby areas through day hikes and shorter outings. While both options offer a chance to connect with nature, backpacking emphasizes covering substantial ground, while camping focuses on enjoying a specific location and its immediate surroundings.
Backpacking: Ideal for the thrill-seekers and those craving the excitement of venturing into the unknown. Backpacking takes you on a journey through challenging terrains, where each step brings new discoveries and unforeseen challenges. The emphasis is on covering substantial distances and immersing yourself in the raw beauty of nature.
Camping: While camping can also offer adventure, it often provides a more localized experience. Camping allows you to establish a base camp, providing the opportunity for day hikes and exploration around a specific area. The focus is on enjoying the immediate surroundings with the option for shorter excursions.
Gear and Equipment:
Backpacking and camping differ greatly in terms of gear and equipment needs. For backpacking, the focus is on minimalism; backpackers select lightweight, compact gear to ensure mobility and endurance on long treks. Every item is chosen for functionality, keeping weight to a minimum while meeting essential needs. In contrast, camping allows for more comfort and convenience, with campers bringing larger, more luxurious items like spacious tents, cushy sleeping pads, and full cooking setups. Without the need to carry everything on their backs, campers can prioritize a comfortable, well-equipped campsite for a relaxed and extended stay.
Backpacking: The mantra here is 'travel light, travel far.' Backpackers carefully select lightweight and compact gear, emphasizing functionality without compromising mobility. A minimalist approach is crucial, ensuring that every piece of equipment serves a purpose while remaining manageable during long treks.
Camping: Campers have the luxury of bringing larger and more comfortable gear since they don't have to carry it over long distances. This includes spacious tents, comfortable sleeping pads, and more elaborate cooking setups. The emphasis is on creating a comfortable and enjoyable campsite for an extended stay.

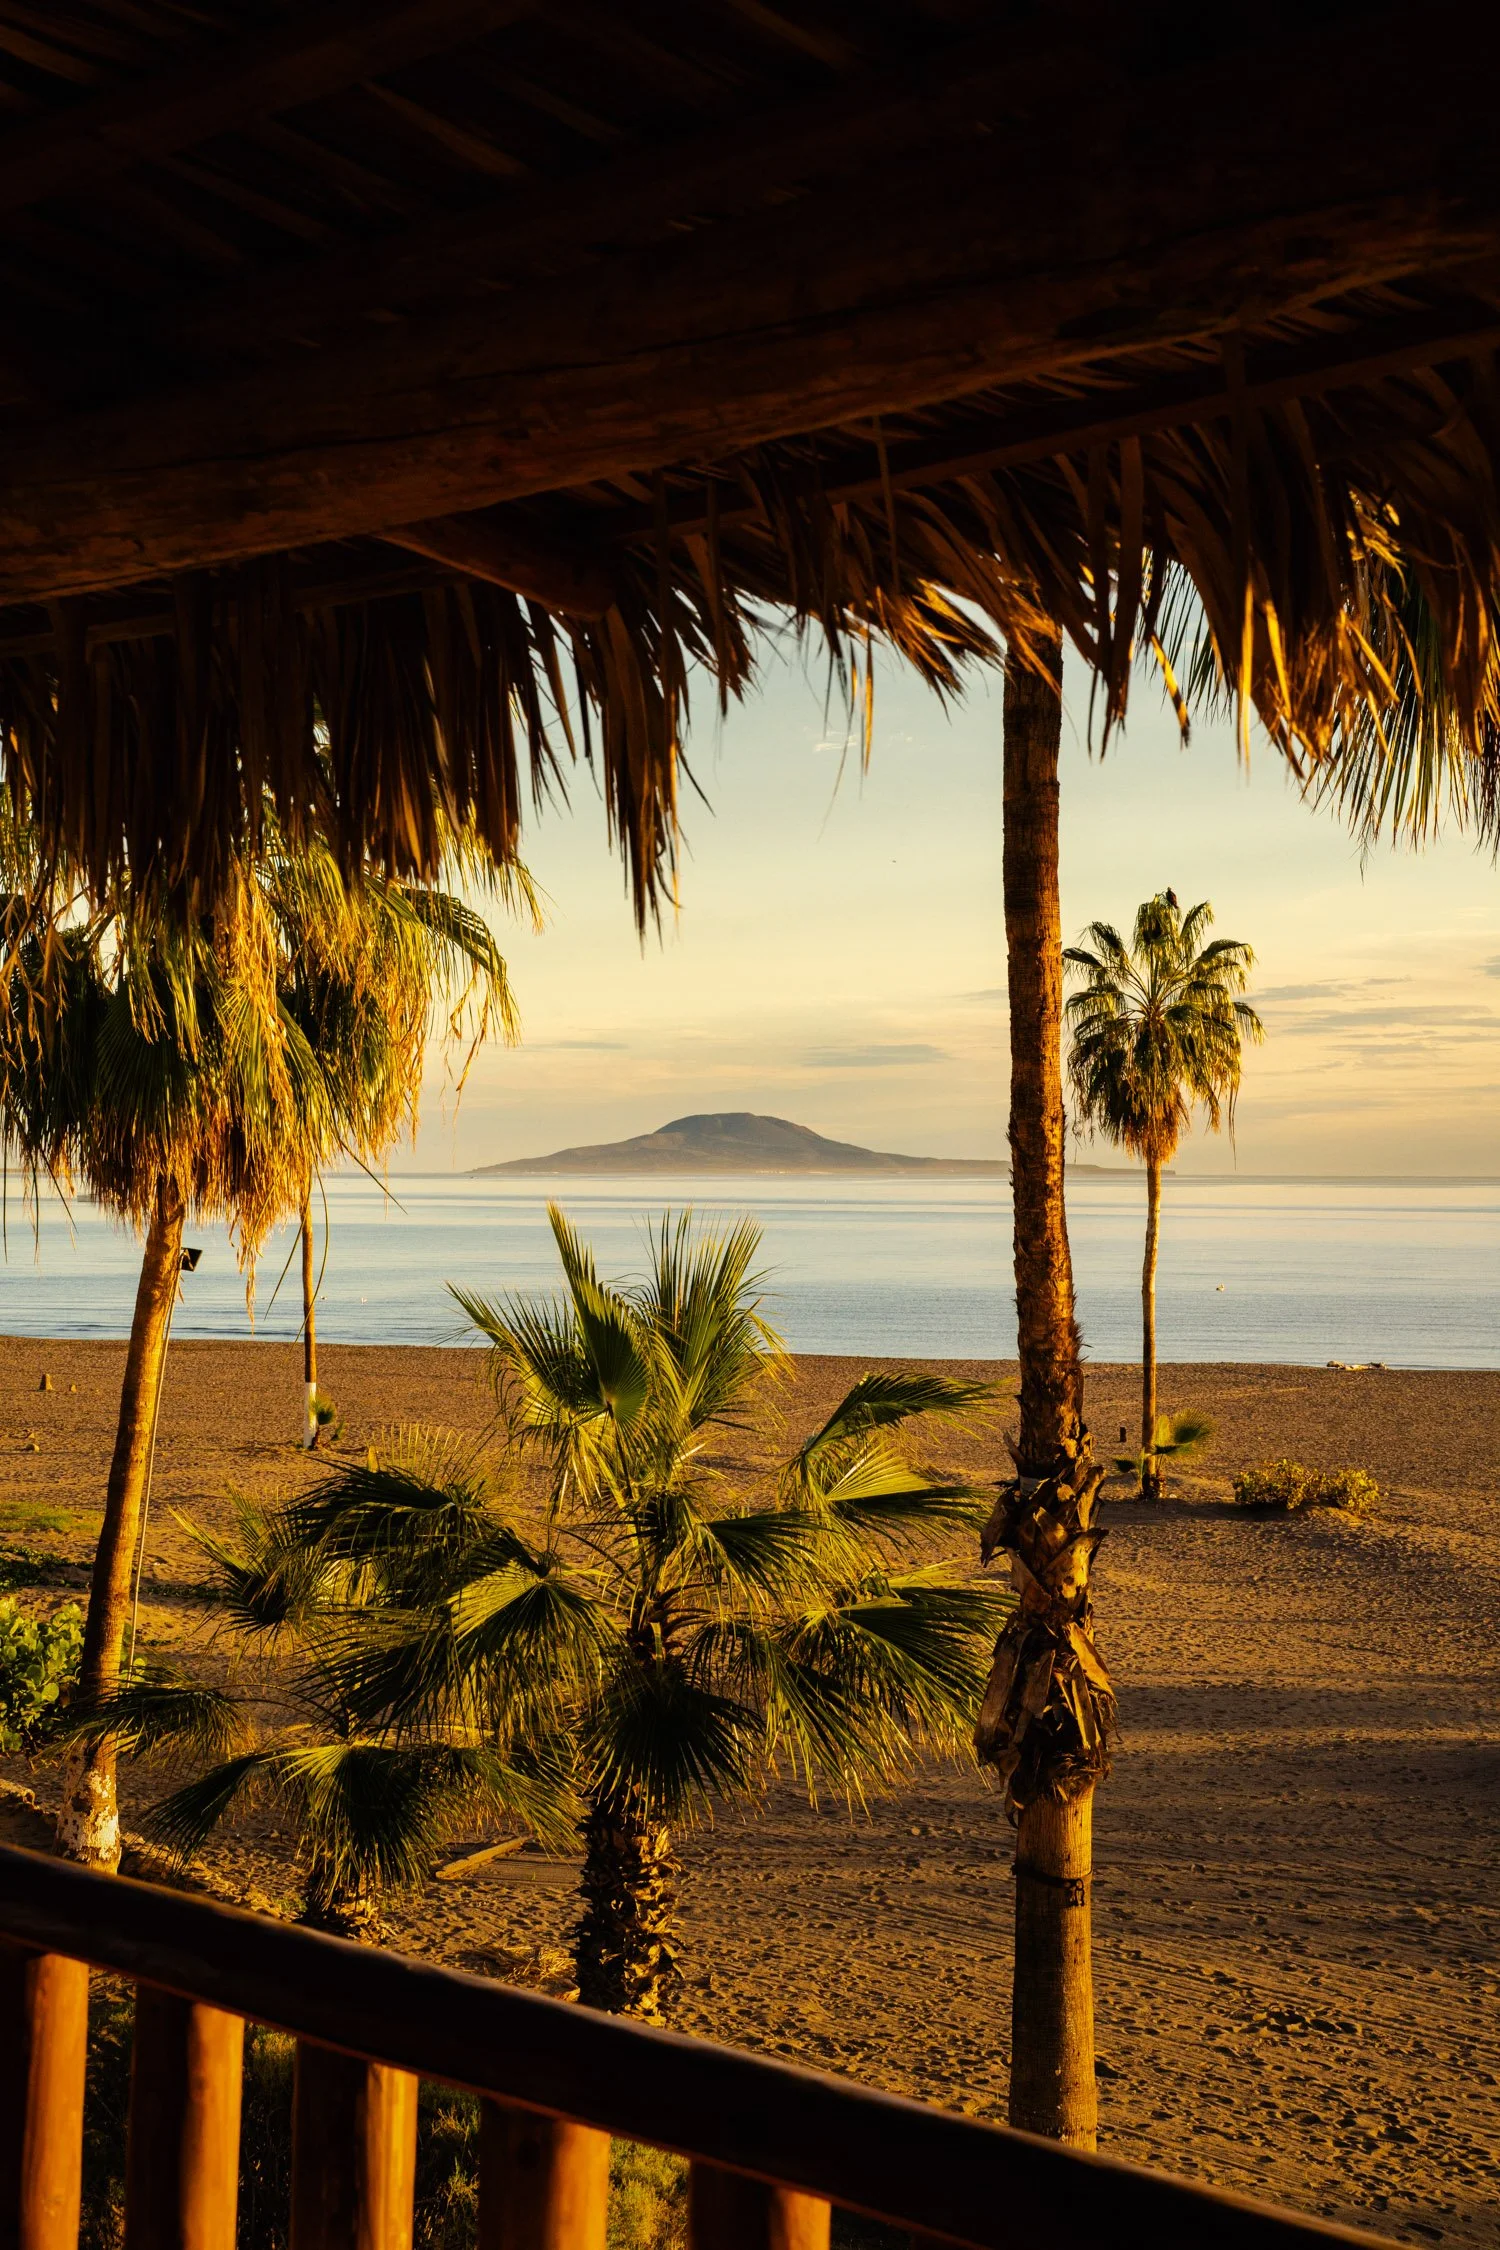
Car camping at the beach in a roof top tent. Photo by Dalton Johnson
Duration of Stay:
Backpacking and camping offer different approaches to the duration of stay. Backpacking is typically transient, involving continuous movement across various terrains over several days or even weeks, with the journey itself as the main focus. Each day brings fresh landscapes and new challenges, keeping the experience dynamic and varied. Camping, however, is more flexible and can last from a single night to an extended stay, depending on personal preference. Campers can settle in one spot for a weekend or a longer vacation, enjoying a relaxed pace that allows them to fully immerse themselves in a specific location.
Backpacking: Characterized by its transient nature, backpacking involves continuous movement, covering significant distances over several days or weeks. The focus is on the journey itself, with each day bringing new landscapes and challenges.
Camping: Camping can range from a single overnight stay to an extended period, depending on the type of camping chosen. Whether it's a weekend getaway or a more extended vacation, campers have the flexibility to decide the duration of their stay, allowing for a more leisurely experience.
Skill Level and Fitness Requirements:
Backpacking and camping differ significantly in skill and fitness demands. Backpacking requires strong physical fitness and advanced outdoor skills, as it involves navigating challenging terrains, dealing with unpredictable weather, and carrying a heavy pack. These elements demand endurance, survival knowledge, and proficiency in the outdoors. Camping, on the other hand, is generally more accessible to a range of fitness levels and skill sets. Car camping, in particular, eliminates the need to carry gear long distances, offering a comfortable experience suitable for families and beginners, with only basic outdoor skills needed for an enjoyable trip.
Backpacking: Requires a higher level of fitness and outdoor skills. Navigating challenging terrains, unpredictable weather conditions, and carrying a loaded backpack demand physical endurance, survival skills, and a certain level of outdoor proficiency.
Camping: While camping also requires basic outdoor skills, it may be more accessible for individuals with varying fitness levels. Car camping, in particular, provides a comfortable experience without the physical demands of backpacking, making it suitable for families and beginners.
Comfort and Pace:
Backpacking and camping differ in comfort and pace, with each offering a distinct style of outdoor experience. Backpacking emphasizes a faster, more dynamic pace, encouraging a nomadic lifestyle where travelers are constantly moving, exploring new territories, and adapting to the challenges of the trail. In contrast, camping offers a more leisurely and relaxed experience. Campers can set up a base camp, allowing them to unwind, enjoy the surroundings, and engage in activities without the need for continuous movement, creating a comfortable and stable outdoor environment.
Backpacking: Emphasizes a faster pace and a more dynamic, nomadic lifestyle. Backpackers are always on the move, exploring new territories and adapting to the challenges of the trail.
Camping: Offers a slower pace and a more relaxed environment. Campers have the luxury of setting up a base camp, providing a comfortable space to unwind, enjoy nature, and engage in various activities without the need for constant movement.
Car camping near Bishop, CA. Photo by Dalton Johnson
The choice between backpacking and camping boils down to your personal preferences, fitness level, and the type of outdoor experience you seek. If you yearn for adventure, the thrill of exploration, and the challenge of the unknown, backpacking awaits. On the other hand, if you prefer a more relaxed, comfortable pace, and the freedom to savor nature at your own speed, camping beckons. Whichever path you choose, both backpacking and camping promise to deliver unforgettable moments and a deeper connection with the great outdoors.
Discover more Adventures

7 Things You Might Not Think About When Planning Your First Adventure Travel Trip
Planning your first adventure travel trip is exciting! However, amidst the excitement, it’s easy to overlook some essential elements that can make or break your experience. To help you avoid common pitfalls and ensure a smooth trip, here are seven things you might not think about but should consider when planning your first adventure travel journey.
Planning your first adventure travel trip is exciting! However, amidst the excitement, it’s easy to overlook some essential elements that can make, or break, your experience. To help you avoid common pitfalls and ensure a smooth trip, here are seven things you might not think about, but should consider, when planning your first adventure travel journey.
Looking out upon the Yosemite National Park skyline at sunset during the fall.. Photo by Dalton Johnson
1. Allowing for Downtime and Recovery
Adventure travel is thrilling but also physically demanding. While it’s tempting to pack your schedule with activities, be sure to include rest days and time for spontaneity. Downtime allows you to recharge both physically and mentally, preventing burnout and letting you enjoy each experience fully. Plan at least one, or two days to relax, whether it’s unwinding at a local café, enjoying a quiet day at your accommodation, or simply reflecting on the week’s adventures. This balance can keep you energized and reduce the risk of travel fatigue.
2. Choosing Activities for Your Skill Level
It’s easy to get caught up in the excitement of adventure travel and sign up for ambitious activities, but it’s crucial to be realistic about your comfort and fitness levels. For instance, a mountain trek might sound exhilarating, but if you’re new to hiking, a less strenuous route is a safer choice. Choose activities that align with your current skill level, or consider taking a beginner’s course on-site. Starting within your comfort zone allows you to build skills confidently and enjoy the experience without unnecessary stress.
At the risk of contradicting myself, don’t hold yourself back either. If you set a goal, trained for it, and want to push yourself, do it! I have found a common thread while traveling for mountain objective, like climbing the seven summits, and long trail runs along the Italian coastline.

Moving to camp three while climbing Denali, North America’s tallest summit. Photo by Dalton Johnson
3. Considering Weather Variability
In adventure travel, the weather can have a major impact on your plans. Unlike a typical vacation, many adventure activities depend heavily on weather conditions. Research seasonal weather trends for your destination, and be prepared for unexpected changes. Packing layered clothing, waterproof gear, and essential weather apps can make a huge difference. Additionally, having a few indoor activities in mind can give you alternatives if the weather doesn’t cooperate.
4. Prioritizing Travel Insurance
Adventure travel often involves riskier activities than regular travel, so having comprehensive travel insurance is essential. Look for policies that cover adventure sports, high elevation, and medical evacuation if you’re going to remote areas. It might feel like an added expense, but travel insurance can be invaluable if you encounter unexpected health issues or need assistance. Not only does it provide peace of mind, but it also helps you focus on enjoying your adventure, knowing you’re covered if anything goes awry.
A few companies I have used:


5. Packing the Right Gear (But Not Too Much)
When it comes to adventure travel, the right gear can make or break your experience. Focus on high-quality essentials rather than over-packing. Items like sturdy hiking boots, a reliable backpack, weather-resistant clothing, and a first-aid kit should be prioritized. It’s tempting to bring extra gadgets or outfits, but adventure travel often means carrying your belongings over rugged terrain. Packing light but effectively can keep you comfortable, mobile, and ready for any activity.
For a deep dive into all things gear, check out our gear section.
6. Understanding Cultural Norms and Etiquette
Adventure destinations often bring you closer to local communities and customs, which means cultural awareness is essential. Some destinations might have specific dress codes (especially when traveling and visiting religious sites), norms around photography, or unique greeting customs. Spend time researching these details to ensure you’re respectful and can better connect with the local culture. Cultural understanding enriches your experience and can also help you avoid misunderstandings or unintended disrespect in unfamiliar settings.
Additional Reads:

Starting to climb the first pitch of the Grand Teton at sunrise. Photo by Dalton Johnson
7. Planning for Digital Detox and Disconnecting
Adventure travel can take you to remote areas with limited connectivity, which can be a fantastic way to unplug from the digital world. However, if you’re used to being constantly connected, it’s good to plan for a digital detox. Let family or friends know your itinerary and set expectations around communication gaps. There’s nothing worse than your digital detox getting ruined by a nervous friend or family member. Use this time to immerse yourself in nature, local culture, practice journalling, and the overall adventure, embracing a break from social media and emails. You might find it’s one of the most refreshing parts of the experience.
A few stories about digital detox:
Snorkeling the Blue Hole in Belize. Photo by Dalton Johnson
Your first adventure travel trip is an opportunity to immerse yourself in unique experiences and test your comfort zone. With these often-overlooked considerations in mind, you’ll be better prepared to tackle the journey with confidence and ease. There is a fine line to navigate between traveling and adventure, but I know you will be able to find what is right for you. Stay safe and enjoy the journey.
Discover more Adventures


A Beginner’s Guide To Planning Your First Adventure Travel Trip
Your first adventure travel trip is an exciting milestone! Adventure travel is all about immersing yourself in new environments, trying exhilarating activities, and stepping out of your comfort zone. While the thrill of adventure is a big part of the experience, planning a smooth trip requires thoughtful preparation. Here’s a step-by-step guide to help you set off confidently and make the most of your first adventure travel journey.
Your first adventure travel trip is an exciting milestone! Adventure travel is all about immersing yourself in new environments, trying exhilarating activities, and stepping out of your comfort zone. While the thrill of adventure is a big part of the experience, planning a smooth trip requires thoughtful preparation. Here’s a step-by-step guide to help you set off confidently and make the most of your first adventure travel journey.
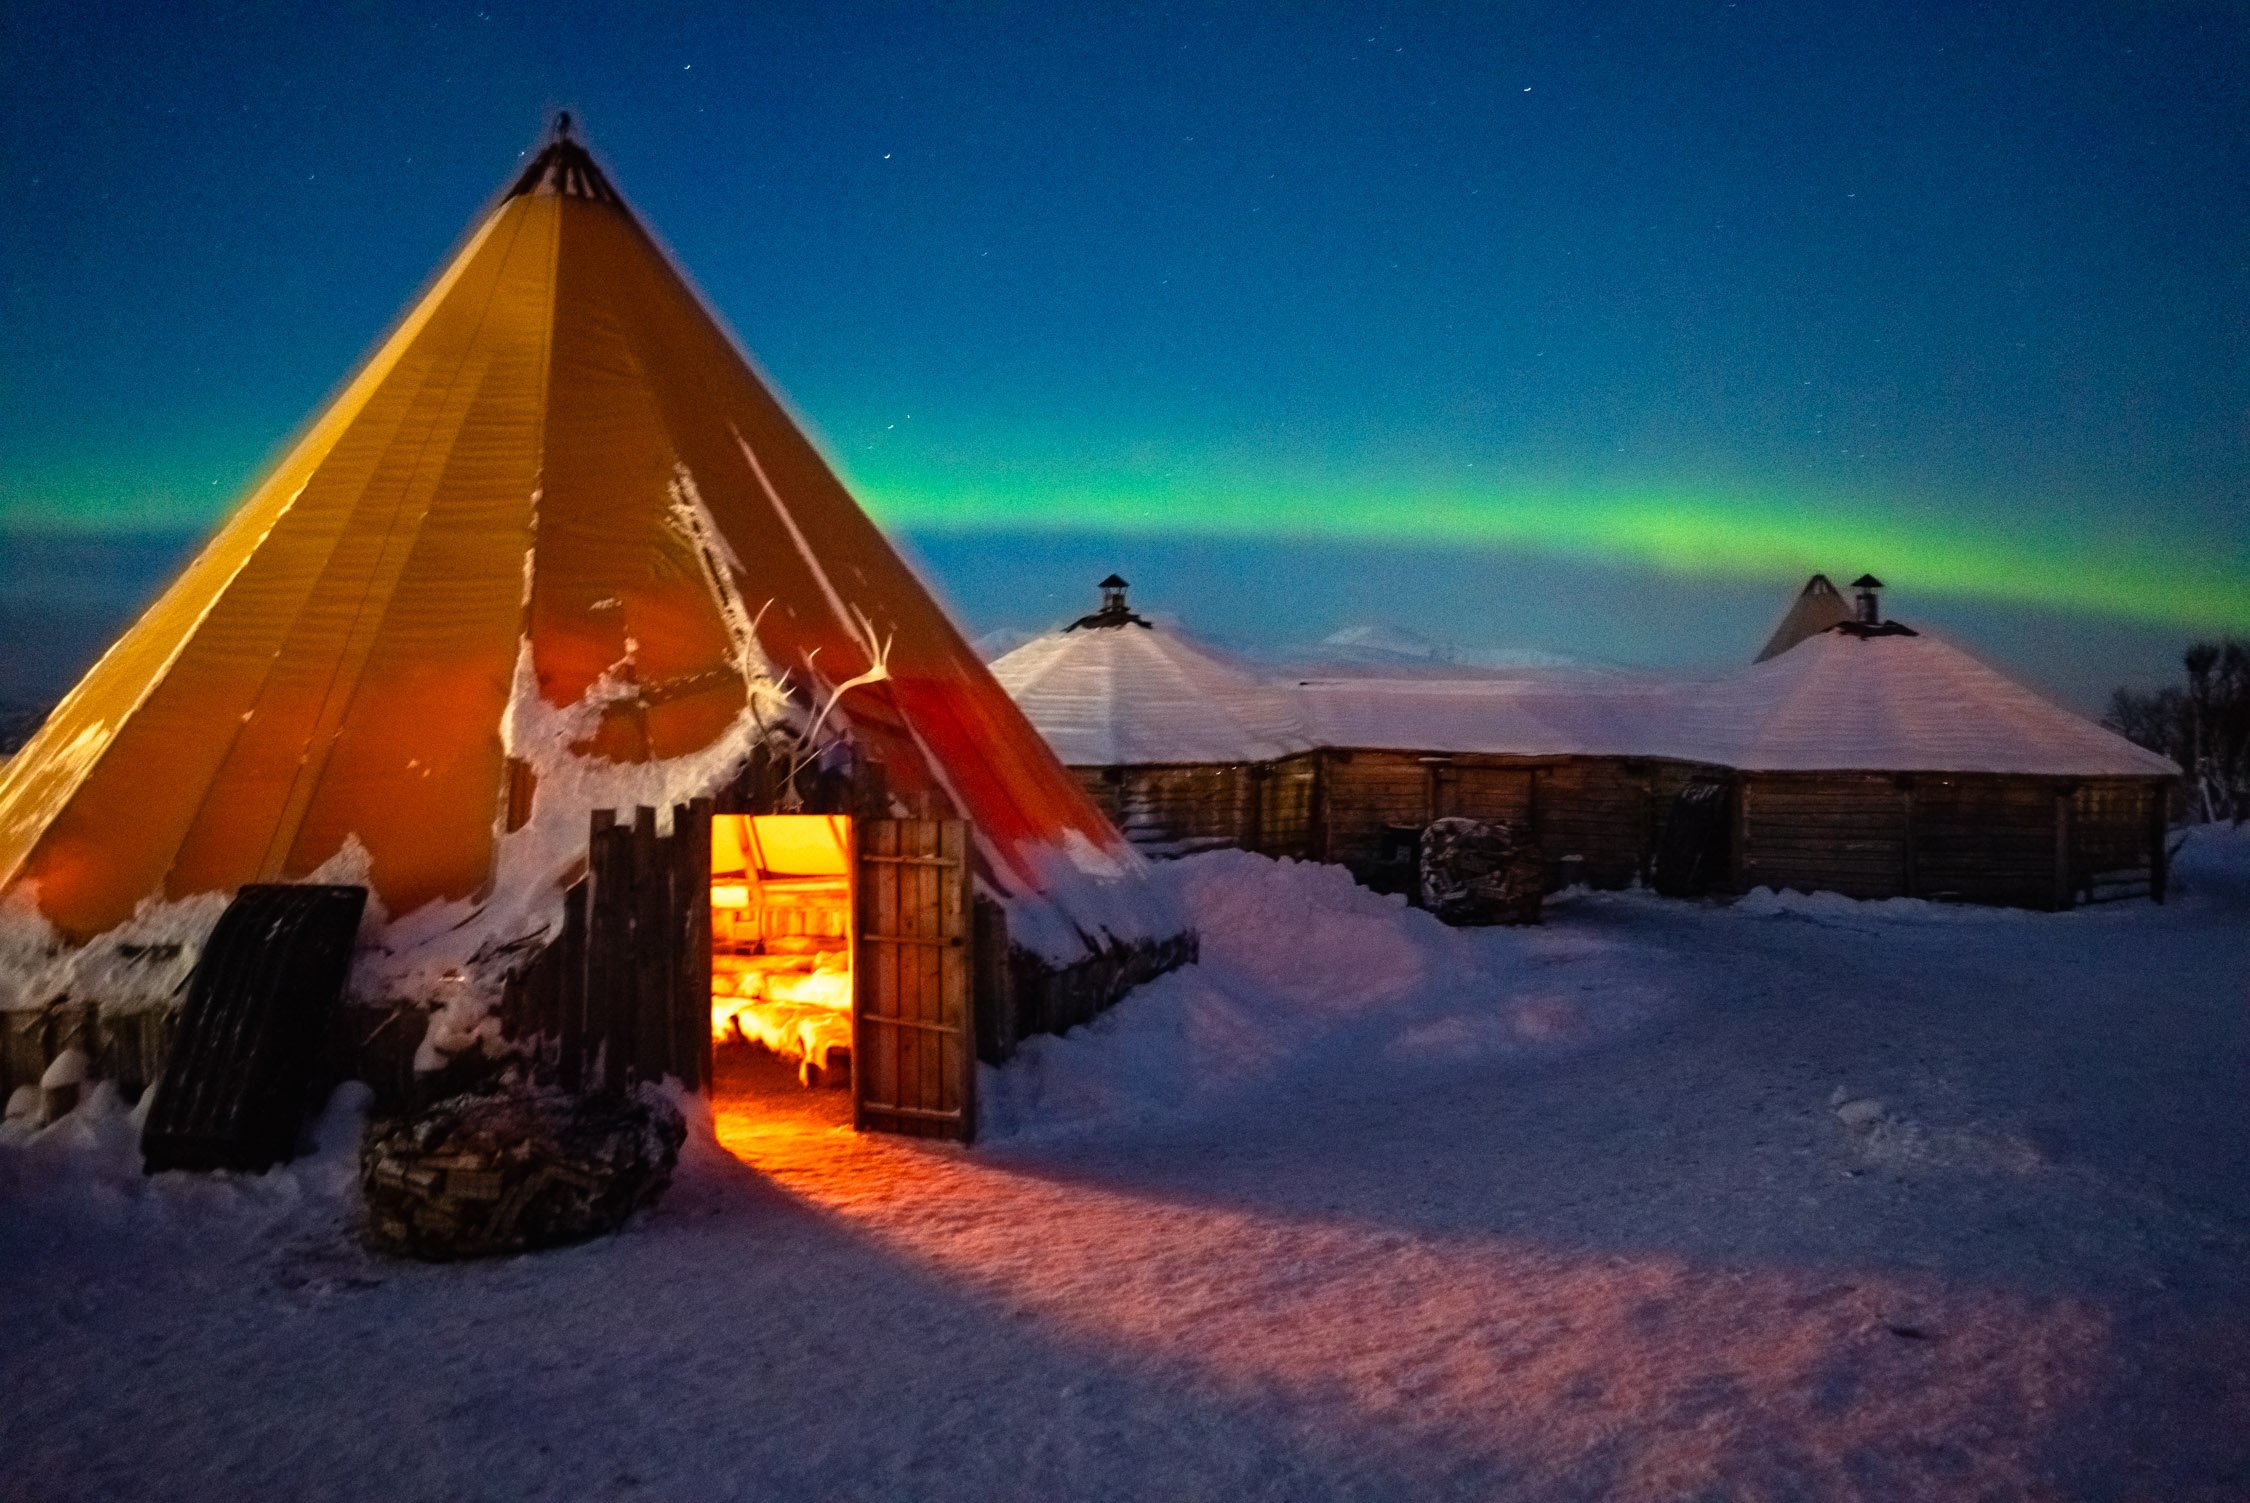
Watching the Northern Lights dance over a Sami residence in Norway. Photo by Dalton Johnson
1. Start with a Plan
Starting with a solid plan is essential for any successful adventure trip, especially if it’s your first. Begin by researching your destination to understand what it has to offer in terms of activities, terrain, and cultural experiences. Knowing the types of activities available will help you decide what to include in your itinerary. Are you looking for mountain hikes, water sports, wildlife safaris, rock climbs, or a mix? Create a realistic schedule that balances activity with rest days, so you have time to relax and process your experiences.
As you plan, keep in mind factors like local weather conditions and safety. Research the best time of year to visit, as weather can affect accessibility to certain areas and the quality of your experiences. Additionally, look up any cultural norms to ensure you’re respectful of local traditions and prepared to navigate social situations.
2. Set Your Budget and Gather the Right Gear
Budgeting is key to adventure travel, as the costs can vary greatly depending on your activities and destination. Break down your budget into major categories: flights, accommodations, meals, activity fees, gear, and a buffer for unexpected expenses. Budgeting in advance also helps you prioritize certain activities and avoid overspending.
Once your budget is set, turn your attention to gear. The type of gear you need will vary depending on the activities you’ve planned. For example, a trekking trip might require durable hiking boots, weather-resistant clothing, and a sturdy backpack, while a snorkeling adventure in Belize calls for swimwear, a snorkel set, and reef-safe sunscreen. Pack light but be thorough, ensuring you have essentials like a first aid kit, reusable water bottle, and any activity-specific equipment. If you’re new to adventure travel, consider renting certain items or purchasing them secondhand to save money.
3. Prioritize Health and Safety
Ensuring your health and safety should be a top priority, especially if you’re traveling solo or to a remote location. Check for any vaccinations or health requirements specific to your destination, and pack any medications or health supplies you may need. Some activities might require additional training or experience, so take a realistic look at your skill level. It’s better to build up gradually than to attempt an activity that feels overwhelming or unsafe.
In terms of safety, keep both your physical and mental well-being in mind. Research local emergency contacts and carry a small first-aid kit with basic items like bandages, antiseptic, and pain relievers. Always let someone know your travel plans, especially if you’re heading to a remote area without cell service. Lastly, consider travel insurance to protect against any unexpected situations, especially if your trip involves activities like climbing, skiing, or scuba diving.

Looking out upon the Amalfi Coast while on an e-bike adventure. Photo by Dalton Johnson
4. Build Flexibility Into Your Itinerary
While a plan provides structure, it’s also essential to stay flexible. One of the best parts of adventure travel is the freedom to embrace the unexpected. Weather, local events, or even a recommendation from a fellow traveler might lead you to change your plans, and that’s okay. Building flexibility into your itinerary lets you explore spontaneous opportunities without feeling stressed about keeping to a rigid schedule.
It’s helpful to leave one, or two days, open in your itinerary to explore areas you discover along the way, relax, or catch up on rest. Remember, you don’t have to see and do everything on your first trip. Adventure travel is about quality experiences and connecting with your surroundings, so savor each moment without rushing.
5. Embrace the Journey, Not Just the Destination
Adventure travel is as much about the journey as it is about reaching specific goals or destinations. Allow yourself to be present and fully engage in each experience rather than focusing solely on your itinerary. Take time to appreciate the landscapes, people, and cultures you encounter. Adventure travel often involves challenges, whether it's an early morning hike or navigating new surroundings, but those moments can lead to the most rewarding experiences.
Kayaking among icebergs in Antarctica. Photo by Dalton Johnson
In the end, your first adventure travel trip is an opportunity to learn, grow, and enjoy the thrill of exploration. With a well-thought-out plan, the right preparation, and an open mind, you’ll be set to make unforgettable memories and come back with stories of a lifetime. So, pack your sense of curiosity and embrace the excitement ahead!
Discover more Adventures

Your Adventure Guide For Yosemite Valley National Park
There is no better place to visit for an adventure than Yosemite National Park. A bold statement no doubt, but here’s why? From jaw dropping views to rock climbing to hiking to backpacking to skiing to photography, Yosemite is the perfect place to immerse yourself in raw nature. These seemingly unlimited options lead to one main issue, paralysis by analysis. Meaning, there is so much to do in Yosemite knowing where to begin is a challenge.
There is no better place to visit for an adventure than Yosemite National Park. A bold statement no doubt, but here’s why? From jaw dropping views to rock climbing to hiking to backpacking to skiing to photography, Yosemite is the perfect place to immerse yourself in raw nature. These seemingly unlimited options lead to one main issue, paralysis by analysis. Meaning, there is so much to do in Yosemite knowing where to begin is a challenge.
So, we took on the ambitious feat of laying out for you all the best things you should do, and could do, while you visit Yosemite. We will cover the best views of Yosemite, how to find the best hiking trails, where to visit the best waterfalls, and how to try rock climbing in Yosemite. Make sure to pack your camera, you’ll want to snap photographs of everything, this land is gorgeous!
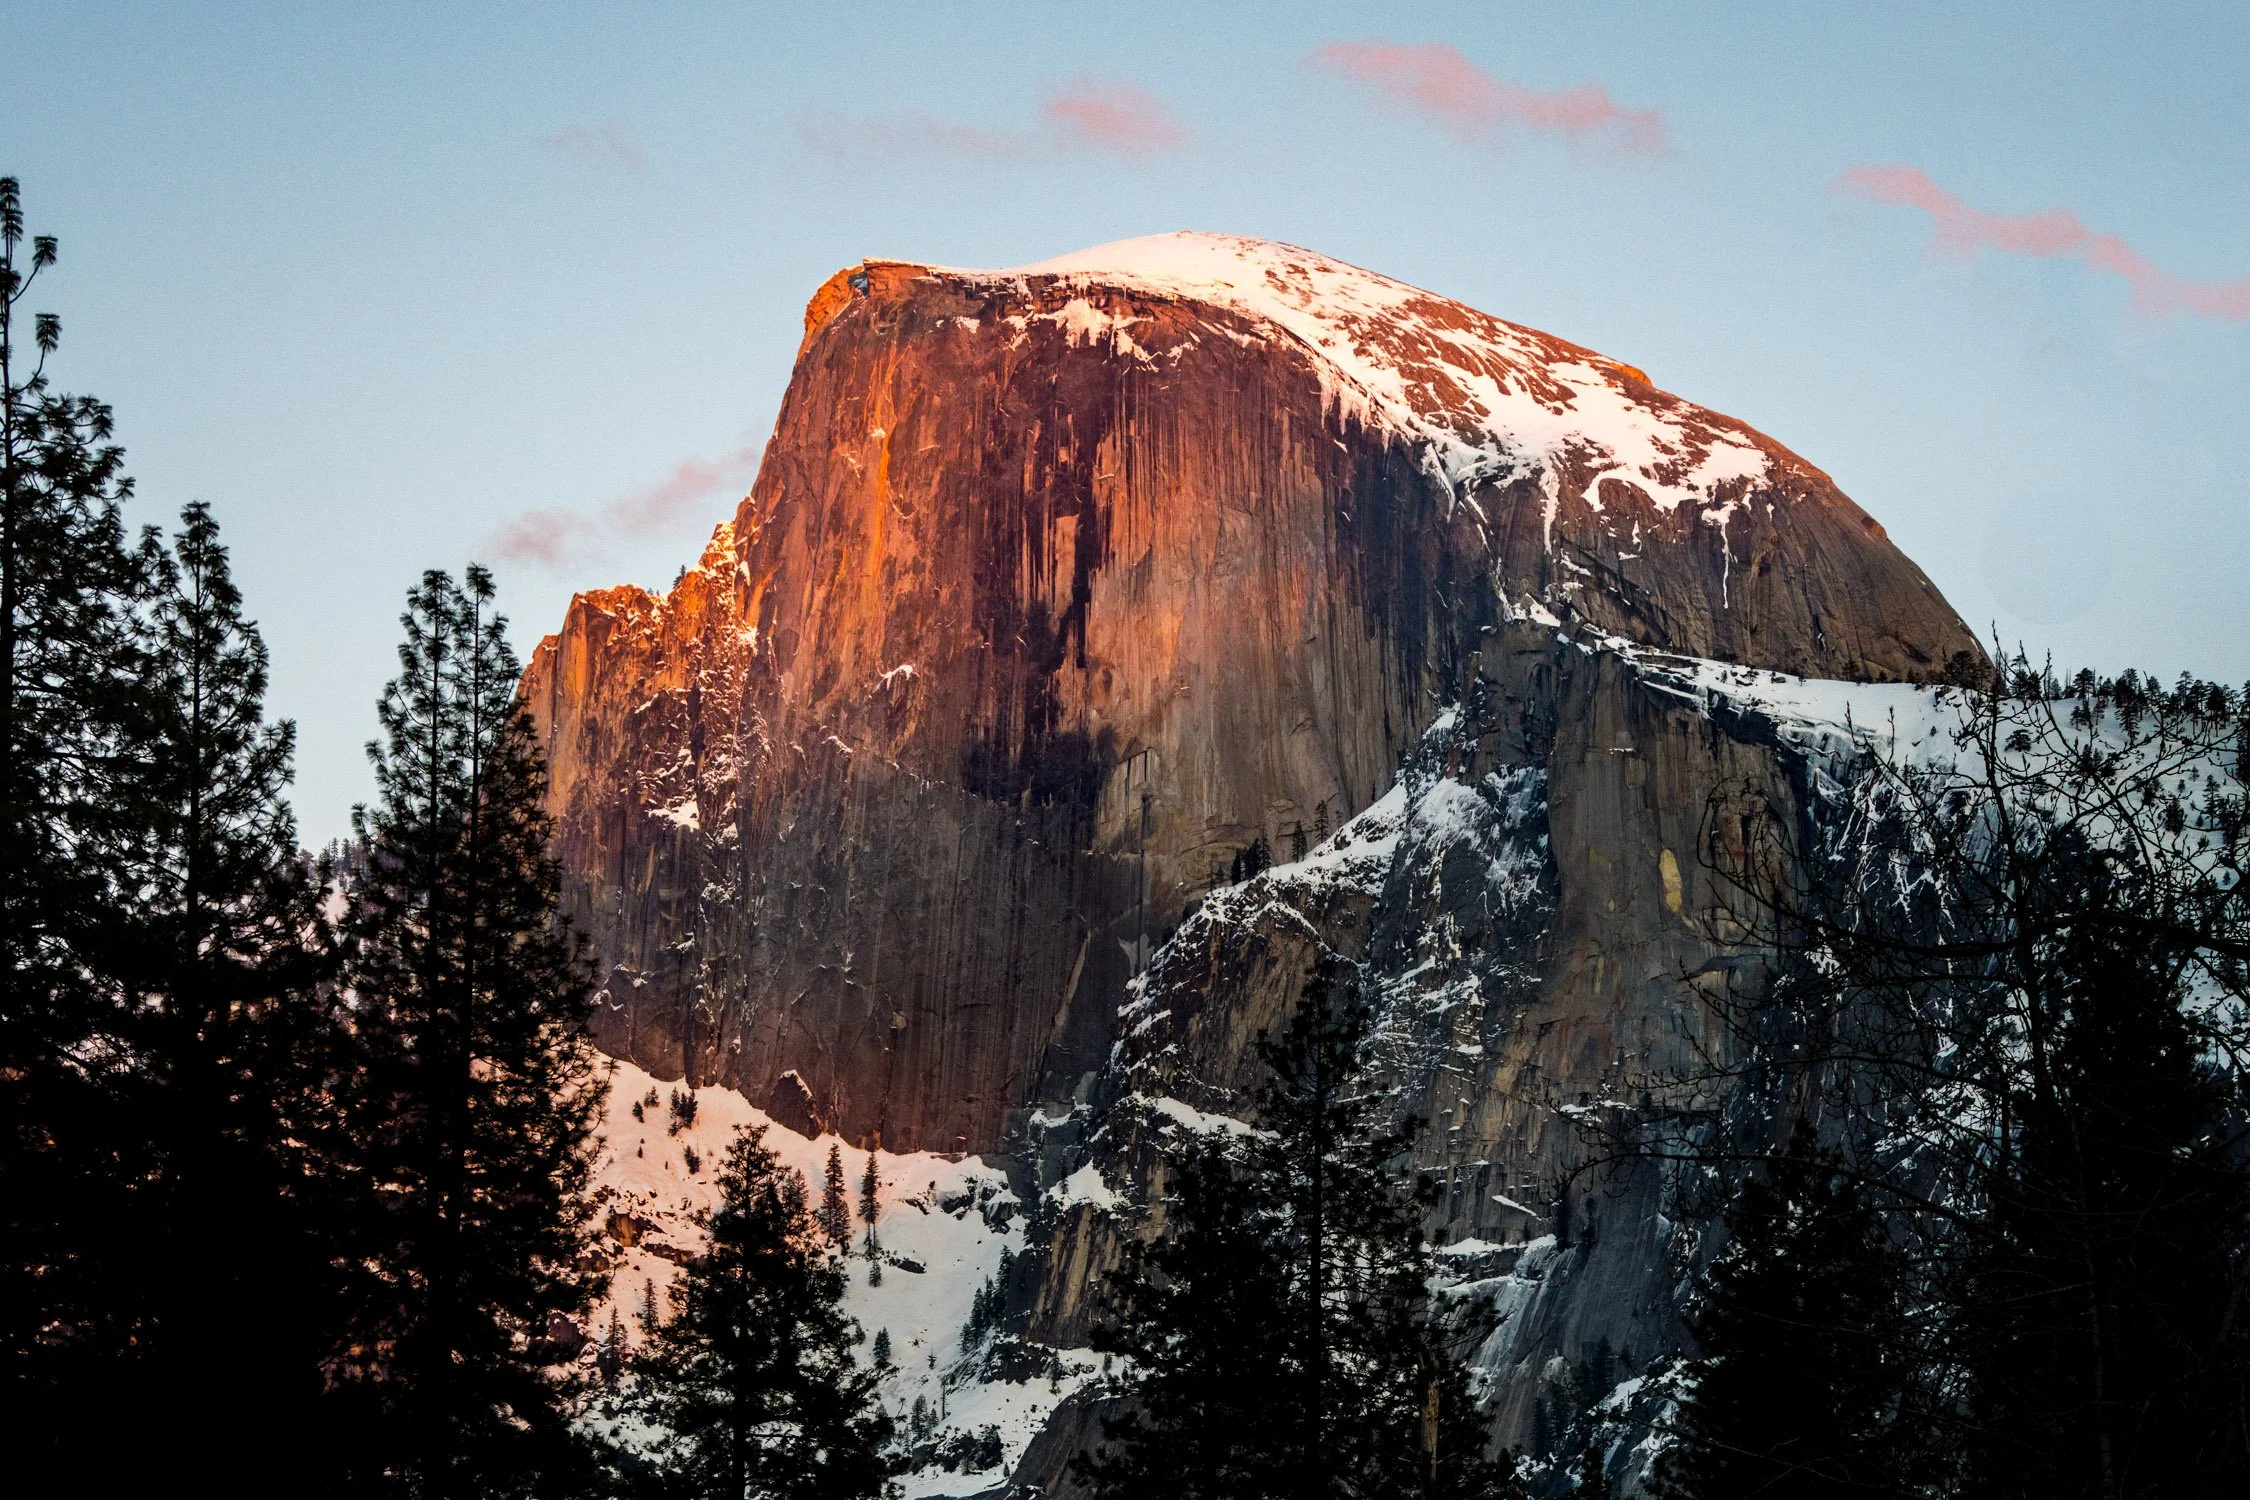
Half Dome at sunset as seen from the iconic Bridge View. Photograph by Dalton Johnson
Best Views of Yosemite Valley
When planning your To Do list for Yosemite National Park, checking out the views of the park ahead of time are critical to having a good time. Yosemite National Park is a large place and can be difficult to navigate with it’s circular driving. If you miss a turn and the traffic is bad, that could be a two hour detour. So, here are some iconic views that you should put on your To Do list and plan out.
Tunnel View
Tunnel View might be the most iconic vista in all of Yosemite National Park and I know that I try to stop here at least once every time I visit this magical place of granite walls and waterfalls. For me, this spot is full of adventures and photo locations.
From Tunnel View you can quickly access the rim after a couple miles of hiking, providing you access to some of the most incredible photo locations like Artist Point, Crocker Point, and Inspiration Point.
Want to know more about Tunnel View? I wrote a full article about Tunnel View, read it by clicking here.
How do I get to Tunnel View?
How long is the hike to Tunnel View?
The hike to Tunnel View is very short once you park, less than one minute. This hike is handicap accessible and you will often see crowds of humans all around the viewpoint. Pro tip, there are several areas to view if you get on the trail and walk for 5-10 minutes.
Check out Prints of Tunnel View
Why should I visit Tunnel View?
Tunnel View is a road side attraction that everyone should add to their Yosemite To-Do list. The view is iconic and has made the park famous. In addition to the beauty of location, you will get a good grasp on the diversity of people who come to Yosemite National Park every year. I recommend having a picnic at Tunnel View
Best Adventures Around Tunnel View:
Winter Hiking to Dewey Point from Tunnel View (make sure to bring snow-shoes)
Astrophotography at Tunnel View
Bridalveil Fall
Bridalveil Fall is one of Yosemite Valley's most striking waterfalls, cascading 620 feet down a cliffside and creating a captivating mist that often catches the sunlight, forming beautiful rainbows. The waterfall is one of the first prominent landmarks you’ll see when entering the valley, setting the tone for Yosemite’s grandeur. Its easy access from the valley floor, along with the mesmerizing view of water veiling down the rock face, makes Bridalveil Fall a memorable stop. Visiting during the spring, when the flow is strongest, enhances the experience, allowing visitors to feel the mist and appreciate the full power of this natural wonder.
How do I get to Bridalveil Fall?
Get directions to Bridalveil Fall
How long is the hike to Bridalveil Fall?
Hiking to Bridalveil Fall takes roughly 10 minutes. The hike to Bridalveil Fall on a paved path, low incline, and accessible to all (current renovations are making this path wheelchair accessible). To get to the base of Bridalveil Fall, you will have to leave the path and walk on a rocky path.
Why should I visit Bridalveil Fall?
Plunging 620 feet (189 meters), Bridalveil Fall is often the first waterfall you'll see when entering Yosemite Valley. In spring, it thunders; during the rest of the year, look for its characteristic light, swaying flow. This swaying flow is what gives the Bridalveil Fall it’s name, for it looks like a Bridalveil moving in the wind.
Check out Prints of Bridalveil Fall

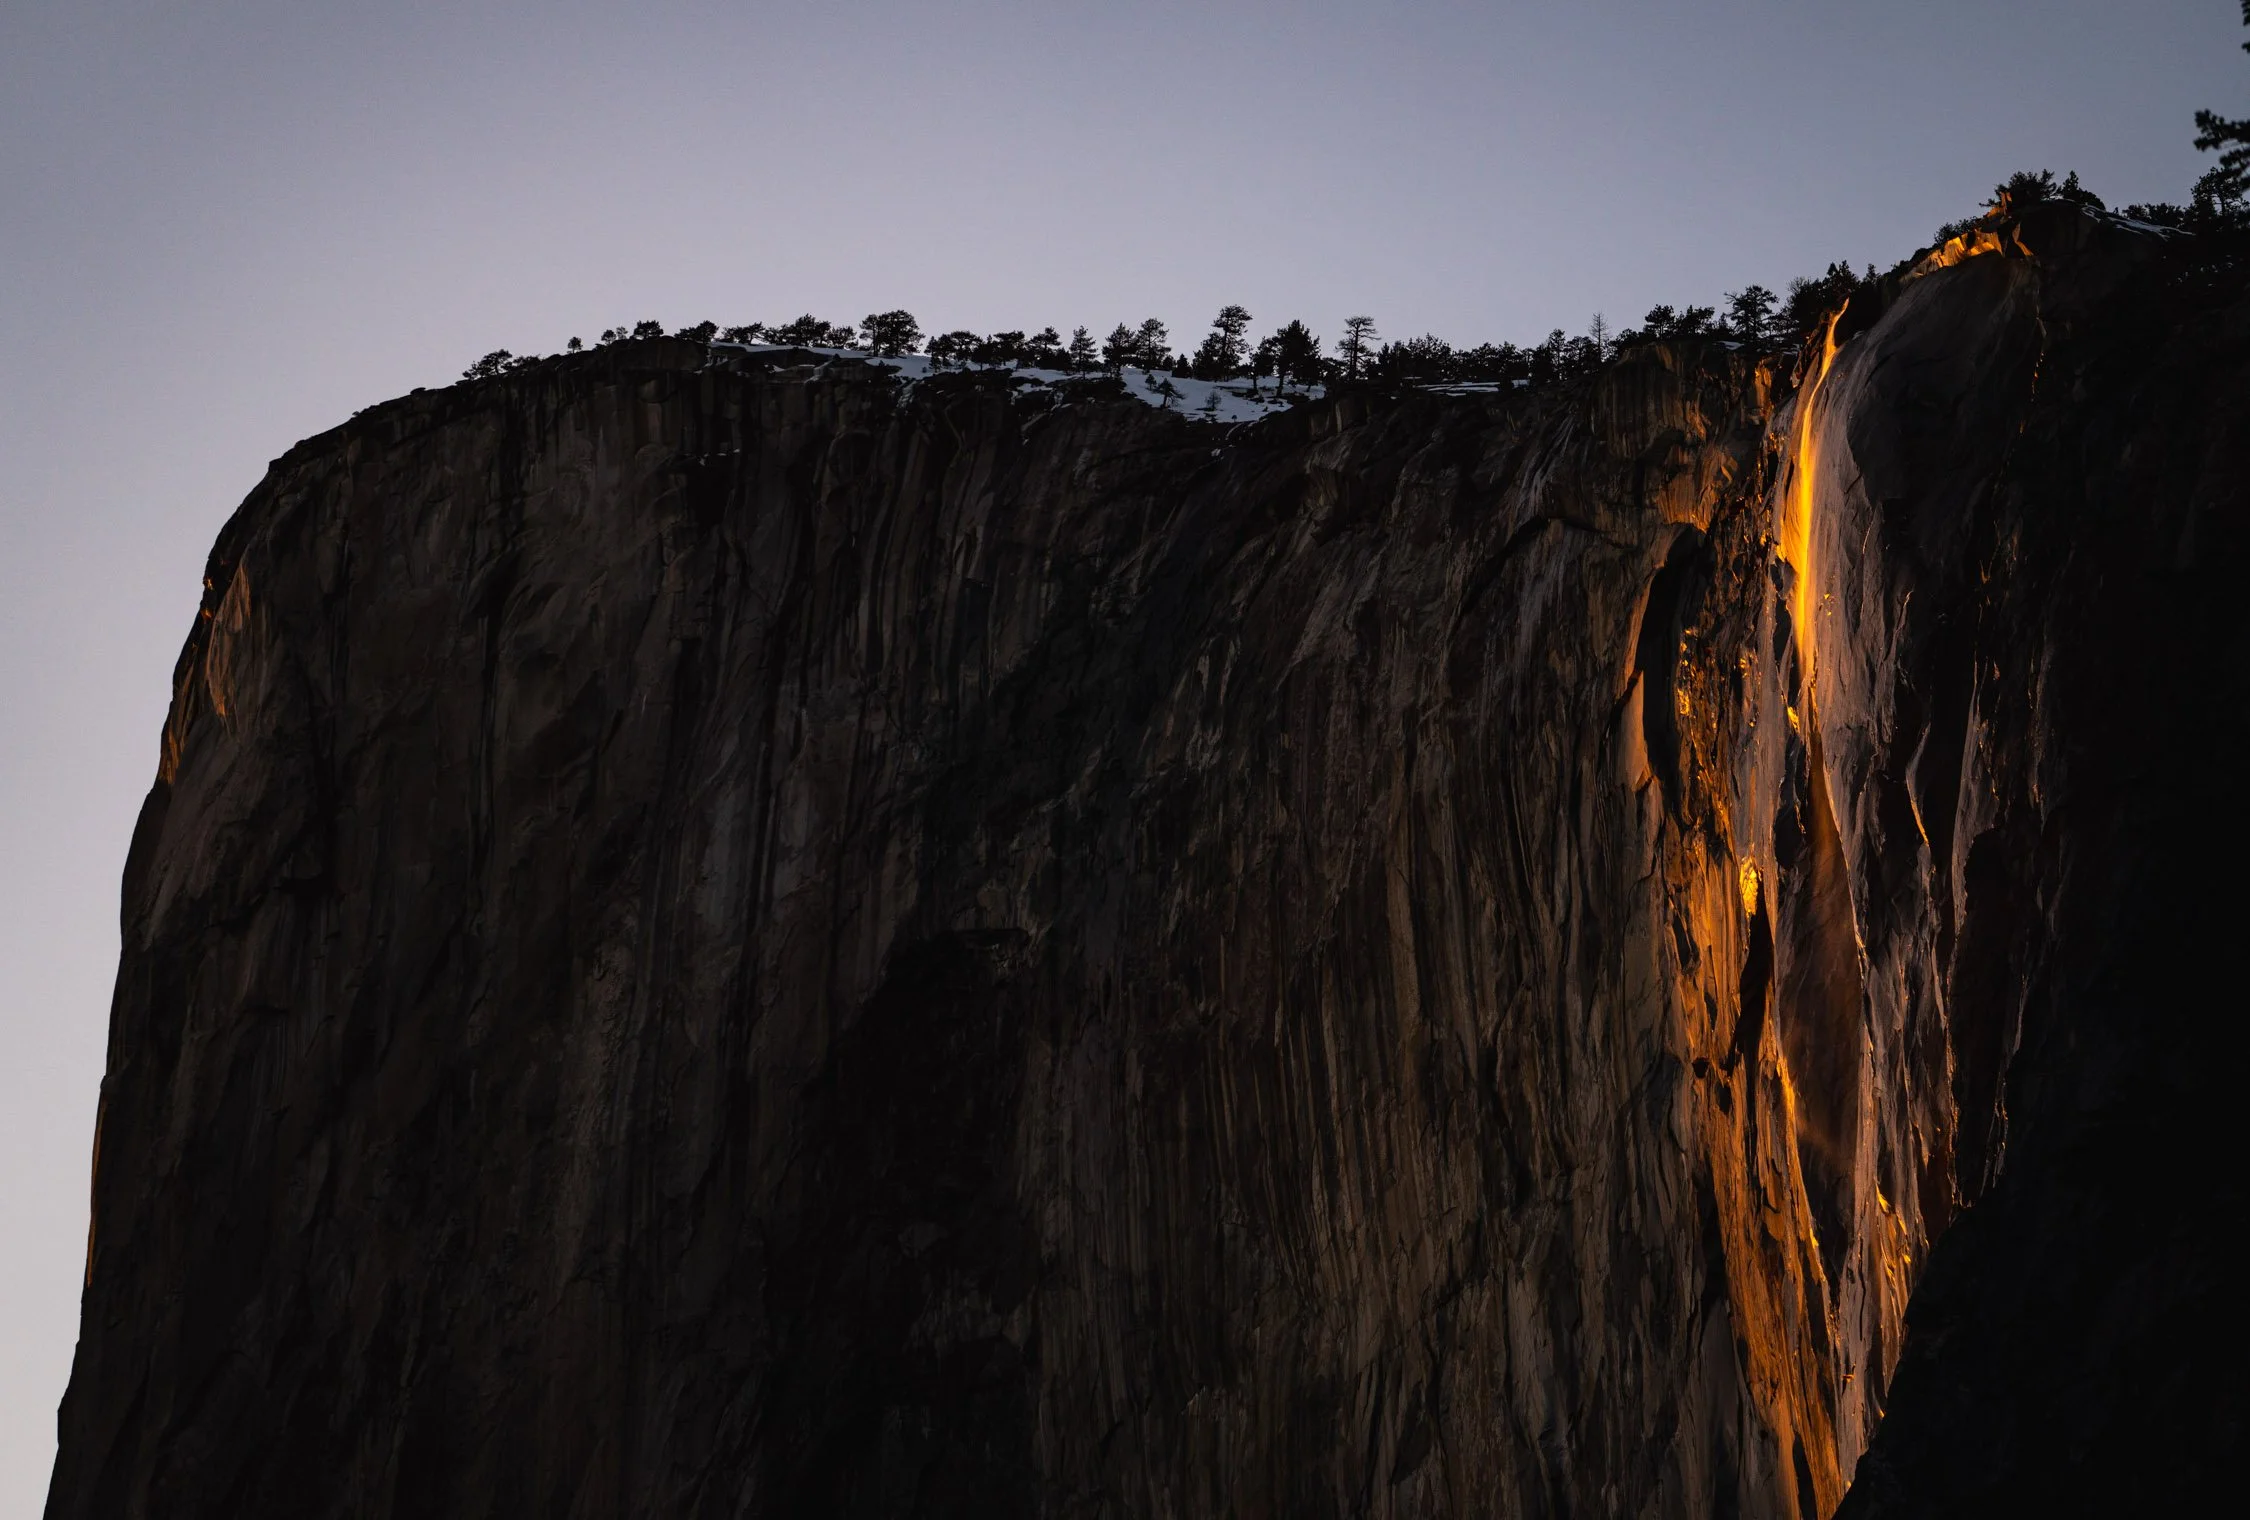
Firefall
The Firefall at Horsetail Fall is one of Yosemite's rarest and most spectacular phenomena, drawing photographers and nature lovers each February. During this time, the setting sun aligns perfectly to cast a golden-red glow on Horsetail Fall, making it look like molten lava is flowing down the cliff. This effect only happens for a few days each year, depending on weather and snowfall, making it an awe-inspiring and often elusive experience. Catching the Firefall is like witnessing nature's magic firsthand, and for those lucky enough to see it, it’s an unforgettable highlight of Yosemite.
How do I get to Firefall?
How long is the hike to Firefall?
Firefall, also known as Horsetail Fall, can not be hiked to, but you can watch the spectacle from most places in the park. The fall comes from a seasonal flow that is based upon the years snowpack in mid to late February.
Why should I visit Firefall?
Firefall is a natural wonder of this world. Why? Well, you have to be in the right place, at the right time, and California has to have had a good year of snow. In other words, to see Firefall everything has to align. Hence, putting this natural wonder of a molten lava looking water fall on your To-Do list is a must.
Check out Prints of Firefalls

Half Dome from Glacier Point
For one of the best panoramic views in Yosemite, Glacier Point is unbeatable. Perched 3,200 feet above the valley floor, this overlook provides sweeping views of Half Dome, Yosemite Falls, and the expansive high country. Glacier Point is particularly stunning at sunrise and sunset, when the light paints the granite peaks in vibrant hues of orange and pink. The scenic drive to Glacier Point is an experience on its own, winding through lush forests and offering glimpses of Yosemite’s rugged beauty. It’s a must-visit for anyone seeking a bird’s-eye view of the park’s iconic landmarks.
How do I get to Glacier Point?
Get Directions to Glacier Point
How long is the hike to Glacier Point?
Hiking to Glacier Point is a 15-20 minute walk from the Glacier Point trailhead parking. The hike is paved and wheelchair accessible, however there are parts of the trail that become unpaved as you go beyond the visitor center and overlook.
Why should I visit Glacier Point?
Glacier Point should be on everyone’s To-Do list when visiting Yosemite Valley. Why? This point overlooks the upper portion of the valley and provides a wonderful view of Half Dome. If you arrive to Glacier Point for sunset, Half Dome will the glowing red. I recommend coming for sunset, staging a picnic, and watching the stars late into the night as the milky way shines over Half Dome. Glacier Point is a magical place to visit while in Yosemite National Park. Additionally, the drive is long in comparison to other Yosemite locations, so the crowds are smaller.
Check out Prints of Half Dome

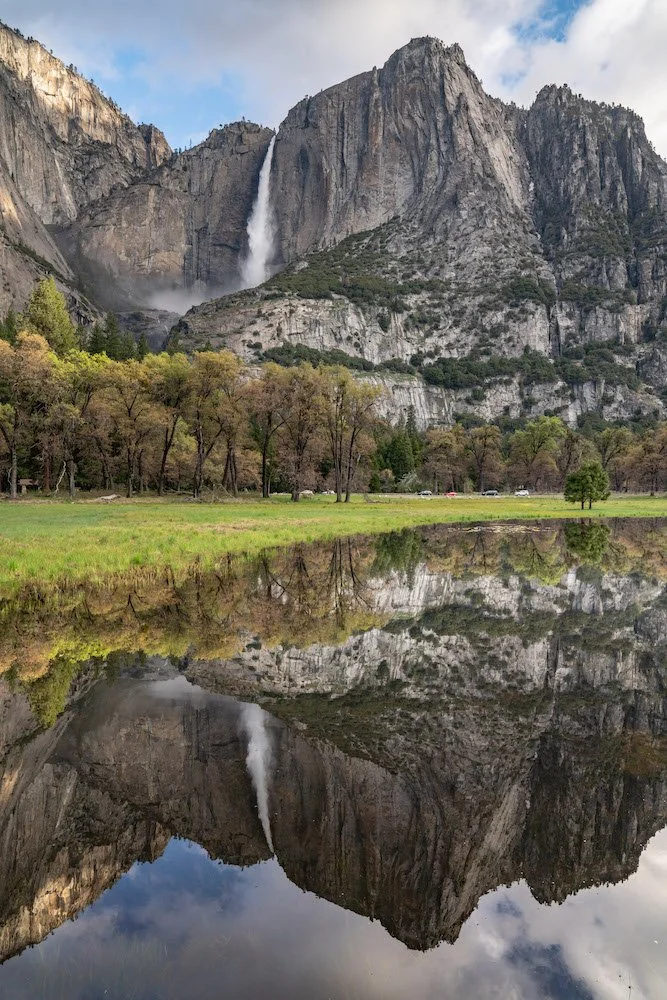
Yosemite Falls
Yosemite Falls is a showstopper, standing as North America’s tallest waterfall with a total drop of 2,425 feet. The falls are divided into Upper Yosemite Fall, Middle Cascades, and Lower Yosemite Fall, each offering its own unique perspective. Visiting in the spring, when snowmelt is at its peak, provides an unforgettable sight and sound experience as the water thunders down. The easy-access Lower Yosemite Fall trail is perfect for families, while the strenuous hike to the top rewards adventurers with sweeping views over the valley and an up-close look at this natural marvel.
How do I get to Yosemite Falls?
Get Directions to Yosemite Falls
How long is the hike to Yosemite Falls?
Yosemite Falls has lower and upper falls. The base of the lower falls is challenging hike taking 1-2 hours round trip. Upper Yosemite falls is a strenuous hike that will take 6-8 hours round trip. Please, make sure to bring water and some snacks. Every year there are a few rescues on this trail from dehydration.
Curious about hiking Yosemite Falls? Check out this blog that covers everything you need to know about hiking Yosemite Falls.
Why should I visit Yosemite Falls?
Yosemite Falls is made of the upper fall, middle cascades, and lower fall, all dropping a total of 2,425 ft. (740 m), and is one of the tallest waterfalls in the United States. So, if you want to see the tallest waterfalls in the United States, you should add this to your To-Do list when visiting Yosemite. If you are feeling up for it, the steep climb is well rewarded with close-up views of Upper Yosemite Fall and distant views of Half Dome and other Sierra mountain peaks. Along the hike, enjoy a bird's eye view of Yosemite Valley's meadows and the meandering Merced River.
Check out Prints of Yosemite Falls
El Capitan
A global icon for rock climbers, El Capitan’s imposing granite face is both awe-inspiring and humbling. Rising over 3,000 feet above the valley floor, this monolithic cliff is a natural wonder that dominates the landscape. Even if you’re not a climber, standing at its base and observing its sheer scale is a surreal experience. For those interested in climbing culture, El Capitan Meadow offers an ideal spot to watch climbers as they make their way up the cliff. Visiting at sunset is particularly magical, as the rock face lights up in shades of gold and red.
How do I get to El Capitan?
How long is the hike to El Capitan?
The hike to the base of El Capitan is 30 minutes round trip. However, if you would like to hike to the top of the granite wall, expect to hike for 12-15 hours round trip if you are going via Yosemite Falls trail.
Why should I visit El Capitan?
Rising more than 3000 vertical feet from the floor of Yosemite Valley, El Capitan is sheer rock granite and a must see in Yosemite National Park. If that isn’t enough for you to add to your To Do list when visiting Yosemite National Park, the history and recent boom in rock climbing should. Not long ago, a movie was put out called Free Solo where Alex Honnold climbed the 3000 foot wall without a rope. To understand how crazy that is, walk to the base and look up, he climbed that.
Check out Prints of El Capitan
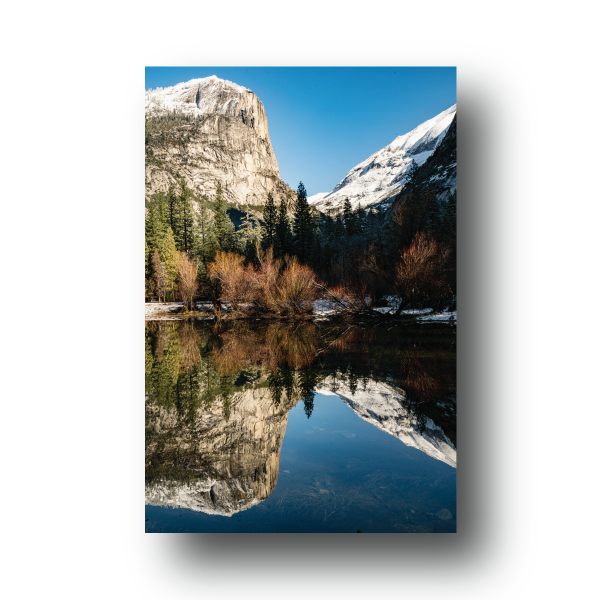
Mirror Lake
Mirror Lake offers a peaceful retreat with unique reflections of Yosemite’s famous cliffs, especially Half Dome. In the spring, the lake lives up to its name, providing a near-perfect mirror image of the granite monoliths around it. As the seasons change, the lake may dry up, transforming into a meadow, which presents a different but equally beautiful landscape. The hike to Mirror Lake is family-friendly and provides a chance to see Yosemite from a quieter, more serene angle, making it an ideal stop for those seeking tranquility amidst Yosemite’s grandeur.
How do I get to Mirror Lake?
How long is the hike to Mirror Lake?
The hike to Mirror Lake can take one hour if you stay on the paved path. However, most people take 2-3 hours as there are several side trails and viewing points that you will want to stop.
Why should I visit Mirror Lake?
With a fresh perspective looking up at Half Dome directly from its base, you'll be rewarded with views of Tenaya Canyon, Mount Watkins, Washington Column, and more. This reflective pool is a magical place to sit and ponder. I would suggest bringing a sack lunch and a journal to sit alone for a little TLC.
Check out Prints of Mirror Lake
Nevada Fall and Vernal Fall as seen from Glacier Point in Yosemite National Park. Photograph by Dalton Johnson
Little Yosemite Valley
Little Yosemite Valley offers a secluded escape and serves as a stepping stone for those venturing to Half Dome and other high-country trails. The valley is nestled along the Merced River, surrounded by towering granite cliffs and serene forests, creating a perfect setting for backpackers and hikers. Its campground is a popular base for those wanting to extend their Yosemite adventure into the wilderness, allowing for early morning starts on iconic hikes. Visiting Little Yosemite Valley offers a taste of the park’s backcountry beauty and the chance to experience Yosemite away from the main crowds.
How do I get to Little Yosemite Valley?
Directions to Little Yosemite Valley
How long is the hike to Little Yosemite Valley?
Many people overnight camp in Little Yosemite Valley, however if you want to day hike to Little Yosemite Valley, expect to spend 8-10 hours round trip. If you are feeling ambitious, check out Little Yosemite Valley during the winter!
Why should I visit Little Yosemite Valley?
Little Yosemite Valley is the most popular area in the Yosemite Wilderness, mainly because it provides easy access to Half Dome. If you plan to summit Half Dome, you will pass through here. If you are looking for a challenging hike with access to a swimmable river, Little Yosemite Valley is a great place to go. Since the Little Yosemite Valley hike takes you into the wilderness of Yosemite National Park, the crowds will be smaller. Often, you wont see many people unless a water fall is close.
Check out Prints of Little Yosemite Valley
Topping out the Nutcrack just before dark while rock climbing in Yosemite Valley. Photograph by Dalton Johnson
Rock Climbing in Yosemite Valley
If you can, try to plan a long weekend of climbing while you visit Yosemite Valley. If you don’t know how to climb, that isn’t a problem, there are several guide services who can and will take you rock climbing. So, make sure to add rock climbing to your To-Do list when you visit Yosemite Valley. Why? Yosemite Valley is the home of American rock climbing and is known for long routes and hard traditional climbing. However, the rock climbing in Yosemite is accessible to everyone. So, I put together a list of classic rock climbs that everyone should try in the 5.7 - 5.10 range.
The Surprise (5.10a)
Where is the rock climb Surprise located?
The Surprise is located on the Five Open Books
Why add the rock climb Surprise to your To Do list?
The rock climb The Surprise (5.10a) is a stellar first valley 10. Why? Well, if you are looking to break into the 5.10 climbing in Yosemite Valley as one of your “To-Do’s” while you visit, this crack is perfect because you get a few warm up pitches to get your head screwed on. Then, you Exciting to open the door to a new milestone for climbing. The finger crack was really fun and what a surprise, hence the route’s name The Surprise, it is when the crack just disappears for a hot second and you make a few moves across some slab to a jug.
Want to climb surprise, but still need more information? Here is a full write up on the climb with everything you need to know.
Rock climbing the last few pitches of The Nose (5.9 C2) on El Capitan in Yosemite Valley. Photograph by Dalton Johnson
The Nose (5.9 C2)
Where is the rock climb The Nose located?
The Nose is located on El Capitan
Why add the rock climb The Nose to your To Do list?
Let’s all be honest, if we are climbing in Yosemite Valley, there is one route we all wish to climb, The Nose. While the grade of the nose goes at 5.9 C2, most climbers see this climb as unattainable, but it isn’t. If you spend the time learning your systems, this granite monolith can be climbed!
Absolutely Free (5.9)
Where is the rock climb Absolutely Free located?
Absolutely Free is located at Camp 4
Why add the rock climb Absolutely Free to your To Do list?
The rock climb Absolutely Free (5.9) in Yosemite Valley is the quintessential adventure route for it’s grade. This gorgeous route definitely did me in on the route finding! Going WAY off route on the "first" pitch up a random gully, because I misread the topo like a dolt, forcing myself to down climb the 90 feet I had just climbed. Not to mention, my partner was like, "hey man, maybe the route is to the right?" so, I went up again, another 120 feet, only to turn around and get my fill of down climbing for breakfast. Yup, about 210 feet of up and down-climbing. On the bright side, all gear was saved!
How do you avoid this? We shouldn't have roped up at the first gully that goes to the right as the route went left through a grove of trees and meandered around for about 200 feet more to the base of the climb. I'm just shaking my head at myself right now.
However, once we got to the base of the first pitch we were ready for some bomber hands and Absolutely Free provided just that! A classic Yosemite adventure route with splitter hands and low-angled, finger lie-backing. Not only was the climb stellar, the view up valley staring at Half Dome and Royal Arches was phenomenal!
Bishops Terrace (5.8)
Where is the rock climb Bishops Terrace located?
Bishops Terrace is located on Church Bowl
Why add the rock climb Bishops Terrace to your To Do list?
Bishops Terrace is a classic climb in Yosemite Valley located in Church Bowl. Some times this climb has a long queue and sometimes you have this climb to yourself. Why is that? Well, this climb doesn’t have much else around that compares to the quality and grade, so all of the 5.8 classic climbers want to hop on Bishops Terrace. If you do come to climb Bishops Terrace, I suggest climbing it in one pitch instead of the two pitches the book says. Logistically, this climb will become much easier for you if you climb it in one go.
Nutcracker (5.7)
Where is the rock climb Nutcracker located?
Nutcrack is located on Manure Pile Buttress
Why add the rock climb Nutcracker to your To Do list?
In terms of classic climbs in Yosemite Valley, climbing Nutcracker, should be on your “To-Do” list. Why climb Nutcracker? The bulge pull. Yup! There is a rad bulge pull that is immediately intimidating upon arrival. However, once you step up to the overhead bulge, you find it has several weaknesses that will allow you pass. The Nutcracker is to be respected, meanwhile having a splendid time!
A bunch of goofballs enjoying to sumnmit of The Grack Center (5.6) while rock climbing in Yosemite Valley. Photograph by Dalton Johnson
The Grack Center (5.6)
Where is the rock climb The Grack Center located?
The Grack is located on Glacier Apron
Why add the rock climb The Grack Center to your To Do list?
In terms of wonderful first rock climbs in Yosemite Valley, climbing The Grack Center, might be the perfect answer. Why? The Grack Center has a grade of 5.6 and goes in three pitches, where the crux is a slab move that is relatively well protected. Additionally, the rappels are straight forward and well bolted. So, if you are looking to climb your first Yosemite multi-pitch rock climb, give The Grack Center a try. Personally, I have not had to wait in line for this climb, but I have heard stories of a long queue.
Waterfalls of Yosemite valley
While Yosemite National Park is forever linked to Half Dome, the massive granite monolith immortalized by landscape photographer Ansel Adams, it’s also home to many fabulous flowing waterfalls. Bridalveil and Yosemite Falls are two of the most famous Yosemite waterfalls, but here are several others you’ll want to check out when you visit Yosemite National Park. Plunging hundreds of feet into rivers and creeks below, the waterfalls at Yosemite National Park thunder past a smooth granite backdrop. Yosemite waterfalls are powered by melting snow and spring rains, so the flowing falls are at their prime in May. Most of the waterfalls at Yosemite are easily spotted from designated viewpoints or after a short walk along paved paths. While it’s difficult to see all of the waterfalls in Yosemite, these five falls are the most spectacular to add to your To-Do list while visiting Yosemite Valley:
Yosemite Falls
Directions to Yosemite Falls:
Click here for driving directions to Yosemite Falls
Fun Facts about Yosemite Falls:
Yosemite Falls can be seen throughout a large portion of Yosemite Valley including from the Yosemite Chapel, Yosemite Valley Lodge and even high above the valley from Glacier Point. One of the tallest in the world at a total of 2425 feet and the tallest in all of North America, it is actually made up of three separate drops:
Upper Yosemite Fall (1,430 feet)
Middle Cascades (675 feet)
Lower Yosemite Fall (320 feet)
Total Height of Yosemite Falls: 2,425 feet
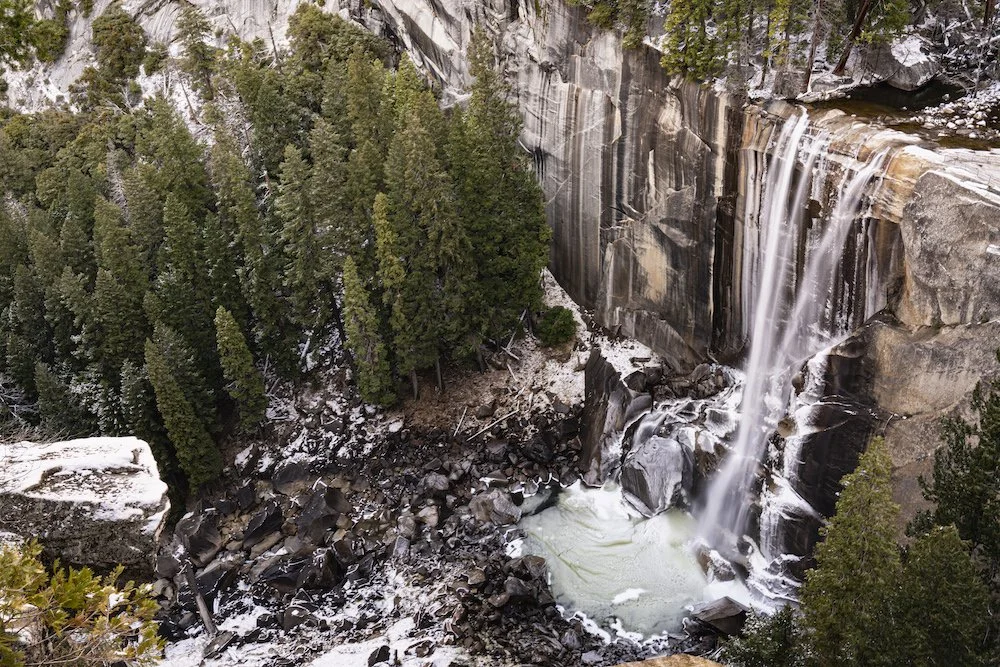
Vernal Fall cascading during the frozen months. Photograph by Dalton Johnson
Vernal Fall
Directions to Vernal Fall
Click here for driving directions to Vernal Fall
Fun Facts about vernal Fall
Just below the frothy Nevada fall is Vernal Fall. The first of the waterfalls in the legendary Mist Trail. Especially in the spring, you’ll truly understand why this hike is called the “Mist Trail.” In short, be sure to bring a raincoat even if it’s sunny. These two mighty waterfalls form a cascade in which the Merced River flows down into the valley and create what is called the “giant staircase.”
Total Height of Vernal Fall: 317 feet
Bridalveil Fall
Directions to Bridalveil Fall:
Click here for driving directions to Bridalveil Fall
Fun Facts about Bridalveil Fall:
As you enter Yosemite Valley from Tunnel View, one of the first falls you’ll see if Bridalveil. It should come as no surprise it's one of the most prominent within the granite walls of the valley. As the name describes it, when there’s a breeze flowing, the mist that wafts off it creates something that would be similar to a 'bride's veil' and thus the name Bridalveil.
Total Height of Bridalveil Fall: 620 feet
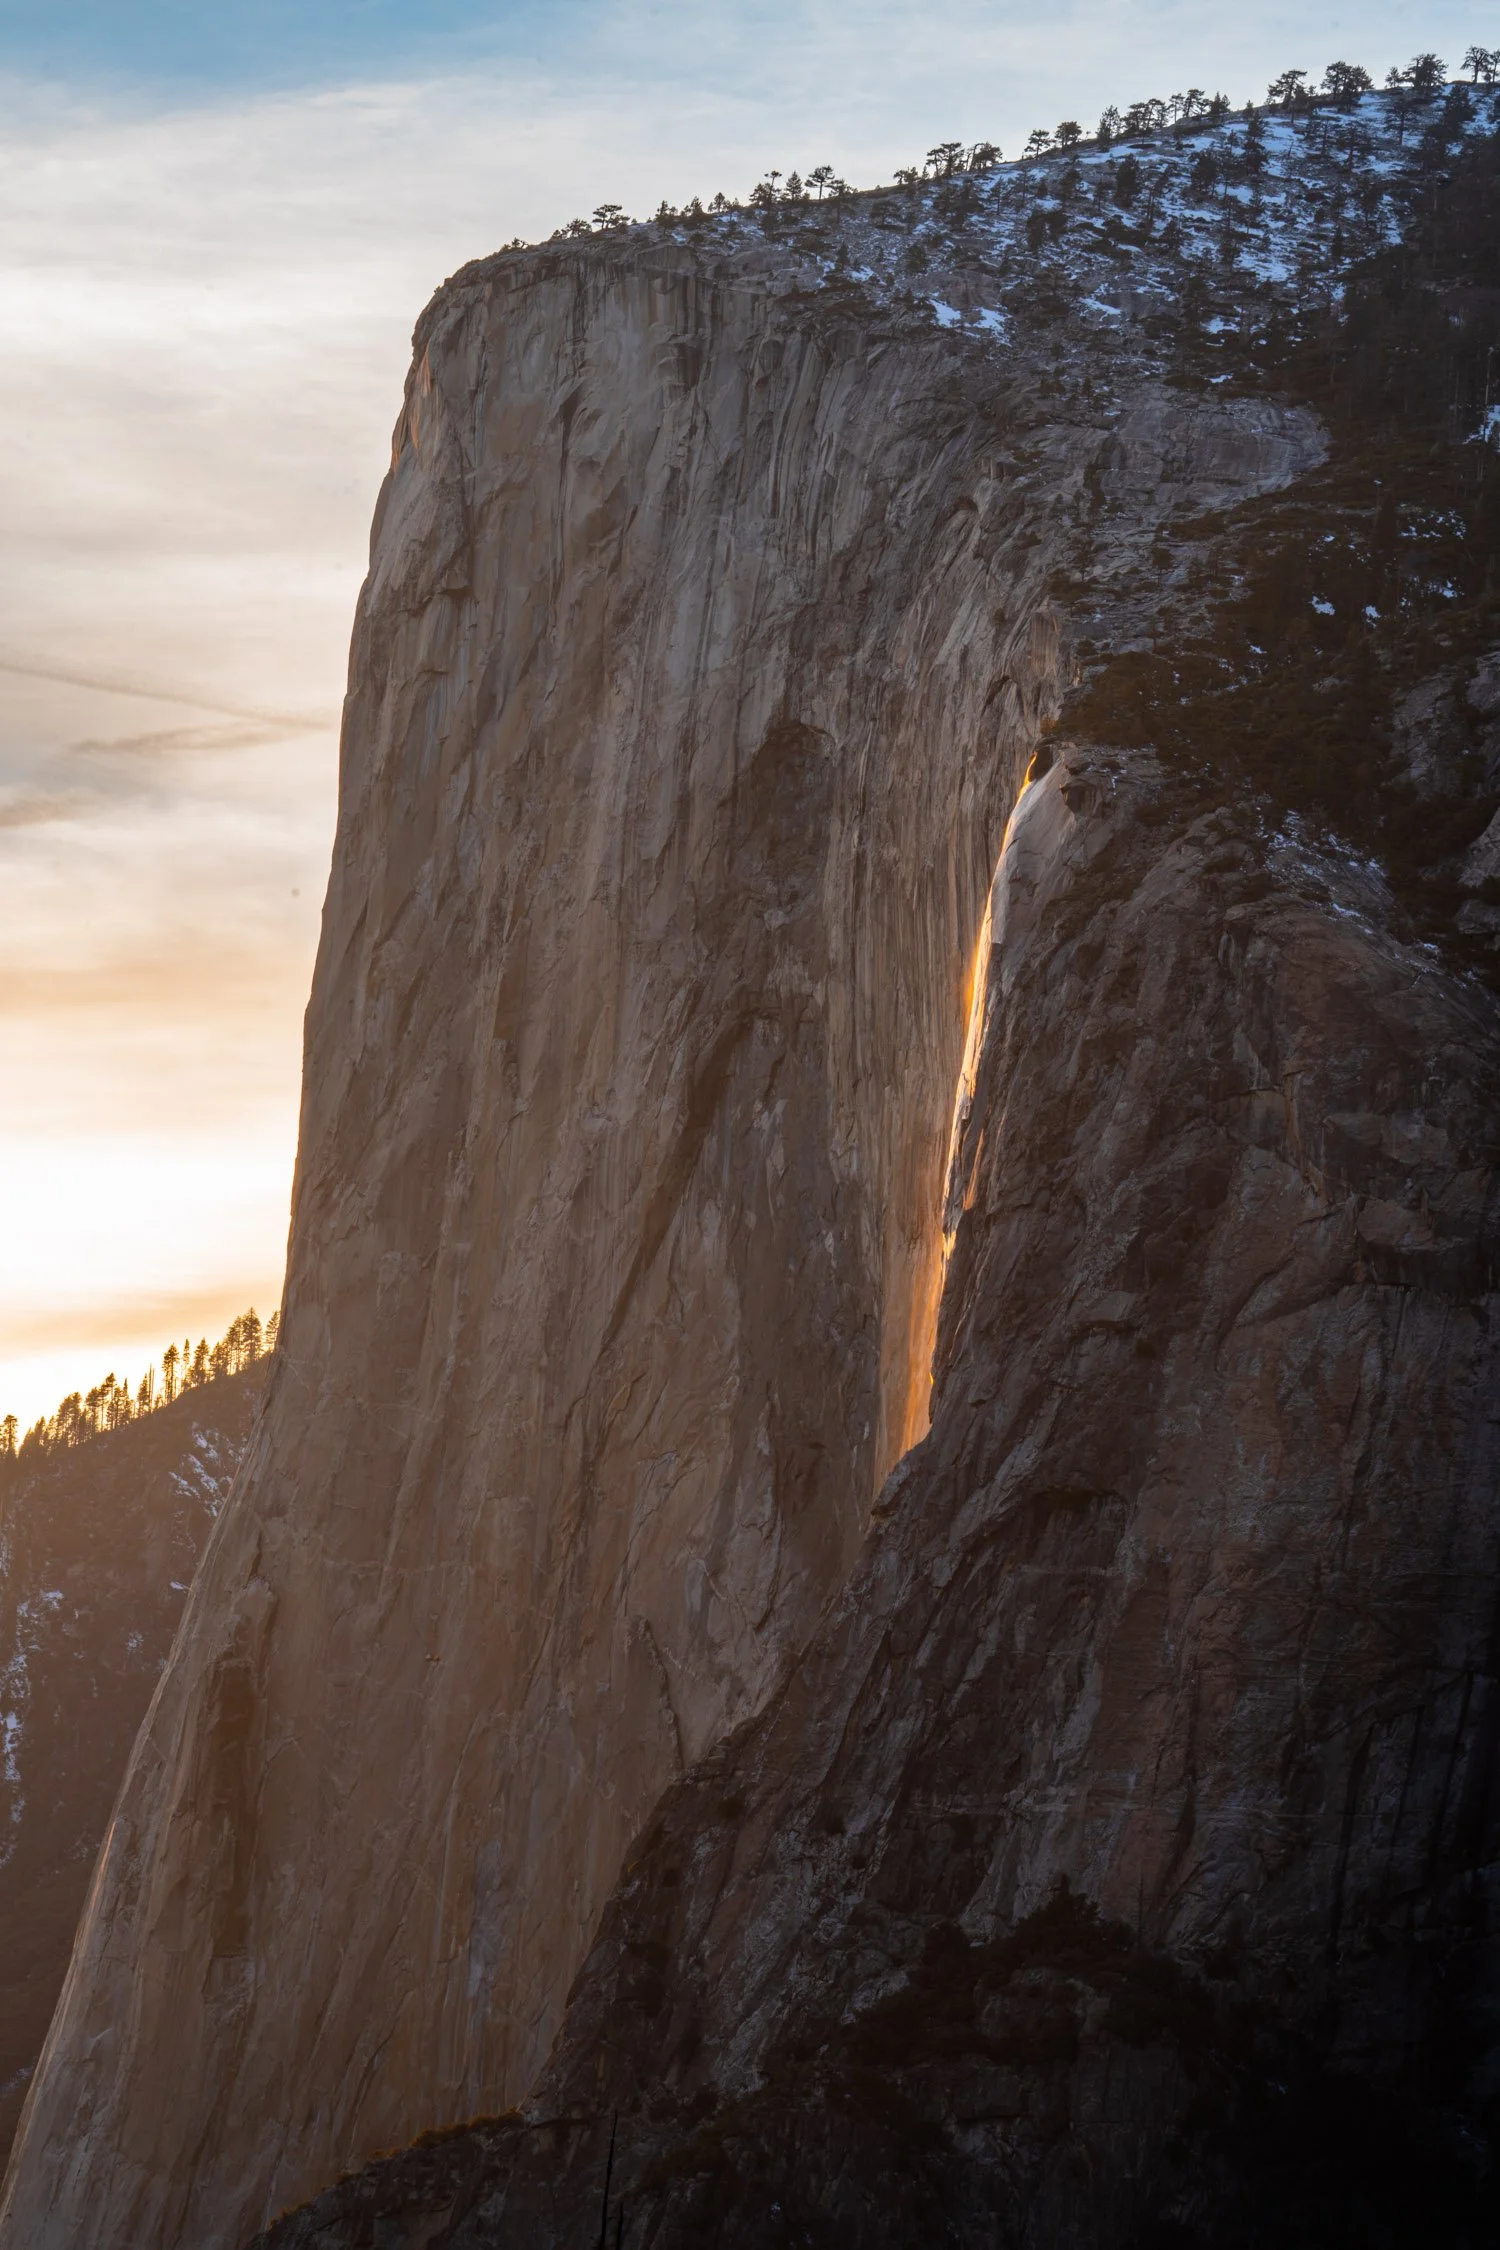
Horsetail Fall on El Capitan plummeting 1000 feet to Yosemite Valley floor during Fire Fall season. Photograph by Dalton Johnson
Horsetail Fall (aka fire fall)
Directions to Horsetail Fall:
Click here for driving directions to Horsetail Fall
Fun Facts about Horsetail Falls:
Horsetail Fall's claim to fame is the legend of the Horsetail Fall Event. It's a natural phenomenon that occurs typically in mid-February when all meteorological and hydrological formations align to create what looks like a ribbon of fire when the rays of the setting winter sun light up the water and mist first golden and then fiery red Horsetail Fall drops off the east side of El Capitan and was known in Ansel Adams's time as El Capitan Fall. Now, this event is called Fire Fall.
Total Height of Horsetail Fall: 1,000 Feet
Nevada Fall
Directions to Nevada Fall
Click here for driving directions to Nevada Fall
Fun Facts about Nevada Fall
The pinnacle of the Mist Trail, it is one part of what many call nature’s “giant staircase.” Located below the giant granite dome known as Liberty Cap, Nevada’s unique shape is one that will help you identify it quickly. The first third of the water falls freely finishing off on a steep slick-rock slope. The water hits the granite with such a force creating a turbulent, whitewater appearance and a great deal of mist... which led to its current name (Nevada is a Spanish word meaning "snowy").
Total Height of Nevada Fall: 594 feet

Hiking in Yosemite Valley
Yosemite Valley is home to some of the best hiking because you can access all of Yosemite National Park from Yosemite Valley. Hikes can range from a few minutes to weeks, the option is there for you. But, the variety of options makes selecting hikes difficult. So, I selected four of the best hikes of Yosemite Valley.
Yosemite Valley Loop Trail
If you want to hike the entirety of Yosemite Valley, this is your hike. Fully paved, the Valley Loop Trail was created to allow visitors a path to explore the entire valley by foot, or bike. While on this hike, you will find hidden gems along the Merced River, wildlife, and be able to soak in the gorgeous granite views Yosemite offers.
How long is the Valley Loop Trail?
21.1 miles
What is the elevation gain of the valley loop Trail?
1,335 feet
How long does it take to hike the valley loop trail?
7 hours and 23 minutes on average to walk
Nevada and Vernal Falls via Mist Trail
Hike to two breathtaking waterfalls, Vernal and Nevada Falls, along some of Yosemite Valley's most popular hiking trails. If you only have time for one hike while in Yosemite look no further - the Mist Trail is the hike for you. While you hike the Mist Trail, you will feel a cold breeze of mist from the waterfalls, making this of the most traveled hikes in Yosemite National Park. You may get wet from the mist, so make sure to bring a rain jacket. The best time to hike this trail is in Spring or early Summer, while the snow runoff is high and the falls are full of water.
How long is the Mist Trail?
6.0 miles
What is the elevation gain of the Mist Trail?
2,162 feet
How long does it take to hike the Mist Trail?
4 hours on average to walk
Panorama Trail
For those who are motivated for a full-day of hiking there’s arguably not a better trail to showcase the park’s natural treasures. There are several ways to enjoy this trail. For a moderate hike, start at Glacier Point and hike down to the Valley Floor. For a personal challenge, hike the Panorama trail from the Yosemite Valley floor out and back for a total of 18 miles, often taking all day. Regardless of how you hike this trail, the panoramic views of Yosemite Valley give the Panorama Trail its namesake.
How long is the Panorama Trail?
9 miles (one way) | 18 miles (out and back)
What is the elevation gain of the Panorama Trail?
2,257 feet
How long does it take to hike the Panorama Trail?
5-6 hours (one way), or 12-13 hours (out and back), on average to hike
Half Dome via John Muir Trail
Half Dome is a serious endurance hike taking you 4800 feet above the Yosemite Valley to spectacular views of Vernal and Nevada Falls, Liberty Cap, the Yosemite Valley, and the High Sierra. This is one of Yosemite National Park’s most iconic hikes and draws a serious crowd. Because of these crowds, you must obtain a permit to hike to the summit of Half Dome via the cable route.
How long is the Half Dome hike?
15 miles
What is the elevation gain of the Half Dome hike?
5,193 feet
How long does it take to hike the Half Dome hike?
10-11 hours on average to hike

Good Spots to Hang with Friends in Yosemite Valley
When visiting Yosemite Valley, there is often a desire to try to see everything; I’ll be frank with you, you just can’t see it all in a single trip. Yosemite Valley is special because of this fact, drawing us back time and time again. The view never get old. In fact, the views of Yosemite are like a fine wine, getting better with age. As you plan your visit to Yosemite Valley, make sure to add in some time to just sit and observe. Try not to run around from dusk till dawn, so you can hang with friends and appreciate the gorgeous views Yosemite Valley has to offer. My suggestions on place to hang with friends are Glacier Point, the Merced River Bank, and the El Capitan Meadow.
Glacier Point
Why is Glacier Point a good place to hang with friends?
Glacier Point is a fantastic place to hang with friends because there are fewer people in the area with several places to kick back and enjoy. Additionally, Glacier Point offers several locations with 360 degree views to see the magnificent Yosemite Valley from above. These views often leave me speechless.
Merced River Bank
Why is Merced River Bank a good place to hang with friends?
The Merced River winds through the entire Yosemite Valley, acting as the center piece. During the summer, you can find several people swimming, jumping off bridges, and enjoying a picnic on any of the many beaches along the Merced River. It is here, along the Merced River Bank, that I have had some of my favorite conversations and most relaxing times in Yosemite Valley. Make sure you bring a towel… just in case you feel the urge to take a dip.
El Capitan Meadow
Why is El Capitan Meadow a good place to hang with friends?
For climbers and tourists alike, the El Capitan Meadow can feel like the center of the universe while visiting Yosemite Valley. This large green meadow is a place where you can escape the crowds gawking at the rock climbers on El Cap or join them. Often you will find rock climbers sitting with binoculars looking up at the massive granite wall and pointing out their friends. Many other climbers will come here just to relax and soak up the sun on a rest day. Tourist are very welcome in the meadow as well because it is here that you can learn all about rock climbing in Yosemite Valley. Additionally, this is the best picnic spot in all of Yosemite Valley.
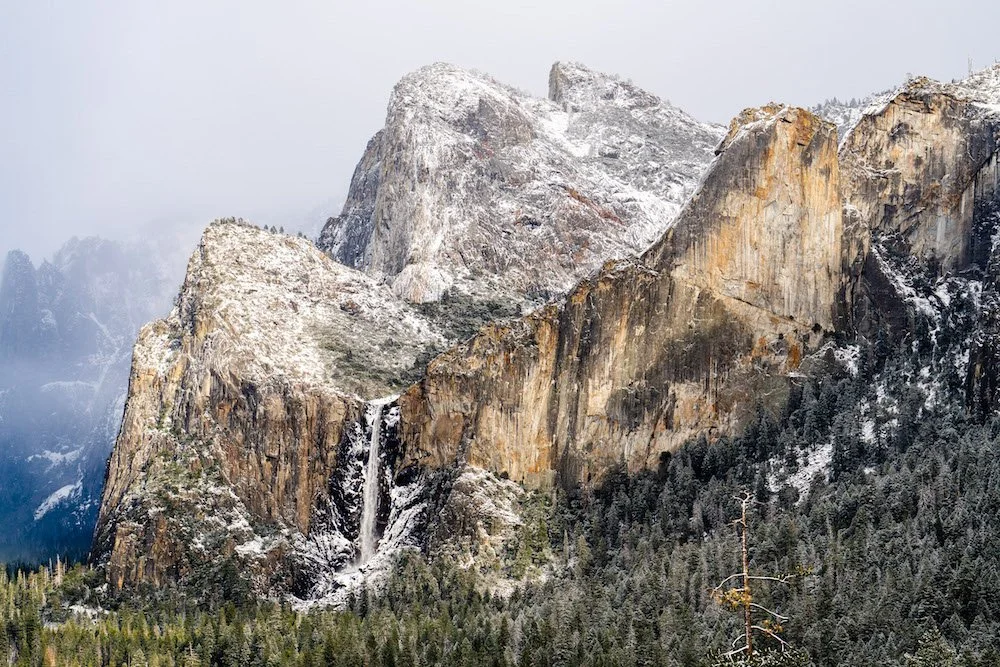
A very snowy Bridalveil Fall as seen just after a winter storm in Yosemite Valley from Tunnel View. Photograph by Dalton Johnson
Now that you have discovered the best views Yosemite Valley has to offer, where to day hike, places to hang with friends, and how to safely explore all of the waterfalls, it is your turn to get outside and explore Yosemite Valley. If this article helped you, or you wish to add some information that would be helpful to other adventurers exploring Yosemite Valley, please leave a comment below.
Discover More of Yosemite National Park
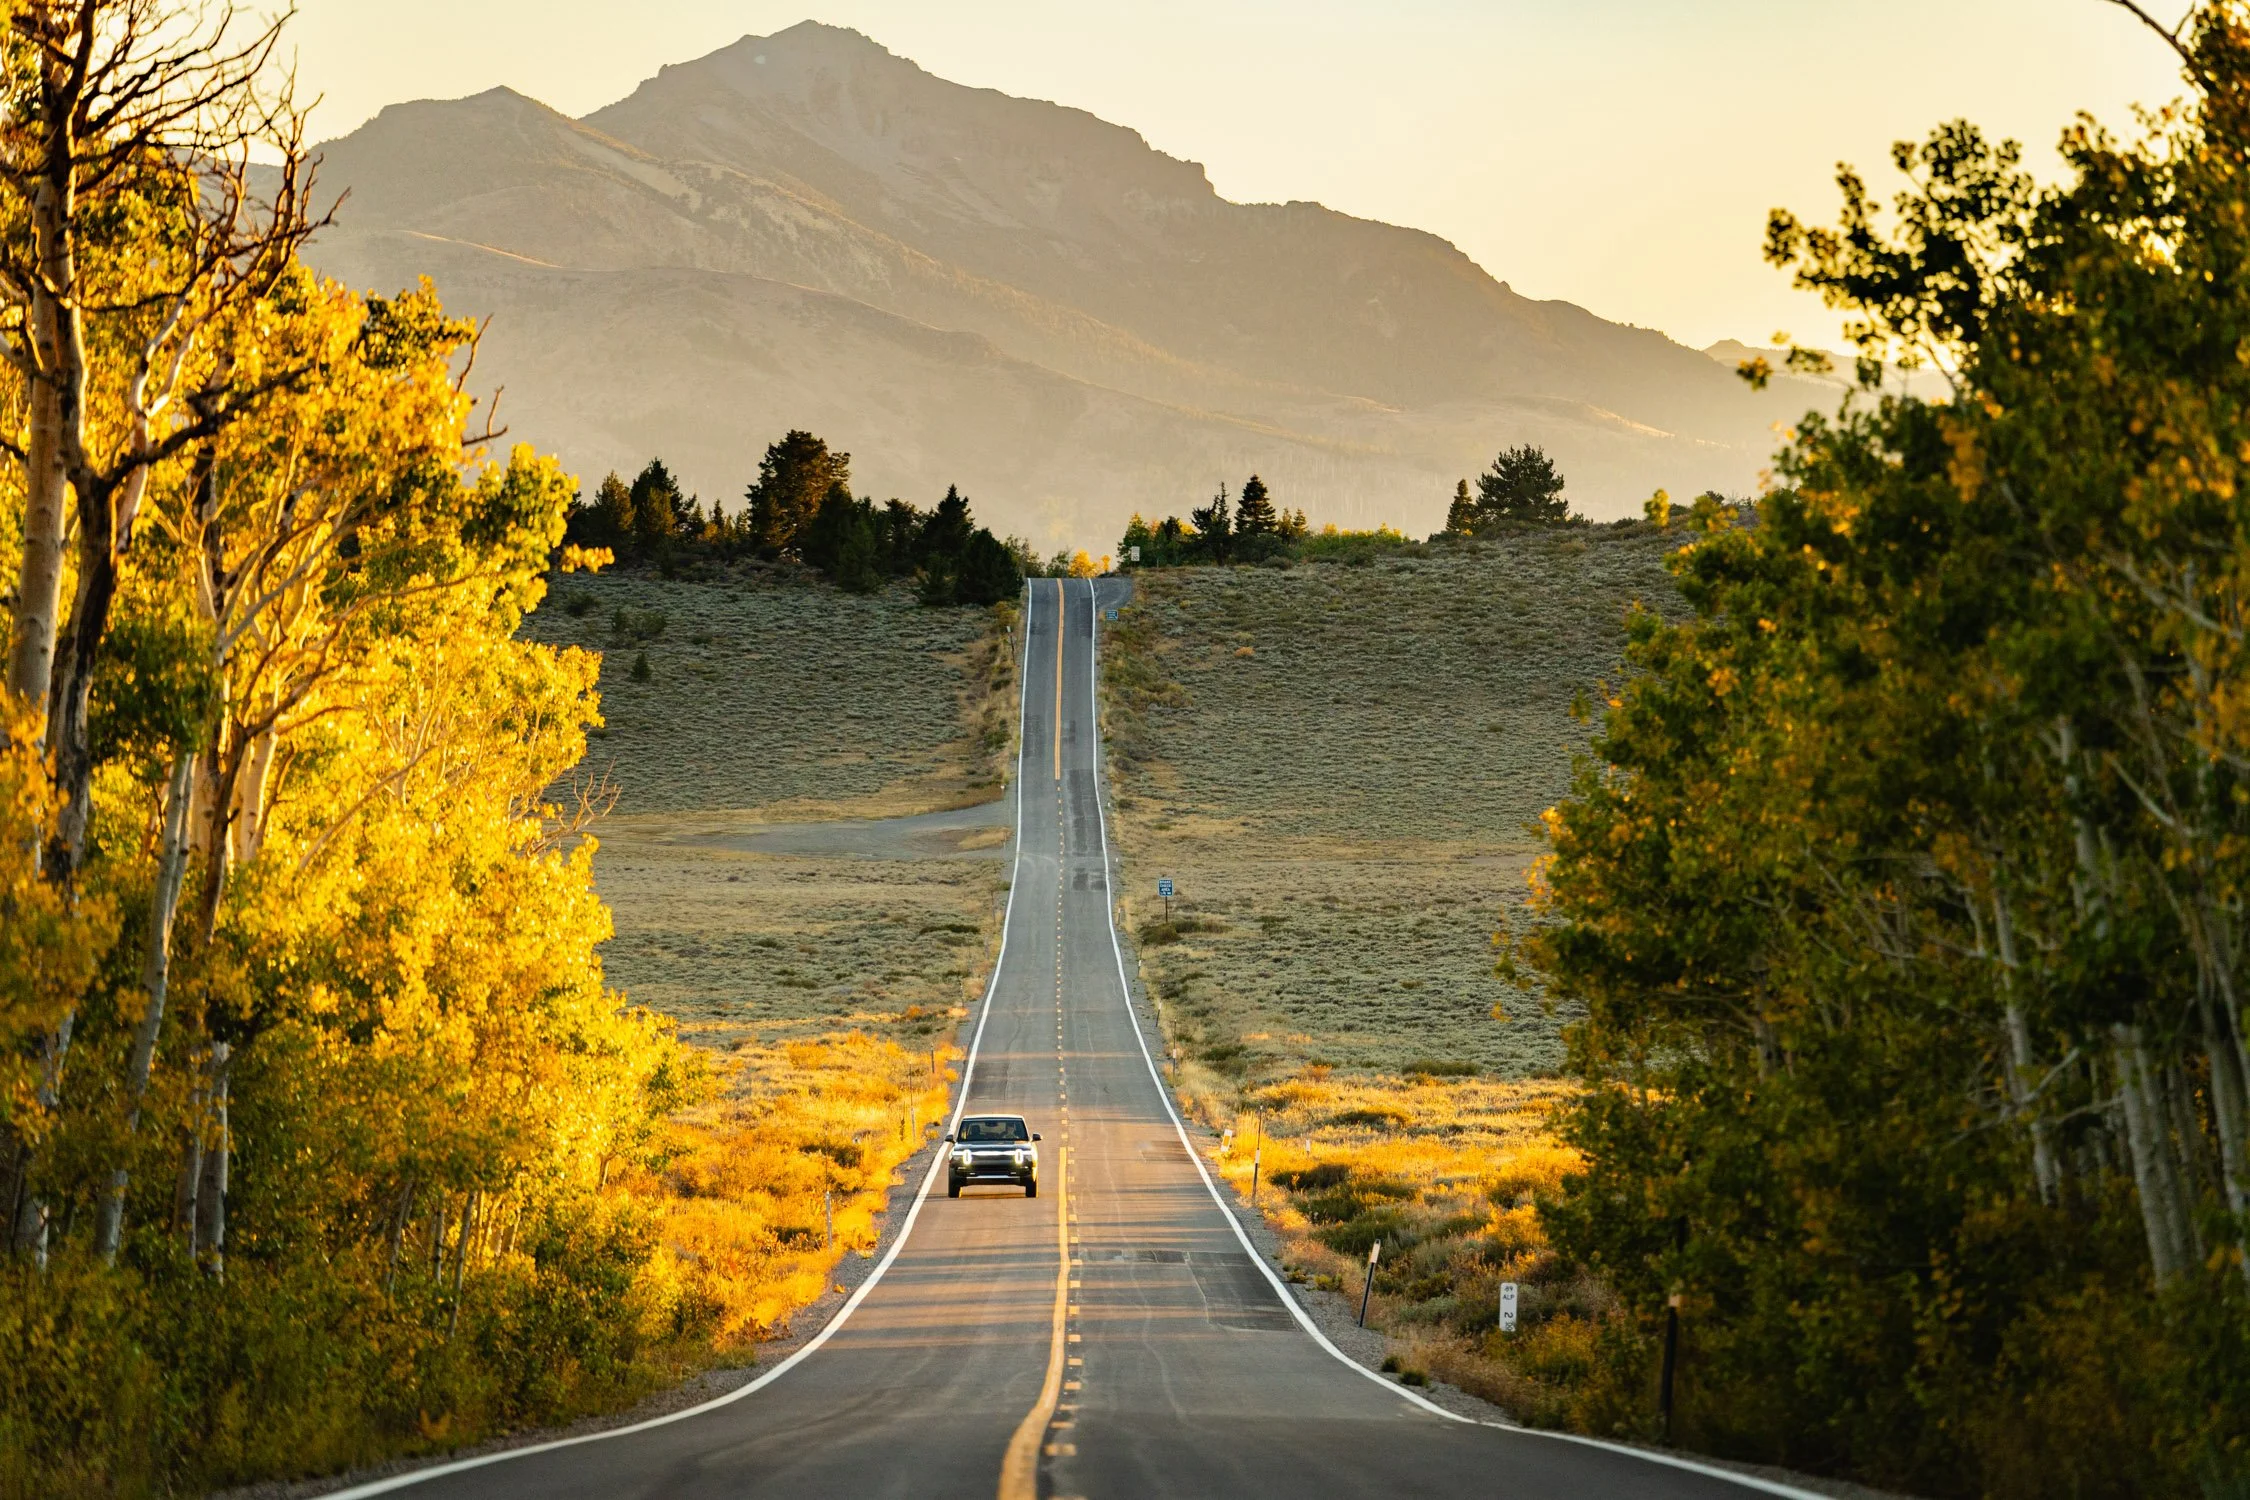
An EV Road Trip in Search of Fall Colors in Northern California
Few road trips start as grand as this one, but our road trip, in search of fall colors, was going to be different.
Starting at Lake Tahoe’s iconic Emerald Bay on a crisp morning, the Rivian R1S had the seats down and was loaded to the brim with camera gear, dog toys, suitcases, snacks, and hiking gear. Kristin, Chestnut (our dog), and myself were in for an adventure of a lifetime. Seeking fall colors throughout Northern California, we had planned a week long road trip looping from Lake Tahoe to Yosemite National Park back to our home in Lake Tahoe via as many backroads as possible.
Few road trips start as grand as this one, but our road trip, in search of fall colors, was going to be different.
Starting at Lake Tahoe’s iconic Emerald Bay on a crisp morning, the Rivian R1S had the seats down and was loaded to the brim with camera gear, dog toys, suitcases, snacks, and hiking gear. Kristin, Chestnut (our dog), and myself were in for an adventure of a lifetime. Seeking fall colors throughout Northern California, we had planned a four-day road trip looping from Lake Tahoe to Yosemite National Park back to our home in Lake Tahoe via as many backroads as possible.
Emerald Bay just before the sunrise on the first morning of our road trip. Photo by Dalton Johnson


The sun poking over the Carson Range and blanketing Lake Tahoe in the much needed warmth marked the beginning of our projected 400 mile road trip. However, we knew our desire to take the roads less traveled to find the color popping foliage meant we would most likely be driving 1200 to 1500 miles. Kinda tricky considering we were in an EV for the first time and worried about how to charge and where to charge. On our list of dream destinations for fall foliage in Northern California we had the following list:
Kirkwood / Hope Valley
Angora Lakes Overlook

Our route in search of fall colors and epic hikes in Northern California. Google Maps
Pros
Using the Rivian, instead of my van, we saved $482 in fuel costs
Utilizing the downloaded maps version of AllTrails allowed me to stay on path while hiking and trail running in Yosemite National park
Pet Mode saved us with Chestnut when we needed to run into a store and leave him in the Rivian
Fall colors on Monitor Pass at sunset blew our minds, we timed that perfectly
Cons
Fall colors were later than expected, so not as grand as previous years
I should have used the AllTrails scenic roads to find more locations for the road trip, but I didn’t know about this feature until the last day
Having Chestnut, our dog, with us prevented us from exploring Yosemite National Park as much as we wanted

Driving through the aspen groves towards the Angora Fire Lookout. Photo by Dalton Johnson
The Night Before Leaving
Like I said before, neither Kristin or myself had ever driven an Electric Vehicle before, so the family hopped in the Rivian and took off with high hopes of finding some fall colors in South Lake Tahoe. We figured our best bet would be around the Angora Lakes area as the winding dirt road has several aspen groves dotting the landscape.
To our surprise, there were only a few groves that had started turning from green to yellow and orange. This year the colors were late.
Weaving up the slopes towards the fire look out, the grove’s started to show signs of color. A pop of yellow here and another pop of color there. Turns out, we just needed to gain some elevation. I’m no scientist, so I have no idea what it takes for the colors to change on aspen trees, but I enjoy watching the yellow leaves dance in the wind. As we drove, Kristin and I were eager about the colors that started to show, especially in the sunset light.
Swapping back and forth, Kristin and I became accustomed to the regenerative braking of an EV. Learning how to drive smooth was a challenge at first and our driving resembled that of 15 year old in driver training as we bobble-headed around the turns of the road. However, after twenty or so minutes of driving, we both were able to understand how to drive with a the single pedal.
Arriving at the lookout just in time, we watched the golden glow of sunset envelop all of the Tahoe Basin.

Kristin and Chestnut soaking in the sunset views from the Angora Fire Lookout overlooking Fallen Leaf Lake and Lake Tahoe from the Rivian Tailgate. Photo by Dalton Johnson

Exploring the dirt roads on the way to Yosemite National Park. Photo by Dalton Johnson
Lake Tahoe to Yosemite National Park:
Leaving Emerald Bay and with myself at the wheel, our journey was underway. Typically, we would drive south to Sacramento, down the Interstate 5, and then head directly to Yosemite Valley, but have you ever set eyes on fall colors along I-5? We haven’t! Instead, we routed a path through the two lane roads of Sierra Nevada Mountains. Often, taking dirt side roads to hidden lakes and mountain towns tucked at the base of cliffs calling out to be climbed. However, we would need to return at a later date for that, for this trip was about fall colors.
The Rivian has roughly 400 miles on a single charge, so we knew we could take as many backroads as our heart’s desired.
Kicking up dust as we made our way south, Chestnut was doing a great job laying in the spacious back seats and would occasionally poke us with his nose, letting us know he needed to use the restroom. As a puppy of 12 weeks, his bladder was small and this was going to be his first big road trip. Luckily, the air conditioner in the back of the Rivian could blow directly on him, keeping him cool on the journey.
After one of the mandatory potty stops for Chestnut, I was feeling ambitious. Our “fuel tank” said we had plenty of energy, so I slammed the pedal to the floorboard to test out how fast we could go. 80, 90, 95, 100, 105, 110, 111…
“That’s enough!” Kristin shouted in a nervous voice next to me as her fingernails dug into my thigh.
“That is crazy! This thing can rip!” I shouted back, wide-eyed with adrenaline.

Recharging at the Rivian Outpost in Groveland, CA. Photo by Dalton Johnson
Stopping in at the flagship Rivian Outpost in Groveland, CA to top off the tank, before heading into Yosemite National Park for the evening, we stretched our legs, grabbed a cup of Jelly Beans (honestly, we did spill them), met a few other Rivian owners, and learned about the new collaboration between Rivian and AllTrails. In the wake of the major overhaul to the AllTrails app, Rivian and AllTrails have teamed up to enable the Rivian community to get outdoors. To do this, stop in at the Rivian Outpost and scan a QR code that will unlock one free month of AllTrails+.
What does AllTrails+ Unlock for you?
Offline Maps: Download maps in advance to ensure you know your location even without cell service, a much needed feature in National Parks. This is by far my favorite feature!
Distance Away: Search for trails based on how far they are from your current location. Whether you have just an hour or an entire day, find trails that match your available time
3D Maps: View an enhanced visualization of trails, including peaks and valleys, to better understand the terrain before heading out. This is my second favorite feature as it allows me to visualize photography spots and scout new routes along the way.
Enhanced Map Details: Access real-time information on air quality, satellite weather, pollen, light pollution, and user heatmaps to plan your trip effectively.
Printed maps: Print customized maps with options for scale, orientation, gridlines, and paper size. Have a backup plan without needing guidebooks.
Wrong-turn alerts: Load a map or trail route into Navigator to get alerts if you veer off course, helping you stay on track and enjoy your surroundings.
Ad-free experience: In other words, you save time while searching and get to spend more time outdoors.


Half Dome glowing in sunset light while parked in the Olmstead Point parking lot. Photo by Dalton Johnson
Yosemite National Park
Without much light left in the day, the gang hopped back in the Rivian and headed into Yosemite National Park, only 24 miles away from the Outpost.
My first thought was to seek out some fall colors in Yosemite Valley, but I figured we wouldn’t have time. So, I took a left at Cane Flat and bolted along Tioga Pass to Olmstead Point for the sunset. To my surprise, we arrived with plenty of time and Kristin pulled out her Kindle to read and look out the window at the transforming skyline. The colors changed from blue to yellow to orange. Yosemite’s most famous rock formation, Half Dome, glowed in the omnipresent golden light and I snapped images while gawking at the stunning view.
When the light was gone, we headed back to our hotel to rest up for the next full day of hiking around Yosemite National Park.
Crocker Point and Breaking my one mile trail personal Best
After a casual morning at the hotel, I took off for Yosemite Valley to meet up with a long time friend while Kristin stayed behind to work and take care of Chestnut. My buddy, Scott, was looking for “a good hike that could be used as a recovery day between climbing days.” Turns out, he had taken the month off to climb in the High Sierra and was conveniently in Yosemite Valley at the same time. So, we met up near Camp 4 where he had been crashing and opened AllTrails to find a hike. The night before, I had downloaded several hikes I thought we might be interested in doing.
“What do you think of this one?” I would say and hand my phone to Scott.
“Nah.”
“This one? It’s got a stunning view.”
“Sure, but I just want to hike it. I don’t think I can trail run that far.” Scott made sure I wasn’t going to sandbag him into running like I typically try to do.
“Sweet! Crocker Point is one of my favorite hikes!”
Off we went. Heading to the rim along Glacier Point Road, my GPS cut out on my phone and we were left to navigate to the trailhead using the AllTrails app. Turns out, the offline mode is a great feature in National Parks.

Utilizing the downloaded map to navigate the trail to Crocker Point. Photo by Dalton Johnson
With our packs over our shoulders, we picked up the trail and started our 10.1 mile hike along the Ponoho Trail to Crocker Point. Wandering through heavy vegetation we lost the trail occasionally, but, the “Wrong Turn” notifications corrected our misguided direction. After a few miles, we started diving into stories about climbing, picking up our friendship right where it was left off when I moved away from Santa Cruz a few years back. Scott and I typically climb together at least once a year, some-where, and this year it was in the Palisade Range of the High Sierra. That was only a few weeks ago, so I was curious to hear how his recent climbing experiences were tallying up.
Overall, he was crushing. Getting in several good leads and it was evident he was feeling strong on this trip.
Time moves quickly when you are hiking with a friend, sharing mutual goals, and planning for the future. So, when we reached the first point, Dewey Point, in what felt like no time, we were a little blown away. Four and half miles went quick. Laughing and joking about being “the best hikers in the world” we continued over to Crocker Point. A place I had only been in the winter, but preached to Scott as being “the best view of the Valley.”
Again, that half mile flew by and we took in the views.
“So, what do you think?” I questioned Scott looking for him to confirm my bias that this was the best view from the valley rim.
“Its stunning. Thanks for bringing me here. Not sure it’s the best, but really nice.” He said with a smirk, knowing I wanted him to confirm Crocker Point was the best view point of Yosemite Valley.
On our way back, Scott asked, “Do you have any goals right now?”


“Not really, but I have been somewhat trying to break my personal best one mile time on a trail.”
“How fast?”
“I need to go faster than 6:24”
“Do you want to try right now?”
“Right now?”
“Yeah, why not? Plus, the next mile is totally down hill, so that should be helpful” Scott claimed.
I laughed and responded, “Sure, let me get some music cued up for us to rip down this hill. You running too?”
“I’m not going to let you run alone.”
“Coming from the guy who said no trail running this morning, I’m a bit surprised.”
“People change their minds.”
So, I cued up some rap music, tied my shoelaces, and cinched down my backpack that was loaded with a camera, journal, a water bottle, some snacks, and a few miscellaneous items. Honestly, I thought this was silly as I didn’t think I could break a personal best with a pack weighing roughly 12 lbs.
“Let’s start with a really short jog to the start of the downhill, then take off like a bat out of hell, to break this thing. Sound good?”
“Let’s go!”
Off we went. Jogging at first and then sprinting down hill. Immediately, we had a to hop over a log and take several quick turns. I thought I might roll my ankle, but I didn’t want to leave any excuses on the table. At a full sprint I did everything I could to break my personal best. Rocks popped out of nowhere and foliage covered the trail. But, I kept sprinting. Scott was no longer in sight when I looked over my shoulder. My lungs were burning and I had that taste of iron in my mouth. Most likely the elevation. Still I sprinted.
“How fast did you go?” Scott asked.
“6:22!”
“Hell yeah!”
We high-fived in celebration and kept hiking out to the car.
Monitor Pass at sunset with a pop of fall colors. Photo by Dalton Johnson
Sunset At Monitor Pass on our journey home
Waking up with a cough after the run, Kristin laughed at my stupidity, “You and Scott always get up to something, don’t you?”
“I can’t deny that.”
This morning was the penultimate for us, so we enjoyed the hotel, packed up the Rivian, and began our journey home. First, we wanted to go for a little trail run in Tuolumne Meadows. So, while we drove through Yosemite National Park keeping an eye out for any fall colors, without much luck, we planned our trail run for the day. Kristin wanted to get in a few miles to break up the drive home and I needed a recovery run from the day prior.
Settling on the Glen Aulin trail, we parked the vehicle, turned on Pet Mode, and hit the trail. Both of us wished we could have had Chestnut run with us, but dogs just aren’t allowed on any trails that are not paved. We felt like bad paw-rents, but with Pet Mode, leaving Chestnut in the car for thirty minutes while we jogged a few miles didn’t seem like the worse thing we could do to him.

Chestnut sitting co-pilot when the Rivian is in Pet Mode.
Arriving back to the Rivian, Chestnut was fast asleep. Waking him up and feeding him lunch, we hit the road north, towards Lake Tahoe.
Driving along Highway 395, there are so many stunning places like Mammoth Lakes, Travertine Hot Springs, and Mono Lake, but we didn’t stop there. We had our eyes set for Monitor Pass at sunset. Which, according to our GPS left us little time for stops along the way, so we powered our way to the left hand turn off HWY 395 onto HWY 89.
Time was ticking and the sun was fading, fast. We drove up, up, up towards the summit. Our fingers were crossed we would make it to the pass just in time because I had heard a rumor from fellow photographers that the colors at the summit were bright yellow and orange. With Kristin at the wheel we sped our way north as I prepared my camera gear.
“Let me out here,” I said to Kristin as we arrived just in the nick of time.
Using walkie talkies, we chatted back and forth to coordinate a photograph that made me happy. ‘Okay, go, go, go.” I spoke into the walkie talkie fearing the light would fade and we would miss the shot.
Cherck, Cherck, Cherck
The camera snapped as Kristin and Chestnut zoomed past in the Rivian.
“I think we got it!” I shouted into the radio excited. “Come on back and pick me up. Let’s go home!”
Discover more Adventures

2025 Photography Guide to Firefall in Yosemite
Capturing the mesmerizing Yosemite Firefall in 2024 is a photography dream come true as the lava-like waterfall glows in the sunset light. However, to make the most of this incredible experience, it's crucial to be prepared. If you have never been to Yosemite Valley in the winter, planning is going to be key as weather changes quickly, sometimes permits are required, and knowing where to point your camera can always be overwhelming in this awe-inspiring landscape.
Capturing the mesmerizing Yosemite Firefall in 2025 is a photography dream come true as the lava-like waterfall glows in the sunset light. However, to make the most of this incredible experience, it's crucial to be prepared. If you have never been to Yosemite Valley in the winter, planning is going to be key as weather changes quickly, sometimes permits are required, and knowing where to point your camera can always be overwhelming in this awe-inspiring landscape.
Here are some essential tips to ensure you have a successful and memorable photography adventure:
Firefalls pourig over the east ledges of El Capitan. Photo by Dalton Johnson
1. Reservations and Planning:
Check for the latest information on reservations. During peak weekends in February, reservations may be required to enter Yosemite National Park. It's wise to plan your visit well in advance, especially if you're considering a weekend excursion.
If permits are required, you can reserver your spot here: www.recreation.gov
2. Crowd Control and Viewing Locations:
Yosemite is implementing measures to control crowds and protect the environment. During the peak Firefall season (between February 10 and 27, 2025), Southside Drive will be closed to pedestrians. The recommended viewing location during this period is the El Capitan picnic area on Northside Drive, where one lane will be closed to vehicles to allow pedestrians to safely access the viewpoint.
To reach the viewing area, you have two options:
Walk the 1.5 miles from the Yosemite Falls parking lot, which is near the Yosemite Valley Lodge.
Take advantage of the free shuttle service from Yosemite Village or Curry Village, which covers the 5 to 6 miles to the viewing point. The shuttle provides a convenient and eco-friendly way to reach your destination.
3. Weather Preparedness:
Yosemite in February can be chilly, sometimes snowy, especially after sunset. Be sure to dress warmly in layers to stay comfortable during your evening photography session. Be mindful of average February temperatures in Yosemite, which range from 28 to 53 degrees Fahrenheit. Preparedness is key to enjoying the experience to the fullest. Recommended clothing includes:
A scarf, or several hoods
Ensure your footwear is suitable for potentially icy or wet conditions, as you may encounter snow or moisture on the ground, like the Columbia Landroamer boot
Also, don't forget to bring a flashlight or headlamp as Firefall occurs at sunset and it will be dark after viewing. So, when you walk back to your car, 1.5 miles, it will be in low light or in the dark.


4. Equipment and Camera Settings:
Photographing Firefall in Yosemite National Park might seem like a straight forward landscape photography outing, but it isn't. There are a few tools and tricks that are important to bringing along on this photoshoot. Some you already know, but some pieces of gear you would not expect:
A sturdy tripod is essential for capturing long-exposure shots during low-light conditions
A wide-angle lens is ideal for capturing the expansive beauty of the Firefall and its surroundings, but this is not my go to lens while shooting Firefall
Bring an ultra-zoom lens, my favorite is the Tamron 150-500mm, so you can frame the waterfall without all the distracting surroundings
Bring a circular polarizer, maybe a VND, so you can utilize a long exposure to smooth out the waterfall and get the lava flow look (make sure to order the correct size filter for your lens)
Familiarize yourself with your camera settings, including manual mode, so you can nail your shots in Yosemite National Park. Here are some of the best settings to use while shooting Firefalls:
ISO: 160-400
Aperture: f/2.8-4.0
Shutter speed: .5" to 1.5" (the slower the better, unless it is windy)
Some shot types to consider are: long exposure, pulled back to showcase crowd, use trees to frame waterfall
Lastly, consider using a remote shutter release or the camera's built-in timer (2-5 second delay) to minimize camera shake when taking long-exposure shots
5. Patience, Timing, and Exploring:
If it is your first time photographing Firefalls in Yosemite, make sure to bring your patience. If you are going to photograph in the popular spot, the experience will not be secluded, nor will it be void of humans, so make sure you play nice with others while photographing/viewing the falls.
If you are looking for a more secluded experience, consider hiking some of the nearby trails to elevate your view and change your perspective to capture a unique image without many people around. This may feel strange, but there is nothing better than exploring the splendors of Yosemite.
Regardless, of where you are, timing is going to be key. The best shots often happen in the moments just before the sun dips below the horizon, creating a warm, fiery glow on Horsetail Falls. Take multiple shots with varying exposures and compositions to ensure you capture the Firefall's full splendor.
Don't be afraid to experiment and get creative with your photography!
Firefall in Yosemite National Park from Taft Point. Photo by Dalton Johnson
By following these essential tips, you'll be well-prepared to capture the Yosemite Firefall in all its natural splendor. Remember that this experience is not just about photography; it's a chance to connect with the beauty of Yosemite National Park and witness one of nature's most remarkable spectacles.
Discover more of Yosemite valley
A Photographer's Guide to Capturing Firefalls With Dalton Johnson
Dalton Johnson shares how to photograph Firefalls in Yosemite Valley

\Photographing Horsetail Fall Firefall in Yosemite National Park, is a dream for many photographers. The unique phenomenon, where the waterfall appears to be ablaze during a backlit sunset, offers a magical and surreal visual experience. To make the most of this opportunity, photographers need to consider several key factors to ensure they capture the moment with precision and artistry.
[embed]https://www.instagram.com/p/p:CrtFlbAOTcA[/embed]
Understanding the Phenomenon
1. Timing is Everything
The Horsetail Fall Firefall occurs in late February when the setting sun casts a warm, orange glow on the waterfall. Clear skies, a flowing waterfall, and the right sun angle are essential elements. If you plan their visit during the weekends of February 10–11, February 17–19, and February 24–25, 2024, National Park Service requires reservations for entrance due to the high demand. So, it's better to avoid these times, if possible, so you can skip the reservation process. Additionally, there will be less people during the weekdays, so you can avoid jocking for position to snap the photo you want.
Pro Tip: Give yourself at least a week to handle weather and learn about the area. The "shot" takes almost perfect conditions, which is rare during the winter. So, make sure you provide yourself with ample time.
2. Choose the Right Equipment
To capture the stunning details of the firefall, equip yourself with a telephoto lens, preferably with a focal length of 200mm or more. This allows you to zoom in on the waterfall and achieve a closer, more detailed shot. Additionally, bring a sturdy tripod, like the Peak Design Travel Tripod, to ensure stability during longer exposure times in low-light conditions.
My Go-To Lenses For Firefalls:
Tamron 150-500 f/5-6.7
Tamron 70-180 f/2.8 G2
Essential Photography Tips
3. Master Your Camera Settings
Achieving the perfect shot requires mastery of your camera settings. Use a low ISO setting (around 100-400) to minimize noise, and select a small aperture (higher f-stop number) for a greater depth of field. Experiment with different shutter speeds to find the ideal balance and convey the desired effect.
If you want to capture the smooth water look to highlight firefalls, set your shutter speed to 1/4 of a second or slower.
4. Arrive Early and Claim Your Spot
Given the popularity of the Horsetail Fall Firefall, arriving early is crucial. Many photographers stake out their positions well in advance, so plan to claim your spot early to secure the best vantage point.
If you have more than one day, explore Yosemite Valley for unique and different compositions for firefalls.
5. Patience is Key
Natural phenomena are unpredictable, and conditions may change rapidly. Be patient and attentive, as the intensity of the firefall effect can vary. Waiting for the perfect moment ensures you capture the spectacle at its most captivating. Hence, the need for multiple days in Yosemite valley to see firefalls.
Navigating the Reservation System
6. Understand the Reservation Process
With the introduction of a reservation system for Yosemite National Park, photographers need to be proactive. Starting at 8 am Pacific time on December 1, day-use reservations for the key weekends will be available. An additional 50% becomes available two days before the reservation date. Each user can make one reservation per seven days, so be prepared to secure your spot promptly.
7. Consider In-Park Accommodations
If you have a reservation for in-park accommodations, such as camping, lodging, or vacation rentals, you won't need an additional day-use reservation. Your overnight vehicle permit is valid for seven consecutive days, covering your entire stay.
Ensuring a Seamless Experience
8. Check and Prepare for Weather Conditions
Clear skies are essential for the firefall effect to be visible. Keep a close eye on weather forecasts and be prepared for varying conditions. Dress warmly, and bring lens cloths to wipe away mist or moisture that may accumulate on your camera equipment.
9. Respect Park Guidelines and Fellow Photographers
As you embark on this photographic journey, remember to respect the natural environment and fellow enthusiasts. Follow park guidelines, ethical photography practices, and be considerate of others who share the space.
[embed]https://www.instagram.com/p/p:CoxMtVLPv-P[/embed]
Photographing firefalls, especially the Horsetail Fall Firefall in Yosemite, is a rewarding yet challenging endeavor. Armed with the right equipment, an understanding of the natural phenomenon, and awareness of the reservation system, photographers can capture breathtaking moments that will be cherished for a lifetime. As the anticipation builds for the upcoming event, photographers are encouraged to plan ahead, secure their reservations, and embark on a visual journey that celebrates the beauty of nature.
Make sure to follow Dalton on Instagram, @detourswithdalton , or check out his photography portfolio.
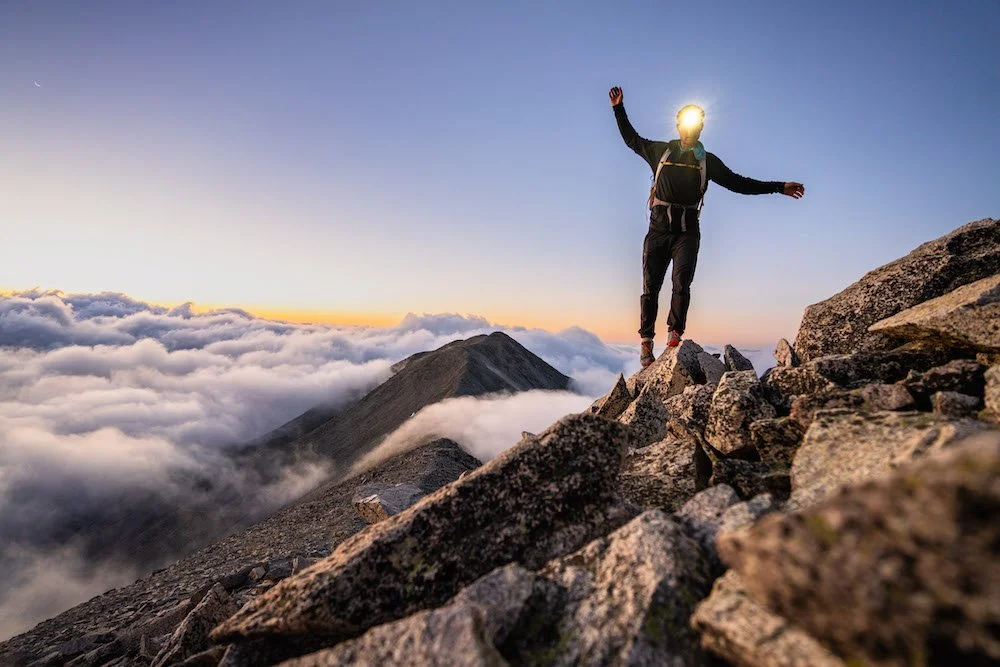
How To Climb All The Sawatch 14ers of Colorado
My legs still burn from the 20 days I spent climbing all of the 14ers in the Sawatch Range of Colorado. Home to fifteen summits poking above 14,000 feet the Sawatch range is a paradise for mountaineers, peak baggers, and hikers, offering a condensed grouping of challenging summits to test your fitness. For me, the goal was to climb all of these peaks in a single season, but for you, it could be to break the FKT or climb one a year, that is up to you.
My legs still burn from the 20 days I spent climbing all of the 14ers in the Sawatch Range of Colorado. Home to fifteen summits poking above 14,000 feet the Sawatch range is a paradise for mountaineers, peak baggers, and hikers, offering a condensed grouping of challenging summits to test your fitness. For me, the goal was to climb all of these peaks in a single season, but for you, it could be to break the FKT or climb one a year, that is up to you. Below is a video series I shot along the way that will give you a visual of what climbing these peaks are actually like so you can figure out which peaks you want to tick off your list.
Before we dive into each peak, below is a quick overview of the Sawatch range and it’s peaks:
The Sawatch Range in Colorado is home to 15, 14,000-foot peaks, making it the range with the highest number of 14ers in the state. Climbing these peaks offers an unparalleled beginner mountaineering experience in the summer, surrounded by breathtaking vistas, diverse terrain, and a sense of accomplishment like no other. Summiting all 15 peaks presents a thrilling challenge for adventurers seeking to test their skills, endurance, and appreciation for the stunning beauty of the Colorado Rockies.
Here's an overview to guide you through your journey to summit all of the Sawatch 14ers in Colorado:
Climbing Mount Princeton in the Sawatch range. Photo by Dalton Johnson
Pros
Breathtaking Scenery: Climbing the Sawatch 14ers rewards you with stunning panoramic views of the Colorado Rockies, including majestic peaks, alpine lakes, and expansive wilderness.
Personal Achievement: Conquering all 15 peaks is a significant accomplishment that showcases your physical endurance, mental resilience, and mountaineering skills.
Adventure and Challenge: Each peak offers a unique climbing experience, ranging from well-marked trails to rugged ridges, providing diverse challenges for mountaineering enthusiasts.
Connection with Nature: The Sawatch Range provides an opportunity to immerse yourself in nature, witnessing wildlife, alpine flora, and awe-inspiring landscapes up close.
Community and Camaraderie: Climbing these popular 14ers attracts like-minded adventurers, fostering a sense of community and camaraderie with fellow climbers on the trails.
Enhanced Physical Fitness: Training for and climbing these peaks improves cardiovascular health, stamina, and overall physical fitness.
Cons
High Altitude Challenges: The elevation of these peaks presents potential risks such as altitude sickness, dehydration, and rapidly changing weather conditions that climbers must be prepared for.
Technical Skills Required: Some routes demand technical mountaineering skills, making them unsuitable for beginners or those without proper training and experience.
Crowded Trails: Due to their popularity, some trails can get crowded, especially during peak climbing seasons, which may impact the sense of solitude and peace in nature.
Risk of Accidents: Climbing any mountain involves inherent risks, including slips, falls, and injuries, making it crucial to exercise caution and safety at all times.
Weather Uncertainty: The weather in the high-altitude Rockies can be unpredictable, with sudden storms and temperature drops, necessitating proper planning and preparation.
Environmental Impact: High foot traffic on popular routes can lead to erosion and impact delicate alpine ecosystems, emphasizing the importance of following Leave No Trace principles.
Mount Elbert - 14,440 ft (4,401 m)
Standard Route: Northeast Ridge - A well-marked trail that begins from the North Mount Elbert Trailhead, offering a gradual ascent through forests and meadows before reaching the exposed ridge leading to the summit.
Miles: Approximately 9 miles (14.5 km) round trip.
Elevation Gain: Around 4,700 feet (1,433 meters).
Trailhead: North Mount Elbert Trailhead.
Average Time: 8-12 hours.
Mount Massive - 14,421 ft (4,396 m)
Standard Route: East Slopes - Beginning from the Mount Massive Trailhead, this route takes you through alpine meadows and a well-defined trail leading to the broad summit ridge.
Miles: Approximately 14.5 miles (23.3 km) round trip.
Elevation Gain: About 4,600 feet (1,402 meters).
Trailhead: Mount Massive Trailhead.
Average Time: 8-11 hours.
Mount Harvard - 14,420 ft (4,395 m)
Standard Route: South Slopes - Starting from the North Cottonwood Creek Trailhead, this route ascends through pine forests and meadows before reaching the rocky summit slopes.
Miles: Approximately 14 miles (22.5 km) round trip.
Elevation Gain: Approximately 4,600 feet (1,402 meters).
Trailhead: North Cottonwood Creek Trailhead.
Average Time: 12-13 hours.
La Plata Peak - 14,336 ft (4,377 m)
Standard Route: Ellingwood Ridge - This challenging route starts from the La Plata Peak Trailhead and follows a steep, rocky ridge leading to the summit, offering exhilarating exposure and stunning views.
Miles: Approximately 9 miles (14.5 km) round trip.
Elevation Gain: About 4,500 feet (1,372 meters).
Trailhead: La Plata Peak Trailhead.
Average Time: 7-9 hours.
Mount Antero - 14,269 ft (4,348 m)
Standard Route: West Slopes - Beginning from the Baldwin Gulch Trailhead, this route follows an old mining road before ascending steeply up the mountain's western slopes.
Miles: Approximately 16 miles (25.7 km) round trip.
Elevation Gain: Around 5,400 feet (1,646 meters).
Trailhead: Baldwin Gulch Trailhead.
Average Time: 8-12 hours.
Mount Shavano - 14,229 ft (4,337 m)
Standard Route: East Slopes - Starting from the Shavano Trailhead, this route follows a well-marked trail up the eastern slopes of the mountain, with a final steep push to the summit.
Miles: Approximately 9 miles (14.5 km) round trip.
Elevation Gain: About 4,700 feet (1,433 meters).
Trailhead: Shavano Trailhead.
Average Time: 10-12 hours.
Tabeguache Peak - 14,155 ft (4,314 m)
Standard Route: Connecting Ridge - Tabeguache Peak is often climbed in conjunction with Mount Shavano via a connecting ridge hike, adding a little extra distance and challenge.
Miles: Approximately 12 miles (19.3 km) round trip (including both peaks).
Elevation Gain: Approximately 5,300 feet (1,615 meters).
Trailhead: Shavano Trailhead.
Average Time: 11-13 hours (including both peaks).
Mount Princeton - 14,197 ft (4,327 m)
Standard Route: East Slopes - Beginning from the Mount Princeton Trailhead, this route offers a steady climb up the eastern slopes, with sections of scree near the summit.
Miles: Approximately 6.5 miles (10.5 km) round trip.
Elevation Gain: About 3,200 feet (975 meters).
Trailhead: Mount Princeton Trailhead - From the cell towers.
Average Time: 7-8 hours.


Mount Yale - 14,196 ft (4,327 m)
Standard Route: Southwest Slopes - Starting from the Denny Creek Trailhead, this route follows a well-marked trail through forests and meadows before ascending the mountain's southwest slopes.
Miles: Approximately 9 miles (14.5 km) round trip.
Elevation Gain: Around 4,300 feet (1,311 meters).
Trailhead: Denny Creek Trailhead.
Average Time: 10-12 hours.
Mount Oxford - 14,153 ft (4,315 m)
Standard Route: Connecting Ridge - Mount Oxford is often climbed in conjunction with Mount Belford via a connecting ridge hike, adding a little extra distance and challenge.
Miles: Approximately 11 miles (17.7 km) round trip (including both peaks).
Elevation Gain: Approximately 5,300 feet (1,615 meters).
Trailhead: Missouri Gulch Trailhead (for both peaks).
Average Time: 12-15 hours (including both peaks).
Mount Belford - 14,197 ft (4,327 m)
Standard Route: Northwest Ridge - Starting from the Missouri Gulch Trailhead, this route follows a well-defined trail up the mountain's northwest ridge, offering stunning views throughout the ascent.
Miles: Approximately 9 miles (14.5 km) round trip (including both peaks).
Elevation Gain: About 4,600 feet (1,402 meters).
Trailhead: Missouri Gulch Trailhead.
Average Time: 12-15 hours.
Mount Columbia - 14,073 ft (4,289 m)
Standard Route: West Slopes - Beginning from the North Cottonwood Creek Trailhead, this route ascends the western slopes of the mountain, crossing a high alpine basin before reaching the summit ridge.
Miles: Approximately 14 miles (22.5 km) round trip.
Elevation Gain: Around 5,300 feet (1,615 meters).
Trailhead: North Cottonwood Creek Trailhead.
Average Time: 10-12 hours.
Missouri Mountain - 14,067 ft (4,287 m)
Standard Route: Northwest Ridge - Starting from the Missouri Gulch Trailhead, this route ascends through forests before reaching the exposed northwest ridge leading to the summit.
Miles: Approximately 10 miles (16.1 km) round trip.
Elevation Gain: Around 4,800 feet (1,463 meters).
Trailhead: Missouri Gulch Trailhead.
Average Time: 8-12 hours.
Mount of the Holy Cross - 14,011 ft (4,271 m)
Standard Route: North Ridge - Starting from the Halfmoon Trailhead, this route follows the well-defined North Ridge trail, offering breathtaking views and the iconic view of the "Cross Couloir" on the mountain's northeast face.
Miles: Approximately 12 miles (19.3 km) round trip.
Elevation Gain: Approximately 5,600 feet (1,707 meters).
Trailhead: Halfmoon Trailhead.
Average Time: 12-16 hours.
Mount Huron - 14,003 ft (4,268 m)
Standard Route: Northwest Slopes - Beginning from the Clear Creek Reservoir Trailhead, this route follows a well-marked trail through forests and meadows before ascending the mountain's northwest slopes.
Miles: Approximately 6.5 miles (10.5 km) round trip.
Elevation Gain: About 3,700 feet (1,128 meters).
Trailhead: Clear Creek Reservoir Trailhead.
Average Time: 8-10 hours.
Climbing finishing ridge of Missouri Mountain in the Sawatch Range. Photo by Dalton Johnson
For myself, completing the ascent of all fifteen 14,000-foot peaks in the Sawatch Range was an extraordinary achievement of endurance and perseverance. I hope you enjoyed the video series and learned which peaks you want to tackle yourself. My suggestion is to start with Huron Peak, Mount Elbert, or Mount Princeton. As you trek through Colorado's wilderness, each peak will offer unique challenges and rewards, leaving you with memories to cherish for a lifetime. Take the time to talk with others on the trail and keep each other safe. Lastly, remember to practice Leave No Trace principles and respect the natural environment as you embark on this incredible climbing journey.
Discover more 14,000 Peaks to Climb

How to Pitch an Article Idea
Thank you for your interest in pitching an article idea, we are excited to see what you have in mind. Please note, we are focused on adventure travel, so make sure your story fits. To make sure you understand what we cover, here is a quick outline:
What We Pay:
As a growing publication, without VC backing or a trust fund to lean on, we do not have a budget for freelance contributors.
In exchange of your content, we add value for contributors by working with you and providing pivotal feedback you will not get at a larger publication. Our editors take the time to hope on the phone with you, go over a submission, and help you become better at your craft. We are an ideal stepping stone for younger writers, photographers, and videographers looking to get their careers off the ground.
Additionally, you can use our publication as a leverage to help secure funds, or press trips spots, for upcoming trips or projects. The way you do this, let us know you are going on a trip and what the potential stories could be. We will chat through those and confirm a publication. Then you can use our distribution channels and audience numbers to help your project secure funding while pitching potential clients.
We understand not getting paid for your work sucks and we look forward to changing that for our contributors in the near future.
What we DO NOT cover:
Athletes on a pro-circuit, but we do cover pros that are doing rad things. Think freesurfers chasing slabs, adventure climbers, mountaineers, kayakers on the search for new lines, etc.
Races. While we love races, and think they are awesome ways to test your abilities, but it doesn’t fit. Now, there is some gray area for those who have a compelling story that are doing extreme and obscure races like the Iditarod, solo self-contained Badwater, etc.
Food, unless you caught/hunted it, cooked it, and ate it.
What we do cover:
Trip Reports from Rad Destinations: This will need to cover how other people can do it and share your personal story along the way
Adventure Travel Tips: The focus here is to share knowledge for new adventure travelers with family, with kids, solo, etc.
National Parks: We have guides and personal trips that can be applied in a more broad manner
Activities We Focus On: climbing (all kinds), fishing (mostly fly fishing), road trips, running (mostly trails), surfing, and van life
Gear Reviews: these are a blend of video and written
Article break down:
70% US based, 30% International
Most articles are 800 - 1200 words, supported by images and ideally have a video or reel
Pitch Format:
Send me an email: editors@the-adventure-travel-network.com
Subject line: Article Pitch: Title
Dear Editors,
Blah blah blah… stroke our ego a little bit… blah blah blah. I have “X” number of pitches for you:
Title: Write your title
Snippet: 3-5 sentences MAX about the article
Estimated length: provide a realistic range
Layers to story:
layer 1
layer 2
layer 3
Why does this belong? Convince me here in 3-5 sentences max. Ideally 2-3 sentences.
Supported by photos, video? Do NOT send them until asked
Thank you so much for your consideration,
Writer
Discover more of Adventure Travel

Van Life vs RV Life, Which Lifestyle Is Better
In the ever-changing landscape of adventure travel, where the open road calls and exploration becomes a way of life, you have two options while living on the road: van life or RV life. Growing up as a kid, I spent every holiday in an RV somewhere around the United States or Mexico, but when I graduated college, reality slapped me in the face that living solo in an RV was, well, extra. I didn’t need all that space, so, I built out my own van and lived full-time on the road for seven years. Now, however, I have a committed girlfriend and dog, so van life isn’t ideal anymore.
In the ever-changing landscape of adventure travel, where the open road calls and exploration becomes a way of life, you have two options while living on the road: van life or RV life. Growing up as a kid, I spent every holiday in an RV somewhere around the United States or Mexico, but when I graduated college, reality slapped me in the face that living solo in an RV was, well, extra. I didn’t need all that space, so, I built out my own van and lived full-time on the road for seven years. Now, however, I have a committed girlfriend and dog, so van life isn’t ideal anymore.
As life changes I am constantly asking myself, should I be in a van or an RV? If you are in this same predicament, here’s a break down of my thought process between RV life vs van life for anyone who wants to live a nomadic lifestyle.

Exploring the open roads of British Columbia. Photo by Dalton Johnson
Comparing van life vs RV life:
Before diving into the nitty-griddy of van life vs rv life, I want to lay down some basics so there is no confusion of what I am comparing. Those basics will include my definitions of van life and RV life, lifestyle assumptions, desired activities, and desired community. My overall goal is to compare the lifestyle of both with a few assumptions:
You can work remotely and make roughly $60k a year
You love the outdoors and want to play outside as much as possible
You don’t have to rely on others if something basic breaks on your rig
You will move your rig around based on the seasons
What is Van Life?
Van life is a chosen nomadic lifestyle where your home is a van. This can mean you road trip around the United States, or around the world. The main characteristic of van life is that your home on wheels is a van. It doesn’t matter if you have a fancy Sprinter van converted by Airstream or a janky and, somewhat creepy, rust bucket for a van. While I haven’t lived in a pre-converted van, I will say, I’ve lived at both spectrums of these van life experience and one is just more comfortable than the other.
In terms of wanderlust, van life emerges as the epitome of agility, granting wanderers and road trippers unparalleled freedom to experience journeys both grand and intimate, near and far, within bustling urban jungles and secluded off-the-beaten-path landscapes. For those who crave the thrill of spontaneity and the ability to uncover hidden gems, van life stands as the ultimate solo and small family vehicle.
What is RV Life?
RV life at it’s roots means you live in an RV, by choice, exploring the wherever the roads allow you to go. You have all the basics and a little comfort, like a shower and a kitchen table. Some RVs have full bathrooms and pop-outs that allow you to do yoga in your “living room” while others are still compact, tiny homes on wheels.
RVs redefine adventure back in the 90’s with a focus on comfort and convenience, much like van life has reinvigorated travelers today. RV enthusiasts enjoy long term travel with the luxury of a traditional home. The coziness and comfort often includes spacious kitchens, couches, bedroom, and full bathrooms making life on the road sustainable for families. The biggest downsize, the size of your rig.
What’s the difference between RV Life and Van lIfe?
In a single, defining word; comfort. Comfort defines the difference between RV life and van life when comparing the two at a 10,000 foot level. Both offer the same level of freedom on the road, yet RV life has a couch, shower, full kitchen, a flushing toilet, room to stretch, and so much more. Meanwhile, van life offers more access to remote camping spots, mobility in cities, stealth camping, and a better starting price point.
Now, that we have the basics down, let’s jump into the details that define these two liftestyles.

Driving a van in Monument Valley. Photo by Dalton Johnson
Cost Comparison
Van Life:
Van life tends to be the frugal choice when living on the road because the barrier to entry is lower than RV life. Vans are generally more cost-effective to purchase ($15k - $110k), maintain (roughly $2k-$5k a year), and fuel (roughly $110 per tank). Also, your registration and insurance on a van is often lower than RVs because a van is typically not considered a luxury item. The best part of living in a van is the cost to park it, which should be free! The smaller size and often more capable vehicles allow vans to enjoy BLM land to camp on for 14 days at a time without moving or paying to sleep. This adds up over time!
For a deep dive in to van life costs, here are three helpful articles:
RV Life:
RV life, with its larger size and amenities, can be a more substantial financial investment upfront and to operate. The RV industry is well established at this point, so the consistency is more predictable, but that doesn’t mean the costs are cheaper. Actually, the costs of anything RV related is often more expensive. While the initial costs to buy ($30K - $1.5M) and maintenance expenses ($5K-10K a year) may be higher than van life prices, RV lifers find value in the comfort and convenience that larger rigs offer. The investment in an RV often translates into a mobile haven that enhances the overall travel and leisure experience. The downside of comfort is you pay for parking, typically $30 to $50 a night (aka $900 to $1,500 a month) and the extra fuel costs ranging from $150 to $300 a tank.

Soaking in the gray skies next to the water while vanlifing in Alaska. Photo by Dalton Johnson
Parking Your Rig and Access to the outdoors
Van Life:
For adventure seekers drawn to remote and wild landscapes, van life is the stands out. Some vans come in 4WD and offer high clearance, so you would have plenty of places you could explore if you know how to maneuver your van well. Additionally, vans are equipped with solar panels, portable toilets, and compact heating systems making them self-sufficient and the perfect exploration vehicle. Van dwellers often embrace the challenge of reaching off-the-grid destinations, down wash-board roads that rattle everything, just to post up for a few days in nature, alone.
I can tell you this has always been my favorite outings! If I can pop my backdoors open to the world and enjoy the beauty of nature, maybe even have a climbing destination as my backyard! That would be my ideal camp spot.
RV Life:
RVs may face challenges reaching remote areas because they are so big. When you pick RV life you better be good at backing up because if you go down a road and can’t turn around, you’ll be scooting backwards for a very long time. On the plus side, RV life offers more comforts for longer stays in remote locations. After a long day out, you can kick back on a couch while your partner cooks dinner and your dog lays on the ground. Moreover, you several people can stay in an RV at one time, so RV life is more suitable for families. The additional indoor space allows you to work remotely more comfortable, which means if you can get your rig deep into the woods, you wont need to return to civilization for up to two, sometimes three weeks.
Even better, if you bring e-bikes with you in your RV, you can run your errands using those!
Personalizing Your Rig
Van Life:
Van conversions are a testament to the creativity of the van life community. Yes, vans are starting to come pre-converted, but those builds are not as popular, nor as cost effiecent, as a self converted van. When converting your own space make sure to utilize the space. When using inventive design solutions, transforming vans into livable spaces that reflect the spirit of their owners. Some van life builds go vertical while others focus on layouts that can be altered, like a bed to table. Every modification becomes a statement, a unique expression of the adventurer's personality and lifestyle. You’ll need to pick and choose what you want as a van lifer.
To make sure you build a van you like, take the time to look at other people’s vans when you see them.
RV Life:
RVs may not offer the same level of customization as vans, but they provide a canvas for personalization that most are unwilling to unlock. Interior decor, layout adjustments, and full redesigns are possible if you are willing to do the work. RVs are larger canvas that should be of interest to all those who need more space. Sure, a remodel isn’t the most ideal when dumping a bunch of cash upfront on an RV, but it is possible. The good news, since the RV industry has been around for a longer time period, people have come up with redesigns online that you can follow for almost any RV.

Enjoying a campfire in remote Baja during a van life meet up. Photo by Dalton Johnson
Community and Lifestyle Differences
Van Life:
The van life community exemplifies camaraderie when you are around each other. The challenge, finding other van life friends. Most of the communities around van life have to due with the activities you enjoy doing. For example, mountain bike van lifers will all be hanging out around the popular mountain biking locations. From my seven years of van life this concept holds true for rock climbing communities, photography communities, and surf communities. Sure, you can try connecting through social media, rely on chance encounters on the road, or head to van life gatherings, but your best bet at building a community of van lifers is to go out and do the activity.
Top Activities for Van life:
Photography
RV Life:
RVers, too, build connections on the road and online, however most of the meetings occur while in a campground. Campgrounds and RV parks become hubs of social interaction, where travelers swap tales of adventures and tips for the next great destination. Sometimes this is around a campfire or at the picnic tables. RV parks often have showers and community centers that are perfect for connecting and building a community. One noticeably different way of connecting is the use of Facebook groups for specific RV builds. Several RV builds have cult followings with a Facebook group of other owners to connect. All of these together help foster lasting friendships, turning the nomadic lifestyle into a collective journey.
Top Activities for RV Life:
Snorkeling
SUPing
Mountain Biking or Road Cycling
Photography
Alaska, the land of long roads and braided rivers. Photo by Dalton Johnson
Which is right for you; van life or RV life?
The choice between van life and RV life becomes a pivotal decision, shaping not only the mode of exploration but the very essence of the journey. Van life offers the nimbleness to weave through urban landscapes and conquer off-road challenges, while RV life provides the comfort and versatility to transform the journey into one of comfort. While the open road might be calling your name, ask yourself these quesitons below to know if a van or an RV is right for you:
How many people are you going to travel with?
Do you want to be off the grid more than on the grid?
Do you plan to sleep BLM or in parks?
What is your budget?
Can you work remote?
What activities do you like?
How much “stuff” do you need/want while living nomadically?
Do you want to move your rig often, or stay posted up in a single location for several weeks?
Do you need a full kitchen?
Do you want a flushable toilet?
When you take the time to answer these questions about how you want to travel and live on the road you will know if RV life or van life is better for your situation. I know my stance has been changing. Since pivoting from a solo traveling moving from surf spot to climbing spot to a guy with a dog and in a committed relationship, RV life looks much better than van life. However, five years ago, van life was perfect for me.
Discover more Adventures

Northern Lights Over Lake Tahoe
My phone binged with an alert from Aurora, an app I had downloaded when I started chasing the Northern Lights in 2023. The message read, “Do to high aurora activity, it might possible to see the aurora in your location right now.” However, since it was 2 pm in the afternoon and the skies were cloudy I knew it wasn’t going to happen, but the alert made me ask the questions; If I could see the aurora tonight in Lake Tahoe, CA where would I want to see it? Could I photograph it?
I got thinking…
Best Places to See The Northern Lights In Lake Tahoe
The Northern Lights, also known as aurora borealis, will be in the northern part of the sky. While that sounds intuitive, it did take me longer than it should have to notice. So, as I jumped off the rock at Bonsai Beach along the eastern shore of Lake Tahoe I brain-stormed the ideal locations in Lake Tahoe that would face north, but also be a good spot for photography. This is what I came up with:
Donner Summit (not Lake Tahoe, but still a good spot)
D.L. Bliss
Pope Beach
Camp Richard
Fallen Leaf Lake Overlook
As I scrolled through the Aurora app to see when the KP index would peak for ideal viewing and photography, I started to narrow down my decision on where to go. Honestly, it was easy for me; Emerald Bay. This area is the most visited area, which can be a challenge, but it is also a stunning location because of Fannette Island and the shape of the bay. Now, I just needed to pack my gear, wait a few hours, and head to the bay.


Gear I packed to Photograph the Northern Lights In Lake Tahoe
Camera gear can become cumbersome, so I wanted to keep things simple, especially if Emerald Bay was going to be busy. My guess, it was going to be! With that said, I knew the low light was going to be an issue, so selecting my camera body I made a decision I typically would not when shooting landscape photography. The gear I went with was:
Sony A7s3: with the dual ISO I knew I could crank it to 12,800 and maintain image quality
Tamron 17-28 f/2.8: this lens has been my go to for all landscape photography
Peak Design Tripod: I really like this tripod because of the ball swivel head, making it easy to level the camera without having to move the legs around all that much
A headlamp: the northern lights happen in the dark, so this was a must
With the gear loaded up in my van, I needed to wait a little while so I could head out, but soon enough I would be snapping images of the Northern Lights over Emerald Bay in Lake Tahoe, CA.
Getting the Shot: Northern Lights Over Emerald Bay
From my past experiences photographing the Northern Lights in Canada and Norway, I’ve found the best time to see the aurora are between 10pm and 2am. While this general rule of thumb doesn’t always work, so keep an eye on the KP index radar, I use it as a guideline. So, I ate a little bit of dinner and asked my girlfriend if she wanted to join. “Of course!” she proclaimed.
“Ready in 20 minutes?” I asked
“Yup!”
We ate some food and hoped into the van around 9:15pm, leaving our home in South Lake Tahoe driving along Emerald Bay Highway. Keeping an eye out the window for signs of activity, the towering evergreens blocked our view, so we kept driving. The song, Astrovan, blasted throughout the speakers as we wound up the west shore of Lake Tahoe. Cars driving in all direction, not normal for this area, was certainly because of the potential aurora. As we drove out the trees, gaining a clear view of the sky, we pulled over, just to take a look.
Pulling out our phones, we snapped some hand held long exposures just to see if the camera could pick anything up. While we couldn’t see anything with the naked eye, we could see a slight pink in the images our phones captured.
“Oh, this could be good, we should head to Emerald Bay.”
“Yeah, let’s go.” Kristin confirmed.
Loading back into the van we made our way to the bay and attempted to find parking. The place was crowded. Cars parked along the road, people walking along the road without a shoulder, it was a bit scary driving the van. The good news, my favorite pull out had plenty of room to squeeze the van along the shoulder and out of the fog line. I pulled in my mirrors and grabbed the camera gear.
Walking a hundred yards, I set up my camera next to a few older photographers sharing stories and drinking beer. Their stories kept me entertained as I got my camera together in the dark.
10 pm came and went, but as 10:30 rolled around, a red column of Northern Lights began reaching towards the sky.
Dialing in my focus, changing my settings around a little bit, I snapped. Not good enough. A few more tweaks to the settings and I snapped again. That one looks good, I said to myself.
Northern Lights over Emerald Bay. Photo by Dalton Johnson
As quickly as the red column came, it faded away. Kristin and I sat around for another 30 minutes hoping something would happen, but the KP index was fading and the radar was showing the Northern Lights were moving away from Lake Tahoe. So, we packed up and headed home, back to a warm cup of tea, a quick edit, and sleep.
Discover more Adventures
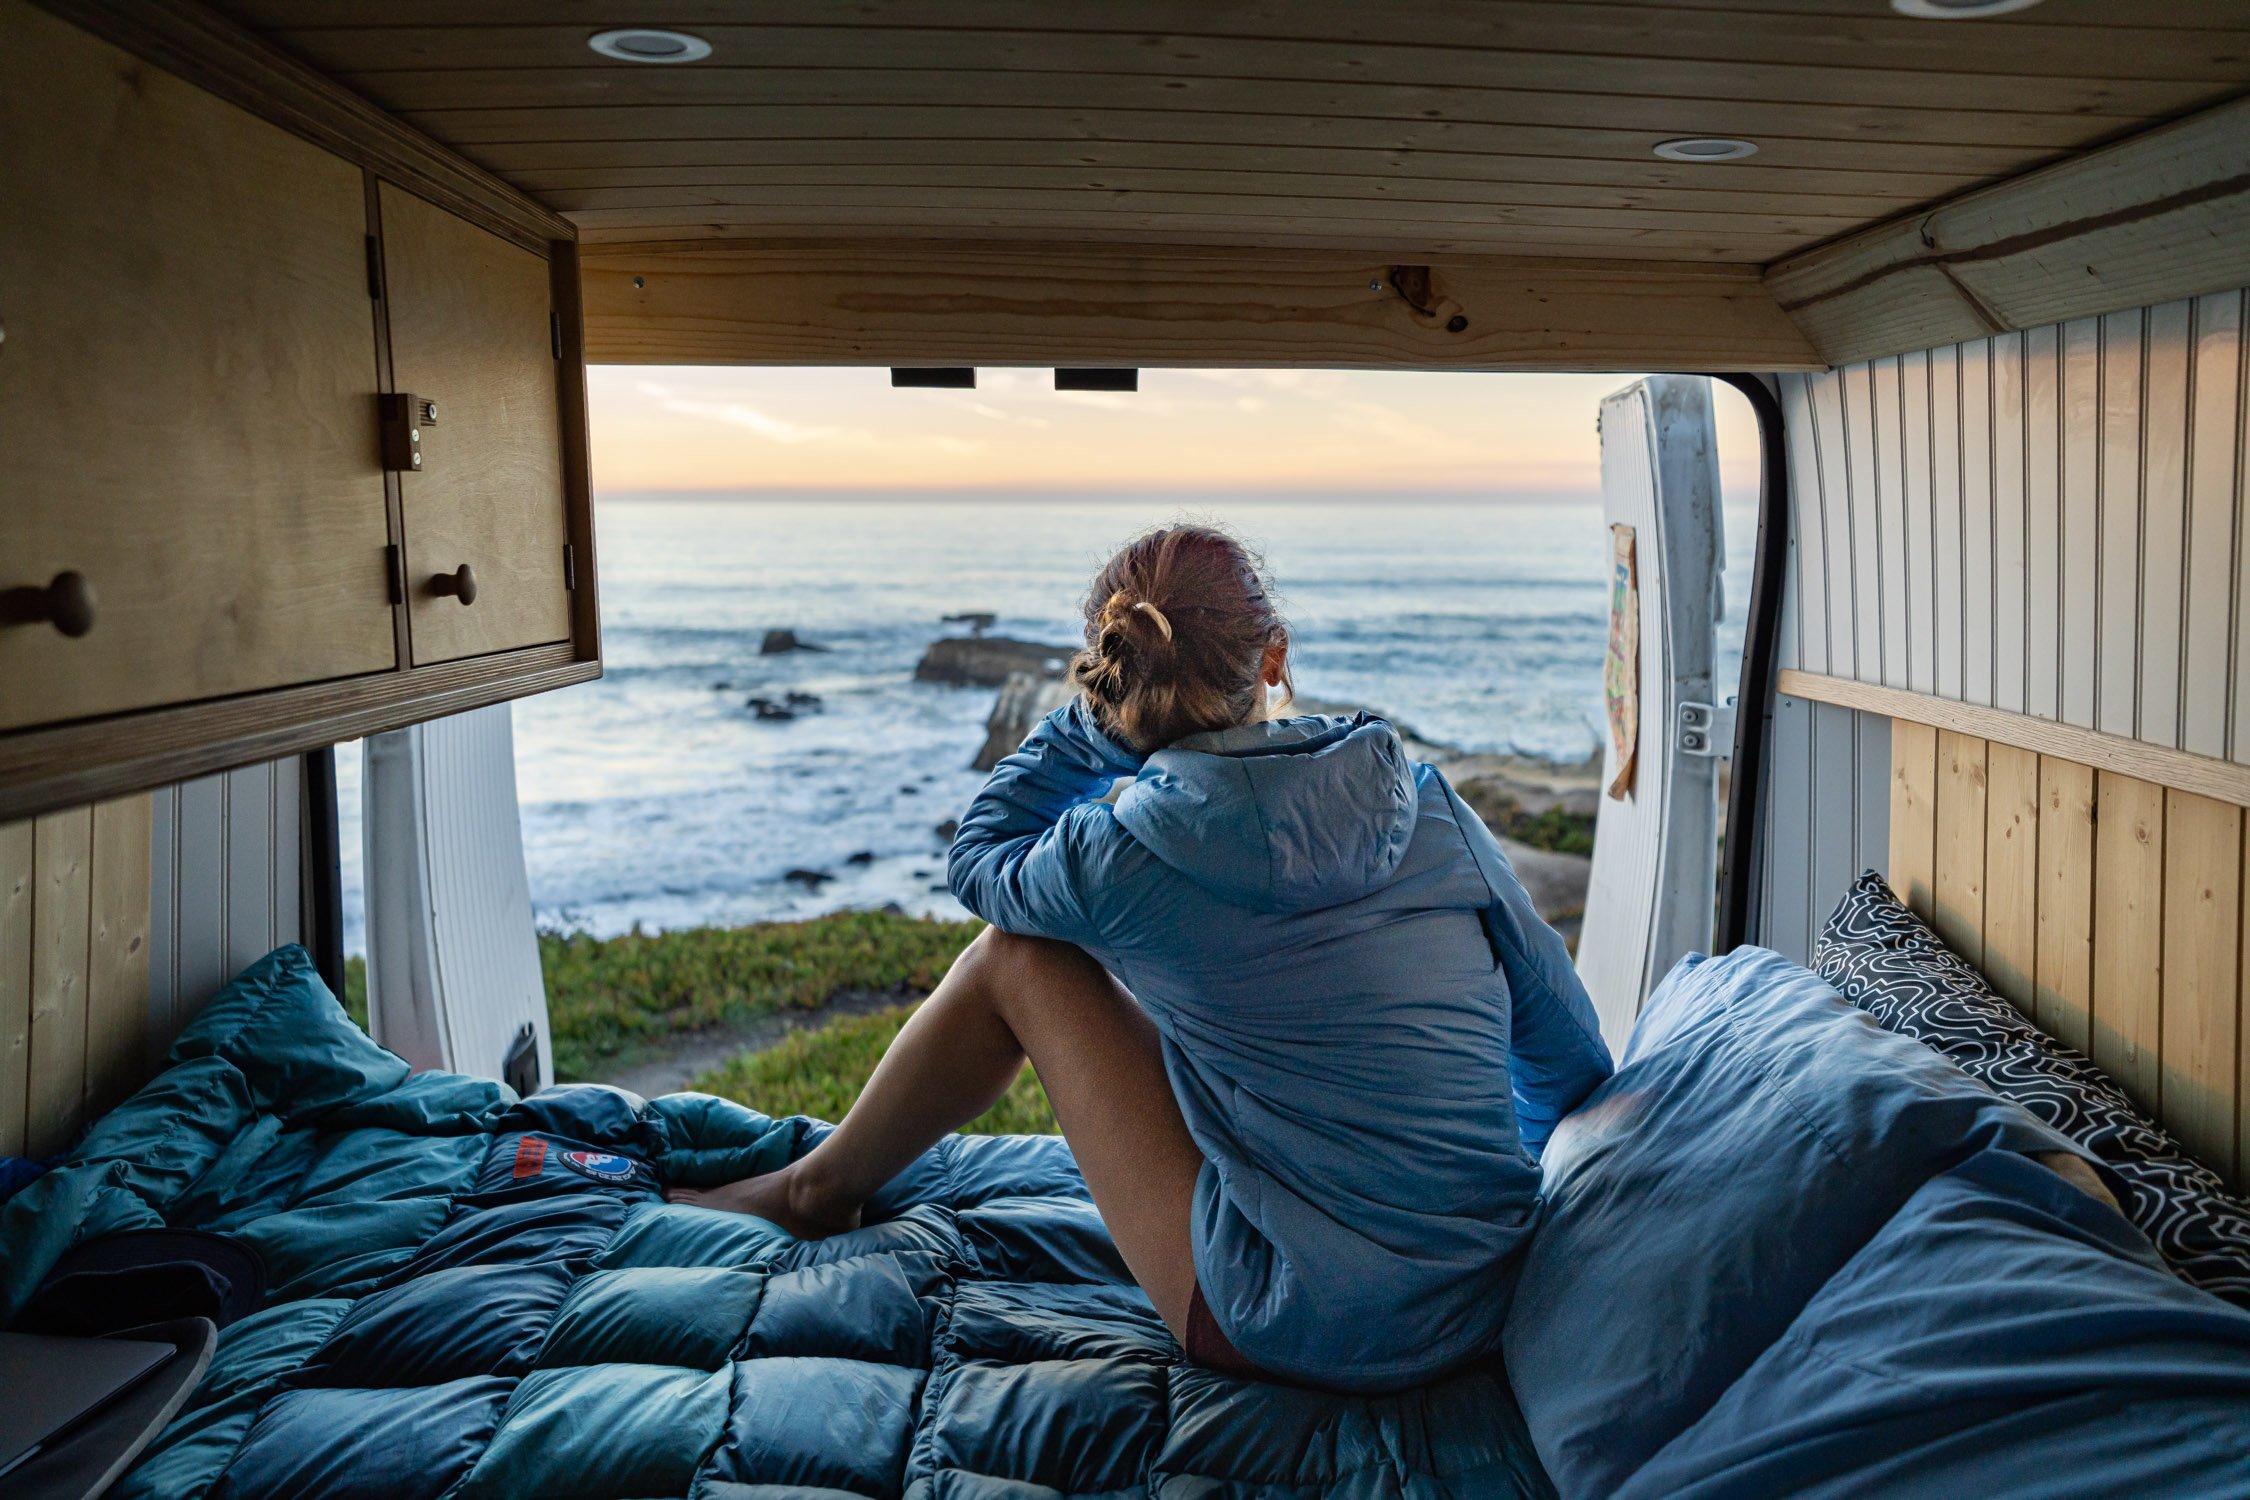
7 Reasons You Should Van Life The Pacific Coast Highway
Stretching from the Mexican to Canadian border, the Pacific Coast Highway spans the entire length of the United States west coast and is one of the great American road trips. With just over 1,650 miles filled with breathtaking coastal views, often glorified in surf media, and some of the cutest towns in America, it’s no wonder this the Pacific Coast Highway is calling the names of all those whom live van life. Yet, who will answer the call? Maybe, not enough. However, for those who road trip along the kinda terrifying, winding, two-lane road of the PCH, memories from a once-in-a-lifetime trip that will leave you reminiscing on the grandeur of this van life road trip. So, click that seat belt and continue reading about why you should drive your van the entire length of Pacific Coast Highway.
Stretching from the Mexican to Canadian border, the Pacific Coast Highway spans the entire length of the United States west coast and is one of the great American road trips. Tallying just over 1,650 miles filled with breathtaking coastal views, often glorified in surf media, and some of the cutest towns in America, it’s no wonder this the Pacific Coast Highway is calling the names of all those whom live van life. Yet, who will answer the call? Maybe, not enough. However, for those who road trip along the kinda terrifying, winding, two-lane road of the PCH, memories from a once-in-a-lifetime trip that will leave you reminiscing on the grandeur of this van life road trip. So, click that seat belt and continue reading about why you should drive your van the entire length of Pacific Coast Highway.
Pros
Breathtaking Scenery: Van life along the Pacific Coast Highway offers unrivaled access to breathtaking coastal scenery, picturesque beaches, majestic cliffs, and charming coastal towns, providing a visually stunning backdrop throughout your journey. If you are interested in photography, here is an article on improving your road trip photography.
Freedom and Flexibility: Van life gives you the freedom to set your own pace and itinerary. You can choose to stay longer at your favorite spots, take spontaneous detours, and explore hidden gems along the way, if you are so lucky to live without being bound by fixed schedules.
Close-to-Nature Experience: Living in a van brings you closer to nature, allowing you to wake up to the sound of crashing waves, sleep under starry skies, and connect with the natural world on a deeper level. This is often overlooked, but if you are sleeping in a secure location, prop your back doors open for glorious night.
Cost-Effective: Van life can be a cost-effective way to travel. By eliminating hotel expenses and opting for campgrounds or free camping spots, you can save money and stretch your travel budget further.
Community and Camaraderie: Van life along the Pacific Coast Highway attracts a vibrant community of like-minded travelers. You'll have the opportunity to meet fellow vanlifers, swap campfire stories, and form meaningful connections with people from all walks of life.
Cons
Limited Space: Living in a van means dealing with limited living space. While the freedom to roam is liberating, it also requires efficient organization and minimalist living to make the most of the available space.
Challenges of Parking and Overnight Stops: Finding suitable and legal places to park overnight can be challenging, especially in popular tourist areas. It's essential to research and plan ahead to ensure you have safe and legal places to rest.
Weather and Seasonal Considerations: Weather conditions along the PCH can vary significantly, and extreme weather, such as heavy rains or coastal storms, may impact travel plans and comfort. However, this can easily be avoided if you go during the summer.
Bathroom and Shower Facilities: Access to bathrooms and showers can be limited during van life on the PCH. You'll need to rely on public restrooms, campsite facilities, or invest in portable solutions. Take a deep dive into van life hygiene with this article.
Maintenance and Repairs: Being on the road for extended periods can lead to wear and tear on your van. It's essential to stay on top of maintenance and be prepared for unforeseen repairs that might arise during your journey. Here’s a guide on van life maintenance.
1) Spectacular Scenery:
The Pacific Coast Highway is renowned for its stunning coastal views, majestic cliffs, and picturesque beaches. From the rugged cliffs of Big Sur to the charming coastal towns, you'll be surrounded by awe-inspiring scenery every day of your journey. Most of the time, trying to decide which of these beaches to visit is the hard part, so below we have a short list that include some of our must see beaches while road tripping the PCH.
Five Stunning Landscapes along the PCH:
Big Sur Coastline, California: Known for its dramatic cliffs, majestic redwood forests, and stunning ocean views, the Big Sur coastline is an iconic and picturesque stretch of the PCH. Click here for the best hikes in Big Sur
Cannon Beach, Oregon: With its iconic Haystack Rock rising from the shoreline, Cannon Beach offers a picturesque setting, complete with sandy shores and breathtaking sunsets.
Olympic National Park Rainforest, Washington: The lush rainforest within Olympic National Park features ancient trees, moss-covered landscapes, and enchanting greenery, creating a magical and ethereal atmosphere.
Glass Beach, Fort Bragg, California: Over the years, the ocean has transformed discarded glass into smooth, colorful pebbles, creating a unique and visually stunning beach.
Ruby Beach, Washington: This rugged beach on the Olympic Peninsula is adorned with sea stacks and driftwood, making it an ideal spot for witnessing stunning sunsets and exploring tide pools.
Related Read: THESE HWY 1 DESTINATIONS WILL TAKE YOUR BREATH AWAY
2) Freedom to Roam:
Van life on the PCH provides unparalleled freedom to explore at your own pace. You can choose to linger at your favorite spots, take spontaneous detours to hidden gems, and wake up to a new view every morning without being tied to a fixed itinerary. This freedom comes at a trade off, but if you have no schedule, why rush? If you drive everyday, the Pacific Coast Highway will take roughly one or two weeks. However, if you have more time, say a month, or two months, there is no need to rush. Allow yourself the freedom to explore hikes, surf spots, cities and towns, coffee shops, record stores, and so many more hidden gems while you road trip the Pacific Coast Highway in a van. If I were to road trip the PCH again, I would look at the trip in four sections:
If I had two months to road trip the PCH in a van, this is how I would do it:
Southern California
While I am not much of a city person, Southern California offers great access to surfing, rock climbing, tacos, and entertainment. My personal take is that most people overweight their time in Southern California during a Pacific Coast Highway road trip, but in a van this area is easy to skip because parking is a challenge. With that said, do your best to find good parking spots and give yourself at least roughly 12 days.
Northern California
I would spend the bulk of my time along the Northern California coastline. This area is the most rugged and easiest for van life stealth parking. The hiking and photography is out of this world along this section of the coast and will leave you with your jaw wide open wishing you had more time. I would give myself 20 days to hike, surf, climb, even backpack along the coastline of Northern California.
Oregon
Oregon has a few gems, but this coastline is the second hardest to find free overnight parking. So, the cost of staying along this coast increases significantly. Also, the water is getting colder, so the casual ocean dips become a little bit harder as you head north. With that said, the moody and very rugged coastline here is well worth exploring. My suggestion is to give yourself 12 to 15 days.
Washington
In the state of Washington, van life parking has been easy, but the weather makes for a challenging time with van life. The Pacific Coast Highway in Washington is stunning. Some of my favorite beaches are in the northern part of the state. Don’t forget to drink some coffee and explore the islands around the Seattle to Bellingham stretch of this coast. These are a true gem you don’t want to miss. Since travel in this area can be time consuming, give yourself at least 15 days.
3) Embrace Nature:
Road tripping the Pacific Coast Highway in a van offers numerous opportunities to park the van and explore the outdoors by hiking, surfing, kayaking, and camping. Since you have your home packed up in a single place, you should have all the gear you need to access the pristine beaches, lush forests, and breathtaking state parks, along the Pacific Coast Highway.
Five Must Do Adventures along the PCH:
Hiking in Big Sur, California: Big Sur is a haven for hikers with its diverse trails that wind through redwood forests, along rugged cliffs, and lead to spectacular ocean vistas. Don't miss the iconic hikes like the McWay Falls Trail and the Ewoldsen Trail for breathtaking views. If you are interested in hiking in Big Sur, here is a blog with 10 of the best hikes.
Surfing in Malibu, California: Malibu is a world-renowned surfing destination with excellent waves and a vibrant surf culture. Whether you're a seasoned surfer or a beginner, catching waves in Malibu will be an exhilarating experience.
Sandboarding in Oregon Dunes National Recreation Area, Oregon: Head to the Oregon Dunes, the largest coastal sand dunes in North America, for an adrenaline-pumping sandboarding adventure. Glide down the steep sandy slopes and enjoy the unique landscape.
Whale Watching in Monterey Bay, California: Monterey Bay is one of the best places for whale watching along the PCH. Take a whale-watching tour from Monterey or Moss Landing to witness majestic humpback whales, blue whales, and dolphins swimming in their natural habitat.
Sea Kayaking in Puget Sound, Washington: Explore the stunning Puget Sound by sea kayak, paddling along the coastlines, and enjoying the tranquil waters. Keep an eye out for marine wildlife like seals, otters, and seabirds during your journey.
4) Community of Like-Minded Travelers:
Van life on the Pacific Coast Highway attracts a vibrant community of young and old travelers. While van life and remote work has leveled the playing field for slow travel, only those dedicated to seeing the world typcially make the full trek. During this trip, you'll have the chance to meet new people while at a campsite or surf spot. Heck, you might even meet a fellow vanlifer while at the grocery store after parking next to each other. There are so many stories of friendships and lasting loves created during a massive road trip like driving the Pacific Coast Highway. There is something about disconnecting from technology and being immersed in nature that unites people. That is one of the most common responses I hear when I chat with fellow van lifers. So, allow yourself to be safe and vulnerable by sharing stories and experiences with strangers to build lasting connections.
5) Unforgettable Sunsets:
You can’t drive the Pacific Coast Highway without realizing the sunsets over the ocean are unlike anything you have ever experienced before. With a van, you can find the perfect spot to watch the sun dip below the horizon, while staying warm and dry, creating unforgettable memories that will stay with you forever. You might even snap some of your best photographs you’ve ever taken.
Five Stunning Places to Watch the Sunset
McWay Falls, Big Sur, California: McWay Falls is an iconic and breathtaking waterfall that cascades directly onto the sandy beach. The sunset here is magical, as the sun's golden rays paint the cliffs and turquoise waters with a warm glow.
Marshall's Beach, San Francisco, California: Located just south of the Golden Gate Bridge, Marshall's Beach offers a unique perspective for sunset viewing. With the bridge as your backdrop, you can watch the sun set over the Pacific Ocean, creating a stunning contrast between nature and engineering.
Butterfly Beach, Santa Barbara, California: This beautiful beach in Santa Barbara offers a serene setting to watch the sunset. As the sun dips below the horizon, you can enjoy the sight of palm trees silhouetted against the colorful sky, making for a truly picturesque experience.
Cannon Beach, Oregon: Known for its iconic Haystack Rock, Cannon Beach offers a dramatic coastal landscape that becomes even more enchanting during sunset. The vibrant colors reflected on the wet sand and the sound of crashing waves create a mesmerizing atmosphere.
Rialto Beach, Washington: Rialto Beach, part of Olympic National Park, is a rugged and wild coastline that provides a fantastic backdrop for watching the sunset. You can witness the sun setting behind sea stacks and explore tide pools as the day comes to a close.
6) Stealth Camping at its finest:
Van life allows you to hop off the road and find a spot with a view that would typically cost hundreds of dollars for free. Falling asleep to the sound of crashing waves and waking up to the sight of the ocean just outside your window, or backdoors, is an unparalleled experience that traditional accommodations cannot match. This is why I advocate for anyone who can to drive their van the entire length of the Pacific Coast Highway. Using apps like iOverland will help you find these magical places to stealth camp for free. If there are sites in the area, look for campsite. They will cost your between $20-$35, but they are well worth it because you will have a toilet, typically a water source, and feel safe to leave your van if you want to go for a hike, or side adventure.
PRO TIP: If you can, pack an e-bike, this will help cut down on the cost of fuel and provide access to so many side adventures you would not do otherwise.
7) Slow Travel and Mindfulness:
Van life encourages a slower pace of travel, allowing you to fully immerse yourself in the journey and practice mindfulness. Taking your time each day allows for greater intentionality and a more curated day to day. Your mindfulness practice could be journaling, or meditating. Regardless of how you reconnect your body and mind, does not matter. What matters is you take the time and the opportunity to stop rushing everywhere and give your body the opportunity to recover while you are on the road. If you constantly overpack your days, you will give yourself travel fatigue, forcing you to slow down and miss out. So, before you hit that point, make time for stillness.
Another way to look at it, when disconnecting from the fast-paced world you can embrace the simple joys of life, making every moment count. This could be acknowledging the light on a ridge, the smell of a flower (maybe the stink of your toilet), or the smile of a stranger. Regardless of how you slow down, giving yourself the opportunity will help you create stronger memories from your time vanlifing along the Pacific Coast Highway.
I hope these seven reasons for van life along the Pacific Coast Highway has encouraged you to start planning your trip, maybe even start packing. For the stunning coastal scenery of Big Sur to the vibrant cityscape of San Francisco are calling your name and summoning your van. Whether you're chasing breathtaking sunsets, seeking unforgettable outdoor adventures, or simply enjoying the camaraderie of fellow travelers, van life on the Pacific Coast Highway promises unforgettable experiences and memories that will stay with you for a lifetime.
Discover more Adventures

iKamper's Raconteur Series Is Ready to Kit Out Your Overland Vehicle
iKamper, known for its innovative rooftop tents and adventure gear, has just redefined overlanding with the launch of its Raconteur Rack Series. Designed to provide a rock-solid foundation for outdoor exploration, the Raconteur racks are overbuilt and optimized for durability, strength, and functionality. If you’re serious about overland adventures, this rack system might be the missing piece for your rig.
iKamper, known for its innovative rooftop tents and adventure gear, has just redefined overlanding with the launch of its Raconteur Rack Series. Designed to provide a rock-solid foundation for outdoor exploration, the Raconteur racks are overbuilt and optimized for durability, strength, and functionality. If you’re serious about overland adventures, this rack system might be the missing piece for your rig.
The Raconteur Rack Series are Built to Last
The Raconteur Series is engineered for toughness, featuring a steel frame, stainless steel hardware, and high-strength aluminum cross bars. Finished with a chip-resistant powder coating, these racks are made to endure even the harshest outdoor conditions. Whether you're mounting a rooftop tent, hauling heavy gear, or loading up for a weekend off-grid, the Raconteur has you covered.
Available for some of overlanding's most popular vehicles—the Toyota Tacoma, Toyota 4Runner, and Jeep Gladiator—the Raconteur Rack Series eliminates the headache of finding a rack compatible with your vehicle. Plus, it’s designed to integrate seamlessly with iKamper rooftop tents and their new adventure-ready accessories.
Raconteur Rack Options and Specs
iKamper’s Raconteur Series offers both roof rack and bed rack configurations, making it easier than ever to customize your vehicle for any adventure.
Raconteur Roof Rack - Toyota Tacoma ($850)
Compatibility: 2005-2023 (2nd & 3rd gen)
Weight: 63 lbs
Dynamic Load Capacity: 400 lbs
Static Load Capacity: 1,000 lbs
Dimensions: 49¼" x 63½" x 5½"
No-drill mounting
Raconteur Roof Rack - Toyota 4Runner ($1,200)
Compatibility: 2010-2024 (5th gen)
Weight: 76 lbs
Dynamic Load Capacity: 400 lbs
Static Load Capacity: 1,000 lbs
Dimensions: 49¼" x 94" x 4¾"
No-drill mounting
Raconteur Bed Rack - Toyota Tacoma
Mid Height ($1,300) / Full Height ($1,400)
Weight: Mid Height - 115 lbs; Full Height - 130 lbs
Dynamic Load Capacity: 440 lbs
Static Load Capacity: 1,213 lbs
No-drill mounting
Raconteur Bed Rack - Jeep Gladiator
Mid Height ($1,400) / Full Height ($1,500)
Compatibility: 2019-current
Weight: Mid Height - 109 lbs; Full Height - 132 lbs
Dynamic Load Capacity: 441 lbs
Static Load Capacity: 1,213 lbs
No-drill mounting
Adventure-Ready Accessories
The Raconteur Rack Series doesn’t stop at just a tough foundation. It’s all about customization, and iKamper offers a variety of accessories to take your setup to the next level.
Raconteur Awning Brackets: Designed to pair with the ExoShell 270 awning, these brackets are available in sizes for both the Tacoma and Gladiator. Simple, bolt-on installation with stainless steel hardware makes setup a breeze.
Bed Rack Accessory Panels: Mount extra gear, traction boards, farm jacks, or Rotopax™ with ease. These panels attach vertically to the MOLLE side panels, providing a customizable storage solution.
Lift Up Brackets: Elevate your rooftop tent setup with Lift Up Brackets, designed to give you extra height for mounting gear securely, especially with larger tents like the BDV.
Rear Window Accessory Panel (Coming October): These panels extend the utility of your 4Runner’s roof rack by attaching to the rear window. Ideal for storing smaller items like Rotopax™ or folding shovels.
Roof Rack Cross Bars & Recovery Track Brackets: Enhance your roof rack’s capability by adding T-channel cross bars for extra gear. Recovery Track Brackets (also arriving in October) make mounting your recovery boards quick and easy.
Wind Deflector Light Bar: Replace your Raconteur wind deflector with this low-profile light bar setup. Pre-cut mounting areas ensure a sleek, protected installation.
Why Choose the Raconteur?
The Raconteur isn’t just a roof rack—it’s a complete overlanding system designed to eliminate the hassles of compatibility and gear organization. Whether you’re a longtime iKamper fan or new to the world of vehicle-based adventure, this rack system offers unparalleled utility and strength.
With the Raconteur Series, iKamper proves once again why they’re at the forefront of overland innovation. The racks are built to handle heavy loads, rough terrain, and endless adventures. If you’re serious about getting off the beaten path, the Raconteur is your one-stop solution for all things overland.

From the backcountry to the open road, iKamper’s Raconteur Rack Series is ready to help you kit out your overland vehicle. Offering superior strength, efficiency, and accessory integration, these racks are purpose-built for adventure. Now available for the Toyota Tacoma, 4Runner, and Jeep Gladiator, with more vehicle options on the way, the Raconteur is the ultimate upgrade for outdoor enthusiasts.
Discover More Gear
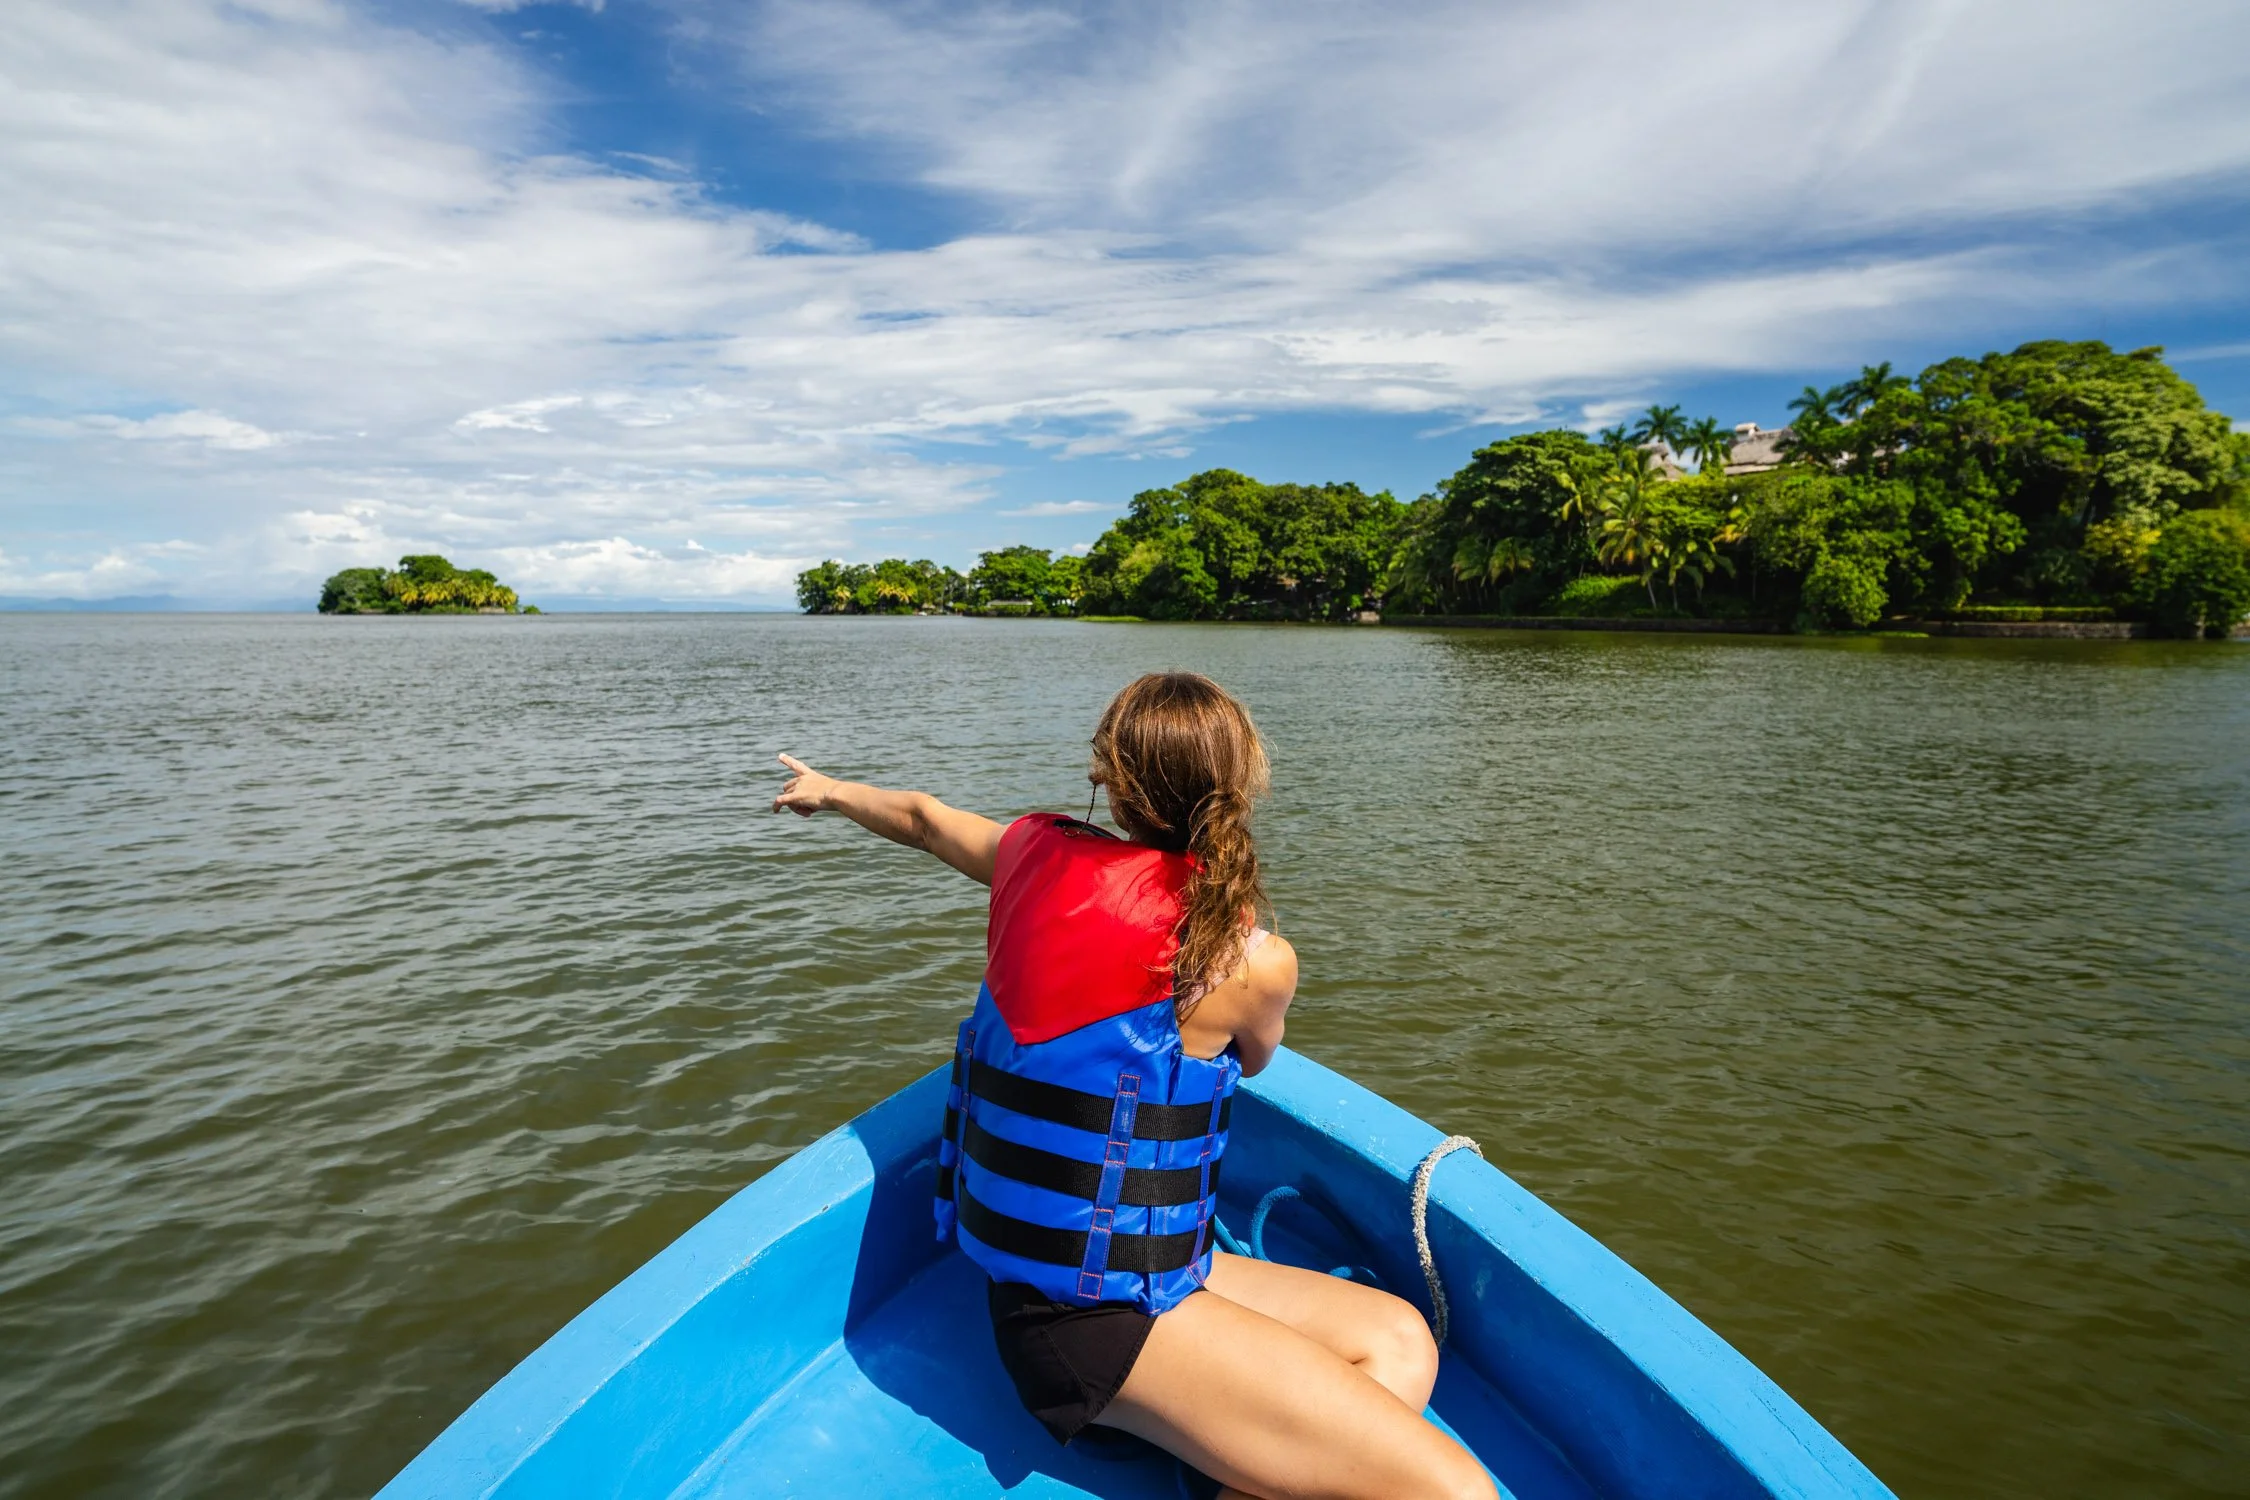
Stop Overplanning Your Vacations, You’re Giving Yourself Travel Fatigue
Travel is meant to be exciting, a way to explore new cultures, sights, and experiences that expand your worldview and create lasting memories. However, the trend of overplanning vacations is leading many travelers down the path of travel fatigue. If you’ve ever come home from a trip feeling more exhausted than when you left, you might be familiar with this. While it’s natural to want to make the most of your time away, packing your schedule too tightly can lead to burnout, overstimulation, and even a sense of dissatisfaction with your experience.
Travel is meant to be exciting, a way to explore new cultures, sights, and experiences that expand your worldview and create lasting memories. However, the trend of overplanning vacations is leading many travelers down the path of travel fatigue. If you’ve ever come home from a trip feeling more exhausted than when you left, you might be familiar with this. While it’s natural to want to make the most of your time away, packing your schedule too tightly can lead to burnout, overstimulation, and even a sense of dissatisfaction with your experience.
Looking for monkey’s around the islands of Lake Nicaragua. Photo by Dalton Johnson
What is Travel Fatigue?
Travel fatigue is that feeling of being mentally and physically drained during or after a vacation, which can come from trying to do too much in too little time. It’s a common phenomenon, especially for those who jam-pack their itineraries with back-to-back activities. While on the surface it seems like the best way to maximize a trip, constantly rushing from one site to another can actually cause you to miss out on the true joy of travel. Instead of savoring the moments, everything becomes a blur, and when you return home, you may struggle to recall the details of what should have been an incredible experience.
Why Overplanning Leads to Travel Fatigue
Overplanning can turn a dream vacation into a series of stressful, rigid tasks. Every moment is scheduled, leaving little room for spontaneity, relaxation, or even appreciating the environment. When you’re constantly on the go, your body and mind don’t have the time to recharge or process what you’re experiencing.
Travel can be overstimulating, especially when you're navigating foreign cities, trying new foods, and meeting new people. When you're on sensory overload day after day, your brain can only take in so much before it starts to blur details together. This can make it harder to remember the experiences you had or feel truly present in the moment.
Avoid Overplanning with These Tips
To truly enjoy your vacation, it's essential to strike a balance between activity and downtime. Here are some practical tips to help you avoid overplanning and reduce the risk of travel fatigue:
1. Plan Downtime
One of the most effective ways to avoid travel fatigue is to schedule rest days into your itinerary. These aren’t just days where you cut back on sightseeing—they are intentional breaks. Whether it's lounging at a café, booking a spa treatment, or simply spending a lazy morning in bed with a good book, giving yourself permission to rest is essential. Rest days offer your mind and body the chance to rejuvenate, leaving you refreshed for your next adventure.
2. Limit the Number of Major Activities Per Day
It’s tempting to want to visit every landmark, museum, and restaurant in a single trip, but this is one of the quickest ways to burn out. Instead, aim to limit your itinerary to one or two major activities per day. This allows you to fully immerse yourself in the experience without rushing through it. You’ll have time to appreciate the details, whether it’s the intricacies of a historic site or the flavor of a local dish.
3. Build in Flexibility
Travel plans don’t always go perfectly, so it’s crucial to leave room for flexibility. Whether it's an unexpected recommendation from a local, a museum that takes longer to explore, or the discovery of a hidden café, having extra time in your schedule lets you adapt and embrace spontaneity. Plus, it gives you a buffer in case plans change or you need extra time to rest.
4. Prioritize Experiences, Not Checklists
Sometimes we feel pressured to check off as many sights as possible, but this can make the experience feel more like a chore. Focus on quality over quantity. Instead of trying to do everything, prioritize experiences that truly resonate with you. This will help create meaningful memories that stand out and give you time to absorb and reflect on what you’ve seen.
5. Travel at a Sustainable Pace
It’s important to travel at a pace that gives you time to process. After an exciting day exploring a new city or hiking in a national park, you need time to decompress and mentally file away those experiences. Moving from one activity to the next without a break can cause you to feel overstimulated and exhausted. Pace your trip in a way that allows for leisurely moments between adventures, so you have time to digest and appreciate the richness of your journey.
Resting Helps You Savor the Experience
When you prioritize downtime, you’re not just preserving your energy—you’re also giving yourself the chance to savor your trip. Quiet moments spent observing a city from a park bench, sipping coffee in a quiet café, or strolling along a beach can offer just as much insight into a destination as a packed itinerary of attractions. In fact, these moments of relaxation often end up being the most memorable.
In the end, the goal of travel isn’t to tick off a checklist of tourist spots but to immerse yourself in the experience—to learn, grow, and create lasting memories. By slowing down and giving yourself time to breathe, you’ll enjoy a richer and more meaningful journey. So, stop overplanning and start enjoying the freedom of a vacation that’s as much about rest as it is about adventure.
The Importance of Rest Days
Rest days are not a sign of laziness; they are an essential part of making the most out of your vacation. By incorporating them into your travel plans, you allow yourself to fully recover from the physical and mental demands of exploring a new place. A well-placed rest day can mean the difference between feeling recharged and ready for the next leg of your journey or feeling too drained to enjoy it.
Incorporating rest doesn’t mean you’re missing out—it’s quite the opposite. It ensures that you’re present for the best moments, rather than running on empty and unable to fully appreciate the experiences. Whether it's a full day of relaxation or just an afternoon of downtime, it’s crucial to give yourself the space to relax and reflect.
The Amalfi Coastline of Italy. Photo by Dalton Johnson
Travel fatigue is a common issue that results from overplanning and overstimulation. The key to avoiding it is to balance your itinerary with periods of activity and rest. Embrace slower travel, limit the number of daily activities, and plan downtime so that you can fully appreciate the experiences and create lasting memories. By taking the time to unwind, you’ll return home not just with souvenirs, but with the energy and mental clarity that a truly fulfilling vacation brings.
Discover more Adventures
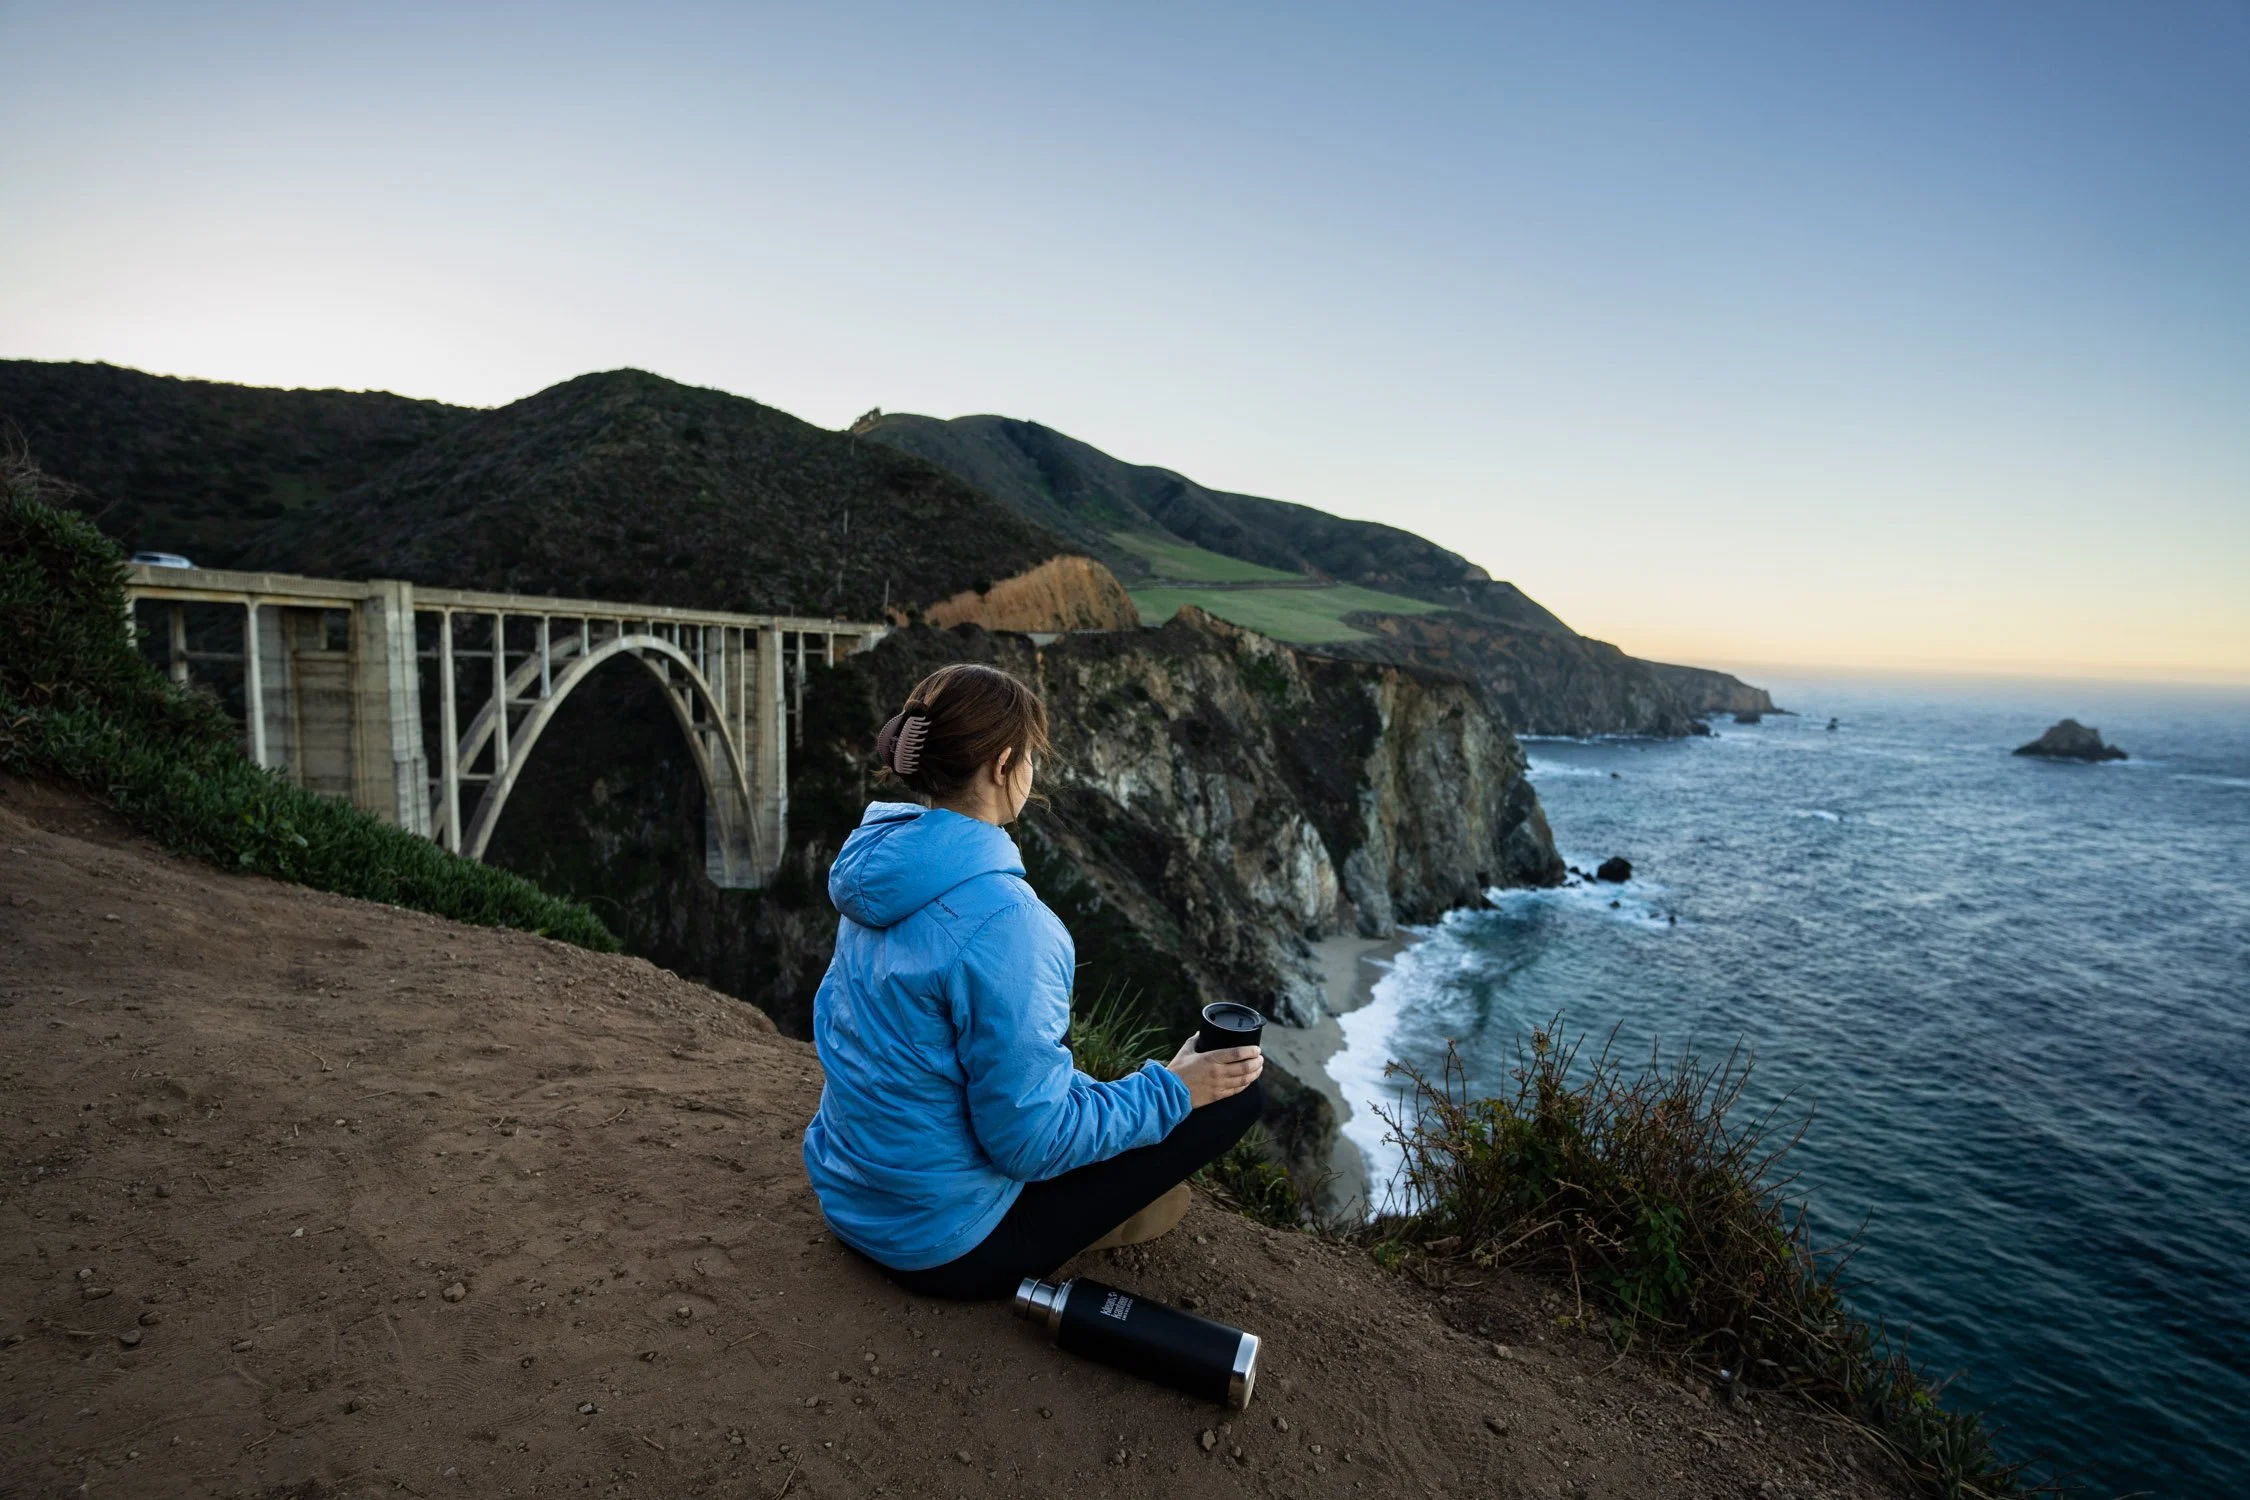
Here’s What You Should Do On Your First Visit to Big Sur
The rugged cliffs of California’s Central Coast and the vast Pacific Ocean define the Big Sur area as a destination calling hikers, road trippers, and photographers with its dramatic landscapes, unspoiled wilderness, and stunning views. With towering redwoods, rocky beaches, and scenic highway, Big Sur feels like a place where nature rules. If it’s your first visit to this wild stretch of coastline, you’ll be in awe of the sheer beauty and diverse outdoor activities available. Whether you’re hiking along coastal cliffs, standing in awe of McWay Falls, or simply soaking in the sunset at Bixby Creek Bridge, Big Sur is a place you won’t forget. Here's what you should do to experience the magic of Big Sur like a seasoned adventurer.
The rugged cliffs of California’s Central Coast and the vast Pacific Ocean define the Big Sur area as a destination calling hikers, road trippers, and photographers with its dramatic landscapes, unspoiled wilderness, and stunning views. With towering redwoods, rocky beaches, and scenic highway, Big Sur feels like a place where nature rules. If it’s your first visit to this wild stretch of coastline, you’ll be in awe of the sheer beauty and diverse outdoor activities available. Whether you’re hiking along coastal cliffs, standing in awe of McWay Falls, or simply soaking in the sunset at Bixby Creek Bridge, Big Sur is a place you won’t forget. Here's what you should do to experience the magic of Big Sur like a seasoned adventurer.
Drinking a cup of tea while watching the sun rise at Bixby Bridge in Big Sur, CA. Photo by Dalton Johnson
Why You Should Visit
Big Sur offers a truly unique combination of coastal and mountainous experiences, blending both forest and ocean into one awe-inspiring adventure. The region is known for its dramatic vistas, where jagged cliffs meet the churning Pacific waters, offering some of the best views in California. But it’s more than just scenery; Big Sur is a playground for adventurers. Hiking through towering redwoods, exploring hidden coves, spotting wildlife, or taking a scenic and kinda scary drive down Highway One are all just part of the experience. With its natural beauty and remote feel, Big Sur provides an ideal escape from the hustle and bustle of everyday life, making it a perfect destination for anyone looking to reconnect with nature.
12 Things You Should Do
1) Hike the Ewoldsen Trail
This moderate-to-strenuous hike offers some of the best coastal views in Big Sur. The 5-mile loop takes you through ancient redwoods and up to ridges where panoramic views of the Pacific Ocean await. It’s a quintessential Big Sur hiking experience.
Highlights:
Coastal Views: Stunning vistas overlooking the Pacific Ocean.
Redwood Forest: Walk through groves of towering redwood trees.
Wildlife: Keep an eye out for local wildlife like deer and hawks.
Quiet Trails: Less crowded than other popular trails in Big Sur.
2) Visit McWay Falls
One of the most iconic spots in Big Sur, McWay Falls is an 80-foot waterfall that cascades directly onto a secluded beach. A short, easy trail leads to the overlook where you can take in this picture-perfect scene.
Highlights:
Iconic View: One of California’s most photographed natural landmarks.
Short Hike: The trail is easy and accessible for all ages.
Golden Hour Magic: Visit at sunset for incredible lighting.
Protected Area: While you can’t access the beach, the view is unforgettable.
Related Read: A LOCAL'S GUIDE TO BIG SUR'S MCWAY FALLS
3) Drive Along Highway One
The Pacific Coast Highway (Highway One) offers some of the most breathtaking views in the country, and driving the stretch through Big Sur is an absolute must. This scenic drive winds along the coast, offering stunning ocean vistas and dramatic cliffs.
Highlights:
Scenic Route: A classic California road trip with jaw-dropping views.
Photo Stops: Pull over at famous spots like Bixby Creek Bridge.
Wildlife Viewing: Look out for seals, whales, and even condors.
Curvy Roads: Take your time on the winding roads and enjoy the ride.
4) Explore Pfeiffer Beach
Pfeiffer Beach is known for its striking purple sand and the iconic Keyhole Rock, which creates a natural archway in the ocean. This hidden gem is perfect for photography, picnicking, and relaxing by the beach.
Highlights:
Purple Sand: Unique sand color created by manganese-rich rocks.
Keyhole Rock: Capture photos of the sun setting through the arch.
Secluded Beach: A more peaceful spot away from crowds.
Tide Pools: Explore small tide pools during low tide.
5) Camp at Julia Pfeiffer Burns State Park
If you want to fully immerse yourself in Big Sur’s natural beauty, camping at Julia Pfeiffer Burns State Park is a must. Wake up to ocean views and fall asleep to the sound of crashing waves at this cliffside campground.
Highlights:
Oceanfront Campsites: Sleep with the Pacific right outside your tent.
Access to Trails: Close proximity to some of Big Sur’s best hikes.
Secluded Setting: The small number of campsites keeps the area peaceful.
Stargazing: The dark skies offer incredible opportunities for stargazing.
6) Check Out Bixby Creek Bridge
One of the most photographed bridges in the world, Bixby Creek Bridge is an iconic symbol of the Big Sur coastline. The best way to experience this engineering marvel is by driving across it, but there are also nearby viewpoints perfect for photos.
Highlights:
Scenic Views: The bridge offers some of the best views in Big Sur.
Photo Op: Stop at the north side for the best angles of the bridge.
Historic Landmark: Completed in 1932, it’s one of the tallest single-span concrete bridges in the world.
Sunset Views: For magical lighting, visit just before sunset.
Related Read: THE LOCAL'S GUIDE TO THE BIXBY BRIDGE
7) Explore the Big Sur River Gorge
A true hidden gem, the Big Sur River Gorge offers a refreshing escape during hot days. This off-the-beaten-path swimming spot is perfect for those willing to climb over rocks and wade through shallow waters to find a peaceful, scenic location.
Highlights:
Natural Swimming Hole: Cool off in clear, fresh water.
Rock Scrambling: A bit of a challenge getting there, but worth the effort.
Secluded Spot: It’s quiet and less crowded compared to other attractions.
Pristine Nature: Surrounded by lush vegetation and towering trees.
8) Hike to Partington Cove
This short but rewarding hike leads you down to a secluded cove that was once used for smuggling during the Prohibition era. Today, it’s a peaceful spot where you can watch the waves crash against the rocks.
Highlights:
Historic Trail: Learn about Big Sur’s past while exploring the trail.
Ocean Views: Stunning views of the rugged coastline and deep blue water.
Quiet Cove: A peaceful spot to sit and enjoy the sound of the ocean.
Accessible Hike: A short, 1-mile round trip hike, perfect for all skill levels.
9) Visit the Point Sur Lighthouse
Standing proudly atop a dramatic volcanic rock, the Point Sur Lighthouse offers both historical charm and incredible views of the Pacific. Guided tours provide insight into the life of a lighthouse keeper and the area’s maritime history.
Highlights:
Scenic Views: Panoramic vistas of the Pacific Ocean from the top of the rock.
Historical Site: Learn about the rich history of the lighthouse, built in 1889.
Wildlife Watching: Keep an eye out for whales, sea otters, and seabirds.
Guided Tours: Take an informative tour led by knowledgeable docents.
10) Watch the Sunset at Garrapata State Park
Garrapata State Park offers rugged beauty with its coastal bluffs and serene beaches, making it the perfect spot to catch a sunset. The park’s numerous trails allow you to explore wildflower-covered hillsides and enjoy stunning ocean views.
Highlights:
Spectacular Sunsets: Witness some of the best sunset views in Big Sur.
Wildflowers: Visit in the spring to see the hills covered in colorful blooms.
Quiet Beaches: Relax on Garrapata Beach, often less crowded than other areas.
Whale Watching: Keep an eye out for migrating whales during the winter months.
11) Explore Limekiln State Park
Limekiln State Park offers a unique mix of history and nature. The park features trails that lead to the remnants of 19th-century lime kilns as well as a stunning waterfall. It’s a hidden gem that feels miles away from the crowds.
Highlights:
Lime Kiln Ruins: Discover the fascinating history of Big Sur’s industrial past.
Waterfall Hike: Follow the Limekiln Falls Trail to a picturesque 100-foot waterfall.
Redwood Forest: Wander through groves of ancient redwoods on peaceful trails.
Secluded Campground: Consider staying overnight at one of the park’s campsites.
12) Go Whale Watching
The waters off Big Sur are home to a variety of whale species, including gray whales, humpback whales, and blue whales. The best time to spot these gentle giants is from December to April during their migration, but they can be seen year-round.
Highlights:
Gray Whale Migration: Witness the migration of thousands of gray whales during the winter.
Whale Watching Tours: Take a boat tour for a closer look at these magnificent creatures.
Cliffside Viewing: Watch for spouts and breaches from popular viewpoints like Point Lobos or Garrapata State Park.
Year-Round Wildlife: In addition to whales, you may spot dolphins, sea otters, and seals.
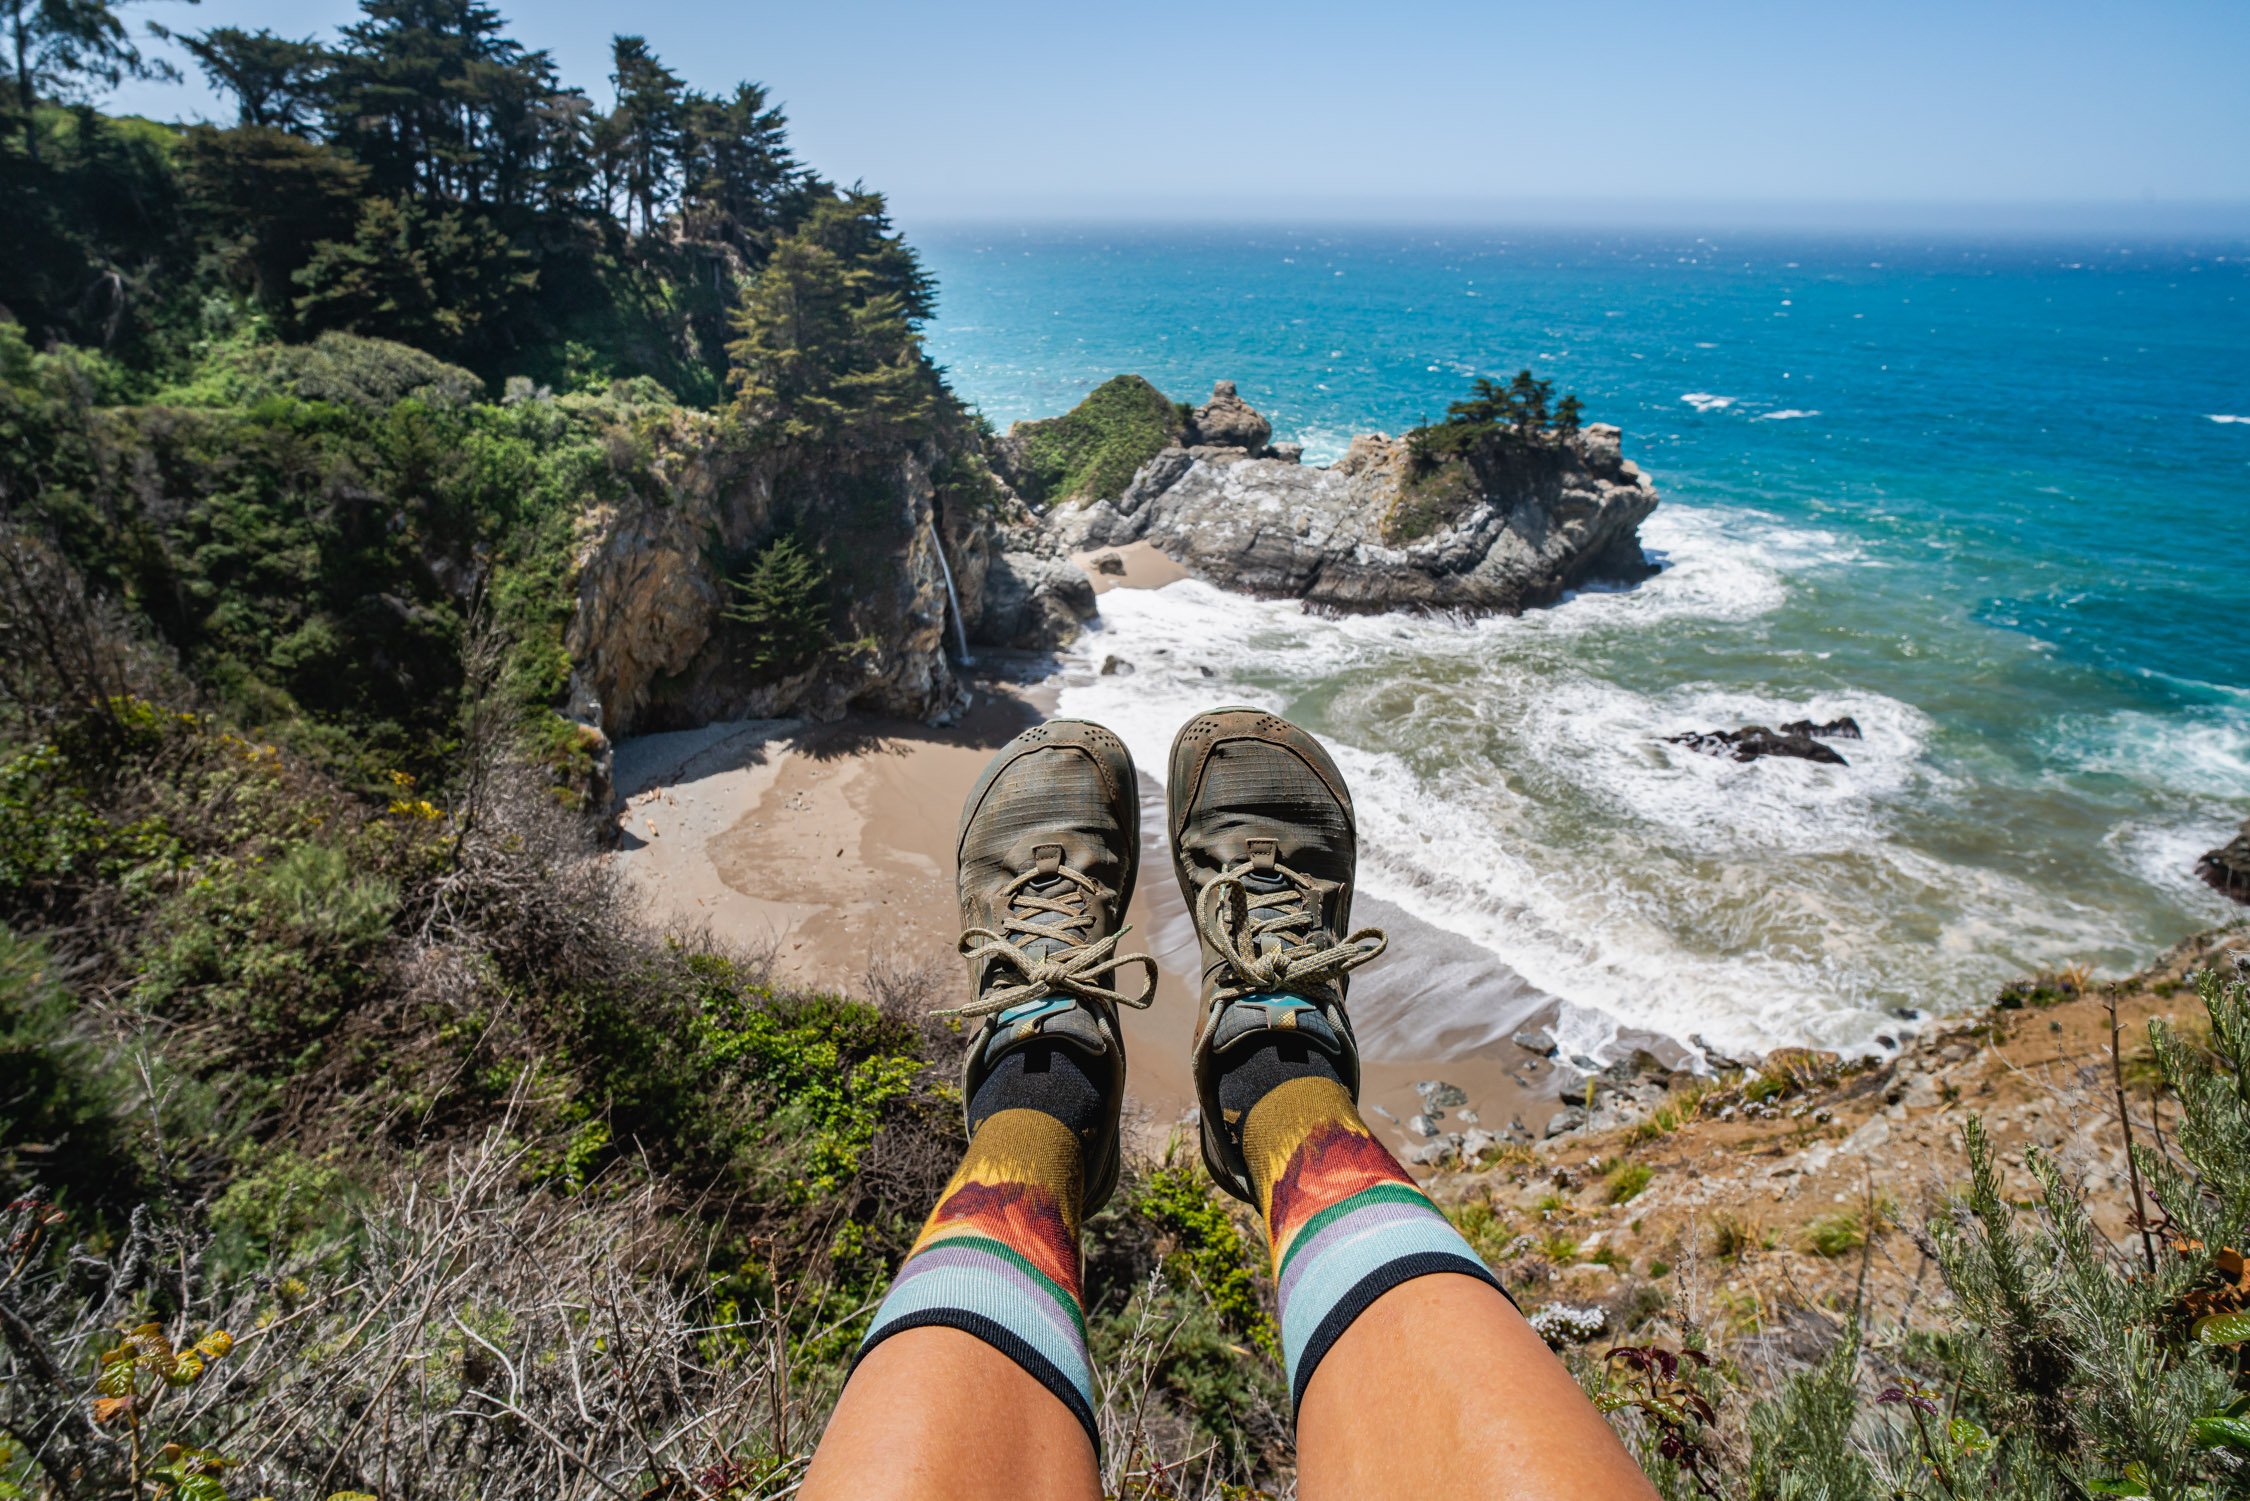
McWay Falls pouring onto the beach in Big Sur, CA. Photo by Dalton Johnson
Big Sur is a magical destination that blends the beauty of coastal cliffs, towering redwoods, and unspoiled wilderness. For first-time visitors, these 12 outdoor activities will help you fully experience the magic of this iconic stretch of California's coastline. From hiking and exploring hidden beaches to camping under the stars and catching panoramic views along Highway One, there’s something for everyone. Whether you’re looking to challenge yourself with a strenuous hike or simply relax in nature’s grandeur, Big Sur delivers unforgettable adventures. If you are worried about crowds, don’t be as we wrote an article for you on how to avoid crowds in Big Sur. Lastly, embrace the raw beauty of this incredible destination and let these experiences shape your first visit into one you’ll never forget.
Discover More Destinations

Fall is Here in Big Sur And This Ranch Should Be Your Home Base
As the crisp autumn air begins to sweep through California, Big Sur transforms into a breathtaking destination to experience the beauty of fall. With vibrant coastal colors, cooler temperatures, and seasonal festivities, it’s the perfect time to explore this stunning stretch of the Pacific coast. Whether you're here for a quiet retreat or thrilling adventures, Big Sur offers the ultimate fall experience. Here’s why Post Ranch Inn should be your home base, along with must-visit spots and activities to make your trip unforgettable.
As the crisp autumn air begins to sweep through California, Big Sur transforms into a breathtaking destination to sit in awe with the beauty of fall. With vibrant coastal colors, cooler temperatures, and seasonal festivities, it’s the perfect time to explore this stunning stretch of the Pacific coast. Whether you're here for a quiet retreat to retap your calm, or adventures to get your body moving, Big Sur offers the ultimate fall experience for those seeking a coastal vacation. While exploring the rugged coastline, having a central home base allows for deeper exploration of the area and Post Ranch Inn provides just that.

The Treehouse at Post Ranch Inn
Why Stay at Post Ranch Inn
Perched 1,200 feet above the rugged cliffs of Big Sur, Post Ranch Inn offers a serene escape that embraces the essence of fall. With its unique architectural design, the luxury inn seamlessly blends into the natural landscape, providing guests with breathtaking views of the Pacific Ocean. This is the perfect spot to witness the fall whale migration, making your stay even more magical.
The Inn’s 40 accommodations, including tree houses, invite you to cozy up with a cup of coffee while watching the waves crash below, especially a treat during the larger swells of the fall and winter. This bucket-list destination, not only for its scenic beauty but for its commitment to sustainability and wellness. With organic, environmentally-conscious design, Post Ranch Inn boasts a spa program focused on nature-inspired treatments. For a deeper connection with the surrounding environment, try falconry—an immersive experience that lets you interact with birds of prey, including falcons, a Harris hawk, and a great horned owl.
What to Do in Big Sur This Fall
1. Big Sur Jade Festival (Nov 1, 2, and 3rd)
The annual Big Sur Jade Festival is a must for anyone visiting in early November. This local favorite brings together artists, musicians, and jade enthusiasts for a weekend of celebration. The event serves as a fundraiser for the South Coast Community Land Trust and is an excellent way to discover the region’s rich history with jade, which is believed to have healing powers. As a guest at Post Ranch Inn, you can even indulge in spa treatments that incorporate jade for a truly immersive experience.
2. Big Sur Food & Wine Festival (October 31 - November 2)
Fall in Big Sur wouldn’t be complete without the Big Sur Food & Wine Festival, a three-day celebration of some of California’s best wines. The festival showcases renowned wineries and culinary talent, all set against the backdrop of Big Sur’s rugged coastline. It’s a perfect way to enjoy local flavors and seasonal cuisine while taking in the stunning scenery.
3. Spot Monarch Butterflies at Andrew Molera State Park
One of Big Sur’s natural wonders during fall is the annual monarch butterfly migration. Head to Andrew Molera State Park in October, where thousands of monarch butterflies gather in the trees for their winter retreat. Visit in the early morning to see them clustered together or catch them fluttering through the park as the day warms up.
4. Dine at Sierra Mar
For a culinary experience like no other, book a table at Sierra Mar, located atop the cliffs at Post Ranch Inn. This award-winning restaurant offers sweeping views of the Pacific Ocean, creating an unforgettable dining setting. Sierra Mar’s seasonal menus reflect the bounty of Big Sur’s coastal harvest, and the fall menu showcases ethically sourced, hyper-local ingredients. It’s the perfect way to end a day of exploring Big Sur’s dramatic landscape.
Why Post Ranch Inn is Your Ideal Fall Retreat
There’s no better place to experience Big Sur in the fall than Post Ranch Inn. With luxurious accommodations, world-class dining, and access to nature-based wellness experiences, this iconic property offers everything you need for a rejuvenating autumn escape. As you explore the epic coastline, Post Ranch Inn serves as the perfect home base to retreat to after a day of adventure.
Whether you’re attending the Jade Festival, savoring wine at the Big Sur Food & Wine Festival, or spotting monarch butterflies, Big Sur promises a fall getaway like no other. Make this stunning region your next autumn travel destination, with Post Ranch Inn at the heart of your journey.
Must-See Areas of Big Sur Nearby
When staying in Big Sur, there are several iconic spots that are simply too breathtaking to miss. Here are some must-visit areas near Post Ranch Inn that showcase the natural beauty and grandeur of Big Sur’s coastline:
1. McWay Falls
Perhaps the most photographed spot in Big Sur, McWay Falls is an 80-foot waterfall that cascades directly onto the beach below, creating a magical scene. Located in Julia Pfeiffer Burns State Park, it's a quick and easy stop along Highway 1, and the short hike to the viewpoint is worth it for the stunning ocean views.
2. Bixby Creek Bridge
An architectural marvel, Bixby Creek Bridge is one of the most famous landmarks along the Pacific Coast Highway. Built in 1932, this historic bridge offers dramatic views of the rugged coastline and is a popular stop for photographers. Fall is a great time to visit, as the crisp air and golden hues of the season add an extra layer of beauty to the scene.
3. Pfeiffer Beach
Known for its purple sand and striking rock formations, Pfeiffer Beach is a hidden gem worth seeking out. It’s a bit off the beaten path, but the secluded beach is perfect for a quiet stroll. The towering sea stacks and natural rock arch create a picturesque setting, especially at sunset when the light hits the waves just right.
4. Point Lobos State Natural Reserve
Just north of Big Sur, Point Lobos State Natural Reserve is a must-see for nature lovers. The coastal trails wind through cypress groves, and the views of the Pacific are simply breathtaking. It’s also one of the best spots for spotting wildlife, including sea otters, seals, and migrating whales during the fall season.
5. Garrapata State Park
For those seeking a bit more solitude, Garrapata State Park offers uncrowded hiking trails and stunning coastal views. Explore the rugged bluffs, venture through redwood forests, or head down to Garrapata Beach, where you can enjoy sweeping vistas of the coastline. It’s a perfect spot for fall hiking, with cooler temperatures and fewer crowds.
6. Big Sur River Gorge
If you're looking for a hidden gem, the Big Sur River Gorge is a great spot for a bit of adventure. This hike involves a bit of rock hopping and river wading, but it leads to beautiful swimming holes surrounded by the tranquil forest. It’s a perfect spot for a peaceful retreat, especially during the quieter fall months.
These must-see areas of Big Sur are all within easy reach of Post Ranch Inn, making it the ideal base for your fall getaway. Whether you’re taking in the dramatic coastal cliffs, relaxing on a secluded beach, or hiking through towering redwoods, Big Sur promises a truly unforgettable experience this autumn.
Fall in Big Sur offers a perfect blend of natural beauty, adventure, and serenity. From the luxurious retreat at Post Ranch Inn to the iconic landmarks like McWay Falls and Bixby Creek Bridge, this breathtaking region promises an unforgettable autumn escape. Whether you’re attending the vibrant Jade Festival, indulging in local flavors at Sierra Mar, or exploring hidden gems like Garrapata State Park, Big Sur delivers a rejuvenating experience. Make Post Ranch Inn your home base and savor the crisp coastal air, fall colors, and seasonal charm of this iconic California destination.
Discover More Destinations

Get Your Spook on in Reno Tahoe This Halloween Season
Reno Tahoe is transforming into a spooky wonderland this Halloween, offering a wide range of thrilling events, from costume-filled bar crawls to terrifying haunted attractions. Known for its unique mix of eerie fun and family-friendly activities, the region has something to offer for visitors of all ages.
Reno Tahoe is transforming into a spooky wonderland this Halloween, offering a wide range of thrilling events, from costume-filled bar crawls to terrifying haunted attractions. Known for its unique mix of eerie fun and family-friendly activities, the region has something to offer for visitors of all ages.
One of the biggest highlights of the season is the Reno Zombie Crawl, named one of the 10 Best Costumed Halloween Parties in the nation by USA Today. Drawing more than 15,000 participants each year, this event is one of the largest bar crawls in the world. Taking place in Downtown Reno, the crawl features over 40 bars, 150+ drink specials, and a variety of entertainment options, including karaoke and dance parties. Participants, dressed as zombies, take over the city for a night of wild Halloween-themed fun.
For those seeking a more spine-chilling adventure, the Corn Creepers Cornfield at Andelin Family Farm in Sparks offers a haunting journey through vast cornfields filled with lurking zombies. Visitors can also test their navigation skills in the farm's 5-acre corn maze or try zombie paintball. For a less terrifying experience, families can enjoy traditional fall activities like pumpkin picking.
Thrill-seekers can head to the Dark Corner Haunted House at the National Bowling Stadium, where the venue has been transformed into a massive haunted house. With over 32,000 square feet of scares, the haunted house is divided into multiple sections, each offering a unique terror—from plague-infested zones to creepy cults and freakish characters.
Families looking for more traditional Halloween fun can visit some of Reno’s iconic spots for trick-or-treating on Halloween night. Popular destinations include the Governor’s Mansion, the Discovery Museum, and the National Automobile Museum, where kids can collect candy and experience Halloween in a more relaxed setting.
Whether you’re seeking spine-tingling thrills or a fun family day, Reno Tahoe’s Halloween festivities promise an unforgettable experience for all visitors this spooky season.
Discover More Destinations
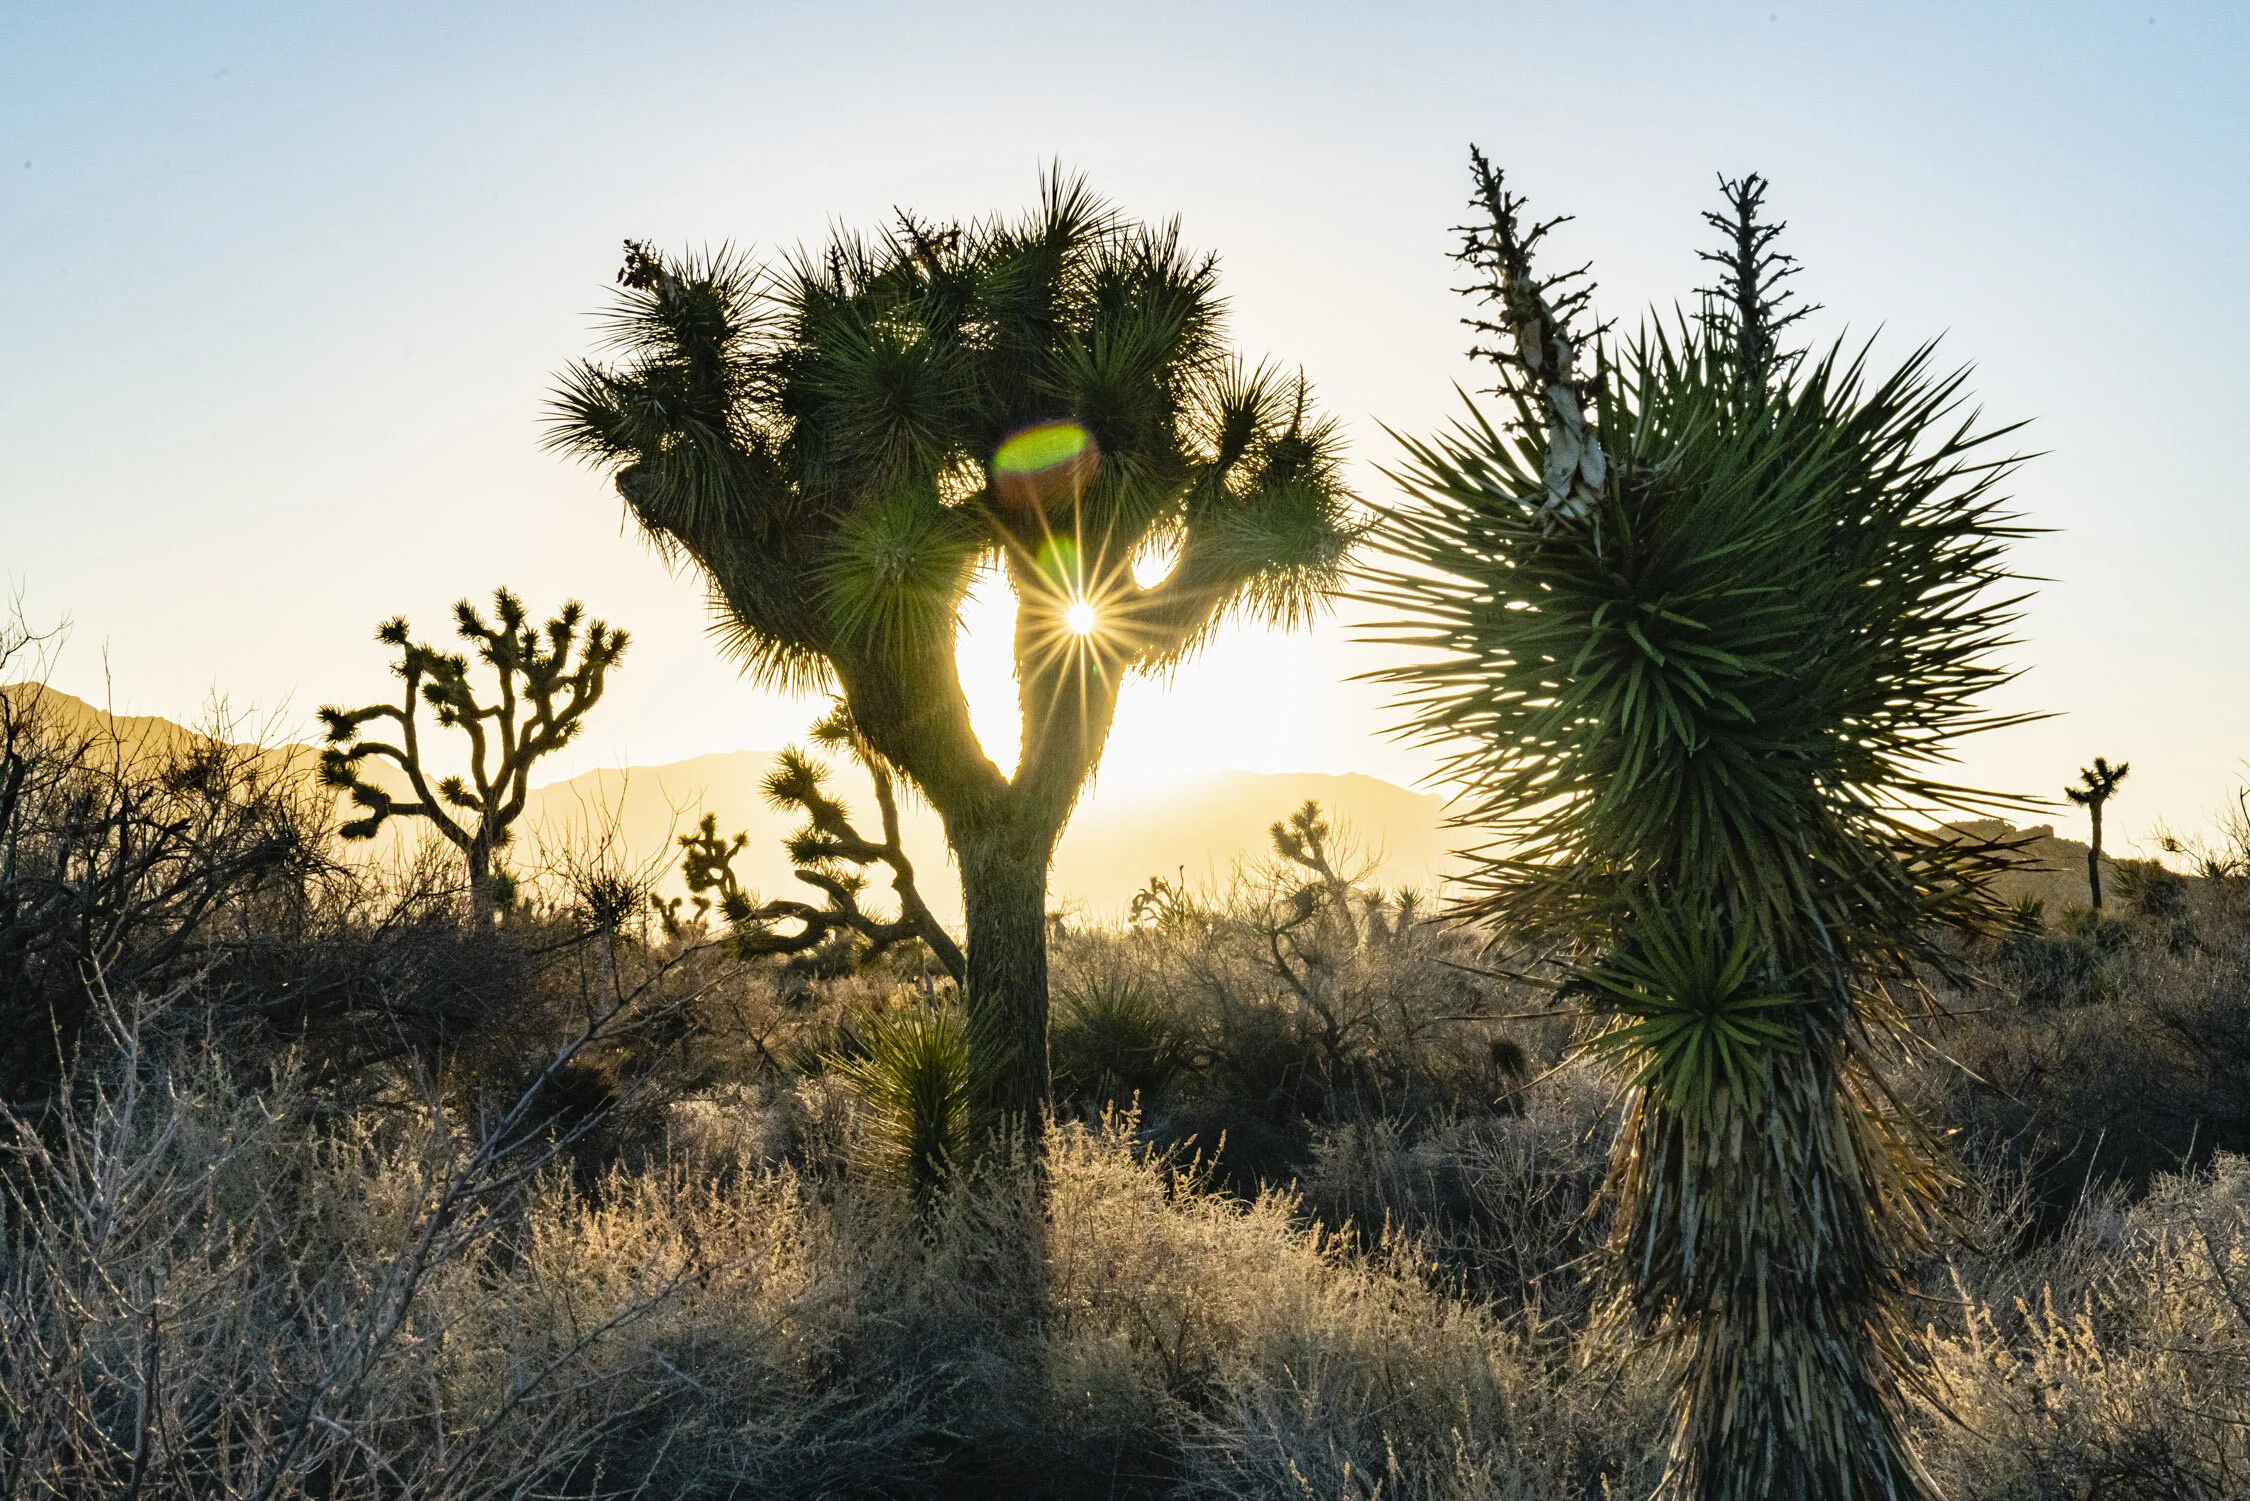
Your Seasonal Guide for Visit Joshua Tree National Park
Joshua Tree National Park, located in southeastern California just outside of San Diego, is a real life Doctor Seuss landscape calling hikers, rock climbers, photographer, stargazers, movie stars, yogis, and, well, just about everyone. With its otherworldly landscapes, granite rock formations, legends of giants sloths, and a forest of iconic Joshua Trees, this desert oasis offers a breathtaking experience year-round. However, the best time to visit Joshua Tree depends on your preferences and what you hope to experience during your visit. So, we will explore the different seasons and what they offer to help you plan your perfect trip to this remarkable desert oasis.
However, the best time to visit Joshua Tree depends on your preferences and what you hope to experience during your visit. In this seasonal guide, we will explore the different seasons and what they offer to help you plan your perfect trip to this remarkable desert gem.
Joshua Tree National Park, located in southeastern California just outside of San Diego, is a real life Doctor Seuss landscape calling hikers, rock climbers, photographer, stargazers, movie stars, yogis, and, well, just about everyone. With its otherworldly landscapes, granite rock formations, legends of giants sloths, and a forest of iconic Joshua Trees, this desert oasis offers a breathtaking experience year-round. However, the best time to visit Joshua Tree depends on your preferences and what you hope to experience during your visit. So, we will explore the different seasons and what they offer to help you plan your perfect trip to this remarkable desert oasis.
Highlining in Joshua Tree National Park. Photo by Dalton Johnson
Spring: March to May
Spring is arguably the best time to visit Joshua Tree National Park. As the desert awakens from its winter slumber, temperatures become pleasantly mild, making outdoor activities enjoyable. The highlight of this season is the spectacular wildflower bloom, as vibrant colors blanket the park's usually arid landscape. The flora, including iconic Joshua trees, cacti, and ocotillos, come to life with vivid reds, yellows, and purples, creating a stunning contrast against the park’s rugged terrain.
The wildflower bloom varies each year depending on rainfall, but March through May typically offers the best chance to see this natural spectacle. Keep an eye on local reports for bloom updates, and head to prime viewing spots like the Cottonwood Spring Oasis, Pinto Basin, and Hidden Valley.
The moderate spring temperatures also make this season perfect for exploring Joshua Tree’s famous rock formations, hiking trails, and climbing spots. The cooler, crisp air allows you to spend extended hours outdoors without the intense heat of summer.
Best Things to Do in Joshua Tree During Spring:
Wildflower Viewing: Witness the park's desert floor come alive with colorful wildflowers at spots like Cottonwood Spring and Pinto Basin.
Hiking Hidden Valley: This easy 1-mile loop offers fascinating rock formations and a chance to enjoy the spring blooms at a leisurely pace.
Exploring Barker Dam Trail: A moderate 1.3-mile loop that features a historic dam, scenic views, and desert plant life in full bloom.
Rock Climbing at Intersection Rock: Joshua Tree is famous for rock climbing, and spring provides optimal weather for climbers to tackle its renowned granite formations.
Photography: Capture the contrast of blooming flowers against the park's iconic rock formations, especially during golden hour.
Birdwatching at Cottonwood Spring: Spring brings an abundance of birdlife, making this oasis a great spot for birdwatching amidst blooming flora.
Stargazing: With clear skies and mild evening temperatures, spring is ideal for stargazing in one of the darkest skies in Southern California.
Joshua Tree Music Festival (May): This spring festival is a celebration of music and art, perfect for visitors looking to experience the local culture and desert atmosphere.
Summer: June to August
Summer in Joshua Tree brings scorching heat, with daytime temperatures often exceeding 100°F (38°C). Because of the intense heat, it’s generally considered the least desirable season to explore the park, but with proper preparation and planning, you can still have a memorable experience.
If you visit during the summer, safety is paramount. Bring plenty of water (at least 1 gallon per person per day), and wear light, breathable clothing to protect yourself from the sun. Always apply sunscreen, wear a hat, and use sunglasses. Many hiking trails and areas of the park may become dangerous due to the extreme heat, so it's best to plan activities for early mornings or late evenings when temperatures are cooler. Avoid hiking during the hottest part of the day, typically between 10 a.m. and 4 p.m.
To avoid the midday heat, consider visiting the park’s higher elevations, such as Keys View or Ryan Mountain, where temperatures may be slightly cooler. Even so, caution is essential. Be sure to check with the park rangers for any trail closures or restricted access due to heat.
The benefit of visiting Joshua Tree in summer is the lack of crowds. You'll find more solitude on the trails and in the park’s most popular spots, allowing for peaceful, uninterrupted experiences in nature. Additionally, summer nights can be surprisingly beautiful, with clear skies perfect for stargazing. The desert’s minimal light pollution makes it one of the best places to observe the night sky—just be sure to check for new moon phases for optimal star visibility, as a full moon can wash out many of the stars.
Tips for Visiting Joshua Tree in Summer:
Start Early or Stay Late: Plan your hikes or outdoor activities for early morning or late evening to avoid the worst of the heat.
Stay Hydrated: Bring plenty of water and electrolytes—dehydration is a major risk in desert environments.
Seek Shade: Use the limited shaded areas for breaks and wear sun protection, including sunscreen, hats, and sunglasses.
Watch for Wildlife: Animals are more active during dawn and dusk to avoid the heat, so you may spot desert creatures during these cooler hours.
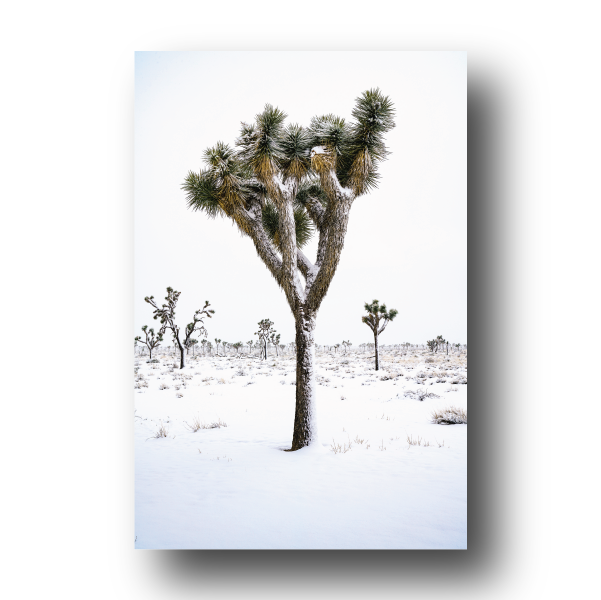


Fall: September to November
Fall is an ideal time to visit Joshua Tree, offering pleasant weather and fewer crowds compared to the busier spring season. As summer’s extreme heat fades, daytime temperatures range from the 70s to 90s°F (20s to 30s°C), creating the perfect conditions for outdoor adventures. Hiking, rock climbing, and exploring the park’s striking rock formations and landscapes are all more enjoyable with the cooler, milder temperatures.
One of the highlights of fall in Joshua Tree is the changing landscape of the Joshua trees themselves. Though not deciduous, the cooler temperatures encourage these iconic trees to display their seasonal charm. The Joshua trees may bloom, producing clusters of creamy white and green flowers that contrast beautifully with the deep blue desert sky. Fall is also a great time to observe the park’s ecosystem, as these blooms attract pollinators like bees, moths, and birds, adding to the magic of the season.
Fall is also a prime season for stargazing. The crisp, cool nights combined with Joshua Tree’s minimal light pollution make it one of the best stargazing destinations in the country. You should try your hand at astrophotography when you visit. The Milky Way becomes visible stretching across the sky, offering breathtaking views of the cosmos. Many visitors choose to participate in ranger-led astronomy programs, which provide insight into constellations, planets, and deep-sky objects visible with the naked eye or through telescopes.
Best Things to Do in Joshua Tree During Fall:
Hiking the Hidden Valley Trail: With cooler temperatures, fall is perfect for exploring this 1-mile loop trail, offering incredible views of rock formations and desert flora.
Exploring Barker Dam: This 1.3-mile loop trail offers scenic views of Joshua Tree’s unique geology, along with opportunities to spot wildlife near the dam.
Visit Keys View for Sunset: Fall sunsets are particularly beautiful from Keys View, where you can take in panoramic views of the Coachella Valley and beyond.
Attend a Ranger-Led Stargazing Program: Enhance your night sky experience by joining a ranger-led stargazing session, where you'll learn more about the constellations and visible celestial bodies.
Drive the Geology Tour Road: Take advantage of the cooler weather and explore the park’s unique geology on this self-guided off-road tour.
Photograph the Blooming Joshua Trees: Capture the beauty of Joshua trees in bloom, set against a stunning desert backdrop.
Explore the Cholla Cactus Garden: Walk through this surreal landscape where the cacti glow golden in the soft light of morning or late afternoon.
Enjoy a Picnic at Cap Rock: With fewer crowds and milder temperatures, Cap Rock is a peaceful spot to relax, have a picnic, and enjoy the desert scenery.
Winter: December to February
Winter in Joshua Tree brings cooler temperatures, with daytime highs ranging from the 50s to 60s°F (10s to 20s°C). While the days are often mild and comfortable for outdoor activities, nights can be quite cold, frequently dropping below freezing. If you plan to camp or stay overnight, be sure to pack warm clothing and appropriate gear to withstand the chilly desert nights.
The desert's beauty in winter takes on a unique character. The stark, rugged landscape stands in striking contrast to the snow-capped peaks of the nearby San Bernardino Mountains, creating picturesque vistas. Joshua Tree’s clear, crisp air makes for excellent photography, and the cooler weather offers comfortable conditions for hiking and bouldering. However, it’s important to stay aware of weather changes, as winter can bring occasional rain or even snow at higher elevations.
A major advantage of visiting Joshua Tree in winter is the lack of crowds. With fewer visitors, you’ll enjoy a more peaceful and solitary experience, perfect for exploring the park’s iconic attractions like Skull Rock, Keys View, and the Cholla Cactus Garden without the congestion seen during peak seasons. The quiet atmosphere also makes it easier to secure prime camping spots and access the park’s most popular sites without waiting.
Winter is also a great time to spot bighorn sheep, as these elusive animals tend to be more active during the cooler months. Keep your binoculars handy and your eyes peeled while exploring areas like the Barker Dam Trail, where they are often seen.
Best Things to Do in Joshua Tree During Winter:
Explore Skull Rock: Take advantage of fewer visitors and explore the unique rock formations, including the popular Skull Rock, with minimal crowds.
Stargazing: With long, dark winter nights, Joshua Tree remains a prime location for stargazing. The crisp air makes for clear skies, ideal for viewing constellations and the Milky Way.
Camp at Hidden Valley Campground: Enjoy the quiet serenity of winter camping in Joshua Tree, with fewer crowds and cooler weather making it a peaceful experience.
Photography at Cholla Cactus Garden: The soft winter light casts an ethereal glow over the Cholla Cactus Garden, making it a perfect spot for photography.
Look for Bighorn Sheep: Winter is the best time to spot these elusive creatures, especially around the rocky outcrops near Barker Dam and the higher elevations of the park.
Snowshoeing in Nearby Mountains: While Joshua Tree itself doesn’t usually receive heavy snowfall, nearby areas in the San Bernardino Mountains offer opportunities for snowshoeing and winter sports.
A solar flare poking through a Joshua Tree. Photo by Dalton Johnson
The best time to visit Joshua Tree National Park depends on your preferences and what you want to experience during your trip. Spring and fall are typically the most popular seasons due to their comfortable temperatures, wildflower blooms, and pleasant hiking conditions. However, if you can handle the extreme heat, summer offers fewer crowds and excellent astrophotography opportunities. Winter, while cooler, provides a unique perspective on the desert landscape and a chance to see bighorn sheep. Ultimately, no matter when you choose to visit Joshua Tree National Park, you're in for a memorable adventure in one of America's most iconic national parks. Just remember to plan ahead, stay hydrated, and respect the fragile desert ecosystem to ensure a safe and enjoyable experience.