
Boots Are Overrated When Climbing 14ers; Use These Instead
When preparing to climb a 14er, you might assume that mountaineering boots are a must. I did too—at first. For my first few fourteeners, I strapped on heavy, clunky mountaineering boots because that’s what I thought the terrain demanded. But as I gained experience, I realized that boots are often overkill for most 14er climbs. In fact, approach shoes or trail running shoes are usually better options. These lighter alternatives offer comfort, flexibility, and the ability to move quickly—qualities that are often more important than the rigid support of traditional boots.
When preparing to climb a 14er, you might assume that mountaineering boots are a must. I did too—at first. For my first few fourteeners, I strapped on heavy, clunky mountaineering boots because that’s what I thought the terrain demanded. But as I gained experience, I realized that boots are often overkill for most 14er climbs. In fact, approach shoes or trail running shoes are usually better options. These lighter alternatives offer comfort, flexibility, and the ability to move quickly—qualities that are often more important than the rigid support of traditional boots.

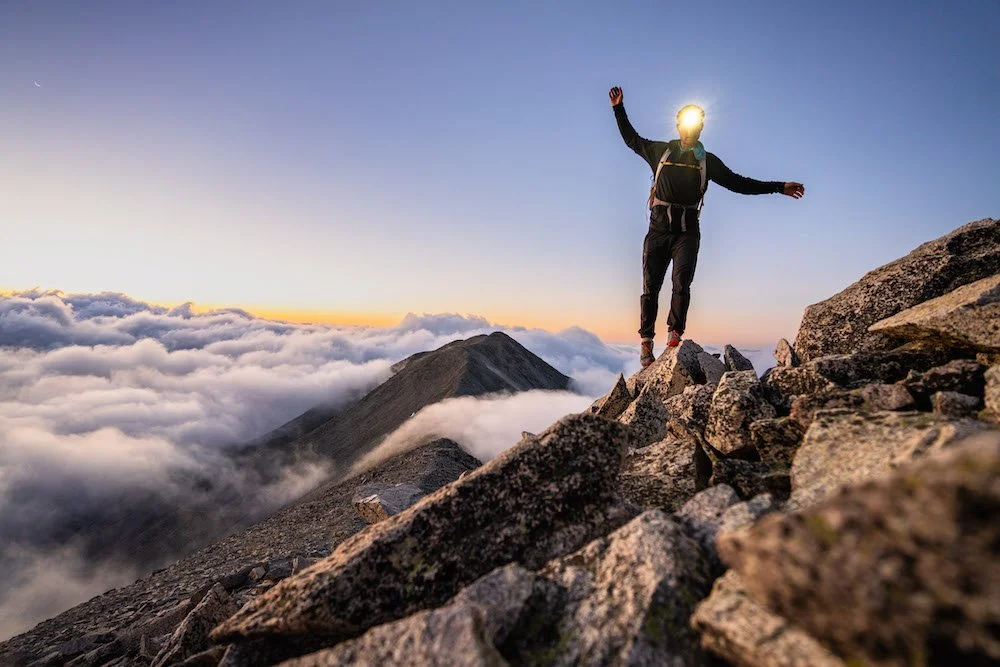
Jumping with joy after completing all 15 of the Sawatch 14ers in 20 days. Photo by Dalton Johnson
Do I Need Specialized Footwear for Climbing 14ers?
The short answer is no—you don’t need specialized mountaineering boots for most 14ers. While boots offer great support, they’re heavier, less flexible, and unnecessary for the majority of non-technical routes. For most 14ers, the ideal footwear includes approach shoes or trail running shoes, especially if you value lightweight performance and comfort.
Why I Prefer Approach Shoes or Trail Runners
Approach shoes and trail runners are lighter, more comfortable, and better suited for quick movements on rocky terrain. Personally, I prefer high-top versions to protect my ankles. With these options, you can maintain agility while still getting enough support for uneven trails. Trail runners, in particular, are fantastic for their breathability and cushioning—qualities that make long, grueling days much more manageable.
Choosing the right footwear can also help reduce fatigue. When you’re covering thousands of feet in elevation gain, every ounce on your feet feels like pounds on your back. Lightweight shoes let you focus on enjoying the climb rather than worrying about sore feet.

La Sportiva
My Favorite Approach Shoes
La Sportiva TX4 (Favorite): These are hands down the best all-around approach shoes for the mountains. The grip is fantastic, and they work incredibly well for moving quickly over mixed terrain. They’re my go-to for 3rd and 4th class scrambles, offering just the right blend of support and flexibility.
Arc'teryx Konseal FL GTX (Second Favorite): These are solid all-around approach-style hiking shoes. The sticky rubber could be better, but they perform great on 3rd and 4th class terrain. I wouldn’t recommend free-soloing anything over 5.5 in them, though. The waterproof design makes them a good choice for wetter conditions.
Black Diamond Mission LT (Good Enough): They get the job done but don’t stand out. I find them difficult to run or jog in due to their stiffness. However, they’re durable and reliable, making them a decent budget-friendly option.

Hoka
My Favorite Trail Runners
Hoka Tecton X3 (Favorite): The extra padding is a lifesaver for long days, and the traction is excellent. Plus, the built-in gaiter keeps rocks and sand out of your shoes. However, the rubber isn’t sticky, so they’re not great for scrambling on rocks. I’ve used these for multiple 14ers and appreciated how they absorbed the impact on long descents.
Merrell Agility Peak (Second Favorite): A great all-around shoe. The only downside is the slightly taller design, which can make balancing tricky on uneven ground. These are excellent for trails with lots of loose dirt or gravel.
Nike ACG Mountain Fly (Good Enough): These shoes have aggressive tread and get the job done, but they feel heavy compared to other options. They’re a reasonable choice for someone transitioning from boots to trail runners.

Running down from the summit of a Colorado 14er. Photo by Dalton Johnson
Tips for Choosing the Right Footwear
When picking between approach shoes and trail runners, consider the specific terrain and conditions of your planned climb. For routes with more technical scrambling, approach shoes with sticky rubber soles will give you the confidence to tackle rockier sections. For long, straightforward trails, trail runners are the better option for their cushioning and breathability.
Another factor is fit. Always try your shoes with the socks you plan to wear on your climb. A snug but not tight fit will minimize blisters and hotspots, which can derail an otherwise great day in the mountains.
A Few Exceptions
While approach shoes and trail runners are sufficient for most 14ers, there are exceptions where boots are necessary:
Glaciated Peaks: For climbs like Mount Shasta or Mount Rainier, mountaineering boots are essential. These peaks often require crampons, and boots provide the rigidity needed to handle glacier travel. That said, I’ve seen an ultra-fit runner tackling Mount Shasta near the Thumb in trail runners, spandex, and a wind jacket—but that’s an exception, not the rule.
Winter Ascents: If you’re climbing a 14er in winter conditions, mountaineering boots are the safer choice due to the added insulation and compatibility with crampons. Winter routes often demand more protection from the elements, and boots excel at keeping your feet warm and dry.
Extended Expeditions: If you’re doing a multi-day climb or carrying a heavy pack, the extra support from boots can be beneficial. This is especially true for routes with significant snow or scree fields, where stability is paramount.
Sunrise summit mission on a Colorado 14er. Photo by Dalton Johnson
Final Thoughts
When it comes to climbing 14ers, boots aren’t the be-all, end-all of footwear. For most climbs, you’ll find that approach shoes or trail runners are more than sufficient. They’re lighter, more flexible, and allow you to move more efficiently on the trail. Consider the terrain and season when making your choice, but don’t feel like you need to default to heavy boots. Save those for the snow and ice!
Ultimately, the best footwear is what feels comfortable and keeps you confident on the trail. By experimenting with different options, you can find what works best for you and enjoy your 14er adventures to the fullest.
Discover More Gear
I Hiked Mount Tallac to Watch the Stars – You Should Too
Living in South Lake Tahoe, Mount Tallac has always been my constant landmark. Its familiar silhouette serves as a compass, grounding me whenever I wander through Tahoe’s endless beauty. Whether I’m kayaking on the lake or hiking a forested trail, Tallac’s jagged profile stands as a reassuring guide. But recently, I felt the urge to shift perspectives. Instead of looking at Mount Tallac, why not look from its summit and discover the view from above?
Living in South Lake Tahoe, Mount Tallac has always been my constant landmark. Its familiar silhouette serves as a compass, grounding me whenever I wander through Tahoe’s endless beauty. Whether I’m kayaking on the lake or hiking a forested trail, Tallac’s jagged profile stands as a reassuring guide. But recently, I felt the urge to shift perspectives. Instead of looking at Mount Tallac, why not look from its summit and discover the view from above?
That’s exactly what I did. Trading my typical day hike for an overnight adventure, I packed my gear—tent, sleeping bag, food, water, and everything needed for a night on the mountain—and set out on a journey to sleep under the stars atop Tahoe’s iconic peak.

Almost to the summit of Tallac in South Lake Tahoe, CA. Photo by Dalton Johnson
Hiking Take At A Slower Pace Brings New Beauty
With a full backpack adding weight, my usual brisk hike turned into a steady climb. The slower pace was a gift. It gave me time to pause, breathe, and take in the sights. Every break offered a chance to marvel at the ridges, the shimmering expanse of Lake Tahoe, and the play of clouds overhead. The trail, normally just a means to an end, transformed into a meditative experience. I noticed the patterns of sunlight filtering through the trees, the subtle changes in vegetation as I gained altitude, and the sound of wind brushing against granite outcrops.
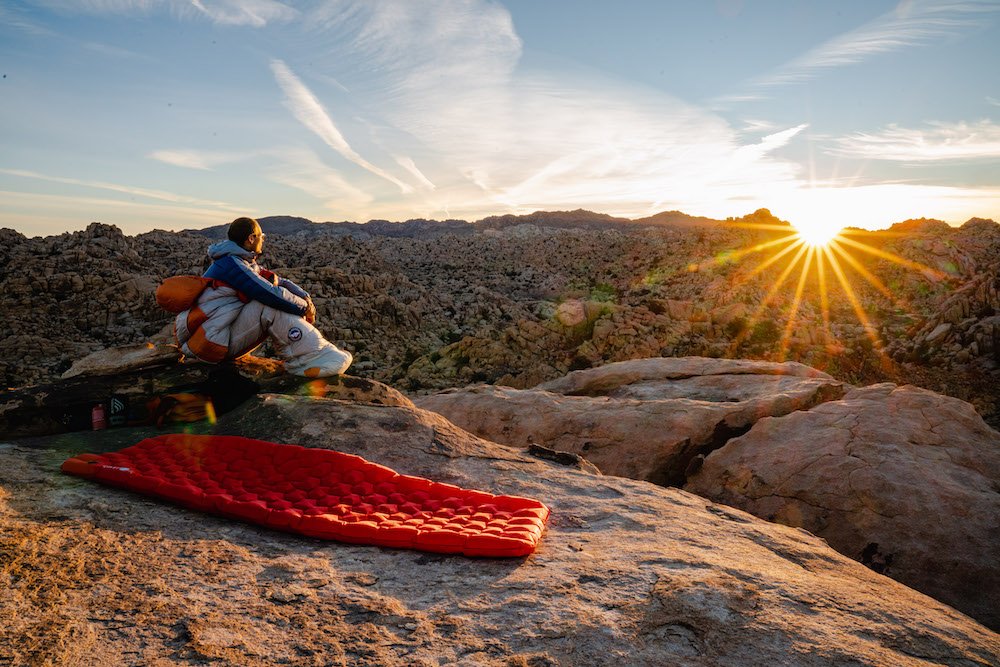
As daylight started to fade, I approached the summit. The timing was perfect. The sun dipped toward the horizon as I found a flat spot to set up my Featherstone tent. With my sleeping quilt ready for later, I wandered to the summit’s edge, catching the last golden rays of sunlight. Watching the sun disappear behind the Carson Range was a moment of pure magic, and I felt deeply connected to the world around me.
Mount Tallac Hike Overview
Trailhead: The hike begins at the Mount Tallac Trailhead, located near Highway 89.
Average Time to Top: Approximately 4-5 hours depending on pace and breaks.
Distance to Top: 5 miles one-way.
Elevation Gain: 3,500 feet from trailhead to summit.

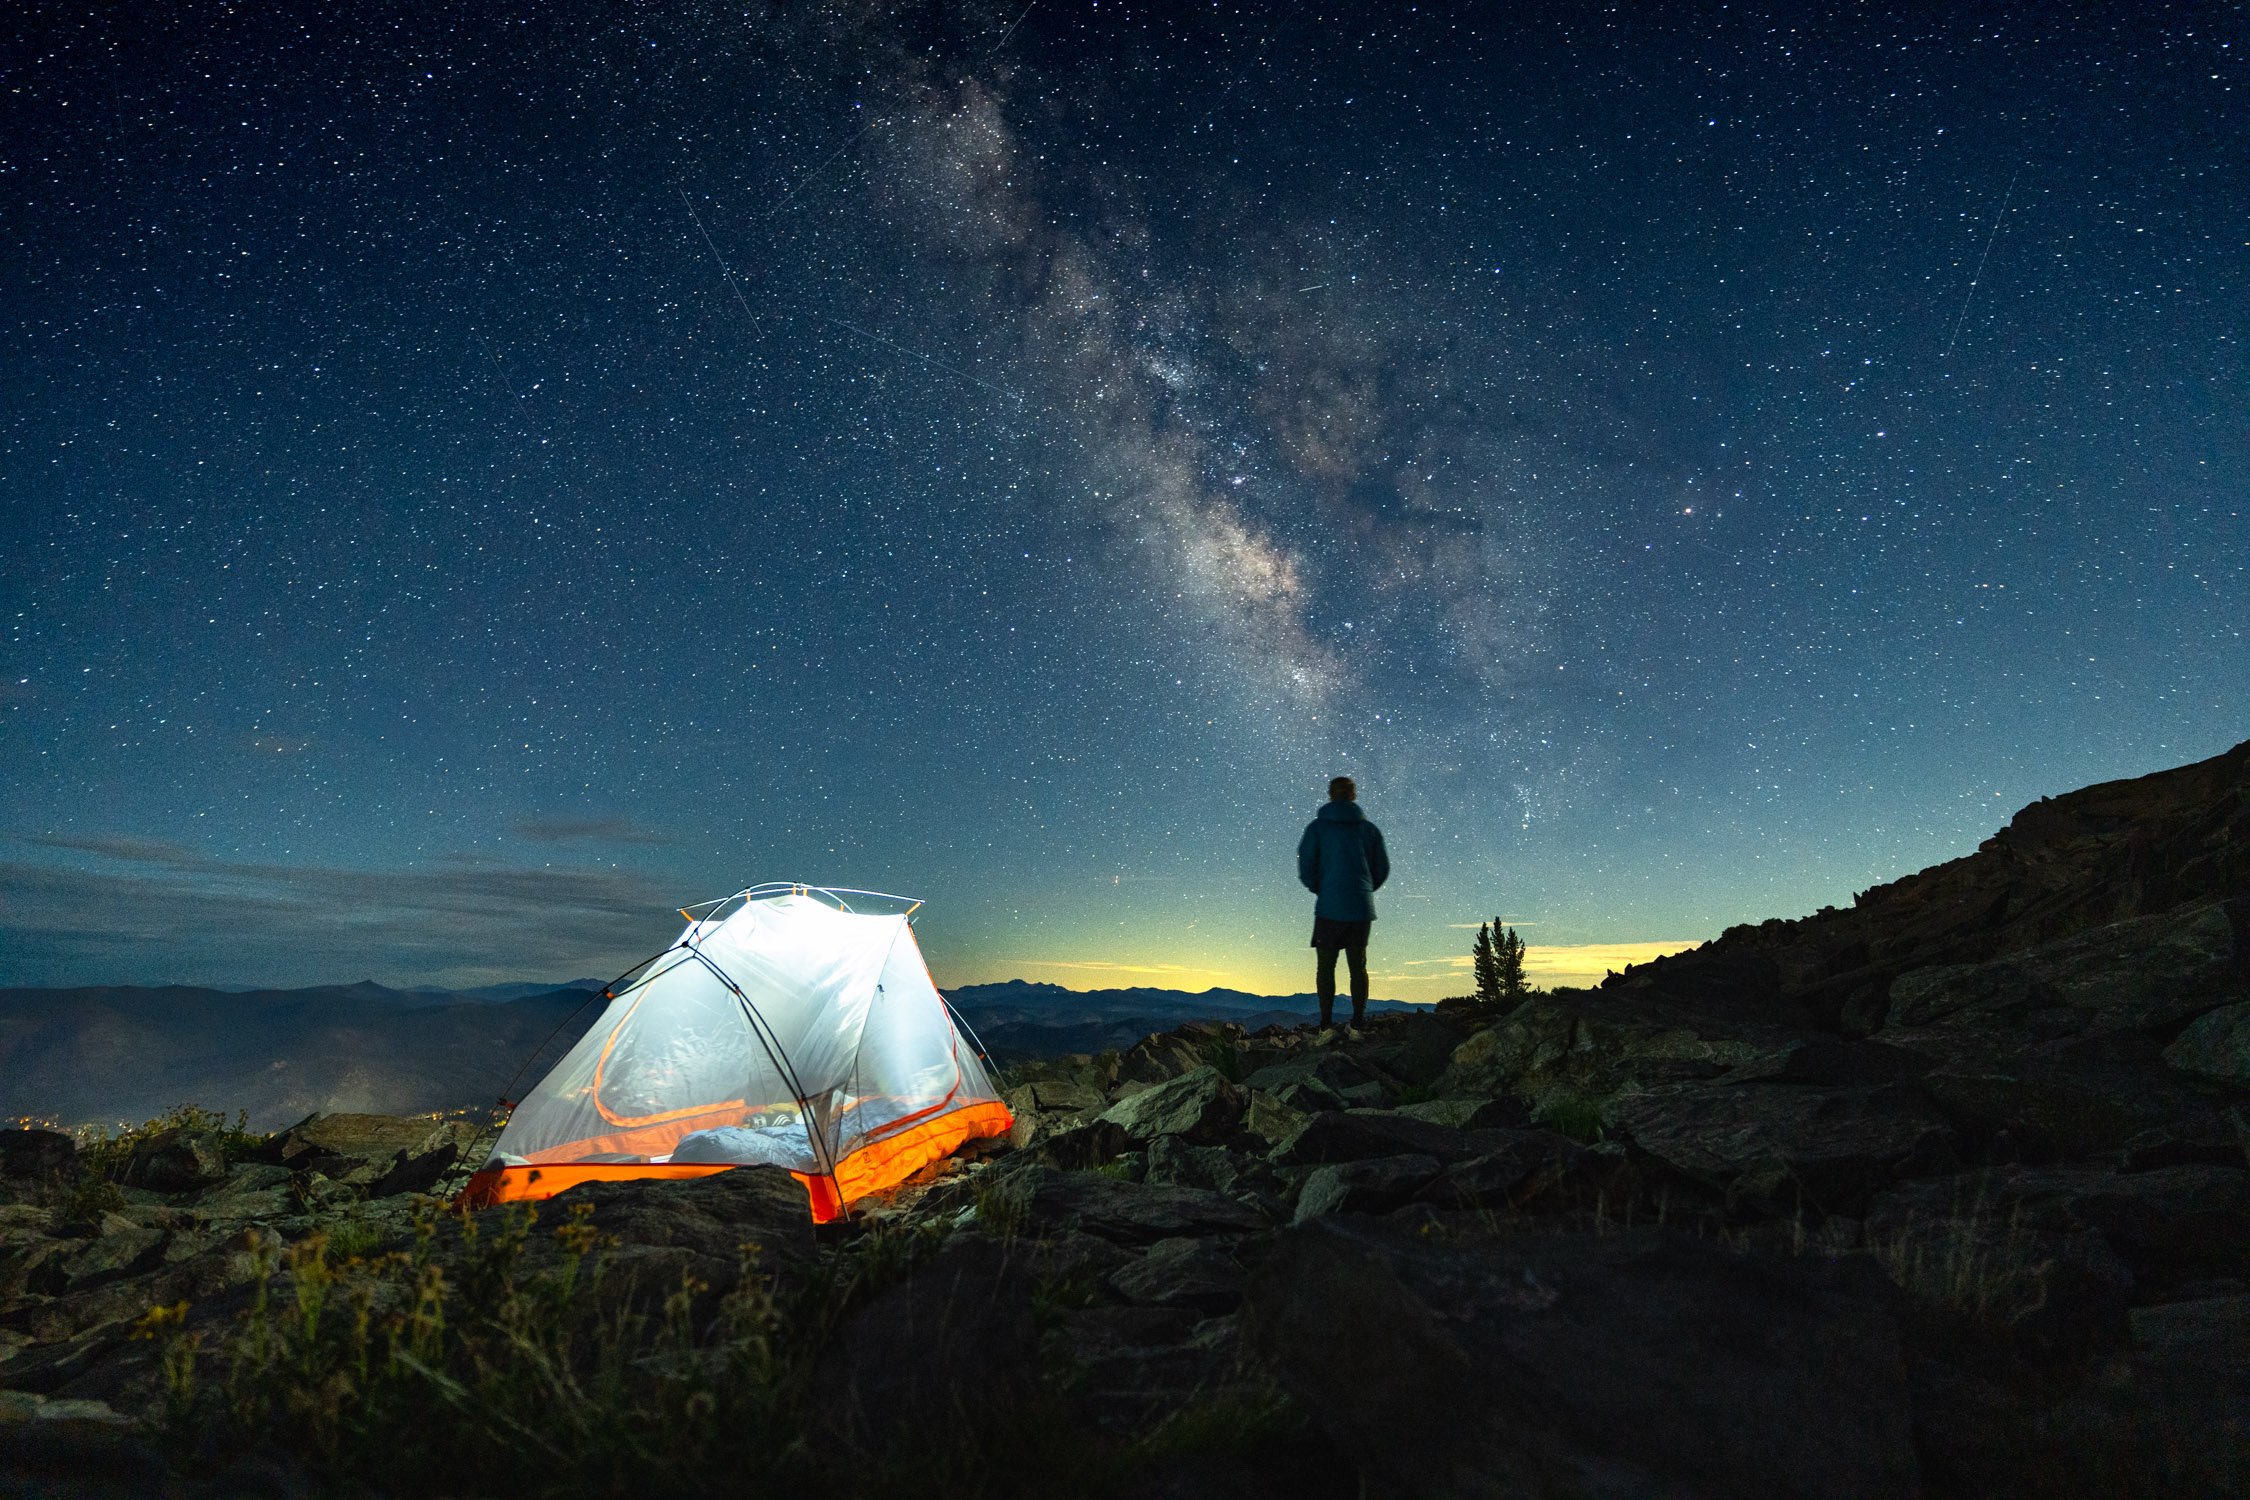
Wandering around the summit under the Milky Way. Photo by Dalton Johnson
A Starry Night Like No Other
By the time I cooked dinner, darkness had fully settled in. Overhead, the Milky Way stretched across the sky, its brilliance accentuated by the clarity of the mountain air. I ate my meal in silence, my gaze fixed upward. The stars felt close enough to touch, and I couldn’t help but reflect on the vastness of the universe. Out here, the usual distractions of life fell away, leaving only the profound simplicity of the night sky.
Something about the vastness of the night called me to explore. With my headlamp on, I wandered the summit. On one side, the pitch-black expanse of Desolation Wilderness. On the other, the twinkling city lights of South Lake Tahoe. The contrast was striking—a reminder of the balance between wildness and civilization. Standing there, I felt like a bridge between these two worlds, soaking in the best of both.
I found myself drawn to the small details of the summit: the rough texture of granite underfoot, the sound of distant wind, and the occasional rustle of nocturnal animals. Eventually, the chill of the night air sent me back to the warmth of my tent. Snug in my sleeping quilt, I drifted to sleep with the stars still vivid in my mind.


Morning Magic on Mount Tallac
I woke to the first light of dawn and the promise of a warm cup of coffee. There’s something deeply satisfying about sipping coffee as the sun rises. The golden light crept over the Carson Range, warming my face as the world around me came alive. The view was breathtaking, and I lingered over my morning routine, savoring every moment of peace.
From the summit, I spotted familiar landmarks with a fresh perspective. Cave Rock stood out along the lake’s eastern shore, and though Emerald Bay was faint in the distance, I could trace its outline. As the wind picked up, I walked around the summit, taking in every detail of the landscape. Each direction offered a new view, from the rolling peaks of the Sierra Nevada to the shimmering blue waters of Lake Tahoe.
A few early risers joined me on the summit, and I couldn’t help but admire their dedication. Sharing the morning stillness with them felt like a quiet camaraderie. We exchanged nods and brief greetings, each of us immersed in our own experience of the mountain’s majesty.
Sunrise and coffee from my Featherstone Tent at the top of Tallac in South Lake Tahoe, CA. Photo by Dalton Johnson
After soaking in the views for an hour, I packed up my camp and began the descent. The hike down felt lighter, not just because my pack was emptier, but because my spirit felt renewed. Sleeping atop Mount Tallac had given me a new appreciation for the area I call home. It reminded me of the power of pausing, looking up, and seeing the world from a different vantage point.
On the way down, I took more time to appreciate the trail. I noticed wildflowers blooming in the rocky soil, the occasional chipmunk darting across the path, and the sound of cascading streams trickling through the forest. The descent felt like a continuation of the journey, rather than just the end of it.
Back at the trailhead, I was tired but fulfilled. My overnight adventure had deepened my connection to the mountain and the surrounding wilderness. It was a reminder that even in familiar places, there’s always something new to discover.
If you’ve ever hiked Mount Tallac and thought about staying a little longer, I can’t recommend an overnight trip enough. Watching the stars from the summit is a humbling experience—one that connects you to the vastness of the universe and the beauty of Tahoe all at once. So, pack your gear and head up Tallac for a night under the stars. It’s an adventure you won’t regret.
Discover more Adventures


I Took the Big Agnes Torchlight Cowboy Camping in Joshua Tree's Backcountry
After a week of climbing in Joshua Tree, my hands were shredded, my skin dry, and my energy low—but I wasn’t ready to leave. Packing up felt premature. I wanted one last night under the stars, away from the crowds and climbing routes. So, I grabbed my daypack, stuffed it with the essentials, and hit the trail.
Joshua Tree’s backcountry makes packing light easy. All I needed was a ground sheet, sleeping pad, my Big Agnes Torchlight sleeping bag, some water, and a quick breakfast. I zipped up my pack, slammed the van door shut, and let the desert guide my footsteps.

Packing my bag to head out for one last night in Joshua Tree. Photo by Dalton Johnson
Wandering the Desert
The late afternoon light transformed the landscape into something otherworldly as I meandered across sandy trails and over boulders. A few hours later, just before sunset, I scrambled up a rock pile to find a flat spot to camp. The view was incredible—miles of open desert stretching to the horizon, scattered with Joshua trees and rock formations.
I set up my simple sleeping system: a ground sheet to protect the pad from popping, my pad for cushioning and warmth, and the Big Agnes Torchlight sleeping bag. The Torchlight is compact and easy to carry, perfect for quick overnights like this. As the desert temperatures dropped with the fading light, I crawled into the bag. The warmth wrapped around me like a hug, a welcome contrast to the crisp night air.

Finding the perfect flat rock to cowboy camp in Joshua Tree. Photo by Dalton Johnson
The Desert at Night
The desert transforms at night, with temperatures plummeting and stars igniting the sky. Cowboy camping here requires a good sleeping bag, and the Torchlight excels. It’s roomy, with adjustable zippers along the sides for customized comfort. Want more space? Unzip the sides. Want to trap warmth? Zip them tight. The large footbox is another win—cozy but not cramped.
As I lay in the bag, the chill outside felt worlds away. Gazing up, I tried to pick out constellations in the star-dotted sky. Cassiopeia’s “W” shape eventually caught my eye, a comforting reminder of how vast and magical the desert is at night. My thoughts drifted to the week of climbing I’d just wrapped up. Climbing in Joshua Tree is as much a mental challenge as a physical one, and breaking into a new trad grade had been a highlight of the trip.
A Perfect Night’s Sleep
The warmth of the Torchlight and the serenity of the desert lulled me to sleep. Unlike camping in a tent, cowboy camping offers a sense of connection to nature that’s hard to replicate. I woke only when the sun began to warm my face. It was a perfect morning.
Stretching inside the bag, I marveled at how well it had performed. No drafts, no discomfort—just uninterrupted sleep. As I fired up my Jetboil for coffee and oatmeal, I felt a deep sense of gratitude for the simplicity of this overnight. By the time I packed up and started heading back to the van, I felt refreshed and ready to return to the road.

Enjoying the sunrise in Joshua Tree. Photo by Dalton Johnson
The Big Agnes Torchlight has become my go-to bag for cowboy camping. Its adaptability, warmth, and packability make it a standout choice for desert overnights like this one. Whether you need a cozy cocoon for a cold night or extra space for a more relaxed sleep, the Torchlight has you covered.
For anyone planning a night under Joshua Tree’s stars—or anywhere else where the nights demand warmth and comfort—the Big Agnes Torchlight is worth considering.
One last night in Joshua Tree was exactly what I needed, and the Torchlight helped make it perfect.
Discover More Gear

What to Expect When Visiting Sedona In Winter
Winter in Sedona is a magical time that combines stunning landscapes with fewer crowds and plenty of outdoor adventure opportunities. Whether you're drawn by the allure of Sedona's famous red rocks or the chance to explore the town's unique cultural vibe, winter is a fantastic season to visit.
Winter in Sedona is a magical time that combines stunning landscapes with fewer crowds and plenty of outdoor adventure opportunities. Whether you're drawn by the allure of Sedona's famous red rocks or the chance to explore the town's unique cultural vibe, winter is a fantastic season to visit.

Sitting in a cave thinking about what or who used to live inside. Photo by Dalton Johnson
Why Winter in Sedona is Special
I’ve always loved the outdoors, but my winter trip to Sedona took my appreciation to a whole new level. The weather was incredible for exploring during the day, with temperatures in the 50s and 60s, and I didn’t have to deal with the intense heat of summer. The occasional rain and even a bit of snow added a magical touch to the red rock formations, making the scenery even more dramatic. Just be ready for the weather to change quickly—one minute it's sunny, and the next you might see rain or snow rolling in.
My Favorite Outdoor Adventures
Hiking: I spent hours exploring Sedona’s famous trails, and winter was perfect for it. The cooler air made hikes like Cathedral Rock and Devil’s Bridge much more enjoyable. It felt like I had the trails almost to myself, which made the experience even more peaceful and rewarding.
UTV Riding: One of the highlights of my trip was taking a UTV out into Sedona’s rugged terrain. The cooler weather was ideal for this adrenaline-filled activity, and I loved getting muddy on the trails after some winter rain. It was such a fun way to see Sedona’s landscapes up close.
Photography: I’m always looking for unique photo opportunities, and Sedona in winter didn’t disappoint. The golden hour light on the red rocks was stunning, and when it snowed lightly, the contrast was just breathtaking. My mornings and evenings were dedicated to capturing these moments, and it was so worth it.
Vortex Hunting: I’d heard so much about Sedona’s spiritual energy vortexes, so I made it a point to visit spots like Airport Mesa and Boynton Canyon. Winter was a great time for this because the cooler weather made it easier to spend time exploring and soaking in the serene atmosphere.
Walking Around Town: During the holidays, Sedona’s town center transforms into a festive wonderland. Walking around the streets near Christmas was one of the most charming parts of my trip. The lights, decorations, and general holiday cheer made it feel like I was in a postcard.


Tips from My Experience
Pack for Variable Weather: I learned quickly that Sedona’s winter weather can change in an instant. Make sure to bring layers, a waterproof jacket, and sturdy hiking boots so you’re ready for anything.
Check Trail Conditions: After a rainy day, some trails were a bit slick. Checking trail updates before heading out saved me from wasting time on trails that were temporarily closed.
Enjoy the Quiet: One of the best things about my winter trip was the smaller crowds. Parking at trailheads was easy, and I could take my time enjoying the views without feeling rushed.
Soak in the Holiday Spirit: If you’re visiting in December, don’t miss the holiday festivities in town. It added so much to the experience and made me appreciate Sedona’s charm even more.
Take Advantage of Deals: Winter isn’t the peak season in Sedona, so I was able to snag a great deal on my accommodations. It’s a good time to find bargains on hotels and rentals.
Challenges I Faced
While I loved my time in Sedona, there were a few minor hiccups. Rain and snow occasionally made some trails less accessible, and I had to adjust my plans. Luckily, Sedona has plenty of indoor attractions and cozy spots to grab a meal, so it wasn’t hard to find something else to do.
Taking in the view of Cathedral from Cresent Moon State Park. Photo by Dalton Johnson
Why I’d Go Back in Winter
Winter in Sedona was an unforgettable experience. From hiking and UTV riding to simply wandering the festive streets of town, it felt like I got to see Sedona at its most peaceful and beautiful. If you’re looking for adventure, serenity, or both, I can’t recommend it enough. Just remember to pack smart and keep an eye on the weather, and you’ll have an amazing time.
Discover more Adventures

The Sonos Ace Are Almost The Perfect Headphone, But They Have One Flaw
When I picked up a pair of the Sonos Ace, my expectations were straightforward. I wanted a solid set of over-ear headphones that could help me drown out distractions while working and deliver high-quality sound for my lazy music-listening days. I didn’t expect them to become my daily companion for just about everything. But here we are, and the Sonos Ace has proven to be far more versatile than I could have imagined, integrating seamlessly into so many aspects of my life that I often forget how limited my previous headphones were in comparison.
When I picked up a pair of the Sonos Ace, my expectations were straightforward. I wanted a solid set of over-ear headphones that could help me drown out distractions while working and deliver high-quality sound for my lazy music-listening days. I didn’t expect them to become my daily companion for just about everything. But here we are, and the Sonos Ace has proven to be far more versatile than I could have imagined, integrating seamlessly into so many aspects of my life that I often forget how limited my previous headphones were in comparison.
A Headphone That Goes Everywhere… ALmost
These headphones have been my trusty sidekick on all sorts of adventures. They’ve accompanied me to Egypt, survived daily sessions at the climbing gym, and even doubled as ear muffs during snowy dog walks. I use them constantly, whether I’m home, traveling, or just out and about. Their lightweight yet durable design makes them easy to carry around without ever feeling cumbersome, which is something I’ve come to appreciate after years of lugging around heavier, less ergonomic gear.
That said, there are a few scenarios where the Sonos Ace aren’t the perfect fit. If you’re expecting over-ear headphones to perform on a ski tour, trail run, or during mountain biking, that’s a bit unreasonable. I’ll admit, I do switch to my AirPods for most activities that involve high-impact endurance when weight matters. However, for everything else—working, relaxing, traveling, or just taking a stroll—the Sonos Ace delivers in spades, making them a true everyday headphone.
Unmatched Battery Life
One of the most impressive features of the Sonos Ace is its battery life. Sonos claims 30 hours, and my experience backs that up. On a grueling 38.5-hour travel day from Egypt, I used the headphones intermittently, and by the next morning, I still had 25% battery left. This reliability means I never have to stress about recharging them mid-day, even on the busiest of schedules. It’s not just about the hours they last; it’s about the peace of mind that comes with knowing your headphones won’t die at a critical moment. Long workdays, cross-country flights, and multi-day trips are all made easier with the dependable battery life of the Sonos Ace.
Even better, the quick-charging feature ensures you can juice them up in a pinch. In just 15 minutes of charging, I’ve been able to get several hours of playback time. This has saved me more than once when I’ve forgotten to charge them the night before a big trip. It’s little conveniences like this that elevate the user experience from good to exceptional.
Noise-Canceling That Lives Up to the Hype
The noise-canceling capabilities are outstanding. With the flip of a switch, the Sonos Ace drowns out the world. The transition sound when activating noise cancellation is satisfying, and once it kicks in, the silence is blissful. Whether it’s the hum of an airplane engine, the chatter of a busy café, or the clangs and bangs of the climbing gym, the noise-canceling tech adapts beautifully to block out distractions.
In the climbing gym, where the snug fit keeps them secure while I boulder or climb auto-belays, the Sonos Ace lets me focus on my routes without being overwhelmed by background noise. At home, they block out even the chaos of my dogs wrestling in the background, letting me focus on work without interruptions. The active noise-canceling doesn’t just reduce noise—it creates a pocket of calm that helps me stay productive and centered, even in hectic environments.
Sound Quality That Shines
Of course, sound quality is where headphones make or break their reputation, and the Sonos Ace does not disappoint. The bass feels rich, the mids and highs are clear, and every note resonates beautifully. Whether I’m writing to a calming instrumental playlist, zoning out to lo-fi beats, or relaxing on the couch with my favorite album, the Sonos Ace delivers a listening experience that’s immersive and satisfying.
I’ve even started to revisit old playlists and rediscover songs I’d forgotten about. The clarity and depth of sound bring out details I hadn’t noticed before, making every listening session a treat. The Sonos Ace also handles a wide range of genres effortlessly. From bass-heavy hip-hop tracks to intricate classical compositions, the headphones maintain balance and precision without ever sounding flat or over-processed. It’s a joy to simply sit back, close my eyes, and savor the music—something I never realized I’d been missing with lesser headphones.
Thoughtful Design and Comfort
Another standout feature is the comfort and fit of the Sonos Ace. The ear cups are plush and breathable, and the adjustable headband ensures a secure fit without ever feeling too tight. I can wear them for hours on end without experiencing discomfort, which is essential for long listening sessions or marathon workdays. The materials feel premium, and the minimalist design is sleek and modern, making them as stylish as they are functional.

A selfie of the author keeping his ears warm with the Sonos Ace while shoveling his driveway. Photo by Dalton Johnson
The Sonos Ace has exceeded every expectation I had. From its long-lasting battery life to its excellent noise-canceling, sound quality, and thoughtful design, this headphone has become an indispensable part of my daily routine. Sure, it’s not designed for extreme sports or water-based activities, but that’s not what I bought them for. What they do offer is reliability, versatility, and an audio experience that’s genuinely enjoyable.
If you’re looking for a high-quality, reliable pair of over-ear headphones that can handle just about anything you throw at them (within reason), the Sonos Ace might just be your perfect match. I only wish I had gotten mine sooner. They’ve redefined what I expect from headphones, and I can’t recommend them enough.
Discover More Gear
It’s Weird, I Know, But I Love Joshua Tree’s Backcountry
Exploring the backcountry of Joshua Tree National Park is an experience unlike any other. For some, the vast, barren desert might seem uninviting or even intimidating. But for me, it’s a place of serenity, creativity, and unmatched beauty. It may sound strange to some, but I genuinely love spending time in Joshua Tree’s backcountry, especially when I go solo. There’s something about being out there, surrounded by desert silence, that keeps calling me back.
Exploring the backcountry of Joshua Tree National Park is an experience unlike any other. For some, the vast, barren desert might seem uninviting or even intimidating. But for me, it’s a place of serenity, creativity, and unmatched beauty. It may sound strange to some, but I genuinely love spending time in Joshua Tree’s backcountry, especially when I go solo. There’s something about being out there, surrounded by desert silence, that keeps calling me back.
Watching the sunrise after a solo night in Joshua Tree’s backcountry.. Photo by Dalton Johnson
Is Backcountry Camping Allowed in Joshua Tree?
Yes, backcountry camping is allowed in Joshua Tree National Park, but there are some important guidelines to follow. Campers must park and register at one of the park’s 13 backcountry registration boards. From there, you’re required to hike at least one mile away from roads and established trails to set up camp. Staying within 500 feet of any water source is prohibited to protect the fragile desert ecosystem.
Backcountry camping in Joshua Tree is entirely primitive—no designated campsites, no water, and no facilities. This minimalist setup is one of the reasons I find it so rewarding. It’s just you, your gear, and the desert.
Packing a small bag before heading into Joshua Tree’s backcountry. Photo by Dalton Johnson
Why Joshua Tree’s Backcountry Feels So Special
I’ve done four backcountry overnights in Joshua Tree, and every trip leaves me eager for the next. There’s something about packing light and embracing the simplicity of cowboy camping under the stars. Without a tent, you’re fully immersed in the desert’s beauty. The light pollution is minimal, making it easy to spot the Milky Way and constellations while lying in your sleeping bag. It’s moments like these that remind me why I keep coming back.
Compared to other backcountry spots, Joshua Tree’s hazards are relatively manageable. Sure, you need to keep an eye out for snakes and always carry plenty of water to avoid dehydration, but otherwise, it’s a straightforward place to camp for a night or two. That simplicity makes it ideal for both seasoned adventurers and those looking to try backcountry camping for the first time.


Wandering and Writing in the Desert
One of my favorite things about Joshua Tree’s backcountry is how much freedom it offers. I usually bring a light pack with the essentials, plus a journal and my camera. From there, it’s all about wandering. The park’s iconic granite formations make it a playground for scrambling and exploring. Climbing to the top of one of these rock piles, you’re rewarded with panoramic views of the sprawling desert and distant mountains.
The desert sun can be brutal, but if you find a patch of shade, it transforms into the perfect spot to sit, write, or doodle. I’ve spent hours in these moments, watching how the sun’s angle changes the shadows on the rocks and the desert floor. It’s peaceful and strangely meditative—something I don’t get from any other type of camping.
The Challenges Are Part of the Charm
Backcountry camping in Joshua Tree does come with its challenges, but they’re part of what makes it special. The heat demands respect, and I always carry more water than I think I’ll need. There’s also the need to be mindful of the park’s delicate ecosystem—staying on durable surfaces and practicing Leave No Trace principles are crucial.
But once you’ve prepared for these elements, the backcountry becomes a haven. Its simplicity, beauty, and quiet make it feel like a world apart, even if you’re only a short hike from the main road.
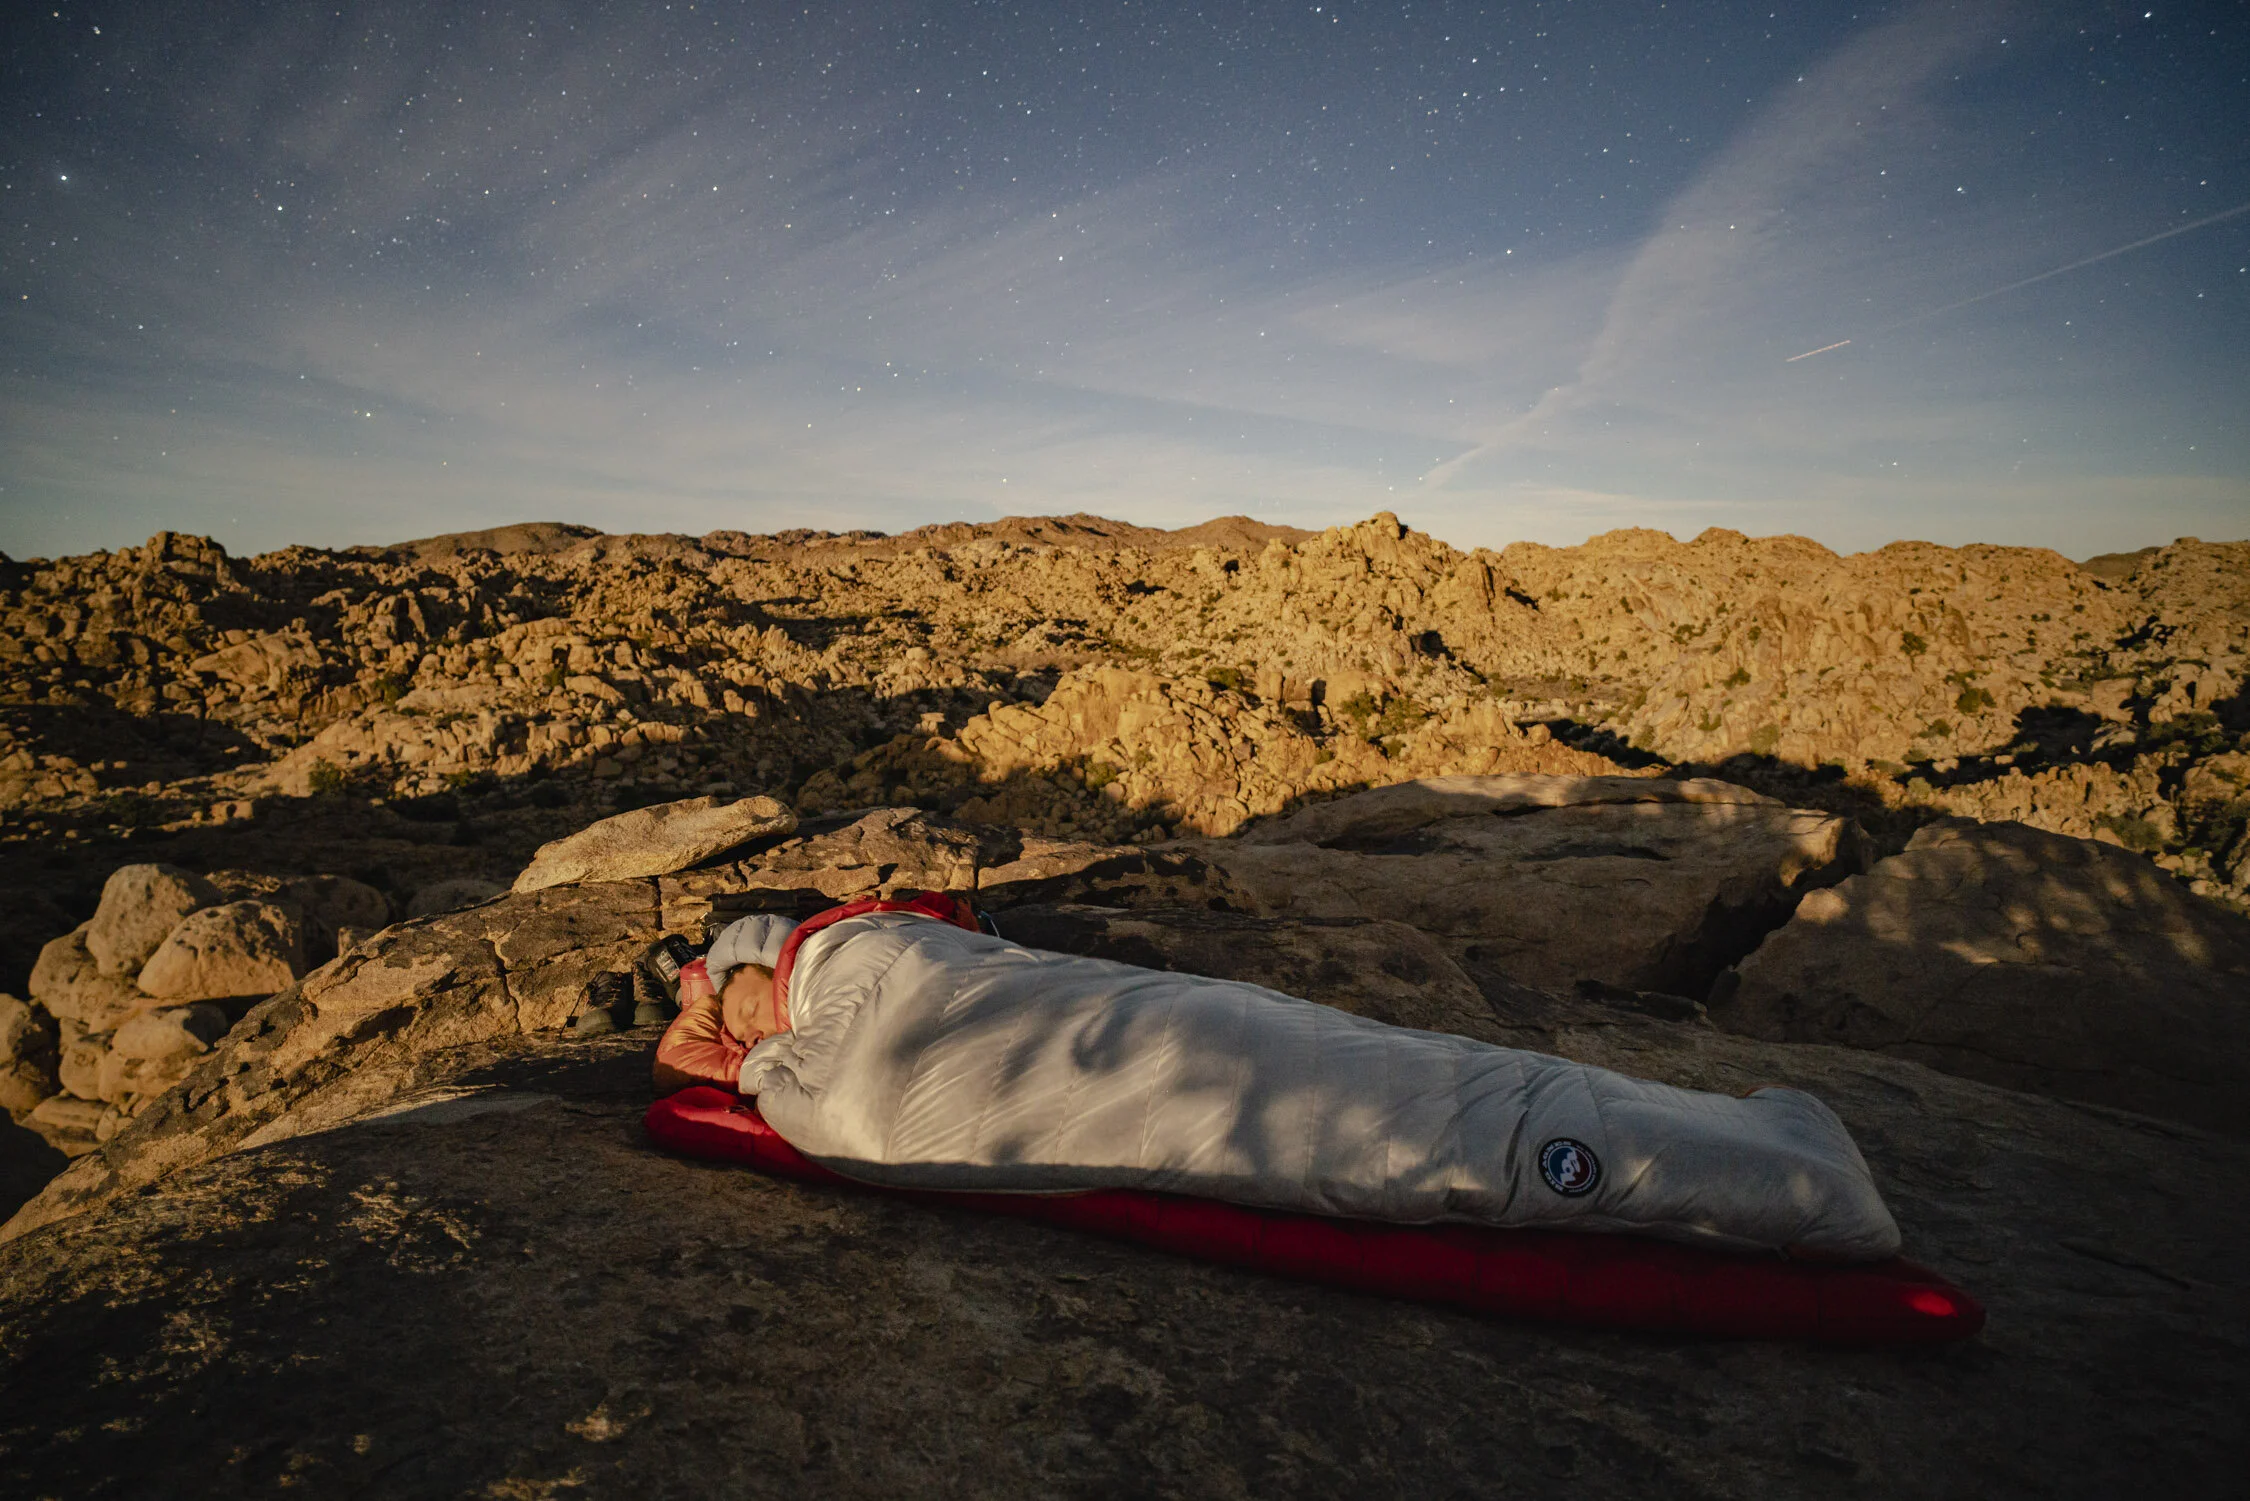
Sleeping under the full moon while cowboy camping in Joshua Tree National Park. Photo by Dalton Johnson
Why I Keep Coming Back
For me, the backcountry of Joshua Tree is about more than just camping—it’s about connection. It’s where I can disconnect from the distractions of daily life and reconnect with myself. Whether I’m stargazing, journaling, or scrambling across boulders, I always feel a sense of clarity and renewal.
Every trip to Joshua Tree’s backcountry is different. The light changes, the landscape shifts, and each adventure feels like a new story waiting to be told. It might not be for everyone, but for me, it’s the perfect escape.
If you’ve ever considered backcountry camping in Joshua Tree, I can’t recommend it enough. Pack your gear, plan well, and prepare to experience a desert that’s as strange as it is magical. You might just find yourself falling in love with it, too.
Discover more Adventures

There Are So Many Types of Climbing, Here They Are So You Don’t Feel Foolish Like Me
When I first started rock climbing, I assumed it was just about scrambling up rocks for fun. It wasn’t until I had been climbing for a while that I realized how many types of climbing exist. Over the past ten years, I’ve tried almost all of them (except ice climbing, which still intimidates me). Each type has unique challenges and joys, and I’ve grown to love them all for different reasons. Let me break them down so you can avoid the confusion I faced as a beginner.
When I first started rock climbing, I assumed it was just about scrambling up rocks for fun. It wasn’t until I had been climbing for a while that I realized how many types of climbing exist. Over the past ten years, I’ve tried almost all of them (except ice climbing, which still intimidates me). Each type has unique challenges and joys, and I’ve grown to love them all for different reasons. Let me break them down so you can avoid the confusion I faced as a beginner rock climber.

Free soloing on some easy terrain in the High Sierra of California. Photo by Dalton Johnson
Free Soloing
Free soloing gained fame thanks to Alex Honnold and the documentary Free Solo. This style involves climbing without ropes or safety gear—just you and the rock. It’s dangerous and not something I recommend for most people. I’ve dabbled in free soloing on very easy terrain while climbing mountains, but only because I know my limits. The precision and mental focus required make it a form of climbing that appeals to purists, but the risks can never be overstated. If you’re drawn to the idea, proceed with extreme caution and a deep understanding of your abilities. The mental discipline and deep connection to the rock that free soloing provides are unmatched, but the stakes are as high as they come.

Bouldering in the Buttermilks of Bishop, CA. Photo by Dalton Johnson
Bouldering
Bouldering is one of the simplest forms of climbing. All you need are climbing shoes and a crash pad. It’s focused on short, powerful routes close to the ground, known as "problems." My favorite bouldering spot is the Buttermilks in Bishop, California. These granite boulders are stunning and challenging, offering a perfect mix of fun and frustration. Bouldering allows for creative problem-solving and explosive strength, making it a great choice for those who enjoy a quick, intense workout. Plus, the social aspect of bouldering—working on problems alongside other climbers—is unbeatable. The community that forms around shared challenges makes bouldering a welcoming entry point into the climbing world.
Free Climbing
This term often confuses beginners. Free climbing doesn’t mean climbing without a rope; it means using only your hands and feet to ascend. Ropes are there for safety, not to help you climb. Free climbing includes bouldering, sport climbing, trad climbing, and more—it’s the opposite of aid climbing. This broad category emphasizes personal skill and physical ability, making it the backbone of modern climbing. Whether you’re scaling a short boulder or a towering cliff, free climbing showcases the purest form of human movement on rock. The distinction between free climbing and other styles often confounds beginners, but understanding it is key to appreciating the diversity of climbing disciplines.

Adrian trying hard on an iconic line in Pine Creek, CA. Photo by Dalton Johnson
Sport Climbing
Sport climbing involves clipping quickdraws into pre-placed bolts as you climb. It’s straightforward and a great way to get comfortable on a rope. Most people start with sport climbing in gyms before transitioning outdoors. While it’s not my favorite style (I’m not the strongest climber), it’s undeniably fun and accessible. Sport climbing emphasizes dynamic movement and technical precision, with routes often graded for difficulty and requiring a mix of endurance and strength. Many iconic climbing destinations, like Spain’s El Chorro or France’s Verdon Gorge, are sport climbing paradises. It’s a style that rewards consistency and training, making it an excellent challenge for climbers looking to push their physical limits.
Traditional climbing on a multi-pitch route in Yosemite National Park. Photo by Dalton Johnson
Trad Climbing
Short for “traditional climbing,” this style involves placing your own gear like cams and nuts into cracks to protect yourself. People often associate trad climbing with crack climbing and an “old-school” vibe. I love the adventure it offers—there’s something magical about feeling like you’re on a quest as you climb. Trad climbing routes often weave through dramatic landscapes, leading climbers into remote and awe-inspiring environments. The technical skill required to place gear properly adds an intellectual element to the sport, making it as much about problem-solving as physical effort. The interplay of precision, strategy, and exploration makes trad climbing a deeply rewarding experience.

Racking up for a day of climbing on the Grand Teton. Photo by Dalton Johnson
Alpine Rock Climbing
This might be my favorite type of climbing. Alpine rock climbing combines technical rock climbing with mountain exploration, often requiring snow crossings or glacier travel. My first alpine rock climb was the Grand Teton, and I’ve been hooked ever since. The combination of breathtaking scenery and climbing makes this style unforgettable. It’s about more than just the climb; it’s about the entire experience of being in the mountains. From dawn starts to navigating changing weather, alpine rock climbing offers a blend of adventure and serenity that’s hard to match. The unique challenges of high-altitude environments make each climb a test of resilience and adaptability.
Alpine Climbing
Alpine climbing takes things a step further. It combines rock climbing, ice climbing, and glacier travel. This style demands extensive skills and gear. It’s challenging but rewarding, often requiring years of experience and a reliable partner. If you’re drawn to big mountain objectives, this might be your calling. Routes like the Matterhorn or Alaska’s Denali test a climber’s endurance, resilience, and resourcefulness. Alpine climbing is as much about mental toughness as physical skill, with success often hinging on split-second decisions in high-stakes environments. The sheer scale of alpine climbs makes every success feel monumental.


Big Wall Climbing
Big wall climbing is about tackling enormous rock faces—usually over 1,500 feet tall—that require multi-day efforts. Climbers sleep on portaledges suspended from the wall. It’s a mental and physical challenge, but the views (and the sense of accomplishment) are unmatched. Iconic big walls like Yosemite’s El Capitan have become rites of passage for climbers worldwide. The combination of technical skill, logistical planning, and sheer determination needed to complete a big wall route makes it one of the most rewarding climbing styles. Each move on a big wall feels consequential, adding a thrilling intensity to every ascent.

Aid climbing the last few pitches of the nose on El Capitan in Yosemite National Park. Photo by Dalton Johnson
Aid Climbing
Aid climbing involves using gear like pitons, ladders, and bolts to assist your ascent. While it’s not as popular today, it’s the foundation of American big wall climbing. Clean aid climbing, which avoids damaging the rock, is a modern evolution of this style. Aid climbing can also serve as a stepping stone for those looking to tackle routes beyond their free-climbing ability, providing an alternative way to reach challenging summits. The meticulous placement of gear and deliberate pace make aid climbing a unique test of patience and precision. Aid routes often blend ingenuity with physical effort, creating a style all its own.
Ice Climbing
I haven’t tried ice climbing yet—it’s a bit intimidating. Climbing frozen waterfalls and icy cliffs requires specialized gear like ice axes and crampons. While I admire those who do it, I’ve been content to enjoy it from afar for now. Ice climbing’s dramatic visuals and inherent risk create a captivating allure, drawing climbers who seek to test themselves against nature’s most unforgiving elements. It’s a sport where preparation and precision are paramount, with even small mistakes carrying significant consequences. Every icy ascent tells a story of determination and calculated risk.
Gym Climbing
Gym climbing is where most people start. It’s safe, social, and a great place to build strength and technique. While gym grades don’t always translate to outdoor climbing, the skills you develop indoors are invaluable for transitioning to real rock. The controlled environment allows for experimentation and growth, making it ideal for beginners and seasoned climbers alike. Many gyms now offer a variety of climbing styles, from bouldering walls to lead routes, ensuring something for everyone. Gym climbing also fosters a vibrant community that often serves as a gateway to outdoor adventures.
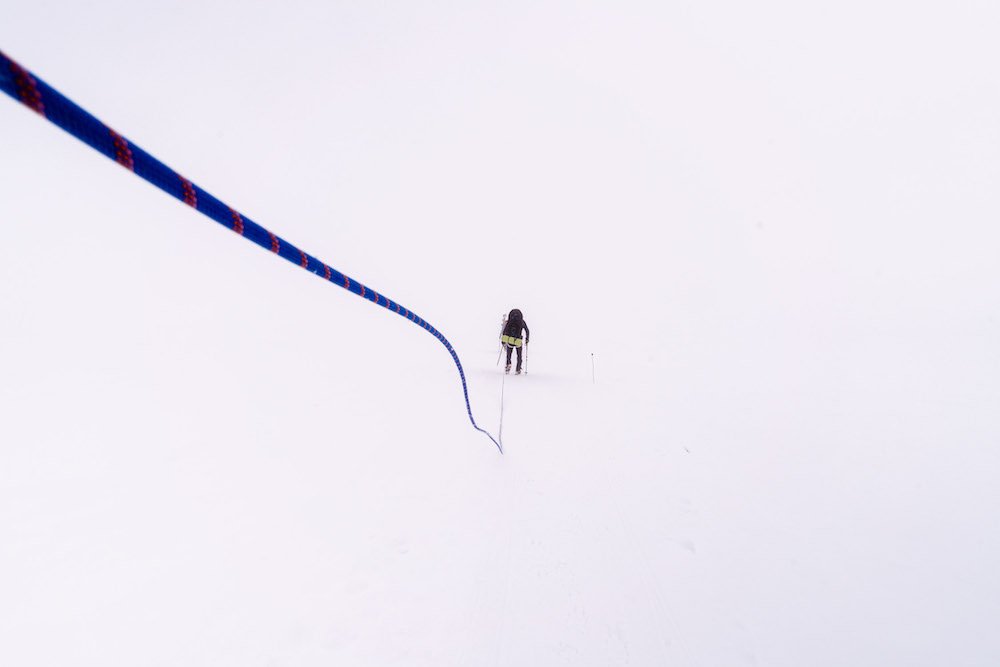
Roped up while traversing a glacier on Denali. Photo by Dalton Johnson
Mountaineering
Mountaineering involves climbing snow-covered mountains, often with glaciers or steep snow slopes. It’s less about technical rock climbing and more about endurance, navigation, and teamwork. Famous routes include the Seven Summits, but even smaller objectives can be rewarding. Mountaineering offers a profound connection to the natural world, requiring climbers to adapt to constantly changing conditions. The mix of physical challenge and breathtaking vistas makes mountaineering an unforgettable pursuit for those willing to embrace its demands. Every mountaineering expedition feels like a journey into the heart of the wilderness.
Peak Bagging
Peak bagging is like mountaineering’s simpler cousin. It’s mostly hiking with occasional use of climbing gear. The goal is to summit a peak, whether it’s a 14er in Colorado or a smaller mountain in your local range. It’s a great way to experience the outdoors without the technical demands of climbing. Peak bagging appeals to adventurers of all levels, offering a sense of accomplishment and a chance to explore stunning landscapes. Popular peak-bagging challenges, like the Adirondack 46ers, provide ongoing inspiration for those who love to check off goals. For many, the pursuit of summits becomes a lifelong passion.
Kristin bagging the summit of Mount of the Holy Cross, a Colorado 14er. Photo by Dalton Johnson
Climbing is so much more than scaling rocks. Each style offers unique challenges and joys, from the simplicity of bouldering to the epic adventures of alpine climbing. If you’re just starting, try a few styles to see what resonates with you. You might be surprised by what you fall in love with—I know I was. The world of climbing is vast and varied, ensuring there’s something for everyone, no matter your interests or skill level. With each ascent, you’ll discover new strengths, perspectives, and an enduring connection to the vertical world.
Discover more Adventures
Getting to Baja's Todos Santos Is Hard, But Worth It
Visiting Todos Santos, Baja is a journey—both in distance and experience—that rewards the effort with unforgettable charm. My most recent trip began with a flight over the rugged Sierra de la Laguna mountains into the San José del Cabo Airport. As the plane descended, I looked down at the arid landscape colliding with the turquoise oceanfront. The strip of resorts in San José del Cabo was unmistakable, and our smooth landing brought us closer to the adventure.
Visiting Todos Santos, Baja is a journey—both in distance and experience—that rewards the effort with unforgettable charm. My most recent trip began with a flight over the rugged Sierra de la Laguna mountains into the San José del Cabo Airport. As the plane descended, I looked down at the arid landscape colliding with the turquoise oceanfront. The strip of resorts in San José del Cabo was unmistakable, and our smooth landing brought us closer to the adventure.
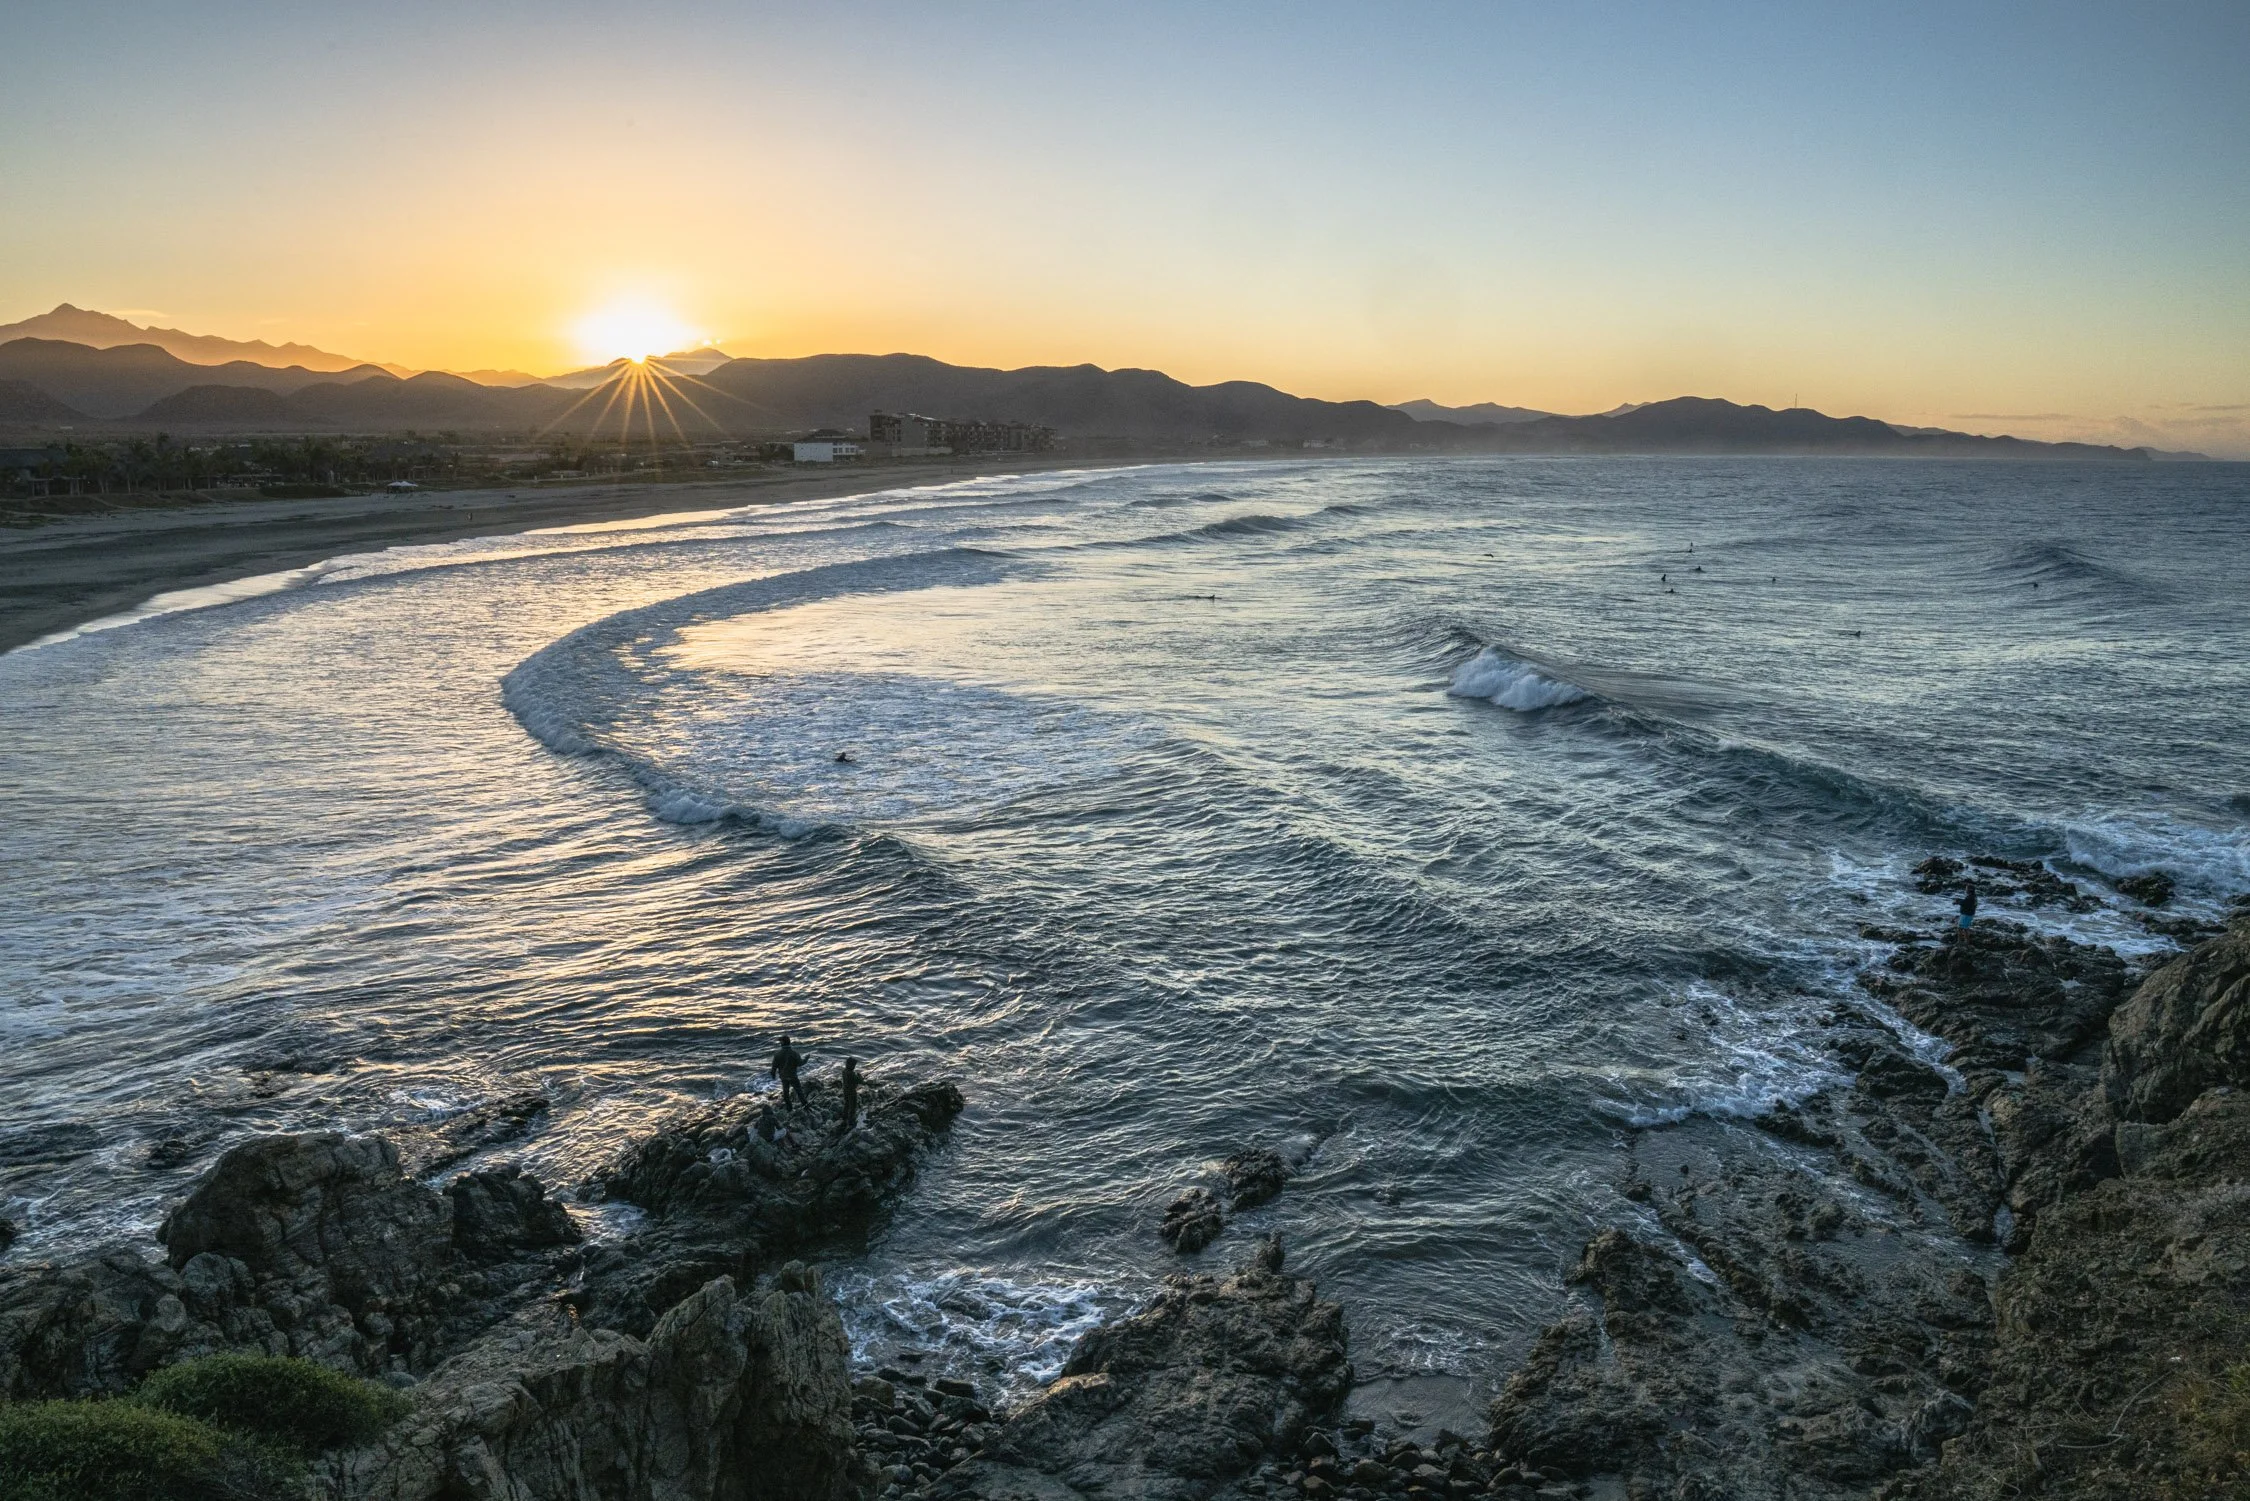
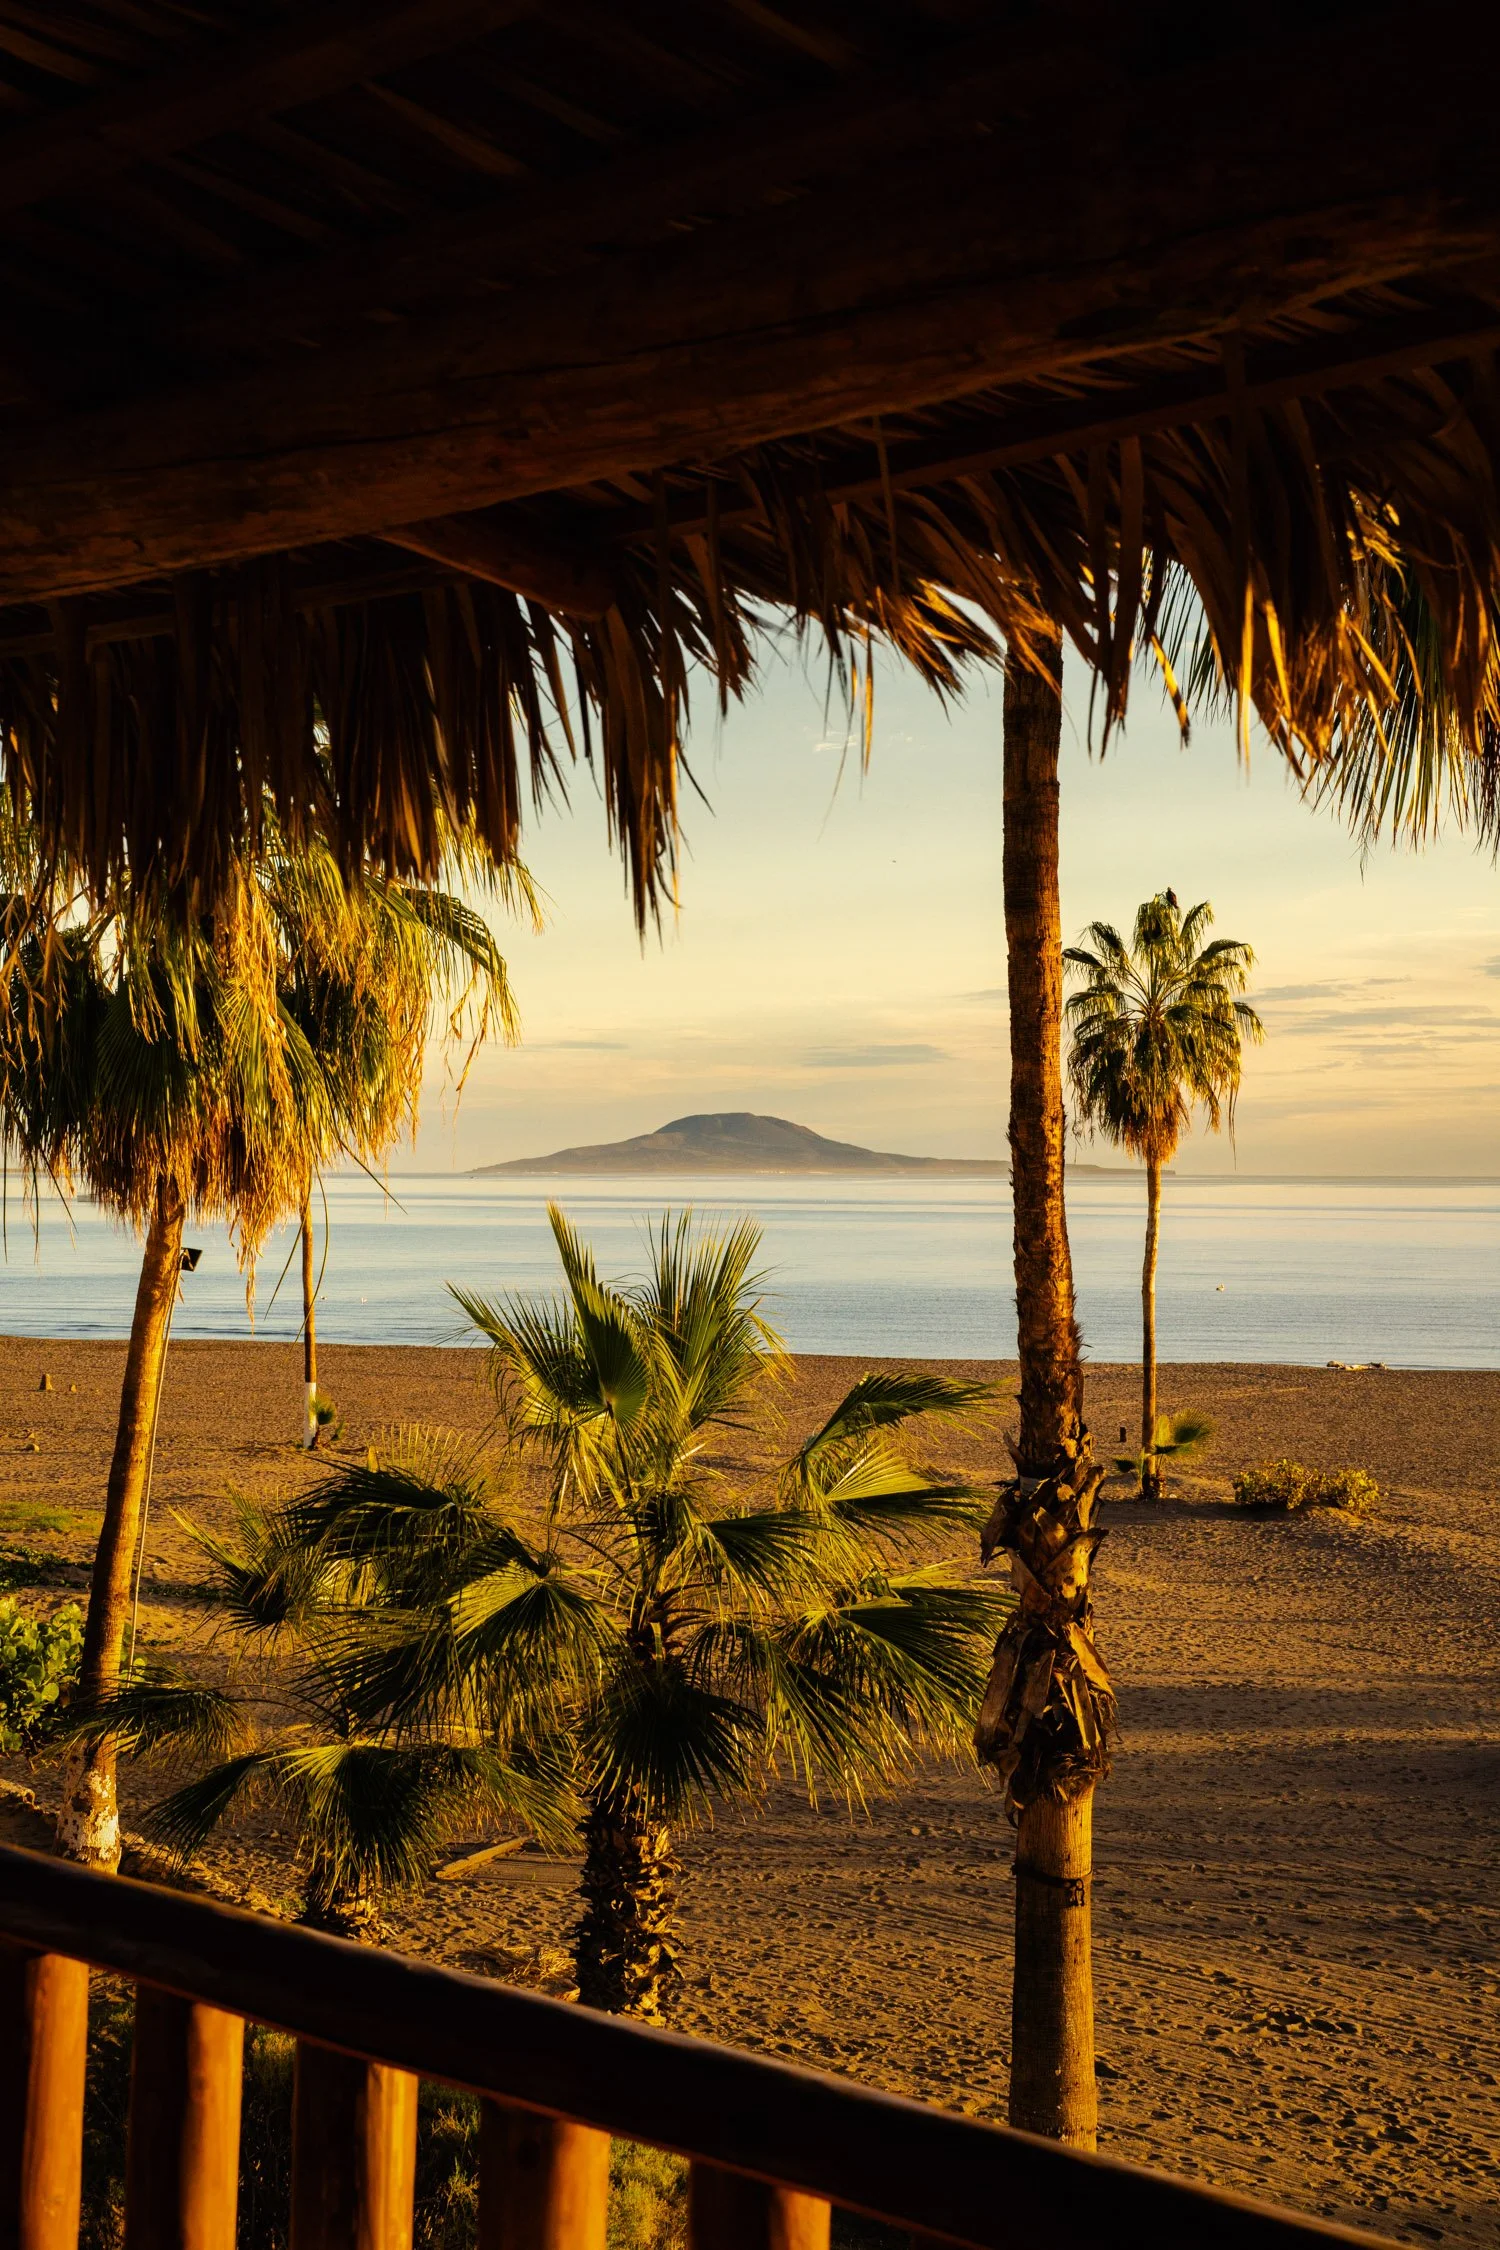
The nearby surf beach called Cerritos Beach at sunrise. Photo by Dalton Johnson
Navigating the Arrival
Disembarking was quick, immigration, as expected, took some patience, but collecting luggage went smoothly. Mexico's unique system includes a randomized search check: pressing a button determines whether you’ll get a green light and walk through or a red light for a bag search. This time, I got lucky—green light. No search, no delay.
Having visited Baja over 40 times, I’ve always found this ritual amusing. If you’re unlucky and get the red light, you might face another hour’s wait. But once you’re through, the airport’s bustle greets you, with vendors and travelers creating a lively scene. The mix of smells, sounds, and sights is a sensory overload, with everything from street tacos to souvenir trinkets vying for your attention. Stepping outside, I sought a taxi for the next leg of the journey—the drive to Todos Santos.
The Long Drive to Todos Santos
Convincing a taxi driver to make the hour-long trip isn’t always straightforward. In this part of Mexico, this is considered a lengthy drive. After some negotiating, I secured a ride for $100 USD. Prices typically range from $100 to $150, and opting for the toll road is worth every penny. It shaves about 20 minutes off the drive and can save an hour when traffic around Cabo San Lucas is heavy.
The toll road winds through the Baja landscape, offering glimpses of the ocean and stretches of desert. Cacti of all shapes and sizes dominate the scenery, and the occasional roadside shrine adds a touch of local culture to the view. As we sped along, I attempted a conversation with the driver in my rusty Spanish. Despite the language barrier, we managed a pleasant exchange. He shared stories of his family and life in the region, and I told him about my frequent visits to Baja.
Todos Santos, is known as an up and coming “artsy” town with a relaxed vibe. Surf spots like Cerritos Beach and Las Palmas are nearby, but the town itself offers a slower pace. It’s a place where creativity thrives, and the connection between locals and the natural world is evident.
The Charm of Todos Santos
Todos Santos feels like a world away from the bustling tourist hubs of Cabo. Its streets are lined with boutique shops, galleries, and delightful eateries. My favorite activity is wandering the town square, where you might catch locals dancing or families enjoying ice cream from Rocco, a beloved nearby shop. The iconic Hotel California—which claims to be the inspiration for the Eagles' famous song—draws plenty of visitors. It’s a must-see for first-timers, even if just for a photo or a drink at the bar.
Beyond the square, the town offers surprises at every turn. Artisan markets showcase handmade goods, from colorful ceramics to woven textiles. Restaurants serve up dishes that blend traditional Mexican flavors with modern twists, and street vendors offer the bacon wrapped hotdogs and elote. Walking through the town, you’ll find murals and public art that reflect the vibrant spirit of the community.
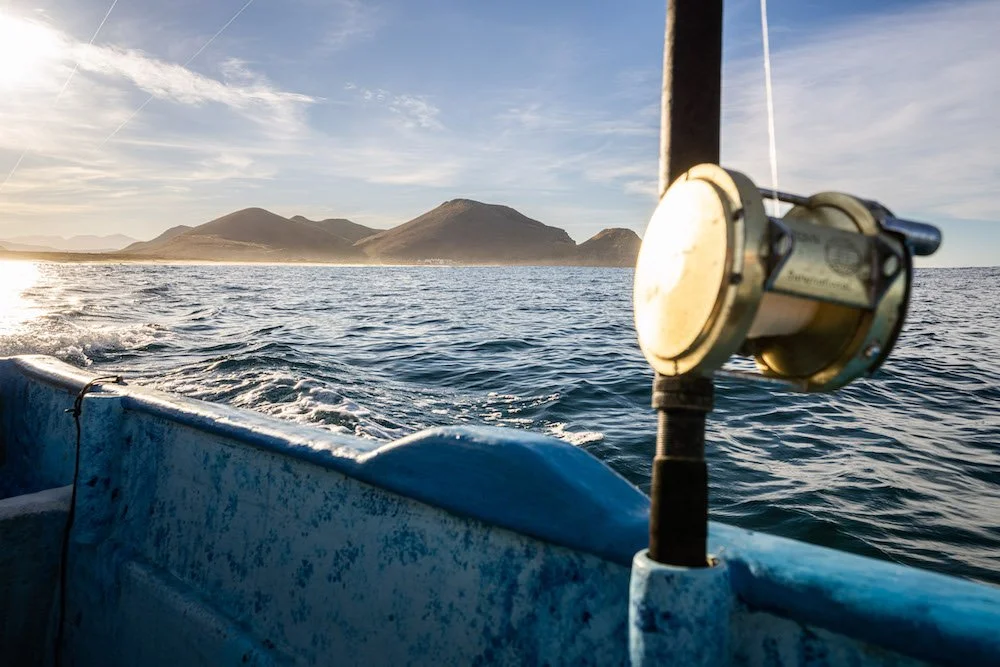
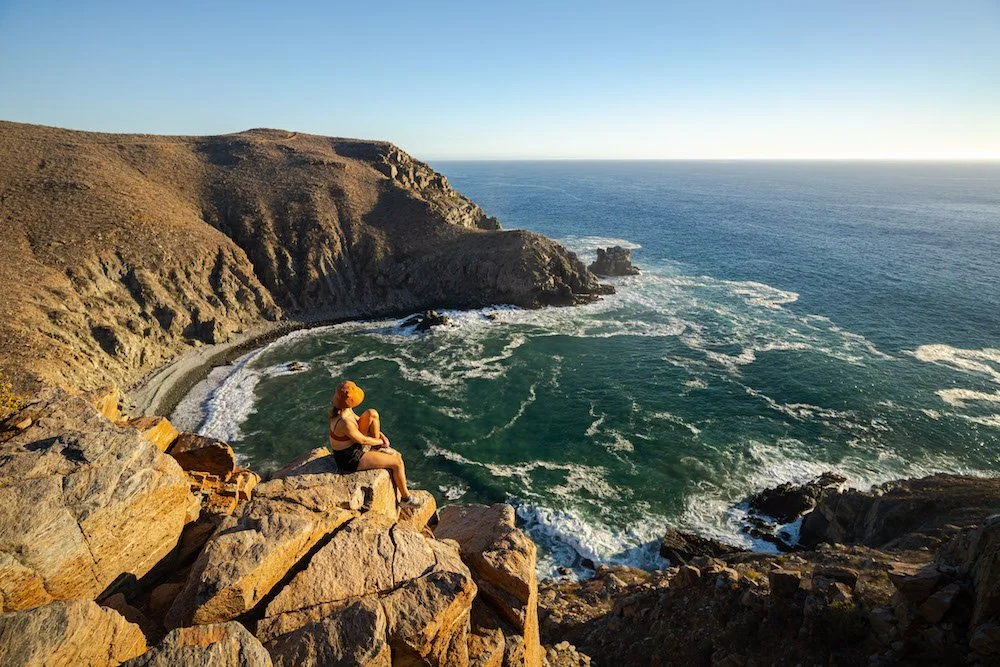
Looking back at the coastline of Todos Santos while fishing. Photo by Dalton Johnson
Scenery on the Way
During the drive, the landscape outside the cab window seemed sparse at first: dirt, cactus, and the occasional cow. But a closer look reveals a thriving ecosystem. Beneath the cactus, small critters scurry about. Hawks perch atop the tall plants, scanning the ground for prey. Along the coastal stretches, keep an eye out for whales breaching during migration season. These moments of discovery make the journey as rewarding as the destination.
The road to Todos Santos also passes through small towns, each with its own character. Brightly painted houses and roadside fruit stands add bursts of color to the otherwise muted desert tones. It’s worth asking your driver to stop for a fresh coconut or some locally made sweets—simple treats that highlight the flavors of Baja.
One of the many dirt roads worth exploring just outside of Todos Santos. Photo by Dalton Johnson
Arriving in Todos Santos
The hour passed quickly, and before long, we arrived in Todos Santos. I tipped the driver, thanked him, and stepped into the quiet charm of the town. My hotel would be my base for the week as I explored the best of Baja. Whether enjoying fresh seafood, browsing local art, or catching a surf session, Todos Santos always delivers a memorable experience.
The evenings in Todos Santos are especially magical. As the sun sets, the town’s streets take on a golden glow. Locals gather in the square, musicians play softly, and the cool desert breeze carries the scent of nearby blooms. It’s a time to slow down, savor the moment, and appreciate the simple beauty of this special place.
Getting there might take some effort, but it’s always worth it. Baja’s beauty, culture, and laid-back atmosphere make every trip a worthwhile adventure. Whether it’s your first visit or your fiftieth, Todos Santos has a way of leaving a lasting impressio
Discover more Adventures

You Need To Hike Soldier Pass Caves When Visiting Sedona, AZ
Sedona is a city I have returned to several times. I am not sure what exactly draws me back to this town of red dirt, but I find myself here at least once a year. On a recent visit, I hiked the Seven Sacred Pools just after a rain and continued my hike onward to the Soldier Pass Cave. After clinging for dear life on the side of a muddy hill, I finally made it to this cave that everyone rants and raves about on social media and Reddit threads. While I am typically not one to seek out social media spots, Soldier Pass Cave caught my eye. Its stunning formation and the challenge it offers make it a bucket-list hike for anyone visiting Sedona.
Sedona is a city I have returned to several times. I am not sure what exactly draws me back to this town of red dirt, but I find myself here at least once a year. On a recent visit, I hiked the Seven Sacred Pools just after a rain and continued my hike onward to the Soldier Pass Cave. After clinging for dear life on the side of a muddy hill, I finally made it to this cave that everyone rants and raves about on social media and Reddit threads. While I am typically not one to seek out social media spots, Soldier Pass Cave caught my eye. Its stunning formation and the challenge it offers make it a bucket-list hike for anyone visiting Sedona.
An Early Morning Start
Kristin and I started our day at 4:30 a.m., ready to chase the sunrise at the Seven Sacred Pools. Visiting Sedona in winter meant unpredictable weather, and unfortunately, the sunrise we hoped for didn’t materialize. Thick clouds blocked the sun, casting a muted gray over the landscape. Despite the disappointment, we hit the trail, eager to make the most of our day in Sedona’s iconic wilderness. There’s something magical about walking through the stillness of early morning, hearing only the crunch of your boots on the trail and the distant chirp of birds.
The early start had its perks, though. The trail was peaceful, with only the sounds of nature accompanying us as we walked past the massive Devil’s Kitchen sinkhole. This sinkhole, caused by a collapse of limestone caverns, is a fascinating geological feature that immediately captures your attention. Shortly after, we arrived at the Seven Sacred Pools, a series of naturally formed pools carved into the rock. The pools were still and reflective, even without the morning light casting its usual golden glow. Their tranquility set the tone for the adventure ahead and reminded us of the beauty in even the simplest aspects of nature.

Kristin staring out upon the red cliffs at Seven Sacred Pools in Sedona, AZ. Photo by Dalton Johnson
Continuing to Soldier Pass Caves
Kristin began to feel unwell and decided to turn back, leaving me to continue the hike alone. While I missed her company, hiking solo allowed me to fully immerse myself in the surrounding beauty. The trail to the Soldier Pass Caves led me deeper into the Sedona wilderness, winding through juniper trees and towering red rock formations. The air was crisp and refreshing, and I couldn’t help but feel a sense of calm as I walked. Every step took me further into the landscape, where the vibrant reds and oranges of the rocks seemed to glow against the overcast sky.
Eventually, I left the main trail and followed a well-trodden side path toward the caves. As I got closer, I began to hear voices echoing off the rocks—a sure sign that I was heading in the right direction. While I typically enjoy the solitude of hiking alone, hearing those voices was reassuring. It reminded me that I was sharing this incredible experience with others who were just as excited to see the caves. The camaraderie of fellow hikers added to the sense of adventure, making the hike feel like part of a larger journey.
Direction to the cave:
Start at the Trailhead: Begin at the Soldier Pass Trailhead, located off Forest Service Road 9904 via Soldier Pass Road. Arrive early as parking is limited.
Alternative Parking: If the lot is full, park at Posse Grounds Park and walk about a mile to the trailhead.
Follow the Soldier Pass Trail: Take Trail #66, passing notable landmarks like the Devil's Kitchen sinkhole (0.25 miles in) and the Seven Sacred Pools (0.75 miles in).
Locate the Side Trail: About 0.6 miles past the pools, look for an unmarked but well-trodden side trail on the left. This path leads uphill to the caves.
Scramble to the Cave Entrance: Use sturdy shoes with good grip for the final short but steep climb to the main cave opening.


Exploring the Caves
Once I reached the base of the cave, I realized just how massive it really is. Two large openings dominate the structure. One is accessible with a manageable scramble, while the other might require a rope. While I am a rock climber, I opted for the easier climb inside the cave. Since I forgot my tape measure, I’ll eyeball and say this cave was 40 to 50 feet tall and 200 feet long. Massive! The entrance crack runs right through the middle of it, and there is a “window” you can sit in. This seemed to be the social media photo glamour spot, so I didn’t last long. The constant shuffle of hikers eager for their perfect shot encouraged me to explore other parts of the cave.
Reaching the Soldier Pass Caves was worth every step. The cave’s sheer size and the “windows” carved into the rock were awe-inspiring. These natural openings framed views of the surrounding landscape, creating the perfect photo opportunity and a breathtaking spot to pause and reflect. However, getting inside the cave is no easy feat. You’ll need sturdy shoes with good grip and a willingness to scramble up the rocks. The climb is short but steep, so take your time and exercise caution. Each step into the cave reveals a new perspective, from the cool shade of its interior to the bright sunlight streaming through its openings.
Avoiding the crowds, I wandered to the other side of the cave and found a way to scramble to the top. Nobody was up here. Quick note: If you are not a confident rock climber, please don’t scramble to the top, as it was dangerous. Soaking in the view from the top and the sun that was breaking through the clouds, I sat and smiled. Curiosity led me to climb up the steep wall in the back of the cave to access the top. From there, I found a quiet spot to sit and enjoy the scenery. The elevated perspective offered a unique vantage point, and I watched as the clouds shifted and the sunlight peeked through. It was the perfect place to take a breather and escape the crowds below. I lingered for a while, savoring the serenity and the sense of accomplishment that came with reaching this spot. The solitude allowed me to truly connect with the natural beauty surrounding me.

The author soaking in the Soldier Pass cave for a brief moment alone. Photo by Dalton Johnson
Tips for Hiking Soldier Pass Caves
Start Early: Arriving early means fewer crowds and cooler temperatures, especially in warmer months. The peacefulness of the early morning enhances the entire experience.
Wear Proper Footwear: The climb into the cave requires sturdy, grippy shoes for safety. Shoes with good traction will make the scramble much easier.
Pack Light but Smart: Bring water, snacks, and a camera. The views are worth capturing! A small daypack is perfect for carrying your essentials without weighing you down.
Be Patient: The cave can get crowded. If you wait, you’ll often find moments of quiet to enjoy the space. Use this time to explore different angles and appreciate the cave’s beauty.
Plan for Extra Time: This hike is about more than just reaching the destination. Allow yourself time to explore and soak in the surroundings.
Trail Overview
Distance: About 4.5 miles round trip (depending on your starting point).
Difficulty: Moderate. There are uphill sections, but they’re manageable for most hikers.
Highlights: Devil’s Kitchen sinkhole, Seven Sacred Pools, and Soldier Pass Cave. Each of these features adds to the trail’s unique appeal, making it a well-rounded hike for nature enthusiasts.
The author enjoying some solitude from the top of Soldier Pass Cave in Sedona, AZ. Photo by Dalton Johnson
Why You Should Hike Soldier Pass Caves
Hiking to the Soldier Pass Caves is an experience that combines adventure, natural beauty, and a sense of accomplishment. The trail offers something for everyone, from the intriguing geological formations of the Devil’s Kitchen sinkhole to the serenity of the Seven Sacred Pools and the rewarding scramble into the Soldier Pass Cave. It’s a journey that immerses you in Sedona’s red rock landscape and leaves you with memories that will last a lifetime.
For me, this hike was a great way to unwind after days of driving and reconnect with nature. Even without the sunrise I had initially hoped for, the trail offered countless moments of beauty and reflection. The Soldier Pass Caves, in particular, stood out as a highlight—a place where adventure and tranquility coexist. I left with a renewed appreciation for Sedona’s rugged charm and a promise to return yet again.
Whether you’re looking for a peaceful hike, a challenging scramble, or an Instagram-worthy destination, Soldier Pass Caves won’t disappoint. It’s the perfect addition to any Sedona itinerary, and I’m confident you’ll leave feeling inspired and rejuvenated. Don’t miss out on this incredible experience—make sure to add Soldier Pass Caves to your Sedona adventure!
Discover more Adventures

Crazy Gift Ideas To Spoil The Adventurer In Your Life
We all have that adventurer in our lives who we want to spoil. Maybe it is their birthday, or it’s the holidays, but finding the right gift is always a challenge for those who love the outdoors. So, the editing team at The Adventure Travel Network has come together to create a list of epic gift ideas that you just want to spoil. These gifts are not cheap and that is okay because we are here to spoil that adventurer. Check out this list of crazy gifts:
We all have that adventurer in our lives who we want to spoil. Maybe it is their birthday, or it’s the holidays, but finding the right gift is always a challenge for those who love the outdoors. So, the editing team at The Adventure Travel Network has come together to create a list of epic gift ideas that you just want to spoil. These gifts are not cheap and that is okay because we are here to spoil that adventurer. Check out this list of crazy gifts:
Our standards for testing and reviewing gear at The Adventure Travel Network:
Here at The Adventure Travel Network we have a dedicated group of gear testers who put hands on all the products we recommend below. Our recommendations are not sponsored, unless noted, and speak from the heart about every product. We share both the good and the bad. If you have any questions or comments about the products or reviews, you can write us at editors@the-adventure-travel-network.com
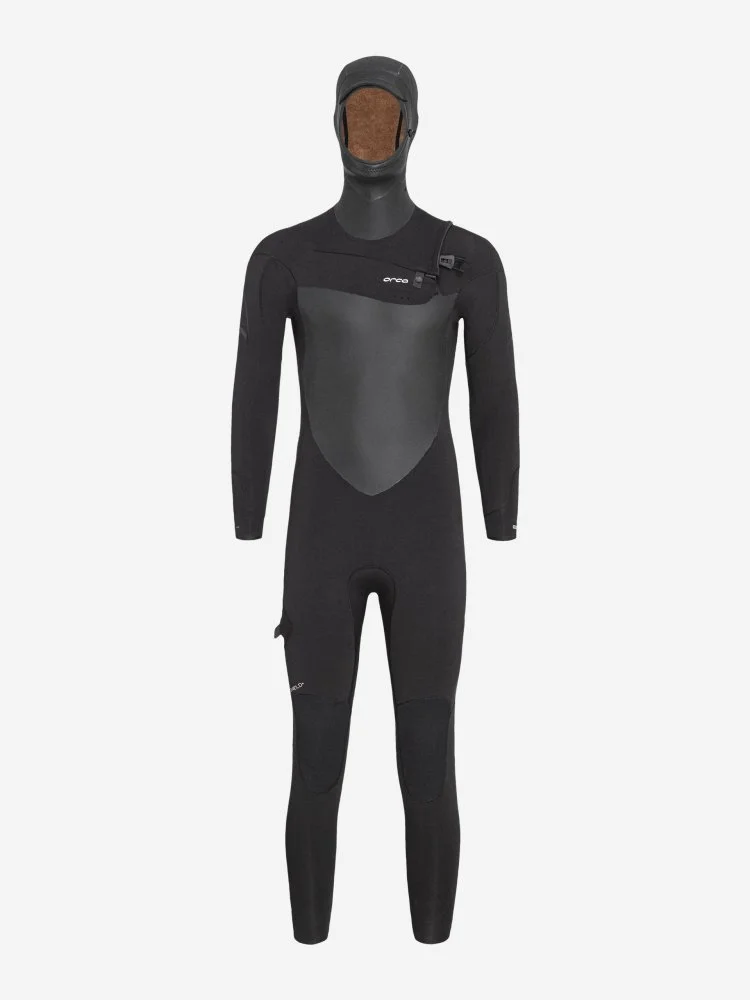
Orca Tango Wetsuit:
Click to order yours now [$649.00]
Orca has been making wetsuits for triathletes and open water swimmers for years. I love and use my open water wetsuit for swimming in Lake Tahoe, CA during the colder months of the when the water drops below 60F. With that said, Orca just entered the surf world with a splash. Taking their incredible knowledge from triathlons and open water swimming, Orca’s new surf wetsuits, Tango and Kabuki, are a perfect way to spoil that surfer in your life. These wetsuits are some the best on the market with a stellar fit.
Sonos Ace:
Click to order yours now [$449.00]
Sonos Ace has become this writer’s favorite tech item of the year. I use these headphones for everything from writing this article to flying to Egypt to working out in a climbing gym. The Sonos Ace are light, have an incredible battery life, and fit my head. That last one is key. I have used several different over-the-ear headphones and they never fit right. However, the Sonos Ace rest on my head perfectly. Now, let’s chat battery life. These headphones are incredible. We are talking active use throughout a 36-hour travel day and I still have 25% left, impressive!
My favorite features are the sounds the headphones make when turning on, connecting, and making adjustments to volume. The sounds are simple, but they let me know what I am doing.
The final added bonus, the carrying case these come in have a great touch with their felt cover and easy to use zipper.

Juiced E-bike:
Click to order yours now [$1899.00]
There is nothing like ripping around on an e-bike and Juiced has made one of the most fun e-bike on the markets. I have personally testing four different brands of e-bikes and the Juiced Scorpion is hands-down my favorite because the seat is plush, the throttle makes you feel like you are on a motorcycle, and the suspension makes on-and-off road fun. I am not sure if Juiced intended for users to jump this beast, but I have taken it over a few jumps and landed smoothly every time.

Blizzard
Blizzard Zero G Skis:
Click to order yours now [$799.00]
If the adventurer in your life loves the outdoors, especially in the winter, there is nothing better than gifting access. That is exactly what you are giving when you gift the Blizzard Zero G backcountry skis to the adventurous person in your life. I have been riding on these skis for a season now and will never look back. They are incredibly light, work in powder, and function at a resort if you chose to take them there. As a ski, this might be the one ski quiver you will ever need. The only draw back to these might be riding waist deep powder… but let’s be real, if you are in Japan or Jackson Hole gliding through pow like that, you are most likely going to have some powder skis.
Isle Switch Inflatable Sup:
Click to order yours now [$895.00]
When it comes to spoiling somebody who loves the water, the Isle Switch inflatable SUP is just that. Switching between a SUP and a sit-on-top kayak this playful design give the paddler the best of both worlds. I have used this to fish from and enjoy a day of kayaking with my dog on Lake Tahoe and haven’t been disappointed. Overall, the design is simple and clean. It is easy to switch between SUP and kayak on land; and the material is very durable, so I don’t worry when I am tossing it in the back of car with some sand on it or my dog is gripping his nails into the front while we paddle.

Mammut Barryvox S2:
Click to order yours now [$599.00]
While you hope to never use this safety tool, the Mammut Barryvox S2 is the peak performance when it comes to avalanche safety. This beacon functions, enough said, right?! Kind of. Using a beacon to save somebodies life is no joke when you are in the backcountry skiing, so having equipment that is easy to use and accurate matters. I have found this in the Mammut Barryvox. The user interface is simple and the locking top feature ensures there will not be any slippage while skining or getting smashed in an avalanche. Make sure to get a probe and shovel as well if you are headed into the backcountry.
Discover More Gear

I Became Addicted to Rock Climbing When I Discovered It
The first time I went rock climbing, it wasn’t love at first sight. My brother and his friend invited me to join them at a slippery limestone quarry. While the day itself was fun—hanging out with my brother and experiencing something new—the climbing itself wasn’t particularly memorable. I remember thinking, “This would be really cool if it weren’t on a broken quarry wall but out in the mountains.”
At that point, I didn’t realize how deeply connected climbing and the mountains truly were. That thought planted a seed that would change my life.
Dalton rock climbing in Yosemite National Park with views of Half Dome. Photo by Dalton Johnson
What Is Rock Climbing?
Rock climbing is the art of ascending vertical or near-vertical rock faces using physical strength, technical skill, and problem-solving ability. For some, it’s a casual hobby. For others, like me, it becomes an obsession.

Rock climbing in Teton National Park with Beau Martino. Photo by Dalton Johnson
How I Fell in Love With Rock Climbing
My real introduction to climbing came later when I attended a NOLS (National Outdoor Leadership School) course. There, I learned the foundational skills of both sport and trad climbing. Trad climbing, short for traditional climbing, involves placing your own gear into the rock to protect against falls. It’s as adventurous as it sounds—and it instantly appealed to me.
Armed with new knowledge and a passion for exploration, I bought my first climbing rack. This gear marked the beginning of a new chapter in my life. I hit the road, living out of my car and chasing rock climbing destinations across the western United States.
I climbed iconic routes in Yosemite, tested my limits on Joshua Tree’s slabs, explored the Tetons, reveled in the granite of the High Sierra, and tackled hidden gems around Lake Tahoe. Every destination brought fresh challenges, incredible views, and a deeper appreciation for the sport.
Rock climbing became more than a pastime—it became my identity. The mountains became my playground, and climbing was my way of connecting with them. Each new summit and harder grade fueled my addiction to the sport.

Bouldering with friends is a great way to get strong and laugh with friends. Photo by Dalton Johnson
Why I Keep Climbing
Today, climbing is as central to my life as it was during those road trip days. I balance time between training in the gym and climbing outdoors, typically four or five days a week. I’d climb more if I could! Life’s responsibilities can get in the way, but even a single day out on the rock leaves me smiling, laughing, and grateful.
The beauty of climbing lies in its endless variety. Each route is a puzzle. Each climb challenges not only your body but also your mind. Whether I’m trying to push my grades or simply enjoying the journey to a summit, climbing never fails to bring me joy.
Kristin soaking in the Alaskan sunset after an afternoon of climbing over the Turnagain Arm. Photo by Dalton Johnson
What Rock Climbing Means to Me
To me, rock climbing is freedom. It’s a way to explore breathtaking landscapes, test my limits, and connect with nature. It’s an activity that brings out the best in me—focus, determination, and a sense of wonder. If you’ve ever thought about trying rock climbing, do it. Whether you’re scaling a gym wall or exploring your first outdoor crag, you might discover something more than a new hobby. You might just find a lifelong passion, as I did.
Discover more Adventures
California's Mammoth Lakes Are Home To The Best Hot Springs
Mammoth Lakes, California, is a destination I return to time and again. Tucked along Highway 395, it offers a perfect combination of adventure, relaxation, and breathtaking scenery. With its natural hot springs scattered across the rugged landscape, Mammoth Lakes has become my favorite place to unwind after a day of exploring Yosemite, skiing at Mammoth Mountain, or adventuring through the Sierra wilderness.
Mammoth Lakes, California, is a destination I return to time and again. Tucked along Highway 395, it offers a perfect combination of adventure, relaxation, and breathtaking scenery. With its natural hot springs scattered across the rugged landscape, Mammoth Lakes has become my favorite place to unwind after a day of exploring Yosemite, skiing at Mammoth Mountain, or adventuring through the Sierra wilderness.
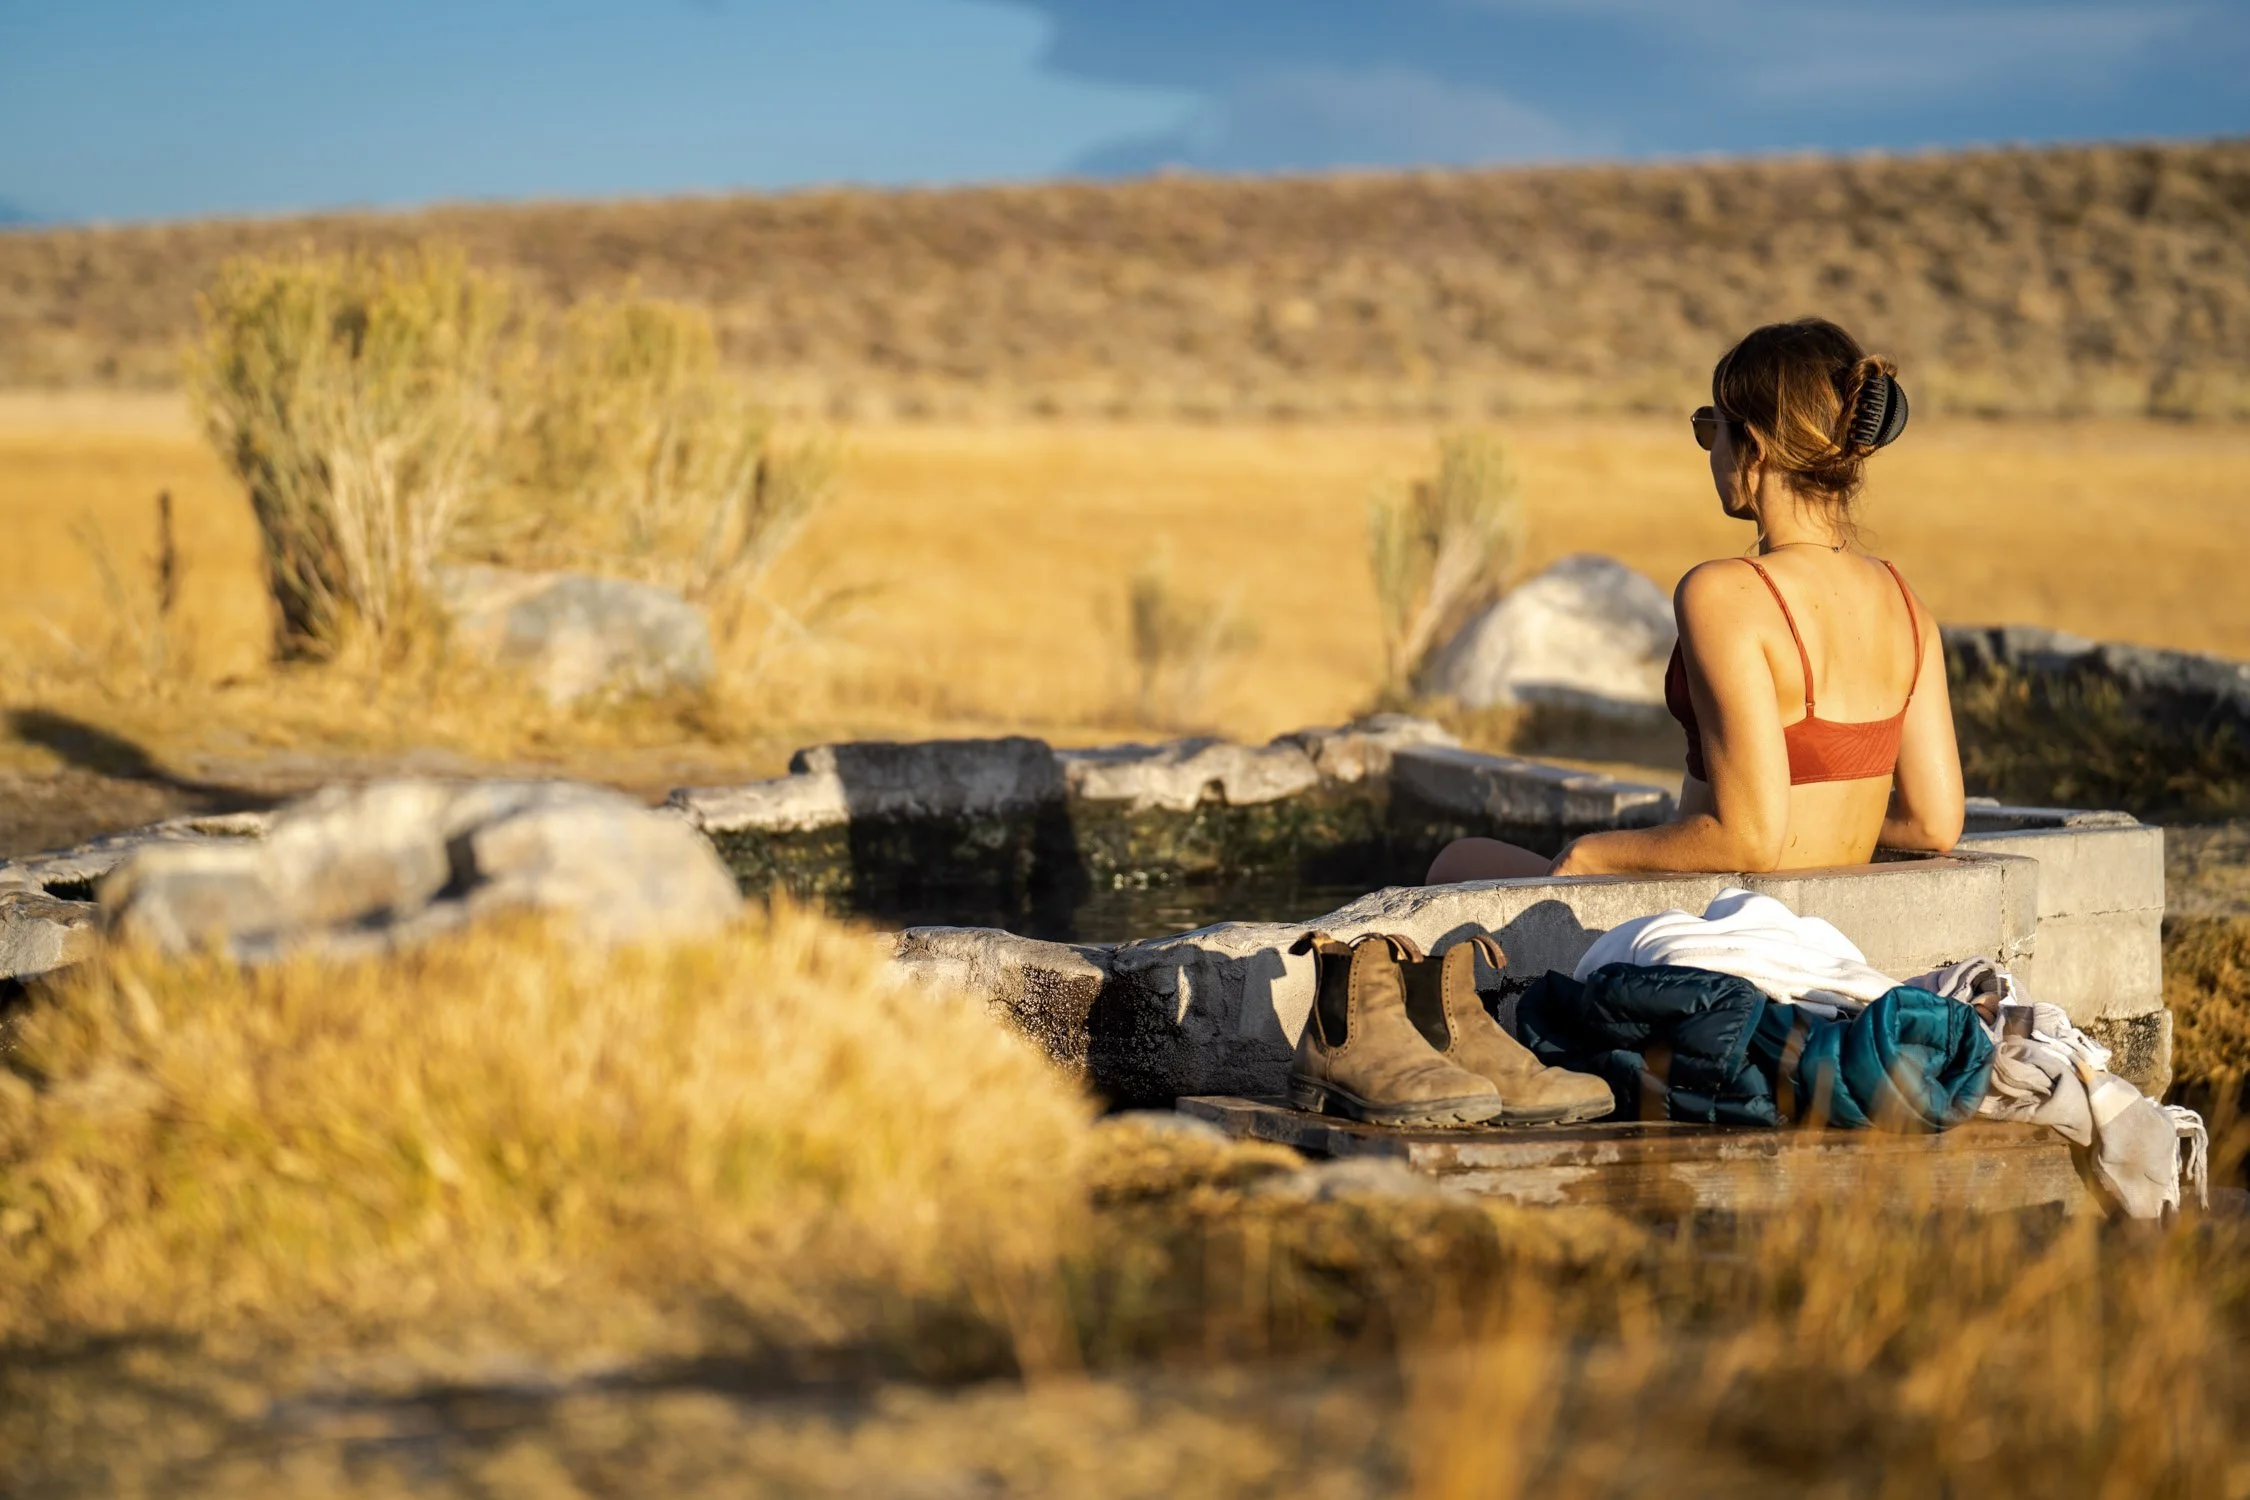
Andrew and Kicker Dog enjoying Mammoth Lakes hot springs on a chilly fall morning. Photo by Dalton Johnson
The Allure of Mammoth Lakes
What makes Mammoth Lakes so special? For me, it’s the sense of discovery and serenity that you can’t find in more crowded destinations like Lake Tahoe. In the winter, skiers and snowboarders fill the slopes, but when summer and fall roll around, the area transforms. Fewer visitors mean quieter trails, empty lakes, and, most importantly, uncrowded hot springs.
The hot springs themselves are reason enough to visit. They’re scattered across the valley, surrounded by the towering peaks of the Eastern Sierra. Each soak feels like a step into another world, where the only sounds are bubbling water and the distant call of birds. Beyond the springs, Mammoth Lakes offers a connection to the wilderness that’s both humbling and rejuvenating. Whether I’m hiking along remote trails, paddling on crystal-clear lakes, or simply sitting quietly with the breathtaking landscapes, this region always leaves me in awe.
Mammoth Lakes also offers an unmatched opportunity to explore the beauty of the High Sierra. The surrounding area is a treasure trove of natural wonders, from the fascinating Mono Lake with its tufa towers to the dramatic vistas of the Ansel Adams Wilderness. The proximity to Yosemite National Park makes it a convenient hub for day trips, though Mammoth’s charm often keeps me lingering longer than planned.

SUPing on Owen’s River near the hot springs. Photo by Dalton Johnson
A Variety of Hot Springs to Explore
One of the things I love most about Mammoth Lakes is the variety of hot springs. On a cold morning, steam rises from pools across the landscape, beckoning me to come closer. Some springs have been slightly modified with rocks for easier soaking, while others remain completely natural. Each visit feels like an adventure in itself as I discover new favorites, with every pool offering its own unique charm.
My Favorite Hot Springs:
Wild Willy’s Hot Spring
This is the most popular spring, but for good reason. It’s easily accessible via a boardwalk and offers a large, warm pool with panoramic views of the Sierra Nevada mountains. I often come here for sunset soaks, when the sky transforms into brilliant hues of pink and orange. Even during busier times, the view alone makes it worth the visit. On particularly clear evenings, the reflections of the alpine glow on the water create an unforgettable scene.Crab Cooker Hot Spring
Smaller and more secluded, this spring is perfect for a peaceful, private soak. Despite the quirky name, it’s a gem for quiet moments and is one of my favorite spots for unwinding solo. The mineral-rich waters here feel especially soothing after a long hike.Crowley Hot Spring
Known for its mineral-rich water, this spring is a go-to for relaxation after a full day of adventuring. The water here feels especially rejuvenating, making it a must-visit when I need to recharge. The stillness of the surrounding area adds a meditative quality to every visit.Shepard’s Hot Spring
With its rustic charm and tranquil surroundings, this spring feels like my own secret retreat. I’ve spent hours here soaking in the quiet and gazing at the expansive sky. On one memorable morning, the sunrise cast everything in golden light, creating a surreal start to the day.
Beyond these well-known spots, I’ve discovered countless unnamed springs over the years. Often, the most rewarding soaks are in those lesser-known pools that feel like they were placed there just for you. Some require a bit of exploration down dirt roads, but the sense of discovery makes them all the more special. Exploring these hidden gems has become a cherished part of my trips, where I’ve encountered both serene moments and small surprises—like unexpected wildlife sightings or the joy of finding a spring completely to myself.


Scenic Soaking Experiences
Soaking in the Mammoth Lakes hot springs is more than just a way to relax; it’s an experience that stays with you. There’s nothing quite like immersing yourself in warm, soothing water while gazing at the dramatic Sierra Nevada peaks. My favorite moments are during sunset, when the alpine glow casts the mountains in shades of pink and gold. Those colors, reflected in the pools, create a scene that feels almost magical.
As a photographer, I’m constantly inspired by these surroundings. Early mornings bring soft pastel skies, while evenings explode with vibrant hues. The interplay of light and shadow across the landscape transforms every visit into a visual feast. Whether I’m behind the lens or simply taking it all in, the beauty of this place never ceases to amaze me.
Even more enchanting are the night skies. On clear nights, the stars seem impossibly bright, and the Milky Way stretches across the heavens. Soaking under this celestial display is an experience that feels otherworldly, a reminder of just how vast and beautiful the universe is. The silence of the night, interrupted only by the faint bubbling of the springs, makes these moments profoundly peaceful. Watching shooting stars while surrounded by warm water is a memory I return to every time I think of Mammoth Lakes.

Sunrise kayak on Convict Lake, we hit the hot springs just after this stunning kayak session. Photo by Dalton Johnson
Adventure and Relaxation in Balance
Mammoth Lakes isn’t just about the hot springs. It’s a hub for outdoor activities that keep me coming back. In the winter, I hit the slopes at Mammoth Mountain, where powdery runs offer thrills for skiers and snowboarders of all levels. During the warmer months, I’ve explored endless hiking trails, paddled across pristine lakes, and even tackled rock climbing routes. The area is home to some of California’s most iconic trails, like the John Muir Trail and Devil’s Postpile National Monument, making it a paradise for outdoor enthusiasts.
For water lovers, the nearby lakes provide opportunities for kayaking, fishing, and paddleboarding. Convict Lake, with its turquoise waters framed by dramatic cliffs, is one of my favorite spots to unwind before heading to the springs. And for those who crave solitude, backcountry camping in the surrounding wilderness offers a chance to disconnect and immerse yourself fully in nature. I’ve spent many nights in the backcountry, waking up to views so stunning they feel unreal, making every moment in Mammoth Lakes feel like a gift.
After a long day of adventuring, there’s no better reward than slipping into a hot spring. The mineral-rich waters work wonders on tired muscles and provide a sense of renewal that prepares me for whatever the next day brings. It’s a ritual that balances the thrill of exploration with the tranquility of relaxation. The transition from pushing physical limits to embracing peaceful stillness is one of the reasons Mammoth Lakes holds such a special place in my heart.
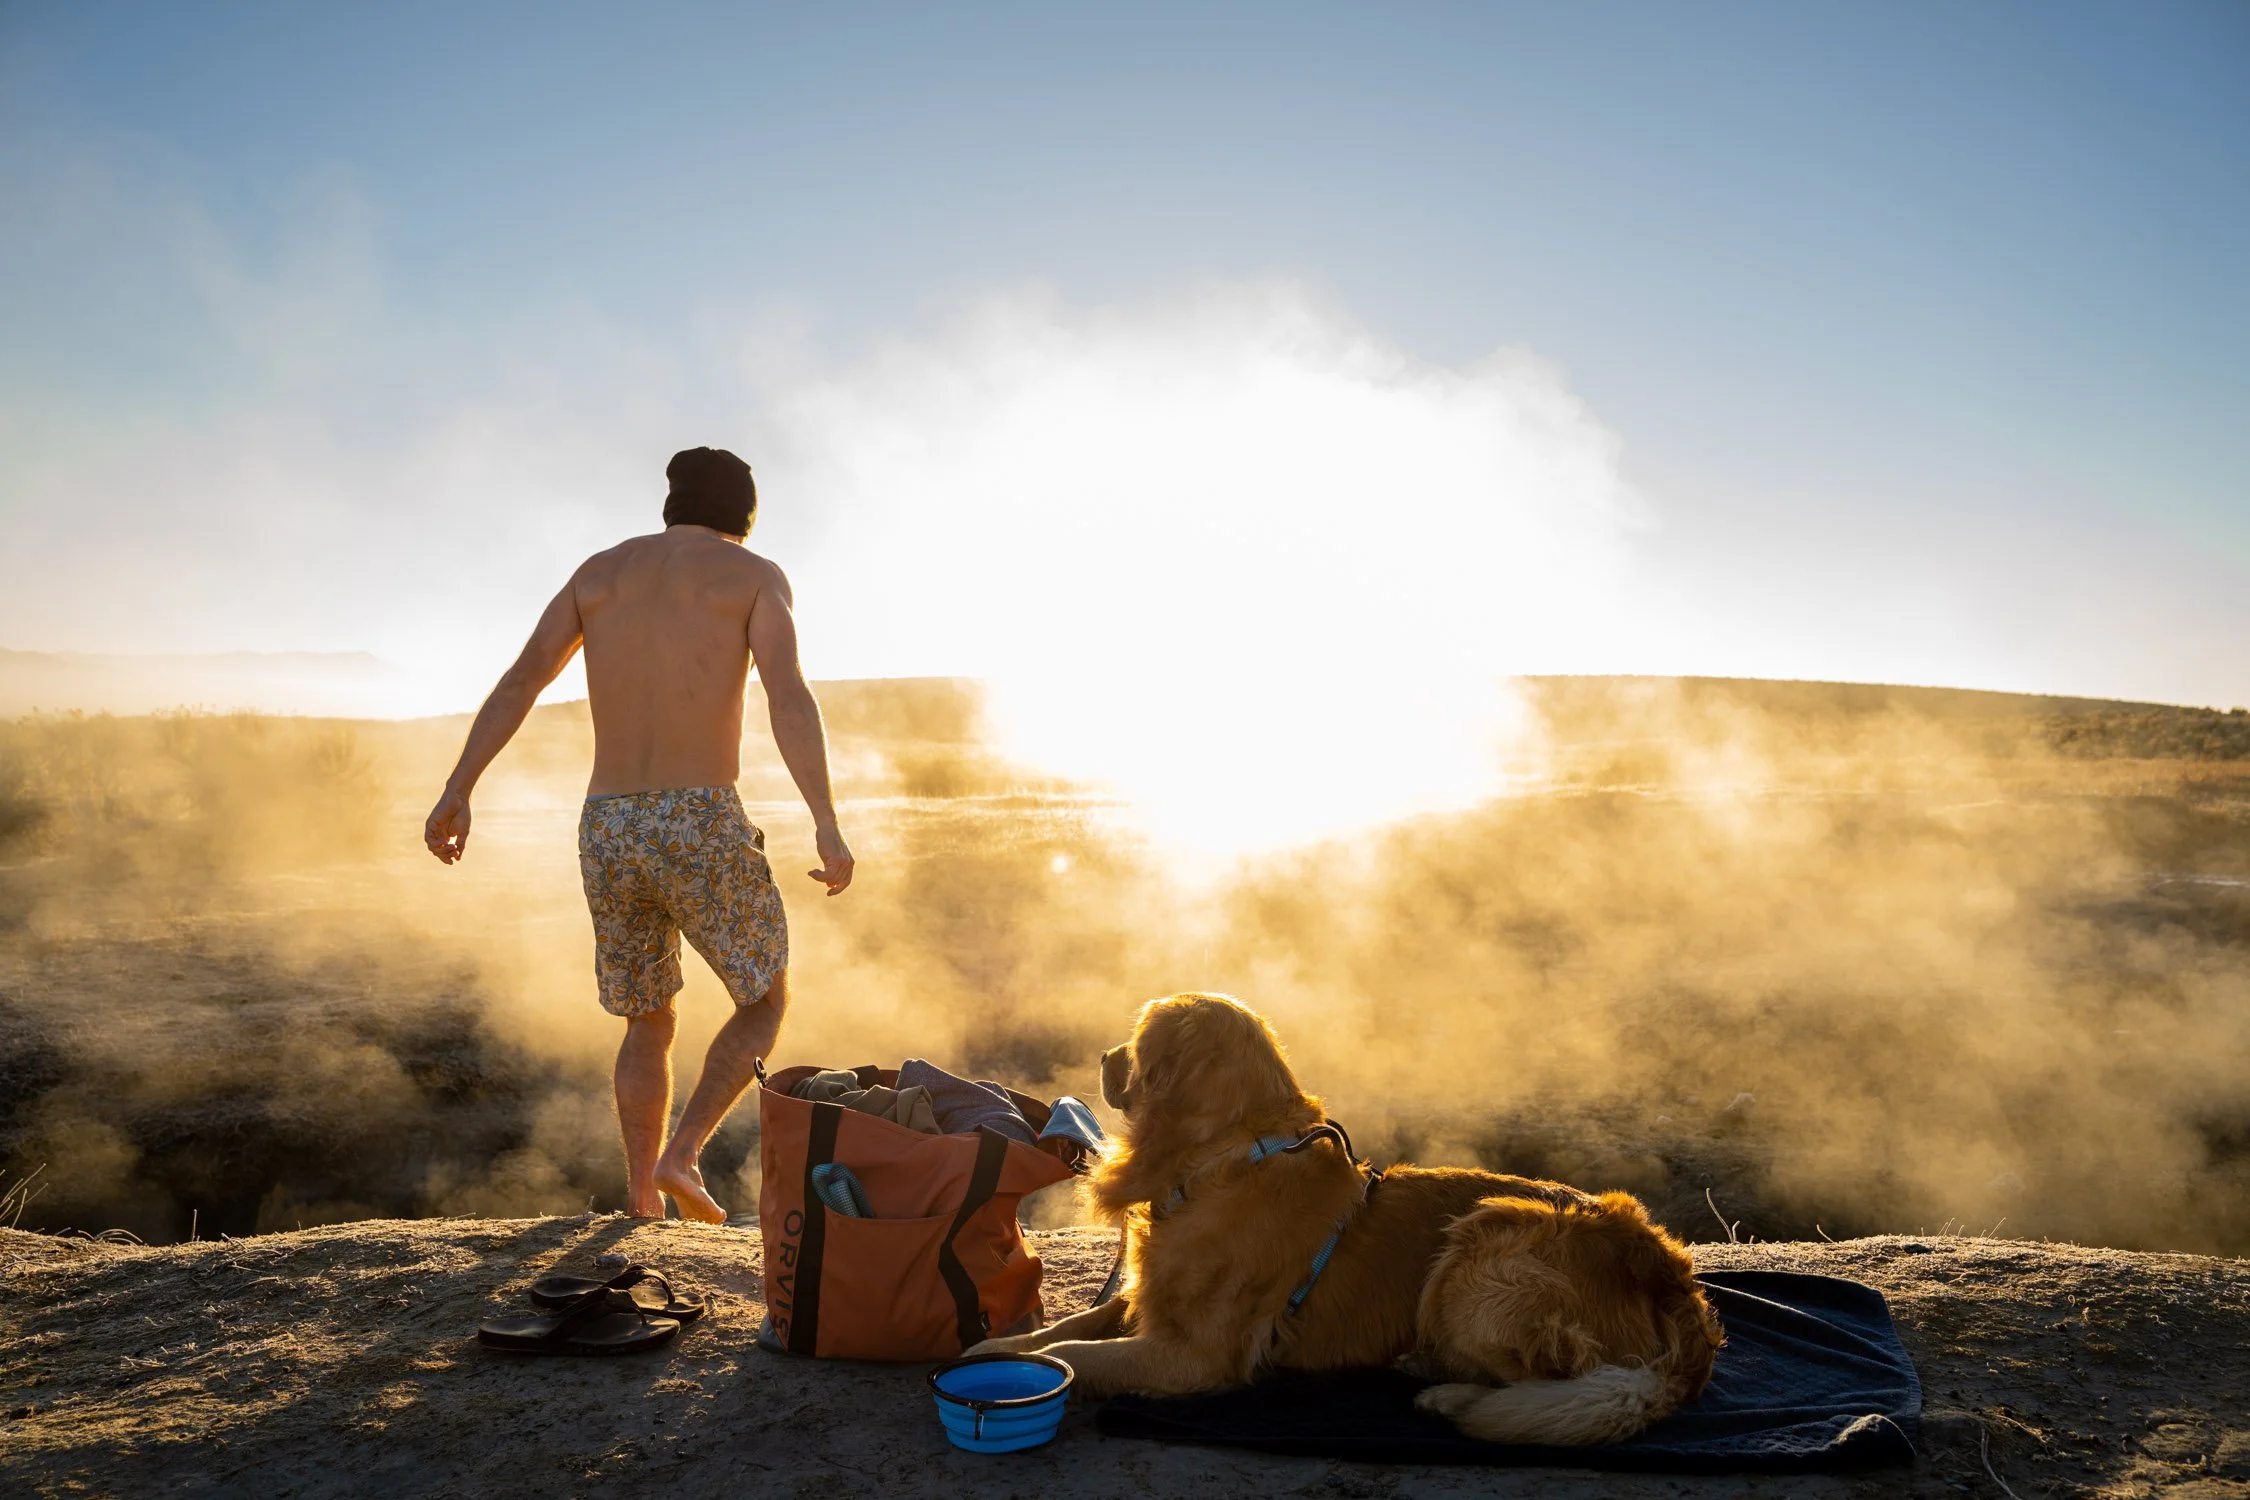
Headed into a steamy Wild Willy’s hot spring for a morning soak. Photo by Dalton Johnson
A Personal Connection to Mammoth Lakes Hot Springs
For me, Mammoth Lakes is more than a destination—it’s a place of comfort and connection. Over the years, I’ve shared these springs with friends, spent nights stargazing in the Wild Willy’s parking lot, and even made memories on dates in these serene waters. Each visit deepens my bond with this remarkable place.
One particularly vivid memory stands out. It was a crisp fall morning, and frost blanketed the ground. The steam rising from the springs created an almost mystical atmosphere. Sitting there, surrounded by the stillness of nature, I felt an overwhelming sense of peace. It’s moments like these that keep me coming back time and time again.
Another time, after a grueling backpacking trip, I made my way to one of the lesser-known springs. The exhaustion melted away as the warm water enveloped me, and I watched the sunset paint the mountains in fiery hues. These are the experiences that transform a destination into something much more—a sanctuary.

Kristin finding the perfect entrance to the heart pool of Wild Willy’s hot spring. Photo by Dalton Johnson
Tips for Your Visit
If you’re planning a trip to Mammoth Lakes Hot Springs, here are a few things I’ve learned over the years:
Go early or midweek to avoid crowds. The quiet hours make the experience even more special.
Respect nature by leaving no trace. Pack out your trash and keep these spots pristine for others to enjoy.
Be prepared. Bring a towel, plenty of water, and sturdy shoes for the rocky terrain. Layers are also essential, as weather can change quickly in the mountains.
Check road conditions if visiting in winter. Snow or rain can make some springs difficult to access.
Explore responsibly. Some springs are on private land, so always research and respect local guidelines.

Kristin soaking in one of the many hot springs near Mammoth Lakes, CA for sunrise. Photo by Dalton Johnson
No trip along Highway 395 feels complete without a soak in one of these incredible hot springs. Whether you’re looking for adventure, relaxation, or simply a beautiful escape, Mammoth Lakes delivers it all. For me, it’s a place that rejuvenates my spirit and always leaves me longing to return. Each visit feels like a new chapter in an ongoing love story with this extraordinary destination.
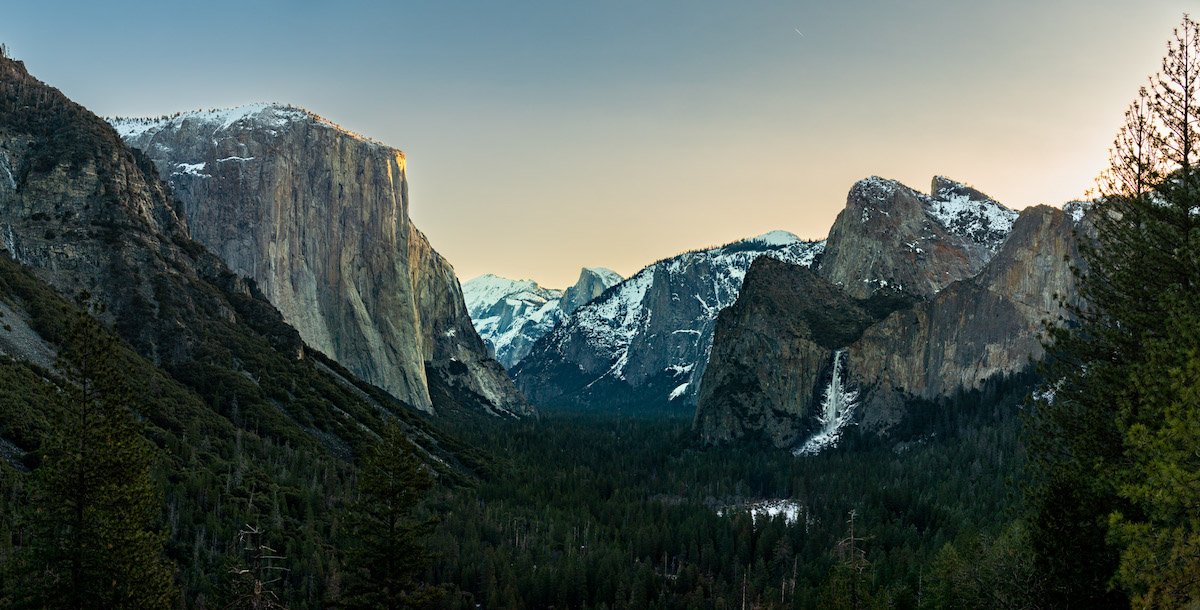
What You Can See From Tunnel View On A Clear Day
Yosemite National Park, a UNESCO World Heritage Site located in the Sierra Nevada mountains of California, is a treasure trove of natural wonders. Among its many renowned viewpoints, Tunnel View stands out as one of the most awe-inspiring locations to take in the park's grandeur.
Yosemite National Park, a UNESCO World Heritage Site located in the Sierra Nevada mountains of California, is a vista point you should not miss. Among Yosemite’s many renowned viewpoints, Tunnel View stands out as one of the most awe-inspiring locations to take in the park's grandeur. On a clear day, this iconic spot offers a sweeping panoramic view of Yosemite Valley that will leave you speechless. In this artilce, we'll explore the breathtaking sights you can expect to encounter when you visit Tunnel View.
Tunnel View just before the sun pokes over the horizon. Photo by Dalton Johnson
El Capitan: The Majestic Monolith
As you arrive at Tunnel View and cast your gaze to the left (north), the first breathtaking sight that greets you is El Capitan. This colossal granite monolith is a symbol of Yosemite and a mecca for rock climbers from around the world.
Rising approximately 3,000 feet from the valley floor, El Capitan's sheer rock face is an awe-inspiring testament to the forces of nature that shaped this landscape over millions of years. The play of light and shadow on its surface throughout the day is a spectacle in itself, making it a favorite subject for photographers.
Clouds Rest: A Majestic Backdrop
Beyond El Capitan, you'll notice the regal presence of Clouds Rest. This distinctive mountain peak, standing tall behind Half Dome, adds depth and character to the valley's landscape. Its unique shape and commanding presence make it a perfect backdrop for capturing the beauty of Yosemite.
Half Dome: An Iconic Wonder
No visit to Tunnel View would be complete without taking in the iconic Half Dome. With its unmistakable, sheer granite face, Half Dome is the quintessential symbol of Yosemite National Park.
The sight of this majestic monolith rising dramatically above the valley floor is a humbling and awe-inspiring experience. Hikers from around the world dream of conquering its challenging ascent, but even if you don't plan to make the climb, the view from Tunnel View is a sight to behold.


Sentinel Dome: A 360-Degree Vista
As your gaze continues to sweep across the valley, you'll come upon Sentinel Dome. This prominent dome, reachable by a rewarding hike, offers a 360-degree view of the park's stunning landscape. Standing atop Sentinel Dome, you'll feel like you're on top of the world, surrounded by the natural beauty that Yosemite is famous for.
Cathedral Rocks: Towering Spires of Granite
Cathedral Rocks, a series of towering granite spires, adds another layer of drama to the valley's skyline. These majestic rock formations are a testament to the geological forces that shaped Yosemite's landscape over eons. The interplay of light and shadow on Cathedral Rocks throughout the day creates a dynamic and ever-changing spectacle for visitors.
Glacier Point: The Distant Marvel
Though not visible from Tunnel View itself, Glacier Point often serves as a point of reference. It's another famous viewpoint in Yosemite, offering its own breathtaking vistas of the valley. While you're at Tunnel View, you can imagine the perspective from Glacier Point, which offers a unique angle on the valley's wonders, including an unparalleled view of Half Dome.
Bridalveil Fall: A Graceful Cascade
Completing the panorama, on the right side of the valley, you'll find Bridalveil Fall. This delicate waterfall plunges gracefully from the cliffs above, often creating a fine mist that catches the sunlight.
In the right conditions, this mist can give rise to ethereal rainbows, adding an extra layer of enchantment to the scene. Bridalveil Fall is a reminder of the park's ever-flowing natural beauty and the interconnectedness of its elements.
The milky way over Tunnel View. Photo by Dalton Johnson
All of these natural landmarks come together to create a scene of unparalleled beauty. The lush pine-carpeted valley, crisscrossed by the tranquil Merced River, provides a striking contrast to the rugged cliffs and towering granite formations. This juxtaposition of natural elements is what makes Tunnel View such a unique and captivating destination within Yosemite National Park.
Whether you're an avid photographer, a nature enthusiast, or simply someone seeking awe-inspiring vistas, Tunnel View offers an unforgettable glimpse into the heart of Yosemite. It's a place where you can stand in awe of the Earth's geological history, marvel at the forces that shaped this landscape, and appreciate the ongoing beauty of nature. So, the next time you find yourself in Yosemite National Park on a clear day, make sure to set aside some time to visit Tunnel View and witness the majesty that awaits.
Discover more Adventures
15 Things to Know About Tunnel View Sunrise
Tunnel View in Yosemite National Park is one of the most iconic viewpoints in the United States. At sunrise, this stunning vista offers photographers and nature lovers a magical experience as the first light of day illuminates the grandeur of Yosemite Valley. If you're planning a visit to catch the sunrise at Tunnel View, here are 15 things you should know to make the most of your experience.
Tunnel View in Yosemite National Park is one of my favorite places to experience the magic of sunrise. There's something extraordinary about watching the first light touch Yosemite Valley, highlighting El Capitan, Half Dome, and Bridalveil Fall. Over the years, I’ve learned a few things to make the most of this iconic spot, and I’m excited to share my tips to help you enjoy it as much as I do. Let’s dive deeper into the details so you can fully embrace the experience.

Tunnel View. Photo by Dalton Johnson
Pros:
Stunning Scenery: Tunnel View offers one of the most iconic and breathtaking vistas in Yosemite National Park, featuring El Capitan, Half Dome, and Bridalveil Fall bathed in the soft light of dawn.
Optimal Lighting for Photography: The early morning light provides perfect conditions for photography, with golden hues and dramatic shadows that enhance the natural beauty of the landscape.
Serene Atmosphere: The early morning hours are often quieter and less crowded, allowing for a peaceful and contemplative experience in nature.
Beat the Crowds: Arriving early helps avoid the larger crowds that gather later in the day, allowing for a more personal and uninterrupted experience.
Time for Exploration: Starting your day early at Tunnel View allows you to explore other parts of Yosemite National Park with the rest of the day ahead.
Cons:
Early Wake-Up: Getting up early can be challenging, especially if you're not a morning person or are traveling with children.
Limited Parking: The small parking lot can fill up quickly, even at sunrise, which might require you to park further away and walk to the viewpoint.
Crowds Even at Sunrise: Despite being less crowded than later in the day, Tunnel View can still attract a significant number of visitors at sunrise, particularly during peak tourist seasons.
Weather Dependency: The experience can be affected by weather conditions. Fog, clouds, or rain can obscure the view, making it less ideal for photography.
Lack of Amenities: There are no facilities (such as restrooms or food vendors) at Tunnel View, so you need to come prepared with your own supplies.
1. Start Your Day Early
Whenever I’m in Yosemite and not doing an alpine start for climbing or a backpacking trip, I set my alarm for Tunnel View. I aim to arrive at least 30 minutes before sunrise. The quiet before the day begins, paired with the anticipation of the sun lighting up the valley, is always worth the early wake-up call. Plus, arriving early means less competition for parking and prime viewing spots. As the soft pre-dawn light grows brighter, it’s easy to feel a sense of peace and wonder that sets the tone for the day ahead.
2. Check the Weather
I always check the weather before heading out. Clear skies are beautiful, but my favorite mornings are after a storm or chilly night when there’s a chance of an inversion layer. Watching the mist swirl and shift as the sun warms the valley floor feels magical. Those mornings stick with me the most. On some occasions, the interplay of light and fog creates dramatic scenes that make every visit feel unique. Even when clouds dominate the sky, the muted tones and dynamic textures can make for an equally captivating experience.
3. Get There Early for Parking
The parking lot at Tunnel View fills up faster than you’d think, even at sunrise. I’ve had to park along the road a few times, but it’s worth arriving early to avoid the hassle. It’s one less thing to worry about when you’re trying to soak in the moment. Arriving before the crowds also means you can enjoy a quieter, more contemplative start to your day, uninterrupted by the hustle and bustle that often accompanies mid-morning hours.
4. Pick the Right Time of Year
For me, spring and fall are the best times to visit Tunnel View. The light is softer, the crowds are smaller, and the temperatures are cooler. Summer can be beautiful too, but mornings are often busier, and winter comes with its own challenges, like icy roads and limited access. During spring, waterfalls are often at their peak flow, creating an extra layer of beauty to the scene. In the fall, the crisp air and golden hues of the changing foliage add a distinct charm that makes sunrise even more special.
Each season at Tunnel View offers a distinct experience:
Spring: Waterfalls are at their peak, and the valley bursts with fresh greenery. The light during sunrise reflects beautifully on the flowing water and lush landscape, making it a photographer’s dream.
Summer: Long days bring warm temperatures and clear skies, but mornings remain cool. Early starts are especially rewarding as they allow you to enjoy the view before the larger crowds arrive.
Fall: Crisp air and vibrant autumn colors make this season particularly charming. The golden hues of the foliage create a warm glow in the valley during sunrise.
Winter: Snow-covered peaks and frosty mornings provide a serene and magical atmosphere. Be prepared for icy roads and colder temperatures, but the tranquil beauty of the season makes it worth the extra effort.
5. Explore Beyond the Main Spot
Most people gather at the main viewpoint, but I like to escape the crowd. Across the road from the parking lot, there’s a small trail leading uphill. If you take it and head right, you’ll find a quieter spot with an incredible view. I’ve spent many mornings here with my coffee, camera, and the valley all to myself. This elevated perch offers a slightly different angle, making it a fantastic alternative for those seeking solitude or unique photo compositions. It’s a hidden gem that many overlook, and it’s become my personal go-to spot.
6. Bring the Right Gear
For photography, I always bring a tripod, a wide-angle lens for capturing the entire valley, and a telephoto lens to zoom in on details like Bridalveil Fall or Half Dome. A remote shutter release helps reduce camera shake, especially in low light. Even if you’re not a photographer, binoculars can help you appreciate the finer details. Having a microfiber cloth handy is also useful for cleaning your lens if condensation or mist appears, ensuring you get crystal-clear shots.
Here’s a list of camera gear to bring:
Tripod: For stability during low light conditions, ensuring sharp photos.
Wide-Angle Lens: Ideal for capturing the expansive view of Yosemite Valley.
Telephoto Lens: Perfect for zooming in on details like Bridalveil Fall or Half Dome.
Remote Shutter Release: Helps prevent camera shake during long exposures.
Spare Batteries: Cold mornings can drain batteries quickly, so bring extras.
Lens Cleaning Cloth: Essential for removing condensation or dust from your lens.
Camera Bag: To organize and protect your gear while hiking to alternate viewpoints.
Polarizing Filter: Enhances the colors and reduces glare, especially during sunrise.
These items will help you capture Tunnel View’s beauty in all its glory.
7. Stay Warm
Even in summer, the mornings at Tunnel View are chilly. I’ve learned the hard way to layer up, bringing a jacket, gloves, and a warm hat. A hot cup of coffee is also a must for me—it’s like a little piece of comfort while I wait for the show to begin. In the cooler months, hand warmers and a thermos of tea or hot chocolate can make the early hours much more enjoyable. Staying comfortable allows you to fully immerse yourself in the moment without distractions.
Here’s a list of layers and gear to bring:
Base Layers: Moisture-wicking thermal tops and bottoms to keep warm and dry.
Mid Layer: A fleece or lightweight insulated jacket for added warmth.
Outer Layer: A windproof and waterproof jacket to protect against the elements.
Hat: A warm beanie to retain body heat.
Gloves: Insulated gloves to keep your hands warm in the chilly morning air.
Neck Gaiter or Scarf: For extra warmth and to block wind.
Footwear: Comfortable hiking shoes or boots with warm socks.
Optional Add-ons: Hand warmers and a lightweight blanket for additional comfort while waiting for sunrise.
These layers ensure you’re prepared for the cool temperatures common during early mornings at Tunnel View.
8. Enjoy the Quiet Before the Crowds
One of the reasons I love getting to Tunnel View early is the peace and quiet. There’s something special about sitting in silence, watching the day begin. Even when others start to arrive, being there first gives me a sense of calm that makes the experience even more rewarding. Listening to the soft sounds of nature—a bird’s call, the rustle of leaves—adds to the serene atmosphere. These moments of stillness often feel as significant as the sunrise itself.
9. Respect the Wildlife
I often see deer grazing nearby in the early morning. It’s a beautiful reminder that Yosemite is their home. I always keep my distance and enjoy watching them from afar—it’s moments like these that make early mornings at Tunnel View even more special. Occasionally, you might also spot other animals, like squirrels or birds, going about their morning routines. Sharing the space respectfully with wildlife enhances the sense of connection to the park’s natural beauty.
10. Take It All In
While I love capturing photos, I always make sure to set my camera down and simply enjoy the view. Watching the sun rise over Yosemite Valley is an experience that can’t be fully captured in a photo. Sometimes, it’s enough just to be present and soak it all in. The shifting light, the crisp air, and the sheer scale of the valley combine to create a moment that stays with you long after you’ve left.
11. Alternate Viewpoints to Explore Later
After sunrise at Tunnel View, I like to explore other spots like Glacier Point or Bridalveil Fall. Each viewpoint offers its own unique perspective of the valley, and it’s a great way to extend the magic of the morning. Glacier Point provides a panoramic view that complements Tunnel View, while Bridalveil Fall offers an up-close look at one of Yosemite’s iconic waterfalls. Adding these destinations to your itinerary rounds out the experience.
12. Pack Snacks and Water, Maybe Make Some Breakfast and Coffee
There are no facilities at Tunnel View, so I always bring a snack and water. Something as simple as a granola bar can make those early hours feel a bit more manageable. One of my absolute favorite things is to make breakfast and coffee right in the parking lot. With a van, this is easy, but even if you’re car camping, preparing breakfast on your tailgate can be a relaxing way to extend your time at Tunnel View. Sharing a warm meal with friends while taking in the iconic view makes the experience even more memorable. Staying hydrated is equally important, especially if you plan to continue exploring the park afterward.
13. Keep It Safe
I always stay within the designated areas at Tunnel View. Climbing over barriers might seem tempting for a better photo, but it’s not worth the risk to your safety or the park’s rules. The viewing area is designed to provide a safe and accessible experience, so there’s no need to take unnecessary risks. Respecting the space ensures it remains pristine for future visitors.
14. Look for the Unexpected
Every sunrise is different. Some mornings the valley is bathed in warm, golden light, while other times clouds or mist create a dramatic and moody scene. I love that unpredictability—it’s part of what makes each visit so special. Staying open to the unexpected often leads to the most memorable experiences, whether it’s a sudden break in the clouds or a surprising wildlife sighting.
15. Capture the Movement
If you’re into photography, try capturing a time-lapse of the sunrise. I’ve done this a few times, and it’s always amazing to watch the light and shadows change over the valley when I play it back later. It’s also a fun way to share the experience with friends and family. Adding motion to your storytelling can bring the scene to life in a way still photos sometimes can’t.

Tunnel View in early spring still with snow. Photo by Dalton Johnson
Tunnel View gives me a reason to wake up early every time I’m in Yosemite. Whether it’s a perfect sunrise or a quiet moment on a misty morning, this iconic spot never fails to leave me in awe. If you’re planning your visit, I hope these tips help you make the most of your time there. Trust me—no matter how many times you go, Tunnel View at sunrise is always worth it.
Discover More Destinations

Your Year Round Guide to Wild Willy's Hot Spring In Mammoth Lakes, CA
Located in the Inyo National Forest, Wild Willy’s Hot Springs is a natural wonder that attracts adventure seekers and nature enthusiasts year-round. If you're planning a trip to this hot spring, you're in for a treat! In this guide, we'll give you everything you need to know about visiting Wild Willy’s Hot Springs near Mammoth.
Located in the Inyo National Forest, Wild Willy’s Hot Springs is a collection of natural geothermal pools that is the perfect stop for road trippers, adventurers with sore muscles, and nature enthusiasts looking to relax at any time of the year. If you're planning a trip, you're in for a treat! I’ve visited these pools in every season, soaking in the hot pools at least 20, or 30 times. What draws me to Wild Willy’s is not just the relaxation it offers but the abundance of adventure waiting in the surrounding Eastern Sierra area. My goal with this guide is to provide you all with everything you need to know about visiting Wild Willy’s Hot Springs near Mammoth Lakes, California.
Soaking in one of the many pools during the fall season at Wild Willy’s Hot Spring. Photo by Dalton Johnson
Pros:
Natural and serene - Wild Willy’s Hot Springs is a natural attraction that provides a peaceful and serene atmosphere, perfect for relaxation and unwinding.
Scenic views - Visitors can enjoy stunning views of the Sierra Nevada Mountains while soaking in the hot springs.
Year-round destination - The hot springs are open year-round, making it accessible for visitors during any season.
Free - Visitors can access the hot springs for free, making it a budget-friendly attraction.
Cons:
Limited space - The hot springs can get crowded during peak season, making it difficult to find a spot to soak.
Remote location - Wild Willy’s Hot Springs is located in a remote area, and visitors need to be prepared with proper gear and supplies. This is apparent in the winter.
No amenities - There are no amenities available at the hot springs, including restrooms (occasionally there are portable restrooms) or changing rooms.
Why Visit Wild Willy’s Hot Springs?
Wild Willy’s is open year-round, offering free access to anyone seeking a serene escape. The hot springs are surrounded by breathtaking views of the Eastern Sierra, making it a perfect destination for relaxation and sightseeing in any season. Whether you're looking for a quiet winter retreat or a scenic summer soak, Wild Willy’s delivers.
Getting to Wild Willy’s Hot Springs
To get to Wild Willy’s Hot Springs from Mammoth Lakes, California, follow these driving directions:
Head south on Main St/CA-203 E toward Minaret Rd.
Turn right onto Minaret Rd.
Continue onto CA-203 E/Main St.
Turn left onto CA-395 N.
After approximately 5.5 miles, turn right onto Benton Crossing Rd.
After approximately 4.6 miles, turn left onto Owens River Rd.
Follow Owens River Rd for approximately 5.5 miles.
Turn left onto a dirt road, and follow it for approximately 0.7 miles until you reach the parking area.
Note: The last leg of the journey involves driving on a dirt road, which can be rough and may require a high clearance vehicle. Visitors should also be prepared with proper gear and supplies, exercise caution when navigating the rugged terrain, and be prepared for the remote location and lack of amenities.
What to Expect When You Get There
Once you reach Wild Willy’s Hot Springs, you'll be rewarded with breathtaking views of the surrounding Sierra Nevada mountains. But what should you bring to make your visit comfortable and enjoyable? Here's a list of must-bring items for your trip to Wild Willy’s Hot Springs:
Hiking shoes - The hike to Wild Willy’s Hot Springs is short, but hard on the feet. Wearing comfortable and supportive hiking shoes will make your journey more enjoyable, but you can certainly get away with the sandals!
Swimwear - You'll need a swimsuit or shorts to enjoy soaking in the hot springs. Local laws on nudity have been changing over the last few years, so just be aware of your surrounding as Wild Willy’s Hot Spring is a family friendly place.
Towel - Bring a towel to dry off after soaking in the hot springs.
Water - It's essential to stay hydrated while hiking and soaking in the hot springs. Bring plenty of water and stay hydrated.
Sunscreen - The sun can be intense, even on cloudy days, so it's important to wear sunscreen to protect your skin.
Hat - A hat can provide additional protection from the sun and keep you cool during the hike.
Warm layers - Temperatures can drop quickly, especially during the fall and winter months. Pack warm layers like a jacket or sweater to keep you comfortable during the hike in, or out.
Snacks - Bring snacks like energy bars or trail mix to keep you fueled during the hike.
Garbage bags - Pack out what you pack in! Bring garbage bags to carry out any trash and keep the area clean for future visitors.

Walking to the hot springs on a chilly Fall morning to watch sunrise from the Wild Willy’s hot springs. Photo by Dalton Johnson
Best Time to Visit Wild Willy’s Hot Springs
Wild Willy’s Hot Springs are open to visitors year-round, but the experience can vary depending on the season. Here's what you can expect at Wild Willy’s Hot Springs during each season:
Winter (December to February)
During winter, Wild Willy’s Hot Springs is a winter wonderland, surrounded by snow-capped mountains. The hot springs can be a perfect place to warm up and relax after a day of skiing or snowshoeing. However, the water temperature can be quite hot, making it challenging to cool off. Visitors need to be careful to avoid hypothermia when getting out of the hot springs as well. Also, the road is often closed, so bring snowshoes or touring skis to make the one mile trek to the hot springs.
Spring (March to May)
In the spring, the area around Wild Willy’s Hot Springs begins to bloom, creating a stunning landscape of wildflowers. The water temperature is usually warm, making it comfortable to soak in the hot springs. However, visitors should be aware of increased water levels due to snowmelt, which can make the hiking trail to the hot springs muddy and slippery.
Summer (June to August)
During summer, Wild Willy’s Hot Springs can be a popular destination for hikers and backpackers. The water temperature is usually comfortable, and the surrounding area is lush and green. However, visitors should be aware of high temperatures during the day, making the hike to the hot springs challenging. Also, it can get crowded during peak season, so visitors should arrive early to secure a spot.
Fall (September to November)
Fall is a beautiful time to visit Wild Willy’s Hot Springs when the surrounding forests change colors, creating a breathtaking landscape. The water temperature remains warm, making it comfortable to soak in the hot springs. Visitors should be aware of colder temperatures at night, so it's essential to pack warm clothing for the hike back to the parking lot.

Camping at Wild Willy’s Hot Spring. Photo by Dalton Johnson
Camping at Wild Willy’s Hot Springs
Camping at Wild Willy’s Hot Springs is a hit-or-miss experience due to the limited availability of camping sites. Only a few spots are located roughly a quarter of a mile away from the hot springs. If everyone parks respectfully, the main parking area can accommodate about 10 vehicles. Around the parking lot, there are also some dispersed camping areas. While the camping may not be luxurious, it complements the unforgettable experience of soaking in the natural hot springs.
For vanlifers or car campers, Wild Willy’s offers a simple but charming camping experience. Personally, I’ve enjoyed staying here many times, thanks to the welcoming community of fellow adventurers. Finding a level spot is key to a comfortable night’s rest. For a quieter stay, consider parking away from the main lot. Although it requires a longer walk to the springs, the tranquility is worth the extra effort.
Make sure to bring your own water and pack out all your trash to keep the area clean and beautiful. There is sometimes a dumpster available, but it’s not always present, so plan accordingly.
Respect is crucial when camping here. Being considerate of others and mindful of the environment helps preserve access to this unique spot. We all share the responsibility of ensuring this beautiful area remains open for future visitors.
Winter camping adds an extra layer of challenge. The access road is often closed due to snow, requiring a two-mile hike from the main road to reach the hot springs. While the hike can be rewarding, it’s essential to be prepared for freezing temperatures and winter conditions. Make sure to pack warm gear and plenty of supplies if you plan to camp during this season.
Explore the Pools in the Surrounding Area
Wild Willy’s is part of a network of geothermal pools scattered across the Long Valley Caldera. While the main pools at Wild Willy’s are the most popular, there are several other pools in the area that are worth exploring:
Hilltop Hot Springs: A smaller, more intimate pool with stunning panoramic views. It’s just a short drive from Wild Willy’s and offers a quieter alternative.
Rock Tub Hot Springs: Known for its unique rock-formed basin, this spot provides a cozy and scenic soak, especially during sunrise or sunset.
Shepherd Hot Springs: A bit more remote, this pool offers a peaceful retreat with fewer crowds.
Crab Cooker Hot Springs: As the name suggests, this pool can get very hot, so be cautious before entering. It’s a great spot for those seeking solitude.
To find these hidden gems, bring a detailed map or download offline navigation tools, as signage is minimal. Exploring these additional pools adds variety to your hot spring adventure, and each one offers its own charm and character.
Enjoying one of the many hot springs around the Wild Willy’s area. Photo by Dalton Johnson
Wild Willy’s Hot Springs is an unforgettable destination that offers adventure and natural beauty year-round. By following our guide, you'll be able to plan your trip with confidence, stay safe, and make unforgettable memories. We hope this guide has been helpful, and we wish you an incredible journey to Wild Willy’s Hot Springs near Mammoth.
Discover more eastern Sierra Gems

We Needed a Place to Relax, and the Shores of Kenai Lake Called Our Name
Camping at Kenai Lake gave us the perfect reset after two intense weeks of road-tripping in our van around Alaska’s Kenai Peninsula. Kristin and I were tired—physically and mentally—and in desperate need of a place to park, relax, and recharge. When we stumbled upon a camping spot on iOverlander right on the edge of Kenai Lake, we knew we’d found our answer.
Camping at Kenai Lake gave us the perfect reset after two intense weeks of road-tripping in our van around Alaska’s Kenai Peninsula. Kristin and I were tired—physically and mentally—and in desperate need of a place to park, relax, and recharge. When we stumbled upon a camping spot on iOverlander right on the edge of Kenai Lake, we knew we’d found our answer.

Driving down the dirt road to our campsite at Kenai Lake in Alaska. Photo by Dalton Johnson
Finding Our Primitive Paradise
Kenai Lake is a glacially-fed gem with an unreal aqua color that seems straight out of a painting. Its beauty drew us in, and we didn’t mind that our chosen spot was primitive. With our converted van, we weren’t worried about the lack of amenities.
Our journey to the campsite, however, was an adventure in itself. The GPS guided us down a bumpy dirt road riddled with washboard grooves. As the van rattled and bounced, I couldn’t help but worry about the cabinets coming loose and crashing to the floor. Thankfully, they held steady, and we eventually turned onto a muddy path that led us to the lake’s shoreline.
When the road finally opened up to the beach, the view of Kenai Lake took our breath away. The glacial water sparkled in the daylight, and the quiet hum of nature filled the air. Within moments, we found a cozy spot to call home for the next few days.
Life Slows Down at Kenai Lake
Camping at Kenai Lake became a soothing retreat for both of us. The simplicity of life here made it easy to unwind. Mornings began with coffee by the water, where we’d sit and read for hours. The lake’s icy waters invited us to take invigorating cold plunges—an exhilarating way to wake up and reset.
We filled our days with the “usual camping things.” Rainstorms gave us a reason to cozy up in the van, while sunny breaks meant we could go for jogs along the shoreline. The solitude of Kenai Lake was the perfect backdrop to let go of the chaos of road-tripping and embrace the slow pace of life.
What We Missed
While our time at Kenai Lake was peaceful, there were moments when I wished we had packed a few extras. Watching people paddle kayaks along the lake’s edge or reel in fish from boats made me long for a kayak of my own. The thought of gliding across the water and exploring its banks was tempting, and I couldn’t help but feel a twinge of envy for the anglers pulling in their catches.
A campfire would have been a wonderful addition to our evenings, but the persistent rain left everything damp. I tried to gather wood and get a flame going, but the wet conditions made it impossible. Instead, we made do with the warm glow of our van’s lights and the natural ambiance of the lake.

Kristin staring out at the incoming storm over Kenai Lake in Alaska. Photo by Dalton Johnson
A Recharge We Didn’t Know We Needed
Camping at Kenai Lake gave us exactly what we needed: time to recharge. Living van life during an Alaskan summer is incredible, but it’s also demanding. Between long drives, ever-changing plans, and limited comforts, we found ourselves running low on energy.
Kenai Lake offered a way to reset both our bodies and minds. The lake’s tranquil shores and breathtaking scenery reminded us why we love the freedom of van life, even when it’s tough. For a few days, the stress of planning and moving melted away, leaving us with nothing but the simple joy of being present.
Kenai Lake and Rainbow Lakes from the sky at sunset. Photo by Dalton Johnson
Why You Should Camp at Kenai Lake
If you’re traveling the Kenai Peninsula and looking for a place to unwind, Kenai Lake is a must-visit destination. Whether you’re in a van, RV, or tent, the lake offers a serene escape from the hustle of road-tripping.
Here are a few tips to make your stay even better:
Bring a kayak or paddleboard. Exploring the lake from the water is an unforgettable experience.
Pack fishing gear. The lake is a hotspot for anglers, and you might just catch dinner.
Prepare for primitive camping. The spots around Kenai Lake are often rustic, so come with everything you need.
Check the weather. Rain is common, so plan accordingly and bring waterproof gear.
Finding a stunning view along the shoreline of Upper Kenai Lake.. Photo by Dalton Johnson
Kenai Lake reminded us that even the busiest adventures need moments of rest. It’s a place where time slows down, and the stunning scenery lets you appreciate the beauty of the journey. Whether you’re recharging for the next leg of your trip or simply soaking in the magic of Alaska, Kenai Lake is the perfect spot to press pause.
Discover more Adventures

We Should Have Come to Bixby Bridge for Sunset, But We Came at Sunrise Instead
As our alarms sounded at 3:30 am, we packed up our van and hit the road, eager to experience one of California’s most iconic landmarks. The plan? Arrive at Bixby Bridge for sunrise. Neither of us was sure whether sunrise or sunset would showcase the bridge at its best, but sunrise felt like the right choice for our night-owl road trip vibe.
As our alarms sounded at 3:30 am, we packed up our van and hit the road, eager to experience one of California’s most iconic landmarks. The plan? Arrive at Bixby Bridge for sunrise. Neither of us was sure whether sunrise or sunset would showcase the bridge at its best, but sunrise felt like the right choice for our night-owl road trip vibe.
The drive along Big Sur’s winding cliffside roads was an adventure on its own. Darkness surrounded us, but the occasional glimpse of the ocean’s edge reminded us why this stretch of Highway One is legendary. Our van, converted into a cozy home on wheels, made the trek feel even more special. Every curve in the road brought a sense of excitement and anticipation, a feeling heightened by the isolation of the early hours.

Looking out the front window of the van at Bixby Bridge for sunrise. Photo by Dalton Johnson
By the time we reached Bixby Bridge, the eastern horizon was just starting to lighten. With time to spare, we parked along the road, crawled into the back of the van, and fired up our stove with a kettle of water. Tea for me, coffee for Kristin—it was a ritual that always made mornings better, even when we’d barely slept. The sound of boiling water and the aroma of freshly brewed coffee added comfort to the chilly morning air.
Tea, Coffee, and a Question Answered
Sitting there with warm drinks in hand, we waited for the magic of sunrise to unfold. The world around us began to glow softly, the kind of light that promises a beautiful day ahead. But as the minutes ticked by and the golden hour stretched on, the reality set in. The mountains to the east blocked much of the rising sun. The bridge would eventually be bathed in the warm light, but not in the way we had imagined. If we had come for sunset, we would have seen the sun dipping into the Pacific, painting the ocean and the bridge in fiery hues.
Even so, the sight before us was stunning. The soft light highlighted the dramatic curves of the bridge and the rugged cliffs, creating a scene that was more serene than spectacular. It wasn’t the show-stopping moment we had envisioned, but it had a quiet beauty that made it worth the trip.
The Hidden Perks of Sunrise
Even though sunset would have been more dramatic, there was something undeniably special about our sunrise visit. The area was completely still, with not another soul in sight. We had the entire cliffside and the iconic view of Bixby Bridge all to ourselves.
In the quiet of the morning, we sipped our drinks and marveled at the solitude. Without crowds, we could linger as long as we wanted, snapping photos and soaking in the view without the pressure of other visitors vying for the perfect angle. The late sunrise was softer than expected, casting a gentle light on the rugged cliffs and the elegant arch of the bridge. The quiet gave us time to appreciate the moment—the sound of waves crashing below, the crispness of the air, and the sheer scale of the bridge.
This solitude was a gift. During the day, Bixby Bridge can become a bustling spot with cars lining the road and tourists competing for space. Experiencing it without the commotion felt like a rare privilege. It was as though we had this iconic landmark all to ourselves, if only for a brief window of time.

Kristin taking advantage of being the only people at Bixby Bridge and exploring the trails. Photo by Dalton Johnson
A New Adventure Awaits
After soaking in the morning tranquility, it was time to move on. The Big Sur coastline called to us with its promise of breathtaking hikes and sweeping ocean views. Our early start gave us the advantage of hitting the trails before the day grew too warm. The adventure ahead felt even more thrilling after such a peaceful start to the day.
We chose a nearby trail that hugged the cliffs, offering stunning vistas of the Pacific. The path wound through wildflowers and rugged terrain, the kind of scenery that makes Big Sur unforgettable. Every step felt like an extension of our sunrise experience, connecting us to the beauty of the coast in a deeper way.
Kristin enjoying a cup of coffee while waiting for sunrise at Bixby Bridge in Big Sur. Photo by Dalton Johnson
So, Sunrise or Sunset at Bixby Bridge?
If you’re chasing jaw-dropping light and picture-perfect colors, sunset is the clear winner at Bixby Bridge. The sun setting over the Pacific Ocean creates a visual spectacle that’s hard to beat. The golden hues reflecting off the water and the dramatic shadows cast on the cliffs make it an unforgettable sight.
However, if you value peace and quiet and want to experience the bridge without crowds, sunrise offers a serene alternative. The calm of the early morning, combined with the soft light and the absence of other visitors, creates a unique and peaceful experience. It’s a moment that’s less about capturing the perfect photo and more about savoring the stillness.
For us, the sunrise wasn’t what we expected, but it still turned out to be a morning to remember. We learned that even when things don’t go as planned, the experience can still be meaningful. Whether it’s sunrise or sunset, Bixby Bridge is worth the trip. The lesson? Sometimes, the journey is just as rewarding as the destination.
Discover more Adventures
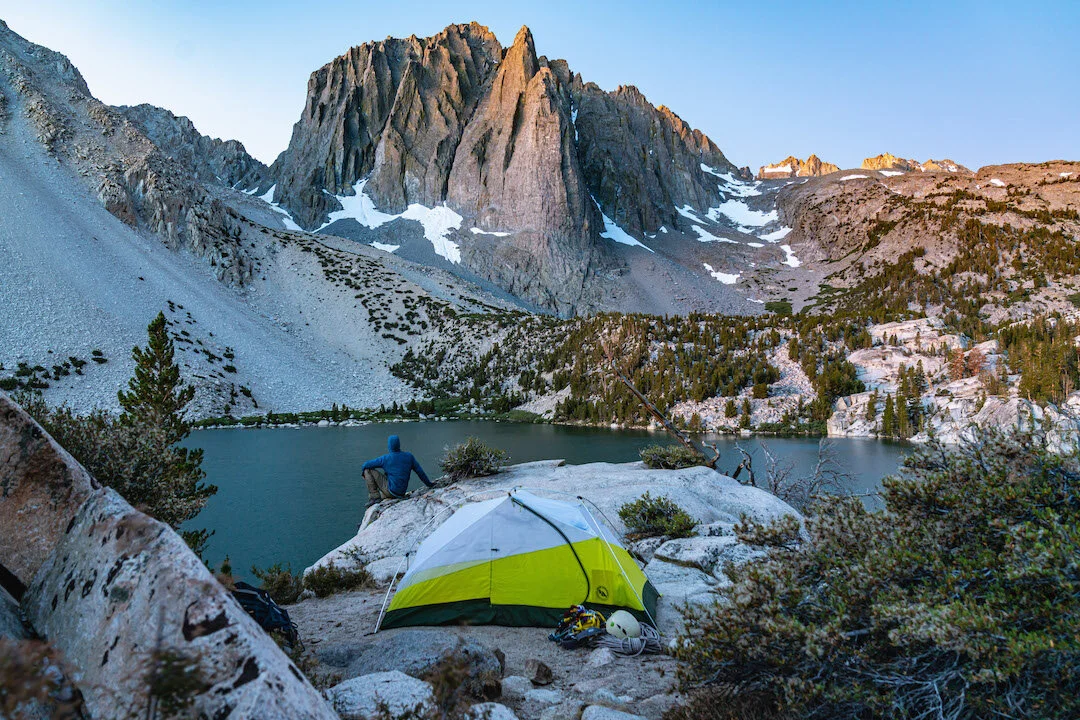
Getting Altitude Sickness Changed My Mind On Climbing 14ers Solo
When I first started my peak-bagging journey, I was obsessed with climbing 14ers. Living in California gave me some great options, but nowhere near the variety Colorado offers. The flipside? Not as many people in California are chasing those 14,000-foot summits. In Colorado, the peaks are buzzing with climbers.
After my first few successful summits in California, I felt invincible. I tackled these mountains car-to-car and stuck to routes no harder than Class 4. Climbing solo felt completely fine—until the day I experienced altitude sickness.
When I first started my peak-bagging journey, I was obsessed with climbing 14ers. Living in California gave me some great options, but nowhere near the variety Colorado offers. The flipside? Not as many people in California are chasing those 14,000-foot summits. In Colorado, the peaks are buzzing with climbers, creating a stark contrast to the more solitary climbs I initially experienced.
After my first few successful summits in California, I felt invincible. I tackled these mountains car-to-car and stuck to routes no harder than Class 4. Climbing solo felt completely fine—until the day I experienced altitude sickness, which completely changed my perspective.

California’s 14ers a bit more technical and challenging than most of Colorado’s 14ers. Photo by Dalton Johnson
My Altitude Sickness Story
Without giving it much thought, I drove from Santa Cruz, CA, straight to the base of a California 14er. I slept in my van and woke up the next morning ready to summit. As I climbed, I began to feel dizzy and developed a pounding headache. At first, I dismissed these symptoms as minor annoyances, but they grew worse with every step. I had to stop several times just to collect my thoughts and regain my balance. I didn’t know what was wrong, but I stubbornly pushed on to the summit and eventually made it back to my van.
I practically collapsed into bed, falling into a restless sleep. When I woke up a few hours later, night had fallen, and I felt worse—still dizzy and increasingly nauseous. To give you an idea of how bad it was, I wrote a note in my journal apologizing to my parents in case the worst happened. In that moment, I truly feared for my life, alone in the dark with no one to help.
Thankfully, I woke up the next morning feeling normal again. The dizziness and headache were gone. I brushed it off as just a fluke and didn’t think about it much—until I gained more experience and realized what had happened. It was a hard-earned lesson in the dangers of solo climbing and the unpredictability of altitude.
Every time I reach the summit, I get a high. Some may call it my addiction. Photo by Dalton Johnson
The Risks of Climbing Alone
After learning more about altitude, I realized I had experienced altitude sickness. Looking back, I know how much worse it could have gotten. Altitude sickness can escalate quickly, and when you’re alone, there’s no one to monitor your condition or help you make critical decisions.
Solo climbers face unique risks. A fall, sudden weather changes, or getting lost can turn into life-threatening situations without the support of a partner. The more remote the peak, the greater the stakes. My experience taught me that even seemingly straightforward climbs can become dangerous when you’re unprepared or overconfident.
Since that day, I’ve continued climbing 14ers alone but with a lot more caution. I always take the time to acclimate properly before heading up, and I listen to my body. If I could go back and give my inexperienced self some advice, I’d say: Don’t climb 14ers alone until you know what you’re doing.
Why You Shouldn’t Start Solo
When you’re new to 14ers, climbing with a partner or group is a smart choice. Here’s why:
Safety in Numbers: If something goes wrong—whether it’s altitude sickness, a fall, or getting lost—having someone with you can be life-saving. A partner can assist in emergencies, share gear, or call for help if needed.
Shared Knowledge: A more experienced partner can guide you on pacing, hydration, route-finding, and what to do if symptoms of altitude sickness appear. Learning from someone else’s expertise can accelerate your skills and confidence.
Support System: Even if nothing goes wrong, having someone to encourage you and share the experience makes the climb more enjoyable. The camaraderie of climbing with others often enhances the overall adventure.
For your first few climbs, having someone with you is not just about safety; it’s about building a foundation of knowledge and confidence for future solo attempts.

Climbing above the clouds while making a sunrise summit bid on a Colorado 14er. Photo by Dalton Johnson
If You Do Climb Alone
If you’re set on tackling a 14er solo, preparation is key. Here are some steps to make your climb safer:
Acclimate Properly: Spend time at higher altitudes in the days leading up to your climb. Avoid heading straight from sea level to 14,000 feet like I did. Gradual acclimatization can reduce your risk of altitude sickness.
Know the Symptoms: Familiarize yourself with the signs of altitude sickness—dizziness, headache, nausea—and be ready to turn back if they appear. Don’t ignore your body’s warning signs.
Carry the Essentials: Bring plenty of water, high-calorie snacks, layers, a first-aid kit, and a GPS device or map. Redundancy in navigation tools is essential in case one fails.
Choose Your Route Wisely: Start with well-trafficked, Class 1 or Class 2 routes where you’re likely to encounter other hikers. These routes are generally safer and easier to follow.
Tell Someone Your Plan: Always let a trusted friend or family member know your route and expected return time. This step is crucial for ensuring help can be dispatched if something goes wrong.
Check the Weather: Monitor the forecast closely and be prepared for sudden changes. Mountain weather can be unpredictable, and storms can roll in quickly.
Solo climbing can be incredibly rewarding, but it’s not without its challenges. Proper preparation can make the difference between a successful summit and a dangerous situation.
Kristin summiting Mount of the Holy Cross in Colorado. Photo by Dalton Johnson
Is It Dumb to Climb 14ers Alone?
Not necessarily—but it depends on your experience level, preparation, and awareness of the risks. When I was just starting out, climbing 14ers solo was a gamble I didn’t fully understand. Now, with more knowledge and preparation, I know how to mitigate the dangers and enjoy the solitude.
Solo climbing has its rewards: the sense of independence, the peace of being alone in nature, and the personal accomplishment of reaching the summit on your own. But safety should always come first. If you’re new to climbing 14ers, I recommend finding a buddy for your first climbs. The mountains aren’t going anywhere, and building your skills with others can make solo climbing safer and more fulfilling in the long run.