
Experience Mount Shasta Like A Local Adventurer
Nestled in the northern reaches of California, Mount Shasta is a towering sentinel that beckons adventurers with its snow-capped peaks and rugged beauty. Standing at 14,179 feet, this dormant stratovolcano offers a diverse playground for outdoor enthusiasts. Whether you're drawn to exhilarating climbs, serene stargazing, or thrilling water activities, Mount Shasta promises an array of adventures set against a backdrop of breathtaking landscapes. In this guide, we'll explore the best ways to experience Mount Shasta like a local adventurer, ensuring you make the most of your journey to this iconic destination.
Nestled in the northern reaches of California, Mount Shasta is a towering sentinel that beckons adventurers with its snow-capped peaks and rugged beauty. Standing at 14,179 feet, this dormant stratovolcano offers a diverse playground for outdoor enthusiasts. Whether you're drawn to exhilarating climbs, serene stargazing, or thrilling water activities, Mount Shasta promises an array of adventures set against a backdrop of breathtaking landscapes. In this guide, we'll explore the best ways to experience Mount Shasta like a local adventurer, ensuring you make the most of your journey to this iconic destination.
Passing the Thumb on Mount Shasta. Photo by Dalton Johnson
Why An Adventure Traveler Should Visit Mount Shasta
Mount Shasta's allure extends beyond its sheer size and grandeur. This volcanic giant is a magnet for those seeking both challenge and tranquility. Its expansive wilderness offers a myriad of adventures, from scaling its snowy slopes to exploring its verdant forests. The mountain's unique geography creates a range of microclimates, ensuring varied experiences in each season. The local culture is steeped in history and mystique, adding depth to your adventure. For those who thrive on outdoor escapades, Mount Shasta is an unmissable destination that seamlessly blends natural beauty with thrilling activities.
Top Adventures You Don't Want to Miss
Hiking
Castle Lake Trail: This moderate 4.5-mile hike rewards you with stunning views of Castle Lake and Mount Shasta. The trail offers a blend of forested paths and rocky terrain, making it a great option for those seeking a balanced hike.
Heart Lake: For a more challenging hike, tackle the 8.6-mile trek to Heart Lake. This trail takes you through alpine meadows and dense forest before reaching the serene lake, where you can enjoy panoramic views of Mount Shasta.
Shasta-Trinity National Recreation Area: With numerous trails ranging from easy to strenuous, this area offers endless hiking opportunities. Explore the Pacific Crest Trail or venture into lesser-known paths for a more secluded experience.
Peak Bagging
Mount Shasta Summit: For experienced climbers, summiting Mount Shasta is the ultimate challenge. The climb requires technical skills and preparation, but the reward is a breathtaking view from the top. Join a guided expedition or prepare thoroughly if you choose to tackle the climb independently.
South Side Route: A popular route for summit attempts, the South Side Route offers a less technical ascent compared to other paths. However, it still demands physical endurance and proper acclimatization.
Green Butte Ridge: This alternative peak offers a less crowded climb with spectacular views of Mount Shasta and the surrounding landscape. It's a great option for those looking to experience peak bagging without the intensity of a summit attempt.
Camping
McBride Springs Campground: Located in the Shasta-Trinity National Forest, this campground offers a peaceful setting with stunning views of Mount Shasta. Enjoy easy access to hiking trails and fishing spots.
Alpine Lodge Campground: Nestled in a picturesque location near the base of Mount Shasta, this campground provides a rustic experience with basic amenities. It's a great base for exploring the surrounding wilderness.
Boulder Creek Campground: A bit farther from the mountain but still within reach, Boulder Creek offers a more remote camping experience. Enjoy the solitude and take advantage of the nearby creek for a refreshing dip.
Cliff Jumping
Castle Lake: Known for its clear waters and scenic surroundings, Castle Lake is a popular spot for cliff jumping. The surrounding rock formations provide various heights for an adrenaline-pumping jump.
Lake Siskiyou: Another great location for cliff jumping, Lake Siskiyou features several cliff edges that offer different jump heights. The lake's warm waters and beautiful views make it a favorite among locals.
Shasta Lake: For those seeking a more adventurous experience, Shasta Lake's cliffs provide several spots for cliff jumping. Ensure you check water levels and local conditions before taking the plunge.
Stargazing
Mount Shasta City Park: With minimal light pollution, Mount Shasta City Park is an ideal spot for stargazing. Bring a telescope or simply lay back and enjoy the celestial display above.
Shasta-Trinity National Forest: Venture into the forested areas for an even more secluded stargazing experience. The dark skies here provide excellent visibility for observing constellations and meteor showers.
Boulder Creek: The remote location of Boulder Creek offers clear, unobstructed views of the night sky. It's a perfect spot for those looking to escape city lights and immerse themselves in the wonders of the cosmos.
Rock Climbing
Sabrina Pinnacles: A renowned climbing area near Mount Shasta, the Sabrina Pinnacles offer a range of routes for climbers of all skill levels. The granite formations provide challenging climbs with rewarding views.
Castle Crags: Known for its striking rock spires, Castle Crags is a favorite among climbers. The area offers a variety of routes, from easy to advanced, catering to different levels of experience.
Shasta-Trinity National Recreation Area: Explore the climbing opportunities within this vast area, where you'll find a range of rock formations and routes to suit your preferences.
Fishing
Lake Siskiyou: Known for its abundant trout and bass, Lake Siskiyou is a popular fishing spot. Enjoy a day on the water or relax by the shore while casting your line.
Castle Lake: This clear, cold lake is home to various fish species, including brook trout. The scenic setting adds to the experience, making it a great spot for a peaceful fishing day.
McCloud River: For those seeking a river fishing experience, the McCloud River offers excellent opportunities for catching rainbow and brown trout. The river's picturesque surroundings enhance the fishing experience.
Flat Water Kayaking
Lake Siskiyou: With its calm waters and scenic views, Lake Siskiyou is perfect for flat water kayaking. Rent a kayak and explore the lake at your own pace, enjoying the tranquility and natural beauty.
Castle Lake: This smaller lake offers a more intimate kayaking experience. Paddle around the lake and take in the stunning views of Mount Shasta and the surrounding landscape.
Shasta Lake: While larger than the other options, Shasta Lake's calm sections are suitable for flat water kayaking. Enjoy the expansive waters and explore the lake's many inlets and coves.
SUP (Stand-Up Paddleboarding)
Lake Siskiyou: Ideal for beginners and experienced paddlers alike, Lake Siskiyou offers smooth waters perfect for SUP. Take in the views of Mount Shasta while gliding across the lake.
Castle Lake: For a more serene SUP experience, Castle Lake provides a peaceful setting with crystal-clear waters. Enjoy a leisurely paddle and soak in the natural beauty.
Shasta Lake: Explore the vast expanse of Shasta Lake on a SUP. The lake's varied shoreline offers plenty of opportunities for exploration and adventure.
Backpacking
Pacific Crest Trail: Passing through the Mount Shasta area, this iconic trail offers a range of backpacking options. Choose a section that suits your time and fitness level for a memorable backcountry adventure.
Black Butte Trail: This 8.5-mile trail provides a rewarding backpacking experience with stunning views of Mount Shasta and the surrounding wilderness. The trail's diverse terrain offers a mix of challenges and scenic rewards.
Mount Shasta Wilderness: For a more remote backpacking adventure, explore the wilderness areas around Mount Shasta. You'll find a range of trails and routes to suit different preferences and skill levels.


Other Highlights of the Area
Places to Eat
Lone Pine Coffee: Start your day with a delicious coffee or breakfast at Lone Pine Coffee. This local favorite offers a cozy atmosphere and a range of tasty options to fuel your adventures.
The Goat Tavern: Enjoy a hearty meal and local craft beers at The Goat Tavern. The relaxed ambiance and diverse menu make it a great spot to unwind after a day of exploration.
Mount Shasta Brewery: Sample local brews and enjoy a casual meal at Mount Shasta Brewery. The brewery's laid-back vibe and tasty offerings make it a must-visit for beer enthusiasts.
Must-See Spots
Mount Shasta City Park: Explore the park's scenic trails, enjoy a picnic, or simply relax while taking in views of Mount Shasta. It's a great spot to unwind and soak in the beauty of the area.
Shasta Dam: Take a tour of the Shasta Dam and learn about its history and significance. The dam offers impressive views of the surrounding landscape and Lake Shasta.
McCloud Falls: Visit the stunning McCloud Falls, a series of three picturesque waterfalls located near the McCloud River. The falls provide excellent photo opportunities and a serene setting.
Photo Locations
Castle Lake Overlook: Capture panoramic shots of Castle Lake and Mount Shasta from this scenic overlook. The combination of lake and mountain views creates stunning photographic opportunities.
Shasta-Trinity National Forest: The diverse landscapes within the forest offer numerous photo-worthy spots. From lush forests to alpine meadows, you'll find plenty of opportunities to capture the beauty of Mount Shasta.
Mount Shasta from Highway 97: The views of Mount Shasta from Highway 97 provide dramatic photo opportunities, especially during sunrise and sunset.
Best Sunset Locations
Lake Siskiyou: Watch the sun set over Mount Shasta from Lake Siskiyou. The reflection of the mountain in the lake creates a breathtaking scene as the sky changes colors.
Castle Lake: The views of Mount Shasta and the surrounding landscape make Castle Lake a great spot for sunset photography. Enjoy the tranquil setting as the day comes to a close.
Mount Shasta City Park: Head to the park for a relaxing sunset experience. The open space provides unobstructed views of the mountain and the changing sky.
Great Places to Swim
Castle Lake: Dive into the refreshing waters of Castle Lake for a cool swim after a hike. The clear, cold water provides a revitalizing break.
Lake Siskiyou: Enjoy swimming in Lake Siskiyou's calm, warm waters. The lake's scenic setting makes for a pleasant and picturesque swim.
Shasta Lake: For a larger swimming area, head to Shasta Lake. The lake's expansive waters offer plenty of space for a refreshing dip.
Cultural Highlights
Mount Shasta Historical Society Museum: Learn about the history and culture of the Mount Shasta region at this local museum. Exhibits cover the area's indigenous heritage, pioneer history, and more.
Yreka: Visit the nearby town of Yreka for a taste of local history and culture. Explore its historic downtown, enjoy local eateries, and soak in the charm of this small town.
Native American Heritage: Discover the cultural significance of Mount Shasta to local Native American tribes. The mountain holds spiritual importance and is deeply embedded in their cultural traditions.

Drying off after a lovely outing to McCloud Falls in Mount Shasta, CA. Photo by Dalton Johnson
Mount Shasta stands as a beacon for adventure seekers, offering a diverse range of activities set in an awe-inspiring landscape. From the thrill of peak bagging to the serenity of stargazing, the mountain caters to every adventurer's desires. Its surrounding areas provide ample opportunities for relaxation and cultural exploration, making it a destination where adventure and discovery go hand in hand. Embrace the challenge, enjoy the beauty, and experience Mount Shasta like a local adventurer.
Discover More Destinations
12 Pro Tips for Beginner Van Lifers
Van life offers a unique blend of freedom and adventure, allowing you to explore the world from the comfort of your own mobile home. For those new to van life, the transition can be both exciting and overwhelming. These 12 pro tips will help you navigate the essentials of van living, from choosing the right van to managing daily routines. With these insights, you'll be well-prepared to embark on your van life journey and make the most of your adventures on the road.
Van life offers a unique blend of freedom and adventure, allowing you to explore the world from the comfort of your own mobile home. For those new to van life, the transition can be both exciting and overwhelming. These 12 pro tips will help you navigate the essentials of van living, from choosing the right van to managing daily routines. With these insights, you'll be well-prepared to embark on your van life journey and make the most of your adventures on the road.

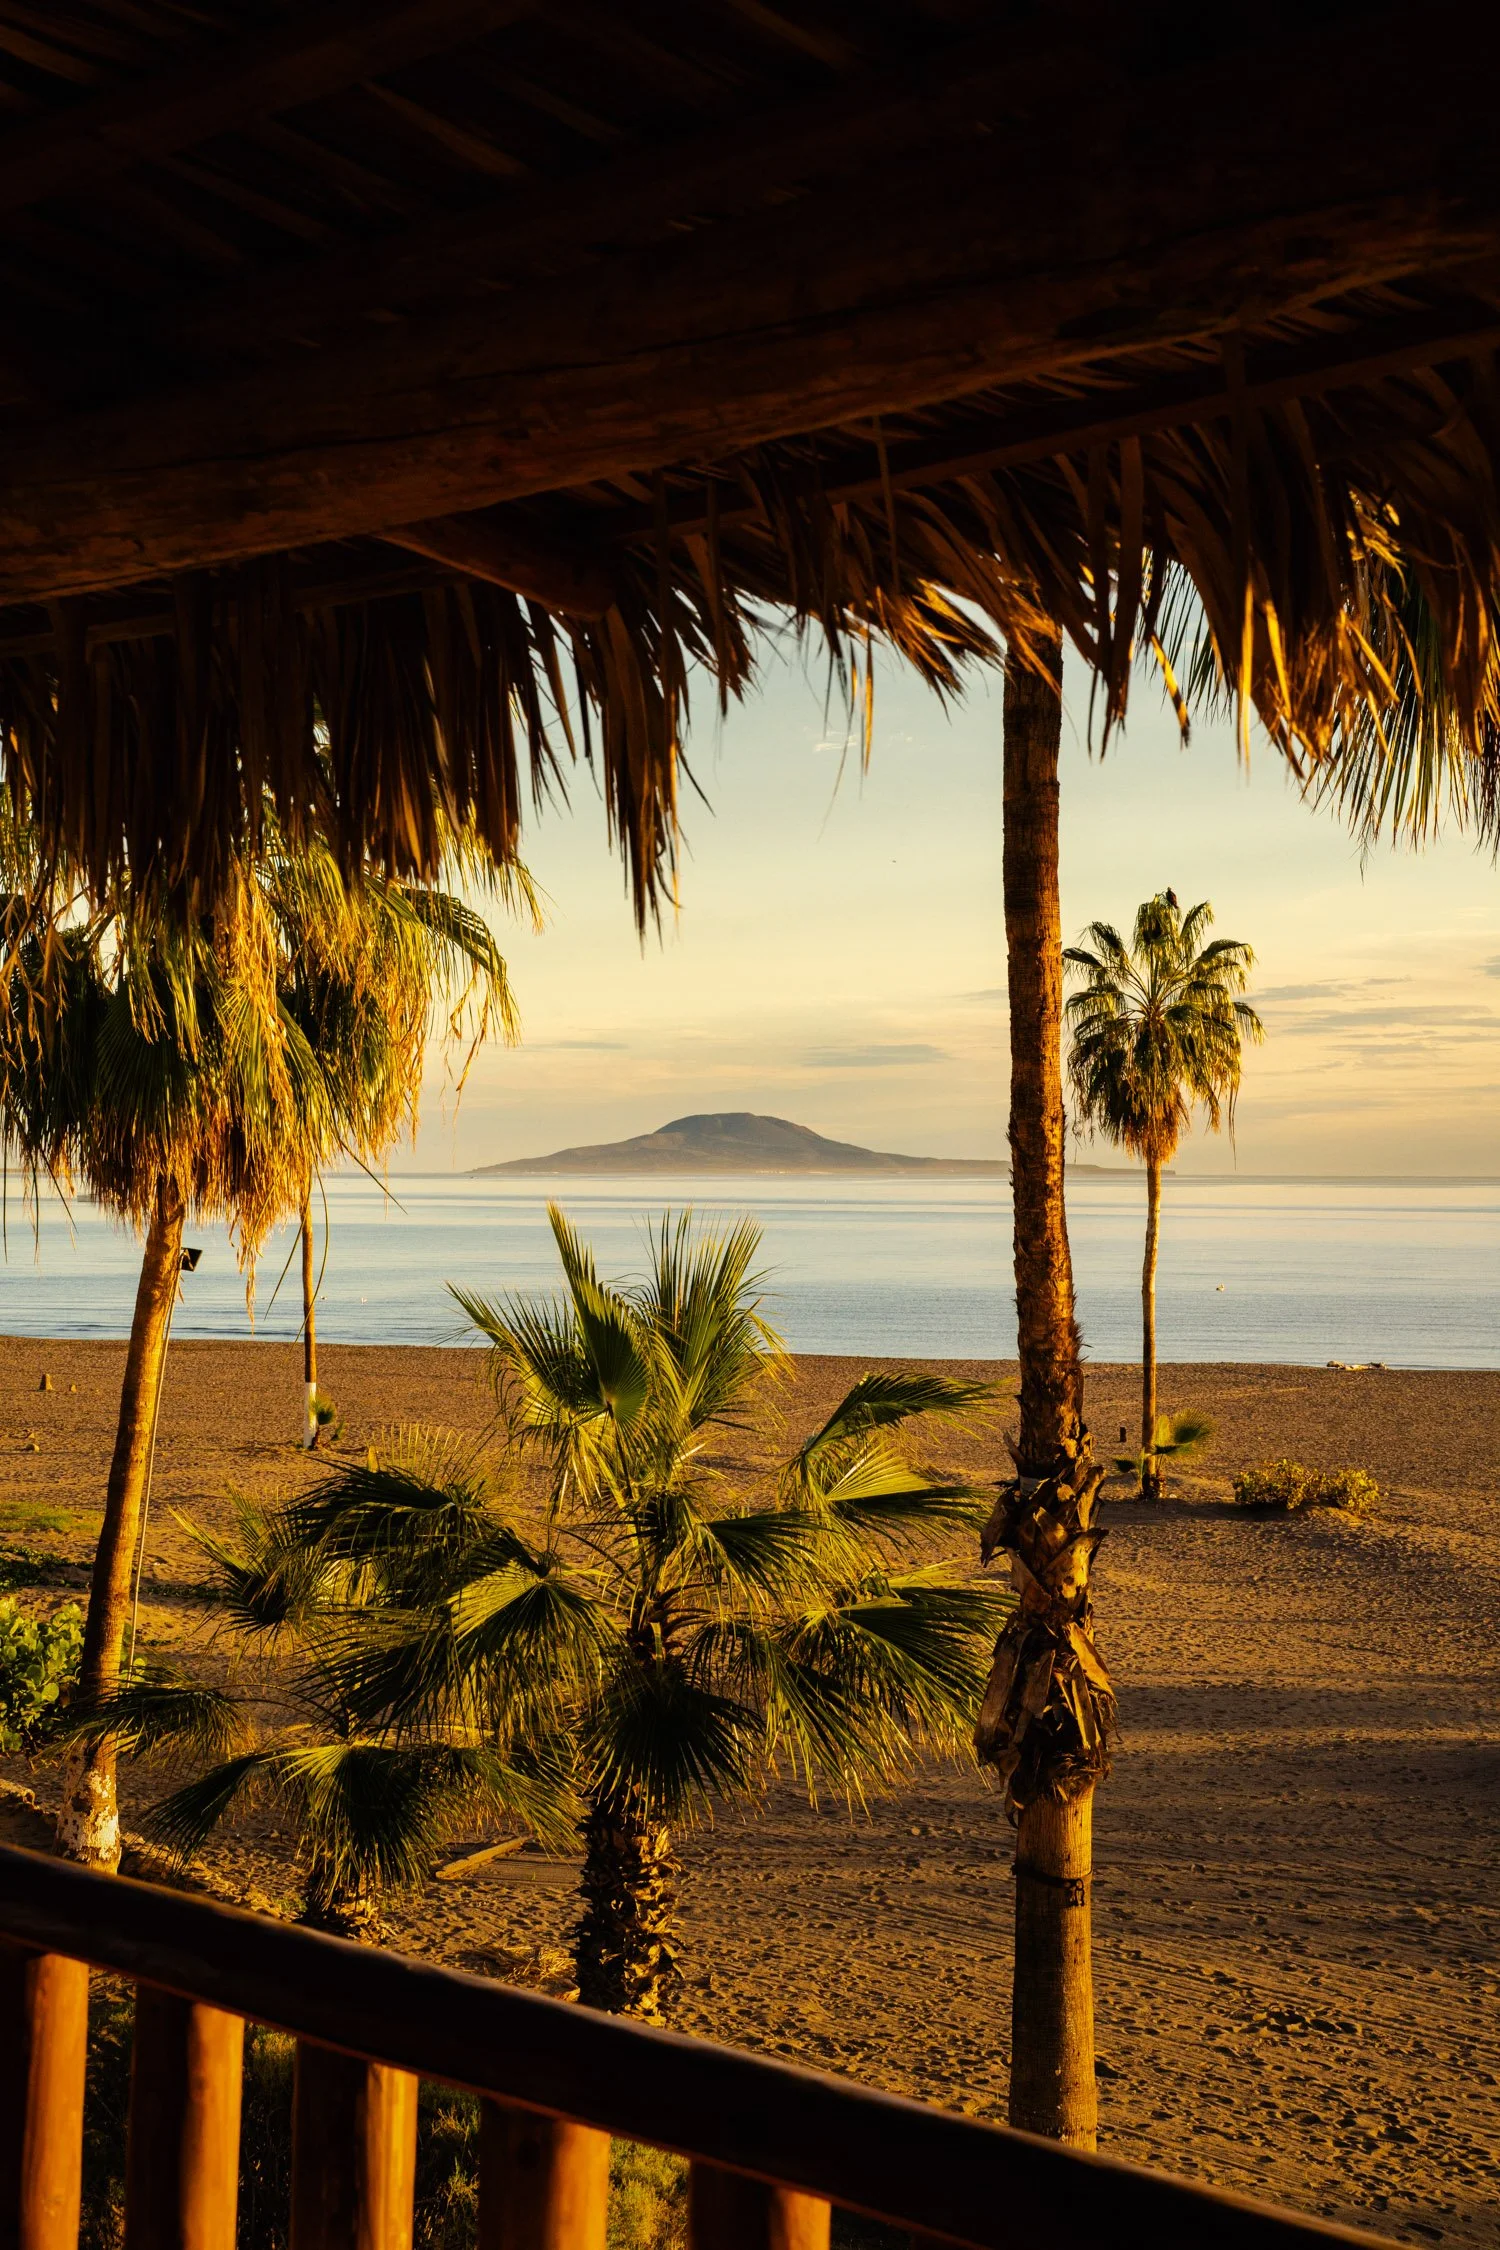
Watching the sunset out the back of the van along the Pacific Coast Highway. Photo by Dalton Johnson
Background:
Van life has gained popularity in recent years as more people seek flexible and adventurous ways to travel. Whether you're a digital nomad, a weekend warrior, or someone looking for a change of pace, van life offers a unique lifestyle that combines mobility with a sense of home. The concept has evolved from simple road trips to a full-fledged lifestyle, with customized vans and sophisticated setups catering to various needs and preferences.
12 Pro Tips for Beginner Van Lifers:
1. Choose the Right Van
Selecting the right van is the foundation of a successful van life experience. Consider factors such as size, layout, and amenities. Whether you opt for a compact van for urban travel or a larger camper for extended journeys, ensure it meets your needs for comfort and functionality. Research different van models, test drive options, and think about your long-term plans before making a decision.
2. Plan Your Van Layout
A well-thought-out van layout maximizes space and enhances your comfort on the road. Plan your layout based on your daily needs, including sleeping arrangements, cooking facilities, and storage. Utilize space-saving solutions such as foldable furniture, multi-purpose items, and efficient storage compartments. A functional layout makes van life more enjoyable and practical.
3. Invest in Essential Equipment
While gear isn’t the main focus, having the right equipment can greatly improve your van life experience. Invest in high-quality essentials such as a portable stove, a reliable cooler or fridge, and a comfortable mattress. Consider items like solar panels or portable chargers to keep your electronics powered. Quality equipment enhances your comfort and convenience on the road.
4. Stay Organized
Organization is key to maintaining a comfortable living space in a van. Use storage bins, organizers, and hanging racks to keep your belongings in order. Designate specific areas for different items and regularly declutter to prevent accumulation of unnecessary items. An organized van makes daily living more efficient and enjoyable.
5. Master Basic Maintenance
Regular maintenance ensures your van remains in good working condition. Learn basic skills such as checking and changing oil, monitoring tire pressure, and troubleshooting minor issues. Keep a maintenance schedule and address any problems promptly to avoid breakdowns and costly repairs. Basic maintenance knowledge empowers you to handle common issues on the road.


6. Embrace Minimalism
Van life often requires a minimalist approach to living. Embrace the idea of having only what you need and prioritize essential items. This approach not only reduces clutter but also simplifies your daily routine. Focus on quality over quantity and choose versatile items that serve multiple purposes.
7. Plan for Hygiene and Comfort
Maintaining hygiene and comfort in a van can be challenging but essential. Consider solutions such as portable toilets, solar showers, or access to public facilities. Bring personal care items like biodegradable soap and a towel for quick clean-ups. Staying clean and comfortable enhances your overall van life experience.
8. Find Reliable Campsites
Finding suitable places to park and camp is crucial for a successful van life journey. Research and use apps or websites to locate campgrounds, RV parks, and public lands where overnight parking is permitted. Respect local regulations and practice good etiquette to ensure a positive experience at each campsite.
9. Manage Your Waste
Proper waste management is vital for maintaining cleanliness and environmental responsibility. Set up a system for disposing of trash and recyclables, and use waste bags or bins to keep your van clean. Consider options for composting or reducing waste, and follow Leave No Trace principles to minimize your impact on nature.
10. Stay Connected
Staying connected while on the road can be important, especially if you’re working remotely or need access to information. Invest in a reliable mobile hotspot or use cellular data to stay online. Plan your routes to include places with good internet access, and consider backup options for connectivity when traveling through remote areas.
11. Explore Local Resources
When traveling, take advantage of local resources such as laundromats, grocery stores, and service centers. Familiarize yourself with nearby facilities and services to make your journey more convenient. Locals often provide valuable recommendations and insights into the best spots and resources in the area.
12. Enjoy the Journey
Van life is as much about the journey as it is about the destinations. Embrace the flexibility and freedom that comes with living on the road. Take time to explore new places, meet fellow travelers, and enjoy spontaneous adventures. The joy of van life lies in the experiences and memories you create along the way.
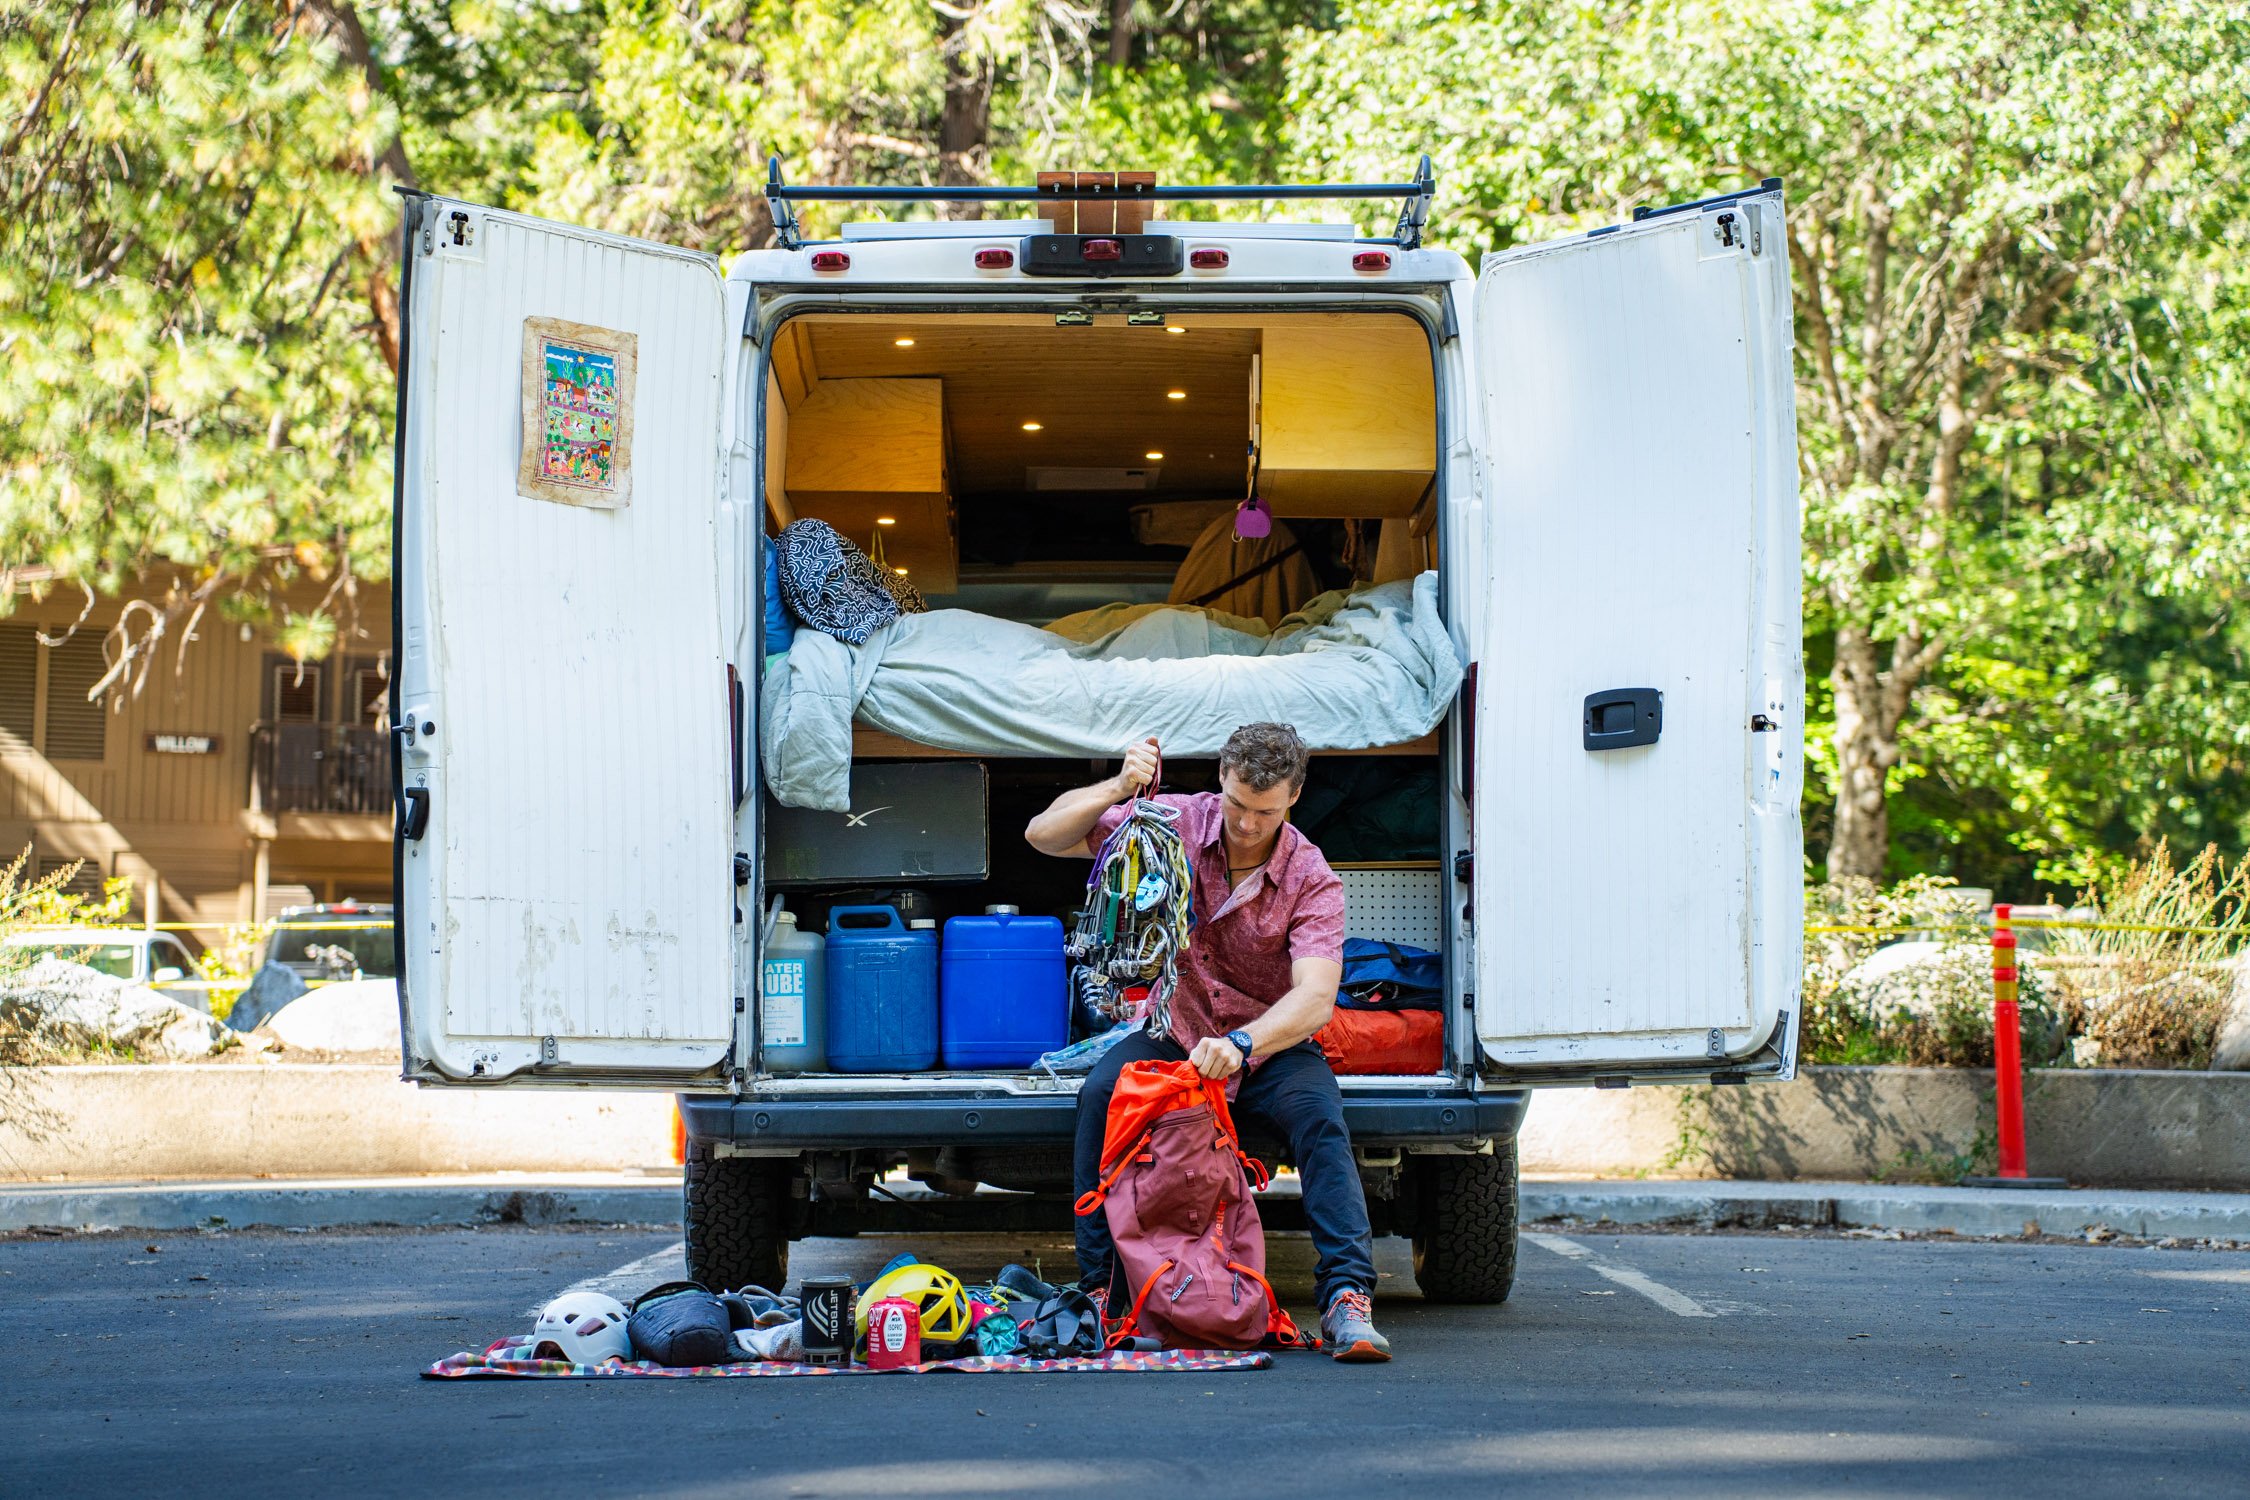
Packing a bag for a full day of rock climbing in Yosemite National Park. Photo by Dalton Johnson
Embarking on a van life adventure opens up a world of possibilities and experiences. By following these 12 pro tips, you’ll be well-equipped to navigate the challenges and joys of van living. Embrace the freedom, stay organized, and enjoy every moment of your journey on the road. With the right preparation and mindset, van life can be an enriching and fulfilling lifestyle choice.
Discover more Adventures


12 Pro Tips for Beginner Stargazers
Stargazing is a captivating way to connect with the cosmos and explore the wonders of the night sky. Whether you're a newcomer to the night sky or looking to enhance your celestial observations, these 12 pro tips will help you make the most of your stargazing experience. From understanding basic astronomical concepts to selecting the best viewing locations, these tips will guide you as you embark on your journey through the stars.
Stargazing is a captivating way to connect with the cosmos and explore the wonders of the night sky. Whether you're a newcomer to the night sky or looking to enhance your celestial observations, these 12 pro tips will help you make the most of your stargazing experience. From understanding basic astronomical concepts to selecting the best viewing locations, these tips will guide you as you embark on your journey through the stars.
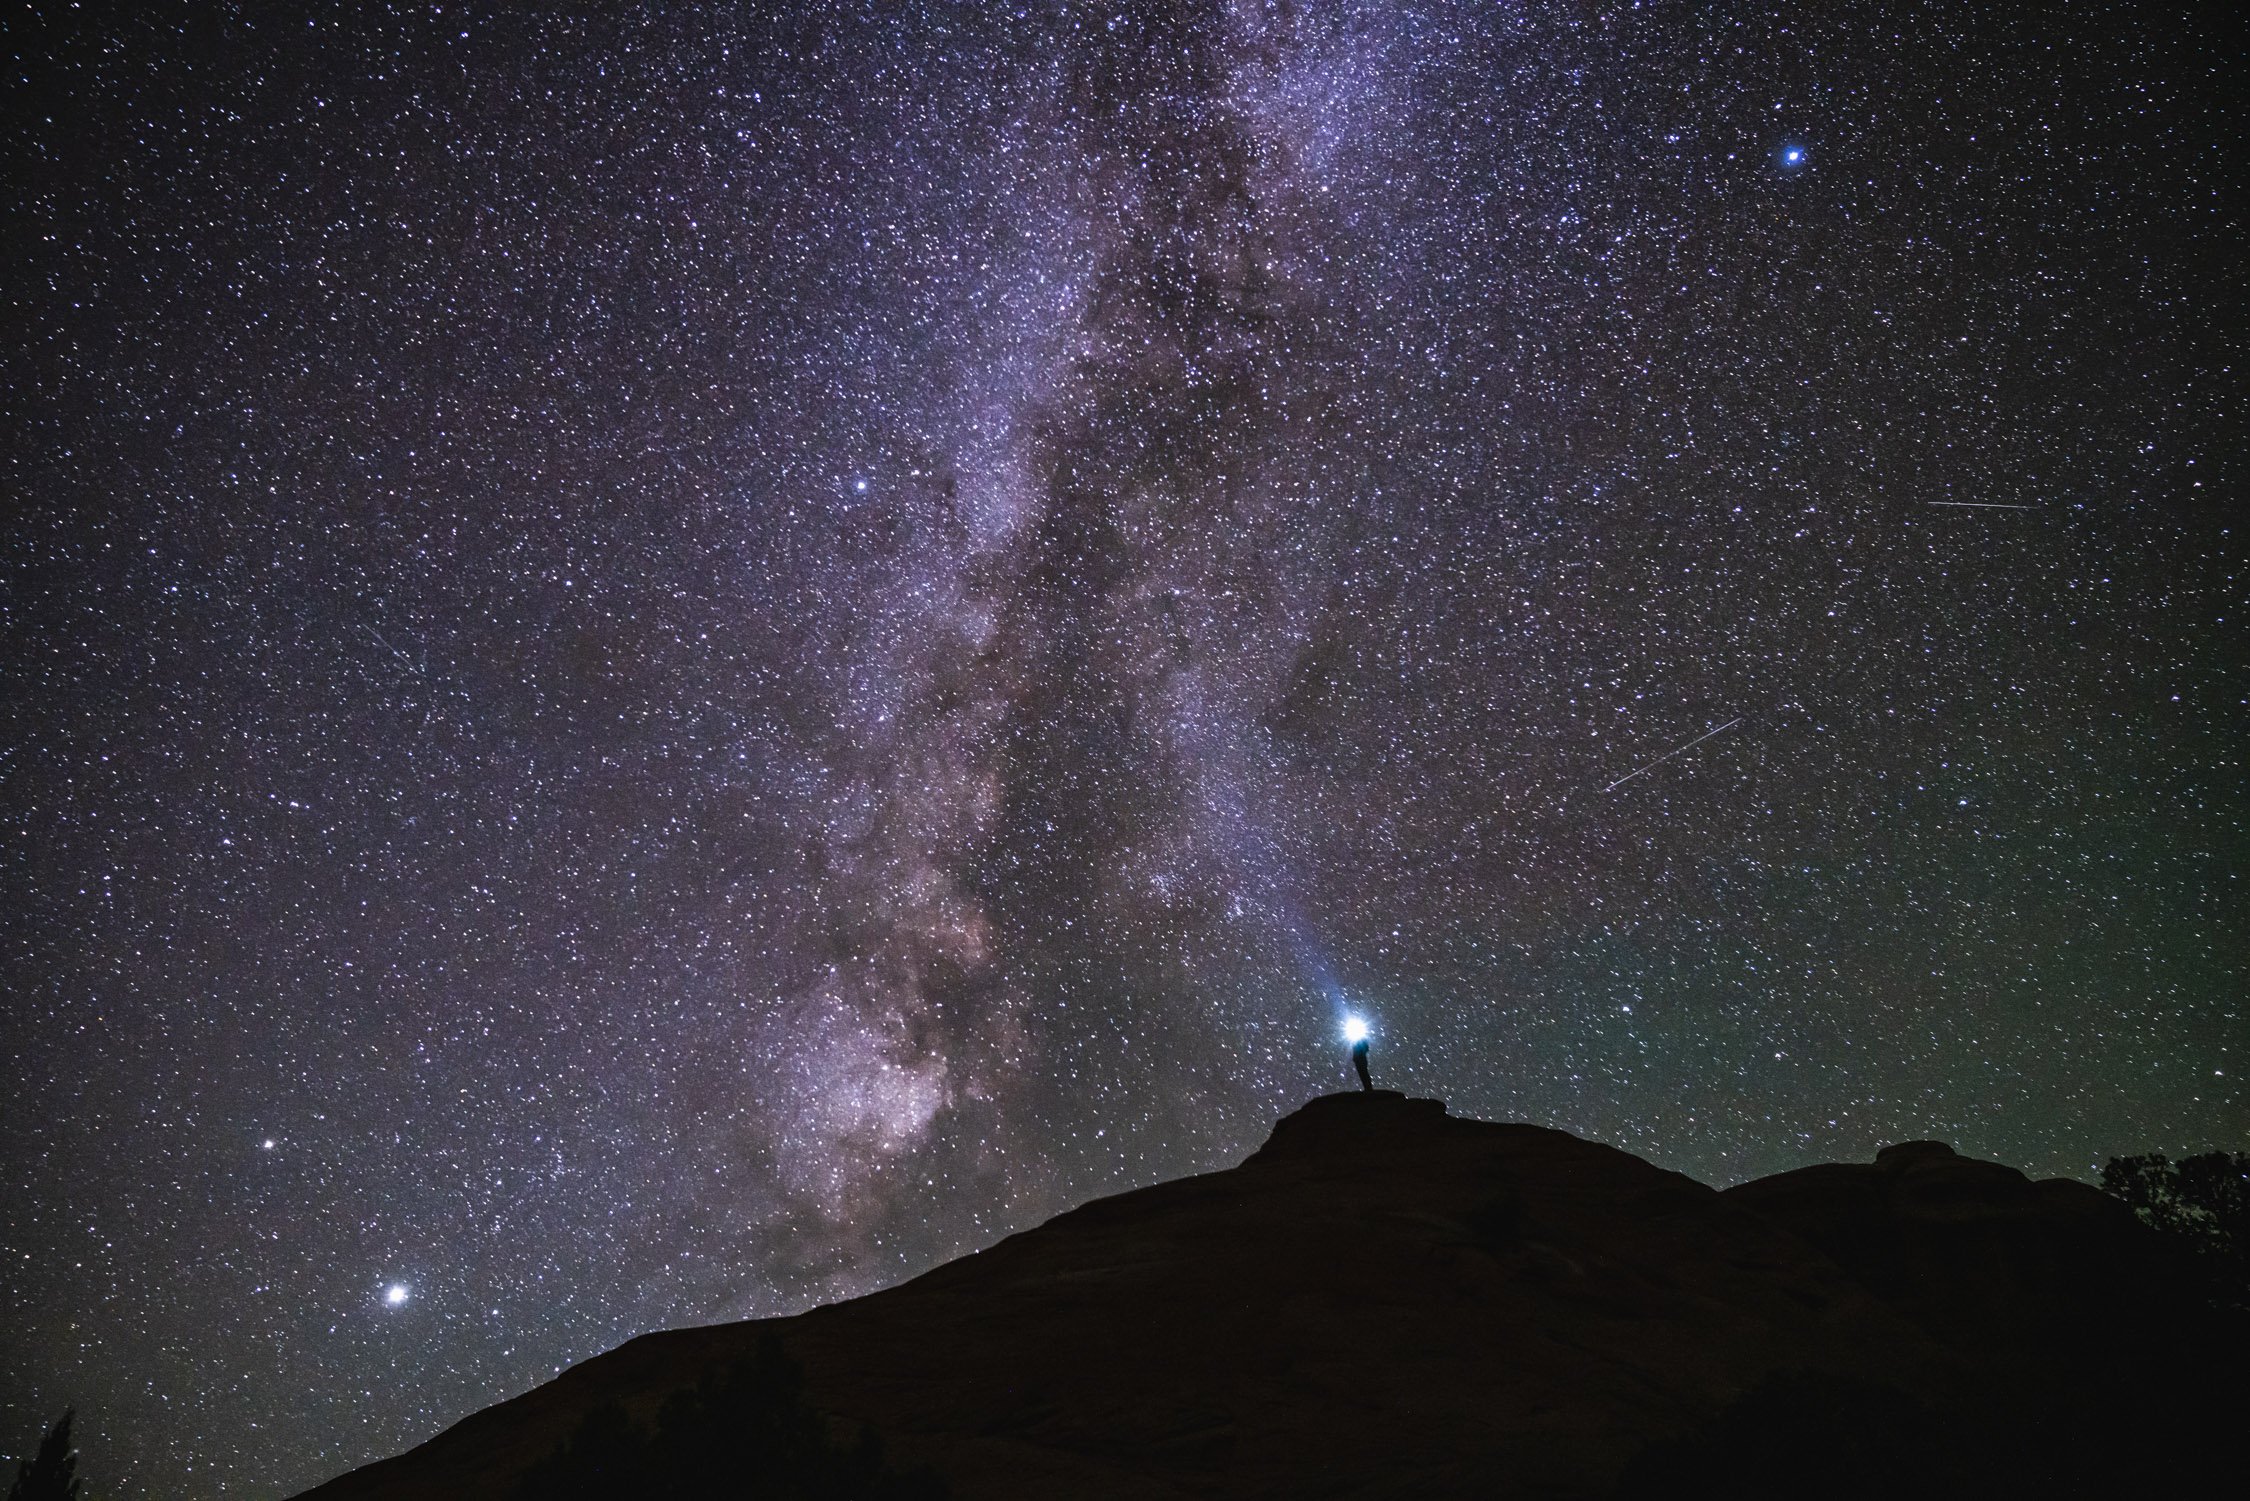
Soaking in the Milky Way while under the dark skies of the Moab area. Photo by Dalton Johnson
Background:
Stargazing has been a source of fascination and inspiration for centuries, with cultures around the world using the night sky for navigation, storytelling, and scientific discovery. From ancient astronomers to modern astrophysicists, people have long been intrigued by the stars and planets. Today, stargazing is accessible to everyone, offering a serene and awe-inspiring way to experience the universe. With the right knowledge and tools, anyone can enjoy the beauty and mystery of the night sky.
12 Pro Tips for Beginner Stargazers:
1. Choose a Dark Sky Location
To get the best stargazing experience, find a location away from city lights and light pollution. Dark sky sites, such as national parks or rural areas, offer clearer views of celestial objects. Use light pollution maps or apps to find suitable stargazing spots near you. The darker the sky, the more stars and celestial features you'll be able to see.
2. Check the Weather
Clear skies are essential for stargazing, so always check the weather forecast before heading out. Look for nights with minimal cloud cover and low humidity. Avoid stargazing during or immediately after rain, as moisture in the air can reduce visibility. Planning your stargazing sessions around favorable weather conditions ensures a more enjoyable experience.
3. Use a Star Map or App
Star maps and stargazing apps are invaluable tools for identifying constellations and celestial objects. Many apps offer interactive features that help you locate stars, planets, and constellations based on your location and the current date. Familiarize yourself with basic constellations and major stars to enhance your understanding of the night sky.
4. Allow Your Eyes to Adjust
Your eyes need time to adjust to darkness for optimal stargazing. Spend at least 20-30 minutes in the dark before starting your observations. Avoid looking at bright lights or using your phone's screen, as this can ruin your night vision. Once your eyes adjust, you'll be able to see fainter stars and details more clearly.
5. Bring Binoculars or a Telescope
While the naked eye can reveal many wonders of the night sky, binoculars or a telescope can enhance your view. Binoculars are portable and easy to use, making them ideal for beginners. Telescopes offer more detailed views of celestial objects but require more setup and practice. Choose the right equipment based on your interest and level of commitment.
6. Learn to Identify Constellations
Constellations are a great starting point for beginner stargazers. Learning to identify key constellations helps you navigate the night sky and locate other celestial objects. Start with prominent constellations like Orion, Ursa Major, and Cassiopeia. Use star maps or apps to assist in recognizing and locating these star patterns.
7. Observe the Moon and Planets
In addition to stars, the Moon and planets are fascinating targets for stargazing. The Moon's phases offer different viewing experiences, from craters and mountains to lunar eclipses. Planets such as Jupiter, Saturn, and Mars can be visible at different times of the year. Check planetary visibility charts to know when and where to observe these celestial bodies.
8. Understand Light Pollution
Light pollution affects stargazing by obscuring the visibility of stars and other celestial objects. Familiarize yourself with different types of light pollution, such as skyglow, glare, and light trespass. Take measures to minimize light pollution in your viewing area, such as using red LED lights and avoiding direct lighting.
9. Stay Warm and Comfortable
Stargazing often involves spending extended periods outdoors, especially during colder months. Dress in layers and bring blankets or reclining chairs to stay warm and comfortable. Pack snacks and hot drinks to make your stargazing session more enjoyable. Staying comfortable ensures you can focus on the night sky without distractions.
10. Capture Your Stargazing Moments
Consider photographing the night sky to preserve your stargazing experiences. Basic astrophotography can be achieved with a smartphone or a camera with manual settings. Use a tripod to reduce camera shake and experiment with long-exposure settings to capture stars, constellations, and even the Milky Way. Capturing images of the night sky allows you to share your experiences and review your observations later.
11. Join a Stargazing Group
Connecting with other stargazers can enhance your learning experience and provide valuable insights. Join local astronomy clubs, attend stargazing events, or participate in online forums. Engaging with a community of fellow enthusiasts offers opportunities to share knowledge, ask questions, and enjoy group observations.
12. Be Patient and Enjoy the Process
Stargazing is a practice that requires patience and curiosity. The more you observe the night sky, the more you'll learn about its patterns and phenomena. Take your time to enjoy the process, appreciate the beauty of the cosmos, and marvel at the wonders of the universe. Each stargazing session is an opportunity for discovery and awe.
The Milky Way going crossing behind Bonsai Rock in Lake Tahoe. Photo by Dalton Johnson
Stargazing is a rewarding and accessible hobby that allows you to explore the mysteries of the night sky. By following these 12 pro tips, you’ll be well-prepared to enjoy clear views of stars, planets, and other celestial wonders. Embrace the journey of discovery, and let the beauty of the cosmos inspire you. With patience and practice, you’ll find stargazing to be a fulfilling and enchanting experience.
Discover more Adventures

12 Pro Tips for Beginner Peak Baggers
Peak bagging is an exhilarating challenge that combines the thrill of reaching mountain summits with the satisfaction of conquering new heights. For beginners, the world of peak bagging can seem daunting, with its rugged terrains and high-altitude conditions. However, with the right preparation and knowledge, you can embark on your peak bagging journey with confidence. These 12 pro tips will guide you through the essentials of peak bagging, helping you safely and successfully reach new summits.
Peak bagging is an exhilarating challenge that combines the thrill of reaching mountain summits with the satisfaction of conquering new heights. For beginners, the world of peak bagging can seem daunting, with its rugged terrains and high-altitude conditions. However, with the right preparation and knowledge, you can embark on your peak bagging journey with confidence. These 12 pro tips will guide you through the essentials of peak bagging, helping you safely and successfully reach new summits.
Crossing the last few steps towards the summit block of Starlight peak in the High Sierra. Photo by Dalton Johnson
Background:
Peak bagging is a popular pursuit among outdoor enthusiasts, involving the quest to summit various peaks or mountains. This activity can range from conquering local hills to tackling some of the highest and most challenging peaks worldwide. Historically, peak bagging has been a part of mountaineering and exploration, offering a sense of accomplishment and adventure. Today, it continues to attract those seeking to push their limits and experience the beauty of high-altitude landscapes.
12 Pro Tips for Beginner Peak Baggers:
1. Start with Smaller Peaks
As a beginner peak bagger, it’s wise to start with smaller, less challenging peaks to build your experience and confidence. Opt for summits with moderate elevation gains and well-established trails. This allows you to gradually acclimate to the physical demands and technical aspects of peak bagging. Once you’re comfortable with smaller peaks, you can progressively tackle more difficult summits.
2. Research Your Peaks
Before setting out, thoroughly research the peaks you plan to climb. Understand the route, difficulty level, and weather conditions. Familiarize yourself with the peak’s elevation, terrain, and any technical requirements. Knowledge of the peak and its challenges will help you prepare effectively and set realistic expectations for your climb.
3. Train for Physical Fitness
Peak bagging demands a high level of physical fitness, especially for longer and steeper climbs. Incorporate a training regimen that includes cardiovascular exercises, strength training, and endurance workouts. Focus on building leg strength, core stability, and overall stamina. Proper training will improve your performance and reduce the risk of fatigue and injury during climbs.
4. Acclimate to Altitude
Altitude can significantly impact your performance and well-being during peak bagging. To minimize the risk of altitude sickness, acclimate gradually by spending time at higher elevations before your climb. Ascend slowly, taking breaks to adjust to the altitude. Understanding the symptoms of altitude sickness and knowing how to respond is crucial for a safe climbing experience.
5. Check Weather Conditions
Weather conditions play a crucial role in peak bagging, affecting both safety and enjoyment. Always check the weather forecast before your climb and be prepared for changing conditions. Mountain weather can be unpredictable, so bring appropriate clothing and gear for various scenarios. Avoid climbing in severe weather conditions such as storms or high winds.
6. Plan Your Route
Effective route planning is essential for a successful peak bagging adventure. Choose a route that matches your skill level and experience, and make sure to study maps and guidebooks. Consider factors such as trailhead access, navigation, and potential hazards. Having a clear route plan helps you stay on track and navigate the mountain safely.
7. Bring Essential Gear
While gear selection can vary depending on the peak and conditions, certain essentials are crucial for peak bagging. Carry a map, compass, first aid kit, headlamp, and emergency supplies. Also, pack sufficient food and water for the climb. Essential gear ensures you’re prepared for emergencies and unexpected situations on the mountain.
8. Practice Navigation Skills
Strong navigation skills are vital for peak bagging, especially when climbing in unfamiliar terrain. Practice using a map and compass, and consider carrying a GPS device if necessary. Learning how to read topographic maps and recognize trail markers will help you stay oriented and avoid getting lost during your climb.
9. Understand Mountain Hazards
Mountain environments present various hazards, such as rockfall, avalanches, and crevasses. Educate yourself about the specific hazards associated with the peak you’re climbing. Understand how to assess and mitigate risks, and know when to turn back if conditions become unsafe. Awareness of potential hazards helps you make informed decisions and stay safe.
10. Start Early
Starting your climb early in the day offers several advantages, including cooler temperatures and more daylight. Early starts help you avoid afternoon thunderstorms and provide ample time to complete your climb before darkness sets in. Planning an early start also allows for a more relaxed pace and reduces the risk of rushing or getting caught in adverse conditions.
11. Stay Hydrated and Nourished
Proper hydration and nutrition are crucial for peak bagging, especially at higher elevations. Drink plenty of water before and during your climb, and consume energy-rich snacks to maintain your energy levels. Avoid heavy meals right before the climb to prevent discomfort. Staying hydrated and well-nourished helps you perform at your best and stay focused on the climb.
12. Know When to Turn Back
Knowing when to turn back is an important aspect of safe peak bagging. If you encounter unexpected challenges such as severe weather, worsening conditions, or signs of altitude sickness, don’t hesitate to abandon the climb and return to safety. It’s better to miss a summit than to risk your safety or health. Trust your judgment and prioritize your well-being.
Celebrating the summit of a Colorado 14er. Photo by Dalton Johnson
Peak bagging is a rewarding and adventurous pursuit that offers a unique sense of accomplishment. By following these 12 pro tips, you’ll be well-prepared to tackle your first peaks with confidence and safety. Remember, peak bagging is about the journey as much as the destination. Embrace the challenge, enjoy the stunning views, and savor the experience of reaching new heights.
Discover more Adventures

12 Pro Tips for Beginner Trail Runners
Trail running offers a thrilling way to combine the benefits of running with the beauty of nature. Unlike road running, trail running challenges you with varied terrain and elevation changes, making each run a unique adventure. For beginners, navigating the trails can be both exciting and intimidating. These 12 pro tips will help you start your trail running journey with confidence, ensuring you enjoy every stride and stay safe on your outdoor runs.
Trail running offers a thrilling way to combine the benefits of running with the beauty of nature. Unlike road running, trail running challenges you with varied terrain and elevation changes, making each run a unique adventure. For beginners, navigating the trails can be both exciting and intimidating. These 12 pro tips will help you start your trail running journey with confidence, ensuring you enjoy every stride and stay safe on your outdoor runs.
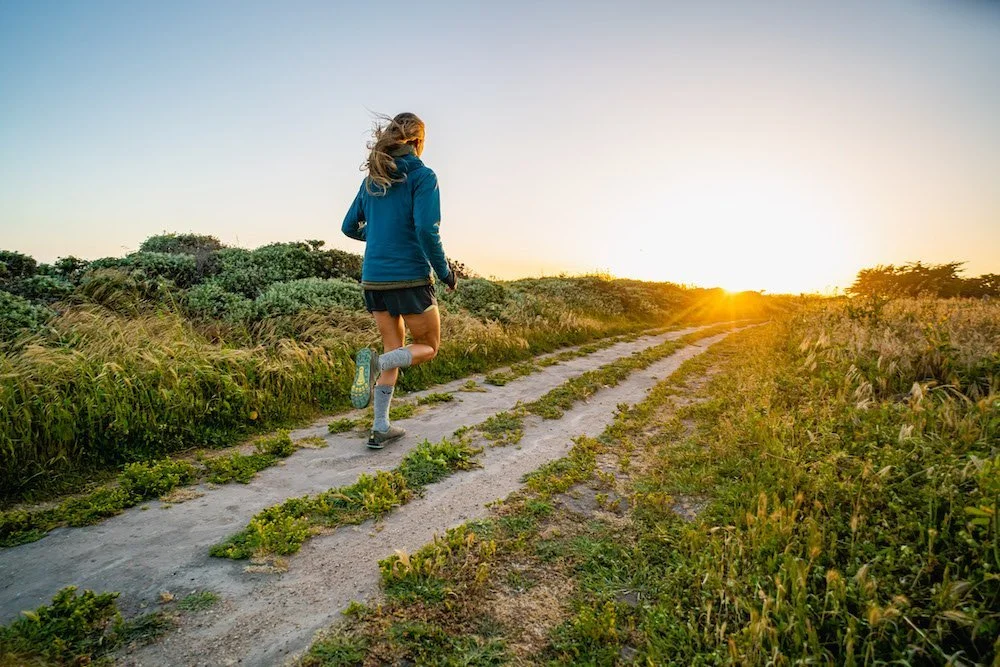
Trail running towards the sunset along the coastal trails of Santa Cruz, CA. Photo by Dalton Johnson
Background:
Trail running has gained popularity as an alternative to traditional road running, offering runners a chance to escape urban environments and connect with nature. With origins rooted in cross-country running and mountain sports, trail running encompasses a variety of terrains, from forest paths to rocky ridges. It combines the physical benefits of running with the mental rewards of outdoor exploration, providing a refreshing and dynamic experience.
12 Pro Tips for Beginner Trail Runners:
1. Start with Easy Trails
As a beginner trail runner, it’s important to start on easy, well-maintained trails. Choose routes with gentle terrain and minimal elevation changes to build your confidence and endurance. Gradually increase the difficulty of your trails as you become more comfortable and skilled. Starting with easier trails allows you to focus on mastering the basics without feeling overwhelmed.
2. Wear Proper Footwear
Trail running requires specialized footwear that provides adequate support and traction. Invest in trail running shoes designed for off-road conditions, which offer better grip and cushioning than road running shoes. Proper footwear helps prevent injuries and enhances your performance on uneven and slippery surfaces. Make sure your shoes fit well and are broken in before tackling longer runs.
3. Focus on Form and Technique
Maintaining proper form and technique is crucial for trail running, especially on uneven terrain. Keep your body upright, engage your core, and use a slight forward lean to maintain balance. Shorten your stride and land on your midfoot to reduce impact and improve stability. Developing good form will help you navigate trails more efficiently and minimize the risk of injury.
4. Stay Hydrated
Proper hydration is essential for trail running, particularly on challenging trails and during longer runs. Carry a hydration pack or bottle and drink regularly throughout your run. Be mindful of weather conditions and adjust your fluid intake accordingly. Staying hydrated helps maintain your energy levels and prevents dehydration, allowing you to perform your best on the trails.
5. Learn to Pace Yourself
Trail running often involves varying terrain and elevation changes, making it important to pace yourself effectively. Start at a comfortable pace and adjust based on the terrain and your level of exertion. Use a run-walk strategy if needed, especially on steep or technical sections. Learning to pace yourself helps you manage your energy and enjoy your run without burning out too quickly.
6. Practice Hill Running
Hills are a common feature of trail running, and practicing hill running can improve your overall performance. Incorporate hill repeats into your training routine to build strength and endurance. Focus on maintaining a steady effort and proper form while running uphill. On downhill sections, lean slightly back and keep your strides short to maintain control and reduce impact.
7. Be Mindful of the Terrain
Trail running requires awareness of the terrain you’re running on. Watch for obstacles such as rocks, roots, and uneven surfaces that can cause tripping or injury. Adjust your stride and foot placement to navigate these obstacles safely. Being mindful of the terrain helps you avoid accidents and enhances your overall trail running experience.
8. Carry Essential Gear
While trail running typically requires less gear than other outdoor activities, carrying some essentials is still important. Bring a small, lightweight pack with items such as a map, first aid kit, whistle, and energy snacks. In case of emergencies or unexpected changes in weather, having essential gear on hand can help ensure your safety and comfort.
9. Follow Trail Etiquette
Respecting trail etiquette helps maintain a positive experience for all trail users. Yield to hikers and other trail runners, especially when running downhill or on narrow paths. Keep noise levels down and avoid disturbing wildlife. By following trail etiquette, you contribute to a friendly and respectful trail environment for everyone to enjoy.
10. Check the Weather
Weather conditions can greatly impact your trail running experience. Check the weather forecast before heading out and prepare for changing conditions. Dress appropriately for the weather and be ready for sudden changes, such as rain or temperature fluctuations. Staying informed about the weather helps you plan your run and stay comfortable on the trails.
11. Use a Trail Running App
Trail running apps can provide valuable information and support for your runs. Many apps offer features such as GPS tracking, route planning, and trail maps. Use these tools to explore new trails, monitor your performance, and stay on track. Trail running apps can enhance your experience and help you make the most of your outdoor runs.
12. Enjoy the Journey
Trail running is as much about the journey as it is about the run itself. Take time to enjoy the natural beauty around you and appreciate the experience of being outdoors. Embrace the challenges and rewards of trail running, and remember that each run is an opportunity for adventure and personal growth.
Trail running along the ridge while linking two Colorado 14ers together. Photo by Dalton Johnson
Trail running offers a unique and exhilarating way to explore the outdoors while staying active. By following these 12 pro tips, you’ll be better prepared to tackle the trails with confidence and enjoy every moment of your runs. Remember, trail running is not just about speed or distance; it’s about embracing the adventure and connecting with nature. So lace up your trail running shoes, hit the trails, and discover the joys of running through the great outdoors.
Discover more Adventures

12 Pro Tips for Beginner Hikers
Hiking offers an invigorating way to connect with nature, explore beautiful landscapes, and challenge yourself physically. For beginners, stepping onto a trail can be both exciting and daunting. With the right preparation and knowledge, hiking can become a rewarding and enjoyable experience. These 12 pro tips for beginner hikers will help you start your hiking journey with confidence, ensuring you make the most of every trail and adventure.
Hiking offers an invigorating way to connect with nature, explore beautiful landscapes, and challenge yourself physically. For beginners, stepping onto a trail can be both exciting and daunting. With the right preparation and knowledge, hiking can become a rewarding and enjoyable experience. These 12 pro tips for beginner hikers will help you start your hiking journey with confidence, ensuring you make the most of every trail and adventure.
Hiking Joffre Lakes in British Columbia, Canada. Photo by Dalton Johnson
Background:
Hiking has been a cherished outdoor activity for centuries, with roots in ancient cultures that sought to explore and understand their surroundings. In modern times, hiking has evolved into a popular pastime for people seeking both recreation and exercise. Whether you’re tackling a short local trail or embarking on a longer trek, understanding the basics of hiking can enhance your experience and keep you safe on the trails.
12 Pro Tips for Beginner Hikers:
1. Start with Easy Trails
As a beginner hiker, it's essential to start with trails that match your fitness level and experience. Opt for shorter, well-marked trails with gentle terrain. This allows you to build your stamina and get comfortable with hiking before tackling more challenging routes. Gradually progress to longer and steeper trails as your confidence and skills improve.
2. Know Your Route
Before heading out, familiarize yourself with the trail you plan to hike. Study the trail map, understand the trail’s difficulty, and be aware of key landmarks. Knowing your route helps you stay oriented and prepared for any changes in the trail or unexpected obstacles. Many hiking apps and websites offer detailed trail information and maps to assist with your planning.
3. Wear Comfortable Footwear
Proper footwear is crucial for a comfortable hiking experience. Choose hiking shoes or boots that fit well, provide adequate support, and have good traction. Break in your footwear before hitting the trails to prevent blisters and discomfort. Well-fitted, comfortable shoes will help you navigate various terrains with ease and prevent injuries.
4. Dress in Layers
Weather conditions can change rapidly on the trails, so dressing in layers is key to staying comfortable. Start with moisture-wicking base layers that keep sweat away from your skin. Add insulating layers for warmth and a waterproof outer layer to protect against rain and wind. Being able to adjust your clothing based on weather conditions will keep you comfortable throughout your hike.
5. Stay Hydrated and Energized
Proper hydration and nutrition are vital for a successful hike. Carry enough water to stay hydrated, and drink regularly throughout your hike. Pack high-energy snacks, such as trail mix, granola bars, or fruit, to keep your energy levels up. Maintaining hydration and nutrition will help you stay focused and energized on the trail.
6. Practice Leave No Trace Principles
Respect for the environment is essential for preserving the natural beauty of hiking trails. Follow Leave No Trace principles, such as packing out all trash, staying on designated trails, and minimizing campfire impacts. Respect wildlife and avoid disturbing their habitat. By practicing responsible hiking, you contribute to the conservation of natural areas for future generations.
7. Use Trekking Poles
Trekking poles can provide additional stability and support, especially on uneven or steep terrain. They help reduce strain on your knees and legs and can improve your balance. If you’re hiking on challenging terrain, consider using trekking poles to enhance your stability and comfort. Practice using them on flat terrain before venturing into more challenging hikes.
8. Understand Trail Etiquette
Hiking trails are shared spaces, so it's important to follow trail etiquette to ensure a pleasant experience for everyone. Yield to hikers going uphill, as they have the right of way. If you’re hiking with others, maintain a pace that allows you to converse without disturbing others. Keep noise levels down and respect other hikers’ space on the trail.
9. Know Basic Navigation Skills
Basic navigation skills are important for staying safe and oriented on the trail. Learn how to read a trail map, use a compass, and follow trail markers. Familiarize yourself with the basics of GPS technology and how to use it for navigation. Knowing how to navigate can help you avoid getting lost and ensure a smoother hiking experience.
10. Plan for Weather Conditions
Weather can significantly impact your hiking experience, so it’s essential to check the forecast before heading out. Prepare for potential weather changes by bringing appropriate clothing and gear. Avoid hiking in severe weather conditions, such as thunderstorms or heavy rain, to reduce the risk of accidents. Planning for weather conditions helps ensure a safe and enjoyable hike.
11. Set a Comfortable Pace
Hiking is not a race, so it’s important to set a pace that’s comfortable for you. Listen to your body and take breaks as needed. If you’re hiking with a group, ensure that everyone is comfortable with the pace and adjust accordingly. Setting a comfortable pace helps you maintain stamina and enjoy the hike without overexerting yourself.
12. Carry a Basic First Aid Kit
Accidents and minor injuries can happen on the trail, so carrying a basic first aid kit is a wise precaution. Include items such as bandages, antiseptic wipes, blister treatment, and any personal medications. Knowing how to handle minor injuries can help you address issues promptly and continue your hike safely.
Hiking along the coastline of Big Sur, CA with friends. Photo by Dalton Johnson
Hiking is a wonderful way to connect with nature, improve your fitness, and enjoy the great outdoors. By following these 12 pro tips, you’ll be better prepared for your hiking adventures and able to navigate trails with confidence. Remember, hiking is about enjoying the journey and the natural beauty around you. With the right preparation and mindset, you’ll find that hiking can become a cherished and rewarding part of your life.
Discover more Adventures

12 Pro Tips for Beginner Micro Adventurers
Micro adventures offer the thrill of exploration and the joy of discovery without requiring extensive time or travel. Ideal for busy schedules, these small-scale adventures allow you to experience the outdoors and embrace adventure close to home. Whether you’re looking to escape the daily grind or simply enjoy a spontaneous adventure, these 12 pro tips will help you make the most of your micro adventures and find excitement in the everyday.
Micro adventures offer the thrill of exploration and the joy of discovery without requiring extensive time or travel. Ideal for busy schedules, these small-scale adventures allow you to experience the outdoors and embrace adventure close to home. Whether you’re looking to escape the daily grind or simply enjoy a spontaneous adventure, these 12 pro tips will help you make the most of your micro adventures and find excitement in the everyday.
Going for a sunset kayak in Lake Tahoe. Photo by Dalton Johnson
Background:
The concept of micro adventures gained popularity as a way to fit adventure into busy lives. Coined by adventurer Alastair Humphreys, micro adventures are short, affordable, and accessible outings that can be squeezed into a weekend or even a single day. They range from local hikes and bike rides to overnight camping trips in your backyard. Micro adventures are about embracing the spirit of exploration and finding joy in the little things.
12 Pro Tips for Beginner Micro Adventurers:
1. Embrace Local Destinations
One of the great benefits of micro adventures is that you don’t need to travel far to find excitement. Explore local parks, trails, and natural areas in your area. Many hidden gems can be found close to home, offering unique experiences without the need for extensive travel. Research nearby destinations and make a list of places you’d like to visit.
2. Plan Short but Sweet Outings
Micro adventures are all about maximizing your experience within a short time frame. Plan outings that fit into your schedule, whether it’s a few hours or a full day. Consider activities like sunrise hikes, sunset picnics, or evening stargazing. Short, well-planned adventures can provide a refreshing break from routine and leave you feeling rejuvenated.
3. Be Spontaneous
While planning is important, don’t be afraid to embrace spontaneity. Some of the best micro adventures come from impromptu decisions and last-minute plans. If you have a free evening or an unexpected day off, seize the opportunity to embark on a spontaneous adventure. Sometimes, the unplanned outings turn out to be the most memorable.
4. Make the Most of Your Time
Since micro adventures are brief, it’s essential to make the most of your time. Focus on activities that provide immediate rewards and enjoyment. Whether it’s exploring a new trail, trying a new sport, or simply relaxing in nature, choose activities that offer a fulfilling experience within the available time.
5. Pack Light and Smart
For short adventures, packing light is key. Bring only the essentials you need for your outing, such as water, snacks, a first aid kit, and appropriate clothing. Avoid overpacking to keep your adventure hassle-free and enjoyable. A lightweight, well-organized pack will make your adventure more comfortable and convenient.
6. Capture the Moment
Documenting your micro adventures can enhance the experience and provide lasting memories. Take photos or keep a journal to record your adventures and the joy you find in them. Sharing your experiences on social media or with friends can also inspire others to embark on their own micro adventures.
7. Embrace Minimalism
Micro adventures often require a minimalist approach, focusing on simple pleasures rather than complex plans. Embrace the idea of doing more with less and find joy in the small, everyday moments. Minimalism in your approach will help you appreciate the adventure for what it is and avoid getting bogged down by unnecessary details.
8. Prioritize Safety
Even on short adventures, safety should always be a priority. Familiarize yourself with the area you’re exploring, be aware of potential hazards, and prepare for changing weather conditions. Carry basic safety gear, such as a map, compass, and a fully charged phone, to ensure a safe and enjoyable outing.
9. Engage in New Activities
Micro adventures are a great opportunity to try new activities and step outside your comfort zone. Experiment with different outdoor pursuits, such as paddleboarding, trail running, or birdwatching. Engaging in new activities adds variety to your adventures and helps you discover new interests and passions.
10. Connect with Nature
One of the core benefits of micro adventures is the chance to reconnect with nature. Take time to observe and appreciate your natural surroundings. Listen to the sounds of wildlife, feel the textures of the environment, and immerse yourself in the beauty of the outdoors. Connecting with nature can provide a sense of peace and rejuvenation.
11. Share the Experience
Sharing your micro adventures with friends or family can enhance the experience and create lasting memories. Invite others to join you on your outings or share your adventures through social media or storytelling. Shared experiences can deepen relationships and inspire others to explore their own local adventures.
12. Reflect and Appreciate
After each micro adventure, take a moment to reflect on your experience and appreciate the time spent exploring. Consider what you enjoyed most and what you might want to try next. Reflecting on your adventures helps you build a greater appreciation for the small moments and encourages you to continue seeking out new experiences.
Jumping off a dock into the chilly waters, just because. Photo by Dalton Johnson
Micro adventures offer a gateway to exploration and enjoyment without requiring extensive time or resources. By following these 12 pro tips, you can make the most of your local adventures and embrace the joy of discovery in everyday moments. Remember, adventure is not just about grand expeditions; it’s about finding excitement and fulfillment in the small, accessible experiences that life has to offer. So grab your gear, explore your surroundings, and embark on your next micro adventure.
Discover more Adventures

12 Pro Tips for Beginner Surfers
Surfing embodies the thrill of riding ocean waves and the tranquility of the sea. For beginners, the sport can be both exhilarating and challenging, as it combines balance, timing, and ocean awareness. Whether you're about to catch your first wave or looking to refine your skills, these 12 pro tips will help you navigate the surf with confidence and enjoyment. Dive into the world of surfing with a solid foundation and make the most of your time on the water.
Surfing embodies the thrill of riding ocean waves and the tranquility of the sea. For beginners, the sport can be both exhilarating and challenging, as it combines balance, timing, and ocean awareness. Whether you're about to catch your first wave or looking to refine your skills, these 12 pro tips will help you navigate the surf with confidence and enjoyment. Dive into the world of surfing with a solid foundation and make the most of your time on the water.

Scoring a barrel in a line up all to himself in Santa Cruz, CA. Photo by Dalton Johnson
Background:
Surfing has roots that stretch back to ancient Polynesian cultures, but it gained widespread popularity in the 20th century, especially in places like California and Hawaii. The sport has evolved into a global phenomenon, with surfers riding everything from gentle rollers to towering swells. As a beginner, understanding the basics of surfing etiquette, technique, and ocean safety is essential for a successful start to your surfing journey.
12 Pro Tips for Beginner Surfers:
1. Choose the Right Surfboard
For beginners, the right surfboard can make a significant difference in learning how to surf. Soft-top boards, also known as soft tops or foamies, provide stability and buoyancy, making them ideal for learning. They are less likely to cause injury and are more forgiving in the water. Opt for a board that suits your height and weight to ensure better balance and ease of paddling.
2. Learn the Basics of Wave Etiquette
Surf etiquette is crucial for safety and enjoyment in the water. Understand the basic rules, such as not dropping in on someone else’s wave (taking off on a wave someone else is already riding), and waiting your turn in the lineup. Respect other surfers and follow local guidelines to ensure a positive experience for everyone in the water.
3. Master the Pop-Up Technique
The pop-up is a fundamental move in surfing that involves transitioning from lying on your board to standing up. Practice the pop-up on land to build muscle memory. Focus on a quick, smooth motion—push up with your hands and then bring your feet underneath you in one fluid movement. Mastering this technique on land will help you perform it more effectively in the water.
4. Practice Proper Paddling Techniques
Paddling is an essential skill for getting into position and catching waves. Use long, smooth strokes with your arms, keeping your body centered on the board to maintain balance. Rotate your torso with each stroke to increase efficiency. Strong paddling will help you get into the right spot to catch waves and improve your overall surfing performance.
5. Understand How to Read Waves
Reading waves is crucial for successful surfing. Learn to identify different types of waves, such as beach breaks, point breaks, and reef breaks. Observe the ocean and look for patterns in wave formation, including the direction and size of incoming swells. Understanding how waves break will help you position yourself better and choose the right waves to ride.
6. Stay Safe in the Water
Safety is paramount when surfing. Always check local surf conditions and weather reports before heading out. Be aware of potential hazards such as strong currents, rip tides, and marine life. Wear appropriate sun protection and stay hydrated. If you’re unsure about the conditions or your abilities, consider taking a lesson from a certified surf instructor.
7. Start with Smaller Waves
Beginner surfers should start with smaller, more manageable waves. Small waves are easier to handle and provide a better learning environment for practicing your technique. As you gain confidence and skill, gradually progress to larger waves. Starting small allows you to build a solid foundation and reduces the risk of injury.
8. Use the Right Stance
Your stance on the board affects your balance and control. For regular-footed surfers (left foot forward), your left foot should be placed near the front of the board, and your right foot near the tail. For goofy-footed surfers (right foot forward), reverse this positioning. Keep your knees slightly bent and your weight centered to maintain stability on the board.
9. Focus on Timing and Positioning
Timing and positioning are key to catching and riding waves. Practice getting into the right position to catch waves by observing their behavior and timing your paddling accordingly. Position yourself where the wave is breaking and make sure to paddle with enough speed to match the wave’s momentum. Proper timing will increase your chances of catching and riding waves successfully.
10. Keep Your Eyes on the Horizon
When paddling and riding waves, keep your eyes on the horizon rather than looking directly at your board or the wave. This helps you maintain a better sense of balance and direction. Focusing on the horizon also allows you to anticipate changes in the wave and adjust your movements accordingly.
11. Learn to Fall Safely
Falling is a natural part of surfing, and knowing how to fall safely can help prevent injuries. Try to fall away from your board and avoid landing on it. Keep your arms close to your body to protect them from impact. Practice falling in a controlled manner to build confidence and minimize the risk of injury.
12. Embrace the Learning Process
Surfing is a sport that requires patience and persistence. Embrace the learning process and be prepared for challenges along the way. Celebrate your progress, no matter how small, and stay motivated by enjoying the experience of being in the ocean. Every surf session is an opportunity to learn and improve, so approach each one with a positive attitude.
A long boarder cutting back during a small sunrise session. Photo by Dalton Johnson
Surfing is a rewarding sport that combines the thrill of riding waves with the beauty of the ocean. By following these 12 pro tips, you’ll build a strong foundation for your surfing journey and enhance your skills both in and out of the water. Remember, surfing is as much about enjoying the experience as it is about mastering the techniques. Embrace the challenges, stay safe, and have fun as you ride the waves and explore the world of surfing.
Discover more Adventures

12 Pro Tips for Beginner Rock Climbers
Rock climbing, with its blend of physical challenge and mental strategy, offers a thrilling journey up vertical rock faces and indoor walls. For beginners, the sport can seem daunting, but with the right approach and preparation, you can build confidence and skills to scale new heights. Whether you're drawn to indoor climbing gyms or outdoor crags, these 12 pro tips will help you start your rock climbing journey on the right foot, ensuring a safe and enjoyable experience.
Rock climbing, with its blend of physical challenge and mental strategy, offers a thrilling journey up vertical rock faces and indoor walls. For beginners, the sport can seem daunting, but with the right approach and preparation, you can build confidence and skills to scale new heights. Whether you're drawn to indoor climbing gyms or outdoor crags, these 12 pro tips will help you start your rock climbing journey on the right foot, ensuring a safe and enjoyable experience.

Victoria hanging on the best she can while climbing in Wild Iris, WY. Photo by Dalton Johnson
Background:
Rock climbing has evolved from its origins as a means of training for mountaineering to a popular sport enjoyed by millions worldwide. It encompasses various disciplines, including bouldering, sport climbing, and traditional (trad) climbing, each with its unique techniques and challenges. Modern climbing gyms have made the sport more accessible than ever, but venturing outdoors adds a new layer of complexity. Understanding the fundamentals of climbing technique, safety, and etiquette will set the stage for a rewarding climbing experience.
12 Pro Tips for Beginner Rock Climbers:
1. Start with Indoor Climbing
Before venturing outdoors, it’s wise to start with indoor climbing. Indoor gyms offer a controlled environment where you can focus on learning techniques, building strength, and getting comfortable with the equipment. Gyms often have routes graded by difficulty, allowing you to progressively challenge yourself. Take advantage of beginner classes and clinics to build a solid foundation in climbing basics.
2. Focus on Technique, Not Just Strength
While strength is important, technique often makes a bigger difference in climbing performance. Focus on mastering fundamental techniques such as proper foot placement, body positioning, and efficient movement. Good technique can help you climb more efficiently and reduce the risk of injury. Practice techniques like smearing, edging, and mantling to enhance your climbing skills.
3. Learn Proper Knots and Harness Use
A crucial aspect of climbing safety is understanding how to use your gear correctly. Learn to tie essential knots, such as the figure-eight follow-through and the double fisherman's knot, and practice them until they become second nature. Ensure you know how to properly wear and adjust your harness. Familiarity with these skills is essential for safe climbing.
4. Build Grip Strength Gradually
Climbing requires significant grip strength, but it’s important to build it gradually to avoid injuries like tendonitis. Incorporate grip-strengthening exercises into your training routine, such as dead hangs and fingerboard training. Avoid overtraining and allow your tendons time to adapt to the demands of climbing. A balanced approach will help you develop a strong, injury-free grip.
5. Use Proper Footwork
Good footwork is the cornerstone of efficient climbing. Practice placing your feet precisely on footholds and using your legs to push yourself up rather than relying solely on your arms. Focus on maintaining a stable and balanced stance. Proper footwork not only conserves energy but also improves your overall climbing performance.
6. Communicate Clearly with Your Climbing Partner
Effective communication with your climbing partner is vital for safety. Establish clear commands for actions such as “on belay,” “climbing,” and “take” before you start. Ensure you both understand the commands and signals used during climbing. Good communication minimizes the risk of miscommunication and enhances the overall climbing experience.
7. Respect Climbing Etiquette
Whether climbing indoors or outdoors, it’s important to follow proper climbing etiquette. Share routes and respect other climbers’ space. At climbing gyms, be mindful of waiting times and avoid monopolizing routes. When climbing outdoors, follow Leave No Trace principles and respect local regulations. Etiquette fosters a positive and safe climbing community.
8. Develop a Climbing Routine
Creating a climbing routine can help you stay organized and focused. Warm up properly before climbing to reduce the risk of injury. Incorporate stretching and technique drills into your routine to improve flexibility and skill. Cool down and stretch after climbing to aid recovery. A consistent routine enhances your climbing performance and helps prevent injuries.
9. Stay Hydrated and Fuel Your Body
Climbing can be physically demanding, and proper hydration and nutrition are essential for peak performance. Drink plenty of water before, during, and after climbing. Consume balanced meals that include carbohydrates, proteins, and healthy fats to fuel your climbs. Eating a nutritious diet and staying hydrated will help maintain your energy levels and overall health.
10. Learn to Fall Safely
Falling is an inevitable part of climbing, and knowing how to fall safely can reduce the risk of injury. Practice controlled falls in a safe environment, such as a climbing gym with padded floors. Learn to fall away from the wall and avoid grabbing holds or tensing up. Understanding how to fall properly will build your confidence and improve your climbing technique.
11. Understand Route Ratings
Climbing routes are graded by difficulty, and understanding these ratings helps you choose routes that match your skill level. Familiarize yourself with the grading systems used in your climbing area, whether it’s the Yosemite Decimal System (YDS) for outdoor climbs or the V-scale for bouldering. Start with routes that are within your skill range and progress gradually as you build confidence.
12. Embrace the Learning Process
Climbing is a journey of continuous learning and improvement. Embrace the process and be patient with your progress. Celebrate small victories, learn from mistakes, and seek feedback from more experienced climbers. Enjoy the challenges and growth that come with each climb. The learning process is integral to becoming a better climber and making the most of your climbing adventures.
Running out the direct route on Intersection Rock in Joshua Tree. Photo by Dalton Johnson
Rock climbing is a dynamic and rewarding sport that combines physical strength, mental strategy, and a love for adventure. By following these 12 pro tips, you’ll build a strong foundation for your climbing journey and develop the skills needed to tackle new challenges. Remember, climbing is as much about the journey as it is about reaching the top. Embrace each climb as an opportunity to grow, learn, and enjoy the thrill of ascending new heights.
Discover more Adventures

12 Pro Tips for Beginner Mountaineers
Mountaineering is the ultimate test of physical endurance, mental resilience, and technical skill. For beginners, the allure of summiting a towering peak is both exhilarating and intimidating. While the journey to the top is fraught with challenges, the rewards of breathtaking views and the sense of accomplishment are unparalleled. If you're just starting your mountaineering journey, these 12 pro tips will help you prepare for the adventure ahead, ensuring you're ready to tackle the mountains with confidence and respect.
Mountaineering is the ultimate test of physical endurance, mental resilience, and technical skill. For beginners, the allure of summiting a towering peak is both exhilarating and intimidating. While the journey to the top is fraught with challenges, the rewards of breathtaking views and the sense of accomplishment are unparalleled. If you're just starting your mountaineering journey, these 12 pro tips will help you prepare for the adventure ahead, ensuring you're ready to tackle the mountains with confidence and respect.
A team working their way up Mount Shasta in California. Photo by Dalton Johnson
Background:
Mountaineering, also known as alpinism, has a rich history dating back to the 18th century, with early explorers conquering the Alps. Today, it remains a sought-after pursuit for those seeking to push their limits in some of the most extreme environments on Earth. Whether you're eyeing a local peak or dreaming of summiting the world's highest mountains, mountaineering requires a blend of fitness, knowledge, and a deep respect for nature's power. For beginners, understanding the fundamentals and preparing thoroughly is key to a safe and successful climb.
12 Pro Tips for Beginner Mountaineers:
1. Start with the Basics
Before attempting more technical climbs, it’s crucial to build a strong foundation in basic hiking and scrambling. Start with less challenging peaks that require minimal technical skills. This will help you build stamina, understand your limits, and get accustomed to the altitude and weather conditions you'll face on more difficult climbs. Mastering the basics will set you up for success as you advance to more challenging terrain.
2. Understand the Risks
Mountaineering is inherently risky, and understanding those risks is vital for your safety. Research the specific dangers associated with the mountain you're planning to climb, such as avalanches, rockfall, and crevasses. Learn about the signs of altitude sickness and how to respond if symptoms arise. Knowing the risks and how to mitigate them will allow you to make informed decisions during your climb.
3. Learn Basic Mountaineering Skills
Before heading into the mountains, invest time in learning essential mountaineering skills. These include rope techniques, knot tying, ice axe use, and self-arrest techniques for stopping a fall on snow or ice. Consider taking a course or hiring a guide to teach you these skills in a controlled environment. Mastering these basics is crucial for your safety and confidence on the mountain.
4. Build Your Fitness
Mountaineering demands a high level of physical fitness, including endurance, strength, and flexibility. Focus on building your cardiovascular fitness through activities like running, cycling, or hiking. Strengthen your core and legs with exercises like squats, lunges, and planks. Don’t forget flexibility training, which can help prevent injuries. A strong, well-rounded fitness routine will prepare you for the physical challenges of mountaineering.
5. Acclimatize to Altitude
Altitude can have a significant impact on your body, especially if you’re climbing above 8,000 feet (2,400 meters). Plan your climb to include time for acclimatization, which allows your body to adjust to lower oxygen levels. Start by spending time at higher elevations before your climb, and consider a gradual ascent to help your body adapt. Recognizing the symptoms of altitude sickness and knowing when to turn back is crucial for staying safe.
6. Practice Navigation
Navigation is a critical skill in mountaineering, especially when you’re in remote areas where trails may not be well-marked. Learn how to read topographic maps, use a compass, and navigate using landmarks. GPS devices can be helpful, but don’t rely solely on technology—always have a backup plan. Practicing these skills on smaller hikes will build your confidence for more challenging climbs.
7. Understand Weather Patterns
Weather can change rapidly in the mountains, and being able to interpret weather patterns is key to making safe decisions. Learn to read clouds, understand weather forecasts, and recognize signs of incoming storms. Always check the weather forecast before your climb and be prepared to adjust your plans if conditions are unfavorable. Remember, it’s better to turn back than to push through dangerous weather.
8. Climb with a Partner
Mountaineering is best done with a partner or as part of a group. Having someone with you provides a safety net in case of an emergency, and allows for shared decision-making. Choose a partner with a similar level of experience and fitness, and make sure you communicate effectively throughout the climb. Trust and teamwork are essential for a successful mountaineering experience.
9. Respect the Mountain
Mountains are powerful and unpredictable, and approaching them with respect is crucial. Follow Leave No Trace principles to protect the environment, and be mindful of the impact you have on the landscape. Understand that the mountain dictates the terms—sometimes, the safest and wisest decision is to turn back, even if it means not reaching the summit. Respect for the mountain ensures not only your safety but also the preservation of these natural wonders for future climbers.
10. Focus on Hydration and Nutrition
Proper hydration and nutrition are essential for maintaining energy levels during a climb. Start hydrating well before your climb, and carry enough water for the journey. Pack high-energy snacks that are easy to eat on the go, such as nuts, dried fruit, and energy bars. During longer climbs, plan for meals that provide a balance of carbohydrates, protein, and fats. Staying fueled and hydrated will help you maintain focus and stamina throughout the climb.
11. Pace Yourself
Mountaineering is a marathon, not a sprint. Pacing yourself is crucial to conserving energy for the entire climb, especially on long or technical routes. Start slow, and find a rhythm that you can sustain for hours. Take regular breaks to rest, refuel, and enjoy the views. Listen to your body—pushing too hard too soon can lead to fatigue and increase the risk of mistakes. Remember, it’s not just about reaching the summit; it’s about getting there and back safely.
12. Celebrate the Journey, Not Just the Summit
It’s easy to get caught up in the goal of reaching the summit, but mountaineering is about much more than just the final destination. Celebrate the entire journey—the preparation, the challenges, the camaraderie, and the personal growth. Whether or not you reach the top, every climb is a learning experience that contributes to your development as a mountaineer. Embrace the process and appreciate the beauty of the mountains along the way.
Looking out the tent while climbing Denali. Photo by Dalton Johnson
Mountaineering is a demanding and rewarding pursuit that requires careful preparation, respect for the environment, and a strong mindset. By following these 12 pro tips, you’ll be well-equipped to take on the challenges of the mountains with confidence. Remember, every climb is an opportunity to learn, grow, and connect with the awe-inspiring power of nature. As you begin your mountaineering journey, stay safe, stay humble, and savor every step of the adventure.
Discover more Adventures

12 Pro Tips for Beginner Grand Adventurers
Embarking on a grand adventure is a thrilling step into the unknown, whether it’s trekking through remote wilderness, exploring a new country, or setting out on a multi-day road trip. These experiences push you out of your comfort zone, offering a blend of challenge, discovery, and growth. For beginners, the idea of a grand adventure might feel overwhelming, but with the right mindset and some expert advice, you’ll be well-prepared to take on the journey of a lifetime. Here are 12 pro tips to help you start your grand adventure with confidence and excitement.
Embarking on a grand adventure is a thrilling step into the unknown, whether it’s trekking through remote wilderness, exploring a new country, or setting out on a multi-day road trip. These experiences push you out of your comfort zone, offering a blend of challenge, discovery, and growth. For beginners, the idea of a grand adventure might feel overwhelming, but with the right mindset and some expert advice, you’ll be well-prepared to take on the journey of a lifetime. Here are 12 pro tips to help you start your grand adventure with confidence and excitement.
Commuting between camp 2 and camp 3 on Denali in Alaska. Photo by Dalton Johnson
Background:
The concept of a "grand adventure" has long captured the human imagination, from the epic tales of ancient explorers to modern-day thrill-seekers setting out to conquer new heights. These adventures are about more than just the destination—they’re about the experiences, the people you meet, and the memories you create along the way. While planning a grand adventure can seem daunting, especially for beginners, breaking it down into manageable steps can make it an achievable and deeply rewarding pursuit.
12 Pro Tips for Beginner Grand Adventurers:
1. Define Your Adventure
The first step in any grand adventure is to define what "adventure" means to you. Are you seeking the thrill of summiting a mountain, the cultural immersion of exploring a foreign city, or the solitude of a long-distance hike? Understanding your motivations and goals will help you choose the right adventure and set realistic expectations. Take time to reflect on what excites you and what you hope to gain from the experience.
2. Start with What You Know
While it’s tempting to dive headfirst into something entirely new, it’s wise to start with what you know and gradually expand your comfort zone. If you enjoy hiking, begin with a well-known trail before tackling a multi-day trek. If travel is your passion, consider exploring a nearby country before venturing to more remote destinations. Building on familiar activities allows you to develop skills and confidence that will serve you well on more challenging adventures.
3. Plan, But Don’t Over-Plan
One of the joys of a grand adventure is the spontaneity it allows. While planning is essential—especially for logistics like transportation, accommodations, and safety—it’s important not to over-plan every detail. Leave room for flexibility and unexpected detours, as these often lead to the most memorable experiences. Embrace the uncertainty, knowing that not everything will go according to plan, and that’s okay.
4. Prioritize Safety
Safety is paramount on any grand adventure. Before you set out, research the potential risks associated with your chosen activity or destination. Whether it’s understanding local customs, preparing for extreme weather, or knowing how to navigate unfamiliar terrain, being well-informed will help you mitigate risks. Always have a backup plan and let someone know your itinerary. Carry essential items like a first-aid kit, emergency contact information, and, if applicable, a map or GPS device.
5. Learn Basic Survival Skills
Even if your adventure doesn’t involve extreme conditions, it’s wise to learn basic survival skills. Knowing how to start a fire, purify water, build a shelter, or navigate using a map and compass can be invaluable in unexpected situations. These skills not only enhance your safety but also deepen your connection with the environment, giving you the confidence to tackle more remote and challenging adventures in the future.
6. Embrace the Physical Challenge
Grand adventures often come with physical demands, whether it’s hiking for hours, carrying a heavy backpack, or enduring long travel days. Preparing your body through regular exercise and conditioning can make a significant difference in your experience. Focus on building stamina, strength, and flexibility, and be mindful of your limits. Remember, it’s okay to take breaks, slow down, and listen to your body—it’s all part of the journey.
7. Pack Light, But Smart
When embarking on a grand adventure, packing light is key, but it’s also important to pack smart. Focus on versatility and functionality—choose clothing that can be layered and serve multiple purposes, and pack only the essentials for your specific adventure. Consider the climate, terrain, and duration of your trip, and resist the urge to bring unnecessary items that will only weigh you down. Remember, you can often pick up supplies along the way if needed.
8. Cultivate a Resilient Mindset
The mental challenges of a grand adventure can be just as demanding as the physical ones. Cultivating a resilient mindset is crucial for overcoming obstacles, dealing with uncertainty, and staying positive even when things don’t go as planned. Practice mindfulness, stay focused on your goals, and remind yourself why you set out on this adventure in the first place. Embrace discomfort as part of the growth process, and remember that every challenge is an opportunity to learn and improve.
9. Connect with Locals
One of the most enriching aspects of a grand adventure is the opportunity to connect with locals. Engaging with the people who live in the areas you’re exploring can provide valuable insights, enhance your cultural understanding, and lead to unique experiences you wouldn’t find in a guidebook. Be open, respectful, and curious—ask questions, share stories, and be willing to step outside your comfort zone to build meaningful connections.
10. Document Your Journey
Documenting your adventure through photos, journaling, or blogging can be a wonderful way to capture memories and reflect on your experiences. It also allows you to share your story with others, inspiring them to embark on their own adventures. However, be mindful not to let documentation take away from being present in the moment. Strike a balance between capturing memories and fully immersing yourself in the experience.
11. Stay Present and Savor the Moments
In the midst of a grand adventure, it’s easy to get caught up in the logistics, the challenges, and the desire to reach the next milestone. However, it’s important to stay present and savor the small moments—the sunrise over a mountain peak, the quiet of a remote forest, or the taste of a simple meal after a long day. These moments are the essence of adventure, and they’re what you’ll remember long after the journey is over.
12. Reflect and Celebrate Your Accomplishments
After completing your grand adventure, take time to reflect on what you’ve achieved. Whether it was conquering a fear, overcoming a physical challenge, or simply stepping outside your comfort zone, every accomplishment is worth celebrating. Reflecting on your experience can also provide valuable insights for future adventures, helping you grow as a traveler and as a person. Celebrate your journey, share your story, and start planning your next adventure.
Taking a break and soaking in the sights while bikepacking around the South Island of New Zealand. Photo by Dalton Johnson
Embarking on a grand adventure is more than just ticking off a bucket list item—it’s about embracing the unknown, challenging yourself, and growing in ways you never imagined. By following these 12 pro tips, you’ll be well-equipped to start your journey with confidence and enthusiasm. Remember, every grand adventure begins with a single step, and each step takes you closer to discovering new possibilities, both within the world and within yourself. So gear up, step out, and let the adventure begin.
Discover more Adventures

12 Pro Tips for Beginner Campers
Camping is one of the most rewarding ways to connect with nature, offering a unique escape from the hustle and bustle of everyday life. Whether you're planning your first weekend in the woods or gearing up for a more extended adventure, camping can seem daunting at first. But with the right mindset and a few insider tips, you'll find that camping is not only doable but also deeply enjoyable. This guide will walk you through 12 pro tips that will set you up for a successful and memorable camping experience.
Camping is one of the most rewarding ways to connect with nature, offering a unique escape from the hustle and bustle of everyday life. Whether you're planning your first weekend in the woods or gearing up for a more extended adventure, camping can seem daunting at first. But with the right mindset and a few insider tips, you'll find that camping is not only doable but also deeply enjoyable. This guide will walk you through 12 pro tips that will set you up for a successful and memorable camping experience.

Camping in Desolation Wilderness just outside of Lake Tahoe, CA. Photo by Dalton Johnson
Background:
Camping has been a favored pastime for centuries, tracing back to the early explorers and pioneers who relied on outdoor survival skills to traverse new territories. Over time, what began as a necessity evolved into a recreational activity enjoyed by millions worldwide. Today, camping is more accessible than ever, offering everyone from seasoned adventurers to first-time campers the opportunity to experience the great outdoors. However, while camping might seem simple on the surface—just a tent and a sleeping bag—there’s a lot more to it than meets the eye, especially if you’re new to the experience.
12 Pro Tips for Beginner Campers:
1. Start Small and Close to Home
For your first camping trip, it’s best to choose a location that’s close to home. Starting with a nearby campground or a state park will allow you to familiarize yourself with the process without the added stress of being too far from home. If anything goes awry, you're just a short drive away from familiar territory, and you can easily return home if necessary. This approach lets you practice setting up camp, managing your time, and getting used to the outdoor environment with minimal pressure.
2. Choose the Right Campsite
Not all campsites are created equal, and choosing the right one can make a huge difference in your experience. Look for a site with amenities like restrooms, running water, and flat terrain for setting up your tent. Research the area beforehand to ensure it matches your comfort level. Some campsites cater to families and beginners, offering easy access to trails, picnic areas, and ranger stations, making them ideal for your first camping adventure.
3. Plan Your Meals in Advance
Meal planning is a crucial aspect of camping that often gets overlooked. Plan simple meals that are easy to prepare and require minimal cleanup. One-pot meals, pre-made sandwiches, and snacks like trail mix are great options. Prepping and packing your food at home will save you time and reduce the chances of forgetting essential ingredients. Remember, camp cooking should be enjoyable, not stressful, so keep it simple and fun.
4. Practice Setting Up Your Tent
Before you head out, practice setting up your tent at home. This will save you time and frustration when you arrive at the campsite, especially if you’re racing against the clock to set up before dark. Understanding your tent's components and how they fit together will give you confidence and ensure you’re not caught off guard by any missing parts or tricky assembly instructions.
5. Arrive Early to Set Up Camp
One of the most common mistakes beginners make is arriving at their campsite too late in the day. Aim to arrive early so you have plenty of daylight to set up your tent, organize your gear, and get acquainted with your surroundings. Setting up camp in the dark can be challenging and may lead to a less comfortable night’s sleep if you’re unable to properly prepare your space.
6. Keep Your Camp Organized
An organized campsite is a safe and stress-free campsite. Designate specific areas for cooking, sleeping, and storing your gear. Keeping your site tidy will not only make it easier to find things but will also help you avoid attracting wildlife. Use storage bins or bags to keep items like food, clothing, and camping tools in order. This way, you'll spend less time searching for things and more time enjoying your surroundings.
7. Respect Wildlife and Follow Leave No Trace Principles
Part of the beauty of camping is being immersed in nature, and it’s important to respect the wildlife that calls the area home. Never feed animals, keep a safe distance, and store food securely to avoid attracting curious critters. Additionally, adhere to the Leave No Trace principles, which include packing out all trash, minimizing campfire impact, and leaving nature as you found it. This ensures that the environment remains pristine for future campers.
8. Dress in Layers
Weather in the outdoors can be unpredictable, so dressing in layers is key to staying comfortable. Even in summer, temperatures can drop significantly at night, so be prepared with a base layer, mid-layer, and outer layer. This system allows you to add or remove clothing as the temperature changes, keeping you warm or cool as needed. Choose moisture-wicking fabrics that dry quickly to keep sweat from making you cold.
9. Stay Hydrated
It’s easy to get dehydrated while camping, especially if you’re active during the day. Always bring plenty of water and make sure you’re drinking regularly. If you’re camping in an area without access to potable water, bring a water filter or purification tablets. Remember, staying hydrated is crucial not just for comfort but also for safety, particularly if you’re hiking or exerting yourself physically.
10. Embrace the Campfire
For many, the campfire is the heart of the camping experience. It’s where stories are told, meals are cooked, and warmth is shared. However, building and maintaining a safe campfire requires some knowledge. Use only established fire rings, never leave your fire unattended, and fully extinguish it before going to bed or leaving the site. Embracing the campfire can enhance your camping experience, making it cozy and memorable.
11. Be Prepared for Emergencies
While camping is generally safe, it’s important to be prepared for emergencies. Carry a basic first-aid kit, know the location of the nearest medical facility, and inform someone of your plans before you leave. Familiarize yourself with the area’s potential hazards, such as wildlife, weather changes, or rough terrain. Being prepared helps ensure that you can handle unexpected situations calmly and effectively.
12. Take It Slow and Enjoy the Experience
Finally, remember that camping is about slowing down and enjoying the experience. Don’t rush through your activities or stress about doing everything perfectly. Take time to appreciate your surroundings, breathe in the fresh air, and disconnect from the digital world. Camping offers a unique opportunity to recharge and connect with nature, so savor every moment, and don’t be afraid to relax and take it all in.
Watching the sunset and city lights of South Lake Tahoe turn on while sleeping on top of Mount Tallac. Photo by Dalton Johnson
Camping is a journey that starts with small steps. By following these 12 pro tips, you’ll be well on your way to becoming a confident and capable camper. Remember, every camping trip is a learning experience, and the more you camp, the more you’ll refine your skills and preferences. So pack your sense of adventure, embrace the unknown, and enjoy the simple, satisfying joys of camping.
Discover more Adventures

Everything You Need To Know To Summit Mount of the Holy Cross
Mount of the Holy Cross is a striking 14er located in Colorado's Sawatch Range, known for its unique snow-filled cross on the northeast face, which gives the peak its name. At 14,005 feet, the climb offers breathtaking views and a sense of accomplishment for those who summit it. Here’s everything you need to know to prepare for your climb:
Mount of the Holy Cross is a striking 14er located in Colorado's Sawatch Range, known for its unique snow-filled cross on the northeast face, which gives the peak its name. At 14,005 feet, the climb offers breathtaking views and a sense of accomplishment for those who summit it. Here’s everything you need to know to prepare for your climb:
Pros:
Stunning Scenery: The unique snow-filled cross on the northeast face is breathtaking. Summit views offer sweeping panoramas of the Sawatch Range.
Sense of Achievement: Conquering a 14,005-foot peak provides a strong sense of accomplishment. The journey and the views make the effort worthwhile.
Non-Technical Climb: Challenging but manageable for experienced hikers without technical climbing skills. The North Ridge via Half Moon Pass is well-established and commonly used.
Camping Option: Opportunity to camp at East Cross Creek with a permit, allowing for a more relaxed pace.
Proximity to Denver: Easily reachable from Denver and nearby areas, making it a popular destination for a day trip or weekend adventure.
Cons:
Challenging Hike: Significant elevation gain of 5,600 feet can be strenuous. Initial ascent to Half Moon Pass and final scramble to the summit can be tough.
Permit Requirement for Camping: Difficulty in obtaining camping permits at East Cross Creek. Basic camping area with no facilities, requiring self-sufficiency.
Weather Risks: Common in summer, posing a risk to hikers. Weather can change rapidly, requiring preparedness for various scenarios.
Crowds: High traffic during peak season can lead to a crowded trail and summit. The popularity might detract from the wilderness experience.
Rough Access Road: The 8-mile road to the trailhead is rough and may require a high-clearance vehicle. The condition of the road can pose risks to vehicles not suited for off-road driving.
Understanding the Climb
Mount of the Holy Cross is a challenging yet non-technical climb, making it accessible to experienced hikers who are prepared for a demanding adventure. The mountain stands as one of Colorado's 14ers, peaks that rise over 14,000 feet, and is renowned for its distinctive cross-shaped snowfield on the northeast face.
The Route: North Ridge via Half Moon Pass
The standard route to the summit is the North Ridge via Half Moon Pass. This trek spans approximately 12 miles round trip with a substantial elevation gain of around 5,600 feet. The journey begins at the Half Moon Trailhead, where hikers embark on a steep ascent to Half Moon Pass, reaching an elevation of about 11,600 feet. From here, the trail descends into the East Cross Creek valley, losing about 1,000 feet of elevation, which hikers must regain on the return trip.
After crossing the creek, the real challenge begins. The trail climbs relentlessly through a mix of dense forest and rocky terrain, leading to the exposed North Ridge. This final stretch to the summit involves navigating large boulders and scree, demanding both physical stamina and mental fortitude. The total elevation gain, including the descent and re-ascent at Half Moon Pass, makes this hike particularly strenuous.
Getting There
To reach the trailhead, take I-70 to Exit 171 for Minturn and follow Highway 24 south for about 20 miles. Turn right onto Tigiwon Road (Forest Road 707) and follow it for 8 miles to the Half Moon Pass Trailhead. A high-clearance vehicle is recommended due to the rough road.
Trail Description
Half Moon Pass to East Cross Creek: The trail starts with a steep ascent to Half Moon Pass at 11,640 feet, followed by a 1,000-foot descent to East Cross Creek. This is a common camping spot for those with permits.
East Cross Creek to Summit: After crossing the creek, the trail climbs steadily through the forest to the treeline. The final stretch involves scrambling over talus and boulders up the North Ridge. The summit offers panoramic views and the iconic cross on the northeast face.
Timing and Strategy
Most hikers aim to complete the climb in a single day, starting early to ensure they summit and descend before afternoon thunderstorms, common in the Rockies during summer months. However, the total elevation gain and distance make this a long and grueling day.
For those looking to break up the journey, camping is an option at East Cross Creek, approximately halfway through the hike. This approach allows for a more manageable ascent, spreading the effort over two days. It's essential to secure a permit for camping, as the area is regulated to preserve its natural beauty and minimize environmental impact. These permits are limited and can be challenging to obtain, so planning well in advance is crucial.
Preparing for the Climb
Given the climb's demands, proper preparation is essential. Hikers should be in good physical condition and acclimated to high altitudes. Essential gear includes sturdy hiking boots, trekking poles, layers of clothing for varying weather conditions, and sufficient water and food. Navigation tools such as maps, a compass, or a GPS device are also vital, as the trail can be difficult to follow, especially above the treeline where cairns mark the route.
Overall, climbing Mount of the Holy Cross is a rewarding experience, offering breathtaking views and a sense of accomplishment. However, it's a test of endurance and preparation, requiring hikers to be well-equipped and ready for the challenges of this iconic Colorado 14er.
Permits and Camping
Camping at East Cross Creek, located approximately halfway along the North Ridge route to Mount of the Holy Cross, requires a permit due to the area's popularity and the need to preserve its natural environment. These permits are limited and can be challenging to obtain, so it is crucial to plan ahead and secure one well in advance of your trip.
Securing a Permit
Permits for camping at East Cross Creek are issued to manage the number of visitors and minimize the environmental impact on this delicate alpine ecosystem. To obtain a permit, you typically need to apply through the relevant forest service or park management agency. This process may involve submitting an application online or in person, and in some cases, there may be a lottery system due to high demand.
When planning your trip, consider the following steps to secure a permit:
Research Permit Requirements: Check the official website of the governing body managing the Mount of the Holy Cross area. This site will provide detailed information on permit availability, application procedures, and any associated fees.
Apply Early: Permits are often released several months in advance, and they can be claimed quickly. Mark your calendar with the permit release date and submit your application as soon as possible.
Be Flexible: If your preferred dates are unavailable, having alternative dates in mind can increase your chances of securing a permit.
Confirm Permit Details: Once you obtain a permit, review all conditions and restrictions, including group size limits, designated camping areas, and any specific regulations you need to follow.
The Camping Experience
East Cross Creek offers a primitive camping experience, which means there are no developed facilities such as restrooms, potable water sources, or established campsites. As a result, campers must be fully self-sufficient and adhere to the principles of Leave No Trace to protect the environment and ensure the area remains pristine for future visitors.
Key Points for Primitive Camping:
Pack Out All Waste: Bring enough bags to carry out all your trash, food scraps, and other waste. Do not leave any litter behind.
Sanitation: Use a portable toilet system or follow guidelines for digging a cat hole at least 200 feet away from water sources, trails, and campsites to dispose of human waste. Pack out toilet paper and hygiene products.
Water Purification: There are natural water sources in the area, but you should always purify water before drinking by using a portable water filter, purification tablets, or boiling.
Food Storage: Store food securely to prevent attracting wildlife. Use bear-resistant containers or hang your food in a tree at least 10 feet off the ground and 4 feet away from the trunk.
Campfire Restrictions: Check current fire regulations before your trip. If campfires are allowed, use existing fire rings and keep fires small. Never leave a fire unattended and ensure it is completely extinguished before leaving.
What to Bring
Essentials:
Navigation: Map, compass, and GPS.
Hydration: At least 3 liters of water.
Nutrition: High-energy snacks and meals.
Clothing: Layered clothing for varying weather, including a waterproof jacket.
Footwear: Sturdy hiking boots with good ankle support.
Sun Protection: Sunglasses, hat, and sunscreen.
Safety Gear: First aid kit, headlamp, and a whistle.
Camping Gear (if applicable):
Tent: Lightweight and weather-resistant.
Sleeping Bag: Rated for cold temperatures.
Cooking Supplies: Lightweight stove and fuel, bear-proof food storage.
Best Time to Climb
The optimal time to climb Mount of the Holy Cross is from late June to early September. During this period, the snow has typically melted, providing safer and more accessible trail conditions. Additionally, the weather is generally more stable, reducing the risk of encountering severe weather during your ascent.
Seasonal Conditions
Late June to Early September: This window is considered the prime climbing season for Mount of the Holy Cross. By late June, most of the snow on the trail has melted, reducing the risk of slipping and making the trail more navigable. Wildflowers bloom in the alpine meadows during this time, adding to the scenic beauty of the hike.
Weather Stability: Summer months in Colorado offer more predictable weather patterns compared to other seasons. However, it's essential to note that weather in the mountains can still be highly variable. Afternoon thunderstorms are particularly common in the summer, making it crucial to plan your climb to avoid being caught in a storm.
Timing Your Ascent
To maximize safety and enjoyment, consider the following tips for timing your climb:
Early Start: Begin your hike early in the morning, ideally around sunrise or even earlier. This allows you to reach the summit and start your descent before afternoon thunderstorms develop. The early start also means cooler temperatures during the initial part of your hike, making the climb more comfortable.
Thunderstorm Awareness: Afternoon thunderstorms are a significant risk in the Rockies during the summer months. Lightning is particularly dangerous at higher elevations. Aim to be below the treeline or back at your starting point by early afternoon to minimize exposure to these storms.
Daylight Hours: Long summer days provide ample daylight, giving you plenty of time to complete the climb within a single day. Ensure you bring a headlamp or flashlight just in case your hike takes longer than anticipated.
Additional Considerations
Trail Conditions: Even in the summer, some sections of the trail can remain wet or muddy, particularly after rain. Waterproof boots and gaiters can help keep your feet dry and comfortable.
Temperature Variations: While daytime temperatures can be warm, mornings and evenings can be quite cool, especially at higher elevations. Dress in layers to adjust to changing temperatures throughout your hike.
Crowds: Summer is the most popular time for hiking Mount of the Holy Cross, so expect more hikers on the trail, especially on weekends. For a quieter experience, consider climbing on a weekday.
Wildlife: Summer is also a time when wildlife is active. Be mindful of your surroundings and practice safe wildlife viewing habits. Keep a respectful distance from animals, and store food securely to avoid attracting them to your campsite or picnic area.
Safety Tips
Acclimatize: Spend a few days at higher elevations before the climb.
Pace Yourself: Maintain a steady pace to conserve energy.
Weather Awareness: Check the forecast and be prepared to turn back if conditions worsen.
Stay on Trail: Pay attention to trail markers and cairns, especially near the summit.
Scouting the route for Mount of the Holy Cross. Photo by Dalton Johnson
Climbing Mount of the Holy Cross is a memorable adventure that requires preparation, endurance, and respect for the mountain's challenges. With proper planning and the right gear, you can safely enjoy the stunning scenery and the accomplishment of summiting this iconic peak. Happy climbing!
Discover More Destinations

Exped's Summer Hiking Bags Will Get You Outside and Keep Your Gear Safe
As hiking season is here, outdoor enthusiasts prepare for hiking adventures, and choosing the right backpack is crucial for comfort and convenience. Exped offers three exceptional packs designed for various activities: the Typhoon 25, Summit Hike 25, and Splash 15. Each pack boasts unique features, making them ideal companions for your summer escapades.
As hiking season is here, outdoor enthusiasts prepare for hiking adventures, and choosing the right backpack is crucial for comfort and convenience. Exped offers three exceptional packs designed for various activities: the Typhoon 25, Summit Hike 25, and Splash 15. Each pack boasts unique features, making them ideal companions for your summer escapades.

Typhoon 25: Weather-Ready Versatility
The Typhoon 25 is a waterproof, lightweight multifunctional backpack perfect for hiking, shorter bike trips, or everyday carry. Its roll-top closure ensures quick access to the main compartment while providing reliable protection against rain. This feature is especially beneficial for activities in wet environments, making the Typhoon 25 an excellent choice for unpredictable weather.
Key Features:
Waterproof roll-top closure for secure rain-proof access.
Recycled, PFC-free 210 denier ripstop nylon fabric for durability and environmental friendliness.
Integrated waterproof liner to keep items dry during heavy rainstorms.
Comfortable mesh-lined back panel and removable hip strap for added comfort.
Two stretch side pockets for easy access to water bottles and snacks.
Zippered inner pocket for valuables such as wallet, keys, and phone.

Summit Hike 25: Mountain Adventure Essential
For those seeking a reliable daypack for mountain adventures, the Summit Hike 25 is a top choice. This lightweight and durable pack features an asymmetrical, extra-long zipper opening for quick access to the main compartment. Its design makes it an excellent companion for hiking, scrambling, or everyday use.
Key Features:
Extra-durable recycled 600 denier polyester fabric with polyurethane coating for robustness.
Padded back panel with a removable foam frame sheet/sit pad for comfort and versatility.
Sold with an integrated rain cover stored in a zippered pocket on the base.
Two stretch side pockets for water bottles and zippered inner pocket for secure storage.
Two shoulder strap pockets for quick access to smaller items like energy bars and phone.
Stowable ice axe loops and daisy chains for securing trekking poles or additional gear.
Hydration reservoir compatibility with a central tube port.
Removable waist strap and sternum strap for load stability during active pursuits.

Splash 15: Ultralight Waterproof Convenience
The Splash 15 is a versatile, ultralight waterproof pack that can be used as a beach pack, light hiking pack, or even a shopping bag. Weighing just 3.7 ounces, it provides 15 liters of carrying capacity and can be easily tucked away in a bike bag, backpack, or even a glove compartment.
Key Features:
Waterproof roll-top closure with fully taped seams for maximum waterproofness.
Airy mesh shoulder straps that are lightweight and quick to dry.
Made from recycled 70 D taffeta nylon, PU coated, seam sealed, bluesign® certified, and PFC-free for eco-friendliness.
Versatile enough to double as a stuff sack for clothing or a light sleeping bag during backpacking or camping trips.
Choosing the Right Pack
When selecting a backpack, consider your specific needs and the activities you plan to undertake:
Typhoon 25: Ideal for wet environments, offering robust waterproof protection and quick access.
Summit Hike 25: Perfect for mountain adventures, providing durability, comfort, and convenient storage solutions.
Splash 15: Best for ultralight, versatile use, suitable for light hiking, beach trips, and as an extra pack on camping trips.
Exped's hiking collection offers a pack for every outdoor enthusiast, ensuring you have the right gear for your adventures. Whether you're tackling mountain trails, braving wet weather, or needing a lightweight backup, these packs provide the reliability and functionality you need to enjoy the great outdoors.
Discover More Gear

30 Facts about Adélie Penguins in Antarctica
Adélie penguins, known for their striking black and white plumage and endearing waddle, are one of the most studied and iconic species in Antarctica.
Adélie penguins, known for their striking black and white plumage and endearing waddle, are one of the most studied and iconic species in Antarctica. Here are 30 fascinating facts about these captivating birds:
A curious Adélie penguin waddles towards the camera. Photo by Dalton Johnson
Scientific Name: Adélie penguins are scientifically known as Pygoscelis adeliae.
Habitat: They are exclusively found along the Antarctic coast and nearby islands, making them true Antarctic residents.
Population: There are an estimated 3.8 million breeding pairs of Adélie penguins in Antarctica.
Named After: The species is named after Adélie Land, a region of Antarctica explored by French explorer Jules Dumont d'Urville, who named the area after his wife, Adèle.
Appearance: Adélie penguins are easily recognizable by their classic tuxedo-like black and white feathers and the white ring around their eyes.
Size: They are medium-sized penguins, standing about 70 cm (27.5 inches) tall and weighing between 3 to 6 kg (6.6 to 13.2 pounds).
Lifespan: These penguins typically live for about 10 to 20 years in the wild.
Diet: Their diet mainly consists of krill, but they also eat fish and squid.
Hunting: Adélie penguins are excellent swimmers, capable of diving up to 175 meters (574 feet) to catch their prey.
Nesting: They build nests out of stones and pebbles, which they meticulously arrange and maintain.
Breeding Season: The breeding season occurs from October to February, coinciding with the Antarctic summer.
Eggs: Females typically lay two eggs, which both parents take turns incubating for about 32 to 34 days.
Chick Rearing: Once hatched, chicks are fed by regurgitation and guarded by their parents until they are old enough to join crèches with other young penguins.
Molting: Adélie penguins undergo a complete molt each year, losing and regrowing all their feathers, which takes about 2 to 3 weeks.
Migratory Behavior: They migrate northward during the Antarctic winter, traveling up to 17,600 km (10,936 miles) round trip.
Predators: Their main predators include leopard seals and orcas, as well as skuas that prey on their eggs and chicks.
Communication: Adélie penguins are very vocal, using a variety of calls to communicate, especially during the breeding season.
Social Structure: They are highly social birds, living in large colonies that can number in the hundreds of thousands.
Adaptations: Their flippers are adapted for swimming, and their webbed feet help them to navigate the icy terrain.
Speed: In water, Adélie penguins can reach speeds of up to 15 km/h (9.3 mph).
Leaping: They can leap out of the water onto ice floes or rocky shores, a behavior known as "porpoising."
Climate Indicators: Adélie penguins are considered indicators of climate change, as their populations and distribution can be affected by changing ice conditions.
Research: They are one of the most studied penguin species, with extensive research conducted on their behavior, biology, and ecology.
Conservation Status: Currently, Adélie penguins are listed as Near Threatened by the IUCN, with some populations decreasing due to changing ice patterns and food availability.
Historic Expeditions: Adélie penguins were first recorded by scientists during the expeditions of early Antarctic explorers like James Clark Ross in the 1840s.
Feeding Technique: They use a technique called "hydroplaning," where they swim just below the surface, leaping out to catch krill and fish.
Camaraderie: These penguins often huddle together to conserve warmth and protect against predators.
Unique Walk: Adélie penguins are known for their distinctive waddle, which, combined with their upright posture, gives them a comical appearance.
Colonies: Some of the largest colonies are found on Ross Island and the Antarctic Peninsula.
Cultural Impact: Adélie penguins have captured the imagination of people worldwide, featuring in documentaries, books, and films, highlighting their charm and resilience.
Adélie penguins porpoising the frigid Antarctic waters Photo by Dalton Johnson
Adélie penguins are a testament to the harsh yet beautiful environment of Antarctica. Their adaptability, social structures, and role in the ecosystem make them a vital part of the Antarctic landscape and an important species for scientific research and conservation efforts. As climate change continues to impact their icy habitat, understanding and protecting these remarkable birds becomes increasingly critical.
Discover More Destinations

The Wildlife I Saw on an Antarctica Cruise Blew Me Away, But Not Why You Think
Antarctica, the southernmost continent, is one of the most remote and pristine places on Earth. Its icy wilderness and surrounding seas are home to a unique array of wildlife that you won't find anywhere else. Embarking on an Antarctica cruise offers the opportunity to witness these incredible animals in their natural habitat. Here, we'll explore the common wildlife you can expect to see, the best times of year to spot each species, what to expect on your journey, and some important guidelines to follow to ensure the safety and preservation of this delicate environment.
Antarctica, the southernmost continent, is one of the most remote and pristine places on Earth. Its icy wilderness and surrounding seas are home to a unique array of wildlife that you won't find anywhere else. Setting sail on an Antarctica cruise offers the opportunity to witness these incredible animals in their natural habitat up close and personal. Here, we'll explore the common wildlife you can expect to see, the best times of year to spot each species, what to expect on your journey, and some important guidelines to follow to ensure the safety and preservation of this delicate environment.

A humback whale taking breath while kayakers enjoy a front row seat. Photo by Dalton Johnson
Common Wildlife in Antarctica
1. Penguins
Penguins are perhaps the most iconic residents of Antarctica. There are several species you might encounter:
Emperor Penguins: The largest of all penguin species, Emperor Penguins are known for their remarkable breeding cycle. They lay their eggs during the harsh Antarctic winter, with males incubating the eggs on their feet.
Adélie Penguins: Small and feisty, Adélie Penguins are often seen in large colonies along the Antarctic coast. They are excellent swimmers and can often be seen diving for krill.
Gentoo Penguins: With their distinctive white stripe above the eye and bright orange beak, Gentoo Penguins are easily recognizable. They are known for their playful behavior and curiosity towards humans.
Chinstrap Penguins: Named for the thin black line under their heads that looks like a helmet strap, Chinstrap Penguins are often found on rocky islands and are highly social.
2. Seals
Antarctica is home to several species of seals, each with unique characteristics:
Weddell Seals: Known for their ability to dive to great depths, Weddell Seals are often seen lounging on the ice. They have a placid nature and are known for their melodic underwater vocalizations.
Leopard Seals: These apex predators are distinctive for their long, muscular bodies and large, reptilian heads. They are solitary hunters, primarily preying on penguins and other seals.
Crabeater Seals: Despite their name, Crabeater Seals primarily eat krill. They have specialized teeth that allow them to filter these tiny crustaceans from the water.
Elephant Seals: The largest of all seal species, male Southern Elephant Seals are known for their massive size and distinctive trunk-like noses. They are often seen during the breeding season, battling for dominance on the beaches.
3. Whales
The waters surrounding Antarctica are rich feeding grounds for various whale species:
Humpback Whales: Known for their acrobatic breaches and complex songs, Humpback Whales are a common sight in Antarctic waters during the feeding season.
Minke Whales: These smaller baleen whales are curious and often approach ships, giving passengers a close-up view.
Orcas (Killer Whales): These highly intelligent and social predators can be seen hunting in packs. They are known for their striking black and white coloration and complex behaviors.
Blue Whales: The largest animals on Earth, Blue Whales can sometimes be spotted feeding on krill in Antarctic waters.
4. Birds
Apart from penguins, several seabird species are commonly seen:
Albatrosses: With their impressive wingspans, albatrosses are a magnificent sight. The Wandering Albatross, in particular, is known for its massive wingspan, which can reach up to 11 feet.
Petrels: These seabirds, including the Giant Petrel and the Snow Petrel, are often seen gliding over the waves or resting on the ice.
Skuas: Aggressive and opportunistic, skuas are often seen around penguin colonies, where they prey on eggs and chicks.
Best Time to See Wildlife in Antarctica
The Antarctic cruise season typically runs from November to March, during the Southern Hemisphere's summer. The best time to see wildlife varies slightly depending on the species:
November to December: Early in the season, the ice begins to break up, and penguins return to their breeding colonies. This is the best time to see courtship displays and nest building. Seals also start to haul out onto the ice to give birth.
January to February: This is the height of the Antarctic summer, with longer days and more activity. Penguin chicks hatch and are fed by their parents. Whale sightings become more frequent as they come to feed on krill.
March: As the season winds down, penguin chicks begin to fledge, and many seals start to molt. Whales are still abundant, taking advantage of the rich feeding grounds before heading to warmer waters.
Related Read: BEST TIME TO VISIT ANTARCTICA ON A CRUISE SHIP
What to Expect on an Antarctica Cruise
An Antarctica cruise is an adventure like no other. Here’s what you can expect:
Expedition Ships: Cruises are typically conducted on specially designed expedition ships that can navigate the icy waters safely. These ships are equipped with Zodiacs (small inflatable boats) for shore landings and close-up wildlife encounters.
Guided Excursions: Experienced guides and naturalists lead daily excursions, providing insights into the region's wildlife, geology, and history.
Educational Programs: Onboard lectures and presentations enhance your understanding of Antarctica’s unique ecosystem.
Strict Guidelines: To protect the fragile environment, strict guidelines are followed. Passengers must disinfect their boots before and after each landing, and there are limits on the number of visitors allowed at each site.
What You Can’t Do in Antarctica
To preserve Antarctica’s pristine environment, several rules must be followed:
No Disturbing Wildlife: Maintain a safe distance from all wildlife. Do not touch, feed, or approach animals too closely.
No Littering: All waste must be carried back to the ship. This includes even small items like cigarette butts or food scraps.
No Collecting Souvenirs: Do not take anything from the environment, including rocks, feathers, or plants.
No Smoking: Smoking is generally prohibited during landings and only allowed in designated areas on the ship.
Stay on Designated Paths: Follow marked paths and stay within the designated visitor areas to minimize environmental impact.

A fur seal poses atop a rock for the camera. Photo by Dalton Johnson
Frequently Asked Questions (FAQs)
1. How close can I get to the wildlife?
While it may be tempting to get as close as possible to Antarctica’s unique wildlife, strict guidelines are in place to ensure their safety and yours. The International Association of Antarctica Tour Operators (IAATO) recommends maintaining a distance of at least 5 meters (15 feet) from all wildlife. For larger animals like seals, a distance of 15 meters (45 feet) is advised. It's crucial to remember that these are wild animals, and close encounters can cause them stress or provoke defensive behaviors. Guides will enforce these rules and provide instructions on how to approach wildlife respectfully and safely.
2. What type of clothing should I pack for an Antarctica cruise?
Packing for an Antarctica cruise requires careful planning. Layers are key to staying warm and comfortable. Start with a moisture-wicking base layer, add an insulating mid-layer, and top it with a waterproof and windproof outer shell. Essentials include thermal underwear, fleece or down jackets, waterproof pants, gloves, a hat, and a neck gaiter. Don’t forget high-quality, insulated boots suitable for walking on ice and snow. Sunglasses and sunscreen are also important, as the sun’s reflection on the ice can be intense. Most expedition companies provide a packing list to ensure you have everything you need.
3. How do I avoid seasickness on the Drake Passage?
The Drake Passage, the body of water between the southern tip of South America and Antarctica, is known for its rough seas. To minimize the risk of seasickness, choose a lower, central cabin where motion is less pronounced. Over-the-counter medications like meclizine (Bonine) or dimenhydrinate (Dramamine) can help, as can prescription options like scopolamine patches. Acupressure wristbands and ginger supplements are alternative remedies some travelers find effective. Stay hydrated, avoid alcohol and heavy meals, and spend time on deck for fresh air and to keep your eyes on the horizon.
4. Are there any age restrictions for Antarctica cruises?
Age restrictions for Antarctica cruises vary by operator. Many expedition companies recommend a minimum age of 8 to 10 years old due to the physically demanding nature of excursions and the harsh environment. Elderly passengers must consider their physical fitness, as landings often involve walking on uneven, icy terrain and climbing in and out of Zodiacs. Some cruises offer special family-friendly departures with activities tailored to younger travelers, while others may have more stringent age and health requirements. Always check with your tour operator for specific age guidelines.
5. What kind of camera equipment should I bring?
Antarctica offers unparalleled photo opportunities, so bringing the right camera equipment is essential. A DSLR or mirrorless camera with a range of lenses, from wide-angle for landscapes to telephoto for wildlife, is ideal. A sturdy tripod is useful for steady shots, especially in low light conditions. Extra batteries and memory cards are a must, as cold temperatures can quickly drain battery life. Waterproof and protective gear for your camera is also important to safeguard against the elements. A polarizing filter can help reduce glare from the snow and ice, enhancing the quality of your photos.
My Recommendations:
6. Can I visit Antarctica independently?
Visiting Antarctica independently is not feasible, for the average boater, due to its remote location, harsh conditions, and strict environmental regulations. The Antarctic Treaty System regulates all human activity on the continent to protect its unique ecosystem. As a result, all visitors must travel with an approved tour operator that follows the guidelines set by the International Association of Antarctica Tour Operators (IAATO). These operators provide the necessary expertise, equipment, and permits to ensure a safe and environmentally responsible visit. Solo travel is not permitted, and all activities are conducted under the supervision of experienced guides.
An Adélie Penguin waddles along the rocks headed for the water. Photo by Dalton Johnson
An Antarctica cruise is a once-in-a-lifetime experience that offers the chance to see some of the most incredible wildlife on the planet. From the playful antics of penguins to the majestic presence of whales, the variety of animals you can encounter is astounding. By understanding the best times to visit, knowing what to expect, and following the guidelines to protect this pristine environment, you can ensure a memorable and respectful journey to the White Continent.
Discover More Destinations
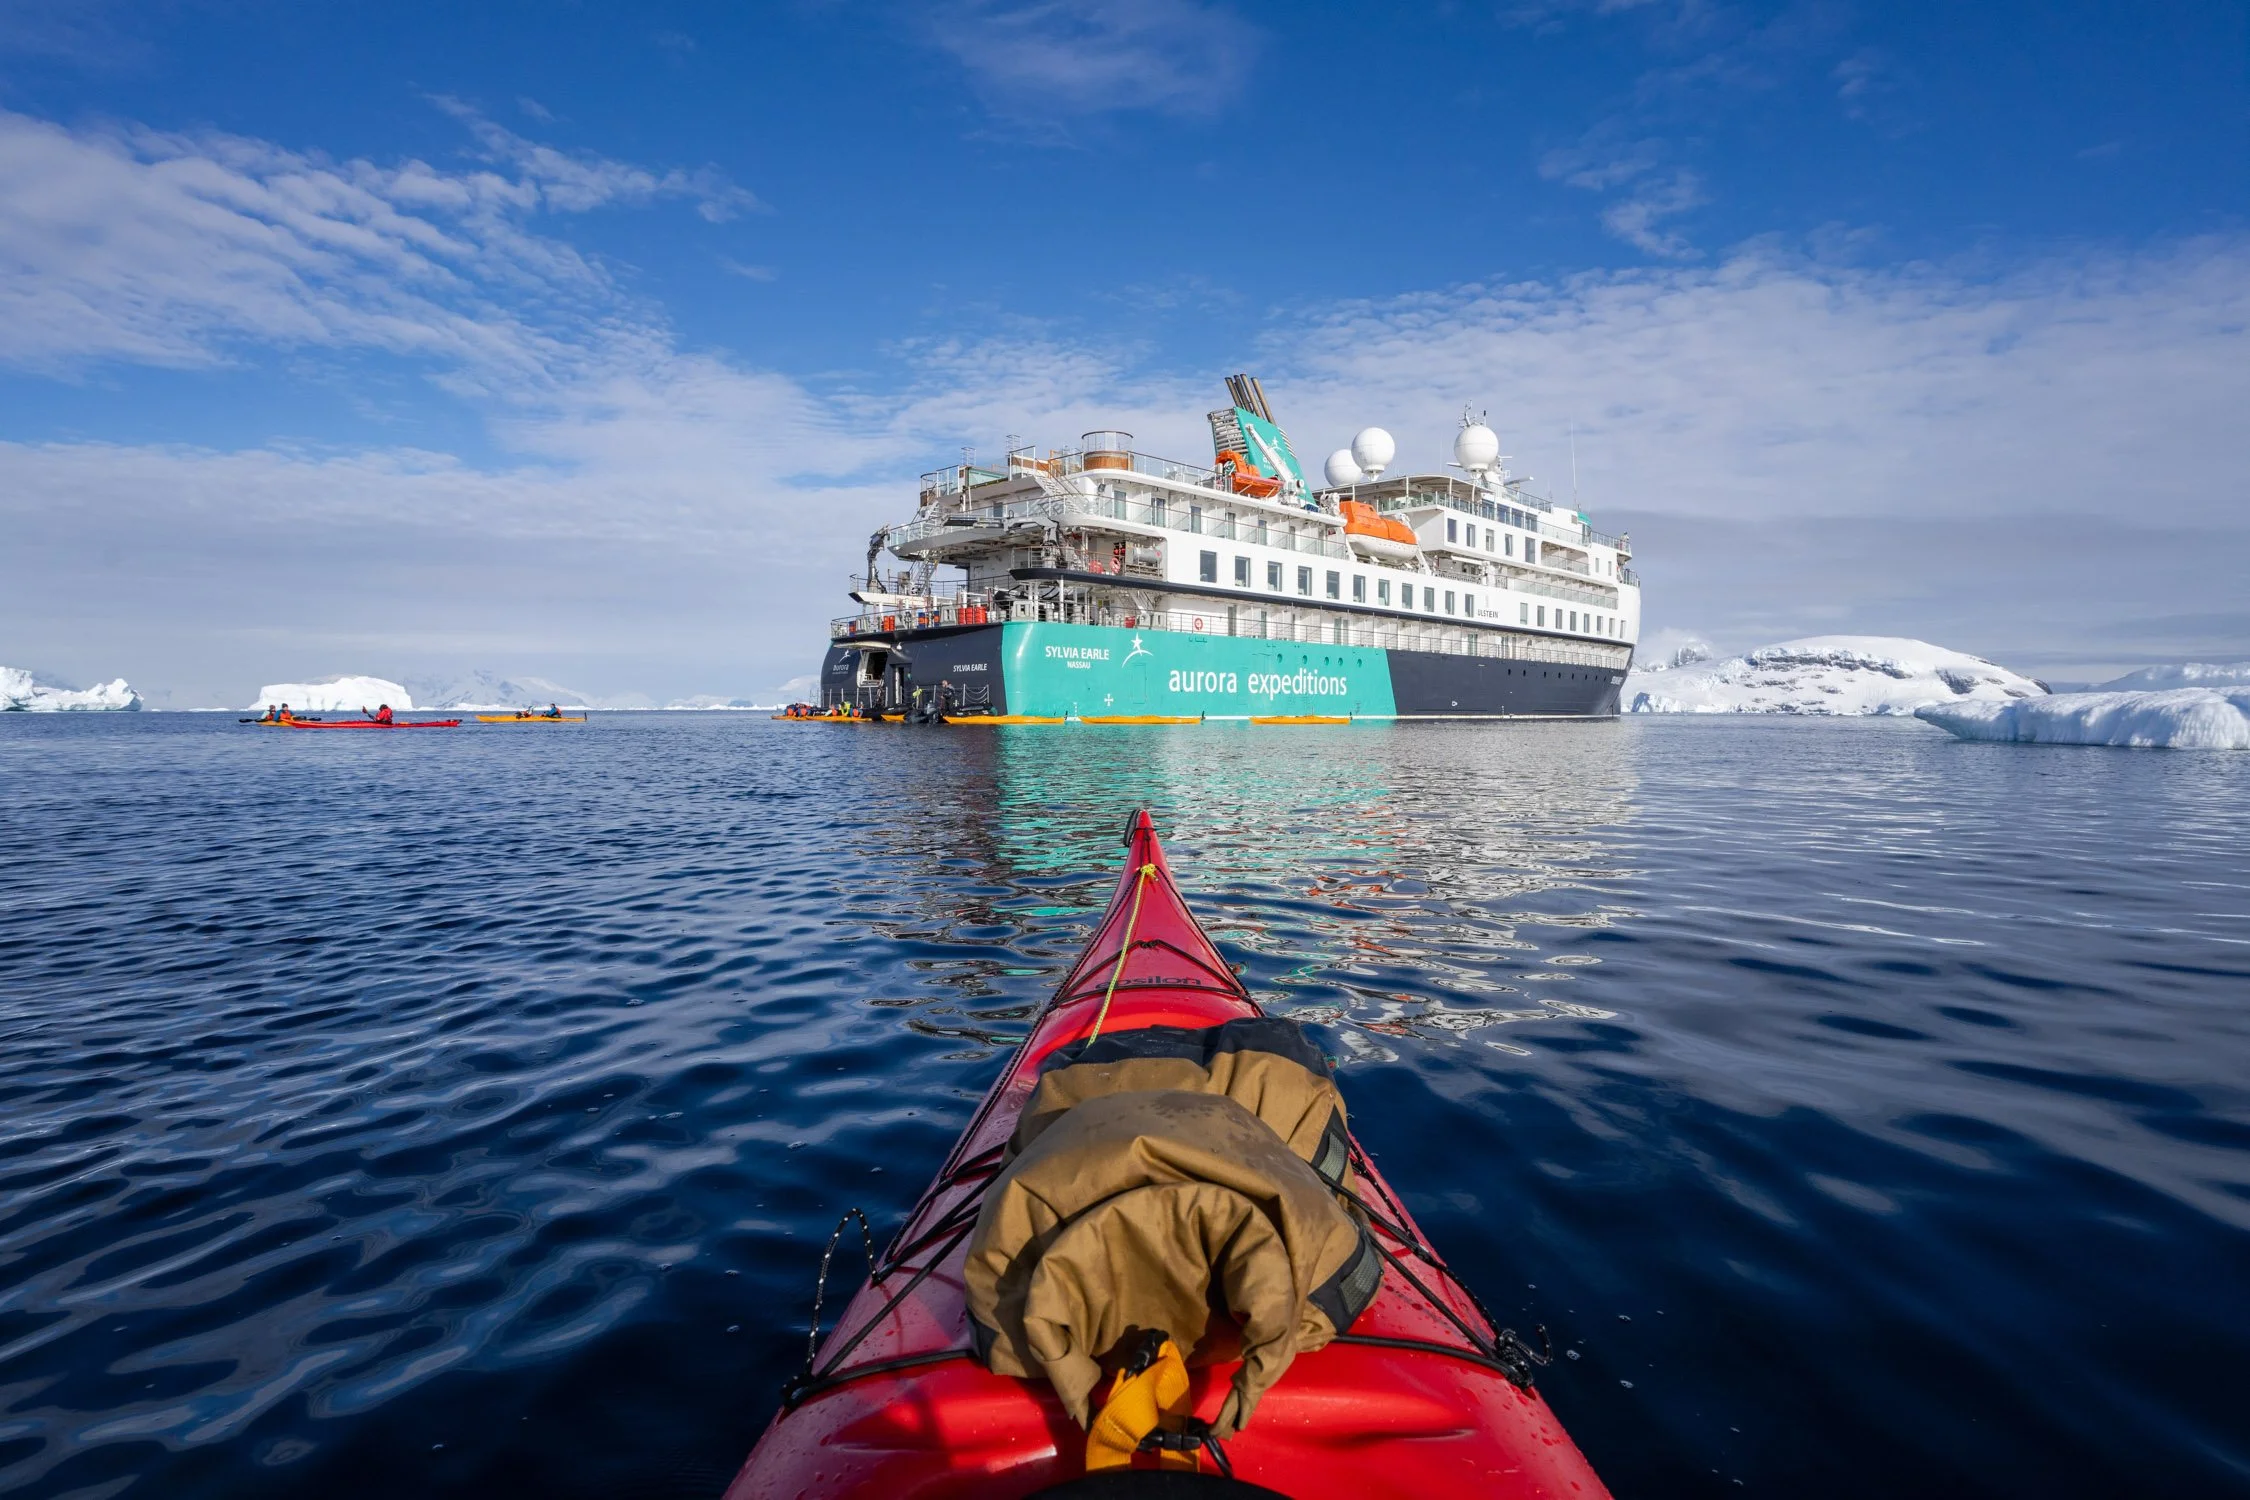
Here's How You Pick The Right Antarctica Cruise
Antarctic cruises typically last between 10 to 24 days. The duration of your cruise depends on several factors, including the specific itinerary, the cruise line, the departure port, and the type of activities you wish to engage in. Understanding these factors can help you choose the Antarctic adventure that best suits your interests and schedule.
Antarctic cruises typically last between 10 to 24 days. The duration of your cruise depends on several factors, including the specific itinerary, the cruise line, the departure port, and the type of activities you wish to engage in. Understanding these factors can help you choose the Antarctic adventure that best suits your interests and schedule.
Kayaking back to the ship after paddling around icebergs along the Antarctica Peninsula. Photo by Dalton Johnson
Itinerary and Duration
The length of your Antarctic cruise is primarily determined by the itinerary you select. Standard itineraries that focus solely on the Antarctic Peninsula generally last between 10 to 15 days. These cruises offer a comprehensive experience of the region's stunning landscapes and unique wildlife without requiring an extended time commitment. During these trips, you'll have the opportunity to visit iconic spots such as Paradise Bay, Deception Island, and the Lemaire Channel.
Longer itineraries, which can last up to 24 days or more, often include visits to additional destinations such as the Falkland Islands and South Georgia. These regions are rich in history and wildlife, offering a more in-depth exploration of the Southern Ocean's ecosystems. In South Georgia, for example, you can witness massive King Penguin colonies and explore historic whaling stations, while the Falkland Islands provide opportunities to see a variety of bird species, including the black-browed albatross.
Departure Ports
The departure port also affects the length of Antarctic cruises. The most common starting point for Antarctic cruises is Ushuaia, Argentina. Ushuaia, known as the "Gateway to Antarctica," is the southernmost city in the world. Cruises departing from Ushuaia typically range from 10 to 15 days for standard itineraries. The proximity of Ushuaia to the Antarctic Peninsula minimizes travel time across the often turbulent Drake Passage.
Other departure ports, such as Punta Arenas in Chile or even more distant locations like Buenos Aires, Argentina, or ports in New Zealand and Australia, can add to the cruise duration due to increased travel distances. These cruises may include additional days at sea or stops at other sub-Antarctic islands.
Big Cruise vs. Small Cruise
The type of vessel you choose can significantly influence your Antarctic experience. Large cruise ships and small expedition vessels each offer distinct advantages and cater to different types of travelers.
Large Cruise Ships:
Capacity: Large ships can accommodate several hundred passengers, offering a wider range of amenities such as multiple dining options, entertainment venues, and more extensive onboard facilities.
Stability: Larger vessels tend to be more stable in rough seas, providing a smoother ride across the Drake Passage.
Activities: While large ships may offer fewer opportunities for shore landings due to strict environmental regulations, they often provide a variety of onboard activities and excursions such as scenic cruising, whale watching, and educational lectures.
Small Expedition Vessels:
Capacity: These vessels typically carry fewer than 200 passengers, allowing for a more intimate and personalized experience.
Flexibility: Smaller ships can navigate narrower channels and reach more remote locations, offering more frequent and varied shore landings and zodiac excursions.
Activities: Expedition vessels focus on immersive experiences, including activities such as kayaking, camping, and guided hikes. The smaller group sizes enhance wildlife encounters and provide greater access to expert guides and naturalists.
Related Read: SMALL SHIP VS BIG SHIP CRUISE: DISCOVER YOUR IDEAL CRUISE EXPERIENCE
Wildlife Watching vs. Adventure Activities
Your interests and preferred activities will also influence the duration and type of Antarctic cruise you choose.
Wildlife Watching:
Focus: Cruises focused on wildlife watching emphasize observing and photographing the diverse species that inhabit the Antarctic region, including penguins, seals, whales, and seabirds.
Itineraries: These cruises often include extended time at key wildlife hotspots, such as penguin colonies and seal haul-outs, and may feature expert-led lectures and presentations on Antarctic wildlife.
Duration: Wildlife-focused cruises can range from shorter trips (10-15 days) to longer expeditions (up to 24 days) that include visits to the Falkland Islands and South Georgia, offering a more comprehensive wildlife experience.
Adventure Activities:
Focus: Adventure-oriented cruises offer a range of activities designed to immerse travelers in the Antarctic environment, including kayaking, camping, snowshoeing, and even scuba diving.
Itineraries: These cruises prioritize destinations that offer the best opportunities for outdoor activities and may include extended time in locations known for their dramatic landscapes and adventure potential.
Duration: Depending on the range of activities and destinations included, adventure cruises can also span 10 to 24 days. Longer itineraries may provide more opportunities to engage in multiple activities and explore diverse regions.
Additional Travel Time
When planning your Antarctic cruise, it's essential to factor in additional travel time beyond the cruise duration itself. Travelers should add at least two days of travel to and from their departure point. For most, this means accounting for international flights to South America, typically arriving in Buenos Aires or Santiago, and then taking a connecting flight to Ushuaia or Punta Arenas.
Moreover, it is highly recommended to arrive at your departure city at least one day before your cruise sets sail. This buffer day allows for any unexpected travel delays, such as flight cancellations or missed connections, ensuring you do not miss your cruise departure. This extra day can also be a great opportunity to explore your departure city. In Ushuaia, you can visit the Tierra del Fuego National Park, take a boat tour on the Beagle Channel, or simply enjoy the local cuisine and culture.
FAQ About Cruising to Antarctica
1. What is the best time of year to cruise to Antarctica?
The best time to cruise to Antarctica is during the austral summer, which runs from late October to early March. This period offers the most favorable weather conditions, with temperatures ranging from -2°C to 8°C (28°F to 46°F). The season is divided into three main parts:
Early Season (Late October to November): This is when the ice begins to break up, and you'll witness the pristine, untouched landscapes of Antarctica. It's also a time to see courtship displays among penguins and the return of seabirds. However, temperatures can be colder, and there's more ice to navigate.
Mid-Season (December to January): This is the warmest time of the year in Antarctica, with longer daylight hours (up to 24 hours of daylight) and abundant wildlife activity. It's the best time for penguin chicks hatching and seal pupping. The ice has retreated significantly, allowing ships to reach more remote areas.
Late Season (February to Early March): This is the peak time for whale watching as they gather in the Southern Ocean to feed. Penguin chicks are growing up, and seals are more active. The ice has melted considerably, making it easier to access various locations.
Related Read: BEST TIME TO VISIT ANTARCTICA ON A CRUISE SHIP
2. What wildlife can I expect to see on an Antarctic cruise?
Antarctica is home to a unique and diverse array of wildlife, adapted to the harsh conditions of the continent. Some of the most iconic species you can expect to see include:
Penguins: The most famous residents, including Emperor, Adelie, Chinstrap, Gentoo, and Macaroni penguins. They are often seen in large colonies, and during the breeding season, you can witness their courtship rituals, nesting, and chick-rearing.
Seals: Several species of seals inhabit Antarctica, including Weddell, Crabeater, Leopard, and Elephant seals. You can observe them lounging on ice floes or beaches, hunting for food, and, in the case of Elephant seals, engaging in dramatic battles for territory.
Whales: The Southern Ocean surrounding Antarctica is a rich feeding ground for whales. Common sightings include Humpback, Minke, and Orca (killer) whales. The best time for whale watching is from February to March when they are most active.
Seabirds: Antarctica and the Southern Ocean are teeming with seabirds, including albatrosses, petrels, skuas, and terns. These birds are often seen soaring above the waves or nesting on rocky cliffs.
3. Do I need any special equipment or clothing for an Antarctic cruise?
Yes, preparing for an Antarctic cruise requires specific clothing and equipment to ensure your comfort and safety in the extreme conditions. Here's a list of essentials:
Clothing:
Base Layers: Moisture-wicking thermal tops and bottoms to keep you dry and warm.
Mid Layers: Insulating fleece or down jackets for added warmth.
Outer Layers: Waterproof and windproof jacket and pants to protect against the elements.
Accessories: Warm hat, gloves, neck gaiter or buff, and thermal socks. Consider bringing glove liners for extra warmth and dexterity.
Footwear:
Waterproof Boots: Sturdy, insulated, and waterproof boots are essential for shore excursions. Many cruise operators provide these, but check beforehand.
Comfortable Shoes: For wearing on the ship.
Other Essentials:
Sunglasses: With UV protection to guard against the intense glare from the ice and snow.
Sunscreen: Even in cold weather, the sun's reflection off the ice can cause sunburn.
Binoculars: For wildlife viewing from the ship.
Camera Gear: To capture the breathtaking landscapes and wildlife. Consider bringing extra batteries and memory cards, as the cold can drain battery life quickly.
Dry Bags: To protect your electronics and other valuables from water and moisture during landings.
4. How physically demanding is an Antarctic cruise?
An Antarctic cruise can be physically demanding, depending on the activities you choose to participate in. Most cruises offer a variety of excursions and activities ranging from leisurely to challenging. Here are some of the common activities and their physical demands:
Zodiac Landings: These inflatable boats take you from the ship to shore. While not overly strenuous, getting in and out of the Zodiacs requires some agility and balance. You may also need to walk on uneven, icy, or rocky terrain once ashore.
Hiking: Many cruises offer guided hikes of varying difficulty levels. Some may be short and easy walks, while others could be more strenuous, involving steep climbs and rough terrain.
Kayaking: This activity allows you to explore the Antarctic waters up close and can be moderately to highly demanding, depending on sea conditions and the duration of the kayaking excursion.
Snowshoeing: Available on some cruises, snowshoeing can be a fantastic way to explore the snowy landscapes but requires a good level of fitness.
Camping: Some expeditions offer overnight camping on the continent, which involves setting up and breaking down camp and dealing with potentially cold and windy conditions.
Overall, a reasonable level of fitness is recommended to fully enjoy the activities offered on an Antarctic cruise. However, most cruise operators provide options suitable for a range of physical abilities.
5. What are the environmental regulations for visiting Antarctica?
Antarctica is a pristine and fragile environment, and there are strict regulations in place to protect its ecosystems. These regulations are enforced by the International Association of Antarctica Tour Operators (IAATO) and other governing bodies. Key regulations include:
Visitor Guidelines: Travelers must adhere to guidelines that minimize environmental impact, such as maintaining a safe distance from wildlife, not disturbing natural features, and not leaving any waste behind.
Biosecurity Measures: To prevent the introduction of non-native species, visitors must thoroughly clean their clothing and equipment before and after shore excursions. This includes vacuuming bags, pockets, and Velcro, and ensuring all footwear is free of soil and seeds.
Wildlife Interactions: Maintaining a respectful distance from wildlife is crucial. This means not approaching or touching animals and allowing them to move freely. Specific distance guidelines are provided for different species.
Protected Areas: Some areas of Antarctica are designated as specially protected areas due to their ecological, scientific, or historical value. Access to these areas is highly restricted and often requires special permits.
Waste Management: All waste must be managed responsibly. This includes carrying out all trash and avoiding any contamination of the environment. Human waste is also handled with strict protocols to prevent pollution.
Zodiac Operations: Zodiac operations are conducted with care to avoid disturbing wildlife and minimizing wake and noise pollution.
Related Read: THE DO'S AND DON'TS OF VISITING ANTARCTICA

Getting close to see a hole in an iceberg while on an Antarctica cruise. Photo by Dalton Johnson
Antarctic cruises typically last between 10 to 24 days, with the duration influenced by the chosen itinerary, cruise line, departure port, and the type of activities you wish to engage in. Adding at least two days of travel time and arriving at your departure city one day early is recommended to ensure a smooth start to your adventure. Whether you opt for a large cruise ship with extensive amenities or a small expedition vessel offering immersive activities, an Antarctic cruise promises a once-in-a-lifetime experience filled with breathtaking landscapes, incredible wildlife encounters, and a deeper understanding of this remote and fascinating region. Proper preparation and planning will help ensure that your journey to the White Continent is as memorable and enjoyable as possible.
Discover More Destinations

Getting Lost in the Woods Sucks, Understanding Trail Markers Will Keep You Alive
Hiking is a rewarding adventure that brings you close to nature, offers a great physical workout, and provides a sense of peace and achievement. However, navigating the wilderness requires more than just physical readiness; it demands knowledge and awareness of your surroundings, particularly trail markers. Understanding hiking trail markers is crucial for not only your safety but also for the sustainability of the trails and surrounding environment. This article will guide you through the different types of trail markers, their importance, and tips on how not to get lost while hiking.
Hiking is a rewarding adventure that brings you close to nature, offers a great physical workout, and provides a sense of peace and achievement. However, navigating the wilderness requires more than just physical readiness; it demands knowledge and awareness of your surroundings, particularly trail markers. Understanding hiking trail markers is crucial for not only your safety but also for the sustainability of the trails and surrounding environment. This article will guide you through the different types of trail markers, their importance, and tips on how not to get lost while hiking.

A classic case of trail signage being a little overwhelming. Photo by Dalton Johnson
Why Trail Markers Exist
Trail markers, also known as trail blazes, are signs or indicators placed along hiking trails to guide hikers. They serve several essential purposes:
Navigation: Trail markers help hikers find their way, ensuring they stay on the correct path and reach their destination without getting lost.
Safety: By following trail markers, hikers can avoid dangerous areas, such as steep cliffs, unstable terrain, or sensitive wildlife habitats.
Sustainability: Trail markers help minimize the environmental impact by directing foot traffic to designated paths, protecting vegetation and wildlife from human disturbance.
Emergency Assistance: In case of an emergency, staying on marked trails makes it easier for rescue teams to locate and assist hikers.
Types of Trail Markers
There are various types of trail markers, each serving a specific purpose. Here are some of the most common ones you might encounter:
1. Paint Blazes
Paint blazes are one of the most common trail markers. They are typically painted on trees, rocks, or other natural features along the trail. These blazes come in different shapes and colors, each indicating different information:
Single Blaze: A single blaze usually indicates that you are on the right path.
Double Blaze: Two blazes, one above the other, often indicate a change in direction. The top blaze may be offset to show which direction to turn.
Color Coding: Different colors can represent different trails or levels of difficulty.
2. Cairns
Cairns are stacks of rocks used to mark trails, especially in areas where paint blazes are impractical, such as rocky or alpine terrain. They are often found above the treeline and can vary in size from small piles to large towers. Cairns are built to be easily visible from a distance.
3. Signs
Trail signs provide detailed information about the trail, such as distances, directions, and trail names. They are usually found at trailheads, junctions, and significant points along the trail. Signs can be made of wood, metal, or plastic.
4. Poles and Posts
In open areas where trees are scarce, poles or posts with trail markers attached are used. These markers are often found in deserts, prairies, or tundra environments. They can be painted, have directional arrows, or include trail information.
5. Flagging Tape
Flagging tape is a temporary trail marker often used during trail maintenance or in less frequently traveled areas. It is typically a brightly colored ribbon tied to trees or bushes to indicate the trail.
6. Reflective Markers
Reflective markers are used for trails that are frequently hiked at night or in low-light conditions. These markers are made of reflective material that shines when illuminated by a flashlight or headlamp.
How to Read Trail Markers
Understanding how to read trail markers is essential for effective navigation. Here are some tips to help you decode the markers you encounter:
1. Know the Color Code
Different trails within a park or trail system often have different color codes. Familiarize yourself with the color assigned to your trail before starting your hike. This information is usually available at the trailhead or on park maps.
2. Pay Attention to Changes in Direction
When you see a double blaze or an offset marker, it indicates a change in direction. The top blaze or marker will often point in the direction you need to turn. Be vigilant for these markers, especially at trail junctions.
3. Look for Continuity
Trail markers are typically spaced at regular intervals. If you haven't seen a marker in a while, you might have strayed off the trail. Backtrack to the last marker you saw and reorient yourself.
4. Use Landmarks
In addition to trail markers, use natural landmarks to aid in navigation. Notable features like rivers, mountains, and distinctive rock formations can help you stay on course.
5. Check Your Map
Always carry a map of the area you are hiking. Trail markers complement maps but should not replace them. Use your map to verify your location and progress along the trail.
Importance of Following Trail Markers
Following trail markers is crucial for several reasons:
1. Safety
Staying on marked trails reduces the risk of getting lost or encountering hazardous terrain. Trails are designed to provide a safe path through the wilderness, avoiding dangerous areas.
2. Environmental Protection
Hiking off-trail can cause significant damage to the environment. It can lead to soil erosion, trampled vegetation, and disturbed wildlife habitats. Trail markers guide you along paths that minimize environmental impact.
3. Preservation of Trails
Using marked trails helps prevent the creation of unofficial paths, which can lead to trail degradation. Official trails are maintained to ensure they remain safe and sustainable for future hikers.
4. Cultural and Historical Preservation
Many trails pass through areas of cultural or historical significance. Staying on marked trails helps protect these sites from damage and preserves them for future generations.
When Is It Okay to Ignore Trail Markers?
While following trail markers is generally the best practice, there are rare occasions when you might need to deviate from marked paths:
1. Emergency Situations
In emergencies, such as needing to find shelter, water, or avoid immediate danger, you may need to leave the marked trail. Always prioritize your safety in these situations.
2. Temporary Detours
Sometimes trails may be temporarily closed for maintenance or due to hazards like fallen trees or flooding. In such cases, follow the detours marked by park authorities rather than the original trail markers.
3. Bushwhacking
Experienced hikers with advanced navigation skills sometimes engage in bushwhacking—traveling off-trail through undeveloped terrain. This should only be done in areas where it is permitted and where you have the skills to navigate safely and responsibly.
Tips for Not Getting Lost While Hiking
Here are some practical tips to help you avoid getting lost while hiking:
1. Plan Ahead
Before setting out, research your trail. Know the distance, estimated hiking time, trail conditions, and any potential hazards. Check the weather forecast and prepare accordingly.
2. Carry Navigation Tools
Always carry a map, compass, and, if possible, a GPS device. Familiarize yourself with how to use these tools before your hike. A fully charged phone with offline maps can also be helpful.
3. Stay on Marked Trails
Stick to the marked trails and follow the trail markers closely. If you need to take a break or explore a side path, make sure you can find your way back to the main trail.
4. Hike with a Buddy
Hiking with a partner increases safety and provides an additional set of eyes to help navigate. If you hike alone, inform someone of your plans and expected return time.
5. Keep Track of Time
Pay attention to how long you have been hiking and how much daylight remains. Turn back or find a suitable camping spot well before dark.
6. Use Landmarks
As you hike, take note of prominent landmarks and their positions relative to your trail. This can help you stay oriented and find your way back if needed.
7. Mark Your Path
In areas with few or no trail markers, you can create temporary markers to help you find your way back. Use natural materials like rocks or sticks to mark your path, but ensure you leave no trace.
8. Trust Your Instincts
If you feel you are lost, stop and reassess your situation. Panicking can lead to poor decisions. Use your navigation tools, backtrack if necessary, and try to reorient yourself calmly.
9. Stay Visible
If you realize you are lost, stay in a visible area and try to signal for help. Use a whistle, flashlight, or brightly colored clothing to attract attention.
Hiking between towns along Cinque Terre in Italy isn’t straight forward, but following the correct trail marker will keep you on track. Photo by Dalton Johnson
Understanding and following hiking trail markers is a crucial skill for any adventure traveler. Trail markers are designed to guide you safely through the wilderness, protect the environment, and ensure the sustainability of hiking trails. By learning to read and interpret these markers, you can enjoy your hikes with confidence, knowing you are minimizing your impact on nature and reducing the risk of getting lost.
While there are rare situations where it may be necessary to ignore trail markers, such as emergencies or temporary detours, it is generally best to adhere to the marked paths. By doing so, you contribute to the preservation of natural landscapes and cultural sites, ensuring that future generations can enjoy the same beautiful trails you do.
So, lace up your hiking boots, pack your navigation tools, and hit the trails with the knowledge that you are well-prepared to follow the markers and enjoy a safe, sustainable hiking adventure.