
We Went to Baja for a Winter of Spearfishing
When the cold months rolled in at home in Lake Tahoe, California, we decided to head south in search of adventure, warm waters, and fresh seafood. Baja's rugged coastline and endless opportunities seemed like the perfect place to spend a winter chasing fish beneath the waves. Our convoy—a van built for living and a Ford Bronco—was packed to the brim with spearfishing gear, surfboards, and the essentials for beachside camping. With three people and a dog, we were ready for anything the Baja peninsula could throw our way. Every mile south spiked our curiosity, from bustling towns like Guerrero Negro to remote beaches like El Canejo that felt like they belonged to us alone. The freedom of the open road was omnipresent, and the promise of the ocean’s bounty—of fish or waves—kept our spirits high.
When the cold months rolled in at home in Lake Tahoe, California, we decided to head south in search of adventure, warm waters, and fresh seafood. Baja's rugged coastline and endless opportunities seemed like the perfect place to spend a winter chasing fish beneath the waves. Our convoy—a van built for living and a Ford Bronco—was packed to the brim with spearfishing gear, surfboards, and the essentials for beachside camping. With three people and a dog, we were ready for anything the Baja peninsula could throw our way. Every mile south spiked our curiosity, from bustling towns like Guerrero Negro to remote beaches like El Canejo that felt like they belonged to us alone. The freedom of the open road was omnipresent, and the promise of the ocean’s bounty—of fish or waves—kept our spirits high.

Starting to spearfish from shore in Baja. Photo by Dalton Johnson
The Call of the Ocean
December and January aren’t typically the best months for spearfishing in Baja. Seasoned anglers warned us that the waters might not be as productive as other times of the year. But we were eager to see for ourselves, willing to take the chance in exchange for the thrill of exploring Baja's vast coastline. The winter months had their own magic—the water was still warm enough to dive comfortably, and the solitude of the beaches made each spot feel like an undiscovered treasure.
The drive along Baja’s highways, with their twists and turns revealing dramatic ocean views, made the journey itself part of the adventure. Between stretches of open road, we stopped at small fishing villages where locals shared tips on the best spots to dive. Each interaction added to the richness of our trip, painting a fuller picture of Baja’s charm and challenges.
As we wound our way down the peninsula, it quickly became clear that Baja was a haven for multi-sport days. Many of the surf spots we visited, like Cerritos Beach and San Juanico, doubled as prime spearfishing locations. The reefs that shaped perfect waves also served as underwater playgrounds for a variety of fish. On days when the surf went flat, we swapped our boards for spearguns and dove below the surface, combining two passions into one seamless adventure. The balance of surfing and spearfishing turned every day into a new opportunity to connect with the ocean.

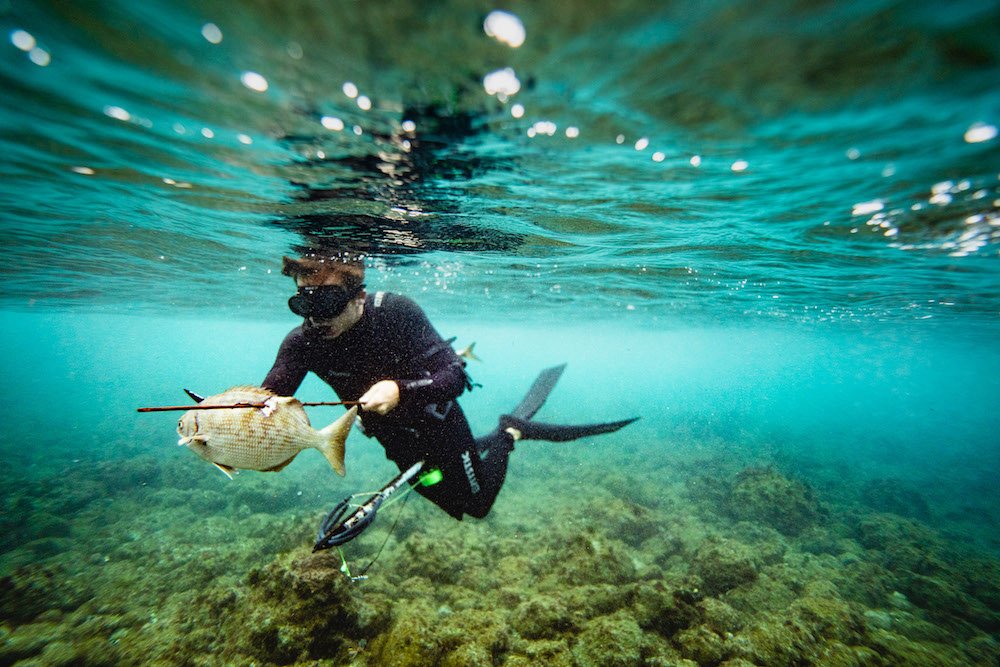
Andrew holding his breath, stalking a fish to spear in Baja. Photo by Dalton Johnson
Learning the Hunt
Each dive felt like stepping into a new world. The ocean’s clarity revealed bustling reefs where fish darted between rocks, and we quickly learned how our movements affected their behavior. Some fish were cautious, disappearing with the slightest motion, while others seemed curious, lingering just long enough to become dinner. It was a game of patience and precision that kept us hooked. With every dive, we honed our skills, discovering the nuances of approaching fish without startling them and understanding the underwater currents that could either help or hinder our hunts.
Most days, we returned to camp with a fresh catch, grilling it on the beach as the sun set. There’s nothing quite like the satisfaction of cooking fish you caught yourself, its flavor heightened by the salt air and the glow of a campfire. But not every dive was successful, and some days we chose to let the fish be. One particular day stands out when the haul just didn’t seem worth the effort, especially considering the hour-long walk back to camp with all our gear. The unpredictability of the ocean made each dive an adventure, whether we caught anything or not. Those quiet days were balanced by the thrill of successful ones, where we celebrated not just the catch but the teamwork and effort that went into it.
We also learned to appreciate the nuances of the hunt. Each species of fish reacted differently to our presence, and understanding their behavior became an obsession. Some days we spent hours experimenting with how best to approach them, and even when we came up empty-handed, the knowledge gained made it worth it. Observing the underwater ecosystem, from darting schools of fish to slow-moving rays, added depth to our understanding of Baja’s marine life. It was a reminder that every dive, whether successful or not, was a chance to connect with a world most people never see.
Safety in Numbers
If there’s one thing we learned from our winter spearfishing adventure, it’s the value of having a buddy in the water. Spearfishing is a team sport, not just for safety but for the camaraderie it brings. While Baja’s waters were relatively calm during our visit and large fish were scarce, the thought of being in shark territory with a hip full of fish kept us vigilant. Diving with friends made every moment more enjoyable and reassured us that someone always had our back. The shared thrill of a successful hunt or the laughter over a misstep turned each outing into a memory we’ll cherish forever.
Having a group also made the logistics of the trip easier. While one person prepped the gear, another scouted potential spots, and someone else took care of camp. This teamwork made the days flow smoothly, allowing us to focus on enjoying the experience. Whether it was navigating tricky roads to remote beaches or cooking meals together under the stars, the sense of community added another layer of richness to the adventure.


The Best Spots for Winter Spearfishing
Our route took us to some of the most beautiful and productive spots Baja has to offer. Each location brought its own unique challenges and rewards:
El Canejo: Remote and peaceful, this spot felt like our private paradise. Mostly known for its surfing, but there were some stellar spearfishing opportunities when we were there. The waves were small and unreliable, but the quiet beaches made it a dream spot for camping.
San Juanico: A dual-purpose gem with great waves and productive reefs. We actually broke the Bronco during our time here by swamping it in the ocean, which forced us to stay a few extra days. It turned out to be a blessing, as the extra time gave us more chances to explore the reefs.
Cerritos Beach: A favorite for surfing, we took a break from camping here and stayed in a condo for a few days to enjoy the waves. What a dream spot! The nearby Baracutas Tacos were out of this world and fueled us for long days in the water.
Todos Santos: Bustling with charm, the nearby waters provided excellent diving opportunities. There are tons of local fishermen, so if you want to go out in a panga, this is a good way to experience the waters from a different angle.
La Ventana: Known for its windsurfing, the underwater life was just as captivating. We only spearfished a couple of times here as the visibility was low, but we surely enjoyed the hot springs on the beach and the relaxed vibe of the area.
East Cape: Quiet beaches and crystal-clear waters made it a highlight of the trip. Often, we saw whales in the distance, their tails breaching the horizon. This part of Baja feels remote, so we were extra careful here to make sure we didn’t get stuck on any of the beaches we camped at.
At each stop, the rhythm of our days depended on the ocean. If the waves were firing, we surfed. If the water was calm, we fished. It was a dynamic, ever-changing schedule that kept us engaged and excited. Baja’s diversity made every day feel like a new chapter in our adventure. Each reef held its own surprises, from schools of vibrant fish to underwater caves waiting to be explored.

Andrew and Kicker stoking the fire while camping on the beach in Baja. Photo by Dalton Johnson
Life on the Road (and the Beach)
For the majority of our trip, we lived on the beach. The van was our basecamp, equipped with everything we needed for life on the road. The Bronco carried our extra gear and made off-road excursions a breeze. Nights were spent under the stars, lulled to sleep by the sound of thudding waves, often with the back doors of the van swung wide open to let in the ocean breeze and the soothing crash of waves.
Beach camping in Baja is an adventure in itself. Choosing a campsite close to the water meant waking up to stunning sunrises and the soothing sound of little waves or the thunder of big waves. We quickly learned a few tips to make the experience smoother: it rains in Baja, so bring the tent's rainfly, you'll need a sweatshirt as the nights are cold, and a fire at the beach is a great way to end the day.
Vanlife in Baja added a unique dimension to the trip, as it allowed us to park in remote spots with ease (as long as we didn’t get stuck). I built my van with my dad and lived in it for three years before this trip, so the van is self-sufficient, meaning cooking meals, charging cameras, working remotely, and the occasional sink shower was possible.
Occasionally, we treated ourselves to a bit of luxury, like the condo at Cerritos Beach, but those moments were rare. Baja is a place that demands you embrace its rugged simplicity. If you push, Baja will snap back and humble you. We learned this the hard way when driving the Bronco on the beach—we swamped the turbo and had to wait three days for it to dry out. However, the nights spent gazing at the stars or chatting around a beach fire remain some of the most vivid memories from our trip. The simplicity of vanlife and beach camping in Baja made every moment feel like we were at home in nature.
Walking back to camp after a long day of spearfishing. Photo by Dalton Johnson
Takeaways from a Winter in Baja
Spearfishing in Baja was a warm reprieve from the cold at home in Lake Tahoe. Even though the winter may not have been the most productive season, this spearfishing and surfing road trip was an unforgettable experience. Every dive taught us something new, whether about the ocean or ourselves. From the calm of the hunt at the ocean floor to the joy of sharing ceviche with friends, this road trip to Baja gave us more than we could have hoped for.
Like all good things, this adventure had to come to an end. We left with memories of waves, fish, and camaraderie that will inspire us until the next journey south. Baja, we’ll see you again.
Discover more Adventures


Call Me a Jerry for Using My Backcountry Ski Gear at a Resort
“Do you look sick, or do I look like a Jerry?” It’s the question I ask myself every time I strap into my backcountry setup for a day at the resort. Early season turns blur the line between style and practicality, and I’m unapologetically in the latter camp. The truth is, I only own backcountry ski gear, so I use it at the resort. Why not just head into the backcountry? Let me explain—but first, here’s a breakdown of my setup.
“Do you look sick, or do I look like a Jerry?” It’s the question I ask myself every time I strap into my backcountry setup for a day at the resort. Early season turns blur the line between style and practicality, and I’m unapologetically in the latter camp. The truth is, I only own backcountry ski gear, so I use it at the resort. Why not just head into the backcountry? Let me explain—but first, here’s a breakdown of my setup.
The author skiing at Heavenly with an inversion layer over Lake Tahoe.
My New Backcountry Ski Gear
This season, I invested in the Blizzard Zero G skis with Look bindings and Lange XT3 boots. While this setup isn’t the lightest, it’s incredibly versatile. It handles everything California throws at it, from light powder days to spring corn and even the infamous California concrete. I’ve already logged eight days on these skis at the resorts, and so far, I’m impressed.
The Zero Gs offer a solid balance of weight and performance, and the Lange XT3 boots deliver both power on the downhill and mobility for uphill skinning. It’s the perfect setup for transitioning between resort groomers and backcountry exploration.
And no, I’m not wearing my beacon while lapping groomers—thank you for asking. But if I were exploring the backside at Kirkwood or venturing into out-of-bounds terrain, that might be a fair question.
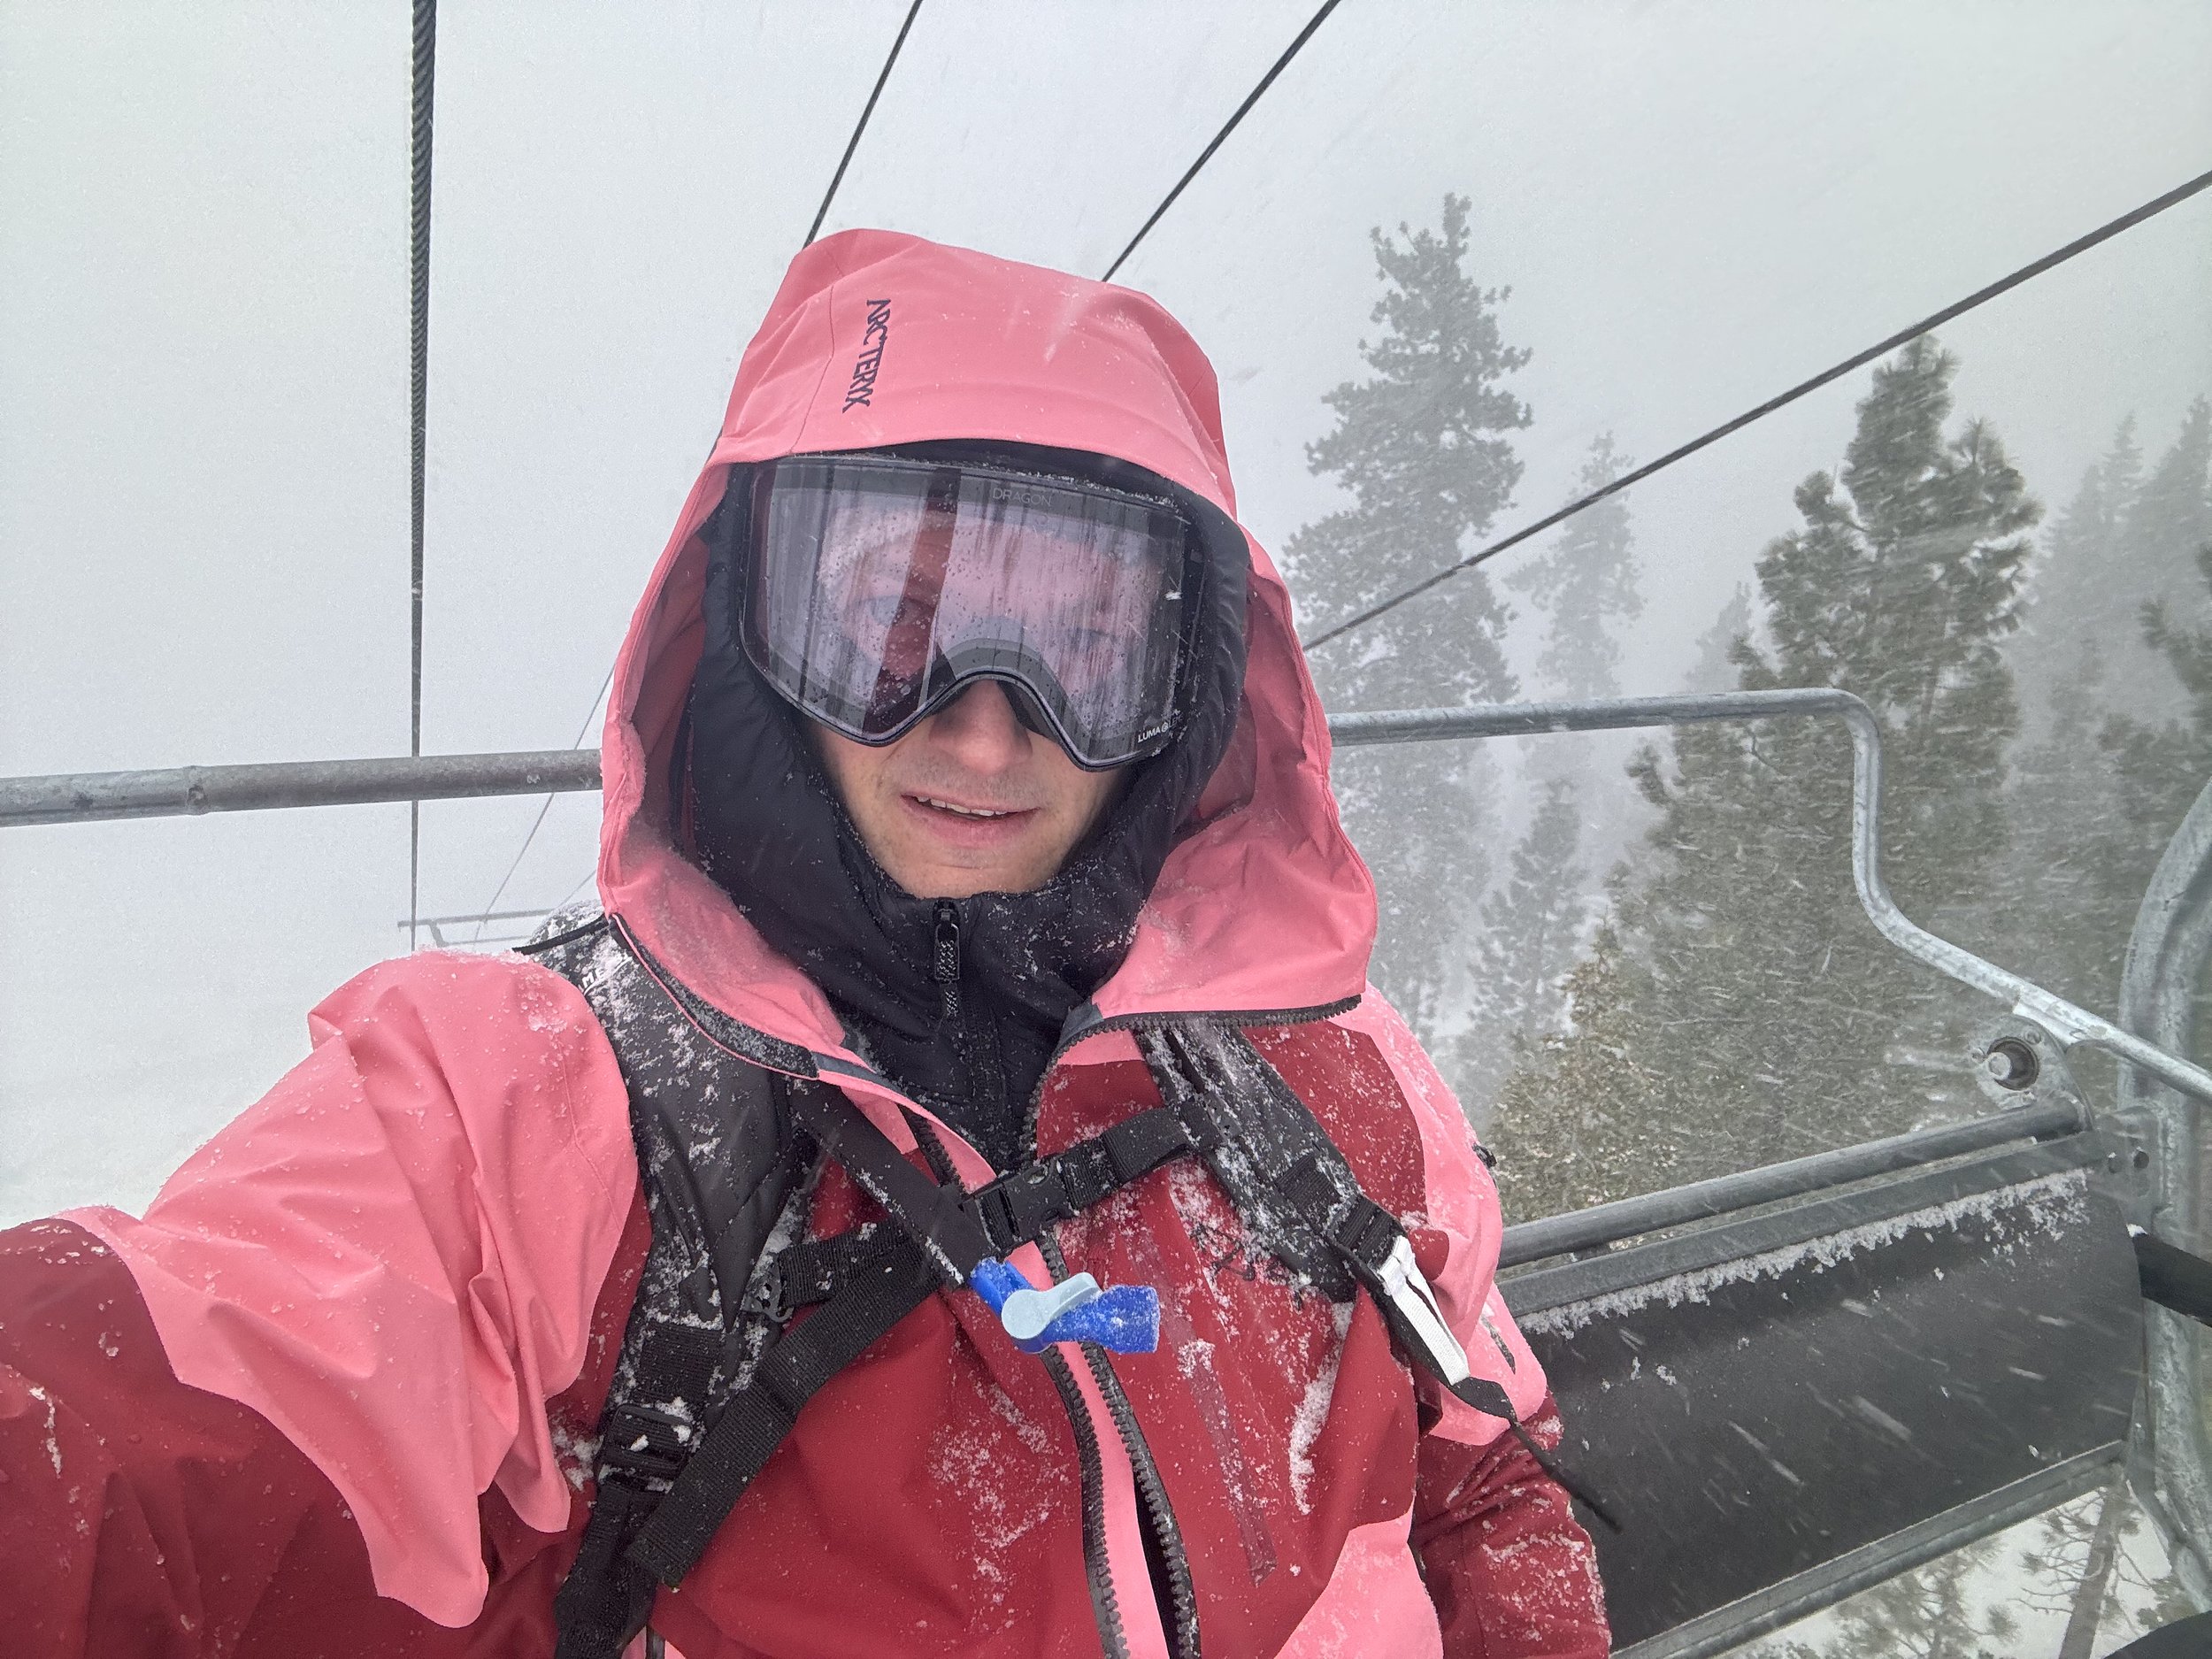
A selfie while testing out a new jacket in snowy conditions.
Why I Use Backcountry Gear at the Resort
You’re probably wondering why I risk looking like a Jerry skiing a resort in backcountry gear. Here’s why:
1. The Backcountry Isn’t Ready
The season is still young, and the snowpack in California isn’t reliable enough for safe backcountry trips. Conditions are thin, avalanche danger is higher, and frankly, the terrain isn’t worth the risk yet.
2. My Ski Buddies Aren’t Ready
None of my friends are eager to join me in the backcountry this early in the season. And while I could branch out and find new ski partners, I’ve opted to wait until conditions improve. In the meantime, I’ve been making the most of my Epic Pass and running fitness laps at the resort.
3. Fitness for the Backcountry
Backcountry skiing demands serious stamina. Running lap after lap at the resort builds the fitness I’ll need when conditions improve. These early-season turns help me shake off the summer rust and build strength for longer, more grueling days in the backcountry. When the snow finally comes, I’ll be ready to tackle second, even third laps with confidence.
4. Shaking Off the Rust
A day at the resort is the perfect environment to dust off your skills after months away from the snow. The predictable terrain and forgiving conditions let me focus on dialing in my gear and technique. By the time the backcountry season kicks off, I’ll be skiing at my best.

Tips Up while riding the lift back to the car after a day of resort skiing in backcountry gear.
Am I a Jerry?
To the untrained eye, maybe I do look like a Jerry. But let’s be real—there’s no shame in maximizing your gear’s potential while waiting for the backcountry season to fill in. So, this one goes out to everyone like me, riding lifts in their backcountry gear, building strength, and waiting for the snow to fill in. We might look like Jerrys now, but when the powder finally drops, we’ll be the ones cruising past with fresh legs and sharp edges.
For now, I’ll keep running fitness laps, dialing in my Blizzard Zero Gs, and laughing at the question: “Do you look sick, or do I look like a Jerry?” Maybe the answer is both—but I’m okay with that.
Discover More Gear
Best Time to Spearfish in Baja
Spearfishing in Baja had been a dream of mine, but I could never pull the trigger until recently. The region is known as a cornucopia of delicious fish to catch regardless if you’re a seasoned diver, or a beginner. But, if you are like me, you’re probable wondering about the best times to plan your trip, the answer depends on what you’re looking to catch and where you’re heading.
Spearfishing in Baja had been a dream of mine, but I could never pull the trigger until recently. The region is known as a cornucopia of delicious fish to catch regardless if you’re a seasoned diver, or a beginner. But, if you are like me, you’re probable wondering about the best times to plan your trip, the answer depends on what you’re looking to catch and where you’re heading.

On the hunt while spearfishing in Baja. Photo by Dalton Johnson
Best Times to Spearfish in Baja
The prime spearfishing season in Baja generally runs from spring through early autumn. That water is warmer, attracting species like yellowfin tuna, wahoo, and dorado, making late spring to fall ideal for those targeting these tropical fish. On the other hand, cooler months that require a wetsuit, such as December and January, are better for catching snapper and yellowtail. Water visibility and weather conditions are typically at their best from late spring to early autumn.
It’s also worth considering the impact of local events like fishing tournaments, festivals, and holiday crowds, which can make some spots busier. Planning your trip around these dates can help you find quieter areas for spearfishing. I went with a buddy who had spearfished in Baja before, so we relied on his knowledge to fish the best spots.
Baja Spearfishing in Every Season
There is no question each season in Baja offers unique opportunity for spearfishing, but it's good to know what you are getting yourself into. Here’s a detailed breakdown of what you can expect throughout the year:
Spring (March to May): Spring bring the warmer water temperatures and improved visibility. Species like yellowtail and grouper are commonly found during this period. This is also a great time to avoid the summer crowds while still enjoying productive fishing. The mild weather and vibrant marine life make spring an excellent season for beginners and experienced divers alike.
Summer (June to August): Summer is peak season for spearfishing in Baja. Warmer waters bring in larger pelagic species such as dorado, yellowfin tuna, and wahoo. Visibility is excellent, making it an ideal time for both beginners and experienced divers. However, summer is also a busy tourist season, so plan your trip to avoid crowded spots. Early morning or late afternoon dives can help you enjoy a more serene underwater experience.
Autumn (September to November): Autumn continues to offer warm waters and good visibility. Many of the same species from summer, like dorado and tuna, remain abundant. This is a fantastic time to enjoy spearfishing with fewer crowds as the tourist season winds down. Autumn also provides calmer seas, making it a preferred choice for divers who prioritize safety and comfort.
Winter (December to February): Winter brings cooler waters, which are better for species like snapper and yellowtail. Although visibility may be slightly reduced compared to summer and autumn, winter spearfishing can still be highly rewarding, especially in less-visited areas of Baja. The cooler water temperatures require thicker wetsuits, so come prepared for the conditions.

Camping on the beach and suiting up to go spearfishing. Photo by Dalton Johnson
We Went Spearfishing for the Winter in Baja
We decided to head south of the border for a winter road trip, exploring Baja with our van and Bronco loaded up with spearfishing gear. December and January weren’t exactly the prime months, but we were eager to see what the ocean had to offer despite the warnings from seasoned anglers.
As we drove along the Baja peninsula, we found that many surf spots doubled as fantastic spearfishing locations. The reefs that create perfect waves are also home to a variety of fish. When the surf went flat, we’d grab our gear and dive beneath the waves to hunt for dinner. The dual-purpose nature of these spots made our trip more dynamic and exciting.
Each dive was a new adventure. We learned how different fish reacted to our movements, a challenge that kept the experience exciting. Most days, we returned to camp with fresh fish to cook, though there were a few times we opted not to shoot anything. One notable time was when none of the fish seemed worth the effort, especially knowing we had an hour-long walk back to camp.
One of my biggest take-aways from this trip was that having a buddy with you makes spearfishing safer and more enjoyable. While we didn’t encounter any large fish during our winter dives, the thought of swimming with a hip full of fish in shark territory kept us cautious. The camaraderie and teamwork added an extra layer of fun and safety to the experience.
Comparing the Pacific Side and Sea of Cortez
We explored both the Pacific side and the Sea of Cortez during our spearfishing road trip to Baja. Each side of the peninsula had its unique advantages. The Pacific waters were cooler and offered different species, while the Sea of Cortez had areas with warmer water and better visibility.
The Sea of Cortez, often referred to as the “Aquarium of the World,” provided a more diverse marine experience. However, it’s important to note that some parts of the Sea of Cortez are marine preserves where fishing is prohibited. Make sure to respect these zones to protect the environment and avoid penalties.
On the Pacific side, the rugged coastline and deeper waters made for a more challenging and rewarding dive experience. The contrasts between these two regions allowed us to appreciate Baja’s incredible variety, ensuring that no two dives felt the same.
Lessons Learned and Final Tips
Spearfishing in Baja during winter was a rewarding experience, even if it wasn’t the peak season. Here are some key takeaways from our adventure:
Research Local Regulations: Know which areas are marine preserves and respect the rules to help protect Baja’s marine life. Being informed ensures a sustainable and hassle-free experience.
Adapt to Conditions: When surf spots were flat, we took the opportunity to spearfish. Flexibility made our trip more enjoyable and allowed us to make the most of changing conditions.
Always Dive with a Buddy: For safety and fun, spearfishing is better with a partner. The shared experience adds to the joy and minimizes risks.
Plan Around Events: Avoid crowded areas by checking for local festivals or tournaments. Planning ahead can make the difference between a chaotic dive and a serene one.
Enjoy the Learning Curve: Observing how fish react and understanding their behavior added to the thrill. Each dive taught us something new, deepening our appreciation for the sport.
Not the best shot, but still caught it while spearfishing in Baja. Photo by Dalton Johnson
While winter spearfishing in Baja brought us plenty of fish and memories, we definitely need to return during the warmer months to experience the region’s peak season. If you’re planning a trip, consider your target species and the time of year to make the most of your spearfishing in Baja.
Discover more Adventures

I Wouldn’t Make It in Vanlife Without a Mr. Buddy Heater
When fall arrived in the Tetons, I found myself facing the harsh reality of freezing temperatures. Nights dipped into the 20s, and my van became an icy box by morning. With just a sleeping bag and some sheets, I woke up shivering and surrounded by frost. Running the van’s engine all night for heat wasn’t an option, so I needed a solution fast. That’s when I discovered the Mr. Buddy Heater.
I drove to the nearest Home Depot, grabbed a Mr. Buddy heater and a small propane tank, and hoped for the best. It worked—kind of. After years of living vanlife through all seasons, I’ve learned what you need to know about using a Mr. Buddy heater to survive cold nights in a van.
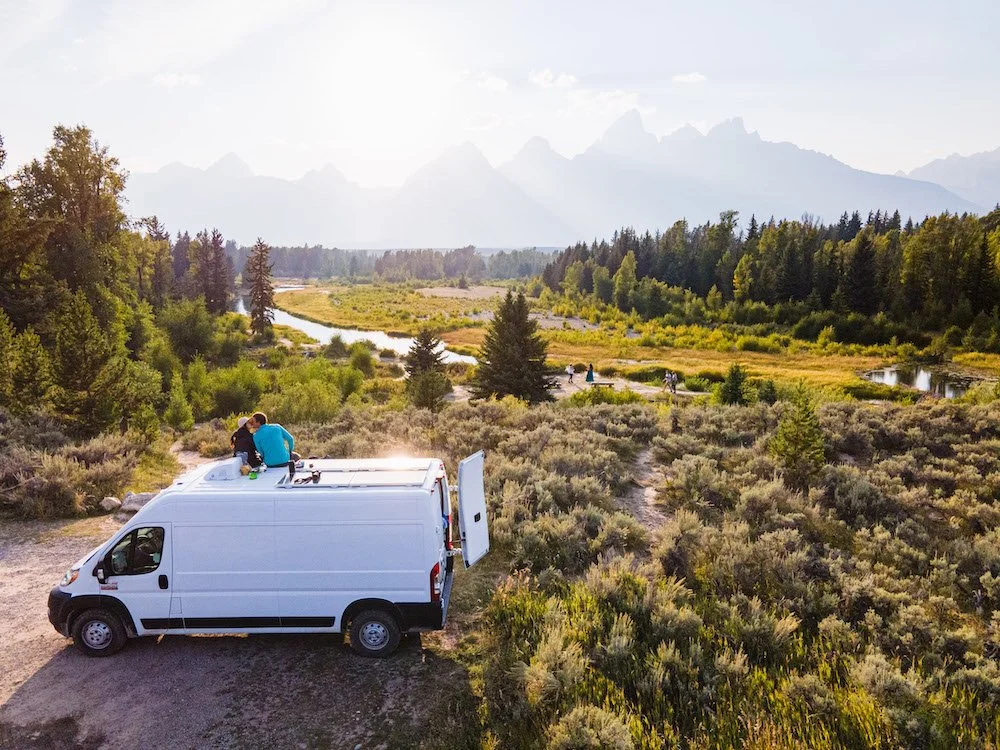
Just before the cold fall days came while vanlifing it around the Tetons. Photo by Dalton Johnson
Why a Mr. Buddy Heater is a Must-Have for Vanlife
For the past eight years, I’ve lived full-time in my van. That includes sweltering summers and bitter winters. Let me tell you, there’s nothing worse than waking up to frost on the inside of your windows or, even worse, an icicle dangling from the roof. Staying warm is essential for comfort and safety. If you’re planning to embrace vanlife in colder climates, do yourself a favor and invest in a heater.
The Mr. Buddy heater is an affordable, simple solution for heating your van. It runs on propane, and with a gas line and tank, it can quickly take the chill off your space. However, like most things in vanlife, there are a few quirks and challenges to consider.

There is nothing worse than trying to get dry without a heater during vanlife. Photo by Dalton Johnson
The Good and The Bad of Using a Mr. Buddy Heater
1. No Thermostat Control
One thing to keep in mind is that the Mr. Buddy heater doesn’t come with a thermostat. That means it’s either fully on or completely off. Even on the lowest setting, it pumps out a steady stream of heat, which can quickly warm up a small space. While that’s great for those freezing mornings, it’s less ideal when you’re trying to sleep.
To balance the temperature, I crack open the roof vent to let some heat escape while still keeping the van warm enough to stay comfortable. It takes a bit of trial and error to figure out what works for your setup, but once you do, it’s a game-changer.
2. High Altitude Limitations
If you’re planning to travel or live at higher elevations, be aware that the Mr. Buddy heater can struggle above 6,000 feet. I’ve learned this the hard way while camping in the Rockies. The heater’s built-in safety features include an oxygen sensor, which can cause it to shut off in thin air. The good news is, if the heater turns off, the propane automatically shuts off too, so there’s no risk of leaking gas.
For those venturing into high-altitude regions, it’s wise to have a backup plan, like extra blankets or an alternative heat source.
3. Maintenance is Key
Vanlife is messy. Dust, dirt, and debris seem to find their way into every corner of the van, and the Mr. Buddy heater is no exception. Over time, the dust can clog the heater’s valve, causing it to stop working. Regular cleaning is essential to keep it running smoothly.
Thankfully, cleaning the heater is simple. All you need is some witch hazel and a few Q-tips. Carefully clean around the valve and any other dusty areas to keep the heater in good shape. A little maintenance goes a long way in ensuring your Mr. Buddy remains a reliable companion during those cold months.
Tips for Using a Mr. Buddy Heater Safely
Ventilation is crucial. Always crack a window or open a roof vent when the heater is running to ensure proper airflow. This helps prevent condensation and reduces the risk of carbon monoxide buildup.
Use a carbon monoxide detector. Safety first! A portable detector is a small investment that can save your life.
Turn it off when you sleep. While it’s tempting to keep the heater running all night, I usually heat the van before bed and then rely on my sleeping bag and blankets for warmth.
Vanlife in the winter along Highway 395. Photo by Dalton Johnson
My Verdict on the Mr. Buddy Heater
The Mr. Buddy heater isn’t perfect, but for vanlife, it’s a lifesaver. It’s affordable, effective, and simple to use. Yes, you’ll have to deal with quirks like high-altitude shutoffs and occasional cleaning, but those minor inconveniences are worth the warmth and comfort it provides.
Without my Mr. Buddy heater, those icy nights in the Tetons might have convinced me to give up vanlife altogether. Instead, I’ve braved eight winters on the road, staying warm and cozy even when the weather outside was anything but. If you’re gearing up for vanlife in colder climates, trust me: a Mr. Buddy heater should be at the top of your must-have list.
Discover More Gear

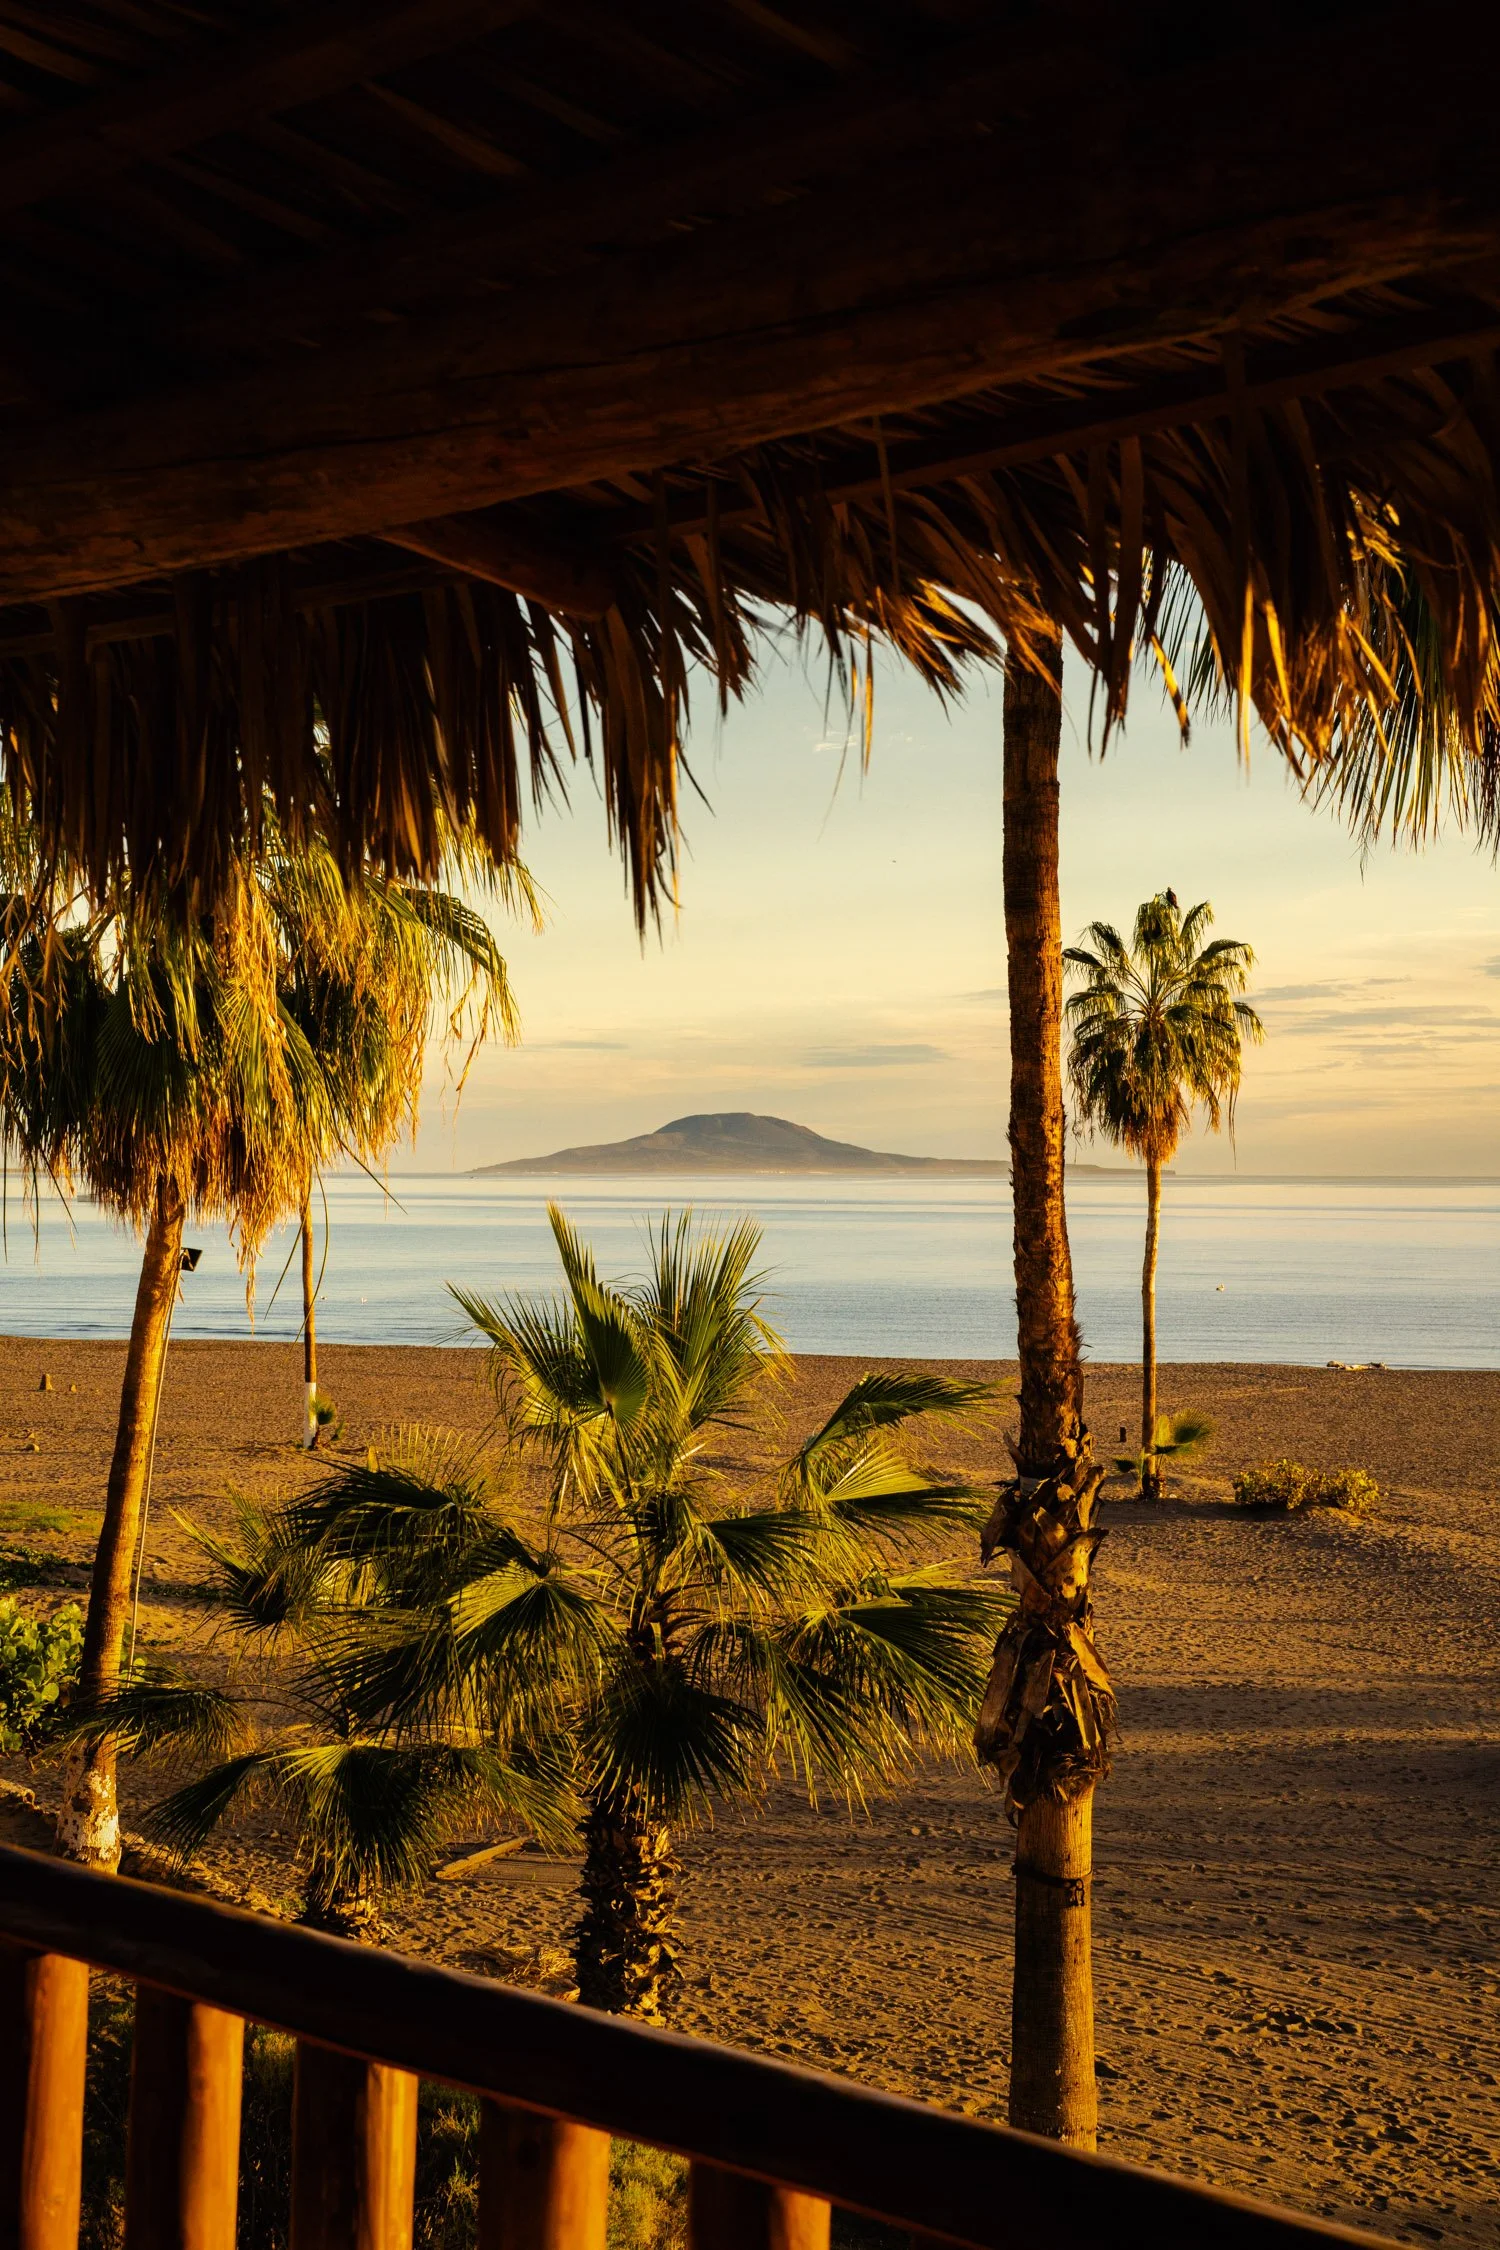
La Ventana's Hot Springs On The Beach Are A Must-Visit
Hot springs on the beach sound like a dream, but in La Ventana, they’re a reality. Just north of this kite-surfing addicted city of Baja Sur lies Playa Agua Caliente, a unique beach where you can soak in natural hot springs at low tide along the Sea of Cortez. These hidden treasures bubble right out of the sand, offering an unforgettable experience for those who make the trip north. The trifecta of secluded beach, desert landscape, and floating islands makes this spot dreamy, at least that is how I felt.
Hot springs on the beach sound like a dream, but in La Ventana, they’re a reality. Just north of this kite-surfing addicted city of Baja Sur lies Playa Agua Caliente, a unique beach where you can soak in natural hot springs at low tide along the Sea of Cortez. These hidden treasures bubble right out of the sand, offering an unforgettable experience for those who make the trip north. The trifecta of secluded beach, desert landscape, and floating islands makes this spot dreamy, at least that is how I felt.
Soaking in the La Ventana hot springs. Photo by Dalton Johnson
My First Experience at La Ventana’s Hot Springs
The first time I visited these hot springs, we were lucky. We didn’t need to dig at all. The springs had already formed shallow pools, about a foot deep, on the sandy beach. As I settled in, searching in the sand, hot water bubbled up beneath me, occasionally surprising me with a hot splash against my skin. The unlocked hot water burned, but that was my fault. All I could remember thinking after getting a little fire to the skin was how could a place like this exisit? Free and no amenities, if this was in the USA, it would be a different story.
As we enjoyed the hot springs, we noticed cows casually wandering nearby, adding to the rustic charm of the setting. The quiet dirt road leading to the beach made it feel like a hidden gem, untouched by major tourism. The distant mountains and the gentle sound of waves crashing added to the tranquil ambiance. We had arrived as the tide was going out, which was perfect timing. However, as the tide returned, the cold ocean water began to creep into the pools. That was our cue to pack up and head home, thoroughly relaxed and rejuvenated.
How to Find the Hot Springs
Getting to these hot springs is straightforward. From La Ventana, take the main road north, following signs or your map to Playa Agua Caliente (Hot Water Beach). The drive itself is part of the adventure, offering stunning views of the Sea of Cortez on one side and rugged desert landscapes on the other. As you drive along the coastline, you’ll notice a small parking area on the far north side of the beach. It’s easy to spot because it’s usually filled with cars, and you’ll see people with shovels heading toward the shore.
Park your car—look for a flat spot if you can—and make your way to the beach. During low tide, you’ll find areas where hot water seeps through the sand. If no pools have formed yet, grab a shovel and dig a shallow hole. Before you know it, hot water will seep into your personal tub. I feel like a miner looking for hidden treasure everytime I dig for a hot spring.
If you’re unsure where to start, just follow the crowd. Many visitors work together to create larger communal pools, adding a social element to the experience. Alternatively, you can find a quieter spot and craft your own private hot spring haven. Either way, the reward of soaking in warm, mineral-rich water while gazing at the ocean is unmatched.
Tips for Enjoying the Hot Springs
Timing Is Key: The hot springs are only accessible during low tide. Check a tide chart before you go to ensure the water level is right for soaking. Arriving just as the tide begins to go out is ideal. The transition between tides offers a dynamic experience where the springs are at their best.
Bring a Shovel: Sometimes the hot springs are already formed, but if not, you’ll need to dig your own pool. A sturdy shovel makes the process easier and faster.
Stay Hydrated: Even though the water is warm, the Baja sun can be intense. Bring plenty of water and snacks to stay comfortable. Sunscreen and a hat are also recommended to protect against the sun.
Cold Plunge Optional: If you start feeling too warm, take a quick dip in the refreshing waters of the Sea of Cortez just steps away. The cool ocean water contrasts perfectly with the heat of the springs, creating an invigorating experience.
Make Friends: The atmosphere is relaxed, and many visitors are happy to share tips on finding the best spots or even help you dig. Conversations often start with shared tools or advice, creating a sense of community.
Bring a Camera: The unique setting of the hot springs, combined with the natural beauty of the area, makes for incredible photo opportunities. Capture the interplay of desert and sea, or simply document your relaxing soak.
Kristin getting goofy after too much time in the La Ventana hot spring. Photo by Dalton Johnson
A Unique Baja Sur Experience
La Ventana’s hot springs are an unforgettable adventure. Whether you’re a seasoned traveler or a first-time visitor, soaking in warm water with the Sea of Cortez on one side and rugged Baja scenery on the other is something you won’t forget. The blend of natural beauty and community spirit makes this spot a must-visit.
What sets Playa Agua Caliente apart is its raw and unspoiled beauty. Unlike other hot springs that may feel overly commercialized, these natural pools retain their organic charm. The simplicity of digging your own tub and sitting in warm water under an open sky makes the experience feel genuine and connected to nature. It’s the kind of adventure that feels both invigorating and grounding.
Don’t miss your chance to experience this beachside wonder. Grab your shovel, time your visit with the tides, and enjoy nature’s hot tub with an unparalleled view. Whether you’re traveling solo, with friends, or with family, Playa Agua Caliente promises a memorable escape into the natural wonders of Baja Sur.
Discover more Adventures

After 2 Years, The Benchmade Station Knife Is Still Scary Sharp
Rarely do I get to write a review about a product almost two years after purchasing it, but today I have the pleasure of discussing the Benchmade Station Knife. This culinary knife is the ultimate “one-knife quiver” that truly does it all. Two years in, the edge still scares me—it’s that sharp—and I use it daily. From meal prep at home to cooking on the road, this knife has proven itself time and time again.
Rarely do I get to write a review about a product almost two years after owning it, but today I have the pleasure of discussing the Benchmade Station Knife. This culinary knife is the ultimate “one-knife quiver” that truly does it all. Two years in, the edge still scares me—it’s that sharp—and I use it daily. From meal prep at home to cooking on the road, this knife has proven itself time and time again.
What I Use the benchmade station Knife For:
Traveling in the Van and Car Camping
Whenever I’m on a vanlife road trip, the Benchmade Station Knife is always in my kit. It’s the perfect all-in-one tool, ideal for simplifying life on the road. Whether I’m prepping food under a lantern-lit night sky, slicing veggies on a campsite picnic table, or even cutting fruit for a quick snack, this knife handles everything. Its versatility means I can pack lighter without compromising utility, and that’s invaluable for vanlife. Having fewer tools without sacrificing functionality makes vanlife and car camping so much easier. It’s also easy to clean, which is a huge bonus when water and resources are limited.
On top of all that, the Station Knife’s robust construction gives me peace of mind. It can handle tough cuts, whether I’m preparing thick-skinned vegetables or slicing through meat. It’s one less thing to worry about when you’re out in the wilderness, far from any store or replacement tools.
Everyday Use in the House
At home, the Benchmade Station Knife often takes center stage as my daily driver in the kitchen. From chopping vegetables for dinner to sausages for breakfast, it’s the knife I reach for most often. While I occasionally reach for specialty knives—like a tomato knife for ultra-thin slices or a bread knife—the Station Knife could easily handle every task if needed. Its edge retention, balance, and versatility make it a standout choice for everyday use. For instance, it’s excellent for dicing onions, mincing garlic, and even carving cooked meat.
The knife’s efficiency saves me time in the kitchen. Its sharp blade means fewer strokes and quicker prep, which is a lifesaver during busy evenings. Even with other knives available, I find myself gravitating toward the Station Knife because it feels so reliable. If I had to downsize my kitchen tools to just one, this would be it without hesitation.
Benchmade
The Good and the Bad about the Benchmade Station Knife
The Good
To put it simply, I don’t have anything bad to say about the Benchmade Station Knife. It’s rare to find a product that ticks every box, but this knife does. From its razor-sharp blade to its balanced feel in hand, it’s a joy to use. It also has a sleek, professional look that adds a touch of elegance to any kitchen. Plus, Benchmade’s Lifesharp Guarantee means the knife will stay in peak condition for life. If it ever needs servicing, they’ve got me covered.
Another highlight is the material quality. The handle’s combination of G10, Richlite, and Carbon Fiber ensures durability and comfort, even during extended use. The blade is incredibly tough and resists dulling, even with daily use over two years. It’s easy to see why this knife has become a favorite among culinary enthusiasts and adventurers alike.
The Bad
Honestly? I can’t think of a single downside. If I had to nitpick, I could mention that the knife’s quality might make other tools in my kitchen feel unnecessary—but that’s hardly a complaint! The Station Knife’s versatility and performance leave little room for improvement. Even its price, while premium, is well justified by its durability and Benchmade’s excellent customer service.

Benchmade
How Does the Knife Feel in the Hand?
For me, the feel of the Benchmade Station Knife is its best feature. The weight and balance are perfect, making it easy to control during precise cuts. The heavy blade helps guide my hand naturally, and the large size ensures visibility, reducing the chance of accidental nicks (fingers crossed that trend continues!).
The handle’s ergonomic design deserves special mention. It feels secure without being overly bulky, which is great for extended use. Whether I’m working on a delicate task like cutting fish, the knife’s grip and stability inspire confidence. Even with wet or greasy hands, the handle doesn’t slip, which is a testament to its thoughtful design.
Specs
Open Length: 10.88'' | 27.64cm
Blade Length: 5.97'' | 15.16cm
Blade Thickness: 0.114'' | 2.9mm
Handle Thickness: 0.608'' | 15.44mm
Mechanism: Fixed Blade
Blade Style: Clip-Point
Handle Materials: Customizable
Ambidextrous: Yes
Weight: 6.92oz | 196.18g
Sheath: Customizable
Sheath Weight: 1.16oz | 32.89g

Benchmade
Final Thoughts
The Benchmade Station Knife has exceeded every expectation I had when I first purchased it. Its sharpness, durability, and versatility make it a staple in both my vanlife adventures and my everyday kitchen. With Benchmade’s Lifesharp Guarantee, I’m confident this knife will be a lifelong companion. If you’re looking for a culinary knife that can truly do it all, the Benchmade Station Knife should be at the top of your list.
Its ability to transition seamlessly between vanlife and home use speaks volumes about its practicality. Whether you’re an adventurer who needs reliable gear or a home cook looking for a high-performance tool, this knife delivers on every front. Two years later, I’m still amazed by its sharpness and quality. Investing in this knife means investing in something that lasts, and for me, it’s worth every penny.
Discover More Gear

The Complete Beginner Guide to Flatwater Kayaking
There's a tranquil beauty that comes with gliding across the still surface of a calm lake, river, or pond, surrounded by nature's serenity. If you've ever been captivated by the idea of exploring these peaceful waters up close, then you're in the right place. Welcome to our beginner's guide on how to embark on the exciting journey of flatwater kayaking.
There's a tranquil beauty that comes with gliding across the still surface of a calm lake, river, or pond, surrounded by nature's serenity. If you've ever been captivated by the idea of exploring these peaceful waters up close, then you're in the right place. Welcome to our beginner's guide on how to embark on the exciting journey of flatwater kayaking.
Flatwater kayaking is the perfect entry point into the world of paddling for those seeking a harmonious blend of adventure and tranquility. Whether you're a nature enthusiast, an adventure seeker, or simply looking for a new way to connect with the great outdoors, this guide will equip you with the knowledge and skills you need to get started.
As we push off on this journey together, we'll dive into the pro tips for beginner flatwater kayakers, from selecting the right kayak and gear to mastering basic paddling techniques and safety measures. By the end of this guide, you'll be prepared to launch your kayak onto calm waters, leaving ripples of excitement in your wake while basking in the serene landscapes that await.
So, grab your paddle and let's set sail on this beginner's odyssey into the world of flatwater kayaking – where every stroke propels you closer to nature's tranquil embrace.
Paddling on the flatwater’s of Convict Lake along Highway 395. Photograph by Dalton Johnson
Pros
Accessible for Beginners: Flatwater kayaking is ideal for newcomers to paddling and water sports. The calm, still waters provide a forgiving environment for learning the basics of kayaking.
Scenic Serenity: Paddling on flatwater allows you to immerse yourself in breathtaking natural settings, from serene lakes and tranquil ponds to slow-moving rivers. It's a great way to appreciate nature's beauty up close.
Relaxation and Stress Relief: The gentle, rhythmic motion of paddling on calm waters can be incredibly therapeutic, offering an opportunity to unwind and de-stress in a peaceful environment.
Fitness Benefits: Kayaking is an excellent low-impact workout that engages your core, upper body, and cardiovascular system. It's a fun way to stay active and improve your physical fitness.
Wildlife Encounters: Flatwater kayaking often provides the chance to observe wildlife in their natural habitats. You might spot birds, fish, turtles, and other creatures while gliding quietly through the water.
Family-Friendly: Flatwater kayaking is suitable for all ages and can be a fantastic family activity. It's a great way to bond with loved ones and introduce children to the wonders of the outdoors.
Cons
Weather Dependency: The calmness of flatwater is weather-dependent. Wind and rain can quickly turn a peaceful paddle into a challenging and potentially unsafe experience.
Limited Excitement: If you're seeking an adrenaline rush or thrilling rapids, flatwater kayaking may not provide the excitement you're looking for. It's a more tranquil and leisurely activity.
Gear and Equipment: Purchasing or renting kayaks, paddles, life jackets, and other gear can be expensive. Additionally, transporting and storing kayaks can be cumbersome.
Physical Strain: While flatwater kayaking is less physically demanding than whitewater kayaking, it still requires some physical effort. Paddling for extended periods can be tiring, especially for beginners.
Safety Considerations: Safety is essential in kayaking, even on flatwater. It's crucial to be aware of potential hazards, wear appropriate safety gear, and have a basic understanding of rescue techniques.
Crowded Waters: Popular flatwater destinations can become crowded during peak seasons, which may diminish the sense of tranquility and solitude that many seek in this activity.

Flatwater kayaking at Grand Teton National Park. Photograph by Dalton Johnson
What is FlatWater Kayaking?
Have you ever heard someone mention they enjoy “flatwater kayaking” but you just weren’t 100% sure what they meant? This is one of the main types of kayaking, and by the time this post is over you’ll know exactly what they mean. So, what is flatwater kayaking?
Flatwater kayaking refers to a type of kayaking that takes place on a body of water that is sheltered from waves, excessive wind, and current. It most typically takes place on small lakes, ponds and other tranquil bodies of water such as marshes or swamps. As there are fewer obstacles and challenges, flatwater kayaking is a great fit for beginners.
If you’re like myself, you may have intuitively understood flatwater kayaking from its wonderfully straightforward name. Ah, so it takes place on water that’s flat? That’s easy. Check.
Related Read: Flatwater Kayaking 101
Gear Needed to Kayak on FlatWater
To enjoy a safe and comfortable flatwater kayaking experience, you'll need the right gear, but the good news, you don’t need much! Here's a breakdown of the essential equipment and gear needed for flatwater kayaking:
Essential:
Kayak: Choose a kayak suitable for flatwater conditions. Sit-on-top kayaks are popular for beginners due to their stability. Longer kayaks track well in calm waters and provide better speed. Related Read: The Best Kayaks for Flatwater Kayaking
Paddle: Select a kayak paddle of an appropriate length and design for your body size and kayaking style. Feathered paddles can reduce wind resistance.
Personal Flotation Device (PFD): A PFD, or life jacket, is a safety must-have. Ensure it is Coast Guard-approved and properly fits your body. It should be comfortable to wear during your kayaking adventure.
Optional / Nice to Have:
Safety Equipment: Carry essential safety equipment, including a whistle, signaling mirror, and a waterproof first-aid kit. These items can be crucial in emergencies but you shouldn’t need them while flatwater kayaking.
Clothing: Dress appropriately for the weather and water conditions. In warm weather, wear moisture-wicking clothing, while in cooler weather, opt for layers to stay warm. A wide-brimmed hat and sunglasses with retention straps can also be helpful.
Footwear: Wear water-resistant or quick-drying footwear, such as water shoes or sandals with secure straps. Avoid wearing cotton socks that can become soggy and uncomfortable.
Sun Protection: Bring sunscreen with high SPF and lip balm with sunblock to protect yourself from harmful UV rays. Sunburn can be a significant concern when kayaking in sunny conditions.
Dry Bags: Use dry bags or waterproof containers to store and protect your personal belongings, such as a phone, camera, and snacks. Ensure they are properly sealed to keep your gear dry.
Navigation Tools: Consider carrying a map, compass, or GPS device to help you navigate and avoid getting lost on larger bodies of water.
Bilge Pump/Sponge: For sit-inside kayaks, a bilge pump or sponge is essential to remove any water that may accumulate inside the kayak.
Kayak Cart: If you need to transport your kayak from your vehicle to the water, a kayak cart with wheels can make this task much easier.
Tow Rope/Tow Belt: In case you need assistance or want to tow another kayak, a tow rope or tow belt can be handy.
Repair Kit: Carry a basic kayak repair kit with tools and materials to fix minor issues that may arise while paddling.
Snacks and Water: Stay hydrated by bringing an adequate supply of water, and pack some energy-boosting snacks for longer trips.
Personal Identification: Keep your identification, emergency contact information, and any necessary permits in a waterproof container.
Flat water kayaking destinations
Flatwater kayaking destinations offer serene and picturesque settings for paddlers to explore. While there are countless beautiful locations around the world, here are 15 top flatwater kayaking destinations known for their stunning landscapes and calm waters:
Lake Tahoe, California/Nevada, USA: This pristine alpine lake is surrounded by the Sierra Nevada Mountains, offering clear waters and breathtaking scenery.
Banff National Park, Alberta, Canada: Paddle on the turquoise waters of Moraine Lake or Lake Louise while surrounded by towering mountain peaks.
Algonquin Provincial Park, Ontario, Canada: Explore the tranquil lakes and rivers within this vast wilderness area, famous for its wildlife and stunning fall foliage.
The Florida Keys, USA: Kayak through the mangrove tunnels and crystal-clear waters of the Keys, where you can encounter diverse marine life.
Lake Bled, Slovenia: A picturesque lake with an island church and a medieval castle, offering a truly magical kayaking experience.
Plitvice Lakes National Park, Croatia: Paddle among cascading waterfalls and emerald lakes in this UNESCO World Heritage site.
Loch Ness, Scotland: While searching for Nessie, you can appreciate the serene beauty of this famous Scottish loch.
The Everglades, Florida, USA: Explore the unique ecosystem of the Everglades while paddling through its calm waterways, observing wildlife such as alligators and wading birds.
Lake Louise, Alberta, Canada: Canoe or kayak on the iconic emerald waters with a backdrop of Victoria Glacier.
Dordogne River, France: Meander through picturesque villages and stunning châteaux as you paddle this tranquil river.
Phang Nga Bay, Thailand: Kayak among towering limestone karsts and through hidden lagoons in this stunning bay.
Lake Wakatipu, New Zealand: Surrounded by the Southern Alps, this glacial lake offers pristine waters and dramatic scenery.
The Maldives: Paddle on the calm, crystal-clear waters of the Indian Ocean, exploring coral reefs and marine life.
Lake Placid, New York, USA: Nestled in the Adirondack Mountains, this lake offers serene paddling and beautiful mountain vistas.
Baja California, Mexico: Explore the Sea of Cortez and its protected bays, home to diverse marine life and stunning desert landscapes.


Sunrise kayaking on a flatwater lake in Alaska. Photograph by Dalton Johnson
When is the Best Times of Day to go Flatwater Kayaking?
The best time of day to go flatwater kayaking can vary depending on your personal preferences and the specific location you plan to paddle. Here are some considerations for different times of day:
Morning:
Calm Conditions: Early mornings often offer the calmest water conditions. Winds tend to be lighter, and the water is usually less choppy, creating an ideal environment for flatwater kayaking.
Wildlife Viewing: Wildlife is often more active during the early morning hours. You may have a better chance of spotting birds, fish, and other animals.
Cooler Temperatures: In warmer climates, mornings provide cooler temperatures, making paddling more comfortable, especially during the summer.
Late Afternoon:
Warmer Water: In some regions, water temperatures may be warmer in the late afternoon, which can be more comfortable for kayaking.
Beautiful Sunsets: Evening kayaking can offer the opportunity to witness breathtaking sunsets over the water, adding a touch of magic to your paddling experience.
Midday:
Steady Conditions: Midday can be a good time if you prefer stable, predictable conditions. The wind and water are typically calmer during this time in many areas.
Lunchtime Break: If you want to enjoy a picnic or break during your kayak trip, midday might be the right time to find a scenic spot and have a meal.
Evening/Night:
Stargazing: Nighttime kayaking can provide a unique experience, allowing you to stargaze and enjoy the tranquility of the water after dark. However, be sure to have proper lighting for safety.
Ultimately, the best time of day for flatwater kayaking depends on your goals and preferences. Consider factors such as weather, temperature, wildlife activity, and whether you want to catch a sunrise or sunset. It's also essential to check local regulations and any specific guidelines for the body of water you plan to kayak on, as some areas may have restrictions on paddling during certain hours.

Finding a good place to launch a kayak is critical to a safe flatwater kayaking outing. Photograph by Dalton Johnson
Safely Launching and Landing a Kayak:
Launching and landing a kayak from a dock or shore is a fundamental skill in flatwater kayaking. Yet, not many of us have ever done this in our daily lives, so it is important to learn the basics before heading to the water. Here's how to do it properly:
Launching a Kayak
Preparation:
Ensure your kayak and gear are ready for launch. Double-check that your paddle, PFD (personal flotation device), and any other essential equipment are in place and secure.
Position the Kayak:
If you are launching from a dock, position your kayak parallel to the dock, with the bow (front) facing the water. If launching from a shore, place the kayak perpendicular to the water, with the bow pointing toward the water's edge.
Enter the Kayak:
Approach the kayak from the side opposite the dock or shoreline. Place your paddle across the kayak, parallel to the cockpit.
Sit on the dock or the ground beside the kayak with your feet in the water and your back to the kayak.
Slide your legs and lower body into the cockpit while keeping your weight centered.
Slowly lower yourself into the kayak, adjusting your seating position as needed for comfort and stability.
Paddle Placement:
Once seated in the kayak, reach for your paddle and place it across your lap. Ensure it is within easy reach for launching.
Launch:
Push off gently from the dock or shore using your hands or paddle, keeping a firm hold on the kayak's sides.
As the kayak begins to float, carefully slide your body into the seat and adjust your footrests to achieve a comfortable leg position.
Start paddling once you are situated in the kayak.
Landing and Exiting a Kayak:
Safe techniques for landing and exiting a kayak are essential to prevent capsizing or accidents. Follow these steps:
Approach the Shore or Dock:
Approach the dock or shoreline at a slow, controlled pace, aligning your kayak parallel to the dock or shore.
Secure Your Gear:
Before landing, make sure your paddle is within reach and that your gear is properly stowed or secured.
Prepare to Exit:
As you approach the dock or shore, stop paddling and prepare to exit. Position your kayak so that it is parallel to the dock or shore, with the bow facing the water.
Exiting the Kayak:
If on a dock, swing your legs over the side of the kayak and stand up. If on the shore, you can perform a "wet exit" by sliding out of the kayak while in shallow water. Use your hands for balance and support.
Be mindful of your balance as you exit, as getting in and out of a kayak can be unstable.
Secure the Kayak:
Once you're out of the kayak, secure it to the dock or shoreline to prevent it from drifting away. Use a tether or rope if necessary.
Collect Your Gear:
Retrieve any gear you had in the kayak and ensure nothing is left behind in the water.
Be Cautious:
Watch your step on slippery surfaces like docks, and be cautious when navigating uneven terrain on the shore.
By following these guidelines for launching and landing your kayak, you can ensure a safe and smooth transition between the water and land, enhancing your overall flatwater kayaking experience.

Kayaking with friends is always more fun. Photograph by Dalton Johnson
Basic Paddle Strokes and Technique
Basic paddling techniques are essential for any flatwater kayaker, especially beginners. These techniques form the foundation of your kayaking skills and will help you maneuver your kayak effectively and efficiently. Here are the fundamental paddling techniques for flatwater kayaking:
1. Forward Stroke:
The forward stroke is the most commonly used paddling technique in flatwater kayaking. It propels your kayak forward in a straight line.
Technique:
Sit with a straight posture in your kayak seat, with your feet resting comfortably on the footrests.
Hold the paddle with both hands, spacing them about shoulder-width apart.
Reach forward with the blade of the paddle and immerse it into the water near your toes.
Push the paddle blade backward through the water, keeping it as close to the kayak's hull as possible.
Rotate your torso and use your core muscles to generate power.
Complete the stroke by bringing the paddle out of the water near your hip.
Tips:
Keep your arms relatively straight but not locked.
Avoid a "scooping" motion with the paddle; instead, focus on a smooth, straight pull.
Practice a relaxed grip on the paddle shaft to prevent fatigue.
2. Backward Stroke:
The backward stroke is used for reversing or slowing down your kayak.
Technique:
Begin with your kayak in a stationary position or moving slowly.
Place the paddle blade into the water behind you, near your hip.
Push the paddle blade away from the kayak, creating a reverse force.
Rotate your torso to apply power to the stroke.
Complete the stroke by bringing the paddle out of the water near your toes.
Tips:
Maintain a firm but controlled grip on the paddle.
Keep your head up and look in the direction you want to go while paddling backward.
3. Turning Strokes:
Turning strokes are used to change the direction of your kayak. Two common turning strokes are the "sweep stroke" and the "draw stroke."
Sweep Stroke:
To turn your kayak to the opposite side (e.g., from left to right):
Reach out to the side with your paddle blade.
Start the stroke near the kayak's bow and sweep it in an arc toward the stern.
The kayak will turn in the direction of the stroke.
Draw Stroke:
To turn your kayak toward the side where you're paddling (e.g., from right to left):
Reach out to the side with your paddle blade.
Start the stroke near the kayak's stern and draw it toward the bow.
The kayak will turn in the direction of the stroke.
Tips:
Maintain good posture and use torso rotation to maximize the effectiveness of turning strokes.
Practice these strokes on both sides to improve your kayak control.
Posture and Grip:
Sit with an upright and relaxed posture in your kayak seat.
Maintain a loose grip on the paddle shaft to reduce strain on your wrists and forearms.
Keep your shoulders relaxed, and avoid hunching or shrugging.
Engage your core muscles for stability and power in your strokes.
Remember that practice is key to mastering these basic paddling techniques. As a beginner, focus on developing a smooth and efficient paddling style, and with time, you'll become more comfortable and skilled in controlling your kayak on flatwater.

Flatwater kayaking doesn’t mean it has to be boring. Here we are kayaking around icebergs in Alaska. Photograph by Dalton Johnson
Whitewater vs flatwater kayaking
Whitewater kayaking and flatwater kayaking are two distinct forms of kayaking, each offering unique experiences and challenges. Here's a comparison of the two:
Whitewater Kayaking:
Environment: Whitewater kayaking takes place on fast-moving, turbulent rivers with varying degrees of rapids, waves, and obstacles. The water is dynamic and can change rapidly.
Adventure and Thrills: It's an adrenaline-pumping sport where kayakers navigate through challenging whitewater features, such as drops, eddies, and holes, providing an exhilarating experience.
Skills Required: Whitewater kayaking demands advanced paddling skills, including precise maneuvering, roll recovery, and reading river currents. It's not recommended for beginners without proper training.
Equipment: Whitewater kayaks are designed for maneuverability and durability. They are typically shorter and have more rocker (curve) in the hull to make it easier to turn and handle the whitewater conditions.
Safety: Safety is paramount in whitewater kayaking, and kayakers wear specialized gear like helmets, spray skirts, and drysuits or wetsuits to protect themselves from the cold water and potential hazards.
Risk: Whitewater kayaking carries a higher level of risk due to the dynamic nature of the water and the potential for capsizing and entrapment in hydraulic features.
Flatwater Kayaking:
Environment: Flatwater kayaking takes place on calm, still bodies of water, such as lakes, ponds, slow-moving rivers, marshes, and canals. The water is generally tranquil and devoid of strong currents.
Serene Experience: It offers a peaceful and serene experience, allowing kayakers to enjoy the tranquility of the water and the surrounding natural beauty.
Skills Required: Flatwater kayaking is beginner-friendly and requires basic paddling techniques, making it accessible to people of all skill levels, including those new to kayaking.
Equipment: Flatwater kayaks are designed for stability and efficiency in calm conditions. They are longer and have flatter hulls, making them suitable for relaxed paddling.
Safety: Safety is still important in flatwater kayaking, but the risks are generally lower than in whitewater kayaking. PFDs are typically sufficient, and specialized gear is not always required.
Purpose: Flatwater kayaking is often chosen for recreational purposes, relaxation, wildlife observation, or simply enjoying a day on the water.
The choice between whitewater and flatwater kayaking depends on your skill level, risk tolerance, and the type of experience you seek. Whitewater kayaking offers excitement, challenges, and adventure, while flatwater kayaking provides a more relaxed and accessible way to enjoy the water and nature's tranquility. It's essential to select the type of kayaking that aligns with your abilities and preferences.

Kayak fishing is one of the best ways to reach the middle of a lake. Photograph by Dalton Johnson
Flatwater Kayaking and Fishing
Flatwater kayaking and fishing can be a perfect combination for outdoor enthusiasts looking to combine the joys of paddling with the thrill of angling. Whether you're a seasoned angler or a kayaking novice, here's how the two activities come together:
Benefits of Flatwater Kayaking for Fishing:
Access to Remote Fishing Spots: Kayaks can reach fishing spots that are difficult to access by boat or on foot. This allows you to explore remote and less-pressured fishing areas, increasing your chances of a successful catch.
Stealthy Approach: Kayaks are quiet and non-disruptive, allowing you to approach fish without scaring them away. This stealthy approach can lead to more productive fishing.
Versatility: Flatwater kayaks are stable and well-suited for fishing. Some kayaks even come equipped with built-in fishing features like rod holders, tackle storage, and anchor systems.
Minimal Environmental Impact: Kayaks have a minimal environmental footprint, ensuring that you leave a small impact on the natural habitat while fishing.
Exercise and Enjoyment: Combining kayaking with fishing adds an element of physical activity and adventure to your fishing trips, making them more enjoyable and rewarding.
Tips for Flatwater Kayak Fishing:
Choose the Right Kayak: Select a kayak designed for fishing. These often come with added features like adjustable seats, rod holders, and storage options for your gear.
Safety First: Always wear a personal flotation device (PFD) while kayaking and fishing. Safety should be a top priority.
Organize Your Gear: Use tackle boxes and storage compartments to keep your fishing gear organized and accessible. Attach rod holders to your kayak for convenience.
Paddle Quietly: Make smooth and quiet paddle strokes to avoid spooking fish. Consider using a paddle with drip rings to keep water from splashing into the kayak.
Anchor System: Invest in an anchor system to help you stay in one spot while fishing. This can be particularly useful in windy conditions.
Check Regulations: Be aware of local fishing regulations and seasons, and obtain any necessary permits or licenses.
Practice Casting: Practice your casting techniques while seated in the kayak to get used to the different dynamics compared to fishing from the shore or a boat.
Be Prepared: Bring essential safety and emergency gear, including a first-aid kit and a communication device like a waterproof cell phone case or marine radio.
Respect Nature: Practice catch and release when appropriate, and leave no trace of your visit. Respect the environment and wildlife around you.
Flatwater kayaking and fishing can provide a fantastic opportunity to connect with nature, relax, and enjoy the thrill of catching fish. Whether you're seeking solitude on a peaceful lake or navigating a slow-moving river, this combination of activities allows you to immerse yourself in the great outdoors while pursuing your passion for angling.
Flatwater kayaking offers a gateway to the serene world of paddling, inviting both beginners and seasoned outdoor enthusiasts to embark on a journey of tranquility and adventure. With the fundamental paddling techniques we've explored, such as the forward and backward strokes, as well as turning strokes, you're equipped with the skills needed to navigate calm waters and explore the hidden wonders that await.
But flatwater kayaking is more than just strokes and technique; it's about connecting with nature, enjoying the therapeutic benefits of the water, and creating lasting memories. It's about the freedom to explore picturesque lakes, tranquil ponds, slow rivers, and other serene water bodies, all while experiencing the thrill of self-propelled exploration.
As you paddle gently through the glassy surfaces of these waterways, be sure to embrace the peaceful moments, appreciate the wildlife that graces your journey, and relish the sense of tranquility that only flatwater kayaking can provide.
So, whether you're seeking a tranquil escape from the hustle and bustle of daily life, a new way to stay active and fit, or simply a connection with the great outdoors, flatwater kayaking is a pursuit that promises relaxation, adventure, and the serenity of calm waters. Grab your paddle, venture out, and let the gentle rhythm of the water carry you to new horizons of exploration and contentment. Happy kayaking!
Discover More About Kayaking

Todos Santos Best Sunset Hike is to the Abandoned Sugar Port
When Kristin and I were on a family vacation in Cerritos Beach, surfing and swimming filled most of our days. But we craved a change of pace and decided on a sunset hike to an abandoned sugar port near Todos Santos. What started as a spur-of-the-moment decision turned into the highlight of our trip, combining stunning views, historical intrigue, and an unforgettable sunset.
When Kristin and I were on a family vacation in Cerritos Beach, surfing and swimming filled most of our days. But we craved a change of pace and decided on a sunset hike to an abandoned sugar port near Todos Santos. What started as a spur-of-the-moment decision turned into the highlight of our trip, combining stunning views, historical intrigue, and an unforgettable sunset.
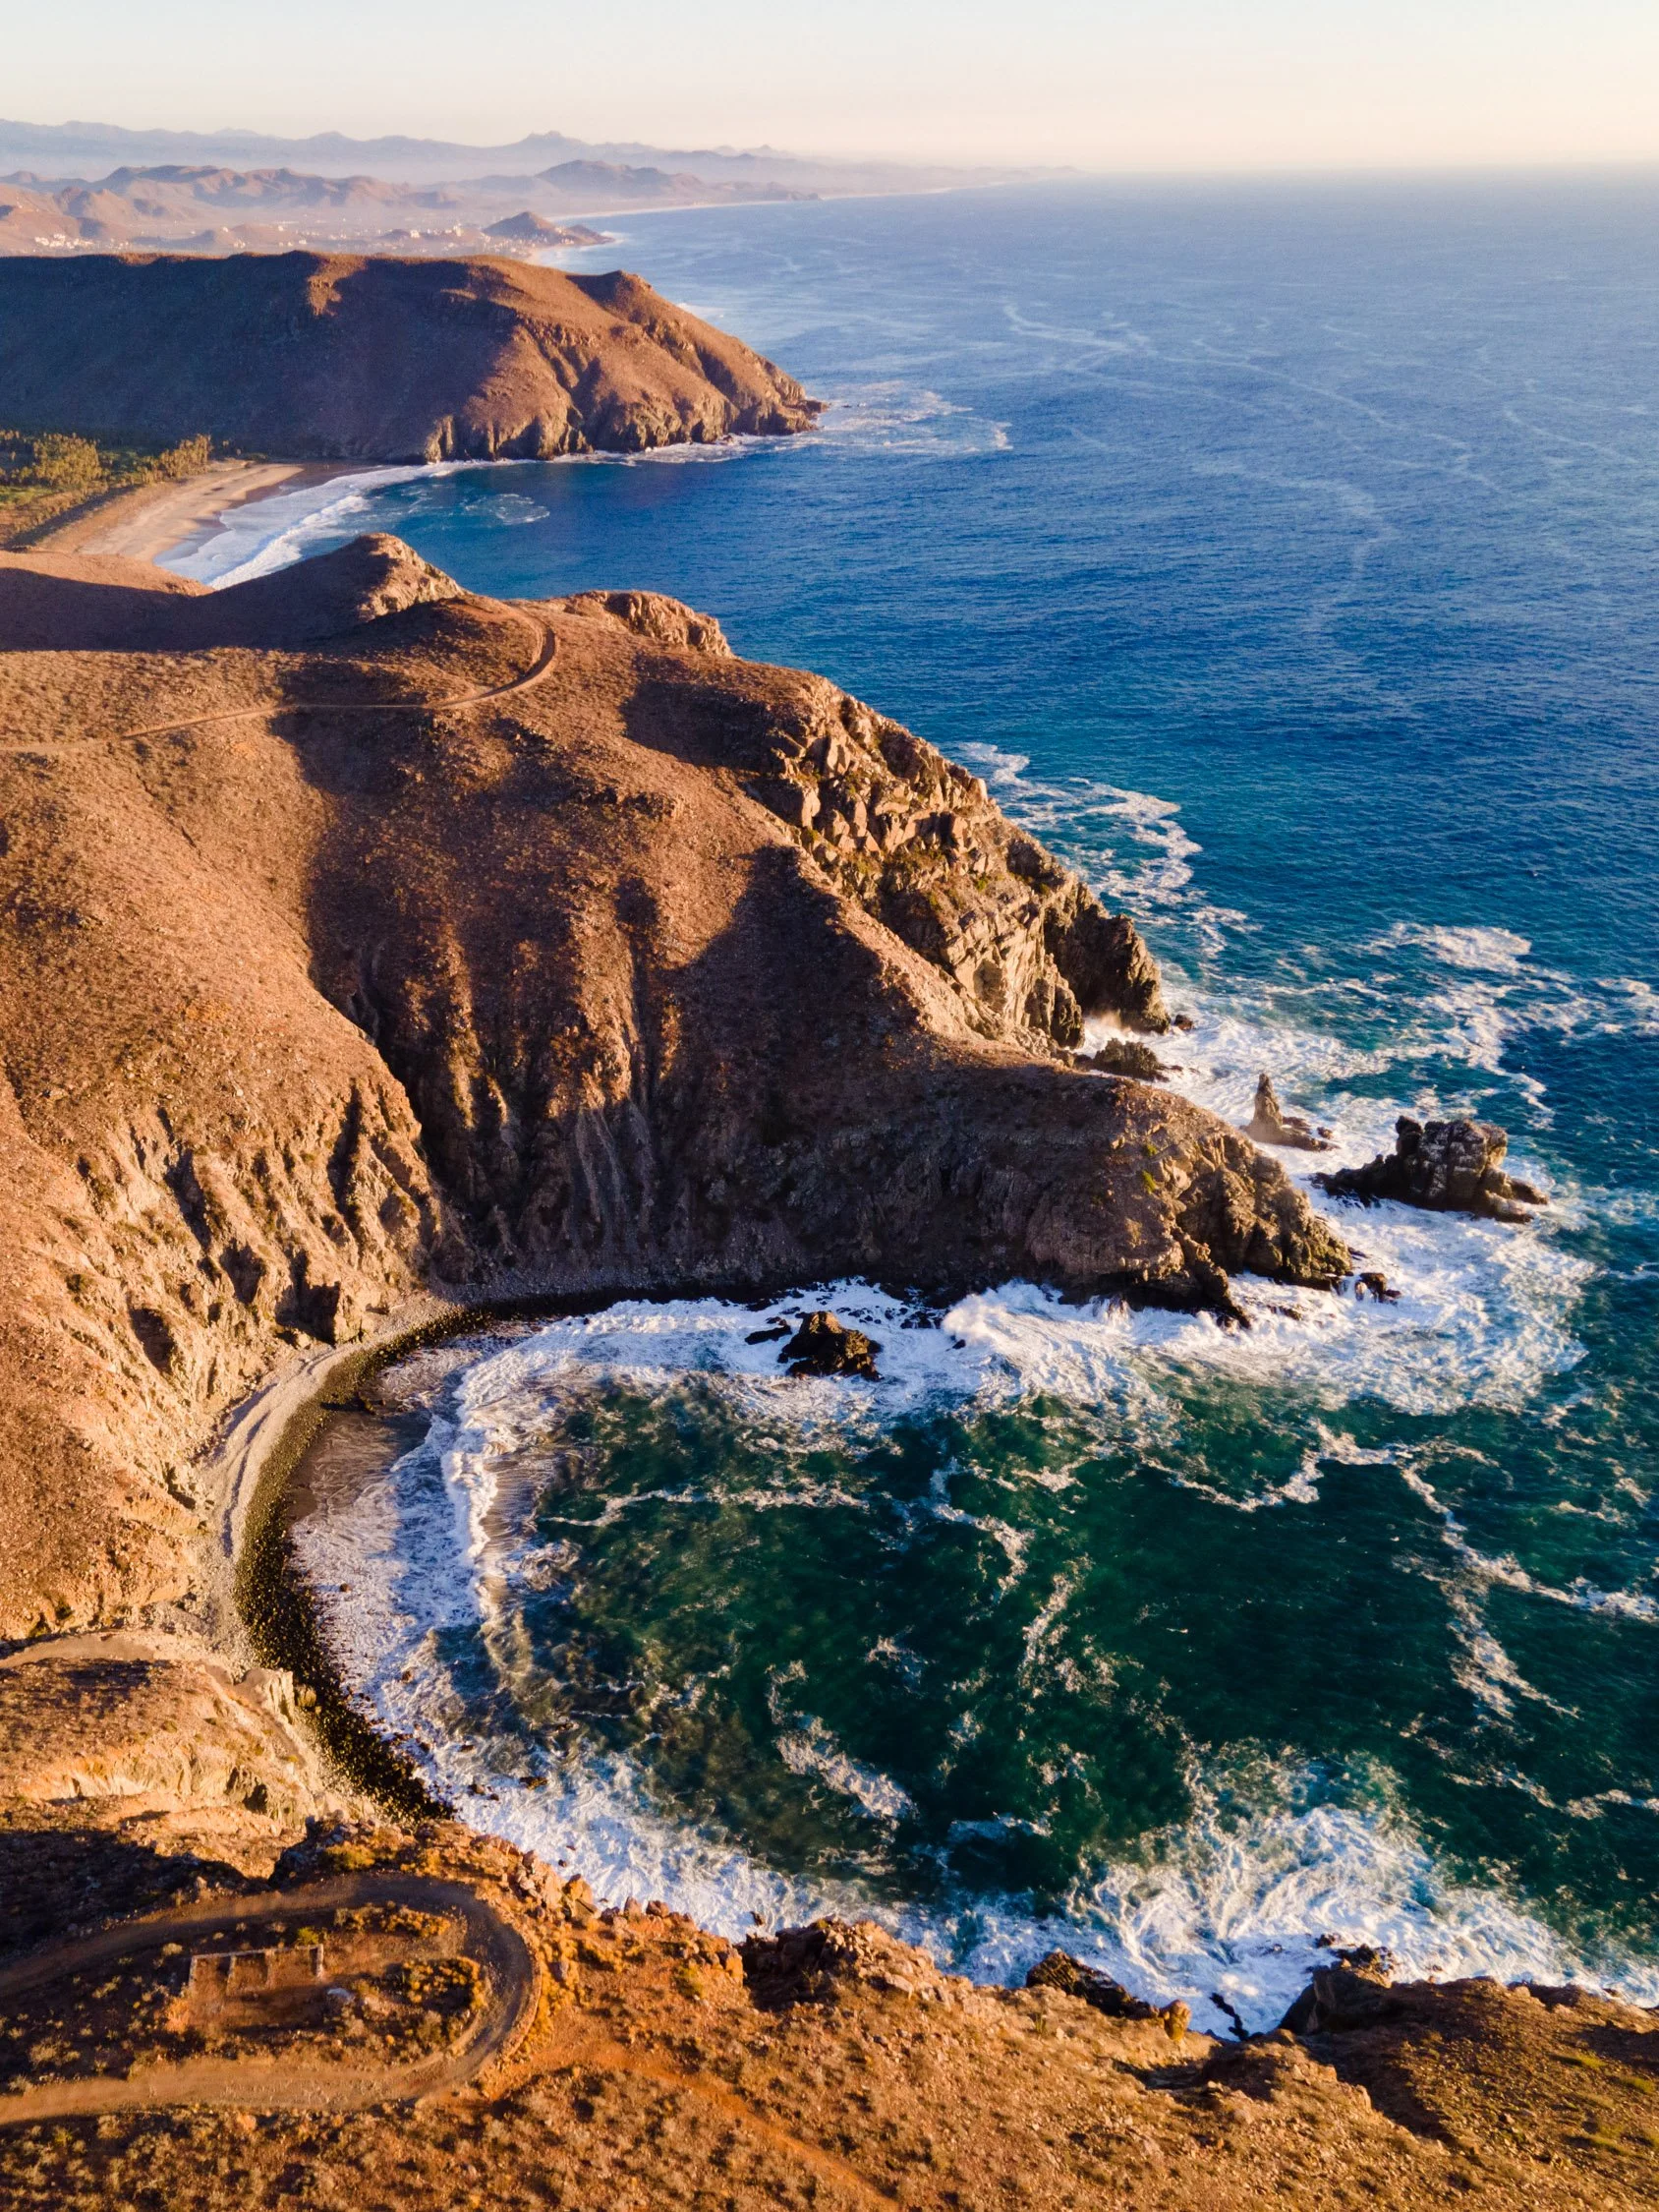
A drone shot of the sugar port cove. You can see the trail in the bottom left corner. Photo by Dalton Johnson
Starting the Journey
We arrived in the late afternoon, parking near a dilapidated building that marks the beginning of the trail. Local lore suggests this structure was once a storage hub for sugar, which was transported over the hill to a protected cove where ships awaited. The building’s crumbling walls and faded history set the tone for an adventure that felt like stepping back in time.
The hike began under a blazing sun. Normally, the Pacific Coast of Baja enjoys a cooling breeze, but on this day, the air was still. The uphill trek was sweaty and challenging, but we took our time, talking and soaking in the desert landscape. The trail winds through a rugged terrain of dry earth, scattered rocks, and resilient desert plants, creating a unique mix of stark beauty and subtle colors.
As we climbed, we passed a few fellow hikers heading back down. “You’re in for a treat at the top,” one of them said with a smile. Their encouragement gave us a boost, even as the climb tested our endurance.
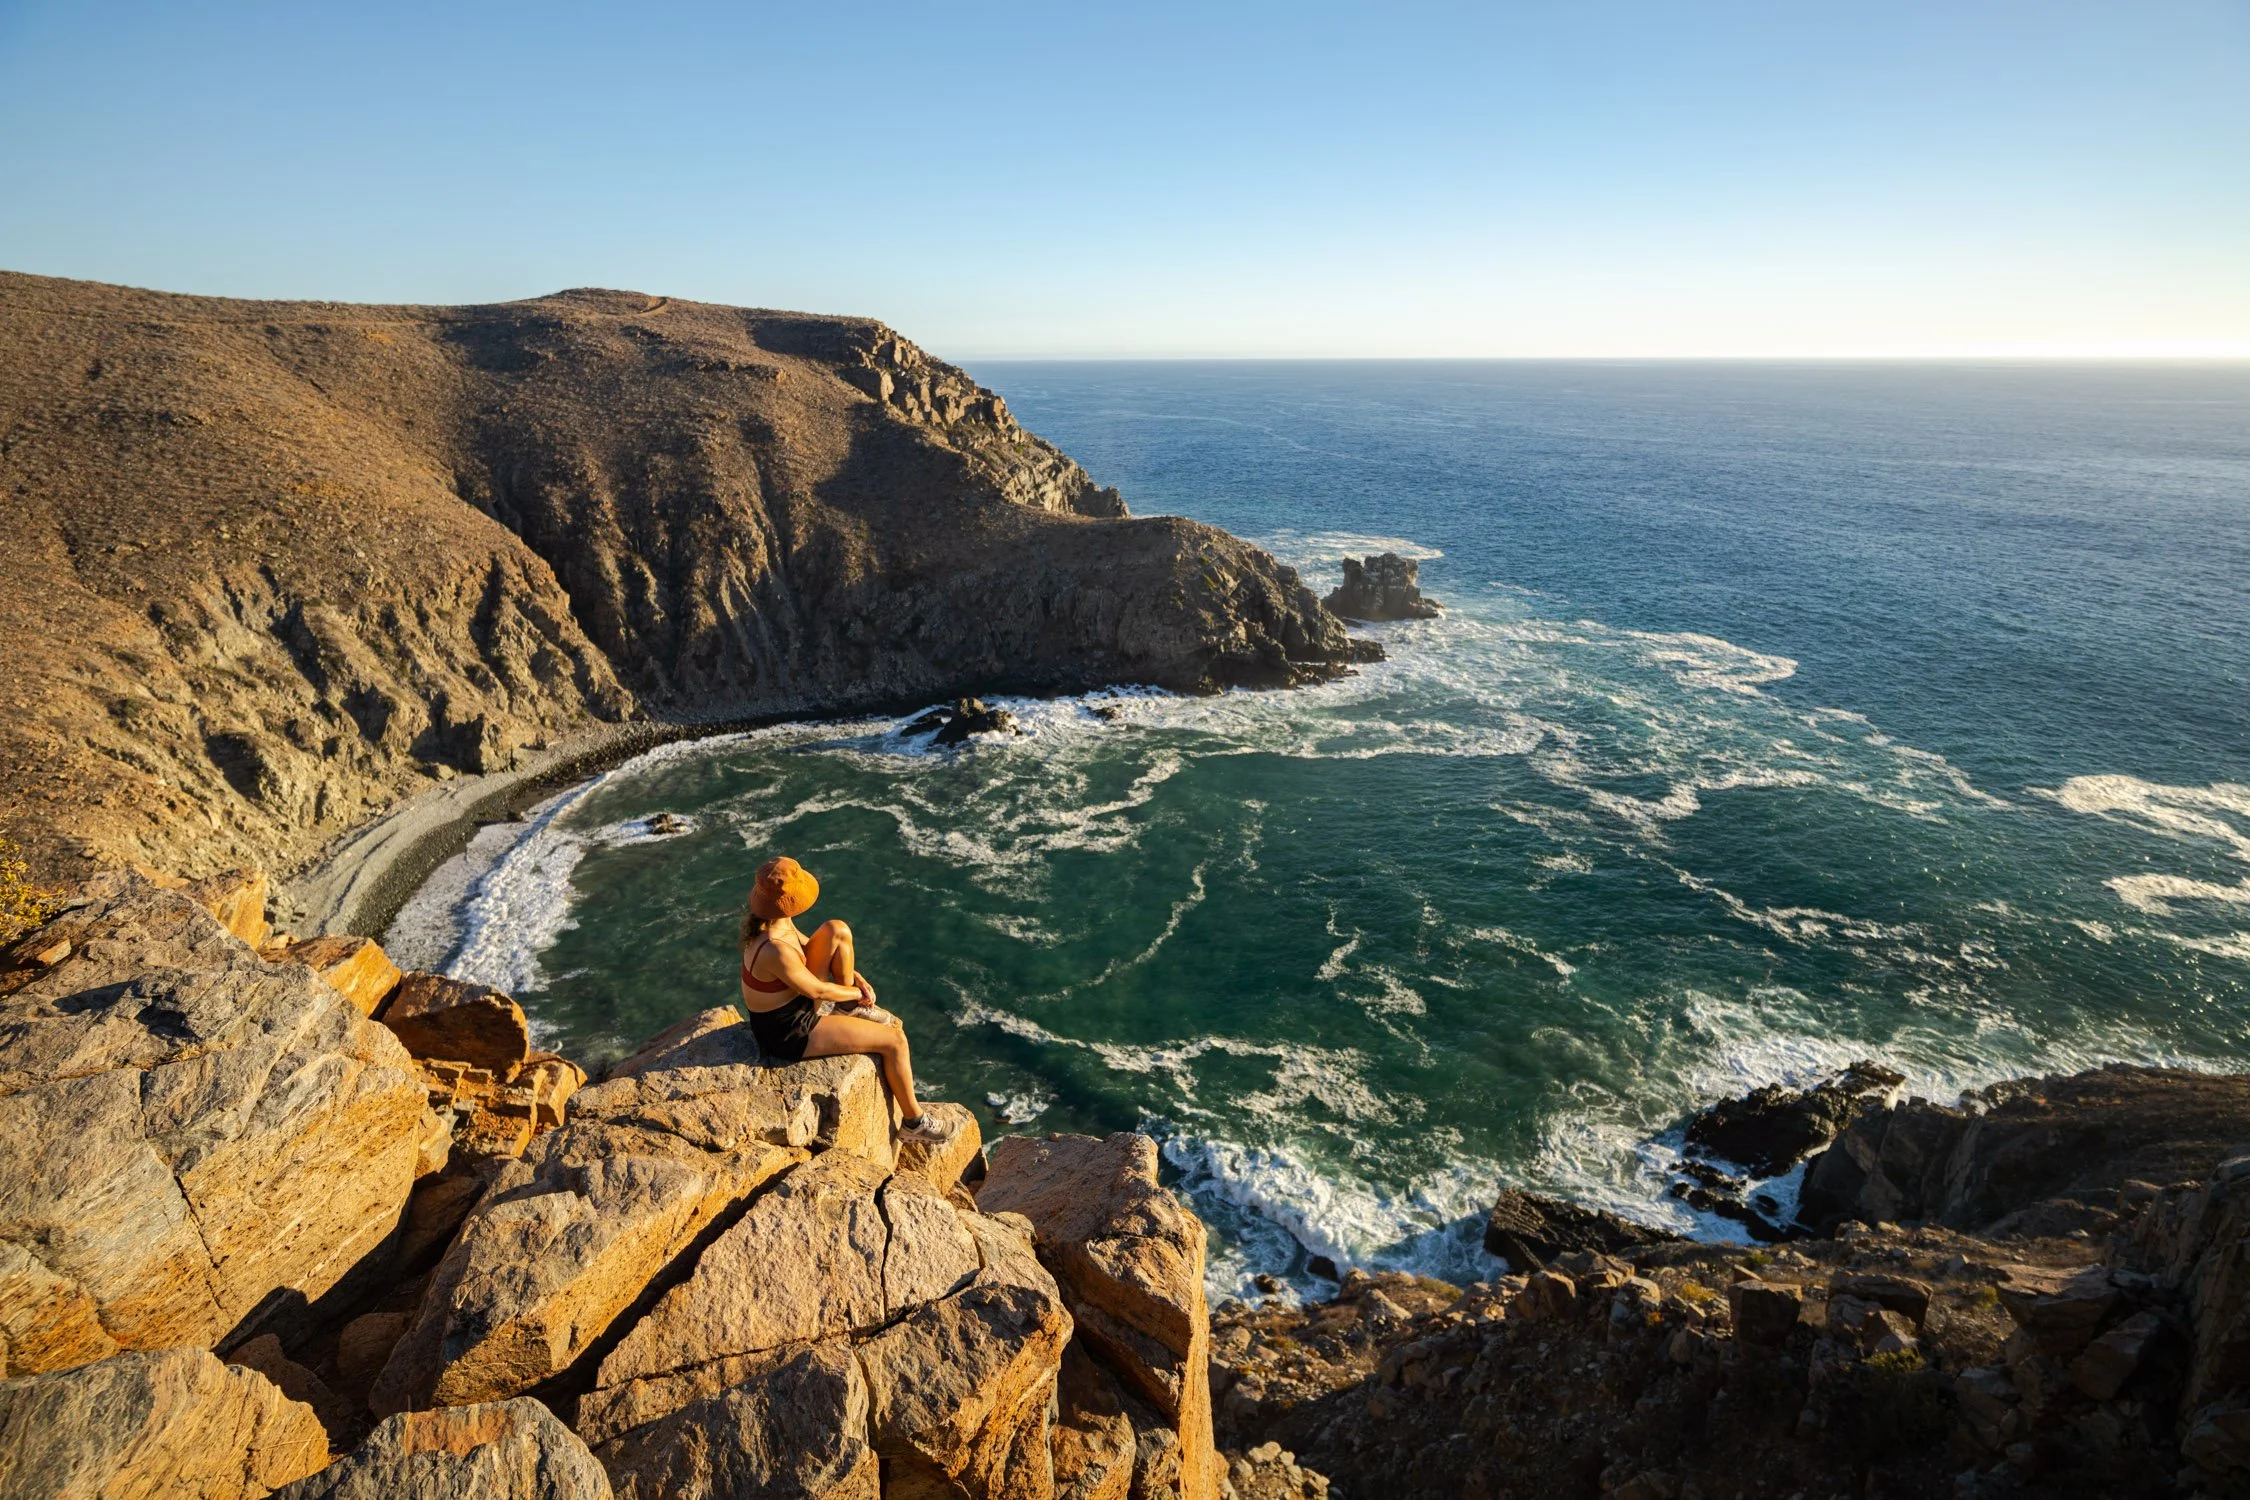
Kristin soaking in the view from the the cliffs over the sugar port in Todos Santos. Photo by Dalton Johnson
Reaching the Cliffs
After about 30 minutes, we reached the top of the cliffs, where the cove spread out below us. It’s a serene sight, though hard to picture the cove bustling with ships loading sugar long ago. The remnants of the port are faint but still visible, adding a touch of history to the picturesque setting. The stillness of the water below contrasts with the dramatic cliffs, making it a place where past and present seem to coexist.
We considered hiking down to the water but decided against it since we were racing the sunset and only had our phone flashlights for the return journey. Instead, we explored the cliffs, savoring the view and solitude. Kristin and I spent time imagining what life must have been like when this cove was a hive of activity, with workers loading sugar onto ships destined for distant shores.

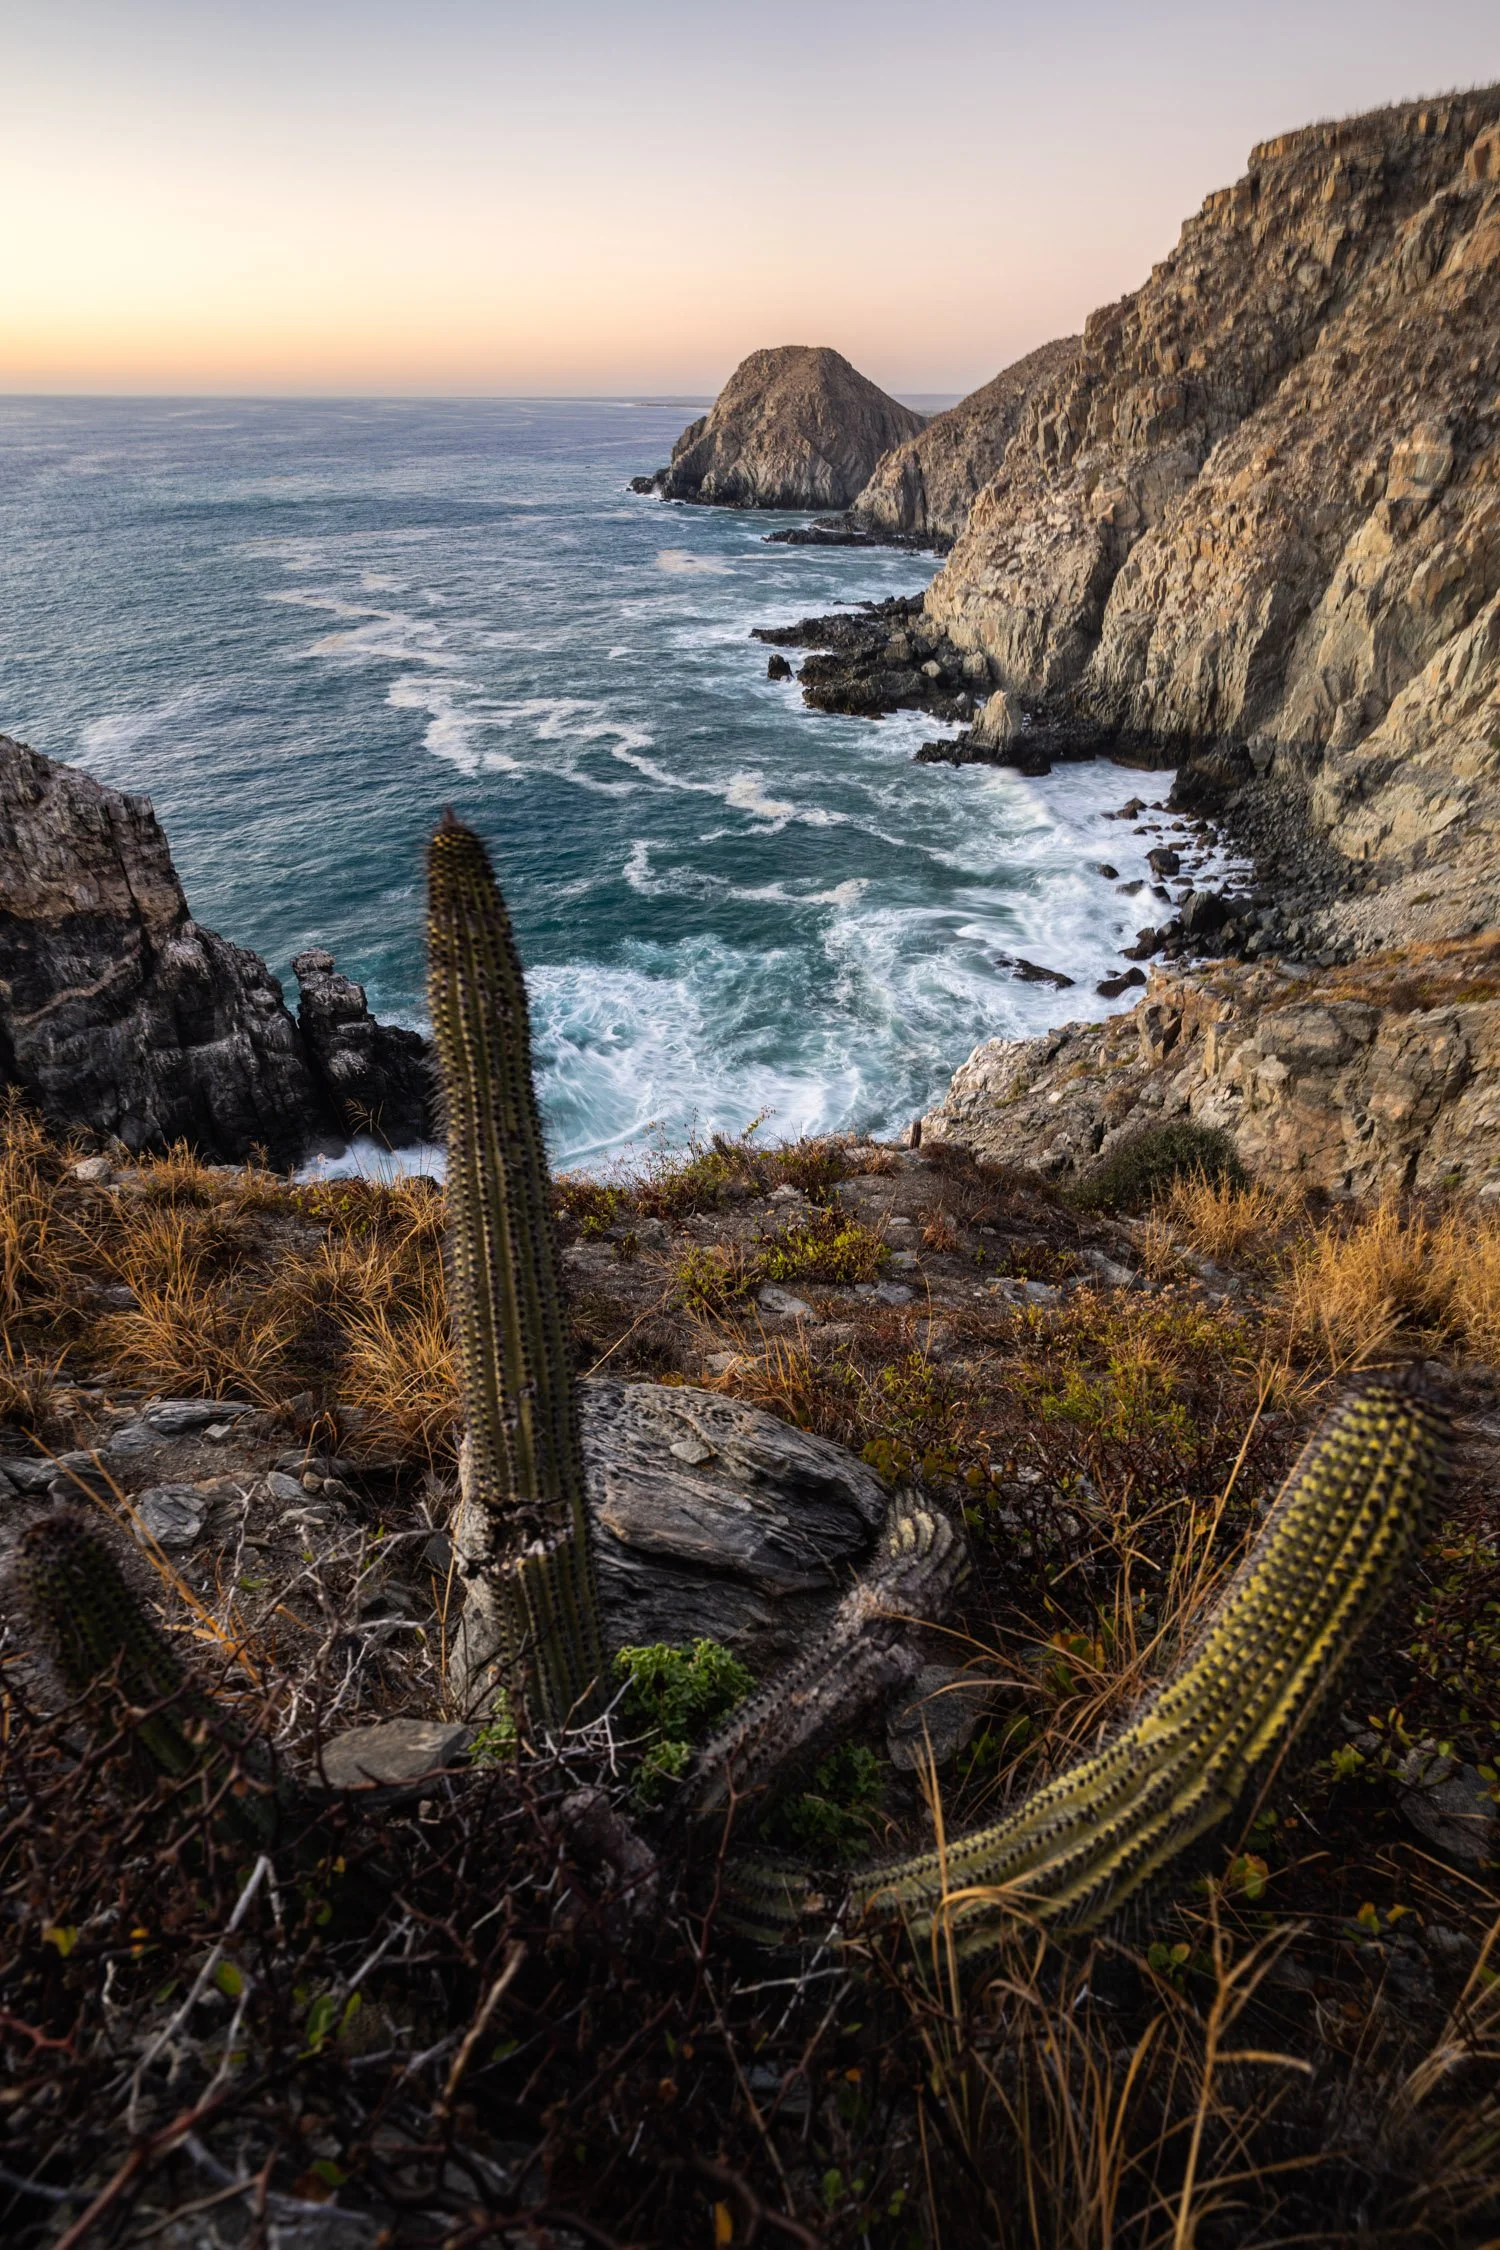
Wandering the side trail as far as it can go, we got clifed out not to far after this. Photo by Dalton Johnson
Discovering the Side Trail
Kristin’s sharp eyes spotted an undeveloped trail branching toward the cliffs overlooking the Pacific Ocean. “Hey, look over here! Do you want to explore this?” she asked, her excitement contagious.
“Yeah, let’s do it!” I replied, and off we went. The trail was rugged and required careful footing, but the effort was worth it. The landscape was dotted with cacti, their spines catching the golden light of the setting sun. Birds chirped in the distance, and the faint sound of waves crashing against the rocks below added to the atmosphere.
The trail led us closer to the edge, where the cliffs dramatically dropped into the ocean. Kristin and I stopped often to take in the views, pointing out small details like a unique cactus or the way the light danced on the water. It felt like the kind of place you could explore endlessly, each turn revealing something new.
Taking in the sunset view from the side trail. Photo by Dalton Johnson
The Sunset View
At the trail’s end, we reached a dramatic viewpoint. Looking north, we could see Todos Santos nestled along the coast, its charm evident even from a distance. Southward, the hills marked the start of Cerritos Beach, where we were staying. The cliffs dropped hundreds of feet into the ocean below, where seagulls and other birds soared. The cries of seals echoed from the water, adding to the magic of the moment.
Kristin and I sat together, mesmerized by the setting sun. The horizon blazed with hues of orange, pink, and purple. The ocean shimmered like liquid gold, reflecting the fading light. We wished we could freeze time, soaking in the beauty and peace of this magical spot. The scene was so captivating that we barely noticed the cool breeze that finally began to pick up, a refreshing reward for the day’s effort.
As we sat there, we talked about everything and nothing, savoring the rare chance to disconnect and simply be present. It’s moments like these that remind us why we love traveling and exploring together.
Returning Home
As the sun disappeared into the ocean, we knew it was time to head back. Retracing our steps to the main trail, we carefully made our way downhill to the car. The descent felt quicker, aided by the lingering glow of twilight and the satisfaction of having witnessed such a breathtaking sunset.
The journey back to our family felt lighter, our hearts full from the adventure. Kristin and I agreed that this hike was not just about the destination but the experience of sharing it together, creating memories that would last far beyond the trip.
The view looking north just after the sun had set while hiking the sugar port trail in Todos Santos. Photo by Dalton Johnson
Hike Details and Tips
Trailhead Location: The trail starts near a dilapidated building on the outskirts of Todos Santos, just a short drive from the main town center. This building is easily recognizable and has historical ties to the sugar trade in the area.
Distance: Approximately 4.7 miles round-trip, with the side trail making it slightly longer.
Elevation Gain: About 900 feet, with a steady incline.
Trail Conditions: The main path is well-worn but can be rocky and uneven. Side trails are less developed and require careful footing.
Difficulty: Moderate. The uphill climb can be challenging in the heat, but it’s manageable for hikers with basic fitness levels.
Timing: Start in the late afternoon to avoid the midday heat and catch the sunset at the cliffs. Plan for at least two hours to fully explore the trails and enjoy the views.
Footwear: Wear sturdy shoes; the trails are rocky and uneven. Proper footwear makes a significant difference, especially on the undeveloped paths.
Essentials: Bring plenty of water, snacks, and a flashlight for the return journey. Sunscreen and a hat are also advisable for the exposed trail.
Exploration: Allocate extra time to explore the undeveloped trails for unique views. These side paths often lead to the most rewarding spots.
Safety: Be mindful of your footing near the cliffs, especially if the wind picks up. Keep an eye on the time to ensure a safe return before it gets too dark.
Whether you're visiting Todos Santos for the first time or returning for another adventure, this hike offers a perfect blend of physical activity, stunning views, and a touch of history. Don’t forget to bring your camera to capture the sunset magic!
My favorite view, showcasing how large the cliff on the Sugar Port hike really are. Can you see the person and cactus on the right point?. Photo by Dalton Johnson
The hike to the cliffs of the abandoned sugar port is more than just a trail; it’s a journey through history, nature, and breathtaking beauty. Whether you’re a seasoned hiker or just looking for a peaceful escape, this sunset hike in Todos Santos is a must. The combination of stunning views, historical intrigue, and a touch of adventure makes it a perfect outing for anyone visiting the area. Kristin and I both agreed—it was the perfect change of pace from our beach days, and an adventure we’ll always cherish.
Discover more Adventures
We Went Spearfishing Near Todos Santos
When you think of spearfishing in Todos Santos, images of clear waters, abundant marine life, and the thrill of the hunt likely come to mind. Our experience was all of that and more, even if we didn’t bring home a fresh catch. It was a day filled with exploration, breathtaking views, and underwater wonders that reminded us why we love this adventurous activity.
When you think of Todos Santos, spearfishing isn’t the first thing that comes to mind. The shoreline is often rough and there is a movement to save the turtles that lay their eggs on these beaches. However, tucked away there are some hidden coves great for exploring the underwater world with ample amounts of fish to hunt. One of the places that immediately come to mind is the abandoned Sugar Port with its clear waters and access to the water once the long hike is over.
Parking at the Sugar Port Trailhead, just south of Todos Santos and near the Hotel San Cristobal, we geared up for the adventure ahead. The trail winds uphill for a couple of miles, offering scenic views of the surrounding landscape as you climb. Along the way, the rustling leaves and chirping birds create a serene ambiance. At the top, the view of the old, abandoned Sugar Port is stunning. A fun fact: Todos Santos used to be a major exporter of sugar cane, and this port was where the ships docked to load their cargo. The remnants of this historic site add an intriguing layer to the experience. From the cliffs, we scoped out the turquoise waters below and got excited to begin our dive.

Hitting the water to go spearfishing at the Sugar Port in Todos Santos. Photo by Dalton Johnson
Hitting the Water
The descent to the water’s edge was straightforward, especially during low tide when the sandy pathway was easily navigable. The remnants of the port walls still extend into the water, creating an accessible and intriguing entry point. These weathered walls, now covered in marine growth, seemed like a gateway to another world. Suiting up in our Mako wetsuits, we splashed into the waves, ready to explore.
Kicking towards the old port walls, we began diving deep—about 20 feet—though even at that depth, we couldn’t see the ocean floor. The rock outcroppings became our guide as we searched for fish. The underwater world was teeming with life: schools of small fish darting between the rocks, vibrant marine plants swaying with the current, and the occasional larger fish passing by. Yet, the larger, edible fish we had hoped to spear remained elusive. Every dive brought its own set of wonders, from shimmering schools of fish to the intricate patterns of coral and algae decorating the rocks.

Swarmed by little fish not great for eating. Photo by Dalton Johnson
The Hunt
Just on the other side of the hill where we parked, commercial fishermen set out every morning to catch fish for the local restaurants, often bringing in tuna and other large species. We were hopeful that some of these bigger fish might wander into the cove. Despite our best efforts, they didn’t. Instead, we were swarmed by the ocean’s smaller residents, darting in and out of their rocky hiding spots, and starting to form a tiny bait ball around us.
Each dive brought new sights and the promise of discovery. We explored the nooks and crannies of the underwater landscape, hoping to catch a glimpse of something larger. However, a recent swell had churned the water, limiting our visibility to about 15 to 25 feet. Even with reduced clarity, the vibrant underwater ecosystem was mesmerizing. Schools of fish swam in synchronized movements, their scales glinting in the sunlight filtering through the water. Sea urchins clung to the rocks, and the occasional octopus peeked out from its hiding spot. We didn’t spot any fish worth spearing, but the sheer beauty of the experience made it worthwhile.
Wrapping Up the Day
As the sun began to set, painting the sky in hues of orange and pink, we decided it was time to call it a day. The golden light reflecting off the water created a magical atmosphere, making the climb back to our car feel like the perfect conclusion to the adventure. No fresh fish would be on our plates that night, but the dive was far from disappointing. Spearfishing isn’t always about the catch; it’s about the adventure, the connection to nature, and the thrill of discovery. It’s also about moments like these—where you feel a deep appreciation for the ocean and its mysteries.

Packed up and headed home without fish. Photo by Dalton Johnson
A Must-Visit Spot for Snorkelers
While we didn’t catch anything this time, the abandoned sugar mill near Todos Santos is a hidden gem for underwater enthusiasts. The easy access, combined with the remnants of the historic port, makes it a fascinating place to explore. The underwater structures create a unique environment teeming with marine life. If you’re a snorkeler or freediver, this spot should definitely be on your list. Strap on a mask, dive below the surface, and immerse yourself in the underwater beauty of Todos Santos. Even if you’re not hunting for fish, the vibrant ecosystem and historical significance make it a worthwhile destination.
Watching the sun dip below the Pacific Ocean at the Sugar Port in Todos Santos. Photo by Dalton Johnson
Spearfishing at the Sugar Port wasn’t about the fish we didn’t catch; it was about discovering a new spot, enjoying the dive, and experiencing the unique history and beauty of Todos Santos. Whether you’re a seasoned spearfisher or someone who simply loves the water, this spot has something to offer. The blend of history, natural beauty, and adventure creates an unforgettable experience. Just remember, sometimes it’s the journey—not the destination—that leaves the lasting impression. Every dive is a story, and this one was filled with excitement, discovery, and the timeless allure of the sea.
Discover more Adventures
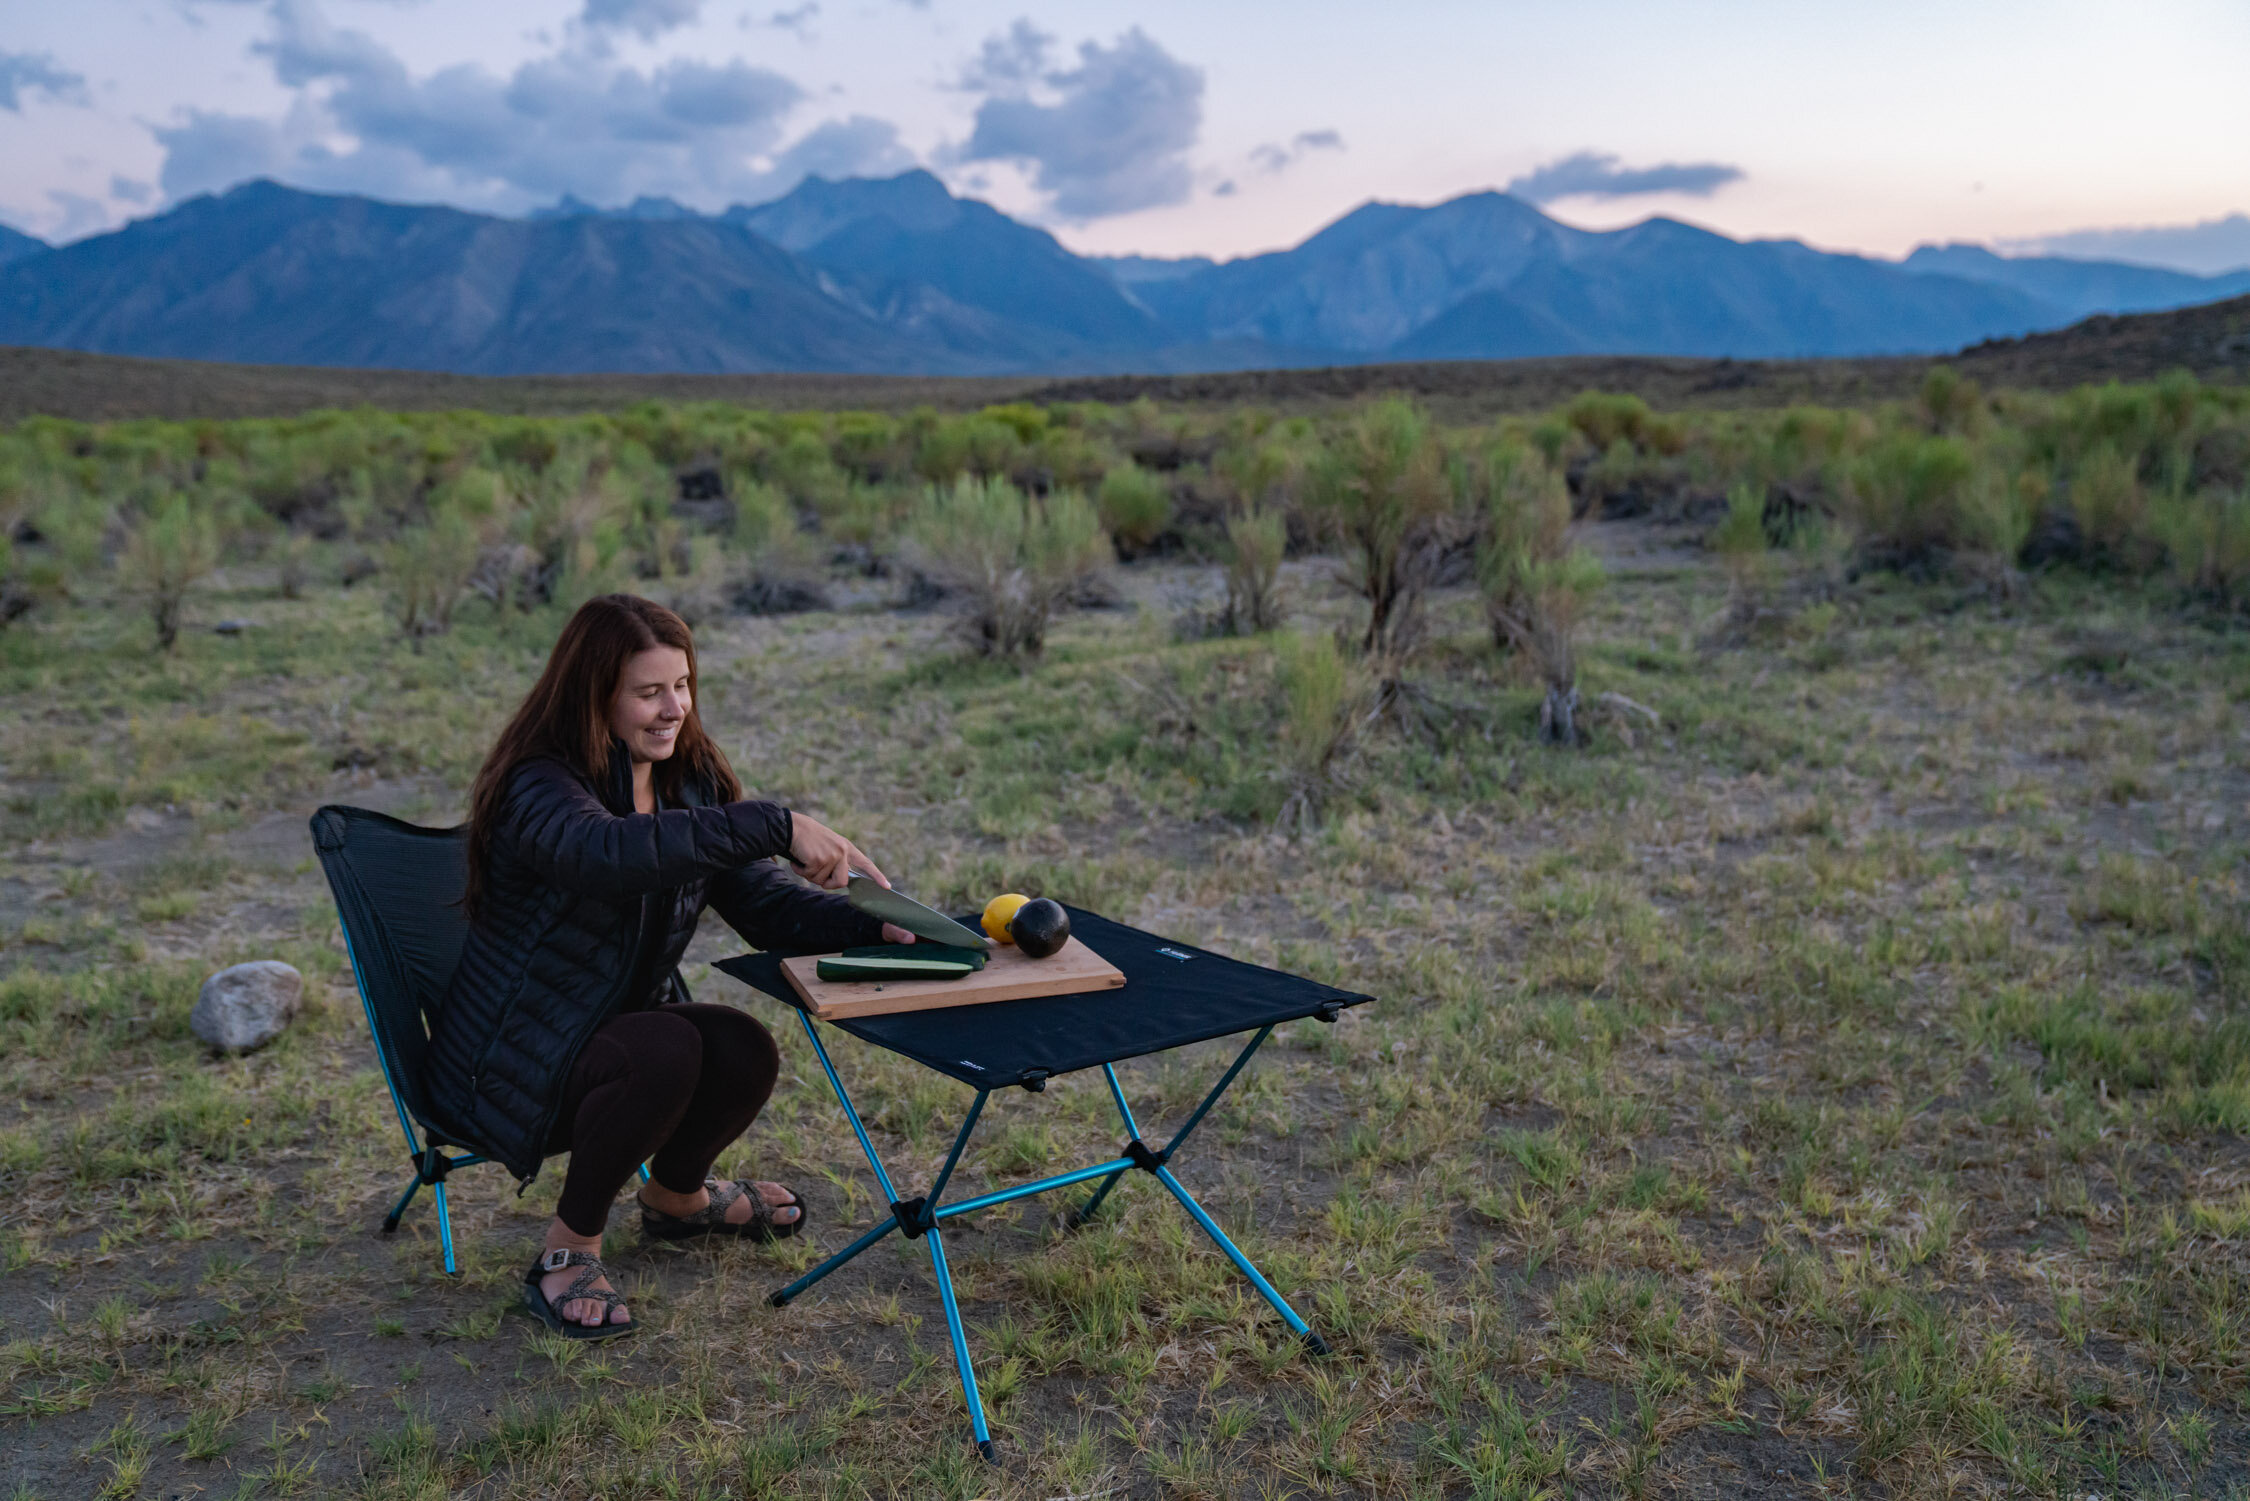
Helinox's Table One Is A Vanlife Essential, Don't Forget The Silicon Topper
After eight years of living vanlife and using camp chairs and camp tables almost daily, I can confidently say that the Helinox Table One is one of the most stable and useful camp tables I have ever used. Compact, sturdy, and lightweight, it has become an indispensable part of my setup. Over the years, I’ve experimented with different options, but none have matched the reliability and convenience of this table.
After eight years of living vanlife and using camp chairs and camp tables almost daily, I can confidently say that the Helinox Table One is one of the most stable and useful camp tables I have ever used. Compact, sturdy, and lightweight, it has become an indispensable part of my setup. Over the years, I’ve experimented with different options, but none have matched the reliability and convenience of this table.
Perfect for Vanlife Adventures
The Helinox Table One fits perfectly in the back of my van, ready to deploy whenever I park and set up camp. It’s compact enough to store easily but functional enough to handle the needs of a full day of outdoor activities. I often use it after exploring the surrounding area or when settling in for an evening under the stars. From casual dinners to workspace needs, this table handles it all.
One of my favorite memories with the Helinox Table One was during a trip near Mammoth Lakes Hot Springs in California. After a long day of scrambling to the summit of Mount Emerson, my climbing partner and I returned to Wild Willy’s Hot Spring to soak our sore muscles. We picked up frozen fish in Mammoth and decided to make sushi under the stars. Thanks to the sturdy Helinox Table One, we had the perfect setup. Within 30 minutes, we were enjoying sushi while gazing at the night sky—a moment made even better by the reliable surface provided by the table.
This wasn’t a one-off experience. On countless occasions, the Helinox Table One has proven its worth—whether I’m perched by a scenic overlook preparing meals or setting up a workstation in the heart of the wilderness. Its adaptability to various needs makes it a true standout.

Cutting all the goodies for sushi under the stars. Photo by Dalton Johnson
Why the Helinox Table One Stands Out
The Helinox Table One is not just another camp table; it’s a game changer. Here’s why:
Sturdiness: Unlike many competitor tables that sag under the weight of heavier items, the Helinox Table One holds its own. The bars snap together seamlessly, and the foam-inlaid design adds extra stability. It’s sturdy enough to handle meal prep, including cutting tasks, and even supports my remote work setup, complete with a laptop and hard drives. This level of reliability is rare in camping gear.
Lightweight Design: Despite its robustness, the table is incredibly lightweight. This feature is crucial for vanlife, where every pound counts, and portability is key. It’s easy to transport from the van to a campsite or even a picnic spot by the lake. The portability factor alone has saved me on numerous occasions when packing light was essential.
Compact Storage: When not in use, the table packs down small, making it ideal for storage in a van or small camping space. Its sleek design ensures that it never feels cumbersome, even during long road trips with limited space.
Multi-Purpose Functionality: From being a makeshift kitchen counter to a workspace or even a card table for nights by the campfire, the Helinox Table One seamlessly adapts to whatever situation arises. I’ve used it for everything from slicing vegetables to holding drinks during a movie night projected onto the side of my van.

Sherman reading lakeside in Tuolumne Meadows. Photo by Dalton Johnson
A Reliable Companion for Remote Work
In addition to its outdoor utility, the Helinox Table One has become a cornerstone of my remote work setup. Vanlife often requires adaptability, and this table delivers. Whether parked by a secluded forest trail or at a busy campsite, I’ve spent countless hours editing photos, drafting articles, and hosting virtual meetings with the Helinox Table One as my workspace. The table’s stability keeps my remote work set up—a laptop, external hard drives, and a cup of coffee—stays secure, even when I’m parked on uneven terrain. The lightweight yet robust construction means I can move it easily from the van to an outdoor setup, allowing me to soak in nature while remaining productive. On windy days or during moments when the ground isn’t perfectly flat, the table’s reliability with the silicon topper keeps everything steady. This level of dependability has made it an integral part of my work-life balance on the road, blending functionality with the freedom of vanlife.
The Silicon Topper is A Game-Changer
The optional silicon topper is my favorite addition to the Helinox Table One. This simple accessory transforms the table into an even more functional piece of gear. Here’s why:
Non-Slip Surface: The silicon cover ensures that your items stay put, even when the wind picks up. This feature is especially handy for cooking and working outdoors. Whether I’m balancing a bowl of soup or placing my camera gear on the table, I know it’s secure.
Easy Cleanup: After making sushi, the silicon topper made cleaning a breeze. Without it, the fish smell could have lingered on the table—yuck! The topper is also great for messy tasks like rolling out dough or preparing sticky foods.
Added Durability: The silicon adds a layer of protection to the table’s surface, ensuring that it remains in pristine condition no matter how much wear and tear it endures. Over time, I’ve noticed that this added layer helps extend the lifespan of the table.
For anyone living vanlife or spending significant time camping, the Helinox Table One is a must-have. Its durability, functionality, and thoughtful design set it apart from other camp tables. Whether you’re preparing a gourmet meal under the stars or working remotely in a beautiful outdoor setting, this table delivers. Add the silicon topper for an extra layer of convenience, and you’ve got a piece of gear that’s worth every penny.
I’ve tried numerous camp tables over the years, and none have come close to the performance of the Helinox Table One. It’s a small investment that makes a big difference in the quality of your vanlife and outdoor adventures. Don’t just take my word for it—try it yourself and see how it transforms your camping experience.
Discover More Gear

Best Things to Do Along Baja's Sea of Cortez
Baja's Sea of Cortez offers an incredible escape for adventurers and beach lovers alike. Often overshadowed by the Pacific side's renowned surf breaks, the Sea of Cortez is a hidden gem with its own unique charm. This coastline is brimming with opportunities for exploration and relaxation, offering something for everyone. Let me share some of the best things you can do in this remarkable area based on my experiences.
Baja's Sea of Cortez offers an incredible escape for road trippers, snorkelers, and beach lovers alike. Often overshadowed by the Pacific side's renowned surf breaks, the Sea of Cortez is a hidden gem with its own unique charm. This coastline is brimming with opportunities for exploration and relaxation, offering something for everyone. Let me share some of the best things you can do in this remarkable area based on my experiences.

Just some of the many fish you see while snorkeling in the Sea of Cortez. Photo by Dalton Johnson
1. Snorkeling and SCUBA Diving in the National Marine Park
The underwater world of the Sea of Cortez is breathtaking. The marine park, particularly around the islands near Loreto, is a haven for snorkelers and divers. With vibrant coral reefs, schools of colorful fish, and even sea lions, this is an adventure you don't want to miss. If you’ve never snorkeled or SCUBA dived before, this is the perfect place to start—it’s like stepping into another world. The waters are so clear that even those sticking to the surface can see an abundance of marine life, making it accessible for all levels of experience. Boat tours are readily available, ensuring you have the chance to visit the best underwater spots.
The marine park is also home to a variety of larger marine creatures, such as manta rays and occasional whale sharks, providing a thrilling experience for more adventurous divers. With multiple dive operators in the area, it’s easy to arrange guided trips that cater to different skill levels. This is truly a once-in-a-lifetime opportunity to explore one of the most biodiverse marine environments on the planet.

Kite Surfing in La Ventana. Photo by Dalton Johnson
2. Kite Surfing in La Ventana
La Ventana is a paradise for kite surfers. While I don’t kite surf myself, watching the beaches come alive with colorful kites slicing through the air is thrilling. The consistent winds make this spot one of the best kite surfing destinations in the world. Whether you're a seasoned pro or looking to learn, La Ventana is the place to be. Many local schools and instructors offer lessons, so even beginners can get a taste of this exciting sport. The vibrant community of kite surfers here creates an energetic and welcoming atmosphere that’s infectious.
Beyond kite surfing, La Ventana offers a range of other activities, including mountain biking and yoga retreats, for those who want to combine their beach adventures with land-based recreation. The nearby hiking trails also provide stunning views of the coastline and surrounding desert, making it a well-rounded destination for outdoor enthusiasts.
Oceanside hot spring along the Sea of Cortez in Baja. Photo by Dalton Johnson
3. Relax in a Hot Spring on the Beach
Imagine soaking in a natural hot spring on the beach while the tide ebbs and flows around you. At low tide in La Ventana, you can dig into the sand to uncover warm geothermal pools. This unique experience is both relaxing and rejuvenating—a must for anyone visiting the area. Bring a towel and some refreshments to make the most of this serene spot, and don’t forget to check the tide schedule to ensure the springs are accessible during your visit. It's an experience unlike any other, blending the soothing warmth of a hot spring with the tranquil sounds of the ocean.
The hot springs also attract a small but friendly community of visitors who gather to enjoy this natural phenomenon. It’s a great way to meet fellow travelers and share stories while soaking in the soothing waters. Don’t forget your camera to capture the unique beauty of this hidden gem.
4. Enjoy Secluded Beaches and Fewer Crowds
The Sea of Cortez side of Baja is blissfully less crowded than its Pacific counterpart. This means more room to spread out on pristine beaches and enjoy the serene coastline. Whether you’re building sandcastles, lounging with a book, or simply taking in the views, the lack of crowds makes every moment more enjoyable. Some beaches are so quiet that you might feel like you’ve stumbled upon your private paradise. This tranquility is perfect for those seeking peace and a slower pace.
For those who enjoy exploring, many of these beaches are surrounded by rocky cliffs and tide pools, offering opportunities to discover marine life and hidden coves. It’s the perfect setting for a day of adventure combined with relaxation. Pack a picnic, bring your favorite beach games, and soak in the natural beauty of these untouched shores.
Balandra Beach from high in the sky. Photo by Dalton Johnson
5. Swim in Beautiful Coves and Bays
The coastline of the Sea of Cortez is dotted with stunning coves and bays perfect for swimming. Two standout spots are:
Balandra Beach: Known for its shallow turquoise waters and iconic mushroom-shaped rock, this beach is ideal for wading and swimming. The gentle slope of the water makes it family-friendly, and the scenery is nothing short of postcard-perfect.
Conception Bay: With calm, crystal-clear waters surrounded by dramatic desert landscapes, this bay is a dream for open-water swims or stand-up paddleboarding (SUP). Numerous small beaches and inlets around the bay offer endless opportunities to explore, picnic, or just unwind.
These spots are not just about swimming; they’re also fantastic for photography, kayaking, and even spotting wildlife. Early mornings are particularly magical, as the light paints the landscape in soft hues, and the beaches are at their most tranquil.
6. Go Whale Watching
The Sea of Cortez is a migration hotspot for whales, including humpbacks, gray whales, and even the elusive blue whale. Whether you’re on a SUP, taking a boat tour, or simply watching from the shore, spotting these majestic creatures is an awe-inspiring experience. The best time to see whales is during their migration season, typically from December to April. Many operators offer eco-friendly tours that bring you close to these gentle giants while respecting their natural habitat. Keep your camera ready—a breaching whale or a spouting blowhole is a sight you’ll never forget.
For an even more intimate experience, consider a kayak tour that allows you to paddle alongside these magnificent creatures. It’s an unforgettable way to connect with nature and witness the sheer scale and grace of these marine mammals up close.

A sunset SUP on the Sea of Cortez near Conception Bay. Photo by Dalton Johnson
7. Kayaking and Paddleboarding
The calm waters of the Sea of Cortez make it perfect for kayaking and paddleboarding. Exploring the shoreline from the water offers a new perspective on the area's dramatic cliffs and sandy beaches. Keep an eye out for dolphins, sea turtles, and other marine life as you paddle. Several rental shops in towns like Loreto and La Paz provide all the equipment you need. For those seeking an extended adventure, multi-day kayaking tours allow you to camp on remote beaches and fully immerse yourself in the natural beauty of the region.
Kayaking also provides access to secluded spots that are otherwise difficult to reach. Paddle through narrow inlets, explore hidden caves, and stop at untouched beaches where you can enjoy complete solitude. It’s a serene and rewarding way to experience the Sea of Cortez.

Beach camping on the Sea of Cortez in Baja. Photo by Dalton Johnson
8. Camp Along the Coastline
If you love camping, the Sea of Cortez is an unforgettable destination. Many beaches allow camping, offering the chance to sleep under the stars with the sound of waves lapping at the shore. Places like Bahia Concepcion and Playa El Requeson are popular spots to set up camp. These sites provide a blend of basic amenities and natural beauty, making them perfect for both experienced campers and first-timers. Watching the sunrise over the calm waters of the Sea of Cortez is a magical way to start your day.
For those looking for more adventure, some camping spots also offer hiking trails that lead to breathtaking viewpoints. Don’t forget to pack essentials like a portable stove, plenty of water, and a good camera to capture the memories. The stargazing opportunities are unparalleled, as the remote locations minimize light pollution, offering a clear view of the night sky.
Camping on a secluded beach of the Sea of Cortez north of La Ventana.. Photo by Dalton Johnson
The Sea of Cortez side of Baja may not have the surf fame of the Pacific, but it doesn’t need it. Its diverse activities, natural beauty, and laid-back atmosphere make it an extraordinary destination worth exploring. From snorkeling with marine life to soaking in beachside hot springs, the Sea of Cortez will capture your heart, just as it has mine. Whether you're seeking adventure, relaxation, or a little of both, this incredible region has something special for everyone.
Discover more Adventures

10 Must See Road Trip Stops Along The Sea to Sky Highway in Canada
Exploring Canada’s breathtaking Sea to Sky Highway is an adventure like no other. This iconic route stretches from Vancouver to Whistler, showcasing stunning landscapes, vibrant communities, and endless opportunities for adventure. Below, you’ll find an expanded guide to 10 must-see stops, making your journey both unforgettable and easy to navigate.
Exploring Canada’s breathtaking Sea to Sky Highway is an adventure like no other. This iconic route stretches from sea in Vancouver to mountains of Whistler, showcasing stunning landscapes outside of your window and endless opportunities for outdoor adventure at almost every stop. Below, you’ll find 10 must-see stops along your Sea to Sky road trip.
A view of the starting point of Highway 99 from the sky. Photo by Dalton Johnson
Pros
Breathtaking Scenery: The Sea-to-Sky Highway is renowned for its spectacular views, showcasing the coastal mountains, dense forests, and the Pacific Ocean. The journey is a visual treat for nature lovers and photographers.
Outdoor Activities: Along the route, there are numerous opportunities for outdoor activities such as hiking, rock climbing, and water sports. Popular spots like Shannon Falls and Squamish provide options for exploration.
Whistler Resort: The highway leads to the world-famous Whistler Blackcomb resort, offering year-round activities like skiing, mountain biking, and vibrant village life. It's a major attraction for adventure enthusiasts.
Cultural Stops: The route passes through towns like Squamish and Pemberton, offering a chance to explore local culture, art, and cuisine. It's an opportunity to experience the unique communities along the way.
Cons
Weather Variability: The weather along the Sea-to-Sky Highway can be unpredictable, especially in winter. Rain and fog are common, affecting visibility and road conditions. Travelers should be prepared for changing weather patterns.
Traffic Congestion: During peak seasons, the highway can experience heavy traffic, particularly around popular attractions and towns. This can lead to delays and a less enjoyable driving experience.
Limited Services in Remote Areas: Some stretches of the highway pass through relatively remote areas with limited services. Travelers should plan accordingly, ensuring they have enough fuel and supplies for the journey.
Road Safety Concerns: The Sea-to-Sky Highway, while picturesque, includes some winding and narrow sections. Caution is advised, especially for those not accustomed to mountainous driving. Snow and ice in winter can add to the road safety challenges.

One of the many stunning views from the sky along the Sea to Sky Highway. Photo by Dalton Johnson
10 Must-See Places to Stop
Vancouver, British Columbia
Begin your journey in this dynamic city nestled between the Pacific Ocean and the Coast Mountains. Vancouver offers a perfect blend of urban excitement and natural beauty. Explore Stanley Park’s scenic seawall, a favorite for walkers and cyclists, or visit Granville Island’s bustling public market filled with fresh produce, artisan goods, and delicious food stalls. Don’t miss neighborhoods like Gastown, where historic charm meets modern dining, or Yaletown, known for its trendy boutiques and waterfront views. Vancouver’s vibrant culture makes it the ideal starting point for your adventure.

Basking in the sun at a “hidden” spot near the summit of the Chief in Squamish. Photo by Dalton Johnson
Squamish, British Columbia
Known as the "Outdoor Recreation Capital of Canada," Squamish is a paradise for nature lovers. Take in the awe-inspiring views of the Stawamus Chief, a massive granite monolith that attracts rock climbers from around the world. Not into climbing? Hike the Chief’s trails to enjoy panoramic vistas of Howe Sound. The Squamish Adventure Centre provides insights into local attractions, including First Nations heritage and outdoor activities. Popular trails like Smoke Bluffs and Sea to Sky Trail offer options for all skill levels, ensuring everyone can soak up Squamish’s beauty.
Shannon Falls Provincial Park
Just minutes from Squamish, Shannon Falls Provincial Park is home to one of British Columbia’s tallest waterfalls. A short, easy walk takes you to viewing platforms where you can marvel at the cascading waters. Surrounded by lush forests, this spot is perfect for a relaxing break or a scenic photo session. Picnic tables and rest areas make it a convenient stop for families and road trippers alike.
Sea to Sky Gondola, Squamish
For unparalleled views, take a ride on the Sea to Sky Gondola. This spectacular attraction offers vistas of Howe Sound, coastal mountains, and dense forests. At the summit, explore well-maintained trails like the Spirit Trail or Panorama Ridge, or cross the thrilling Sky Pilot Suspension Bridge. Whether you’re seeking adventure or simply want to take in the views, this stop is sure to leave a lasting impression.
Britannia Mine Museum
Step back in time at the Britannia Mine Museum in Britannia Beach. This National Historic Site provides a fascinating look at British Columbia’s mining history. Take a guided underground tour, pan for gold, and explore interactive exhibits that bring the mining industry’s legacy to life. Kids and adults alike will enjoy this engaging and educational stop.

Kristin testing out her balance at middle lake in Joffre Lakes Provincial Park. Photo by Dalton Johnson
Joffre Lakes Provincial Park
Prepare to be amazed by the turquoise waters of Joffre Lakes. This provincial park is a haven for hikers, offering a moderate trail that winds past three stunning glacial lakes. The vibrant blue hues of the lakes are a result of glacial silt, creating an otherworldly atmosphere. While the hike can be challenging in parts, the reward is well worth the effort. Remember to bring sturdy footwear and plenty of water.
Related Read: Hike Joffre Lakes; What You Need To Know Before Going
Pemberton, British Columbia
Nestled in a valley surrounded by towering mountains, Pemberton is a charming destination with much to offer. Visit local farms to sample fresh produce and artisanal goods or enjoy a meal at one of the town’s farm-to-table restaurants. Outdoor enthusiasts can explore mountain biking trails or take a helicopter tour of the Pemberton Icefield. The picturesque setting and friendly community make Pemberton a must-visit stop.
Nairn Falls Provincial Park
A short hike leads you to Nairn Falls, a powerful cascade that rushes through a narrow canyon. This family-friendly trail is just 1.5 kilometers long, making it an easy addition to your itinerary. The park’s serene atmosphere is perfect for a picnic or a moment of quiet reflection amid nature’s beauty.
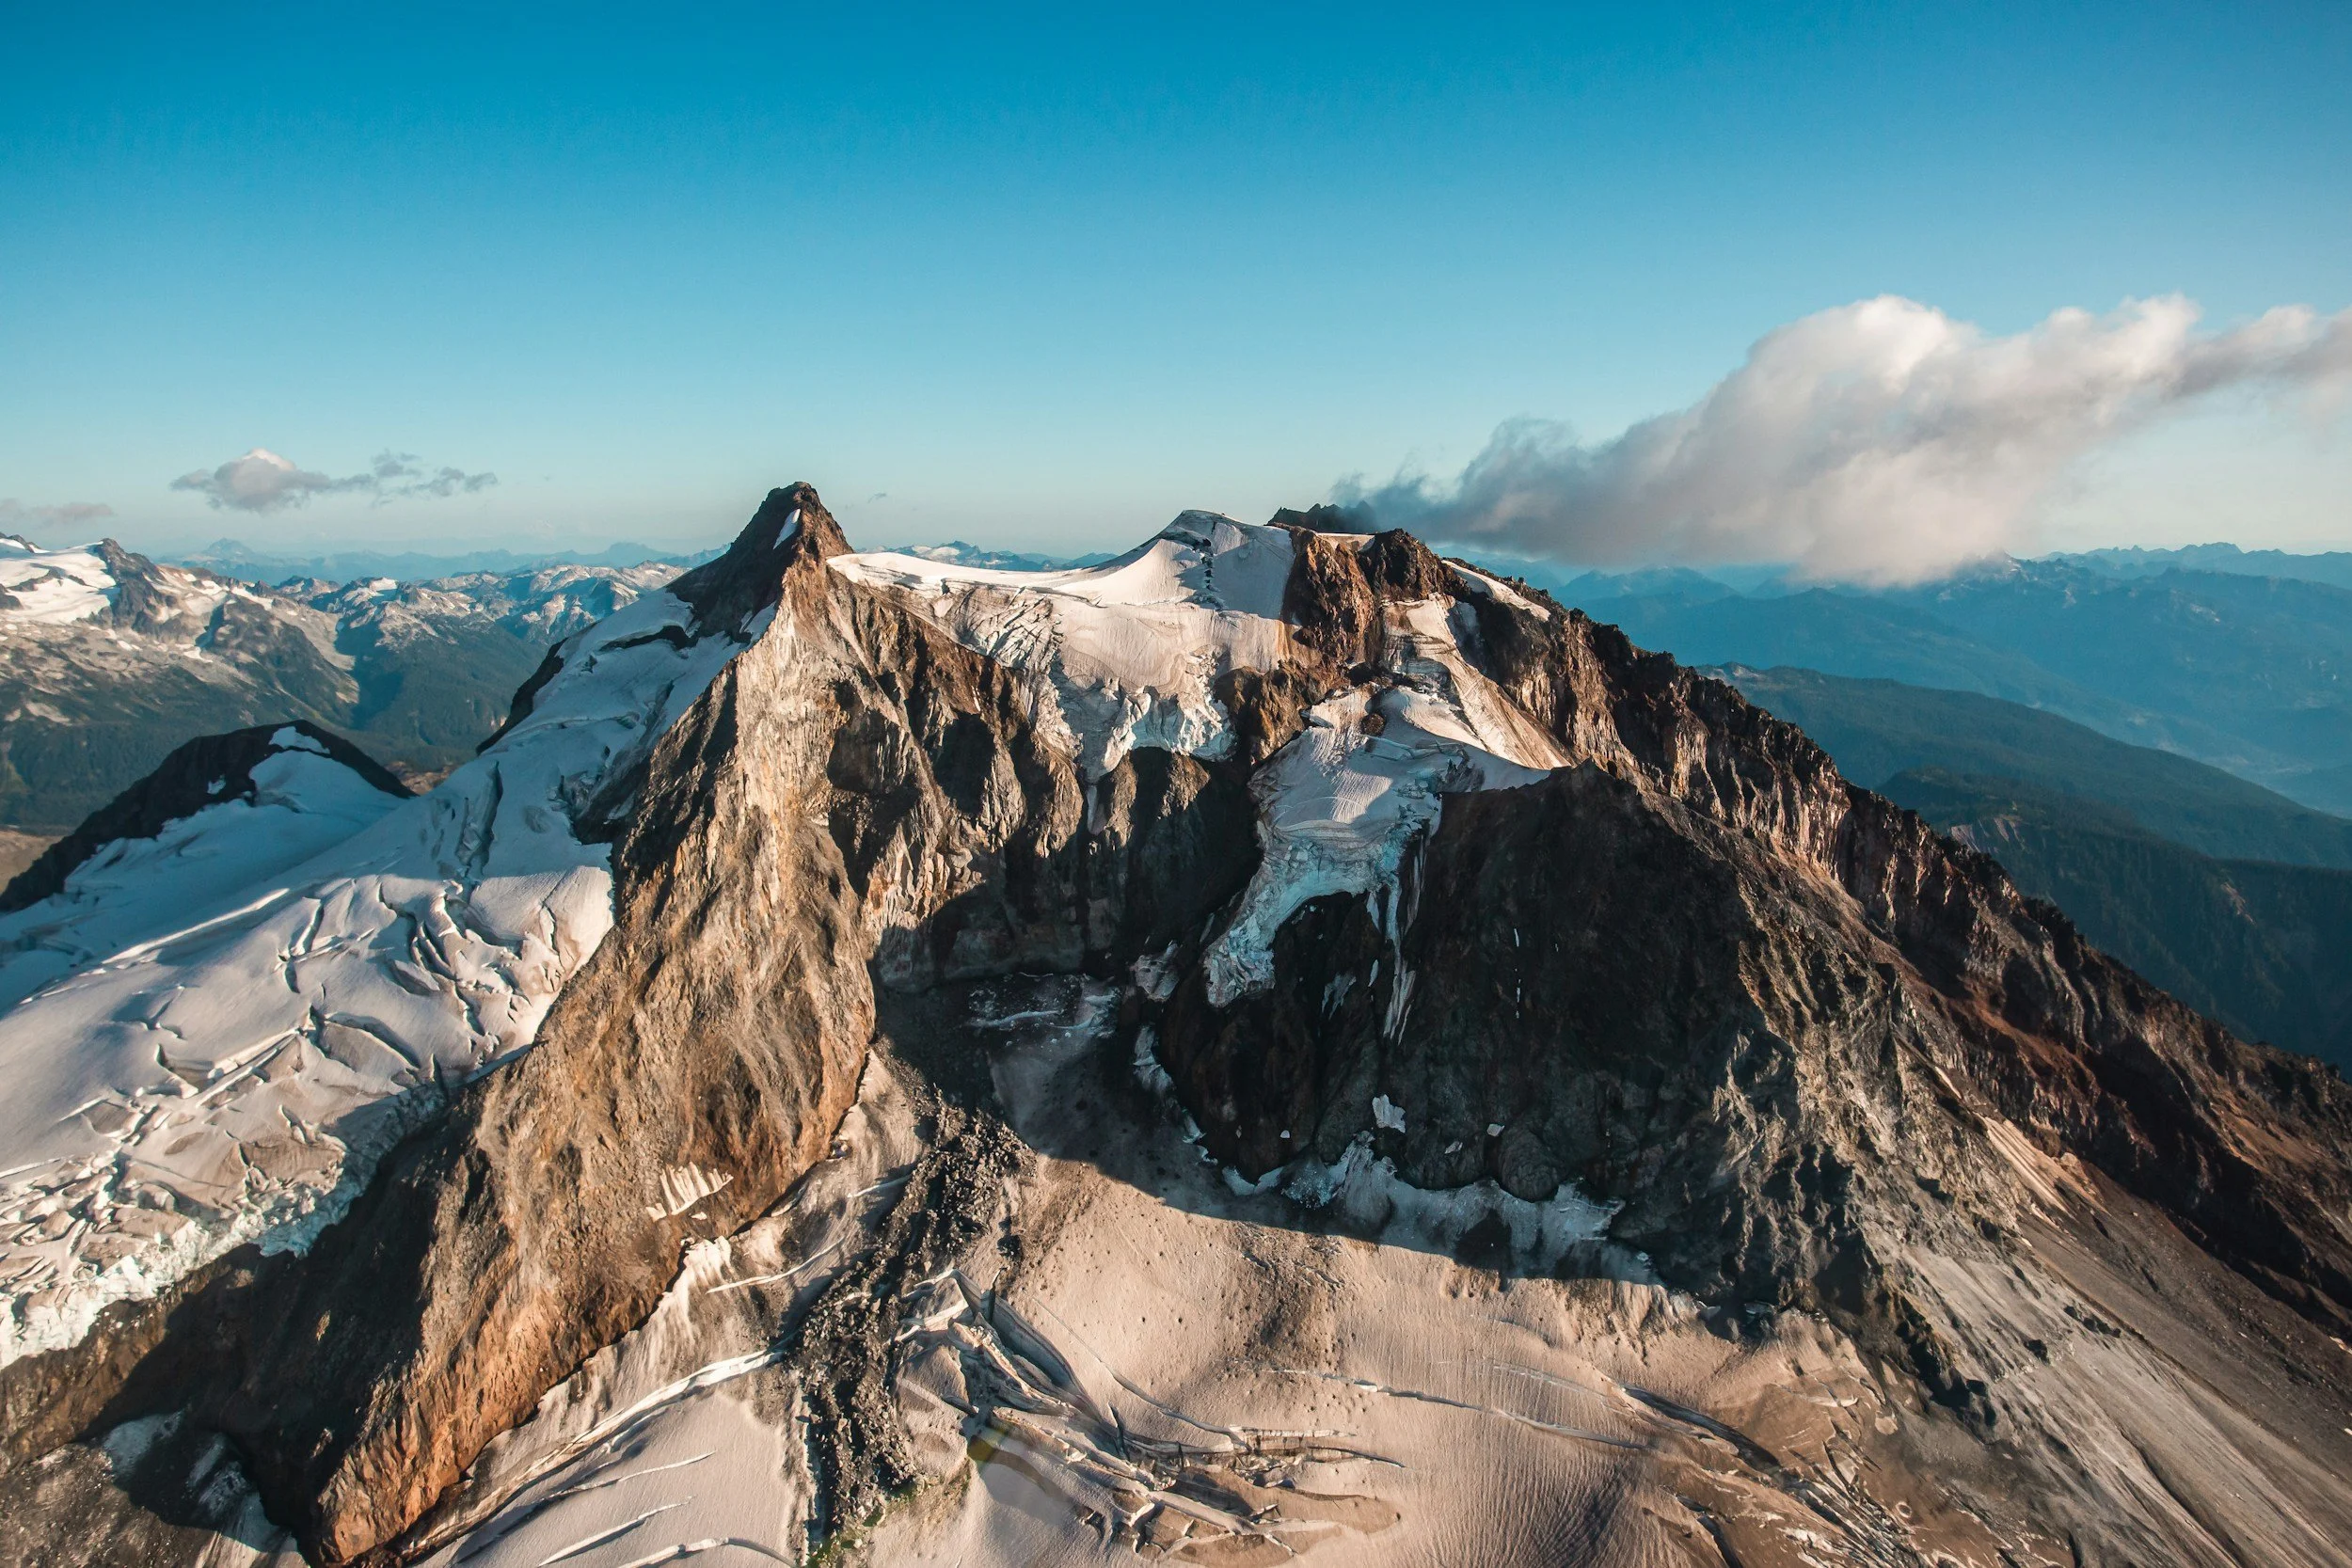
Whistler, British Columbia
Whistler is a world-renowned destination that offers something for everyone. In winter, enjoy skiing and snowboarding at Whistler Blackcomb, while summer brings opportunities for mountain biking, hiking, and zip-lining. The pedestrian-friendly village features shops, restaurants, and lively entertainment. Don’t miss the Peak 2 Peak Gondola, which connects Whistler and Blackcomb Mountains and provides breathtaking views of the surrounding alpine landscape.
Brandywine Falls Provincial Park
End your journey with a visit to Brandywine Falls, a stunning 230-foot waterfall set amid lush forest. A short walk from the parking area leads to a viewing platform where you can admire the falls and the serene Daisy Lake below. This peaceful spot is the perfect way to conclude your Sea to Sky adventure.


Tips for Road Tripping Sea to Sky Highway
Can You Road Trip the Sea to Sky Highway?
Absolutely! The Sea to Sky Highway, also known as Highway 99, stretches from the Pacific Ocean in Vancouver to the alpine wonderland of Whistler. This picturesque route takes you through some of the most breathtaking scenery British Columbia has to offer, making it a perfect road trip for nature enthusiasts and adventure seekers alike.
What Documents Are Needed?
For a road trip along the Sea to Sky Highway, ensure you have your valid driver's license, vehicle registration, and proof of insurance. If you're an international traveler, make sure to check and fulfill the entry requirements for Canada, like a passport and visa.
How Long Is the Trip, Distance, and Time?
The Sea to Sky Highway spans approximately 120 miles (195 kilometers) and can be comfortably driven in about 5 to 8 hours, depending on your pace and the number of stops you plan to make. However, with the spectacular scenery and attractions along the way, consider taking your time, 1 to 3 days, to fully savor the experience.
Route Options:
The Sea to Sky Highway itself is a spectacular route, winding through coastal rainforests, along the shores of Howe Sound, and into the Coast Mountain Range. Along the way, you'll have the opportunity to explore charming towns, outdoor adventures, and breathtaking viewpoints.
Pretending to walk a tight rope along the cliff’s edge at the Chief overlooking the Sea to Sky highway. Photo by Dalton Johnson
A road trip along the Sea to Sky Highway is a journey through the very best of British Columbia's natural beauty. From the coastal city of Vancouver to the alpine retreat of Whistler, and with stops at Squamish, Joffre Lake, and other scenic destinations, this road trip promises a perfect blend of adventure and relaxation. So, gear up, hit the road, and enjoy the awe-inspiring landscapes of the Sea to Sky Highway.
Discover more Road Trips
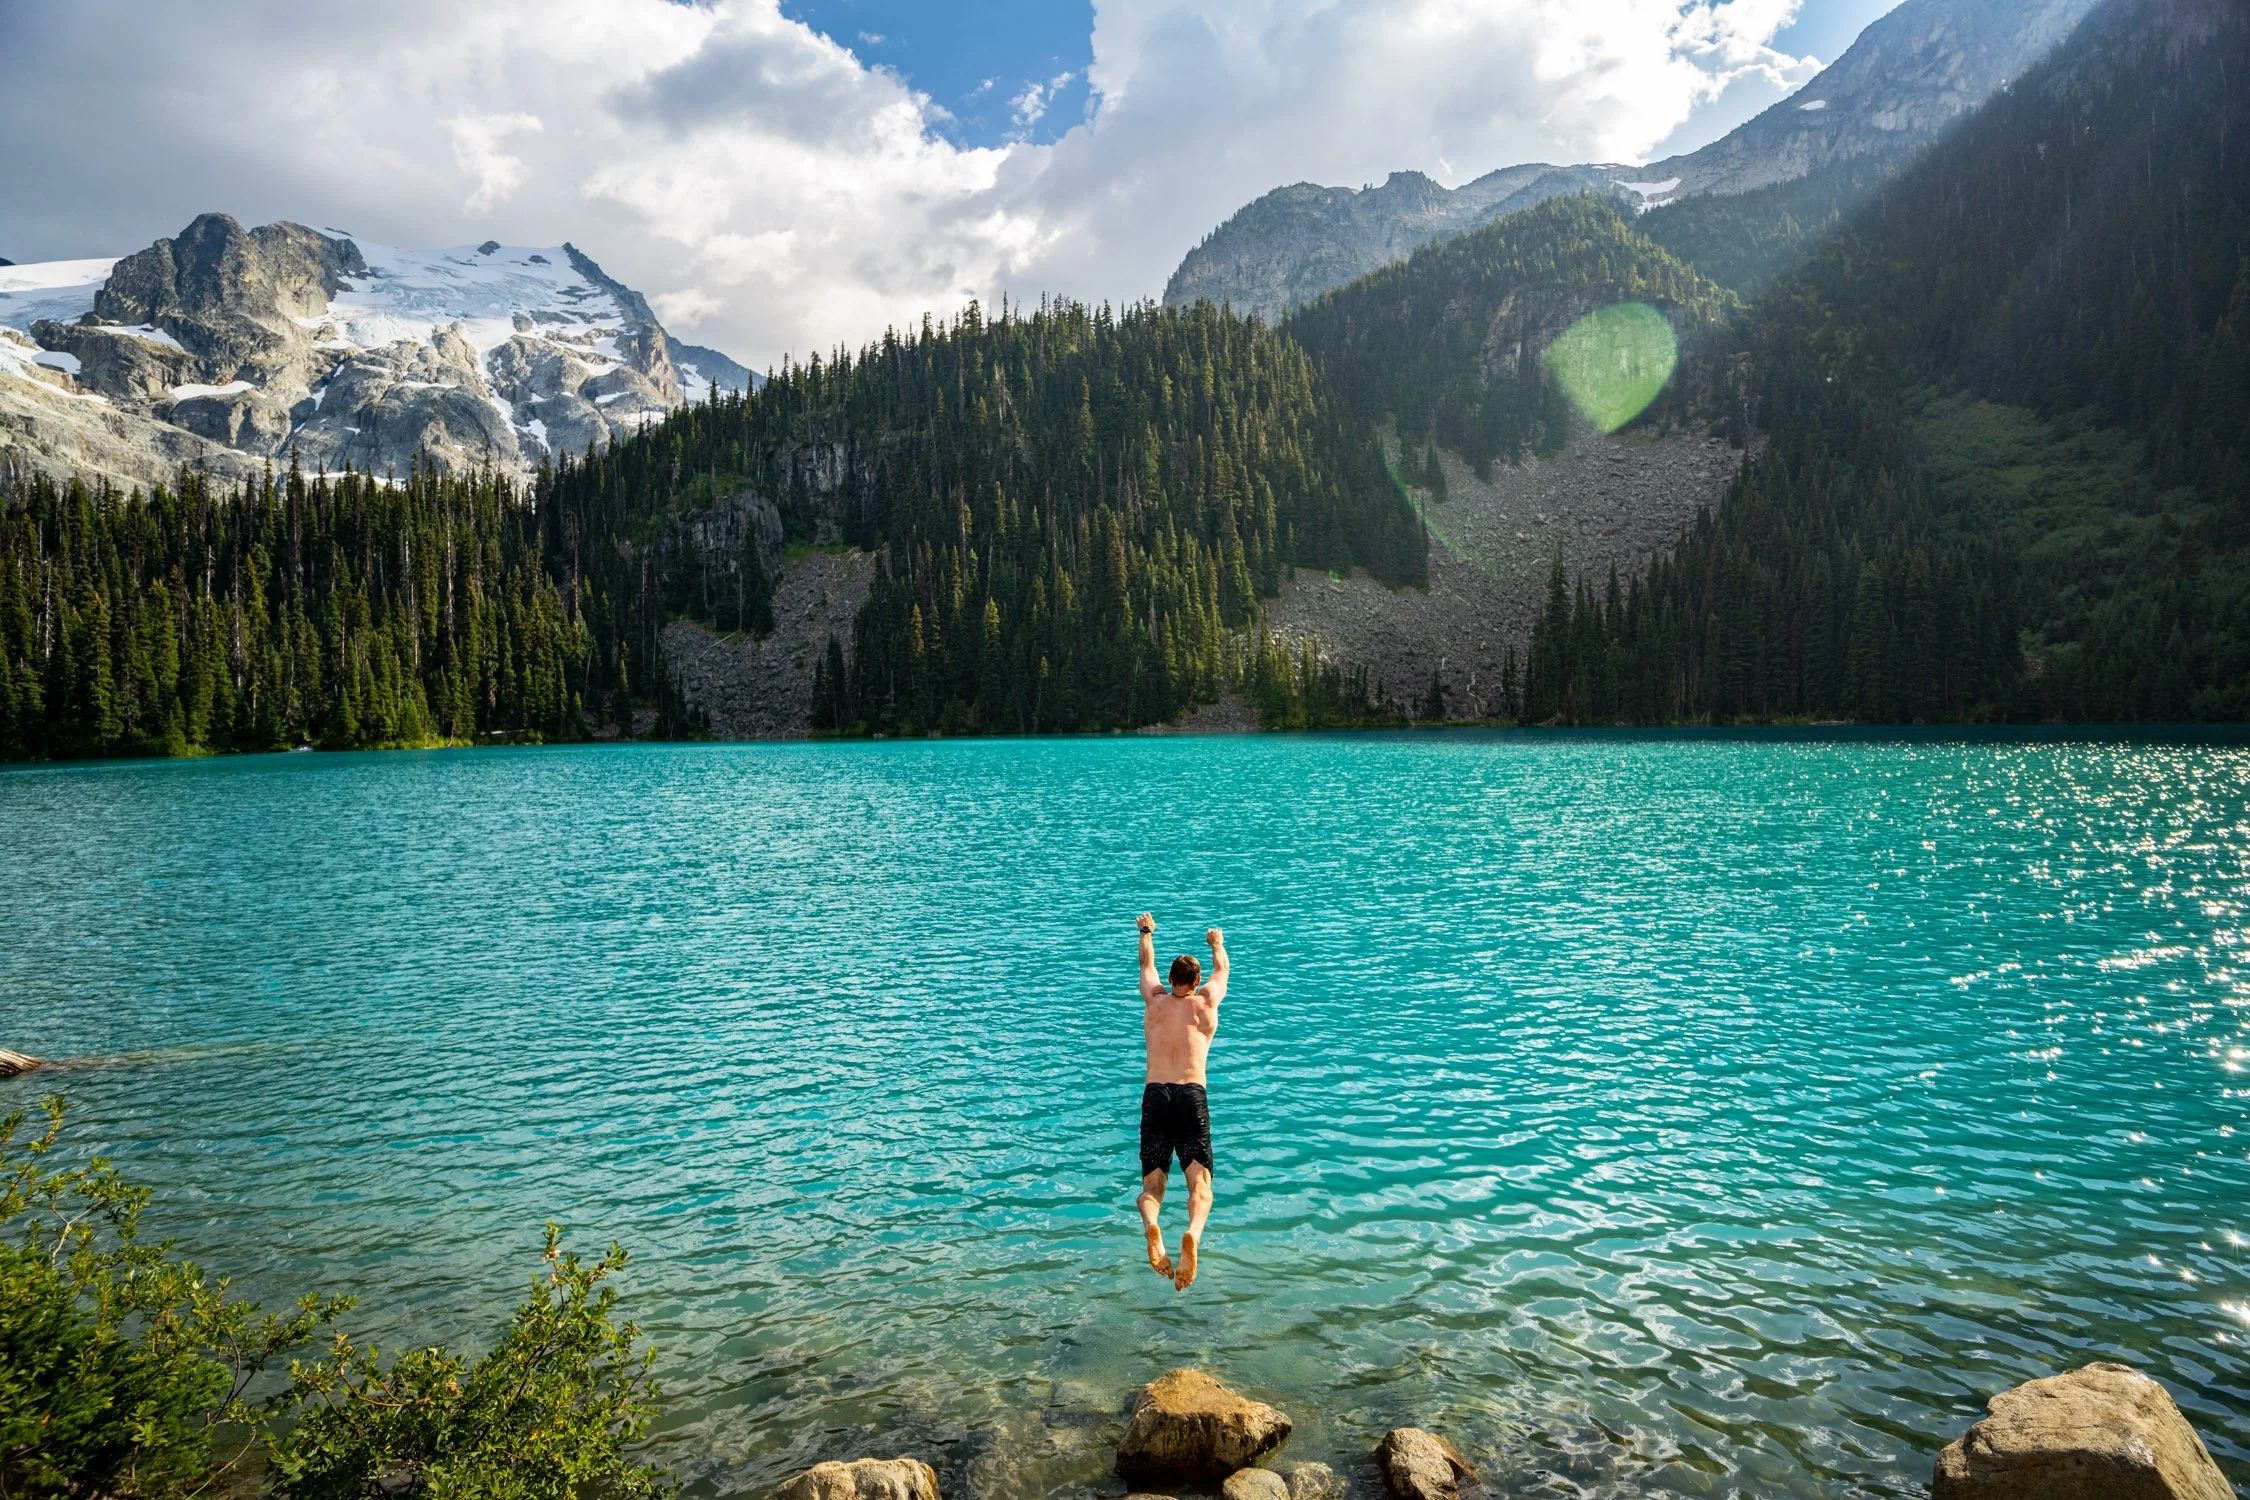
Hiking Joffre Lakes, What You Need To Know Before You Go
There are those “by happen stance” occasions that just happen to work out, this is one of them. Driving back to the lower 48 from Alaska, I needed to use the bathroom. So, while in British Columbia, Kristin and I stopped in a large parking lot with bathroom. This lot seemed to be in the middle of no where, but that didn’t surprise me as there are several random lots along the drive from Alaska to the lower 48. However, very few of those lots had swarms of people. So, I asked somebody, “Why are there so many people here?”
They laughed and said they were doing the prettiest hike to in all of British Columbia, Joffre Lakes.
Jumping into the gorgeous blue color waters of Joffre Lakes in British Columbia. Photograph by Dalton Johnson
Pros
Breathtaking Scenery: Joffre Lakes is renowned for its stunning alpine scenery, including three picturesque turquoise lakes surrounded by snow-capped mountains and glaciers. The views along the hike are simply breathtaking.
Variety of Hiking Trails: The park offers a variety of hiking trails suitable for different skill levels, from the easy walk to the first lake to the more challenging trek to the third lake. This makes it accessible to hikers of various abilities.
Photographic Opportunities: The natural beauty of Joffre Lakes provides numerous opportunities for photography. The vivid blue lakes, glaciers, waterfalls, and lush forests make for great photos.
Wildlife Viewing: You may encounter wildlife like birds, chipmunks, and marmots during your hike. Keep your camera ready for some wildlife photography.
Camping Options: Joffre Lakes Provincial Park offers camping facilities, allowing you to extend your stay and enjoy the tranquility of the area.
Adventure and Challenge: For experienced hikers, the trail to the third lake is challenging, offering a sense of adventure and accomplishment when you reach your destination.
Cons
Crowds: Joffre Lakes has become increasingly popular in recent years, leading to overcrowding, especially during peak seasons. This can detract from the peacefulness of the experience and make parking and trail access more challenging.
Limited Parking: Parking at the trailhead can be a significant issue, especially on weekends and holidays. Arriving early or using alternative transportation methods can help alleviate this problem.
Weather Variability: Weather conditions in the mountains can change rapidly. Be prepared for sudden temperature drops, rain, or snow, even in the summer months.
Trail Conditions: Depending on the time of year, the trail can be muddy or covered in snow and ice, making it slippery and potentially dangerous without proper gear and precautions.
Difficulty: While there are easier trails in the park, the hike to the third lake is challenging and not suitable for everyone. It involves steep ascents, rugged terrain, and can be physically demanding.
Environmental Impact: The popularity of Joffre Lakes has led to concerns about the environmental impact on the delicate alpine ecosystem. It's essential to follow Leave No Trace principles and stay on designated trails to minimize harm to the environment.
For me, that seemed like a bold statement, but I was intrigued. So I pried a little bit more, “Really, what makes it so pretty?”
“You haven’t heard of Joffre Lakes?” This random person responded, “Why are you here then?”
“I am driving back from Alaska, I just needed to pee.”
“Sadly, I think you will need to get a permit and they are all booked today. Also, there is no service here. I don’t know how you could hike it today, but I highly suggest you make time for the hike. It is lovely.” The random human encouraged.
“Thank you! I’ll see what I can do.”
Turns out, they were right about the lack of service in the area. There isn’t any. Additionally, I saw a ranger who said they were booked for the day, but to check online once we had service as people cancel from time to time. Both Kristin and I were now disappointed. We didn’t have the time to wait around a couple of days to get a permit, so we drove down the winding hill.
At the bottom of the hill, Kristin looked up the ticket registration while we made some lunch. Turns out, there were a couple of tickets left. She reserved the tickets and we drove back to the trailhead to join the masses on the hike.
I must say, this trail was packed with humans!
Everything You Need To Know about Joffre Lakes:
How To get a permit and hike joffre Lakes
Hiking and camping—yes you can camp at these gorgeous lakes—in Joffre Lakes Provincial Park is undoubtedly one of the most beautiful experiences in all of British Columbia, Canada. With its lush, emerald forests and vivid turquoise waters – Joffre is the Canadian explorers’ dream.
The lakes are 2.5 hours from the Vancouver Airport and 30 minutes from Whistler
You need a permit to day hike and/or camp CLICK HERE
Make sure to check if Joffre Lakes is open CLICK HERE
You have to bring your own toilet paper for the restrooms
Best time to hike is between July and August, though Joffre Lakes Provincial Park is open year round
Related Read: How To Backpack Joffre Lakes

Overlooking the middle lake of Joffre Lakes in British Columbia. Photograph by Dalton Johnson
The Ideal Backpacking Itinerary for Joffre Lakes
If you are lucky enough to snag a backpacking permit for Joffre Lakes, take it! Backpacking in Joffre Lakes Provincial Park offers a fantastic opportunity to immerse yourself in the stunning alpine scenery of the area. Here's a suggested backpacking itinerary, keeping in mind the camping restrictions, permit requirements, and safety considerations:
Day 1: Arrival and Hike to Upper Joffre Lake
Arrive at Joffre Lakes Provincial Park early in the day to secure a parking spot, as it tends to get crowded.
Begin your hike from the parking lot to the first lake, Lower Joffre Lake, which is not suitable for camping.
Continue your hike to the second lake, Middle Joffre Lake, which also does not permit camping.
After enjoying the scenery at Middle Joffre Lake, continue your hike to the third and uppermost lake, Upper Joffre Lake.
Set up camp at one of the designated backpacking campsites near Upper Joffre Lake. These sites require permits, so be sure to have them in advance.
Day 2: Explore Upper Joffre Lake and Surroundings
Spend the morning exploring the area around Upper Joffre Lake, taking in the stunning views of the glacier and surrounding peaks.
You can also enjoy a swim in the frigid, turquoise waters of the lake if you're up for it.
In the afternoon, consider taking a short hike to one of the nearby viewpoints for even more breathtaking vistas.
Return to your campsite at Upper Joffre Lake for another night of camping.
Day 3: Hike Back to the Trailhead
After a leisurely morning at Upper Joffre Lake, start your hike back to the trailhead.
Take your time to appreciate the scenery once more as you descend the trail.
Ensure that you follow Leave No Trace principles, leaving the wilderness as pristine as you found it.
Finally, return to the parking lot and conclude your backpacking trip.
Remember to check the current permit requirements and availability, as regulations and quotas may change. Additionally, as mentioned, it's safer and more enjoyable to hike in a group, especially in the backcountry. Be prepared with appropriate gear, clothing, and food for your trip, and always prioritize safety and environmental responsibility while enjoying this beautiful area.
Kristin testing her balance out on a log going into the water at Joffre Lakes. Photograph by Dalton Johnson
Here’s How long you need to hike all three joffre lakes
Hiking to all three Joffre Lakes can either be completed as a day hike, or you can purchase a permit to stay overnight at one of the camping sites. The 9.2-kilometer / 5.7-mile roundtrip hike takes about 3 – 5 hours, depending on your pace and the number of rest stops. You don’t have to go all the way up to the third lake to enjoy the beauty of the park, but I encourage it! Many visitors choose to turn around as the second hike. On average, the first lake takes about 5 minutes to reach from the parking lot, while the second lake takes 1.75 hours and the third lake 2.5 hours (one way). The last lake is worth hiking to, especially if you are looking to escape the crowds.
LOWER JOFFRE LAKE TRAIL STATS
Difficulty: Easy
Distance: 0.2 km / 0.1 miles (roundtrip)
Elevation gain: N/A
MIDDLE JOFFRE LAKE TRAIL STATS
Difficulty: Intermediate
Distance: 5.5 km / 3.43 miles (roundtrip)
Elevation gain: 410 m / 1,348 ft
UPPER JOFFRE LAKE TRAIL STATS
Difficulty: Intermediate
Distance: 9.2 km / 5.72 miles (roundtrip)
Elevation gain: 673m / 2,209 ft
Should I hike to Upper Joffre Lake?
If you're up for a bit of extra adventure and the opportunity to experience a more secluded and picturesque side of Joffre Lakes Provincial Park, hiking to Upper Joffre Lake can be a rewarding choice. While the views might not be dramatically different from Lower Joffre Lake, the additional hike offers several enticing advantages.
One of the highlights is the improved perspective of the glacier, allowing you to appreciate its magnificence up close. Moreover, the trail takes you past a cascading waterfall, adding an enchanting element to your journey. The seclusion and tranquility of Upper Joffre Lake also make it an ideal spot for a peaceful picnic, providing a unique and serene outdoor experience for those who choose to venture further into the park.

Splashing into the cold water of Joffre Lakes. Photograph by Dalton Johnson
Tips for swimming in joffre Lakes:
Absolutely, you can take a refreshing swim at Joffre Lakes, and it's an experience you shouldn't miss. The crystal-clear, turquoise waters of the lake are not only stunning to look at but also inviting for a dip. However, it's essential to be prepared for the cold water, as the glacier-fed lake can be quite chilly, and your initial immersion might take your breath away.
Once you acclimate, though, the cool waters are incredibly invigorating, offering a unique and unforgettable swimming experience amidst the breathtaking natural beauty of the park. Don't forget to capture the moment with a photo or video for your Instagram feed to share your adventure with others and inspire them to explore this stunning natural gem as well.
Things to bring when Day hiking joffre lakes:
If you are lucky enough to get an overnight permit for Joffre Lakes, you should take it. If not, you will be day hiking the lakes, which is still a fantastic experience. During your day hike, I highly suggest you bring the following:
Go-to hiking boots are Columbia Newton Ridge or Merrell Moab’s
A swim suit, the water is cold but you just need to take a dip, so quick dry hiking shorts are great
Sunscreen, like Dermatone or Sunbum, that won’t destroy the water if you swim
Sunglasses that are polarized, my favorite afforadable sunnies are Sunski and Goodr
Day Pack like the Big Agnes Impassible or the Osprey Sportlite
Water bottle and filter like the Katadyn BeFree system
Hiking poles, the Leki Khumbu Lite are my go-to poles for all hikes
Snacks, on snacks, on snacks… looking for something different? Try Moon Fruit!
A towel that is quick-dry and easy to use like a Nomadix
Related Read: What To Bring When Hiking Joffre Lakes
Joffre Lakes History:
Joffre Lakes Provincial Park, located in British Columbia, Canada, has a relatively brief but interesting history:
Discovery and Exploration (19th Century): The area around Joffre Lakes has a long history of indigenous use by First Nations people, but it gained more prominence in the late 19th century as European explorers and settlers began to venture into the region. However, the park as we know it today was not established at this time.
Logging and Resource Extraction (20th Century): Throughout the 20th century, the area around Joffre Lakes was primarily used for resource extraction, including logging and mining. The region's natural beauty remained relatively undiscovered by the general public during this period.
Protection and Establishment of Joffre Lakes Provincial Park (1988): Joffre Lakes Provincial Park was officially established in 1988. Its creation aimed to protect the pristine alpine lakes, surrounding forests, and stunning mountain landscapes from further development and environmental degradation. The park was named after General Joseph Jacques Césaire Joffre, a French military commander during World War I.
Rising Popularity (21st Century): In the 21st century, Joffre Lakes gained popularity as a hiking destination, thanks in part to its accessibility from Vancouver and the incredible natural beauty it offers. The park's popularity grew through social media and word of mouth, leading to increased visitation.
Challenges and Conservation Efforts: The park has faced challenges related to overcrowding, environmental impact, and the strain on its infrastructure due to the surge in visitors. Conservation efforts and visitor management strategies have been put in place to mitigate these issues and protect the park's delicate ecosystem.

Joffre Lakes frozen over in the winter.
what to know about hiking joffre Lakes in winter
Hiking Joffre Lakes in the winter is possible, but it can be a challenging and potentially hazardous adventure. Here are some important considerations:
Snow and Ice: During the winter months, the trails at Joffre Lakes are typically covered in snow and ice. This can make hiking conditions treacherous, especially if you don't have the appropriate gear, such as microspikes or crampons, to provide traction on icy surfaces.
Avalanches: The area around Joffre Lakes is prone to avalanches in the winter. Avalanches can be extremely dangerous, and hikers need to be aware of the avalanche risk and have the necessary knowledge and equipment for avalanche safety if they plan to hike in this season.
Reduced Visibility: Winter weather in the mountains can change rapidly, leading to reduced visibility due to fog, snowfall, or low clouds. This can make navigation more challenging and increase the risk of getting lost.
Shorter Days: In the winter, the days are shorter, which means you have less daylight for your hike. It's important to plan accordingly and start early to ensure you have enough time to complete your hike and return safely before darkness falls.
Limited Access: The road to the trailhead at Joffre Lakes may be closed or difficult to access during the winter due to snow and ice. Be sure to check road conditions and park closures before attempting a winter hike.
Experience and Preparedness: Winter hiking in the mountains requires a higher level of experience and preparedness. You should be well-equipped with warm clothing, proper winter hiking gear, navigation tools, and knowledge of winter backcountry safety.
If you are an experienced winter hiker and are well-prepared for the challenges and risks associated with hiking in snowy and icy conditions, Joffre Lakes can offer a serene and stunning winter landscape. However, for most people, especially those without experience in winter backcountry travel, it is safer to explore Joffre Lakes during the milder seasons when the trails are more accessible and conditions are less extreme. Always prioritize safety when considering a winter hike in any mountainous area.
Braving the cold waters while hiking to Upper Joffre Lakes in British Columbia.Photograph by Dalton Johnson
British Columbia is truly a dream destination for hikers and road trips, and Joffre Lakes is just one of the many beautiful spots in this gorgeous province! I hope this Joffre Lakes hiking guide has inspired you to visit or add this destination to your bucket list. If you’ve ever been, I would love to hear about your experience in the comments below!
Discover More Incredible Hikes
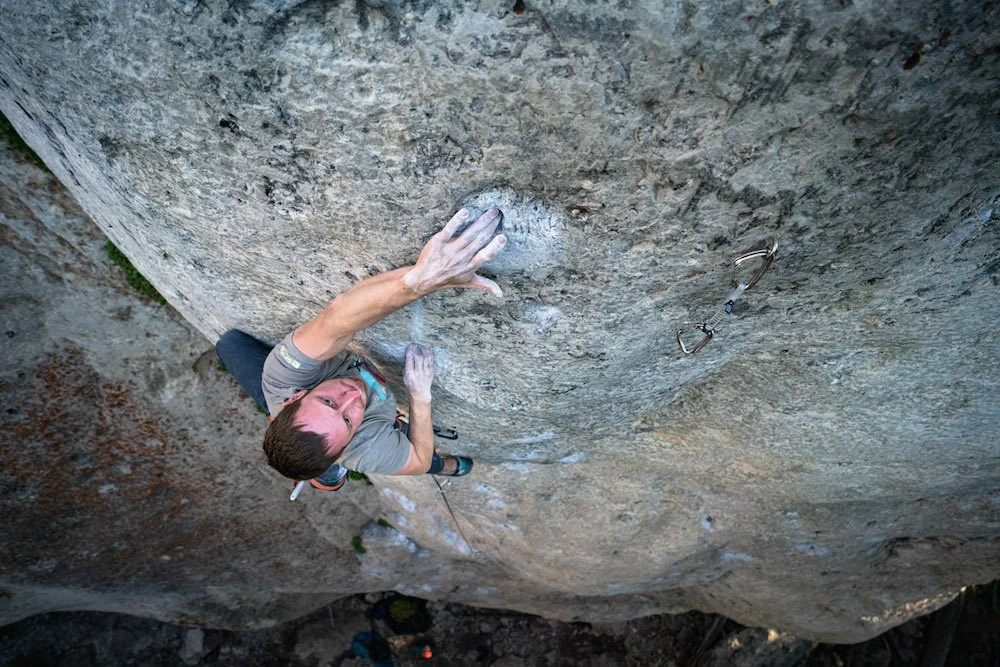
Gear You Actually Need to Start Sport Climbing
When you’re ready to make the leap from gym climbing or bouldering to outdoor sport climbing, the gear list is surprisingly simple. Sport climbing, especially single-pitch routes, requires less gear compared to other climbing disciplines, making it an accessible next step for climbers. Here’s everything you need to get started, along with some bonus recommendations to enhance your experience.
When you’re ready to make the leap from gym climbing to outdoor sport climbing, the gear list is surprisingly simple. Sport climbing, especially single-pitch routes, requires less gear compared to other climbing disciplines, making it an accessible next step for climbers. Here’s everything you need to get started, along with some bonus recommendations to enhance your experience.

Victoria sport climbing in Wild Iris. Photo by Dalton Johnson
Essential Gear for Sport Rock Climbing
1. Climbing Shoes
Invest in a pair of climbing shoes. If you’re climbing primarily on outdoor sport routes, look for a slightly downturned shoe that balances performance with edging. Most sport climbing is technical with small holds. Trad shoes work, but are not the best.
A few of our favorites:
2. Harness
A well-fitted harness is critical. Choose one with adjustable leg loops and gear loops to hold your quickdraws and other essentials.
A few of our favorites:
3. Belay Device
A reliable belay device is a must. Assisted-braking devices, such as the Petzl GriGri or Black Diamond ATC Pilot, are popular for sport climbing as they add an extra layer of security.
A few of our favorites:
4. Chalk Bag and Chalk
Sweaty hands can make climbing outdoors tricky. A chalk bag with loose chalk or chalk balls will keep your grip secure. For an added benefit find some chalk with lavender in it to calm yourself down when doing some runout climbing.
A few of our favorites:
5. Rope
A dynamic rope, typically 60 or 70 meters, is perfect for most sport routes. Check the route length before heading out to ensure your rope is long enough for both climbing and rappelling. Some places, like Red River Gorge and Owen’s River Gorge might require longer ropes.
A few of our favorites:
6. Helmet (Optional but Highly Recommended)
Falling rocks and unexpected impacts can happen outdoors. While some climbers skip helmets for sport climbing, it’s a good habit to wear one for added safety. I try to play this off here, but please wear one.
A few of our favorites:
7. Quickdraws
Bring 10–12 quickdraws for clipping into bolts. The number depends on the length of the routes you’ll be climbing. Look for lightweight yet durable options, I prefer the ones with large carabiners. Sure, they are heavier, but they are easier to clip.
A few of our favorites:
8. Locking Carabiners and Cordelette for the Anchor
You’ll need a few locking carabiners to secure yourself at the anchor and set up a safe rappel or belay. A cordelette or long sling helps create a secure and equalized anchor.
A few of our favorites:

Jack clipping the first bolt on a sport climbing project. Photo by Dalton Johnson
Bonus Gear for a Better Experience
1. Belay Weight Equalizer (OhM Device)
If you and your partner have a large weight difference, a device like the Edelrid Ohm with an assisted-braking system can make belaying smoother and safer.
2. Stick Clip
If the first bolt is high off the ground or in a tricky spot, a stick clip can help you pre-clip it to avoid sketchy ground falls.
3. Guidebook or Climbing App
A guidebook for the area you’re climbing provides crucial beta, including route details, difficulty, and safety notes. Alternatively, apps like Mountain Project or Vertical Life can help you navigate sport climbing areas.
4. Ground Sheet
Keeping your rope clean is always preferred and prolongs the life of your rope. A simple fix for that is to use a ground sheet to put your rope. This doesn’t have to be a “climbing specific” ground sheet. A tarp works well. A blanket works, but is heavy. You can get creative!
5. Crag Backpack
I am going to sound like a total hypocrite here, but I have fallen in love with a crag climbing pack from Arc’teryx (skip to 2:00 in the video above). The bag makes life very easy to transport all of the gear required to go climbing. You don’t need a fancy bag, however. I used a backpacking backpack for years before upgrading to this pack I have now.

Adrian on a Pine Creek classic. Photo by Dalton Johnson
Why You Don’t Need Much
After bouldering, single-pitch sport climbing is one of the most gear-efficient climbing styles. A simple setup of shoes, harness, belay device, rope, quickdraws, and a few carabiners gets you started. Over time, you can add convenience items like a stick clip or specific gear for unique climbing areas, but the initial investment is straightforward.
Safety First
While the helmet might feel optional, wearing one adds an extra layer of protection from falling debris and unexpected impacts. Always inspect your gear regularly for wear and tear, and learn how to build safe anchors before climbing outside.
With this gear list, you’re ready to start exploring the world of outdoor sport climbing. Keep it simple, stay safe, and enjoy the incredible feeling of clipping your way up the rock!
Discover More Gear
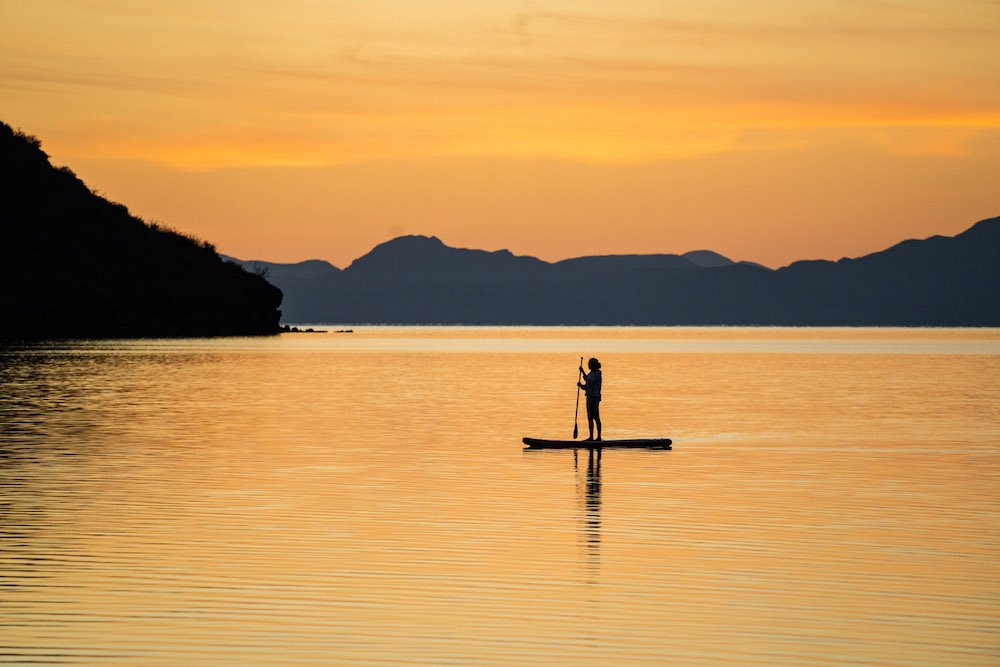
Baja's Conception Bay Might Be The Best Place To SUP
After a long day of driving our van south along the Baja Peninsula, Kristin and I stumbled upon a hidden gem: Conception Bay. Tucked among Baja’s rugged eastern coastline, this serene bay is the perfect destination for stand-up paddleboarding (SUP), and it left us questioning why we hadn’t come sooner.
After a long day of driving our van south along the Baja Peninsula, Kristin and I stumbled upon a hidden gem: Conception Bay. Tucked among Baja’s rugged eastern coastline, this serene bay is the perfect destination for stand-up paddleboarding (SUP), and it left us questioning why we hadn’t come sooner.
We arrived just before sunset, the sky shifting from gold to deep blue as we parked at a $5-a-night beach campsite. This fee included not just a spot to park but access to basic amenities like toilets, patchy Wi-Fi at the on-site restaurant, and a front-row seat to one of Baja’s most beautiful bays. As the sun set, we propped open the back doors of our van, cooked dinner, and let the day fade away to the peaceful sounds of gentle waves lapping the shore. We watched the water reflect the changing hues of the evening, the tranquility wrapping around us like a warm blanket.

Kristin taking in Blue Hour at Conception Bay in Baja. Photo by Dalton Johnson
A Perfect Morning for SUP
The next morning, the sunrise over Conception Bay woke us as it poured golden light into the van. It was one of those rare moments where everything feels perfectly aligned—a beautiful start to the day, with the promise of adventure ahead. Today, we had the whole day to explore the bay’s calm, clear waters with our paddleboards. After a leisurely breakfast, coffee, and a bit of yoga, we set up our computer in the van to offload memory cards from the past few days of surf photography and spearfishing. The process would take about an hour, giving us just enough time to dive into the day’s first paddleboarding session.
We launched our boards onto the still, glass-like waters of Conception Bay. The bay was pristine, with visibility as clear as Lake Tahoe. The clarity of the water allowed us to see deep into the underwater world below, revealing schools of fish and colorful marine plants. As we paddled, the only sound was the gentle splash of our boards. Sailboats dotted the horizon, their sails flapping lazily in the breeze, and fellow campers cast fishing lines or played at the water’s edge. It was a haven of tranquility.
The paddleboarding experience was so peaceful and engaging that we lost track of time. We explored coves, glided past rock formations, and even paused in the middle of the bay to soak up the sun. It was one of those moments where nature’s beauty felt almost overwhelming.

Waking up in the van while beach camping in Conception Bay. Photo by Dalton Johnson
Family-Friendly Fun and Endless Exploration
What struck me most about Conception Bay was its family-friendly vibe. The shallow waters near the shore were perfect for kids, while adults could paddle deeper into the bay or relax on the beach. Despite this being my first time here, I quickly understood why people might choose to stay for several days—or even weeks. Families played together at the water’s edge, and groups of friends gathered around campfires as the sun set, sharing stories and laughter.
Kristin and I explored every nook of the bay, paddling under the sun until our skin began to bronze. After an hour, we returned to the beach, rehydrated, and checked on the computer’s progress. The van, doubling as our mobile office, had become a perfect base for balancing work and play. It wasn’t long before we were back on the water, repeating the cycle of paddleboarding and working all day. Each session on the paddleboard felt like a new discovery, with different angles of the bay offering unique views and experiences.
By midday, we decided to take a break and swim. The water was refreshingly cool, and it felt invigorating to dive in after hours on the paddleboards. We noticed others around us enjoying the same—some snorkeling, others simply floating and soaking up the sun. The atmosphere was laid-back and inviting, making it easy to lose ourselves in the moment.


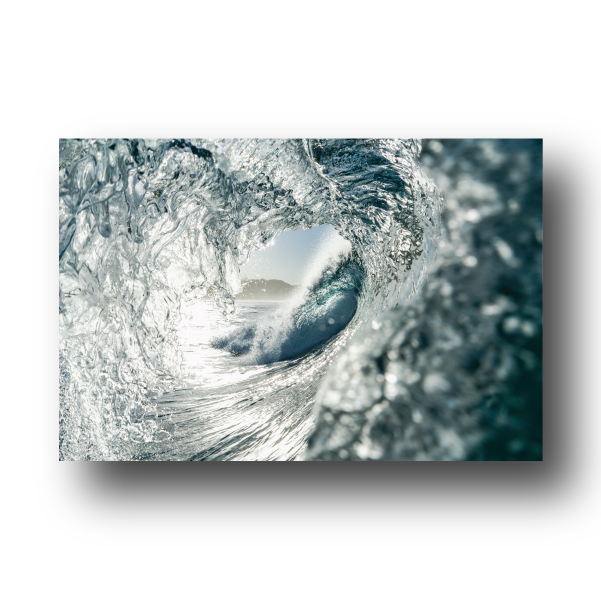
Sunset on the Water
Our second night in Conception Bay ended with a long paddleboarding session at sunset. The colors in the sky shifted from fiery orange to soft pink, reflecting off the water like a painting. It was one of those moments that makes you pause and soak in every second. As the sun dipped below the horizon, the sky turned into a canvas of deep purples and blues, the stars beginning to twinkle above us. Paddleboarding at this time felt almost magical, as if we were gliding through a dream.
Even though we planned to continue our Baja road trip the next morning, neither of us wanted to leave. For $5 a night, we found not only an affordable escape but also an unforgettable SUP experience. We agreed that Conception Bay wasn’t just a stop on our journey—it was a highlight, a place that called for a return visit in the future.
Why Conception Bay Is Perfect for SUP
Calm Waters: The bay’s protected location means the waters are nearly always calm, making it ideal for beginners and experienced paddlers alike.
Clear Visibility: You can see deep into the water, revealing a vibrant underwater world as you paddle. The clarity adds a sense of connection with the environment that’s hard to match.
Affordable Camping: At just $5 a night, it’s one of the most budget-friendly beach camping spots in Baja. The campsite also provides basic amenities, making it convenient for extended stays.
Family-Friendly Atmosphere: Shallow waters and easy access make it great for families. Kids can play safely near the shore while adults explore further into the bay.
Spectacular Sunsets: Watching the sky change colors from a paddleboard is an experience like no other. The serene setting makes every sunset feel extraordinary.
Diverse Activities: Beyond SUP, visitors can enjoy snorkeling, fishing, swimming, or simply relaxing on the beach. The versatility of activities ensures there’s something for everyone.
A sunset SUP on Conception Bay. Photo by Dalton Johnson
If you’re planning a Baja road trip, make sure Conception Bay is on your itinerary. Whether you’re a seasoned paddleboarder or just looking for a peaceful escape, this hidden gem offers the perfect combination of adventure and relaxation. It’s a place that invites you to stay longer than planned, and once you experience it, you’ll understand why.
Discover more Adventures
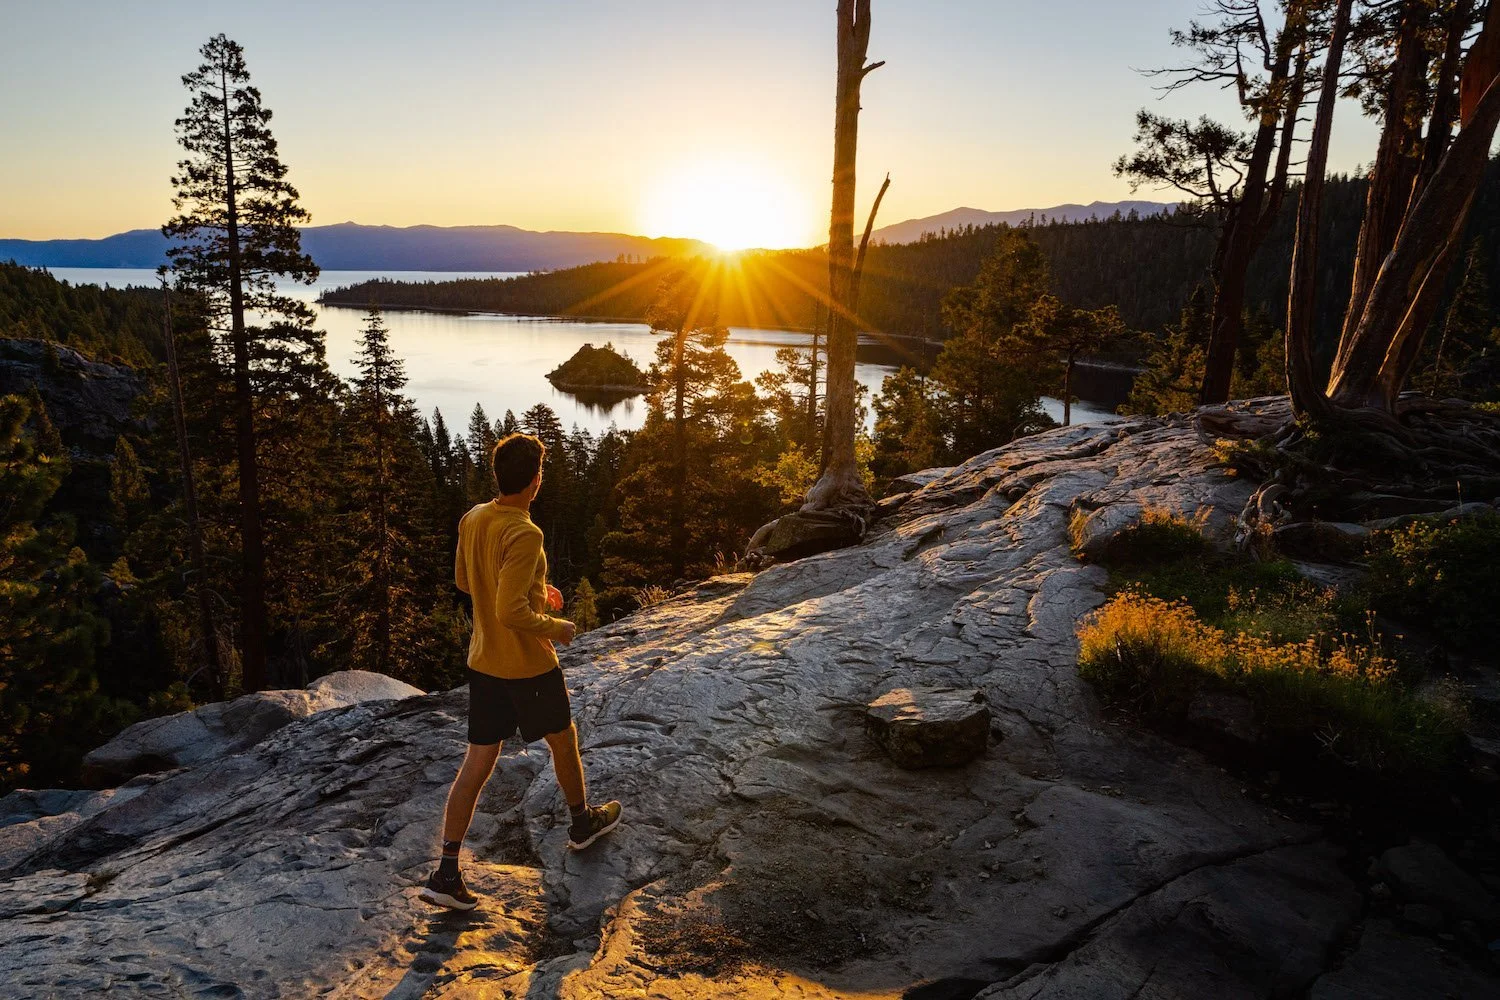
What's The Difference: Day Hike vs. Backpacking vs. Trekking
Embarking on an outdoor adventure is a wonderful way to disconnect from the bustling city life, reconnect with nature, and challenge yourself physically and mentally. When it comes to exploring the great outdoors, day hikes, backpacking trips, and trekking expeditions are popular choices. Each option offers a unique experience, catering to different preferences, skill levels, and time commitments.
When I got into the outdoors I started to hear terms like day hikes, backpacking trips, and trekking. Honestly, I had no idea what people were talking about and found it hard to understand. So, I wrote this article for you all in the same position, wondering, what the heck is the difference between day hikes, backpacking trips, and trekking.
The short answer to the question, “What really is the difference between day hiking, backpacking, and trekking?” Day hiking involves completing a trail within a single day, covering shorter distances and requiring minimal gear. Backpacking, on the other hand, includes spending one or more nights in the wilderness, carrying camping gear and supplies for longer trips. Trekking is a more intense and extended form of hiking, often lasting weeks or months, covering extensive distances, and involving challenging terrains and higher physical demands.
However, there is more to the story, so below you will find the differences between day hikes, backpacking, and trekking.
Backpacking in Washington. Photo by Dalton Johnson
What Really Are the Differences?
While day hiking, backpacking, and trekking all involve outdoor exploration, key differences set these activities apart. Understanding these distinctions can help you choose the adventure that aligns with your goals, preferences, and abilities. Each offers unique challenges and rewards, making them suitable for various fitness levels, time commitments, and personal goals.
Duration and Distance
Day Hiking: Typically completed within a single day, these excursions cover shorter distances ranging from a few miles to a dozen miles. They are ideal for quick getaways or testing your fitness without extensive preparation. Day hikes are great for exploring local trails, enjoying a scenic spot, or introducing beginners to outdoor activities.
Backpacking: This involves spending one or more nights in the wilderness, often covering longer distances that can span multiple days. Backpacking trips can range from a weekend adventure to a week-long journey, depending on the destination and itinerary. Multi-day hikes allow for deeper immersion in nature and the opportunity to explore remote areas that day hikers cannot reach.
Trekking: These are longer and more demanding journeys that can last for weeks or even months. Treks often cover extensive distances, traversing rugged terrains such as mountain ranges, deserts, or jungle trails. Treks like the Appalachian Trail or Everest Base Camp require sustained endurance, planning, and often a deep appreciation for cultural and environmental exploration.

Backpacking in Lake Tahoe, CA. Photo by Dalton Johnson
Self-Sufficiency and Gear
Day Hiking: Requires carrying essential items like water, snacks, a first-aid kit, and extra layers. Day hikers rarely need camping gear or extensive supplies, keeping their packs light and manageable. This simplicity makes day hikes an accessible option for individuals of all experience levels.
Backpacking: Necessitates carrying all the gear required for overnight stays, including a tent, sleeping bag, cooking equipment, and sufficient provisions. Backpackers must also consider weather conditions and prepare accordingly with items such as rain gear, thermal clothing, or navigation tools. A well-packed backpack can make the difference between a comfortable adventure and a challenging one.
Trekking: Similar to backpacking but may involve additional specialized equipment depending on the terrain, altitude, and climate. For example, trekkers in high-altitude areas might need crampons, trekking poles, or portable oxygen systems. Some treks also involve logistical support such as porters or guides, which can influence the type and amount of gear carried.
Accessibility and Location
Day Hiking: Day hikes are often located near populated areas, with accessible trails in local parks, nature reserves, or nearby mountain ranges. These trails are designed to be beginner-friendly and convenient for quick escapes into nature. Some popular day hiking spots even offer well-marked paths and facilities like restrooms and parking.
Backpacking: This activity can take place in a variety of settings, including designated backpacking routes, national parks, or remote wilderness areas. Backpackers often seek trails that provide a balance between challenge and scenic rewards. National parks frequently have dedicated backpacking routes with established campsites, offering both adventure and safety.
Trekking: Treks often occur in remote and less-accessible regions. Locations such as high mountain passes, deep forests, or isolated villages provide unique cultural and natural experiences. Trekkers may need to rely on guides, porters, or pre-arranged logistical support. Iconic trekking destinations often combine challenging routes with opportunities to experience local traditions and breathtaking landscapes.

Day hike in Sedona, AZ to a cave. Photo by Dalton Johnson
Level of Difficulty
Day Hiking: Generally suitable for beginners or individuals with moderate fitness levels. Day hikes are less physically demanding and involve minimal risk, making them accessible for families and casual adventurers. They offer a great way to enjoy nature without significant physical or logistical challenges.
Backpacking: Requires a higher level of physical endurance and strength. Backpackers must be prepared for longer distances, heavier loads, and elevation changes. Conditioning and preparation play a significant role in a successful backpacking trip. Backpacking is often considered a stepping stone to more ambitious outdoor adventures like trekking or mountaineering.
Trekking: Demands exceptional fitness, stamina, and mental resilience. Treks often involve challenging terrains, unpredictable weather, and significant altitude changes, testing both physical and mental limits. Trekkers must be ready to face extended periods of physical exertion, often in remote and harsh environments.
Time Commitment
Day Hiking: A single-day activity, making it perfect for individuals with limited time or busy schedules. Many trails allow hikers to enjoy nature without dedicating extensive time to preparation or travel. This makes day hiking a flexible option for spontaneous adventures.
Backpacking: Involves a commitment of several days or weeks. This makes it ideal for those seeking a more immersive experience during vacations or breaks, allowing for deeper exploration of natural landscapes. Backpacking offers the chance to disconnect from daily life and embrace the solitude of the wilderness.
Trekking: Requires the most time, often spanning several weeks or months. Trekkers need to plan for extended periods away from home and may need to coordinate logistics like visas, permits, and resupply points. Long treks often become transformative journeys, offering both physical challenges and profound personal growth.

Regardless of hike, backpacking, or trekking the natural views are stunning. Photo by Dalton Johnson
Choosing the Right Adventure
Day hiking, backpacking, and trekking offer distinct outdoor experiences, each catering to different preferences, skill levels, and time commitments. Whether you prefer a shorter, accessible day hike, a self-sufficient backpacking journey, or an epic trekking expedition, consider the following factors:
Duration: How much time can you dedicate?
Gear Requirements: Are you equipped for overnight or extended stays?
Difficulty: What is your fitness and experience level?
Accessibility: How far are you willing to travel to reach the trailhead?
Time Commitment: Are you looking for a single-day outing or a long-term adventure?
Ultimately, the most important aspect of any outdoor activity is immersing yourself in nature, challenging your limits, and enjoying the incredible beauty of the outdoors. Each option offers unique rewards, so choose the adventure that best fits your lifestyle and aspirations. Remember that all three activities provide opportunities to reconnect with the natural world, build resilience, and create lasting memories. Whether you're starting small with day hikes or embarking on a life-changing trek, every step taken outdoors is a step toward adventure.


Day hikes can be short, like this one to the cliff at Sharkfin Cove in Santa Cruz, CA. Photo by Dalton Johnson
Day Hiking
A day hike is a perfect choice for beginners, people with limited time, or those seeking a shorter, more manageable outdoor experience. Day hikes involve setting out on a trail and completing it within a single day, returning to your starting point by evening. The distance can range from a few miles to a dozen, depending on trail difficulty and personal preference.
Pros of Day Hiking:
Accessibility: Day hikes are often near populated areas, making them easy to plan in local parks, nature reserves, or nearby mountain ranges.
Lighter Pack: You only need to carry essentials like water, snacks, a map, and extra clothing layers.
Flexibility: You can choose your pace, rest stops, and even alter plans mid-hike if necessary.
Ideal for Beginners: Day hikes allow newcomers to gain experience, build stamina, and enjoy the outdoors without committing to longer trips.
Cons of Day Hiking:
Limited Exploration: Since day hikes are time-constrained, you may not reach deeper, more remote wilderness areas.
Less Immersion: Returning to civilization by evening means missing out on the solitude and night-time ambiance of the wilderness.
Essential Gear for Day Hiking:
Comfortable hiking boots or shoes.
Weather-appropriate clothing.
A small backpack or daypack.
Water, snacks, a map, a compass, and a first aid kit.
Optional trekking poles for stability.
A lightweight rain jacket or windbreaker.

Backpacking in the High Sierra for a week. Photo by Dalton Johnson
Backpacking
Backpacking offers a more immersive outdoor experience by combining hiking with overnight camping. It involves carrying all necessary supplies, including camping gear, food, and water, in a backpack. Backpacking trips often cover longer distances and require careful planning and preparation.
Pros of Backpacking:
Wilderness Immersion: Explore remote areas and escape the crowds.
Extended Time in Nature: Enjoy multiple days and nights outdoors, including breathtaking sunrises, sunsets, and stargazing.
Sense of Accomplishment: Completing multi-day treks fosters self-reliance and provides a sense of achievement.
Cons of Backpacking:
Heavier Load: Carrying camping gear and supplies requires physical endurance and a larger backpack.
Planning and Logistics: Backpacking demands route planning, permits (if needed), and transportation arrangements.
Time Commitment: Multi-day trips require dedicating several consecutive days.
Essential Gear for Backpacking:
A sturdy and comfortable backpack.
Tent or hammock system with a rainfly.
Sleeping bag and sleeping pad.
Cooking equipment and lightweight food.
Water filtration or purification system.
Extra clothing layers for varying weather.
Navigation tools like a map, compass, or GPS.
Headlamp or flashlight.
Personal hygiene items and repair kits.

At a certain point, trekking starts to feel like living on the trail. Photo by Dalton Johnson
Trekking
Trekking is the ultimate outdoor adventure, involving long-distance journeys through challenging terrains. Trekking experiences can range from multi-day trips to expeditions lasting weeks or months. These trips push physical and mental boundaries, often taking place in remote regions with stunning landscapes.
Pros of Trekking:
Epic Adventure: Undertake extended journeys through diverse landscapes, crossing mountain passes and encountering unique cultures.
Stunning Scenery: Trekking routes showcase breathtaking scenery, including high peaks, valleys, and pristine lakes.
Personal Growth: Trekking tests resilience and adaptability, fostering self-discovery and growth.
Cons of Trekking:
Intense Physical Demands: Long distances and challenging weather require high fitness levels.
Extensive Preparation: Planning involves researching routes, selecting gear, and understanding safety measures.
Time and Resource Commitment: Trekking can span weeks or months, demanding significant time and financial investment.
Essential Gear for Trekking:
Durable trekking boots for rough terrains.
Lightweight, moisture-wicking clothing.
Trekking poles for stability.
Crampons and ice axes for icy or snowy conditions.
High-altitude gear for cold temperatures.
Climbing harnesses and ropes for technical sections.
Avalanche safety equipment if trekking in prone areas.
Supplies for altitude sickness prevention and treatment.
Day hiking to the summit of Mount Freel in Lake Tahoe. Photo by Dalton Johnson
Whether you opt for a day hike, backpacking adventure, or trekking expedition, each outdoor experience offers its own rewards and challenges. Consider your fitness level, time constraints, and personal preferences when making a choice. Remember, the journey itself matters as much as the destination, so embrace the opportunity to connect with nature and create lasting memories on your chosen adventure.
Discover more adventures

Everything You Need To Know To Go Spearfishing In Baja Mexico
What more could you ask for than the freshest fish tacos, a beer, and sunset ocean view? Well, you can have just that while spearfishing in Baja, Mexico. In this article you will find the best areas to go spearfishing, get a long list of potential fish to spear, and answers to the most frequently asked questions about spearfishing in Baja, Mexico.
What more could you ask for than the freshest fish tacos, a beer, and a sunset ocean view? Nothing really… Well, maybe knowing the fact that you caught the fish in those delicious tacos while spearfishing in Baja Mexico.
Anyone can recreationally spearfish in the ocean throughout the Baja Peninsula as long as they have a fishing license if spearfishing from a boat. If spearfishing from shore, no license is required. Some of the most popular places to spearfish in Baja are the remote beach of El Canejo, the calm waters of La Ventana on the Sea of Cortez, and the greater Cabo Area. All of the spearfishing in Baja is safe, offers a variety of fish species to spear, and makes for a good personal challenge. Spearfishing is not just a sport; it is a way to connect with nature and hone your underwater skills.
Read on to discover the best areas to go spearfishing, get a long list of potential fish to spear, and answers to the most frequently asked questions about spearfishing in Baja, Mexico. You’ll also learn about the best times to go, the essential gear to bring, and whether a guided or self-guided approach is right for you.
Heading home after a long day of spearfishing near Cerritos Beach in Baja. Photograph by Dalton Johnson
Best Times to Spearfish in Baja
The best time to spearfish in Baja depends on the type of fish you want to catch and the region you plan to visit. In general, spring through early autumn offers the best conditions, with warmer waters and abundant fish populations. Snapper and yellowtail are more common in cooler months, while species like yellowfin tuna, wahoo, and dorado thrive in warmer waters from late spring through fall. Weather conditions and water visibility also tend to be optimal during this time, ensuring a safer and more enjoyable experience.
Keep in mind that local festivals, fishing tournaments, and holiday seasons may impact the availability of quiet spearfishing spots. Plan your trip to avoid crowds and take advantage of the natural rhythms of Baja’s marine life.
Gear You Need to Bring Spearfishing in Baja
To spearfish in Baja, you need reliable and high-quality equipment to ensure safety and effectiveness:
Speargun: Choose a size suited for the type of fish you’re targeting. For larger fish, a longer speargun is often better.
Wetsuit: A thin wetsuit (3mm) is typically sufficient for Baja’s warm waters. It will also protect you from jellyfish and sharp reefs.
Fins and Mask: Durable fins and a clear, comfortable mask are essential for effective diving.
Weight Belt: Helps you achieve neutral buoyancy while freediving and makes it easier to maneuver underwater.
Dive Knife: Useful for safety and handling your catch, as well as cutting through fishing lines or kelp if needed.
Float Line and Buoy: Keeps your catch secure and helps boats spot you, ensuring both safety and convenience.
Gloves: Protect your hands from sharp reefs, fish spines, and accidental cuts.
Fishing License: A license is required to spearfish from a boat, but if you are fishing from shore, you don't need a license.
Optional but highly recommended items include a dive watch, a GoPro for documenting your adventure, and a cooler to keep your catch fresh.

Checking a hole for some easy spearfishing in Baja. Photograph by Dalton Johnson
Guided vs Self-Guided Spearfishing in Baja
Guided Spearfishing
Guided spearfishing trips are ideal for beginners or those new to Baja. Local guides provide essential knowledge about the best spots, local fish species, and safety considerations. Many guided trips also include equipment rentals, making it easier for travelers to participate without bringing their own gear. These trips often include transportation to prime locations and expert advice on techniques.
Guided spearfishing also allows you to learn about marine conservation and local fishing laws directly from experienced professionals. It’s an excellent way to ensure your trip is both fun and sustainable.
Self-Guided Spearfishing
Experienced spearfishers may prefer a self-guided approach, exploring Baja’s diverse underwater landscapes independently. This option offers flexibility and the opportunity to discover hidden spots. However, it requires thorough preparation, including research on local regulations, fish species, and safety measures. Be prepared with maps, tide charts, and weather forecasts to avoid potential hazards.
Self-guided trips are more cost-effective but demand a higher level of expertise and self-reliance. For seasoned adventurers, the rewards of finding untouched fishing grounds and crafting a personalized experience are unmatched.
Best Places to Spearfish in Baja Mexico
El Canejo
El Canejo has crystal clear, blue water with a flourishing fish community, perfect for spearfishing. The fish diversity ranges drastically, but you will be able to find a fish of your choice if you look long enough. The ocean around El Canejo is exposed to the Pacific Ocean so there can be a strong swell on occasion, making it difficult to reach the deeper water where the fish congregate. There are some local octopus and lobster fisherman, so please do not take from their income.
La Ventana
While La Ventana is known for its wind sports, the depths of the ocean are rarely explored for spearfishing. If you head north or south of the town of La Ventana, you will find wonderful reefs to spearfish at. These reefs are spread out, so be prepared to swim if you do not spot them with a drone beforehand. The calm waters and vibrant coral ecosystems make La Ventana a hidden gem for both beginner and intermediate spearfishers.
Cabo Area
The Cabo area is growing in the spearfishing community, but still a novelty. Most tourists who come to Cabo to fish are hoping to go deep sea fishing on boats. Because of this difference, the waters around Cabo close to shore are often great for spearfishing. If you explore around the cape, towards the Sea of Cortez, you will find several locations with great spearfishing. Seasonal migrations of fish add an exciting element of surprise to each trip.
La Paz Area
La Paz is the capital of Baja Sur and is heavily populated, however just outside of the La Paz city limits are incredible beaches perfect for spearfishing. The water is clear and calm on the Sea of Cortez, so grab your speargun, put on a thin wetsuit, and go for a swim! You will surely catch a fish. The city’s accessibility also makes it a great base for day trips to nearby reefs.
San Juanico
Hidden in the middle of the Baja Peninsula is a small fishing and surf town called San Juanico. While the town is most famous for its surfing, the spearfishing is excellent. Just offshore, there are several reefs that house a variety of fish species ranging in size. The water is clear and the humans are friendly. Please note, San Juanico is a fishing town that specializes in octopus and lobster, so please do not take from their income.
Hunkering down, playing the waiting game as Andrew stalks a fish. Photograph by Dalton Johnson
Fish You Can Catch in Baja
Snapper (Pargo)
Being opportunistic feeders, this type of fish takes bait and escapes into the rocks. Catching them is tricky; therefore, you need to always be on your feet when luring resistant big pargo. Colorado Snapper, Dog Snapper, and Barred Pargo inhabit the Sea of Cortez. These will hit if you fish right above the rocks. Snappers have the ability to grow up to fifty pounds, but the majority in Baja are twenty pounds on average.
Best months for Snapper in Baja: April-July
Yellowfin Tuna (Atún Aleta Amarilla)
They are the most commonly found and one of the most popular species of fish in Baja. To catch these, you must sum up a great deal of strength because they’re tough ones to reel in. Make sure you are in possession of your top-notch equipment, live bait, and a good fight. Ideally, yellowfin tuna is to be found through diving schools of birds. Therefore, find a school of porpoises, fling the live bait, and wait for the excitement of your catch.
Best months for Yellowfin Tuna in Baja: July-October
Yellowtail (Jurel de Castilla)
In the springtime, when the water is a bit cooler, plenty of yellowtail fish make an appearance. Mackerel and live sardines are the most common bait of choice for this type of fish. When all fails and they refuse to surrender to live bait, blue, green, or yellow bait are sure to do it. Yellowtail weigh about ninety pounds, so muster your energy and prepare for a fast and steady reeling motion.
Best months for Yellowtail in Baja: February-April
Wahoo
Wahoo are characterized by being rapid swimmers, hard to catch, and delicious fish. They prefer the warm water and can swim up to 70mph. Reeling them in is a thrill, and what a challenge that is. Because of their extremely sharp teeth, you’ll need a wire leader that wouldn’t just break in their mouths.
Best months for Wahoo in Baja: after June, starting July.
Sailfish (Pez Vela)
Another fast, warm water fish that can travel up to 60mph, but is pleasing to the eye. Their dorsal sail gives them a mesmeric appearance, since they do tend to spend most of their time on the surface. Sailfish are not to be taken for granted as they are incredible fighters and will most likely run off your reel. The ideal technique for catching them is the ‘tease and switch’ approach.
Best months for Sailfish in Baja: after June, starting July.
Dolphin Fish (Dorado)
Unlike their bright appearance, a Dorado, or a Mahi Mahi can be quite aggressive. In their first year, a Dorado can grow up to 20 pounds in size. They can be caught using trolled lures, live bait, and flies. Since they are in fact warm fish, smaller dorado may start visiting Baja as early as May. If you’re up for a challenge, wait on the water to get warmer for larger ones.
Best months for Dolphin Fish in Baja: June-November
Landing a fish while spearfishing in Baja. Photograph by Dalton Johnson
Need-to-Know Info Before You Spearfish in Baja
Can You Spearfish in Baja?
Yes, you can spearfish in Baja using a single speargun while freediving. Spearfishing in this area is an exciting activity that combines the thrill of the hunt with the beauty of Baja’s underwater world. Freediving allows for a more natural interaction with the marine environment, and many consider it an essential part of the sport. Oxygen tanks are not allowed, as they take away from the skill and challenge of the experience.
Are There Limits on Spearfishing in Baja?
Yes, there are specific limits on what you can and cannot do while spearfishing in Baja. Spearfishers are allowed to catch a maximum of 5 fish of the same species per day. It is important to note that spearfishing for crustaceans, aquatic mammals, reptiles, amphibians, or mollusks is strictly prohibited. These regulations are designed to protect the biodiversity of Baja’s waters and ensure the sustainability of marine life for future generations. Always familiarize yourself with local rules and guidelines before heading out to avoid any infractions.
Do You Need a Fishing License to Spearfish in Baja?
A fishing license is required if you plan to spearfish from a boat in Baja. However, if you are spearfishing from the shore, a license is not necessary. This distinction allows shore-based spearfishers to enjoy the activity with fewer administrative steps. Be sure to carry proof of your license if fishing from a boat, as authorities may conduct checks to ensure compliance with local regulations. Purchasing a fishing license can often be done online or at local shops in Baja.
Can I Use Scuba Gear to Spearfish in Baja?
No, the use of scuba gear for spearfishing is prohibited in Mexico, including Baja. The practice of freediving is not only a legal requirement but also a key element of the sport. Scuba gear can scare off larger predatory fish with its bubbles, making it harder to catch your target. Freediving allows spearfishers to engage with their surroundings more naturally and develop skills like breath-holding and underwater stealth. For many, the challenge of freediving is part of what makes spearfishing so rewarding.
What Are the Best Locations for Beginners?
Beginners are encouraged to start in calmer and clearer waters, such as those found near La Ventana or the La Paz area. These locations offer excellent visibility and manageable depths, making it easier for those new to spearfishing to hone their skills. With the guidance of a local expert or a friend, beginners can quickly build confidence and enjoy a safe and successful spearfishing experience.
Is Spearfishing Dangerous?
While spearfishing is generally safe, it does come with inherent risks. These include encounters with strong currents, limited breath-holding capacity, and interactions with marine life. To minimize risks, always dive with a buddy, use proper safety equipment, and be aware of your limits. Taking a freediving course beforehand can also help you learn essential safety techniques and build your underwater stamina.
Can I Keep Every Fish I Catch?
No, you cannot keep every fish you catch. In addition to daily limits on specific species, some fish are protected and cannot be targeted. These include certain species vital to the ecosystem or those under conservation programs. Before heading out, research the local fish populations and make sure to target only legal and sustainable species. Releasing unwanted or prohibited catches immediately is also an important practice.
What Should I Do if I Encounter Dangerous Marine Animals?
If you encounter potentially dangerous marine animals, such as sharks or stingrays, remain calm and avoid sudden movements. Most marine animals are not aggressive unless provoked. Give them plenty of space and slowly back away if needed. Carrying a dive knife can provide an added sense of security, though it should only be used as a last resort in extreme situations.

Cutting up the catch, to make ceviche, after a successful spearfishing outing. Photograph by Dalton Johnson
Spearfishing in Baja Mexico offers an unforgettable adventure with its diverse marine life, stunning underwater landscapes, and accessible locations. Whether you choose a guided trip or venture out on your own, the experience promises excitement and a rewarding challenge. Make sure to follow local regulations, respect the marine ecosystem, and prepare adequately for a safe and enjoyable spearfishing adventure in Baja. With its combination of natural beauty and thrilling opportunities, Baja stands as a top destination for spearfishing enthusiasts of all skill levels.
Discover More Adventures

Looking For Adventure In Baja While Road Tripping With Andrew Muse
Last October, I received a phone call from Andrew Muse to be the Director of Photography for the fourth season of Tiny Home Adventures. I’ll be honest, I had never watched an episode of the series, but my interest was peaked by the location, potential adventures, and the client list we would intertwine throughout the series. So, after we chatted on the phone, I watched a few episodes and gave him a call back, “I’m in, it looks like fun.”
I received a phone call from Andrew Muse to film, adventure, and experience Baja, Mexico for the fourth season of Tiny Home Adventures. I’ll be honest, having never watched an episode of the series I wasn’t sure what I would be getting myself into, but my interest was peaked by the location, Baja. This would be my 37th trip to Baja, so I was ready for some fun! Additionally the potential adventures, and the client list we would intertwine throughout the series. So, after we hung up, I watched a few episodes and gave him a call back, “I’m in, it looks like fun.”
The goal of the project would be to create a few episodes for season 4 of Tiny Home Adventures and shoot a list of projects for clients while traveling through Baja, Mexico for two months. I’ll admit, not everything went to plan, but it was great learning lesson.

Beach camping during our road trip in Baja. Photo by Dalton Johnson
Surfing Along the Coast of Baja, Mostly Baja Sur
Get ready to ride the waves along the picturesque coast of Baja, with its pristine beaches and world-class surf breaks. Whether you're a seasoned surfer or a novice catching your first wave, Baja's legendary breaks offer an exhilarating experience that will leave you craving more. From the towering swells of Todos Santos to the gentle rollers of La Paz, Baja's diverse coastline promises endless thrills.
Off-Roading and Blowing Up a Ford Bronco
Hold on tight as you venture into the rugged terrain of Baja's interior. Off-roading enthusiasts will revel in the challenge of conquering desert trails, rocky landscapes, and winding mountain paths. And yes, you read that right - be prepared for a heart-pounding explosion as a Ford Bronco meets its explosive fate in an unforgettable display of pyrotechnics and off-road prowess.
Check out this article on off-roading along the Baja 1000 route in Cataviña
Paragliding Whenever the Wind Would Cooperate
Feel the wind beneath your wings as you soar high above the Baja landscape, taking in panoramic views that few get to experience. Paragliding offers a unique perspective of Baja's diverse landscapes, from its majestic mountains to its serene beaches. Glide through the sky, guided by the whims of the wind, and let the world unfold beneath you.
Related Read: PARAGLIDING IN BAJA, IT'S A THING AND HERE'S HOW YOU DO IT
Kite-Surfing in La Ventana
Harness the power of the wind and waves in the kite-surfing paradise of La Ventana. This coastal haven is known for its consistent winds and ideal conditions, making it a must-visit destination for kite-surfing enthusiasts. Whether you're a seasoned pro or a beginner looking to catch your first gust, La Ventana's azure waters and warm hospitality will make your kite-surfing dreams come true.
Related Read: KITE SURFING IN LA VENTANA
Prepare to be captivated by the adrenaline-pumping adventures that await in this series, where each episode promises to immerse you in the heart-pounding excitement of spearfishing, surfing, off-roading, paragliding, and kite-surfing in the stunning landscapes of Baja. Get ready to embark on the journey of a lifetime.

Spearfishing Along the Pacific Ocean and Sea of Cortez
Dive into the crystal-clear waters of the Pacific Ocean and Sea of Cortez as you explore the mesmerizing world beneath the surface. Spearfishing becomes your ticket to an underwater realm teeming with marine life. Feel the rush of adrenaline as you hone your skills and chase your prey, all while gaining a deeper appreciation for the ocean's bounty. The best part, making ceviche from the fish you just speared!

Where did we go?
San Juanico (aka Scorpion Bay): A surfer's paradise, San Juanico offers some of the longest and most consistent waves in Baja. With its stunning coastline, it's a haven for those seeking the thrill of riding the waves.
Cuatro Casas: Nestled on the west coast of Baja, Cuatro Casas is a tranquil and secluded destination known for its pristine beaches and excellent surfing opportunities. It's an ideal escape for those in search of solitude and epic surf.
Cerritos Beach: Located on the Pacific Coast, Cerritos Beach is a popular spot for both beginner and experienced surfers. Its golden sands and gentle waves make it a family-friendly destination with a laid-back atmosphere.
La Ventana: A kite-surfing mecca, La Ventana boasts consistent winds and crystal-clear waters, making it a top choice for water sports enthusiasts. Explore the skies and waves in this coastal gem.
San Jose del Cabo: The charming counterpart to the bustling Cabo San Lucas, San Jose del Cabo offers a more relaxed and cultural experience. Stroll through its historic streets, explore art galleries, and savor delicious cuisine.
Conception Bay: A tranquil oasis, Conception Bay is known for its pristine beaches, clear waters, and excellent snorkeling opportunities. It's a hidden gem for those seeking a serene coastal retreat.
El Canejo: A picturesque beach destination, El Canejo boasts dazzling white sands and turquoise waters. It's perfect for sunbathing, swimming, and unwinding in a peaceful, natural setting.
Off roading in Baja, Mexico with a Ford Bronco. Photograph by Dalton Johnson
After answering the call from Andrew, it wasn’t long before we pointed our headlights south of the boarder for two months of thrills. From blowing up a Ford Bronco to surfing some of my favorite breaks to discovering new locations along the Baja Peninsula, this trip south was one I will always remember.