Best Lake Hikes of the Eastern Sierra
California is packed with lake hikes that will blow your mind, especially in the Eastern Sierra Mountains. The best part of lake hiking in the Eastern Sierra is the access. From remote lakes tucked days away in the mountains to roadside lake hikes, any hiker can find something for themselves during a visit to the Eastern Sierra. As a kid, I grew up in the foothills of Lake Tahoe wandering around the Eastern Sierra, exploring lake hikes, and embracing the often chilly mornings while searching for gorgeous landscapes. So, what happens when you put the calm of a cold morning and an extraordinary lake hike together? Scroll down below and discover the best lakes hikes of the Eastern Sierra for yourself!
California is packed with lake hikes that will blow your mind, especially in the Eastern Sierra Mountains. The best part of lake hiking in the Eastern Sierra is the access. From remote lakes tucked days away in the mountains to roadside lake hikes, any hiker can find something for themselves during a visit to the Eastern Sierra. As a kid, I grew up in the foothills of Lake Tahoe wandering around the Eastern Sierra, exploring lake hikes, and embracing the often chilly mornings while searching for gorgeous landscapes. So, what happens when you put the calm of a cold morning and an extraordinary lake hike together? Beauty.
The Best Lake Hikes of the Eastern Sierra are:
Eagle Falls in Lake Tahoe
Yosemite Falls on Cook Pond
Rae Lakes Loop
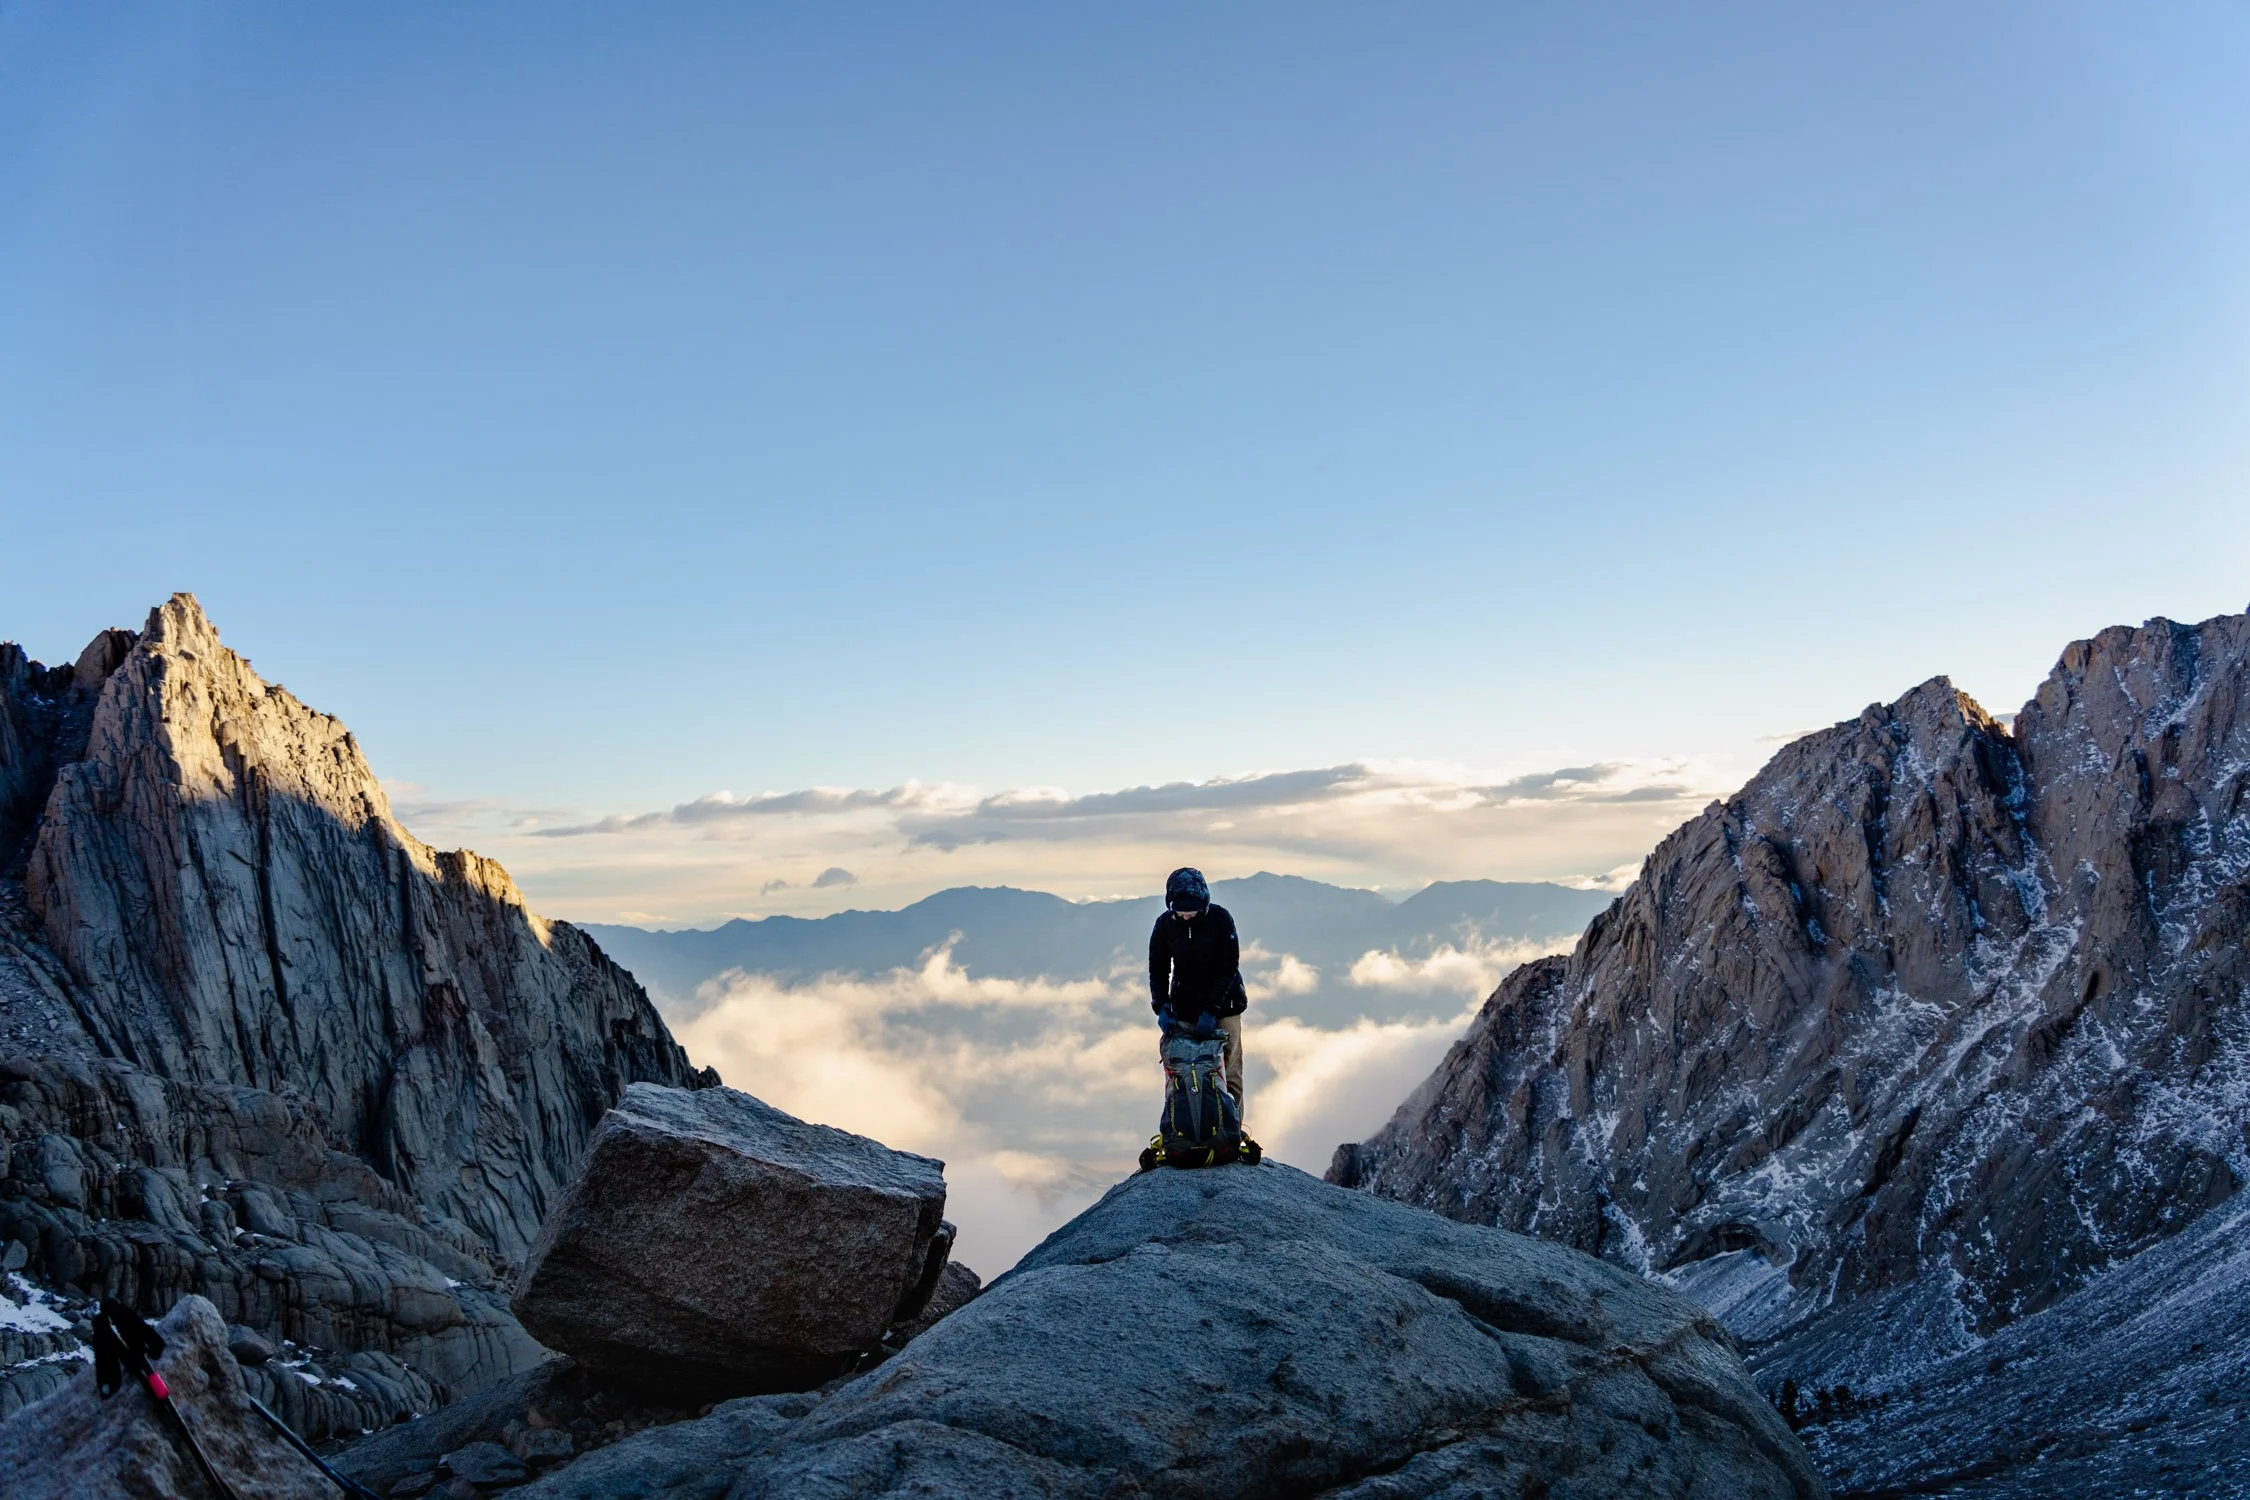
Mount Tyndall on Alpine Lake
North Palisade on Dusy Basin Lake
Third Lake of Big Pine
Evolution Range on Lake Sabrina
Bonsai Rock on Lake Tahoe
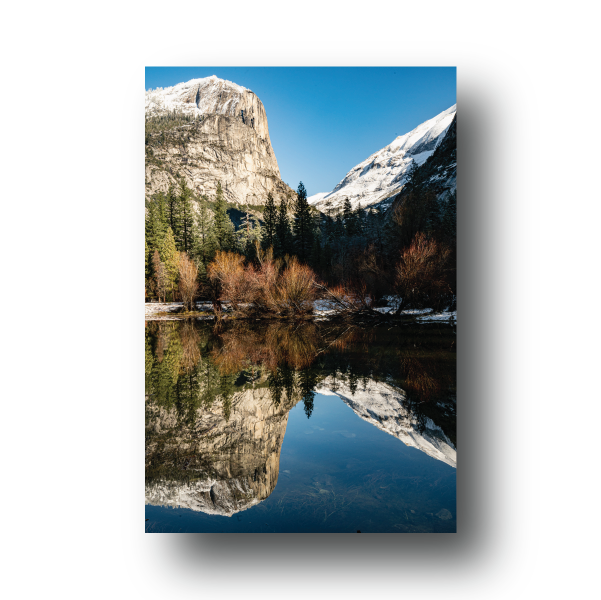
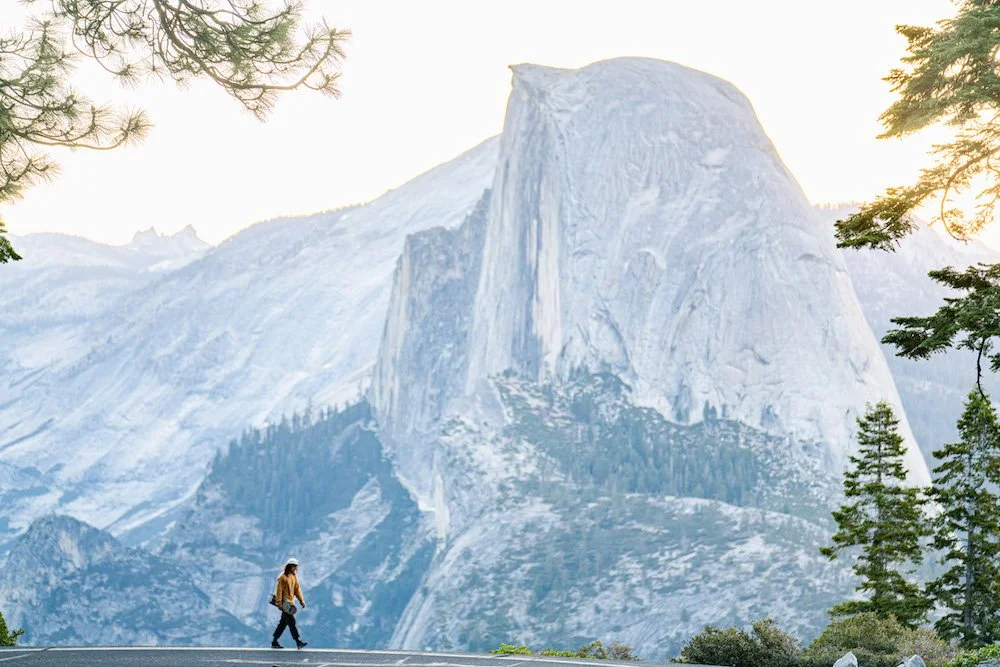
Mirror Lake in Yosemite Valley
Read on to discover where these incredible hikes start, how long the hike takes, the best season to visit, and so much more about the best lakes hikes of the Eastern Sierra.

Overlooking Emerald Bay from Eagle Falls at sunrise in Lake Tahoe, California. Photograph by Dalton Johnson
Eagle Falls in lake tahoe
Where can you see this Eagle Falls in lake tahoe view?
Eagle Falls is a cascading waterfall that can been seen from the road, or hiked to, from the Eagle Lake trailhead.
Click here for directions to Eagle Lake Trailhead
Best Season to enjoy this view of eagle falls:
The best season to visit Eagle Falls is in the spring. Eagle Falls flow is created by snow melt, making spring season (February to April) the best time to see Eagle Falls flowing into Emerald Bay of Lake Tahoe.
How long is the hike to see Eagle Falls in lake tahoe?
The hike to Eagle Falls is about .5 of a mile and takes 5-10 minutes depending on where you park. Hiking to Eagle Falls in the Eastern Sierra Mountains is a well maintained trail that is easy to hike. With that said, this hike is not wheelchair accessible.
The parking lot and road side parking fills up fast, so make sure to get there early if you want a get a spot.
The best Time of Day to see this Eagle Falls in lake tahoe view:
My favorite time to visit Eagle Falls in Lake Tahoe is at sunrise. Why sunrise? If you look at the image above, the sun rises off in the distance, creating a golden glow on the waterfall. This effect makes sunrise special. Additionally, if you arrive for sunrise there will be very few people at Eagle Falls.
What makes hiking Eagle Falls in lake tahoe special?
Hiking Eagle Falls in Lake Tahoe is special because the sunrise view is extraordinary when the waterfall is flowing. A golden glow, few people, the grandiose blue waters of Lake Tahoe, and the brisk air make a splendid combination for all hikers visiting Eagle Falls. Also, as you walk around Eagle Falls, you will notice a few spots that make the falls look as though the cascading water pours directly into Emerald Bay… mind blowing!

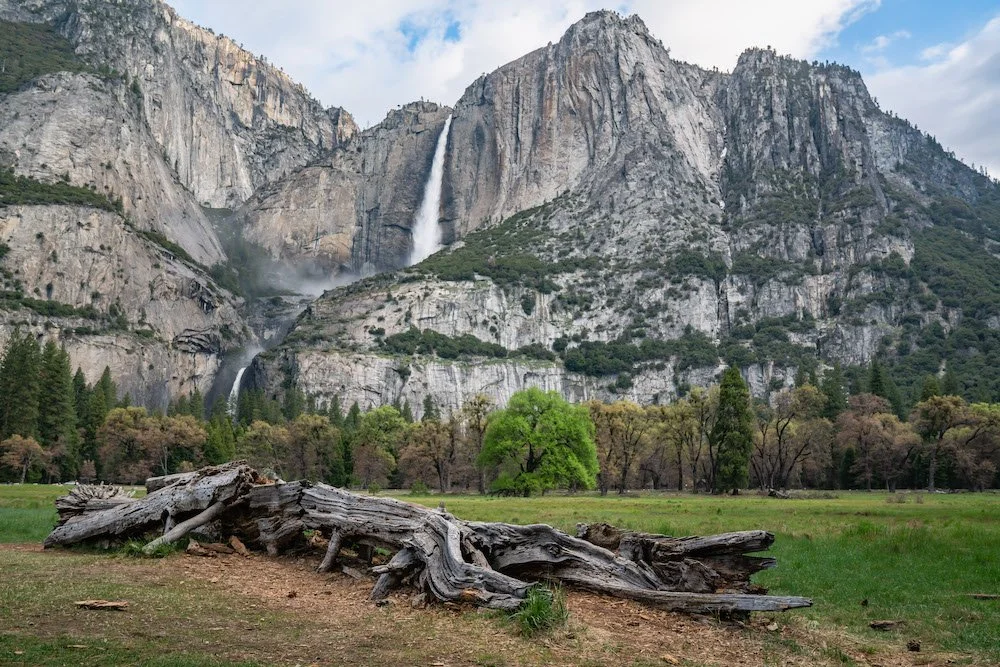
Yosemite Falls reflecting a seasonal pond while hiking the Valley Loop trail in Yosemite. Photograph by Dalton Johnson
Yosemite Falls on Cook Meadow Pond
Where can you see this Yosemite Falls Reflection?
During high snow years, Yosemite Valley floods creating pools of water that often reflect Yosemite Falls. While you hike the Valley Loop trail into Cook Meadow, this reflection will leave you breathless.
Click here for directions to Cook Meadow
Best Season to enjoy this reflection of Yosemite Falls:
The best seasons to enjoy this Yosemite Falls hike around Cook Meadow is during the spring season. This seasonal pond requires a heavy snow year in California. During the spring months, the snow melts and creates a small flood filling the pond centered in Cook Meadow.
How long is the hike to see this reflection of Yosemite Falls on Cook Meadow Pond?
You can access this seasonal pond in Cook Meadow several different ways, but the hike, regardless of where you park, should not take more than 30 minutes. The hike is a flat and paved path called Cook’s Meadow Loop. This loop is 1 mile long and is wheel chair accessible.
The best Time of Day to see this Yosemite Falls reflection:
The best time of day to see this Yosemite Falls reflection while hiking the Cook’s Meadow loop is late morning into the afternoon. During sunrise and sunset, Yosemite Falls is in the shade.
What makes hiking Yosemite Falls on Cook Meadow Pond special?
Yosemite National Park is a national icon that attracts a record number of tourists annually. Luckily, most tourists enjoy their morning cup of coffee, warm shower, and time with a significant other. If you are chasing the sights, skip the shower, convince your partner to join you, and hike with your coffee to see the beautiful reflections that are abundant during a flood year in the late spring of Yosemite Valley. Most likely, you will only see a few others who brave the morning chill.
Cooking breakfast while backpacking the Rae Lakes Loop in the Eastern Sierra Mountains. Photograph by Dalton Johnson
Rae lakes Loop
Where can you see this Rae lakes view?
There are two ways to access Rae Lakes Loop; Kearsarge Pass and Sequoia and Kings Canyon. The most popular way access point being Sequoia and Kings Canyon, but this trailhead often fills up. So, I suggest starting on the Eastern side of the Sierra Nevada Mountains at Kearsarge Pass.
Click for directions to Kearsarge Pass Trailhead
Best Season to enjoy this view of rae lakes:
The best season for hiking into Rae Lakes is the fall, before the snow hits the mountains. The fall in the Eastern Sierra provides a golden light that gets caught on the mountains and illuminates them at sunset is not to be missed.
How long is the hike to see Rae lakes?
The full Rae Lakes loop is 40 miles long and will take several days, however there are shorter day hikes that can be made to a single lake.
The best Time of Day to see this Rae lakes view:
The best time of day to see Rae Lakes is at sunset because the mountains capture the orange glow of the evening light on the mountaintops surrounding the lakes.
What makes hiking Rae lakes Loop special?
The Rae Lakes loop is a special lake hike because it is challenging and remote, yet tranquil. While the trip will leave you huffing and puffing over mountain passes, once you reach the lakes, there is an overwhelming solitude that drops you into a meditative state.
I suggest coming out here to camp for a few nights so you can embrace the solitude that I speak of. Addtionally, if you want to see the light show at sunset, you will want to sleep here as the trek out will be long and in the dark.

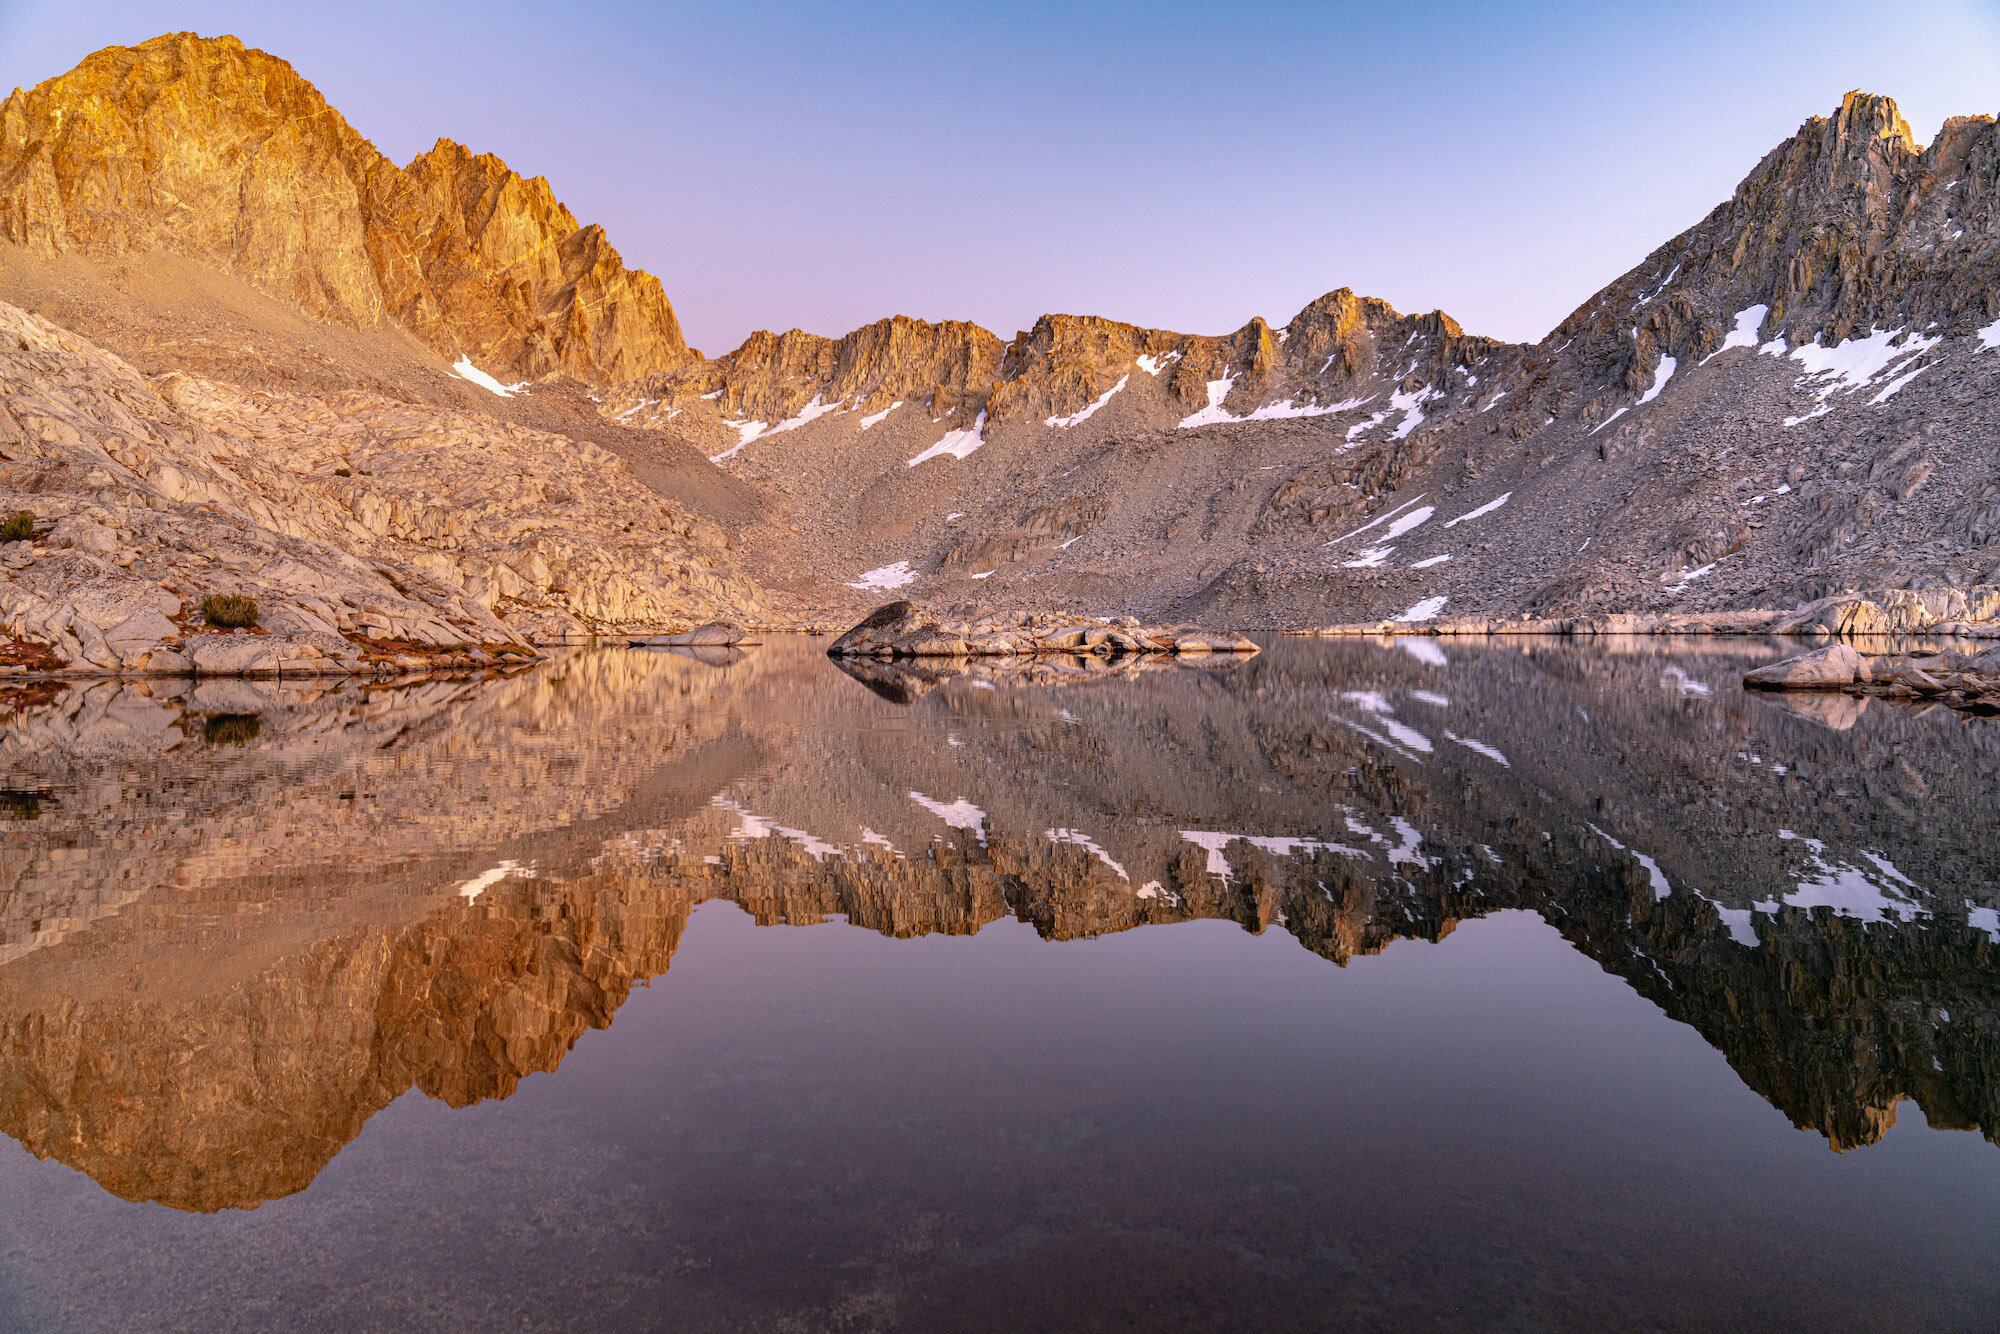
Mount Tyndall reflected in an alpine lake while hiking over Shepard's Pass in the Eastern Sierra Mountains. Photograph by Dalton Johnson
Mount Tyndall on Alpine lake
Where can you see this Mount Tyndall Reflection?
Mount Tyndall is one of California’s 14,000 foot peaks and is the 10th highest mountain in California. Beginning at Shepard’s Pass, you will hike about 14 miles and 10,000 feet of elevation gain to get to the base of the mountain. This hike is a BEAST!
Directions for Shepard’s Pass Trailhead
Best Season to enjoy this reflection of Mount Tyndall:
The best season to hike Mount Tyndall is in the early fall before the snow blankets the high country of the Eastern Sierra. If you are feeling courageous, head up the pass with some skis and go winter camping in the Tyndall and Williamson basin.
How long is the hike to see Mount Tyndall on Apline lake?
Hiking to Mount Tyndall is a 35 mile out-and-back hike that takes roughly 20-22 hours. Most people turn this very long day hike into a three day backpacking trip because of the length and elevation gain (roughly 10,000 feet) of Mount Tyndall.
If you would like to summit Mount Tyndall, there is a 3rd class route up the Third Rib of Mount Tyndall. The route is called the third rib because many say Mount Tyndall looks like a dinosaur.
The best Time of Day to see this Mount Tyndall reflection:
The best time of day to see Mount Tyndall reflected in the alpine lake is the early morning because the mountain face of Mount Tyndall faces east, catching the morning light.
What makes hiking Mount Tyndall on Apline lake special?
If you enjoy suffering, then this lake is for you! Sheppard’s Pass has been one of the most difficult hikes for me in the Eastern Sierra. I have now done this hike three times and every time I question my motives. From the parking lot to this lake is 13.6 miles and over 10,000 feet of vertical gain. This hike could have been 9,000 gain, but there is a random 1,000-foot decline around 1/3 the way to the pass.
If you can secure a backcountry permit, take advantage of the opportunity and spend a few days up here. You can summit Mount Tyndall and Mount Williamson, both of which are 14,000-foot peaks!

North Palisade reflected on Dusy Basin Lake while hiking over Bishop Pass in the Eastern Sierra Mountains of California. Photograph by Dalton Johnson
North Palisade on Dusy Basin Lake
Where can you see this North Palisade Reflection?
The northwest aspect of the Palisade Range is home to the most 14,000 foot peaks in California and can be accessed from Dusy Basin. Dusy Basin is 7 miles into the Ansel Adams wilderness if you leave from the South Lake trailhead of Bishop’s Pass. Dusy Basin houses several lakes that are great for swimming, soaking, refreshing, and photography.
Directions to Bishop Pass Trailhead (south lake)
Best Season to enjoy this reflection of North Palisade:
The Eastern Sierra, specifically the area around North Palisade receive a lot of snow, so exploring this area during the late summer is the best for safety reason, but also an incredible time as the late summer light will take your breath away at sunset.
How long is the hike to see North Palisade on Dusy Basin Lake?
Starting at the South Lake trailhead for Bishop’s Pass, hiking to Dusy Basin Lake is 15 miles round trip, taking an average of 7-8 hours to complete. Since this hike gains roughly 3,000 vertical feet during those 15 miles, several hikers make this trip over two days. The benefit of making this hike an overnight trip is the ability to watch the sunset light glow on North Palisade.
The best Time of Day to see this North Palisade reflection:
The best time of day to see North Palisade reflected on Dusy Basin Lake is in the evening. During sunset, the orange glow will light up North Palisade. This glowing orange mountain is one of my favorite sights in all of the Eastern Sierra.
What makes hiking North Palisade on Dusy Basin Lake special?
Ansel Adams coined the Eastern Sierra the “Range of Light” and for all those who venture into the glacial carved range, they will surely agree. In the mornings, the light bounces off the east-facing walls and for sunset, the west-facing aspects glow in a golden light. Hues that range from burnt orange to purple are often a single frame. The views are unparalleled to any I have experienced thus far.
Additionally, when you hike to the base of North Palisade massif and look up from Dusy Basin Lake, you are starting at the largest concentration of 14,000 foot peaks in California. This incredible sight humbles the soul from the magnitude of the size of these mountains. For climbers and peak baggers alike, this range is sought after and completing a full traverse of the Palisade Ridgeline is one the climbing gems of the Eastern Sierra.
Enjoying the sunrise view at Third Lake while hiking in the Eastern Sierra along the North Fork of Big Pine. Photograph by Dalton Johnson
Third lake of Big pine
Where can you see this Third lake of Big pines view?
Starting at the North Fork of Big Pine trailhead, you will huff and puff your way along the 15.2 miles out-and-back hike which takes you past a chain of alpine lakes, most notably Third Lake, which are all glacially fed, giving them a turquoise color. The Eastern Sierra hike to Third Lake is difficult, gaining almost 4,000 vertical feet, but the view is worth it!
Driving directions to North Fork of Big Pine Trailhead
Best Season to enjoy this view of third lake:
There are two ideal seasons for hiking into Third Lake; late-summer and winter. If you are capable to winter camping and navigating in the snow, you should make the trip out to Third Lake for a winter wonderland. However, if you are an avid hiker, but snow isn’t your ideal camping/hiking conditions, make you hike to Third Lake during the late-summer for the wildflower blooms.
How long is the hike to see Third lake of Big pines?
Hiking to Third Lake from the Big Pine Trailhead will take 8-9 hours round trip, covering 15.2 miles and 4,000 vertical feet of gain. This fantastic Eastern Sierra lake hike is a classic, must-do hike.
The best Time of Day to see this Third lake of Big pines view:
The best time to be at Third Lake is for sunrise. Why? When you are at Third Lake, you will see a jagged mountain peak across the way, this is called Temple Crag. During the sunrise, Temple Crag will catch the first glimpses of sunrise and turn a bright red.
What makes hiking to Third lake of Big pines special?
Third Lake of Big Pine is a special hike because the lakes are breathtaking, their turquoise color reminds me of jade. More than the color, the camping at Third Lake is secluded, but growing in popularity, so you can still get permits easily to see this splendid location.
I have been to Third Lake twice and I am already planning the third trip because this spot is amazing. The colors, the tranquility, the access to rock climbing, and the variety of other lakes in the area makes the North Fork of Big Pine a special place. Toss in a hike that will get your heart pumping… what a treat!

Lake Sabrina reflecting the Evolution Range in the Eastern Sierra while hiking around Bishop, CA during the early winter months. Photograph by Dalton Johnson
Evolution Range on Lake Sabrina
Where can you see this Evolution Range Reflection?
Lake Sabrina is a quick drive from Bishop, CA and provides easy access to boating and paddling activities most of the year. While the parking lot has great views, there is a ton of hiking in the area that will provide excellent views of the Evolution Range in the Eastern Sierra Mountains.
Driving directions to Lake Sabrina
Best Season to enjoy this reflection of the Evolution Range:
The most beautiful season to be a Lake Sabrina and hike around the Evolution Range is in the early winter before there is significant snow on the ground. While the temperatures will be cold, there will not be many people and the light dusting of snow creates a wonderful atmosphere to hike around Lake Sabrina.
How long is the hike to see Evolution Range on Lake Sabrina?
Hiking from the trailhead to Lake Sabrina is .25 of a mile, however the trailhead provides access to 100s of miles of trails for all those who wish to immerse themselves within nature. So, decide what you would like to do and embark on an enjoyable hike in the Eastern Sierra Mountains.
The best Time of Day to see this Evolution Range reflection:
The best time of the day to be at Lake Sabrina is the morning. The lake will be still, so the reflection of the Evolution Range will be clear on the surface of the lake. Also, there will be very few boaters, or fisherman, on the lake.
What makes hiking Evolution Range on Lake Sabrina special?
Hiking around Lake Sabrina is a special hike in the Eastern Sierra because this is an access point for many of the most striking mountains in the high sierra. From Lake Sabrina, you can hike a very short distance, or long ways. Either way, you will be surrounded by wilderness that is raw and beautiful.
If you are considering going to Lake Sabrina in the winter, here is a fun story from one of my many trips there: The thermometer read 10F, my snot was starting to freeze to my nose, and I was bundled in four layers. My gloved hands held the camera as steady as possible, but I made sure to have a high shutter speed because the shivering was inevitable. I have never been a fan of the cold, however, I have come to enjoy being warm in cold places. There is something magical about the muted sounds of a snow-filled environment. The head is quiet. The lungs fill with crisp air. Often, you have these typically busy places to yourself.

Bonsai Rock in lake tahoe
Where can you see Bonsai Rock in lake tahoe?
Bonsai Rock in Lake Tahoe is located on the eastern short near Incline Village along Highway 28. This spot is a road side attraction that offers access to the water’s of Lake Tahoe where large granite boulders show in the shallow clear water.
Driving directions to Bonsai Rock in Lake Tahoe
Best Season to enjoy this reflection of Bonsai rock:
Bonsai Rock is amazing year round, however the slopes to access the water are difficult in the winter months when they are covered in snow. Many people prefer to access Bonzai Rock in the summer because the days are warmer and the lake is enjoyable to swim in.
How long is the hike to see Bonsai Rock in lake tahoe?
Hiking to Bonsai Rock from the parking area is .25 of a mile and will take about 10 minutes. If you are carrying a cooler, or paddle-board, please be careful as the hill has loose sand and it is easy to slip.
The best Time of Day to see this Bonsai rock reflection:
The best time of day to visit Bonsai Rock is sunset or early-morning. Sunset is a splendid time to be at Bonsai Rock as the rocks will glow orange as the sun sets behind the Emerald Range of the West Shore. However, during sunset, the wind can be significant and there are often several people around. So, if you are looking for a quiet and intimate time at Bonsai Rock, I suggest packing some coffee and heading out in the early morning. There is nothing to see during sunrise, as Bonsai Rock will be in the shade, but the lake will be still and you will have the area to yourself.
What makes hiking Bonsai Rock in lake tahoe special?
Bonsai Rock in Lake Tahoe is special because the water is clear, there are submerged granite boulders, you can enjoy the water, jump off Bonsai Rock, lay in the sun like a lizard on a summer day, and paddle around on a SUP, or kayak. Essentially, I am trying to let you know that you can do almost anything you want at Bonsai Rock.
Bonsai Rock is a well known location that many people come to everyday to see the spectacle. If you are trying to have time alone, take a short hike along the coastline, you will find some secluded beaches that are a wonderful place sit alone and reflect.

Mirror Lake reflecting Mount Watson in Yosemite Valley during the late winter months. Photograph by Dalton Johnson
mirror lake in yosemite valley
Where can you see mirror lake in yosemite valley?
Mirror Lake is a popular hike at the eastern most point of Yosemite Valley and covers 4.4 miles with 300 feet of elevation gain along a well maintained trail.
Driving directions to Mirror Lake Trailhead
Best Season to enjoy this reflection of Mirror lake:
Late spring into early summer is the best season to for Mirror Lake. Since Mirror Lake is fed by snowmelt, this lake can dry up as early as the late summer.
How long is the hike to see mirror lake in yosemite valley?
The hike to Mirror Lake is 4.4 miles round trip and take 1-2 hours if you stay on the paved path. However, most people take 2-3 hours as there are several side trails and viewing points that you will want to stop. If you have the time, go slow and enjoy this special location in Yosemite Valley.
The best Time of Day to see this mirror lake reflection:
Mirror Lake is most calm in the morning, creating the best reflection, however the morning light is bland. If you have a windless day, the evening will be the best time to watch sit by Mirror Lake and take in the beautiful reflection of Half Dome catching the sunset glow.
What makes hiking mirror lake in yosemite valley special?
Mirror Lake has little water much of the year becoming more of a Mirror Meadow than a lake, but in spring and early summer, the shallow lake refills. When water is calm, the lake offers beautiful reflections of surrounding cliffs. Additionally, this is also a great option for biking. You can bike nearly the whole trail to Mirror Lake except for the last 1/4 mile. You will see bike racks at the point in the trail when bikes are no longer allowed.
With a fresh perspective looking up at Half Dome directly from its base, you'll be rewarded with views of Tenaya Canyon, Mount Watkins, Washington Column, and more. This reflective pool is a magical place to sit and ponder. I would suggest bringing a sack lunch and a journal to sit alone for a little TLC.
Conclusion
As you can see, the Eastern Sierra in California are stacked with some of the best lake hikes. This is a wide range of lake hikes, tucked away in the Eastern Sierra mountains, allows for any level of hiker to find a beautiful landscape to blow their mind. From Lake Tahoe down to Mount Whitney, the Eastern Sierra might have the best lake hiking in all of the United States, at least that is my opinion. What are your thoughts?
Discover More Eastern Sierra Gems


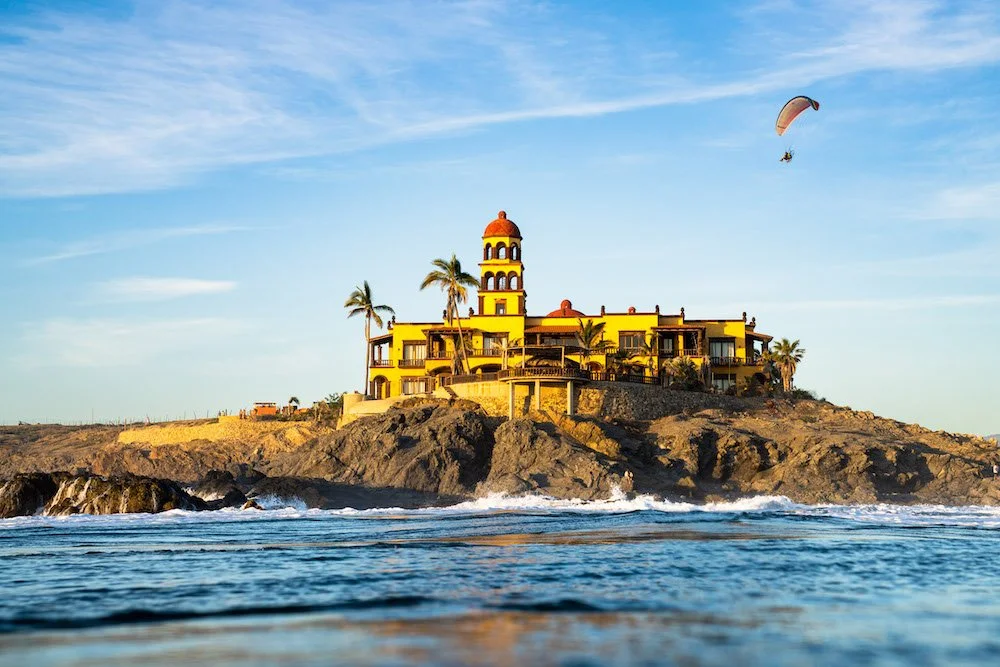
Is Cerritos Beach Swimmable?
Cerritos Beach, also known as Playa Los Cerritos, is the perfect place for swimming while in Baja Sur. The water is warm in comparison to the beaches of the United States, but still chilly to the touch. This long sandy beach is family friendly and is growing in popularity as a boom in vacation rentals grows beyond Cabo San Lucas. The safety of Cerritos Beach has continued to improve with the growth of the town by adding life-guards (Juan and Carlos), an ambulance station, and safety flags.
Cerritos Beach, also known as Playa Los Cerritos, is the perfect place for swimming while in Baja Sur. The water is warm in comparison to the beaches of the United States, but still chilly to the touch. This long sandy beach is family friendly and is growing in popularity as a boom in vacation rentals grows beyond Cabo San Lucas. The safety of Cerritos Beach has continued to improve with the growth of the town by adding life-guards (Juan and Carlos), an ambulance station, and safety flags.
Swimming at Cerritos Beach In Baja
Where can i swim at Cerritos Beach?
When you arrive to Cerritos Beach, you will find a long sandy beach that is friendly to all level of swimmers. The water is shallow for a long ways, so one can walk into the ocean gradually. For those looking to swim at Playa los Cerritos make sure to notice the three distinct parts of the the beach; the cove, the waves, and the rip-current.
The Cove: The cove is the closest area to the big yellow hotel on the point (you can’t miss this). This is the safest area to swim at Cerritos Beach as the water is shallow, the waves are friendly, and you will be accompanied be several others enjoying the ocean.
The Waves: This area is outside of the cove and becomes deep enough that you wont be able to touch the ground. Here you will find break waves perfect for swimming, body surfing, boogey boarding, and surfing.
The Rip-current: This area is on the hand side of the beach, denoted with a red flag, which is not safe for swimming as the water is flowing out into the open ocean. If you find yourself moving towards this area, please exit the ocean and walk back to safety.
Is Playa Los Cerritos a Safe beach?
Cerritos Beach is safe to swim for even the most inexperienced swimmer as the long sandy beach allows a person to walk into the ocean waist deep safely. Additionally, the safety of Cerritos Beach has continued to improve with the growth of the town by adding life-guards (Juan and Carlos), an ambulance station, and safety flags. All together, this makes Playa Los Cerritos a safe beach to swim at.
Hanging out and enjoying the water at Playa los Cerritos. Photograph by Dalton Johnson
Direction to Cerritos Beach
Play de Cerritos is an hours drive north of Cabo San Lucas and a 15 minute drive south from Todos Santos. Once you turn off the highway to Cerritos Beach, the road is dirt.
How to Get to Cerritos beach from Todos Santos?
Driving from Todos Santos to Cerritos Beach will take roughly 15 to 20 minutes. To get there in your car, access highway 19 south and drive for 14 kilometers. You will have three entrances to on your right side (the ocean side), all will take you to Cerritos Beach via a dirt road. I suggest you take the second one as it is the quickest and straightest shot to the beach.
How to Get to Cerritos Beach from Cabo San Lucas?
Driving from Cabo San Lucas to Cerritos Beach will take roughly a 60to 90 minutes. To get there in your car, access highway 19 north and drive for 60.2 kilometers. You will have three entrances to on your left side (the ocean side), all will take you to Cerritos Beach via a dirt road. I suggest you take the second one as it is the quickest and straightest shot to the beach.
NOTE: If you reach the town of El Pescadero, you have gone too far.
Discover more of Baja Mexico


Best Views of Yosemite Valley
The natural beauty of Yosemite is so incredible that it inspired an entire 19th-century conservation movement, which resulted in the valley’s protection as a national park in 1890. Naturalists led by John Muir (1838–1914) and artists like photographer Ansel Adams (1902–1984) found inspiration for their life’s work here. When planning your trip to Yosemite National Park, checking out the best views of Yosemite Valley ahead of time are critical to the Yosemite experience.
Immersing yourself in the natural wonder that is Yosemite is akin to stepping into a living masterpiece, a canvas of unparalleled beauty that ignited a 19th-century conservation movement. In 1890, the valley's breathtaking landscapes prompted the establishment of Yosemite as a national park, an enduring testament to the visionaries like John Muir and artistic pioneers such as photographer Ansel Adams. Their profound connection to this sanctuary laid the groundwork for a legacy that continues to inspire seekers of beauty and tranquility.
As you embark on your journey to Yosemite National Park, navigating its expansive terrain becomes a crucial aspect of the Yosemite experience. The park's vastness, intertwined with circular driving routes, demands careful planning to ensure you capture the essence of Yosemite without losing precious hours to unexpected detours. To guide you through this natural marvel, we've curated a list of iconic views that deserve a coveted spot on your must-see list. These vistas, easily accessible from both paved roads and hiking trails, promise to leave first-time visitors breathless, offering glimpses of Yosemite's heart-stopping beauty.

El Capitan and Bridalveil Fall as seen from Tunnel View during the winter. Photograph by Dalton Johnson Media.
TUNNEL VIEW:
Location and Accessibility: Located at the east end of the Wawona Tunnel along Wawona Road (Highway 41), Tunnel View is a mere 30-minute drive south from Yosemite Village. Accessible to all, this iconic viewpoint is conveniently situated just steps away from the parking area, making it a must-visit stop for every Yosemite traveler.
What to Expect: At Tunnel View, prepare to be awe-struck by the majestic beauty of Yosemite Valley. From this vantage point, you'll be treated to panoramic views showcasing Yosemite's most renowned landmarks, including the towering granite monoliths of El Capitan and Half Dome, as well as the graceful cascade of Bridalveil Fall.
Experience and Activities: The hike to Tunnel View is virtually effortless, taking less than a minute from the parking lot to the viewpoint itself. Despite its accessibility, this popular spot is often bustling with visitors eager to soak in the breathtaking scenery. For a more secluded experience, venture a short distance along the trail for additional viewing areas, where you can capture the splendor of Yosemite from different perspectives.
5 Reasons to Visit Tunnel View: Tunnel View isn't just a roadside attraction – it's a quintessential Yosemite experience that belongs on every traveler's itinerary. Beyond its iconic vistas, Tunnel View offers a glimpse into the diverse tapestry of visitors who flock to Yosemite National Park each year. Consider packing a picnic to savor the scenery and soak in the atmosphere of this legendary location.
Iconic Vistas: At Tunnel View, nature unfurls its grandeur, showcasing the iconic granite giants – El Capitan, Half Dome, and the ethereal Bridalveil Fall. These towering landmarks form the backbone of Yosemite's distinctive landscape, and witnessing them from this vantage point is a visual symphony that resonates with the park's profound beauty.
A Glimpse into Diversity: Beyond its breathtaking scenery, Tunnel View serves as a microcosm of Yosemite's diverse tapestry. Here, you'll encounter fellow travelers from all walks of life, united by their shared awe for the natural wonders that surround them. It's a communal experience that emphasizes the universal allure of Yosemite, where people from across the globe converge to witness the spectacle that is Tunnel View.
Embracing Tranquility: Consider packing a picnic and immersing yourself in the tranquil ambiance that permeates Tunnel View. Spread a blanket on the grass, indulge in local delights, and allow the scenery to become the backdrop for moments of quiet reflection. As you savor the flavors of your picnic, you'll find a profound connection with the land, creating memories that extend beyond the visual feast.
Capturing Timeless Moments: Tunnel View isn't just a snapshot; it's a canvas of timeless moments waiting to be captured. The changing hues of the day and the interplay of light and shadows on the granite cliffs create a dynamic and ever-evolving landscape. Seize the opportunity to freeze these fleeting moments with your camera, allowing yourself to become a part of the narrative written by the sun's gentle descent over Yosemite Valley.
Immersive Atmosphere: More than a viewpoint, Tunnel View immerses you in an atmosphere that transcends the ordinary. It's a space where the whispers of wind through the trees, the distant rumble of waterfalls, and the collective gasps of admiration from fellow visitors blend harmoniously. Absorb the energy of this legendary location, and let it become a vivid memory etched in your Yosemite journey.
Tips for Photographers: To fully capture the grandeur of Tunnel View, equip yourself with an easy-to-use camera or a wide-angle lens. Whether you're a seasoned photographer or a casual snap-shooter, Tunnel View provides endless opportunities to capture Yosemite's timeless beauty in vivid detail.

A frozen Bridalveil Fall photographed from during the winter in Yosemite Valley. Photograph by Dalton Johnson Media.
BRIDALVEIL FALL
Location and Accessibility: Embark on a journey to witness the awe-inspiring Bridalveil Fall, the majestic 620-foot cascade that greets visitors entering Yosemite Valley. Easily accessible, the fall is a short drive from the valley, and you can get detailed directions to Bridalveil Fall to ensure a seamless experience. Recent renovations are transforming the path into a wheelchair-accessible route, making it even more inclusive for all.
Spectacular Sight: At Bridalveil Fall, prepare to be mesmerized by a breathtaking display of nature's power as 620 feet of water plunges to the earth, creating a spectacle that resonates with both the thunderous energy of spring and the graceful, swaying flow characteristic of the rest of the year. The fall's name is derived from this ethereal movement, resembling a bridal veil dancing in the wind.
Hiking Experience: The journey to Bridalveil Fall unfolds along a paved path with a gentle incline, ensuring a leisurely hike suitable for all fitness levels. Taking approximately 10 minutes, the trail grants access to captivating viewpoints. For a more immersive experience, venture off the path onto a rocky trail leading to the base of the fall. Here, you'll not only feel the magnitude of the waterfall but also have the chance to capture the essence of Bridalveil Fall up close.
Why Visit Bridalveil Fall: As the first waterfall greeting those entering Yosemite Valley, Bridalveil Fall holds a special place in the hearts of visitors. Its grandeur is a spectacle to behold, from the thunderous roar in spring to the gentle, swaying flow throughout the year. The symbolism of a bridal veil in motion adds an extra layer of charm to this natural wonder, making it an essential stop on your Yosemite itinerary.
Versatile Perspectives: Bridalveil Fall offers two distinct ways to be experienced — up-close or from afar. Hike the trail to the waterfall's base for an immersive encounter, feeling the mist and power firsthand. Alternatively, savor the view from the meadow across the trailhead or the iconic Tunnel View for a picturesque perspective ideal for photography.
What to Bring: While the hike is short, the allure of Bridalveil Fall might encourage you to linger. Pack a daypack to carry essentials and ensure a comfortable experience. If you choose to venture close to the falls, consider bringing a rain jacket to stay dry and protected, enhancing your overall enjoyment of this captivating natural spectacle. Bridalveil Fall beckons, inviting you to embrace the harmony of nature and create lasting memories amid its breathtaking beauty.
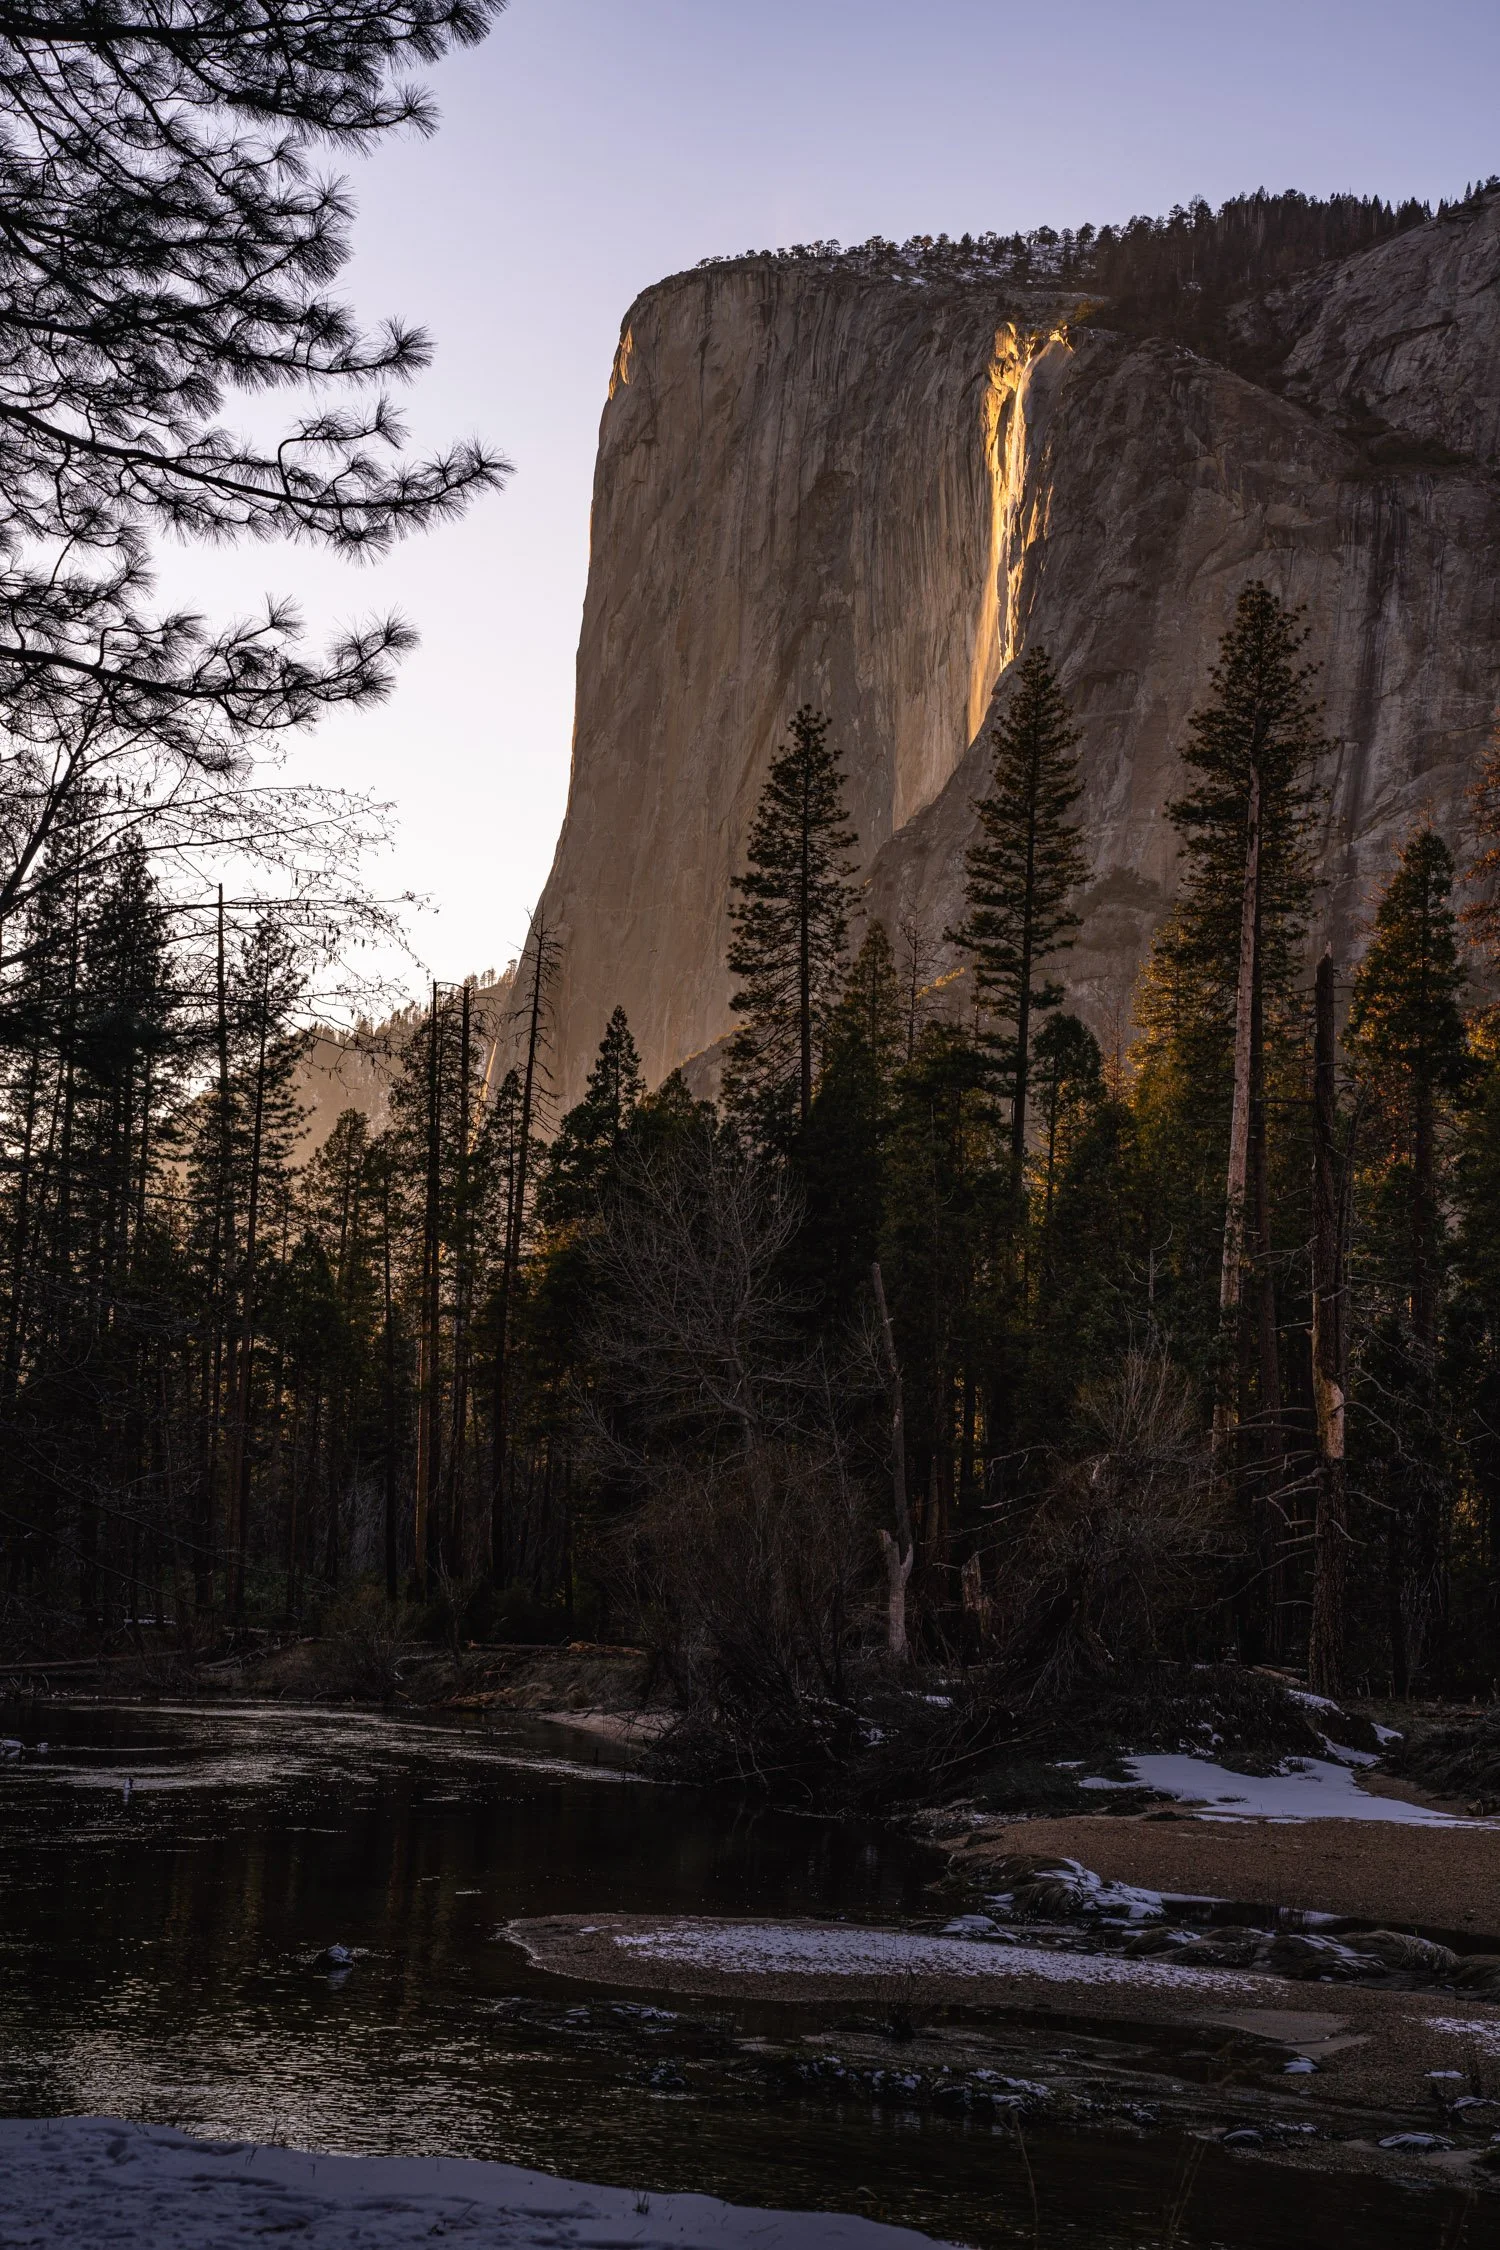
Yosemite Valley’s natural wonder Firefalls glow bright during late-February. Photograph by Dalton Johnson Media.
FIREFALLS
Location and Seasonal Spectacle: Embark on an extraordinary journey to witness Firefalls, an enchanting phenomenon also known as Horsetail Fall, set against the backdrop of Yosemite's majestic landscapes. While you can't hike directly to Firefalls, you can experience its magical glow from various vantage points throughout the park. To ensure you're in the right place at the right time, plan your visit in mid to late February when the seasonal flow, influenced by the year's snowpack, transforms the cascade into a radiant red waterfall at sunset.
Why Witness Firefalls: Firefalls is not merely a waterfall; it's a natural wonder of the world that requires a perfect alignment of elements. For this captivating spectacle to unfold, you need to be in Yosemite at the right time of year, with California having experienced a bountiful snow season. Adding Firefalls to your must-see list is a testament to embracing the unpredictable beauty of nature, where molten-like cascades create a surreal, once-in-a-lifetime experience.
Understanding the Magic: Most of the year, Horsetail Fall may blend into the Yosemite landscape, with a modest flow originating from the top of El Capitan. However, during mid to late February, the scene transforms dramatically. The small stream, fed exclusively through snowmelt and run-off, metamorphoses into a radiant cascade resembling molten lava, offering a unique and ephemeral spectacle that captivates those fortunate enough to witness it.
What to Bring: As you prepare to witness Firefalls in the crisp, late-winter air of mid to late February, be mindful of the cold temperatures. Pack a cozy puffy jacket and warm gloves to ensure your comfort as you soak in the mesmerizing display. The ethereal glow of Firefalls, set against a winter backdrop, is an experience that transcends the ordinary, making your venture into Yosemite's embrace an unforgettable odyssey.
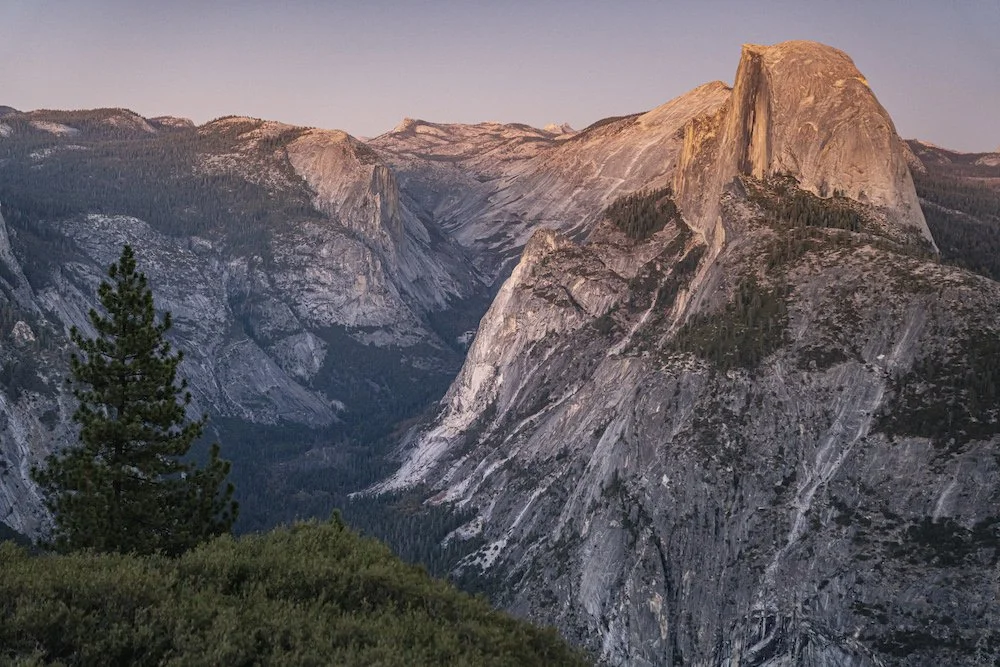
Half Dome glowing in the last light as seen from Glacier Point in Yosemite Valley, California. Photograph by Dalton Johnson Media.
HALF DOME FROM GLACIER POINT
Location and Accessibility: Embark on an extraordinary journey to Yosemite's pinnacle of panoramic grandeur — Glacier Point. Begin your quest by securing precise directions to Glacier Point, ensuring a seamless traverse to this elevated vantage point. The journey will lead you to a realm where the iconic sights of Yosemite Valley unfold before your eyes.
Captivating Vistas: At Glacier Point, the majesty of Yosemite reveals itself in a captivating dance of nature. Witness the breathtaking allure of Half Dome, the lofty Sierra Nevada range, the cascading beauty of Vernal Fall, the regal arches of Royal Arches, and the timeless cascade of Yosemite Falls. This panoramic spectacle, set against the backdrop of the high country, paints an awe-inspiring tapestry that encapsulates the essence of Yosemite's unparalleled beauty.
Hiking Experience: Embark on a scenic 15-20 minute walk from the Glacier Point trailhead parking to immerse yourself in the unfolding splendor. The paved and wheelchair-accessible trail leads you to a point where the landscape opens up, revealing a visual symphony that transcends the ordinary. Beyond the visitor center and overlook, the path may become unpaved, offering a more rustic and immersive experience for those eager to venture further.
Why Visit Glacier Point: Inscribing Glacier Point onto your Yosemite itinerary is a non-negotiable, offering an elevated perspective of the upper valley and an unrivaled view of Half Dome. As the sun sets, witness the mesmerizing transformation of Half Dome, bathed in hues of glowing red. Set the stage for an unforgettable evening by arriving for sunset, relishing a picnic, and marveling at the celestial display as the Milky Way graces the night sky over Half Dome. Glacier Point, with its magical ambiance and smaller crowds due to the more extended drive, stands as an essential pilgrimage within Yosemite National Park.
Spectacular End to the Road: At the terminus of Glacier Point Road, approximately an hour's drive from the valley, lies arguably the most spectacular view in the park. Here, the Sierra Nevada high country unfolds, with the iconic silhouette of Half Dome taking center stage, etching an indelible memory in the hearts of all who behold it.
Essentials to Pack: Ensure you capture the brilliance of Glacier Point's sunset view by packing essential photography gear. A sturdy tripod and a DSLR camera are your companions for preserving the stunning visual symphony that unfolds before you. This is not just a view; it's a visual masterpiece that deserves to be frozen in time.
Yosemite Falls flowing during a spring day after a good snow year in California. Photograph by Dalton Johnson Media.
YOSEMITE FALLS
Navigating to the Cascades: Embark on an enchanting journey to Yosemite Falls, a majestic masterpiece tucked within the heart of Yosemite National Park. Secure precise directions to Yosemite Falls to ensure a seamless venture to witness the breathtaking dance of water against the granite canvas of the valley.
Cascading Wonders: Yosemite Falls reveals its grandeur in two acts — the Lower Yosemite Fall and the challenging ascent to the Upper Yosemite Fall. The base of the Lower Falls beckons with a challenging hike, demanding 1-2 hours for a round trip. Meanwhile, the Upper Yosemite Fall, a more strenuous endeavor, unfolds over 6-8 hours round trip. As you embark on this adventure, ensure to carry ample water and snacks, as dehydration poses a risk on the trail, leading to occasional rescues.
Why Conquer Yosemite Falls: Yosemite Falls, a vertical tapestry comprised of the Upper Fall, middle cascades, and Lower Fall, descends a staggering 2,425 feet (740 meters), securing its place among the tallest waterfalls in the United States. Make this remarkable feat a priority on your Yosemite itinerary if you yearn to witness the sheer power and beauty of one of nature's most awe-inspiring spectacles. The challenging climb is generously rewarded with close-up views of the Upper Yosemite Fall and distant panoramas featuring Half Dome and the majestic Sierra mountain peaks. Traverse the trail to relish bird's eye perspectives of Yosemite Valley's meadows and the serpentine Merced River.
Seasonal Unveilings: Timing your visit to Yosemite Falls is key, with the spring offering the most robust water flow. Late summer, however, may witness a more subdued cascade. Don't miss the extraordinary spectacles that Yosemite Falls presents, such as the elusive moonbow, gracing the night sky in April and May.
Essentials for the Ascent: Prepare for the arduous yet rewarding climb to the Upper Yosemite Fall by donning sturdy hiking boots. Equip yourself for the journey with footwear like the suggested boots, ensuring comfort and support on the long and challenging trail.
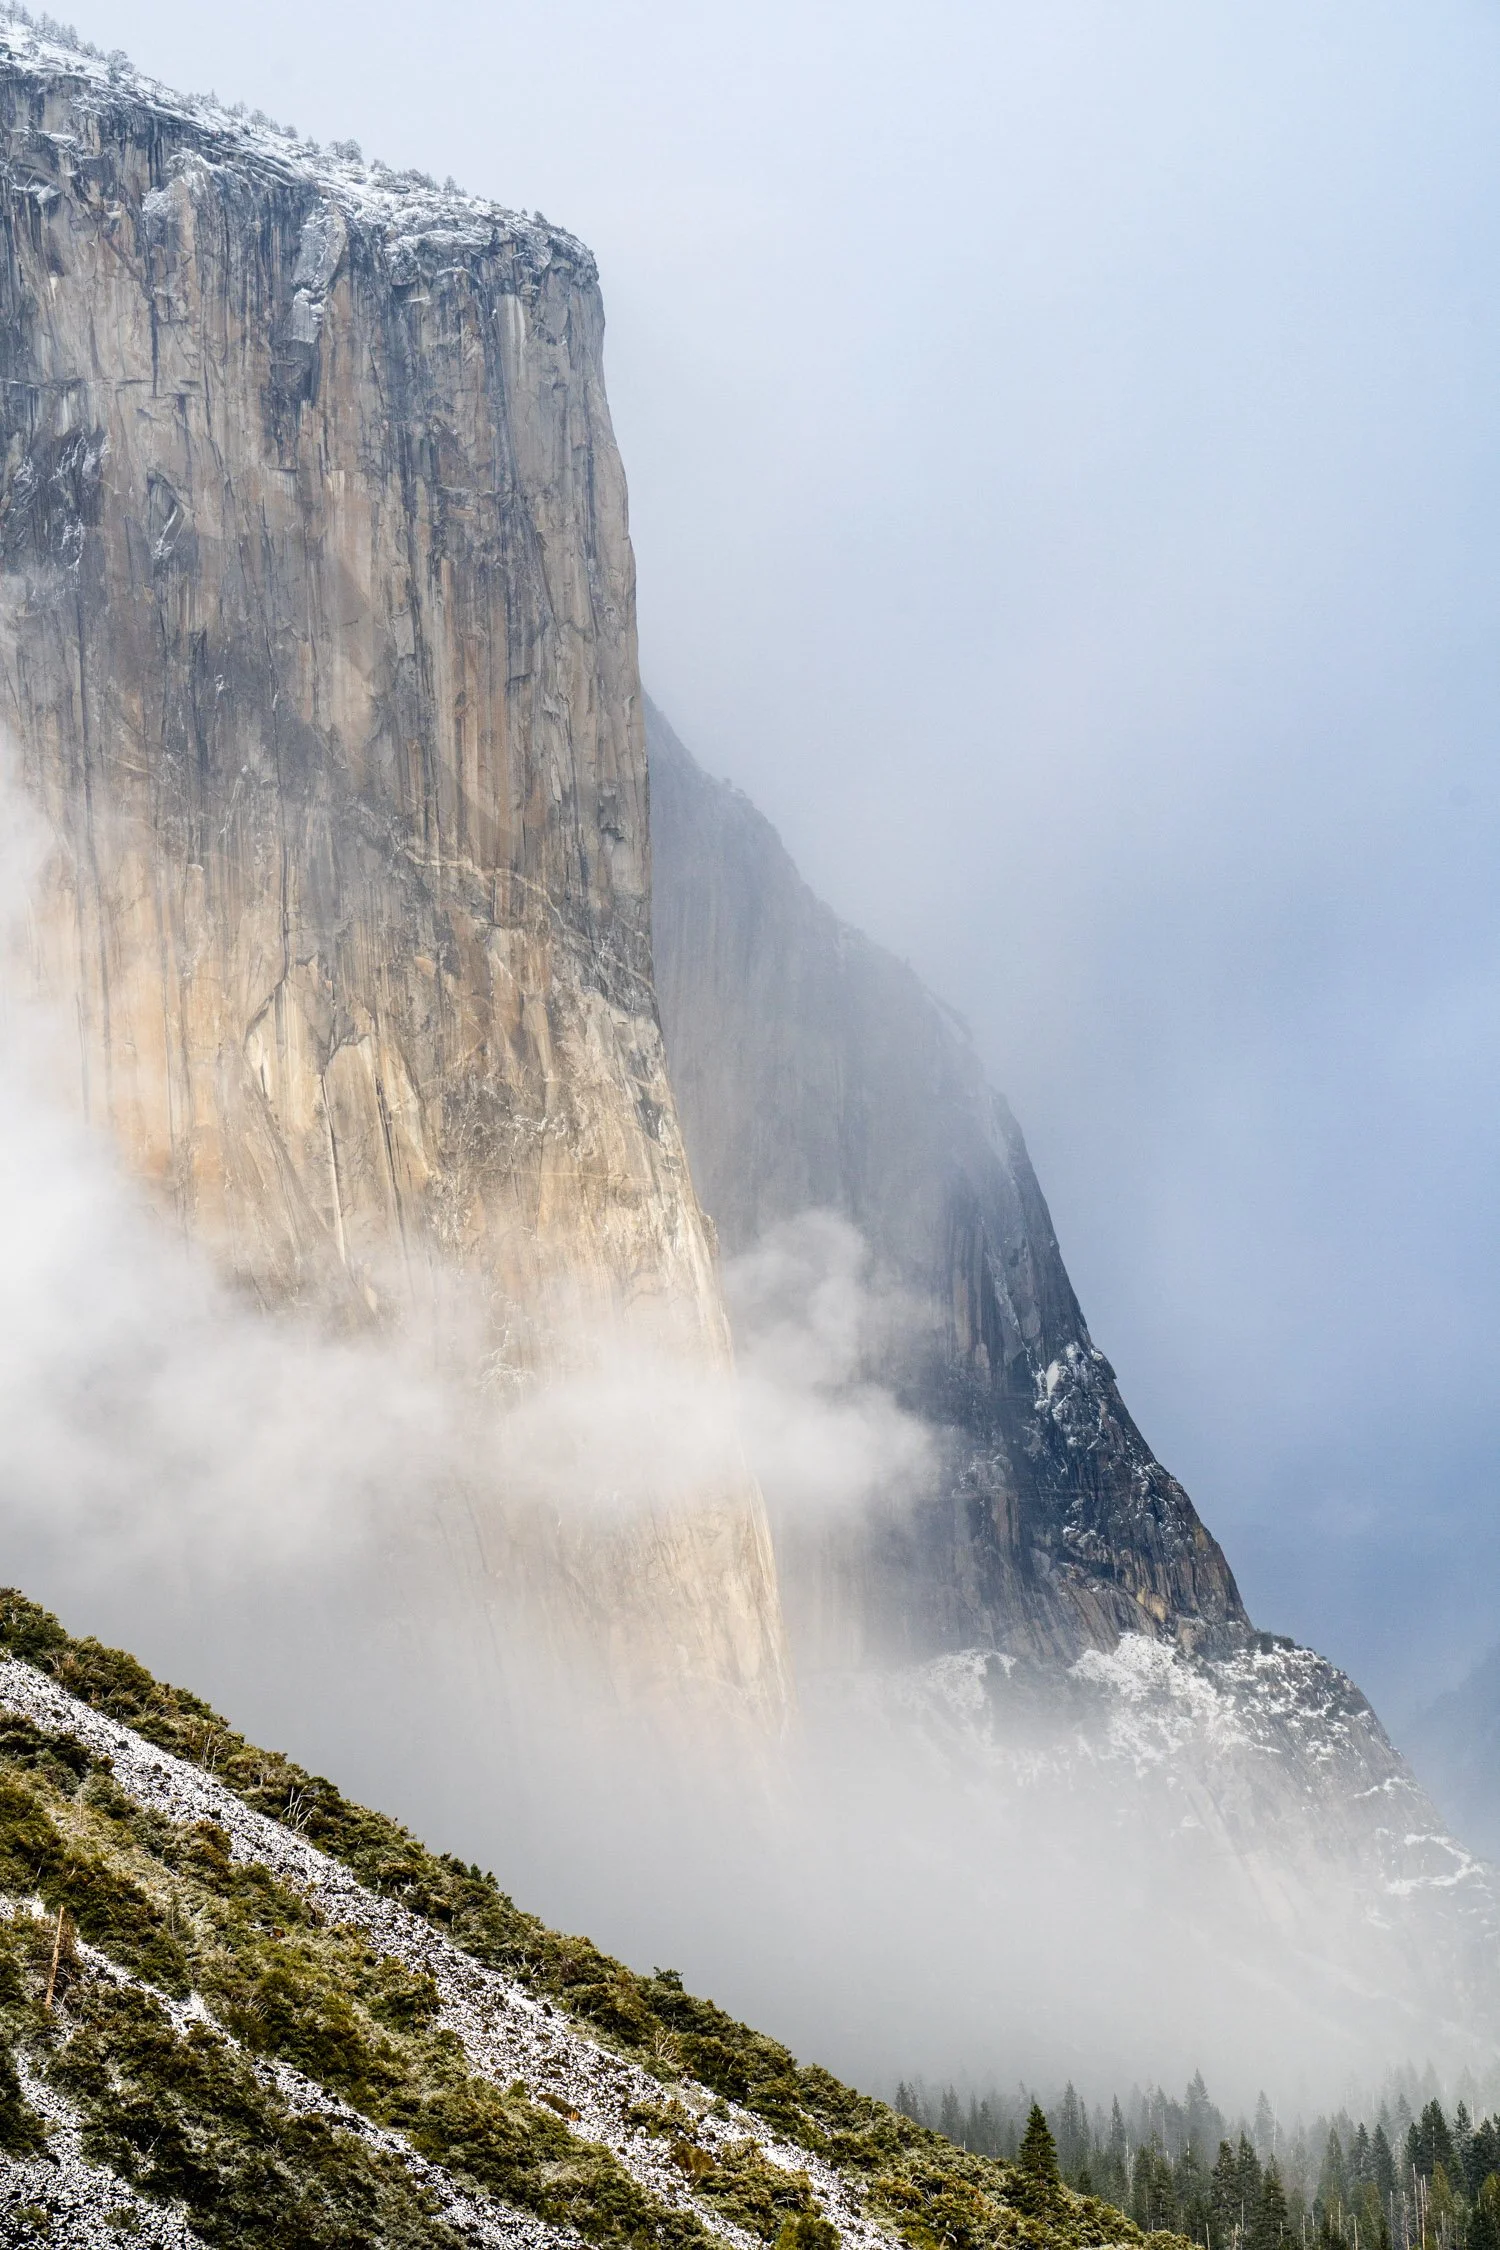
EL CAPITAN
Embarking on the Journey: Set your sights on Yosemite's iconic El Capitan, a colossal granite monolith that stands as a testament to nature's grandeur. Begin your adventure by securing precise directions to El Capitan, ensuring a seamless journey to witness the awe-inspiring spectacle that awaits.
Spectacles Within the Granite Realm: As you approach El Capitan, prepare to be captivated by a scene where rock climbers dance against the massive granite wall, creating a mesmerizing ballet of skill and determination. The sheer magnitude of El Capitan is a sight to behold, punctuated by the enchanting presence of Horsetail Falls and the ethereal phenomenon of firefalls during the right season.
Navigating the Trails: Embark on a 30-minute round trip hike to the base of El Capitan, where the sheer verticality of the granite wall becomes palpable. For the intrepid explorers seeking an elevated perspective, venture further by taking the Yosemite Falls trail, a challenging 12-15 hour round trip trek to the top of the granite giant. The view from the summit promises a panoramic reward that will etch itself into your memory.
Why El Capitan Demands Your Presence: Rising more than 3000 vertical feet from the floor of Yosemite Valley, El Capitan is an imposing force of nature that demands attention. Beyond its sheer size, El Capitan holds a storied history and, more recently, a surge in rock climbing popularity. The acclaimed documentary "Free Solo," featuring Alex Honnold's awe-inspiring ascent without a rope, attests to the audacity of those who conquer this monumental wall. To stand at the base and look up is to comprehend the magnitude of their feat.
The Timeless Majesty: Driving through Yosemite Valley, the presence of El Capitan is impossible to ignore. Stretching over a mile long and towering at 3200 feet, it remains a perennial attraction, leaving an indelible impression whether it's your first visit or your hundredth. After a storm, witness a postcard-perfect moment as sunlight bathes El Capitan, creating a play of clouds that imbues the mountain with a mystical aura.
Essentials for the Observer: To fully appreciate the climbers scaling El Capitan, bring along a pair of binoculars like the suggested NOCS and a camp chair. Find a vantage point in the El Cap meadow, where you can sit and marvel at the audacious climbers making their ascent up this monumental rock wall.
MIRROR LAKE
Navigating to Reflections: Embark on a serene journey to Mirror Lake, nestled within the embrace of Yosemite National Park. Ensure a seamless transition into this reflective haven by securing detailed directions to Mirror Lake, unlocking the path to an enchanting escape.
Visions Reflected: As you arrive at Mirror Lake, prepare to be captivated by the pristine reflections of Mount Watkins and the iconic Half Dome shimmering upon the tranquil waters. This pristine mirror, nestled in the heart of nature's grandeur, promises a visual symphony that harmonizes with the surrounding granite giants.
Hiking the Scenic Trail: Embark on a scenic hike to Mirror Lake, where the journey along the paved path can be a leisurely one-hour stroll. However, the allure of this picturesque landscape often beckons explorers to meander along side trails and pause at captivating viewpoints, extending the hike to a more leisurely 2-3 hours.
Why Pause at Mirror Lake: Gazing up at Half Dome from the base takes on a fresh perspective at Mirror Lake, offering rewarding views of Tenaya Canyon, Mount Watkins, Washington Column, and beyond. This reflective pool, whether brimming with water in spring or transformed into a tranquil meadow in dryer months, invites contemplation and connection with the natural wonders surrounding it. Pack a sack lunch and a journal, and take a moment for some well-deserved TLC amidst this magical setting.
Nature's Ephemeral Art: Mirror Lake undergoes a transformation throughout the seasons, often resembling more of a Mirror Meadow than a lake. Spring and early summer witness the resurgence of its shallow lake, providing stunning reflections of the encircling cliffs when the water is calm. Beyond hiking, Mirror Lake offers a delightful biking option, with bikes permitted along the majority of the trail, except for the final 1/4 mile.
Optimizing Your Visit: To fully savor your Mirror Lake experience, take the scenic route during early spring, strolling past the lake to discover a quiet spot away from the clouds. Capture the essence of Mirror Lake with a wide-angle lens if you're inclined to photography, ensuring you immortalize the breathtaking beauty that unfolds within this serene sanctuary.
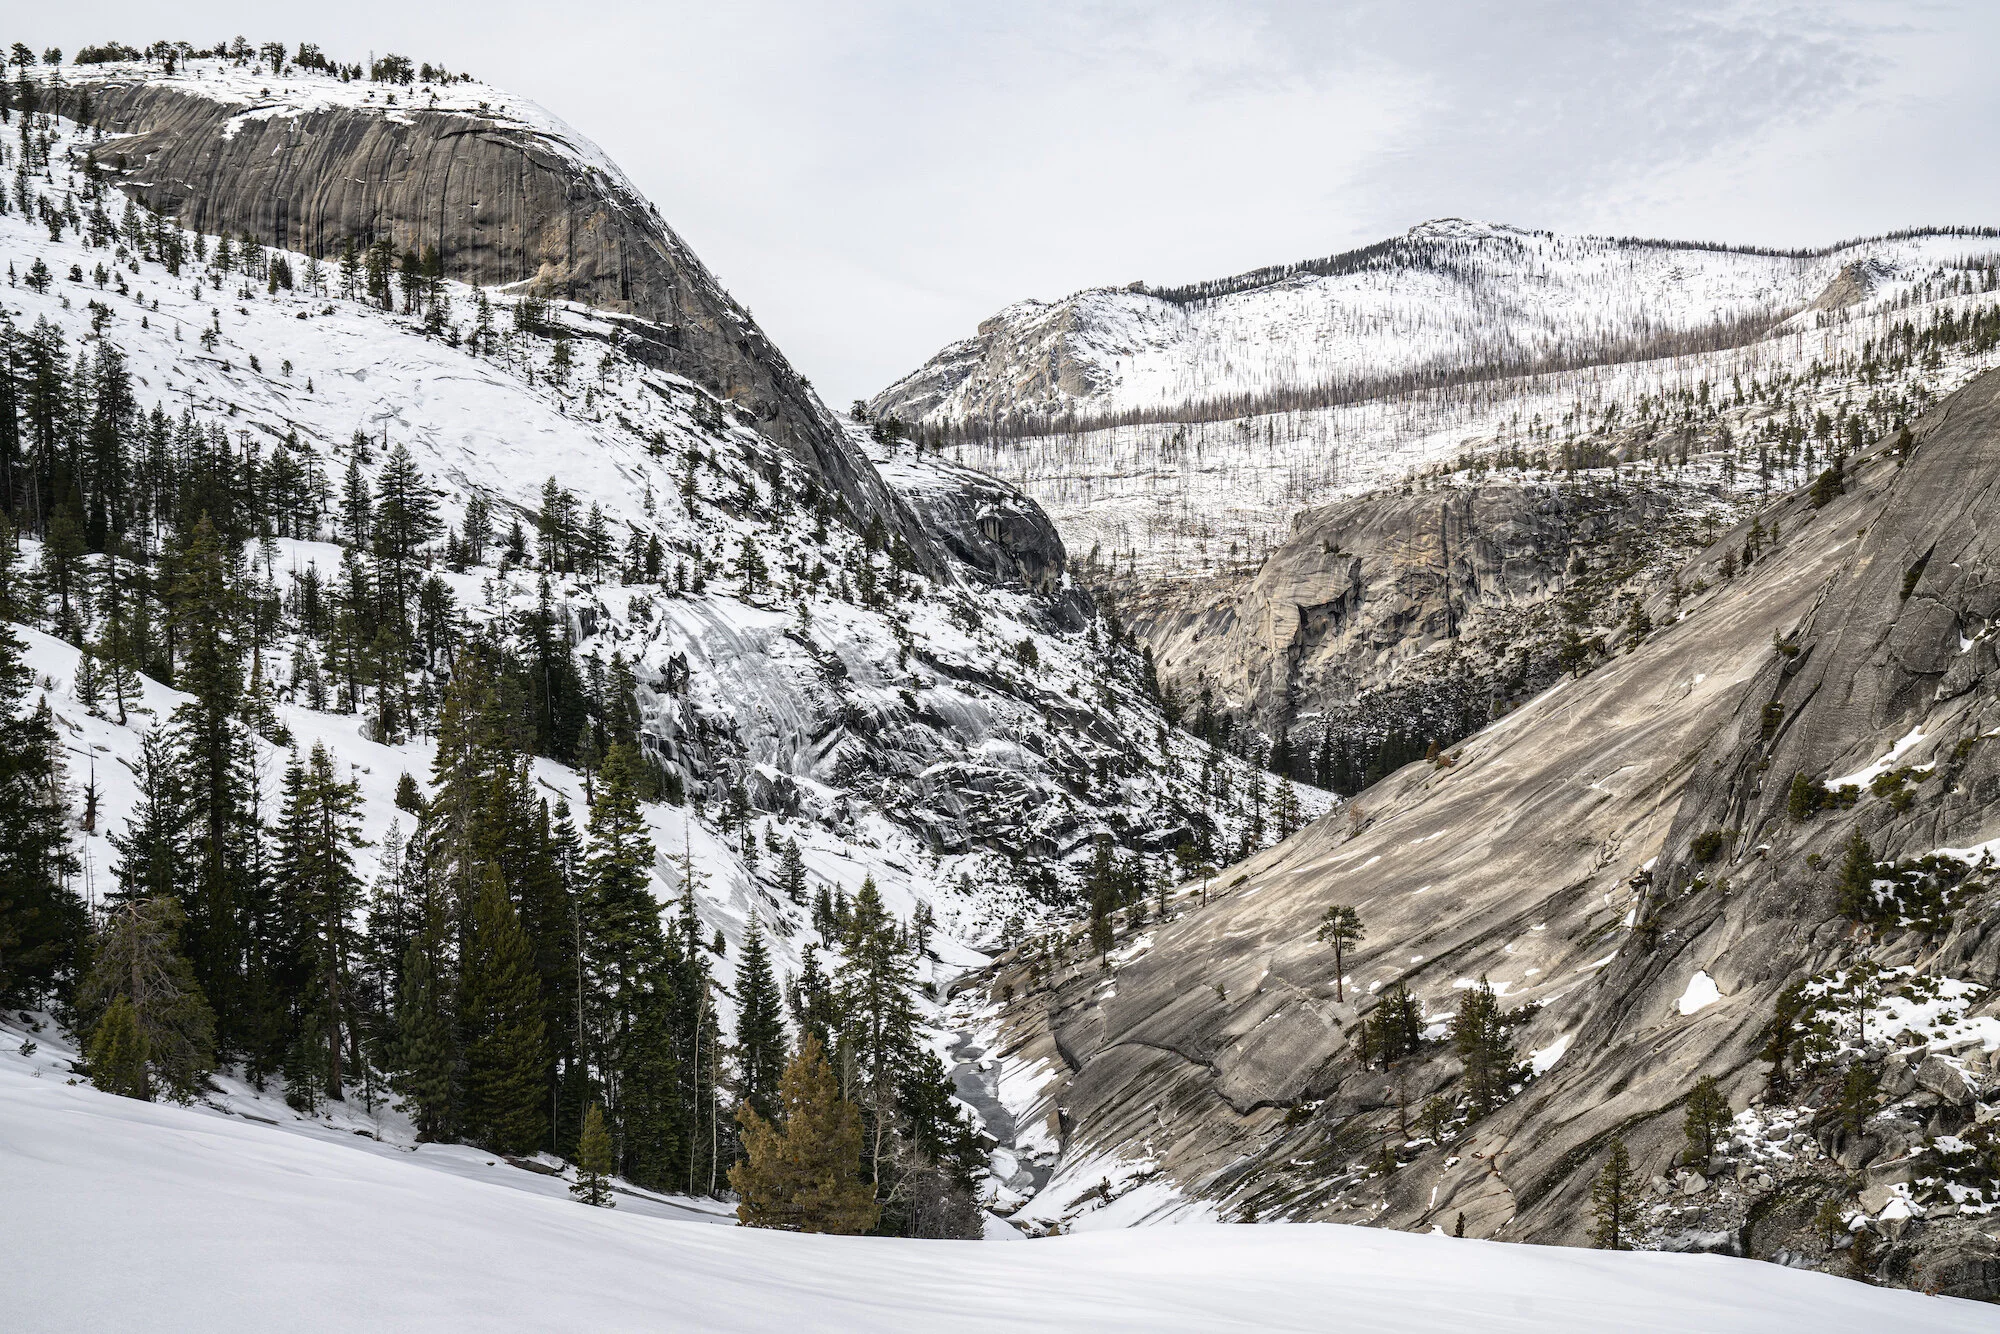
LITTLE YOSEMITE VALLEY
Embarking on the Trail: Chart a course to the heart of Yosemite's wilderness by securing precise directions to Little Yosemite Valley, a sought-after gateway to nature's untamed wonders. Navigate the journey that unfolds amidst towering peaks and cascading falls.
Panoramas Unveiled: As you arrive at Little Yosemite Valley, prepare to be immersed in a landscape adorned with the grandeur of Vernal Fall, the majestic cascade of Nevada Fall, the iconic silhouette of Half Dome, and the rugged charm of Mount Broderick. Each step through this pristine valley unveils panoramic vistas that echo the untamed beauty of Yosemite.
Trekking Through Time: The trek to Little Yosemite Valley, often an overnight odyssey for many, also beckons day hikers to indulge in an 8-10 hour round trip adventure. This trailhead is not just a path; it's an invitation to traverse through the heart of Yosemite's wilderness and savor the allure of the surrounding peaks.
Reasons to Roam in Little Yosemite Valley: Little Yosemite Valley stands as the most popular region in Yosemite's wilderness, primarily due to its convenient access to the legendary Half Dome. Whether you embark on the challenge of summiting Half Dome or seek a demanding hike complemented by a refreshing swim in the Merced River, this valley is a haven for those craving both adventure and solitude. Venture beyond, and the crowds thin, revealing the pristine beauty of this wilderness escape.
Insights into Exploration: For those yearning to witness Little Yosemite Valley without embarking on the hike, Glacier Point offers an alternative. Drive to Glacier Point to catch glimpses of Vernal Fall and Nevada Fall, providing a unique perspective into the high country. While not a substitute for the hike, it offers a glimpse into the rugged grandeur that awaits those who venture deeper.
Optimizing the Experience: For hikers ready to embrace the Mist Trail and the challenge that lies beyond, bring along swim trunks. The Merced River invites a refreshing dip, offering a delightful respite on your journey to the summit of Nevada Fall and beyond.
Essentials for the Wilderness Odyssey: If the call of Little Yosemite Valley beckons you to backpack into its embrace, secure your wilderness permit in advance. Pack your backpacking essentials, and don't forget a reliable sleeping bag, with a suggested 15-degree rating to ensure a cozy night's rest at the elevation of approximately 6500 feet.
Additional Yosemite Blogs


For She is the Drug of Choice
This nature poem is a thank you to mother nature. As a little boy, I would run around the “woods” of my backyard naked letting my imagination run free. In many ways, my work allows me to continue this adventure through my imagination (not so much the naked part), and explore the natural beauty of our planet. I am unsure why, but any chance I get to see this planet, I take it. From mountains to the ocean, I crave the beauty of our planet and attempt to share it with you all.
For She is the Drug of Choice
Laying exposed for all to see
Men, women, even children
Admiring and craving
to be with her.
The early morning sun accentuates her beauty,
radiating lustful thoughts.
Men want to climb her,
women want to befriend her,
children wish to be held by her.
Her presence,
a lasting ecstasy, a mind-altering drug,
bringing all people to their knees.
Unconquerable, steadfast to all, yet
unable to take advantage of her. No spirits
will waver her mind. Her vastness and beauty
incomprehensible.
For she is Mother Nature.
About the Poem:
This nature poem is a thank you to mother nature. As a little boy, I would run around the “woods” of my backyard naked letting my imagination run free. In many ways, my work allows me to continue this adventure through my imagination (not so much the naked part), and explore the natural beauty of our planet. I am unsure why, but any chance I get to see this planet, I take it. From mountains to the ocean, I crave the beauty of our planet and attempt to share it with you all.
My dreams as a kid have stayed with me; see the world, play a sport in college, and be a writer. Well, I am happy to say all three of those goals are getting checked. The best part, see the world and be a writer are journey’s that will never end.
In college, I was captivated by poetry and wrote every night. Most of my writings ended in the trash, but several have not seen the light of day. For I am scared to share my writing as it is the closest thing to my heart. My brain used to tell me, don’t you dare share this, you wont be accepted. However, I am coming to a point in my life to accept my writing as a safe space for me to express my experience on this planet.
So, here is the first for me, a combination of a poem and visuals. All of which documents mother earth.
I hope to share more.
Discover more Creative works by Dalton
How To Hike Lake Tahoe's Tallest Summit Freel Peak
Arriving in South Lake Tahoe to begin a personal challenge of a supported bike packing adventure from South Lake Tahoe to Mount Whitney, I started the trip with hiking Freel Peak. My goal was to start at the Freel Peak trailhead and hike to the top for sunset, but that didn't happen. Getting a late start, my journey to the tallest peak in Lake Tahoe ended in the dark, but that is okay, I brought a head lamp. By the way, the sunset while on the hiking trail to the summit of Freel Peak was phenomenal!
Updated: Sept. 20, 2024
Rising to an elevation of 10,886 feet (3,318 meters), Freel Peak proudly claims the title of the tallest summit in the Lake Tahoe Basin. This iconic peak offers a challenging and rewarding physical experience, captivating the attention of hikers, backpackers, peak baggers, and trail runners alike. With its stunning vistas, challenging uphills, and sense of peace while standing atop the summit, it is no wonder hiking Freel is a popular Lake Tahoe hike. Although popular, not many visitors take on the challenge because this peak requires a half, to full, day for most hikers. The panoramic views of Lake Tahoe to the north, Carson Valley to the east, and the surrounding Sierra Nevada Mountains to the south, and east, make hiking Freel an unforgettable option to soak in the Lake Tahoe views. So, let’s dive into how you can successfully hike Freel Peak in South Lake Tahoe.
Pros:
Spectacular Views: Freel Peak offers breathtaking panoramic views of Lake Tahoe, the surrounding mountains, and the Carson Valley, making it a must-visit for nature enthusiasts and photographers.
Variety of Trails: There are multiple trails to reach the summit of Freel Peak, catering to hikers of various skill levels and preferences. You can choose from shorter, steeper routes or longer, more gradual ascents.
Wildlife Viewing: The area around Freel Peak is home to diverse wildlife, and you may have the chance to spot birds, deer, and other animals along the trail.
Solitude: Compared to some of the more popular trails in the Lake Tahoe area, Freel Peak tends to be less crowded, providing a more peaceful and immersive outdoor experience.
Wildflowers: Depending on the season, you may encounter a variety of wildflowers along the trail, adding to the natural beauty of the hike.
Physical Challenge: If you're looking for a physically challenging hike, Freel Peak offers a good workout, especially if you choose one of the steeper routes.
Cons:
Elevation Gain: The hike to Freel Peak involves a significant elevation gain, which can be challenging for inexperienced hikers and those not acclimated to high altitudes.
Weather Variability: Weather conditions in the Lake Tahoe area can change rapidly, even during the summer months. Be prepared for sudden changes in temperature, wind, and the possibility of afternoon thunderstorms.
Trail Difficulty: Some of the trails leading to Freel Peak can be steep and rocky, requiring proper footwear and hiking gear. Inexperienced hikers may find certain routes challenging.
Limited Facilities: There are limited facilities along the trail, such as restrooms and water sources. Ensure you carry enough water and supplies for your hike.
Trailhead Accessibility: Some trailheads to Freel Peak may require driving on unpaved roads, sometimes requiring 4x4, which could be a challenge for some vehicles.
Wildlife Encounters: While wildlife viewing can be a pro, it can also be a con if you encounter potentially dangerous animals like bears or mountain lions. Be aware of wildlife safety precautions.
Hiking Freel Peak Need to Know:
The hike up to Freel Peak is a hard, primitive, sandy and rocky trail. Located in the Carson Range in the Sierra Nevada near South Lake Tahoe, the hike offers great views of Lake Tahoe, High Meadow, Crystal Range and Desolation Wilderness.
Distance: 9.7 miles
Elevation Gain: 3763 ft
Route Type: Out and Back
Water: A couple of seasonal streams, make sure to bring your own water
Time to hike to Freel Peak Summit: 3 hours average
Time to hike Freel Peak car to car: 5-6 hours average
What to bring when day hiking Freel Peak:
Hiking Freel Peak is a serious hike in the Lake Tahoe area which takes you above 10,000 feet in elevation. While most people will be okay with reaching this summit, even if they are coming from sea level, some people might experience the altitude. Don’t let that scare you away though! Hiking Freel peak is a fun, full day adventure. If you are a fit human, or an avid trail runner, you can complete this hike in just a couple of hours. For those who are looking for a challenging hike in Lake Tahoe, this hike is for you. With that said, make sure you bring the essentials:
Hiking shoes like the Merrell Moab OR trail runners like La Sportiva Ultra Raptor
3 liters of water
500 calories of snacks
Hiking poles, my go-to are the Leki Khumbu (these save your knees)
A camera, like the Sony a6600 to capture gorgeous images
Best Time of Year to Hike Freel Peak:
The best time of year to hike Freel Peak largely depends on your personal preferences and what you hope to experience during your hike. Here's a breakdown of the different seasons to help you choose the optimal time for your adventure:
Spring (Late May to Early June):
Wildflowers: Spring is an excellent time to witness the Sierra Nevada's wildflower bloom. The hillsides around Freel Peak come alive with vibrant colors, adding to the scenic beauty.
Cooler Temperatures: While some snow may still linger on the higher elevations in late spring, temperatures are generally comfortable for hiking.
Limited Crowds: Spring is less crowded compared to the summer months, providing a more tranquil hiking experience.
Summer (Late June to Early September):
Warmer Weather: Summer offers the warmest temperatures for hiking, making it the most accessible time for many visitors.
Clear Skies: You can expect clear, sunny days for most of the summer, providing excellent visibility for panoramic views.
Longer Days: The longer daylight hours in summer give you more time to complete the hike and enjoy the summit.
Wildlife Sightings: Summer is a prime time for wildlife sightings, with animals becoming more active as they forage for food.
Fall (Late September to Early November):
Cooler Temperatures: Fall offers comfortable hiking temperatures with cooler days, making it an ideal season for those who prefer milder weather.
Fall Foliage: The aspen trees in the area turn brilliant shades of yellow and orange in the fall, creating a stunning contrast against the evergreen forests.
Fewer Crowds: Similar to spring, fall sees fewer hikers on the trails, providing solitude and a more peaceful experience.
Less Chance of Thunderstorms: Unlike summer, fall typically has fewer afternoon thunderstorms, reducing the risk of encountering inclement weather.
Winter (December to April):
Snow Sports: While not suitable for traditional hiking, Freel Peak and the surrounding area become a playground for winter sports enthusiasts. Backcountry skiing and snowshoeing are popular activities during this time.
Winter Wonderland: The landscape takes on a serene and enchanting quality under a blanket of snow, offering a different kind of beauty for those who enjoy snow-covered landscapes.


Where is Freel Peak?
Freel Peak is indeed the tallest peak in the Lake Tahoe region, but it is not located in South Lake Tahoe, California. Instead, it is situated in the Sierra Nevada mountain range to the southeast of Lake Tahoe, and it is closer to the town of Meyers, California. The Armstrong Pass Trailhead is one of the popular starting points for hiking Freel Peak, and it provides access to various trails leading to the peak. While South Lake Tahoe is relatively close by, the actual location of Freel Peak is not within the city limits of South Lake Tahoe. While this is a technicality, what you need to know is that the road to the trailhead can require 4x4 during certain times of the year. The road is dirt, often pitted out, and has a gate that closes for the winter.
Directions to trailhead: Armstrong Pass Trailhead
Fun Facts about Freel Peak:
Tallest Peak in Tahoe: Freel Peak is the tallest peak in Lake Tahoe at 10,886 feet above sea level.
Mountain Range: Freel Peak is part of the Sierra Nevada mountain range, which stretches across California and Nevada and is known for its rugged terrain and stunning landscapes.
Named After: Freel Peak is named after James Freel, an early settler in the area. It's interesting to note that the peak is sometimes misspelled as "Frel Peak."
Snow-Covered Winters: Due to its high elevation, Freel Peak often retains snow well into the spring and even early summer, offering opportunities for snowshoeing and backcountry skiing.
Hiking Variety: In addition to being a great first 10,000-foot summit, Freel Peak is also a popular destination for snowshoers and backcountry skiers during the winter months.
Wildlife: While hiking Freel Peak, you may come across various wildlife species native to the Sierra Nevada, including mule deer, chipmunks, and various bird species.
Geological Significance: The rock formations and geology of Freel Peak and the surrounding area are fascinating for geology enthusiasts, showcasing the geological history of the region.
Sunrise and Sunset: Hiking Freel Peak during sunrise or sunset can be a magical experience, as the changing light casts different hues on Lake Tahoe and the surrounding landscape.
Stargazing: The clear, high-altitude skies near Freel Peak make it an excellent spot for stargazing and astrophotography on clear nights.
Is there cell service on Freel Peak?
Yes, there is cell service at the summit of Freel Peak. However, it's important to note that you should not expect to have cell service at the trailhead or while hiking along the trail leading to the summit. Cell reception can be quite limited or non-existent in the backcountry areas of the Sierra Nevada, so it's advisable to plan accordingly by informing someone of your plans and expected return time before starting your hike and to carry any necessary offline maps or emergency communication devices if needed.
Can You Backpack to Freel Peak?
Yes, you can backpack to Freel Peak, and it's a stunning experience sleep near the top to watch sunrise in the morning. Also, for outdoor enthusiasts looking to extend their stay in the beautiful Sierra Nevada wilderness, backpacking Freel Peak gives you more time to enjoy the area. Here's some information to help you plan your backpacking trip to Freel Peak:
Overnight Permits: Backpacking in the area typically requires an overnight permit. You can easily obtain these permits online through the appropriate agencies responsible for managing the land. It's essential to check the current permit requirements and regulations, as they can vary depending on the specific trail and jurisdiction.
Camping Options: While it's technically possible to camp on the summit of Freel Peak, most backpackers choose to camp at lower elevations, where it's less windy and more sheltered. There are suitable camping spots along the trails leading to Freel Peak, such as the Armstrong Pass Trail. These sites offer a comfortable and scenic place to spend the night.
Water Availability: One crucial consideration when backpacking to Freel Peak is water availability. There are no reliable water sources along the trail, especially during the dry summer months when temperatures can be hot. It's essential to carry enough water to sustain yourself during your hike and overnight stay. Consider using a water filter or purification method if you plan to collect water from streams or creeks.
Seasonal Considerations: The best time for backpacking to Freel Peak depends on your preferences and tolerance for weather conditions. Summer offers longer daylight hours and warmer temperatures but can be hot, while spring and fall offer milder weather and fewer crowds. Winter backpacking is also an option for experienced winter sports enthusiasts.
Leave No Trace: As with any outdoor adventure, practicing Leave No Trace principles is essential when backpacking to Freel Peak. Be sure to pack out all trash, minimize your impact on the environment, and follow established backcountry camping guidelines to preserve the area's natural beauty.
Navigation and Safety: Backpackers should be prepared with appropriate navigation tools, first aid supplies, and knowledge of the trail and terrain. The high-altitude environment can present unique challenges, so it's crucial to be well-prepared and informed about potential hazards.
Backpacking to Freel Peak can provide a more immersive and extended experience in the stunning Sierra Nevada region. Whether you choose to camp near the summit or at lower elevations, careful planning and adherence to outdoor ethics will help ensure a safe and enjoyable backpacking adventure.
Other Great Hikes that are close to Freel Peak:
Finishing the hike to the summit of Freel Peak in Lake Tahoe, California. Photograph by Dalton Johnson
Hiking Freel Peak in Lake Tahoe is an adventure that encapsulates the very essence of the Sierra Nevada wilderness. With its towering summit, pristine alpine lakes, and breathtaking vistas, this trail beckons both novice and seasoned hikers to explore its diverse landscapes and immerse themselves in the natural beauty of the region. Whether you seek the thigh burning euphoria of standing on top of the tallest peak in the Lake Tahoe Basin, or simply yearn for a peaceful escape into nature for an overnight trip, Freel Peak offers an unforgettable experience that leaves a lasting imprint.
Discover More of Lake Tahoe


How to Create Commercial Photography on a Budget
There is nothing more annoying than a company low balling you to create content. At least that is what I originally thought! Companies are just trying to get as much as they can within their budget, there is nothing wrong with that. Heck, I always try to get as much money as possible for a job, so am I any different? Not really. So, what should we do to try to fix this budget confusion around creating content?
There is nothing more annoying than a company low balling you to create content. At least that is what I originally thought! Companies are just trying to get as much as they can within their budget, there is nothing wrong with that. Heck, I always try to get as much money as possible for a job, so am I any different? Not really. So, what should we do to try to fix this budget confusion around creating content?
As a creator, you can always say, "NO!" But, what if you take a different approach? An approach where we focused on value proposition and worked together to create the best content we can with the resources we have hand. What would that approach look like and feel like? As a content creator, could we just create what you can within clients budget. Yes, we can! How is that so? A dirty little secret, not everything you create needs to be portfolio work.
If we realign our goals as creators and become happy the company reached out to us and to understand our value, that would be perfect. As a creator, if we spoke with honesty and showed real numbers, then we could work together to achieve the best that we can. Budgets don’t need to be an enemy, they are just a metric for what is possible! In this article we will explore how a content creator can do the best work with the limited resources at hand, and most importantly have fun!
What is branded content?
Branded Content is a broad term for marketing materials created specifically for a brand to put their logos on. The type of content here ranges from photography, videography, short form videos, and copywriting. Most companies use branded content for marketing purposes making the goal of branded content to attract customers and sales through a curated brand identity.
The words “branded content” can be swapped out for “commercial content” or “ commercial photography”.
I mean, who doesn’t love a good jump photograph? While I still have more to edit from Alaska, this is one of my favorite self-portraits of the trip. Photograph by Dalton Johnson
What are the budget constraints you’ll often run into?
Budget constraints don’t have to be the enemy, nor a devaluation of your work. As a content creator, the goal is to understand the budget your client has so that you can build a project within the allotted budget. Most companies have a range they need the project to fall into, if so, they will share. If not, then they are shopping, or just don’t know, so you will need to educate the client on the costs. So, what budget constraints will you typically run into?
Client doesn’t understand the true cost of production
Client has a lump some of money and it is an all or nothing solution
You, the content creator, don’t know how to quote a job
You, the content creator, don’t understand the industry
The both of you are not speaking the same language
Let’s dive into these five common budget constraint issues:
Client does not understand the true cost of production
Solution: This is an easy fix. After you have a conversation with the client about creating their dream project, send them an estimate with the line items built out. When doing this, most likely you know that the price is higher than their budget, so you ask do two things. First, educate the client on the cost difference. Second, propose a solution to fix/adjust the budget and ask for their imput as well, they might be willing to cut something. One of my favorite “go-to’s” in situations like this is to deliver three “packages” showing the difference in deliverables with price-points.
Client has a lump some of money and it is an all or nothing solution
Solution: This is a hard fix. If a client is playing the “all-or-nothing” game with you, I suggest walking away. This is a power play, but you have to stand up for yourself. I’ve found in the end, these clients are a pain to work with and often make you feel icky inside when the job is done. However, if you believe in your heart you “need this job” then take it, but make sure to lay out the harmful short cuts will you have to take to complete the job. Additionally, make sure your contract is well written and signed before starting the project!
You, the content creator, don’t know how to quote a job
Solution: Ask around and search the web. If you are unsure how to quote a job, ask your peers for help. Most are willing to help. Additionally, seek out advice from agents and peers who are a bit “ahead” of you. If you don’t have access to either of those, then give the company a price you think is fair. To do this, calculate your cost of doing business, add a little fluff to the price (roughly 10%) for negotiations, and give it to the client. If they say no, ask for feedback. If they say yes, ask for feedback. Regardless, this is a learning process, embrace it.
You, the content creator, don’t understand the industry
Solution: This is a content creator problem. Yup, it is a you problem, but have no worries, you can fix that. Education. I would suggest getting on CreativeLive and watch course after course. Additionally, find creators who are willing to help you. This might mean they share blogs, have online courses, or offer digital downloads. Regardless of how you consume your knowledge, make sure you are learning about the industry you are working in, that is your responsibility. If you are just starting out, calculate your cost of doing business and start quoting jobs. Most likely your difficulty isn’t going to be pricing, it’ll be getting a client.
The both of you are not speaking the same language
Solution: A tricky situation. If you realize that you and the client are not speaking the same language, you need to change how you are talking. If the client wants to talk in terms of deliverables, talk in terms of deliverables. If the client wants to talk in terms of creativity, talk in terms of creativity. If the client wants to talk in terms of dollar signs, talk in terms of dollar signs. I think you get the picture, listen to the client. They will tell you what they need, follow along with that. Ultimately, the goal is to create something fun and get paid to create it.
Tips and Tricks for talking with a small budget client:
If you are given the opportunity to create for a company with a small budget, most likely they just don’t know what it takes to create branded content. So, part of your job is going to be educating the client. At times, educating a client can be frustrating, but remember, you are the specialist and that is why they are coming to you! So, here are a few pointers for talking with a client who has a small budget to create commercial content:
Be honest and realistic with what you can create
Be patient and open with a client
Voice what you need to create the job
Share what could be done with a larger budget
Provide a realistic timeline
When should you say no and walk away as a content creator?
There are tons of reasons to say yes to projects and it takes a certain level of privilege and prestige to be able to walk away saying “no” to paid work. But, when should you say no to a client as a content creator? For myself, I do a triple check and it kinda goes like this:
Is this a project I want to do? yes/no
Is this project going to make me money to do something else I want to do? yes/no
Is this project going to be a portfolio piece? yes/no
If I get two yes’s I will most likely do the job. If I get two no’s I will most likely not do the job. However, that is not totally the case.
The second question, in this grouping, is the most important to me, “Is this project going to make me money to do something else I want to do?” If a door is going to open because I take this job, I will most likely do it. If a job gives me access to something I want to do in the future, I will most likely take it. However, I do have to weigh the other options. Having doors open to us is the most difficult part of the job. Access to new clients, a peak behind the door to the next level, different opportunities are all hard to manifest as a content creator. So, as a content creator weighing saying yes or no to a project, access to something new is the most important key for myself.
Sometimes a client just wants a simple shot, hold our product to the sky with a pretty backdrop. There’s nothing wrong with that. Photograph by Dalton Johnson
Gear to help you create on a budget?
I will be the first to admit that I am not a gear head, nor do I think we should rely on gear as crutch, but sometimes you just have to, especially if you are solo shooting. So, what gear have I found to be a great crutch?
Helps with run and gun shooting. Additionally, you can set up on a tripod and control it remotely from your phone.
Drone (I use the DJI Mavic Air 2)
This is a MUST for me! I use a drone in almost every shoot as a drone allows me to be a subject and still get the shot.
Full-frame camera (I use the Sony a7r4)
I suggest a large sensor camera with a high mega-pixel count so that you can crop if need be. You might have to set this up on a tripod and shoot via interval timer to capture yourself.
A Lens Quiver (I use the Tamron f/2.8 line up)
Having a variety of lenses allows you to create several different photographs all in the same location.
This is a jack of all trade, master of none tool. I keep this around for all the quick and dirty shots that would take a long time to get using a larger camera.
Commercial photography is often product driven, so make sure to capture the product in use. Photograph by Dalton Johnson
Final Thoughts on Budget Content Creation
If you are doing work on a budget, be respectful all the way around. That means to yourself and your client. The best way to do that is to be honest a transparent with your pricing and what you are capable of doing. That is exactly what I did in this video while in Alaska. Dermatone knew that their budget was low and they were asking for a lot of content. So, they knew we couldn’t hire talent, there wasn’t the budget for an assistant, and they had to release creative control to me. Overall, we were both happy with the project. Why was that? Taking on this sunscreen project gave me an opportunity to do something with my girlfriend that I would not have done otherwise and Dermatone got the content they wanted within their budget.
Discover more about photography

How to Make Money as a Freelance Content Creator | Part 2 of 5
If you are a freelance content creator, or have aspirations on becoming a freelance content creator, this five part series will help you lay the foundation for making money. In episode two of this five part series, I cover ways to generate active income streams for freelance careers. To do this, I dive deep into what types of active income exist and what the end results will look like. All of these are focused on freelance jobs.
How to Make Money as a Content Creator
If you are a freelance content creator, or have aspirations on becoming a freelance content creator, this five part series will help you lay the foundation for making money. In episode two of this five part series, I cover ways to generate active income streams for freelance careers. To do this, I dive deep into what types of active income exist and what the end results will look like. All of these are focused on freelance jobs.
What is Active Income?
Active Income as a freelancer means you are actively pursuing and creating the work you are hoping to sell. This work often takes up the bulk of your time and creative energy.
Another way to think about active income is work you are creating for a client.
Active Income Jobs
Jobs in the active income category have a wide range, but are typically what you might expect in terms of freelance jobs for content creators. These jobs are:
Create Branded Content
As a freelance creative, creating branded content is the quickest way to money. This means creating marketing assets that a company will put their logo onto. Branded content is also the most sure way to get paid as a freelance creative.
Copywriting
If you are a writer, copywriting is a wonderful way to get paid for your craft. Initially, I thought of a copywriter as a person who wrote blogs. That could be true, but a copywriter also writes newsletter, webpages, about me bios, and so so much more. Think of a copywriter as a person who writes for a brand.
Video Creation
Video creation is a growing need for all companies as the rise of short form video is taking over the social world. Outside of short form video editing, there is also long form, and commercial work. Video creation doesn’t have to be branded work, it could be Youtube, educational videos, video editing, and so much more. If you are a skilled editor, you will be in high demand!
Project Sponsorship
This is my favorite and most lucrative type of work. Project sponsorship takes the most work as the freelance creative must do everything and a company simple exchanges money for the opportunity to be apart of the project. This type of work isn’t for the faint of heart as you never know if the work will see the light of day, get funded, or gain traction. I like to think of project sponsorship like gaining VC funding for Entrepreneurship. You are seeking a backer who believes in your work for a return of assets.
Building a social media presence
The modern way of becoming a creator is to build an audience yourself. As a freelancer, if you can bring an audience to a client you are a step ahead of most other creatives. Now, this isn’t an easy thing to do at all! Building an audience takes a lot of persistence and dedication to the cause you are working on. If you decide to go down this path, good luck! I only kid a little bit here. If you want to become an influencer, just try your best not to wrap your self worth into the numbers.
Repurposing your archived content into new content
For creatives that have been around for a while and are looking to expand their base income level, I suggest figuring out how to repurpose your content so that it works for you. What do I mean by this? Look at your archive and ask yourself, what is sitting around that I could turn into a money making machine? For example, could you start a social media account? Could you develop a blog? Could you develop a youtube channel? Could you sell prints? What can you do to make your old work worth money… again!
Final Thoughts
Thank you for taking the time to read through this blog about how to make money as a freelancer. The goal of this series is to help other creatives find a way to remain in the field longer and make money doing what they love. If you have any questions please, send me an email. We don’t have to do everything ourselves and should rely on each other to grow as a community. That is why I write these blogs and put out these videos. Below you will find a variety of articles that are full of useful information.
Addtional Articles to Read:
Part 1 - How To Make Money as a Freelancer
Examples of Content Creation - Big Agnes
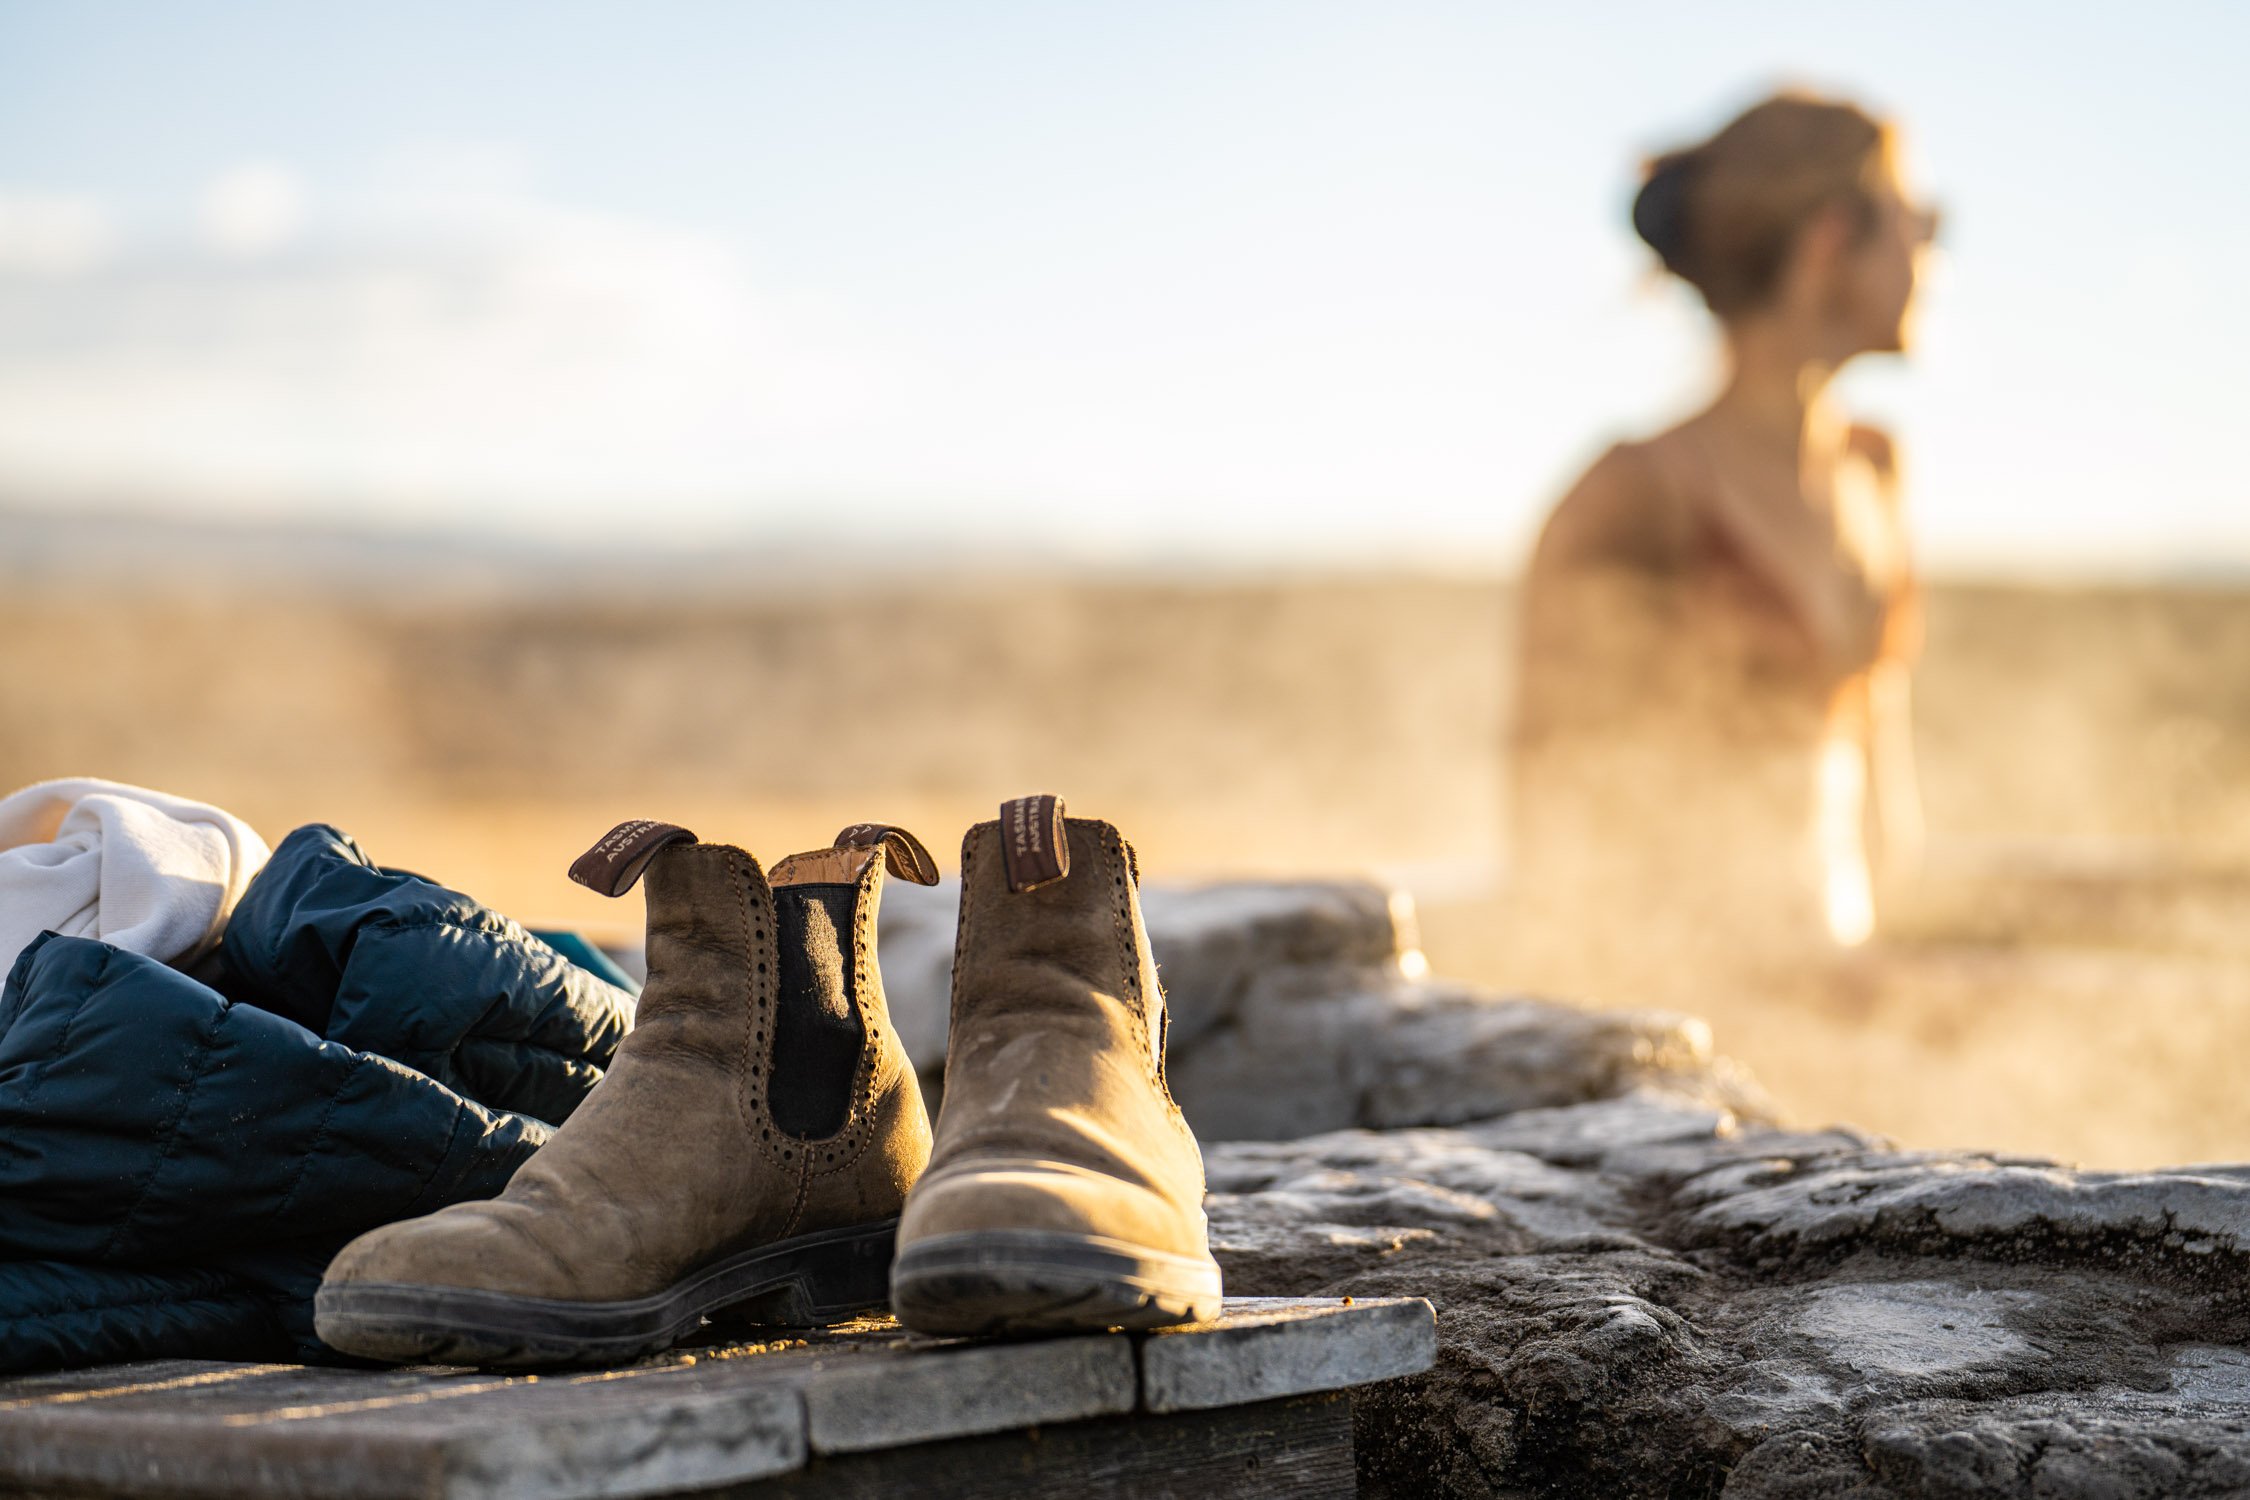
Creating Speculation Work for Blundstone Boots
I have been wanting to expand my lifestyle work to expand beyond the outdoor action sports field, so, I took a little bit of time and came up with a concept to shoot a speculation project for Blundstone Boots. This project was a good challenge for me as I had never photographed a shoe before. I have captured socks, but never shoes.
Image Specs
Location: Mammoth, California
Aperture: f/2.8
Shutter Speed: 1/1000
Focal Length: 90 mm
Story Behind the Image
I have been wanting to expand my lifestyle work to expand beyond the outdoor action sports field, so, I took a little bit of time and came up with a concept to shoot a speculation project for Blundstone Boots. This project was a good challenge for me as I had never photographed a shoe before. I have captured socks, but never shoes.
Where the idea came from:
Throughout a year, I take online courses to see what else is out there in the world. Lately, I have been on a CreativeLive kick and watched a class with Theron Humphrey. Towards the end of the class, he gives every student a challenge of conducting a shoe shoot. At first, I thought this sounded a bit boring, especially coming from action sports, but I gave in. Looking around at the shoes I had available to shoot, the only ones which did not have holes in them were my girlfriends Blundstone. I guess I might need to get some new shoes! With the Blundstone’s in mind, I started to look up concepts for the shoot. My thoughts landed on a shoot in Mammoth around the hot springs.
Setting Up the shoot:
This shoot took a little bit of planning, but nothing overwhelming. I was already heading to Mammoth, California for a different photo project, so I squeezed this spec shoot into the mix. The talent is my lovely girlfriend, Kristin Riegel, who already owns a pair of Blundstone boots. Grateful she was willing to help out on the shoot, I kinda didn’t tell her the full story of the spec shoot. What had I fibbed about? The early and cold morning.
I really wanted to show off the early morning light which hits the Mammoth area so beautifully. Also, I was hoping the outside temperature would be cold enough to get lots of steam billowing off the hot spring. Thankfully, I got both :-) Making Kristin some coffee, I was able to get her into the cold and snap a few images. This one has been my favorite thus far.
I would love to hear your feedback on the image and/or the post. Please drop a comment below or send me an email by CLICKING HERE
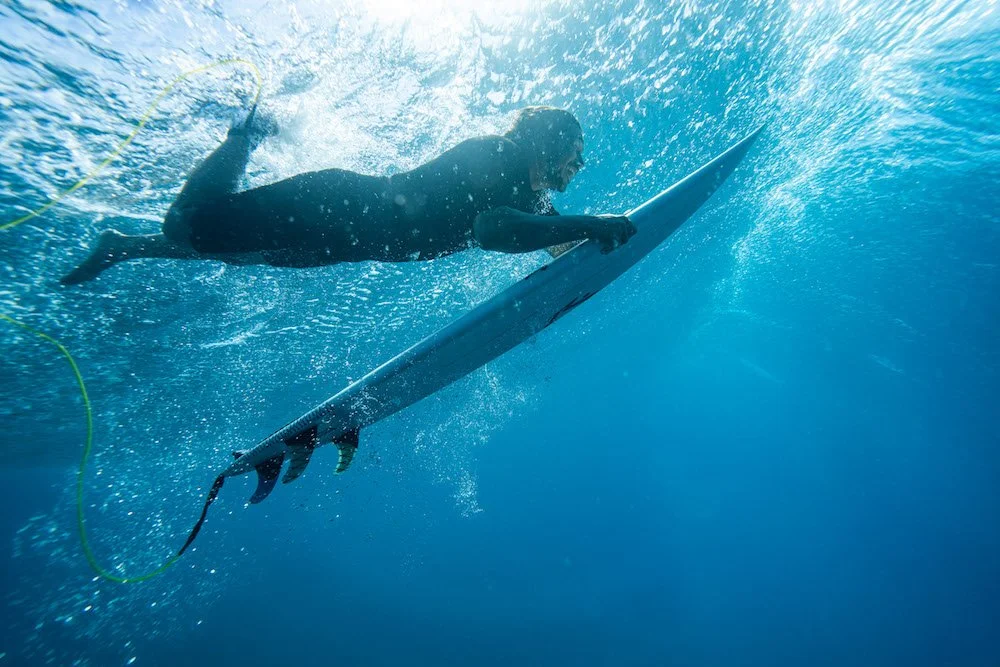
Surfing and Camping in Baja, Mexico
We headed to Baja Mexico for a three months of winter to surf and camp on every beach we could. Loading up the van with surfboards, snorkel gear, and sunscreen we did our best to explore on dirt roads, get sunburnt, and surf throughout the Baja Peninsula. Our goal was to avoid the crowds, but still catch good waves. I would be remiss to mention we missed a couple of swells, got cut up by the reef, and punctured a few boards, but the trip was a success. While the trips wasn’t all sunshine and rainbows, we had a splendid time in Baja chasing waves and sleeping on beaches.
We headed to Baja Mexico for a three months of winter to surf and camp on every beach we could. Loading up our self-converted van with surfboards, snorkel gear, and sunscreen we did our best to explore on dirt roads, get sunburnt, and surf throughout the Baja Peninsula. Our goal was to avoid the crowds, but still catch good waves. I would be remiss to mention we missed a couple of swells, got cut up by the reef, and punctured a few boards, but the trip was a success. While the trips wasn’t all sunshine and rainbows, we had a splendid time in Baja chasing waves and sleeping on beaches.
If you are in the planning stages of a road trip to Baja in your van, car, or truck, you have come to the right spot. This blog is designed to help you find beaches to camp on and surf breaks to shred while you road trip throughout the Baja Peninsula. So, read on to discover the best beaches for beach camping and surfing throughout Baja Mexico.
Pros:
Beautiful Scenery: Baja California offers stunning coastal views and rugged landscapes, providing a picturesque backdrop for both surfing and camping.
Epic Surf Spots: Baja is renowned for its world-class surf breaks, with consistent waves that cater to surfers of all skill levels.
Remote Adventure: Camping in Baja allows you to disconnect from the hustle and bustle of daily life and immerse yourself in nature.
Affordability: Compared to other popular surf destinations, Baja is often more budget-friendly, making it accessible to a wide range of surfers and campers.
Cultural Experience: You can explore local Mexican culture and cuisine, adding an enriching dimension to your trip.
Flexibility: Camping gives you the flexibility to move from one surf spot to another, following the best conditions and chasing the perfect wave.
Starry Nights: Baja's remote locations offer some of the best stargazing opportunities, with minimal light pollution.
Wildlife Encounters: You might have the chance to spot whales, dolphins, and other marine life while surfing or camping near the coast.
Cons:
Weather Variability: Baja's climate can be unpredictable, with potential extreme heat, cold nights, and occasional rain, which can affect camping comfort.
Limited Amenities: Campgrounds (if you stay at them) in Baja may have basic facilities or none at all, requiring you to be self-sufficient with food, water, and sanitation.
Language Barrier: If you don't speak Spanish, communication can be challenging in more remote areas.
Environmental Impact: Irresponsible camping practices can harm fragile ecosystems, so it's essential to follow Leave No Trace principles.
Road Conditions: The roads in Baja can be rough, with potholes and challenging terrain in some areas, requiring a sturdy vehicle for access.
Isolation: While the solitude can be a pro, it can also be a con if you encounter problems or emergencies without easy access to help.
Health and Safety: Baja may lack access to medical facilities, so you must be prepared for minor injuries or health issues.
Best Surf Beaches of Baja:
Surfing in Baja Mexico has changed over the last 10 years as the growing desire of vacationers to try surfing for the first time rises. This is neither good nor bad, it just means there are more surfers at popular surf spots. So, if you are a dedicated surfer looking for a secluded Baja surf experience, rent a car (or drive down), and sleep on the beaches that vacationers can’t get to from their hotel room. Additionally, come outside of the high season, running November until February, for the best surf in Baja is during the summer. However, if you are new to surfing in Baja, Mexico here are a few known locations that are fun to surf at:
PUNTA ABREOJOS
Swell Report for Punta Abreojos
Known for its epic right reef breaks and 200m-long (656ft) rides, Punta Abreojos is always on the top of every Baja surf veteran’s list. If you’re just starting out, there are also some easier beach breaks here. After your surf, make sure you stop by the local fishermen boats to buy the fresh catch of the day for your barbecue back at the campsite.
PLAYA LA PASTORA
Directions to Playa La Pastora
Swell Report for Playa La Pastora
Known as Cabo San Lucas’ premier big wave, La Pastora has been known to reach triple overhead. In other words, huge – and usually reserved for the pros. Those who do manage to take on this break, however, say it’s absolutely perfect. The best time to surf here is during mid-low tide. Expect both left and right breaks over a sandy bottom.
BAJA MALIBÚ
Known for constant beach breaks and some of the biggest waves along the peninsula, Baja Malibu beach is the first popular surfing hotspot once you cross the border. Located in Rosarito just 18 miles south of the US-Mexico border, Baja Malibu is a quick day trip from San Diego. When all the elements line up, the beach is known as a world-class surfing spot for intermediate and advanced surfers. Winter months are when the waves really shine with huge barrels thanks to northwest swells. Summer months can see decent, albeit inconsistent, beach breaks. Most surfers bypass Baja Malibu for the classic Baja spots like K38, La Fonda and San Miguel 30 minutes south meaning the water is never overly crowded and there is always room in the lineup.
CERRITOS BEACH
Swell Report for Cerritos Beach
About 20 minutes from the popular artist town of Todos Santos is Playa Los Cerritos. The long sandy beach butts up next to the rocky point of a cliff. The beach is known for its highly constant surf making every day of the year a great day to go surfing. Because of the consistency, surf schools gravitate towards this beach to teach newbie surfers how to catch a wave.
The beach caters to both beginners and experienced surfers depending on how big the swell is. Because of increasing tourism in the area the beach can get quite crowded. To escape the crowds, head away from the rocky point to a secluded area on the northside of the beach. Despite the crowded water, the area still maintains a laid-back, friendly vibe. The sunsets are a spectacular reason to stick around after a long day of surfing.
SCORPION BAY
In recent years the small fishing village of San Juanico, better known as Scorpion Bay, has transformed into a classic Baja surf spot. The long, sweeping beach has four point breaks that produce vastly different types of waves making the spot perfect for groups of surfers with varying degrees of skill levels. The first and second points are typically smaller waves making it exceptional for beginner surfers and longboarders. The third and fourth breaking points are steeper creating long barrels where surfers can ride waves for a minute or more.
When all the conditions are on point the bay can produce world-class waves, although Scorpion Bay is known for inconsistent surf conditions. In general, spring and summer offer the most consistent surf. If waves are not pumping, charter a fishing boat and go fishing with local fishermen. Because of its remote location, the water is never overly crowded. Nearby campsites and one hotel house overnight guests.
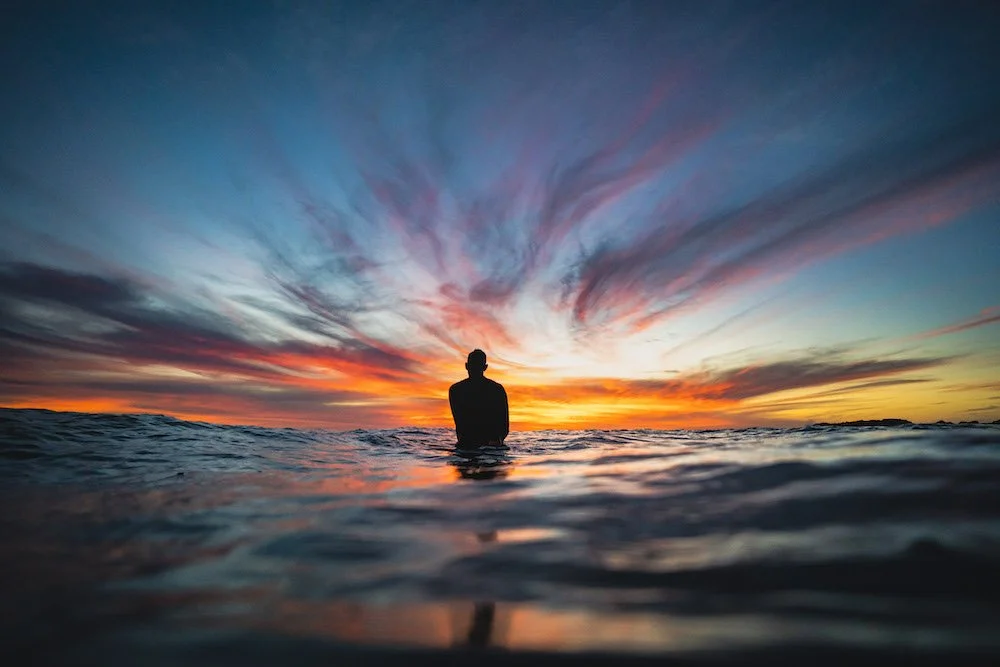
A surfer enjoying the light show Baja, Mexico often puts on for sunset. Photograph by Dalton Johnson
10 Tips for a Successful Surf Trip in Baja
Baja California, Mexico, is a mecca for surfers seeking epic waves, stunning scenery, and a laid-back atmosphere. Whether you're a seasoned pro or a beginner looking to catch your first wave, Baja has something to offer. To ensure a successful and memorable surf trip in this unique region, consider these ten tips:
1. Choose the Right Season:
Baja experiences different surf conditions throughout the year. The winter months, particularly from November to March, offer the most consistent swell and are ideal for more experienced surfers. However, if you're a beginner or prefer smaller waves, consider visiting during the spring or fall when conditions are milder.
>> Read this full article on the best season to head south and catch waves
2. Research the Best Surf Spots:
Baja boasts a variety of surf breaks, each with its own unique character. Research the surf spots that align with your skill level and preferences. Some renowned surf spots in Baja include Scorpion Bay, K-38, Cerritos Beach, and San Miguel.
>> Read this blog on the best surf spots in Baja Norte and Sur
3. Bring the Right Gear:
Ensure you have the appropriate surfboard and wetsuit for the conditions you'll encounter. Baja waters can be chilly, especially in the winter, so a good-quality wetsuit is essential. If you don't want to travel with your gear, you can often rent boards and wetsuits locally.
Shortboard, ideally something sustainably built like a Timber Surfboard, for the daily waves
A Big Wave board (we can’t say “6un” on this page LOL) if you plan on hitting Isla Todos Santos or K-38
Drybag to carry all of your stuff back and forth to the beach is nice, I like the Chums roll-top bag
4. Secure Accommodations:
Popular surf destinations in Baja can get crowded during peak seasons, so it's wise to book accommodations in advance. You can choose from beachfront surf camps, budget-friendly hostels, or even camping sites, depending on your preferences and budget. Typically Airbnb is a great place to find accommodations while on the road, but also remember you can camp on the beaches in Mexico.
5. Plan for Road Tripping:
Baja's surf breaks are often spread out, so you may need to embark on a road trip to access different spots. Ensure your vehicle is well-maintained and suitable for potentially rough terrain. Carry extra water, fuel, and a basic tool kit for emergencies.
>> Double check yourself with this Baja road trip blog
6. Respect Local Surf Culture:
Embrace the local surf culture and show respect for fellow surfers. Wait your turn, follow the lineup etiquette, and be mindful of local customs. Baja's surf community is welcoming, but respecting local norms is crucial.
7. Be Eco-Friendly:
Baja's pristine natural environment is part of its charm. Practice Leave No Trace principles by cleaning up after yourself and disposing of trash responsibly. Be conscious of your environmental impact and protect the beauty of the region.
8. Stay Safe:
Prioritize safety during your surf trip. Always surf within your skill level and be aware of your surroundings. Check surf reports and weather forecasts regularly, and familiarize yourself with local beach conditions and potential hazards.
9. Learn Some Basic Spanish:
While you can get by with English in tourist areas, knowing some basic Spanish phrases can enhance your experience and help you communicate with locals. It's a sign of respect and can lead to more meaningful interactions.
10. Embrace the Adventure:
Baja is more than just surfing; it's an adventure. Be open to exploring beyond the surf breaks. Discover local cuisine, hike in the desert, or immerse yourself in the vibrant culture. Flexibility and an adventurous spirit will make your surf trip even more memorable.
A surf trip to Baja can be a life-changing experience, filled with incredible waves, breathtaking scenery, and the chance to connect with fellow surfers and locals. By following these ten tips, you can ensure a successful and rewarding surf adventure in Baja California. Whether you're riding the waves or soaking in the sun on the beach, Baja's surf culture and natural beauty are sure to leave a lasting impression.


Best Beach Camping for Surfing in Baja Mexico:
While on our three month saga of van life in Baja, Mexico, we slept on every surf beach we could find. Yup, that is right, you can sleep on the beach and wake up to magnificent waves everyday for free. Well, not always for free, as some spots you need to pay, but most are free. One of my favorite parts about traveling in Baja for surfing is the fact that you can sleep on the beaches. Camping is allowed almost everywhere. All you need to do is ask around and you’ll learn quickly if it is okay.
SAN JUANICO
San Juanico is a small fishing village with a large surfing problem. Myth and legends are told of a mile-long ride from third point to first. Some have even gone on and said the link-up has been done from fourth peak… insane! The best part of this sleepy town, other than the surfing, is the camping. You get to park on the cliffs and overlook the breaks you want to surf. The catch? Well, if you want to sleep around the main points, you’ll have to pay… I think $2/day to the cantina. If you are looking for free beach camping, just head down the way, not but a couple of miles on a friendly dirt road. If this isn’t your jam, then head down to the marina and take the beach for as far as you want. I’ve made it 20 miles!
TODOS SANTOS area
Todos Santos is a bustling town, but just outside of the town proper, there are several smaller oasis. In this grouping of places is Cerritos Beach, Tuna Beach, Turtle Beach, the Green Room, and so much more! Some of the best times I have had in the van has been north of Todos Santos. If you drive the beach road north, you will leave the town and end up crossing farmer’s land. One year, I wanted to search for waves, so I headed north for as far as I could, only to skinny dip in the ocean and lay in the sand naked for a few days. There is literally nothing out there, so make sure to bring some gas and water!
CONCEPTION BAY
Conception Bay is very large with hidden gems throughout, so make sure you keep an eye out for an arroyo that could take you to the water. Over the past few years, a few beach camping spots have become “developed” and require payment. This has fluctuated by the cost is usually in the $5-10/night range. For that, you get a toilet and a guard. If you are not keen on paying to sleep on a beach, keep driving, there are tons of beaches are free to camp directly on the beach.
EAST CAPE ROAD
The East Cape Road is where I learned how to dive. My Dad took me out there when I was roughly 12 years old, plopped me in the front seat of his Ford 250, and asked if I could reach the pedals. The East Cape is littered with beach camping and its development has been slow. With that said, several ex-pat communities have popped up and on a recent trip up this road, I noticed several UTVs in use. The roads out here are dirt, often washboarded out, but well worth the tour. I would not recommend an RV take this road, but my 2-wheel drive van made it no problem—we only got stuck in the sand once.
Playing connect four while camping on a beach in Baja Mexico. Photograph by Dalton Johnson
10 Tips for a successful time camping in Baja
Camping in Baja California is an adventure like no other. With its rugged landscapes, stunning coastlines, and world-class surf breaks, Baja offers a unique opportunity to connect with nature and enjoy outdoor activities. However, to ensure a successful and enjoyable camping experience in this beautiful region, it's essential to be well-prepared and informed. Here are ten tips to help you make the most of your camping adventure in Baja:
1. Research and Plan Ahead:
Before embarking on your Baja camping trip, do thorough research. Familiarize yourself with the campgrounds, surf spots, and the specific area you plan to visit. Make a rough itinerary to have a general idea of where you'll be each day, but also be flexible to adapt to changing conditions.
2. Choose the Right Season:
Baja experiences extreme weather variations, so it's crucial to choose the right season for your camping adventure. Winter is ideal for surfing, while summer can be scorching. Spring and fall offer a balance of pleasant weather.
3. Bring Adequate Supplies:
Since some camping areas in Baja may lack amenities, it's essential to be self-sufficient. Bring enough food, water, and camping gear, including a reliable tent, sleeping bags, and cooking equipment. Don't forget essential items like a first aid kit, insect repellent, and sunscreen.
4. Secure Accommodations in Advance:
While Baja is known for its remote camping opportunities, it's wise to secure accommodations in advance, especially if you plan to visit popular surf spots or during peak tourist seasons. Some areas have established campgrounds, while others offer more primitive camping options.
5. Check Your Vehicle:
Ensure your vehicle is in excellent working condition. Baja's roads can be challenging, so a reliable 4x4 or off-road vehicle is ideal. Check tire pressure, engine fluids, and carry spare parts and tools for emergency repairs.
6. Learn Basic Spanish Phrases:
While English-speaking travelers can get by in many tourist areas, learning some basic Spanish phrases can be immensely helpful, especially in remote locations where locals may not speak English.
7. Respect Local Culture and Environment:
Show respect for the local culture and environment. Follow Leave No Trace principles, pick up your trash, and be mindful of the delicate ecosystems you encounter. Engage with locals respectfully and learn about their customs and traditions.
8. Stay Informed about Safety:
Baja is generally safe for travelers, but it's essential to stay informed about any safety concerns or updates, such as weather conditions and road closures. Keep emergency contact numbers handy and have a backup communication method like a satellite phone.
9. Be Weather-Wise:
Baja's weather can be unpredictable. Bring clothing for various conditions, including lightweight clothing for hot days, warm layers for chilly nights, and rain gear just in case. Stay informed about weather forecasts to plan your activities accordingly.
10. Embrace the Adventure:
Baja is about adventure and the great outdoors. Embrace the unexpected, whether it's encountering unique wildlife, meeting fellow travelers, or discovering hidden gems off the beaten path. Flexibility and a sense of adventure will enhance your camping experience.
Camping in Baja is an opportunity to disconnect from the digital world, reconnect with nature, and enjoy the thrill of surfing some of the best waves in the world. By following these tips and being well-prepared, you can ensure a successful and memorable camping experience in this captivating region. Whether you're a seasoned camper or a first-time adventurer, Baja has something special to offer, and your camping trip is sure to be an unforgettable journey of discovery.
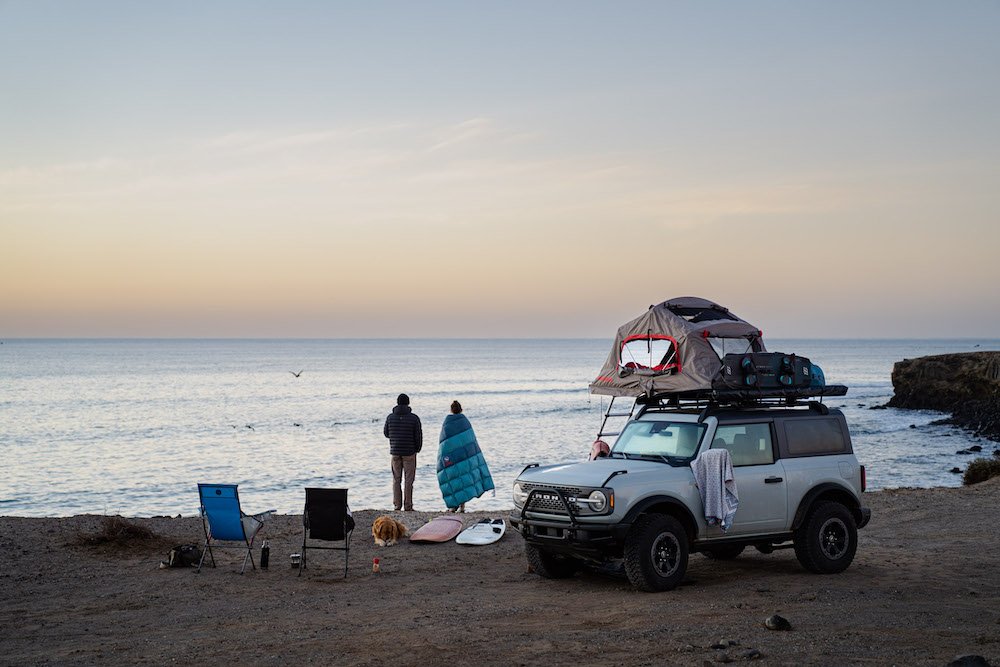
Beach camping in San Juanico, a popular surf break in Baja Norte. Photograph by Dalton Johnson
I hope this blog has helped you design an epic road trip to Baja Mexico. From white sand beaches to camp on and to surf breaks with clear water your road trip throughout the Baja Peninsula is not far away. If this blog helped you in any way, please give back by dropping a comment below or sharing this blog on your social media. Have a safe trip!
Discover more of baja Mexico


Miracles During My Second Seasonal Job
While in Yosemite National Park climbing and sleeping in the boulders, a couple of things happened. First, I committed to my second seasonal job as an outdoor educator. Second, I met some famous climbers. Both of which pulled me in opposite directions.
While in Yosemite National Park climbing and sleeping in the boulders, a couple of things happened. First, I committed to my second seasonal job as an outdoor educator. Second, I met some famous climbers. Both of which pulled me in opposite directions.
The seasonal job was on the east coast in Baltimore and the famous climbers, Conrad Anchor and Graham Zimmerman, offered me a position at a diner just outside of Yosemite. At the time, all I cared about was climbing and seeing new things, so I wanted to take the diner position, but I also had a gut feeling that if I committed to the diner, I would have to stop climb and work all of the time. So, I stayed committed and headed to the East Coast.
Arriving at the Baltimore Outward Bound school with my bicycle, climbing and backpacking gear, and my Sony a6000 with a kit lens, I had no idea what I was getting myself into. Heck, all I knew was that I wanted to see new places and the east coast was new. Additionally, I knew that if I committed and finished this apprenticeship, I would have enough money where I could ride my bicycle home to California. So, that was my goal.
Yoshie sharing the ABC’s of backpacking with a new group of students. Photograph by Dalton Johnson
Unloading my gear, I quickly found a few awesome places in this converted mansion we would be living in for the next three months. There was a bouldering room and a coupala (the name given to a watch tower kind of place at the top of the mansion) which would become my home. Now, it was time to meet the people.
I’m not sure why, or how, but I have always felt like an outcast. My mom has playfully called me “the king of misfits” as I am kinda like a stray cat who brings home the weirdos. And, ironically, I found the people at Outward Bound to speak a similar language. We loved the outdoors, getting dirty, and went to the beat of our own drum.
The kind faces met everyone with smiles. It was awesome, but where did I fit in? Of this, I was unsure. I am always unsure. For the most part, I am an overconfident human that is down for almost anything. Well, not anything, but most things. As the group of apprentices got to know each other, we found common threads. However, everyone kinda filled a niche of their own. Mine was using a camera and helping the Marketing Director, Ben Worden.
We had three months to learn the ropes of the Baltimore Outward Bound way of things. In a somewhat good metaphor for life, we were challenged to try everything at the school. We taught backpacking courses, rock climbing days, school group day lessons, worked in logistics, packed food and cleaned gear, we did it all. Then, a turning point came about for myself. I found myself wandering into Ben’s office just to talk, to see what he was working on, or share a creative idea.
Ben was always kind and encouraging, responding to my ideas like, “Heck yeah, I love it! You should try it out. Do you want to barrow one of our cameras?” While swiveling around in his chair to find the right camera and lens for the job. It was in that moment when something began to click for me. I actually enjoyed this. I was going out and taking photographs or recording video for fun. I officially had a hobby.
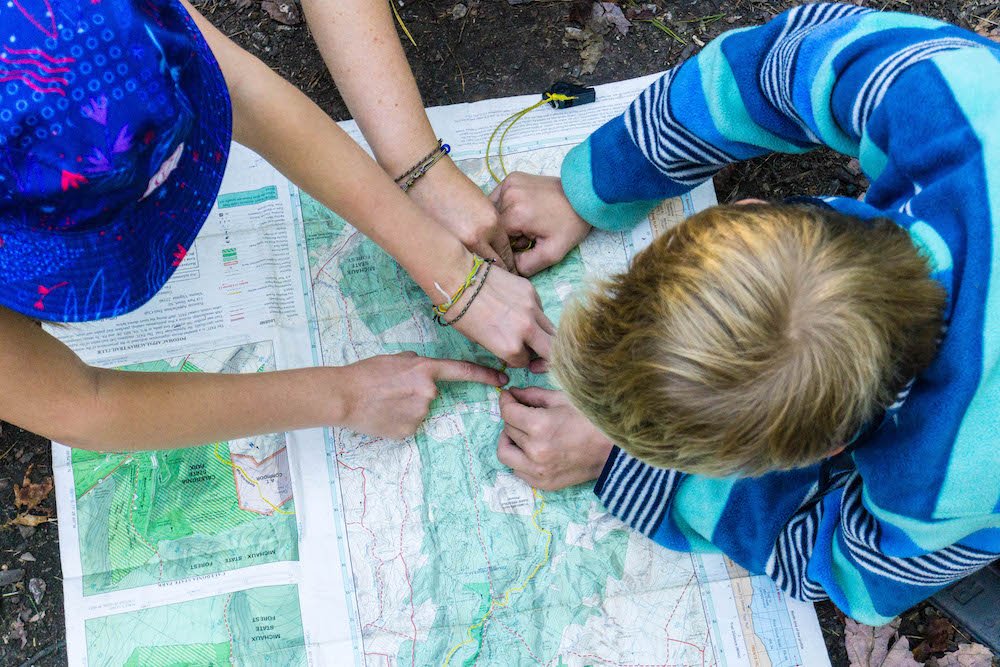
Two students refining their map reading skills while on a backpacking course with Outward Bound Baltimore. Photograph by Dalton Johnson
Growing up and throughout college, I was consumed by sports, so the idea of a hobby never existed. I forwent friendships so I could focus on getting out of my childhood town. Not because it was a terrible place or anything, but because I wanted to see more. I wanted to see the world. My sports dreams were over and I now had a hobby. So, I did what any washed-up athlete does when they find something new, get competitive with themselves about it.
Everyday, I went out and photographed. I did everything I could to be in a position to snap a photograph. My knowledge didn’t exist, so I just snapped away and review later. There wasn’t a goal to achieve, just a way to express myself. I wanted to tell a story or show an emotion. Heck, I just loved showing Ben my favorite image from the day and him smiling saying, “Dude! That is awesome!”
There came a point that I was spending so much time in Ben’s office that a desk was somehow put into his office for me to sit at and edit. I am not totally sure how this came to be, but I would just sit there and edit images everyday. Bouncing ideas off Ben and then going out with a camera to try to capture this idea. But, it didn’t stop there. Video came into the picture as well. This was another ball game that was challenging. There were so many moving parts, I was just unsure how to move forward. However, Ben was there to help me.
I told him that I wanted to try to do a video project, so he gave me a challenge to create a video about the life of an apprentice at Outward Bound. Without thinking twice, I accepted. For about a week, I chased down a variety of people in hopes of making the this video. Interviews, b-roll, a-roll (is that thing?), I really had no idea what I was doing. What I did know is that I had fun doing it. So, I kept pushing and here was the result:
Now, I know this isn’t very good now, but at the time, I was impressed! For my first ever video that I strung together, I was happy with how it came out. Additionally, Ben was as well. He helped get all of the branding and name plates for the video, I had no idea how to do that.
As my time as an apprentice came to a close, the time for me to begin biking back to California was quickly approaching. For that, I had no plan, which I was happy about. There is something about the unknown which appeals to me. Discovering along the way is better than planning it out and just following the road map you have made for yourself. I guess I might do this to protect myself from not trying something, for I knew what I was committing too, I most likely would not do it. However, setting a destination and slowing working your way towards it is romantic in the sense of self-discovery. I start feeling instead of thinking.
Just a week left until I would leave the east coast, Ben asked me, “Would you be interested in coming back next year to be a photographer?”
I thought for a second and naively contemplated, “Do people get paid to take photographs?”
“Yeah! You would get paid about 10x what you were paid for this apprenticeship.” Ben explained.
“Really?” I asked in disbelief.
“Well, not 10x but definitely double to triple.”
“I’m in!”
“Okay, you’ll have to set up a business over the winter. I’ll send you the paperwork you’ll need to do. After that, we can set a date and we will fly you back to the east coast for a project.”
“Awesome! Thank You!” I couldn’t believe this was happening to me.

How to Make Money as a Freelance Content Creator | Part 1 of 5
Converting your content into a money making machine provides you freedom. As more money comes in, you can let go of other responsibilities and focus on your creative work that fills your cup. Additionally, getting paid for your work feels great, motivates you to continue, and provides a not-so-healthy validation that your work is good. So, how do you make money as a content creator?
How to Make Money as a Content Creator
Converting your content into a money making machine provides you freedom. As more money comes in, you can let go of other responsibilities and focus on your creative work that fills your cup. Additionally, getting paid for your work feels great, motivates you to continue, and provides a not-so-healthy validation that your work is good. So, how do you make money as a content creator?
Active Income Methods
Active Income means you are actively pursuing and creating the work you are hoping to sell. This work often takes up the bulk of your time and creative energy. At first, this will be how you build your archive of content.
Create Branded Content
Copywriting
Video Creation
Project Sponsorship
Building a social media presence
Repurposing your archived content into new content
Passive Income Methods
Passive Income means you are passively making money from work you previously created. To insure this income persists, you do need to maintain the streams of income, via marketing, but minimal work needs to be done.
Licensing Content
Ad Revenue
Selling Prints
Selling Books or E-Books
Selling Education Courses
Affiliate Marketing
Influencing*
*Influencing could go in both methods, but I am putting influencing under passive income with the pretense you are leveraging your audience and repurposing content from your archive that fits the company you are influencing for.

A Beach Walk To Review Tamron 50-400 Zoom Lens
On a cloudy day along the Northern California coast, I went for a walk to try out my new lens; the Tamron 50-400mm. Now, I don't know much about the lens other than I like the range, so I clicked it onto my Sony camera body and went for a walk to see what I could find.
Updated: Sept. 20, 2024
In case you didn’t watch the video, here are my thought about the Tamron 50-400mm Sony e-mount lens. For the first time in way to long, I took a Sunday off. Now, before you all roast me for being a workaholic, I get it and I am working on it. So, what did I do on my day off? I went surfing in the morning for a couple of hours near Davenport, CA.
How were the waves? They were fun! Roughly shoulder high and consistent. A bit shifty with the winds, but I caught a few fun ones. Thank you for asking.
After a wonderful time resetting my mind in the water, I made some tea and headed out on a beach walk to snap some photos for fun. Along the way, I thought making a youtube video would be fun as well, so I made some tea, unpacked my new Tamron 50-400mm, and went for a walk.
Watch the video above to experience the outing for yourself!
A nice leading line of a trail leading to the ocean while on a beach walk with a new lens. Photograph by Dalton Johnson
Tamron 50-400mm Lens Specs
On this beach walk along a remote beach in Northern California, I tried out the Tamron 50-400mm zoom lens for sony e-mount. Yup, that is a mouthful to write. Anyways, this ultra-zoom lens has a ton of impressive details to share:
Weight: 40.7 oz
Length: 7.2 inches
Exposure: F4.5-6.3
8x zoom ratio
Vibration Compensation
The list of awesome things go on and on, but I must admit, at a certain point I just can’t comprehend what all of these things are. For example, the VXD (voice-coil extreme-torque drive) is awesome, but I have no idea what that is. Luckily, we don’t have to know. All we need to know is that this Tamron 50-400mm lens is packed with so many goodies, making it easy to use!


While the day was filled with clouds, taking this new lens our for a walk along the beaches of California was a delight. As you can see from the photos, the weather wasn’t the best, but I still had a great time shooting some images of birds and playing with some black and white images. Overall, I enjoyed my time with this Tamron 50-400m lens and plan on keeping it in my quiver of lenses to use when I need a wide range.

A Kayaking Road Trip Down Highway 395
With 72 hours of “free-time”, so we headed out on a kayaking adventure. Starting our kayaking outing at Emerald Bay in Lake Tahoe, CA for sunrise, it ended in a breathtaking sunset over the Emerald Range. As the road trip continued, our bodies grew tired, the milky way was overhead, and we cuddled in the van.
With 72 hours of “free-time”, so we headed out on a kayaking adventure
Starting our kayaking outing at Emerald Bay in Lake Tahoe, CA for sunrise, it ended in a breathtaking sunset over the Emerald Range
Our bodies were tired, the milky way was overhead, and we were cuddling in the van.
We celebrated our final morning with an early morning paddle on Convict Lake

A Year of Creating Content with Big Agnes
Thank you Big Agnes for the opportunity to create with you all. I have enjoyed the process of learning your style and doing my best to contribute to you all!
There are those full circle stories that are always kinda nice to read from time to time, this is one of them.
Throwback to 2016, I really wanted to get my work in-front of the Big Agnes marketing team. Having wrapped up a two month bike-packing trip around the South Island of New Zealand, with a Big Agnes Tent, I thought I had taken some banger shots.
At the time, I was only starting a photography career and had no idea how to share my work with a potential client. Actually, I had no idea how to connect with a brand at all. I was so green! However, I had these blinders on that told me I was good enough to pursue photography and that is what I did.
Fast forward to 2020. I was now in a place where I was getting jobs here and there for photography. Most of my income came from my work behind the camera, but then again I was a dirtbag, so I didn’t need much. While in the Tetons on a perpetual road trip for climbing, I had gotten into the habit of guessing emails. Well, Big Agnes was still on my radar and I guessed a couple of emails correctly, the same day. Turns out, I had guessed almost everyone in the marketing departments email and they all received the same email.
I made an impression!
After a few days, I received and email (that I wish I still had) which went a little something like:
Dalton,
Thank you for your email, looks like the whole team got it. We don’t know what you are looking for, but it looks like you are a photographer and an athlete. Are you trying to submit images, or are you asking for a sponsorship?
Best,
BA Marketing
I was a blow away, I didn’t know what to say and felt a bit silly for sending everyone the same message. My goal was to share images, so that is what I ask for. They were kind, I think they laughed at me in their little office (at a later date I had a video call with a marketing team member, everyone sits next to each other).
After a couple of months and a few submissions later, the Big Agnes team and I clicked. What I was shooting was perfect for them and I enjoyed the process of shooting spec work keeping them in the back of my mind.
Fast Forward to 2022. I have done a good amount of work with Big Agnes. Below is just a sample of the work that has come out this year and I know there is much much more on the horizon :-)
Brand Identity Videos
Video Ads
Website Headers
Emails
Catalog
Blogs I have Written for Big Agnes
Go for the Slowest Known Time
A funny one about moving slow on purpose:
https://www.bigagnes.com/blogs/sleep-in-the-dirt/make-it-an-adventure-and-go-for-the-skt
Five Jaw-Dropping Campsites of HWY 395
An SEO based blog focused on camping spots along HWY 395:
https://www.bigagnes.com/blogs/sleep-in-the-dirt/five-jaw-dropping-camping-spots-along-highway-395
How to Pack for Backpacking
An educational blog designed to education and sell Big Agnes’s newly released backpacks:
https://www.bigagnes.com/blogs/sleep-in-the-dirt/how-to-pack-for-backpacking
5 Easy Steps to Make Ceviche While Beach Camping
A how to guide for making Ceviche while on a Baja Road trip:
Trust Your Friends’ Outlandish Voicemail Ideas
A really fun and entertaining recap to adventures around the western United States:
https://www.bigagnes.com/blogs/sleep-in-the-dirt/trust-your-friends-outlandish-voicemail-ideas
Thank You Big Agnes
Thank you Big Agnes for the opportunity to create with you all. I have enjoyed the process of learning your style and doing my best to contribute to you all!

How to Kayak Portage Lake to Portage Glacier in Alaska
As we began planning our road trip to Alaska’s Kenai Peninsula, one of my bucket list ideas was to rent a couple of kayaks, paddles, and PFDs so we could see a glacier at its source. While searching the internet for ideas, I stumbled upon a couple photos of people kayaking to a glacier, I was sold. Portage Glacier was added to the ideas list.
Kayaking to Portage Glacier is one of the most memorable adventures I have ever been on. Why? Well, this challenging kayak trip takes a full day as you are often paddling into a headwind, in both directions, you get to kayak among icebergs, and you can reach the glacier all in your kayak. This trip is not for the faint of heart, nor a person who has never kayaked before!
To begin this kayaking trip, you will start at the visitors center. From here the paddle is roughly 4 miles, one way. Along the way you will want to stop often for waterfalls and icebergs. The iceberg ice is very tasty! As you paddle your way towards the glacier, the chilly wind will pick up, so make sure to bring a jacket. For myself, rounding the corner and seeing the Portage Glacier from the water for the first time was a moment that will be with me forever. I was awe-struck.
Read on to discover a first person account of kayak to portage glacier, the rules on the portage lake, who can make this paddle, and so much more.
Pros
Scenic Beauty: Kayaking to Portage Glacier offers breathtaking views of the glacier, surrounding mountains, and pristine wilderness, providing a unique and intimate experience with nature.
Adventure: It's an adventurous way to explore the glacier and its surroundings, making it an exciting and memorable journey.
Wildlife Viewing: You may have the opportunity to spot wildlife such as seals, otters, eagles, and other marine and bird species along the way.
Physical Activity: Kayaking is a great form of exercise, providing a full-body workout as you paddle through the glacial waters.
Cons
Weather Challenges: Alaska's weather can be unpredictable and extreme, which may lead to challenging kayaking conditions, including strong winds, rain, or even snow, depending on the time of year.
Safety Concerns: Glacier-fed lakes can have rapidly changing water conditions, including floating icebergs, which can pose safety risks. Proper gear and training are essential.
Limited Access: Access to Portage Glacier by kayak may be limited during certain times of the year due to ice conditions or wildlife closures, restricting when you can visit.
What is needed to Kayak to Portage Glacier?
The gear and preparations required for kayaking to Portage Glacier are a crucial aspect of ensuring a safe and enjoyable adventure in the Alaskan wilderness. While the basic equipment includes a kayak, paddle, and personal flotation device (PFD), there are additional considerations to keep in mind:
Appropriate Clothing: Given the extreme and often unpredictable weather conditions in Alaska, dressing in layers is essential. Start with a moisture-wicking base layer to keep sweat away from your body. Over this, wear an insulating layer to trap warmth, such as fleece or down. A waterproof and windproof outer layer, like a drysuit or a sturdy waterproof jacket and pants, is vital to protect against cold water and rain. Don't forget to wear insulating gloves and a hat to keep extremities warm.
Footwear: Neoprene or waterproof kayaking boots are recommended to keep your feet dry and warm. These boots also provide good grip, which is important when entering and exiting your kayak.
Paddling Gloves: Gloves designed for kayaking can protect your hands from blisters and cold water while ensuring a firm grip on the paddle.
Personal Flotation Device (PFD): Always wear a Coast Guard-approved PFD. It not only keeps you afloat but also provides insulation in cold water.
Safety Gear: Carry essential safety equipment, including a whistle, a signaling device, and a marine radio for communication in case of emergencies. A dry bag is useful for keeping these items dry.
Food and Water: Pack plenty of water to stay hydrated throughout your journey. Bring energy-rich snacks or a small meal to refuel, as kayaking to Portage Glacier can be physically demanding.
Navigation Tools: Bring a waterproof map, a compass, and a GPS device to help with navigation. Glacier-fed lakes can sometimes have low visibility due to fog or changing weather conditions.
Sturdy Kayak: Ensure your kayak is designed for open water and can handle rough conditions, including 2-3 foot wind swells. It should be stable and equipped with flotation devices in case of capsizing.
Dry Bags: Use dry bags to protect sensitive equipment and personal items from getting wet, especially electronics and spare clothing.
Emergency Kit: As a precaution, carry a small emergency kit that includes first-aid supplies, fire-starting materials, and a multi-tool.
Weather Forecast: Check the weather forecast before heading out and be prepared to change your plans if conditions are unfavorable. Alaska's weather can be highly variable, and safety should always be a top priority.
Experience and Knowledge: Prior experience in kayaking and knowledge of basic water safety and rescue techniques are invaluable. Consider taking a kayaking course or hiring a local guide for your trip.
Kayaking to Portage Glacier is a remarkable adventure, but it requires thorough planning, appropriate gear, and respect for the challenging Alaskan environment. Always prioritize safety and be prepared for changing conditions while enjoying the stunning beauty of this natural wonder.
Who Can kayak to Portage Glacier?
Kayaking to Portage Glacier is an exhilarating and scenic adventure, but it's essential to understand that it's not suitable for everyone. The suitability of this journey largely depends on your experience level, physical fitness, and preparedness for the challenging conditions that can arise in the Alaskan wilderness. Here's a more detailed breakdown of who can and should consider kayaking to Portage Glacier:
Intermediate to Advanced Kayakers: This expedition is best suited for intermediate to advanced flat water kayakers. You should have prior experience in kayaking and feel confident in your ability to paddle and control a kayak in calm water conditions. Familiarity with basic kayaking techniques is crucial for safety and enjoyment.
Physical Fitness: Kayaking to Portage Glacier requires a reasonable level of physical fitness. Paddling across Portage Lake, especially in the face of unexpected weather changes, can be physically demanding. It's important to be prepared for a full day of paddling and be able to handle the physical rigors of the journey.
Cold Water Endurance: The water in Portage Lake is extremely cold, even during the warmer months. If you're not accustomed to cold-water kayaking, it's essential to understand the risks and have appropriate gear, such as a drysuit, to protect against hypothermia.
Weather Resilience: The weather in Alaska, including the Portage Glacier area, is notoriously unpredictable. Conditions can change rapidly, with wind and rain being common challenges. Kayakers must be mentally prepared to adapt to changing weather and make safe decisions, even if it means altering or canceling their plans.
Preparation: Adequate preparation is key to a successful kayak trip to Portage Glacier. This includes having the right gear, such as waterproof clothing, a sturdy kayak, safety equipment, and navigation tools. It's also crucial to check weather forecasts, have a backup plan, and inform someone of your itinerary and expected return time.
Safety Awareness: Understanding safety protocols and having the ability to handle emergency situations on the water is essential. This includes knowing how to handle capsizing, navigate in low visibility conditions, and communicate with others in your group.
Experience with Glacier Conditions: Glacier-fed lakes like Portage can have unique challenges, such as floating icebergs and changing water conditions. Prior experience or guidance from experienced local kayakers is valuable in navigating these conditions safely.
Respect for the Environment: Kayakers should have a deep respect for the pristine wilderness of the area and commit to leaving no trace. This includes following Leave No Trace principles and respecting any wildlife closures or regulations.
Kayaking to Portage Glacier in Alaska is an extraordinary adventure, but it's not a trip for beginners or those unprepared for the challenges that the Alaskan wilderness can present. It's crucial to assess your own skills and readiness, seek guidance or training if needed, and prioritize safety at all times while enjoying this stunning natural wonder.
Rules and Regulations for Kayaking to Portage Glacier:
When embarking on a kayaking adventure to Portage Glacier in Alaska, it is essential to be aware of and follow specific rules and regulations to ensure safety and protect the environment. Here are the key rules and guidelines:
Launch Location: People are permitted to paddle non-motorized craft, such as kayaks, from a designated parking area on the north side of Portage Lake. This area is typically accessible after passing through the first tunnel on the road to the Anton Anderson Memorial Tunnel to Whittier.
Stay on the North Side: Kayakers are required to stay on the north side of Portage Lake. This restriction is in place to preserve the natural environment and ensure safety, as the south side and the immediate vicinity of the glacier can be dangerous and are off-limits to watercraft.
Landing Area: Kayakers can land their crafts at the beach located at the base of Portage Pass. This designated landing area allows paddlers to take a break, explore the shoreline, or simply enjoy the stunning views of the glacier from a safe distance.
Sudden Winds: Portage Lake is notorious for experiencing sudden and unpredictable wind patterns that can lead to treacherous waves. Kayakers should exercise extreme caution when these winds occur and be prepared to adapt their plans or seek shelter if necessary. Monitoring weather forecasts before and during the trip is highly advisable.
Cold Water Awareness: It's essential to understand that the water in Portage Lake is exceptionally cold, even during warmer seasons. Paddlers must be prepared for the frigid water temperature by wearing appropriate clothing, including drysuits or wetsuits, to mitigate the risk of hypothermia in case of immersion.
Leave No Trace: Practicing Leave No Trace principles is crucial to protect the fragile wilderness surrounding Portage Glacier. Kayakers should pack out all trash and minimize their impact on the environment. Respect any wildlife closures or regulations in place.
Wildlife Viewing Guidelines: If you encounter wildlife during your kayaking journey, maintain a safe and respectful distance. Binoculars or zoom lenses for cameras are recommended for close-up wildlife viewing to avoid disturbing the animals.
Emergency Preparedness: Always carry essential safety equipment, including a first-aid kit, signaling devices, a marine radio, and a map and compass or GPS for navigation. Be prepared for emergency situations and know how to call for assistance if needed.
Trip Planning: Before setting out, thoroughly plan your trip, including a detailed itinerary and estimated return time. Inform a responsible person or family member about your plans and expected return, and establish a system for checking in periodically.
By adhering to these rules and regulations, kayakers can enjoy a safe and responsible journey to Portage Glacier while preserving the natural beauty of this Alaskan wilderness destination. Always prioritize safety, environmental stewardship, and respect for the unique challenges and conditions that this remote area presents.

What kayaking to Portage Glacier is Like:
THREE… TWO… ONE…
“Whooo!” Kristin shouts as she glides onto Portage Lake in Alaska in her fire red kayak.
We take in the view just before doing the best kayaking in Alaska. Photograph by Dalton Johnson.
“We’re going to a glacier… we’re going to a glacier…” I repeat as we begin our paddle towards Portage Glacier, which pours into this massive lake.
As we began planning our road trip to Alaska’s Kenai Peninsula, one of my bucket list ideas was to rent a couple of kayaks, paddles, and PFDs so we could see a glacier at its source. While searching the internet for ideas, I stumbled upon a couple photos of people kayaking to a glacier, I was sold. Portage Glacier was added to the ideas list.
While both of us have paddling experience in rivers, we had never paddled on a lake before, so this was going to be a new experience. As we collected our boats, the outfitter questioned me about our gear—water… check… sunscreen… check… dry bag… check— then went on to share a horror story of a group of renters who got caught in a wind swell, capsizing a kayak, and needing Search and Rescue to save them. I am not sure if this was folklore, or the truth, regardless, the outfitter’s story put me on guard.
“Is that an ICEBERG?” Kristin’s excitement made her voice squeak.
“No way! Check this thing out!” I remarked as I paddled towards the first iceberg I had ever seen.
Keeping our distance for a short while, we cautiously crept in. Unsure where the line of safety was, we observed together. But, only for a short while. Kristin’s confidence quickly grew and she got close enough to touch the iceburg with her paddle.
Kristin enjoying glacial ice during the best kayaking in Alaska. Photograph by Dalton Johnson.
As an avid lover of ice, Kristin broke off a chunk of ice and looked at me asking, “What does this taste like?” Before sucking on the ice chunk.
Laughing together, we gunnelled up. Having paddled for about an hour we took in the calm and clear day. We needed to turn the corner to see the glacier, but, first, a little pick me up. Drinking some water, shoveling a snack down the hatch, and reapplying some Dermatone sunscreen as the sun began to beat down upon us and also reflect off the water on our skin.
“Should we find some more ice?” I asked as we ended our break and continued paddling down the L-shaped lake.
“Yup!”
Thirty-minutes later, we were in a field of icebergs. Weaving, in and out of icebergs, we made our way to where the glacier met the lake.
“Wow, look at that!”
SHHH PACK… a chunk of ice slide and smacked into the water.
We had made it to the glacier. Another bucket list idea checked off this trip. Now, we just needed to paddle back to the van.
Kayaking on Portage Lake just after a glacial calving event was the best kayaking I did while traveling Alaska. Photograph by Dalton Johnson.
Now that you have discovered a first person account of kayak to portage glacier, the rules on the portage lake, and who can make this paddle it is your turn to get out and experience this glaciated world for yourself! If you have any additional information that would/could benefit this growing community of adventurers, please drop a comment below!
Discover more Alaska Adventures


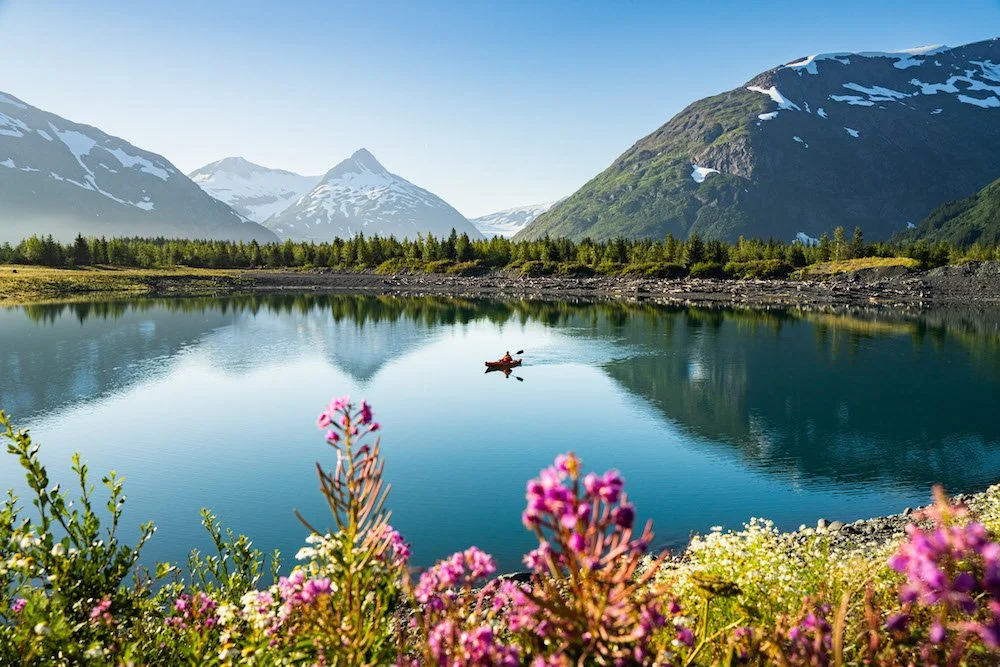
How to Spend an Entire Summer in Alaska
Getting to Alaska was not easy, nor was it an over night journey. Flashback six years, I had just graduated college and was starting a career in photography. Often, I drooled over images of braided glacial rivers documented from small bush planes. I would day dream about the non-pressurized cabins and the images I could potentially take. However, I was not in a place where I could fund a personal project to Alaska. I was broke, living in a car, struggling to pay my student loans. So, how did I go from broke to being paid to travel through Alaska? Mostly luck with a little bit of fortune.
Getting to Alaska was not easy, nor was it an over night journey. Flashback six years, I had just graduated college and was starting a career in photography. Often, I drooled over images of braided glacial rivers documented from small bush planes. I would day dream about the non-pressurized cabins and the images I could potentially take. However, I was not in a place where I could fund a personal project to Alaska. I was broke, living in a car, struggling to pay my student loans. So, how did I go from broke to being paid to travel through Alaska? Mostly luck with a little bit of fortune.
How to build a travel photography career in 5 years:
I am going to over-simplify here as I understand there are entire blog sites and online schools dedicated to teaching how to build a photography career. However, the steps are quite simple, but the work and patience is hard:
Step One: Build a lifestyle where you can travel often; vanlife, be homeless (only kinda kidding), be a dirtbag
Step Two: Build a portfolio
Step Three: Share your work everywhere; every social media site, emails, agencies, everywhere
Step Four: Build a book of business (aim for roughly 50 companies to pitch ideas to)
Step Five: Be persistent asking for work to your book of business
Step Six: Rinse and repeat steps one to five
Like I said, this would be an over-simplification of the process, but this is what it takes to build a business. All of the little things add up over time! If you stick with it, you will see!
Your are successful at starting a photography business, now what?
Congratulations on building a business, now, can you get away from it? Or, can the photography business go with you? If not, start making some changes. If it can, you are in the perfect position. Why is that? Well, you have a business that is feeding directly into the life you want to live. For myself, that is always the key. Money sitting in the bank (or ideally invested) is nice, but a lifestyle you enjoy is more important.
Some tweaks you might need to make:
Project delivery dates hold you back; get an editor, or start to schedule them farther out
Your book of business doesn’t care about Alaska content; convince them AK has something for everyone, or find other clients
You don’t have the money to travel to and from AK; find a client to cover the costs and you front the rest
You are scared to leave and make traveling Alaska a personal project; have an outlet for image licensing and/or build an influencer account (micro-influencers can still get their costs covered)
Once you make these tweaks, you should be set to go, but how do you do that?
How to make a summer in Alaska Possible as a content Creator?
At first, you might think it isn’t possible to get your trip to Alaska funded for every excuse under the sun. I don’t blame you, that was my original thought six years ago. I had build three decks and shared them with over 300 companies, most of which never had the courtesy of responding even after 5 follow ups. But, that did not stop me, nor should it stop you. If you want to spend a summer in Alaska and get paid to be there, here are the steps you will need to take:
Build a pitch deck to share with companies; this should include the 5 W’s, what they will get, and convince them to get on board
A reminder, most companies will say no, or simply not respond. This hurts, but it is normal.
Figure out all the details you can, save up enough money to go, then go
If companies backed you at first, great! If not, be there like you are on a shoot, everyday.
Shoot timeless work and don’t sleep. Like actually, work so hard you pass out as soon as your head hits the pillow.
Back up all of your work and review content daily
Pitch brands while you are in Alaska, but focus on local brands and be willing to do exchanges for your time to offset the cost
Again, shoot timeless images. These are images that are evergreen and not brand focused. This allows you to sell those images in the future to brands, magazines, and everyone under the sun.
I understand this is a lot of information. If you have questions on this, give me a follow on Instagram and shoot me a DM asking a question.
Personal story of taking the risk and traveling to Alaska for a summer:
Yes, I used the outline above to make a summer in Alaska happen. Yes, I was paid as a content creator to be there. Yes, I made a profit from the trip and I haven’t even finished sorting all of the content from my four months road tripping around the massive state of Alaska. Additionally, I focused on creating content to expand my portfolio in several aspects like wildlife, adventure, tourism, and cold locations. I took a risk instead of pocketing the money from the main job. At the moment, after four months of traveling and creating content in Alaska I have profited $232 (that means all of my bills were paid etc.). That might not be a lot at first glance, but time will tell how much this trip will actually make me. My guess, 10s of thousands of dollars.
What did I do while Traveling in Alaska?
How I got there: I drove my van from California, up the Alaskan Highway and Cassiar Highway to the state of Alaska
My main job: I was the camera operator and director for a mini-documentary on an athlete climbing Denali (this fronted the cost of the trip)
Side Jobs: I created brand work for a sunscreen company
Trade Work: While in Alaska, I did several trade jobs (providing content for an experience) to expand my portfolio
Speculation Work: I shot spec work for companies in the outdoor industry space that I hope to license to them in the future
How will I make 10’s of thousands of dollars from this trip?
Right now this is an estimation of what can come from this initial trip, but I do have hope that if I market this work correctly, the profits will be tremendous. How is that so?
Influencing: I built a personal library of Alaskan Travel that I can now share and build a following around it
Image and video license: Companies and magazines are always on the look out for Alaska content
Write a book about vanlife travel from Cabo, Mexico to Denali National Park: This is something I have wanted to do for a long time and feel I can write this in the coming year, I just need to have somebody publish it
Future Brand Work: If I market the work correctly, companies and agencies will see what I am capable of doing then hire me
Mini-doc credibility: As with most projects, you hope it goes well. Making the mini-documentary I am hopeful that will lead to some other work in the mountain space, but I am not totally certain. I’ll keep you posted!
If you are looking at that list and saying to yourself, “Dalton, you are a lier, this is not making money directly from traveling in Alaska.” You are correct. However, this initial investment of four months time, the experience of road tripping with a loved one to new locations, and coming out of it with a modest profit should be worth it in the future for the reasons listed above. Now, that is not to say that I don’t have a ton of work ahead of me to edit and market the content I have created.
Highlights You Don’t Want to Miss While Road Tripping to Alaska:
1) Boya Lake in British Columbia, Canada
This provincial park is gorgeous! The color of the water is unlike anything I have ever seen in terms of a lake that is land locked. The video below shows you just how pretty it is!
2) Make sure to find out where you can find eagles, they are majestic
If you are exploring the Kenai Peninsula in Alaska there are eagles everywhere. Keep an eye out around rivers for these massive birds. Check out this short of a few eagles I saw while in traveling in AK:
3) Go backpacking and enjoy the colors of the never ending sunsets
During the summer months, the days are long in Alaska and the sunsets last for a long time (my longest was 2.5 hours of orange glow) as a photographer, this was a dream! Two hours of color popping sunsets on a backpacking trip made for some grogeous drone footage. Check it out below:
4) Be on the lookout for Moose
Moose were all over the place during the summer in Alaska. This means you need to drive safe, but it also means you have a massive opportunity to document wildlife if you are an aspiring wildlife photographer. Check out this baby and momma moose I saw near the road:
Take the risk and travel to Alaska to create content
My heart says be bold. If you want to go to Alaska and have the ability to create content for a living, do it! You will not be upset about it. In fact, you will be excited that you opted in on the idea. Heck you might even cash in on the trip. All you need to do is listed above in this blog. Yes, I will admit, making a profit of $232 isn’t a lot, but that is only for now. Please note, money is only one of serval metrics of success. This trip, regardless of future financial gain, is already a success. I achieved a dream of mine. Visiting Alaska and being paid to be there, I can still hardly believe it happened. When I said you will need a bit of luck, I meant it. The original client who brought me to Alaska came via word of mouth and out of blue while I was on a project Joshua Tree.
Once he told me about making a mini-documentary on Denali, I got my butt in gear so I could be in good enough shape to lug my camera gear around the mountain. While we didn’t make it to the summit—the athlete backed off at the fixed lines—I had been mentally building the trip to Alaska out in my mind for years prior to leaving. This time and dedication to the dream allowed me to create an endless library of content that I will be using for years to come.
On a final note, if you are considering going to Alaska. Do It! Plan accordingly, work your buns off, and make the trip!
Update Late 2022: My work has now accrued a small amount of recognition and I have now landed three jobs directly from my time in Alaska so my return on the investment of traveling to Alaska is around $11.3K, at the moment.
Discover more about Photography

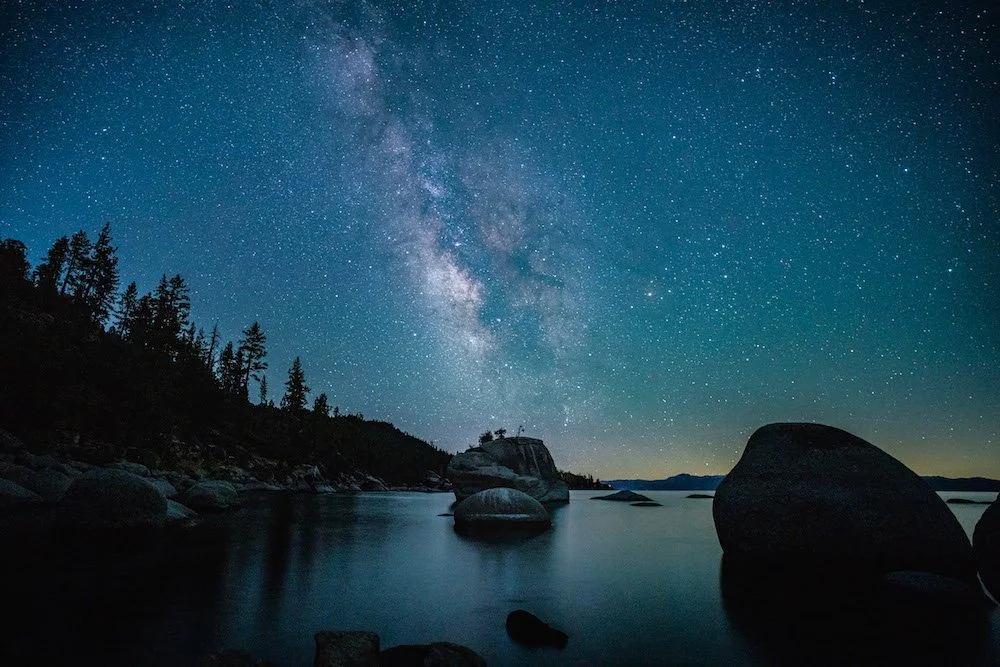


Travertine Hot Springs: Your Guide to a Tranquil Sierra Nevada Getaway
Travertine Hot Springs is a wonderful stop for all those traveling along Highway 395. If you finished with a long hike, come pamper yourself. If you need time to reflect, bring a journal and enjoy a silent morning before the crowds arrive. If you need a place to sleep, there is dispersed camping around the area, so go for a soak and post up for the night, on forest service land, for a free night of camping. Be a kind human while at the hot springs and enjoy your warm soaks.
Nestled along the scenic Highway 395 in Bridgeport, California, lies a hidden gem waiting to enhance your journey - Travertine Hot Springs. Whether you're seeking respite after a strenuous hike, craving a tranquil morning for introspection, or in search of a serene camping spot for the night, this natural wonder offers it all.
Set against the backdrop of pristine forest service land, Travertine Hot Springs invites you to rejuvenate your body and soul in its soothing waters. As you immerse yourself in these therapeutic pools, remember to embrace the spirit of kindness, ensuring that everyone can savor their warm soak in this idyllic oasis.
Pros
Natural Beauty: Travertine Hot Springs offers stunning natural scenery with its geothermal pools set against the backdrop of the Sierra Nevada mountains.
Free Access: Unlike many hot springs, entry to Travertine Hot Springs is free, making it an affordable destination for travelers.
Relaxation: Soaking in the warm, mineral-rich waters can provide relaxation and relief for tired muscles and stress.
Accessibility: The hot springs are easily accessible from Highway 395, making it a convenient stop for road trippers.
Camping Opportunities: There's dispersed camping available nearby, allowing you to enjoy a night under the stars after your soak.
Scenic Drives: The journey to the hot springs along Highway 395 offers picturesque views and opportunities for exploration.
Cons
Crowds: Travertine Hot Springs can get crowded, especially during peak times, which may limit the tranquility of your experience.
Limited Amenities: There are limited facilities at the site, including no restrooms or changing rooms, which can be inconvenient for some visitors.
Variable Water Temperature: The temperature of the hot springs can vary, and it may take some trial and error to find the ideal pool temperature.
Environmental Impact: Overuse and improper disposal of waste by some visitors can harm the natural environment around the hot springs.
Noisy Crowds: During busy times, the hot springs can become noisy and less conducive to peaceful relaxation.
Getting to Travertine Hot Springs:
Finding your way to the relaxing oasis of Travertine Hot Springs is a breeze:
Off Highway 395: Travertine Hot Springs is conveniently located just a short drive off Highway 395. If you're heading south, watch for a left-hand turn before you reach the ranger station.
Follow the Signs: As you make that left turn, drive about one hundred yards, and you'll spot a clear sign pointing you in the direction of Travertine Hot Springs.
Dirt Road Adventure: Follow the indicated path down a dirt road that leads you to the parking area adjacent to the hot springs.
For detailed step-by-step directions, you can click here: Travertine Hot Springs
Swimming at Travertine Hot Springs:
Travertine Hot Springs offers a delightful assortment of naturally occurring thermal pools that beckon both soaking enthusiasts and swimmers alike. While the pools have been thoughtfully enhanced in some places, they generally maintain a comfortable depth of around waist-high and span from 5 to 10 feet in diameter.
One of the perks of Travertine Hot Springs is its multiple pools, which means you're likely to discover a serene spot all to yourself for either a relaxing soak or a refreshing swim. So, whether you're seeking tranquil relaxation or a brisk dip, these hot springs have you covered.
Clothing Optional at Travertine Hot Springs:
At Travertine Hot Springs in Bridgeport, you have the option to enjoy your soak in the buff. The atmosphere here is inclusive, welcoming both clothed and nude soakers. To maintain a harmonious and respectful environment, there's an unspoken etiquette: if you arrive at a pool where others are clothed, it's considerate to ask for permission before disrobing. This simple gesture is a sign of respect for your fellow visitors.
However, if you're fortunate enough to have a hot spring all to yourself, you're in charge – feel free to set your own rules and preferences. The key takeaway is to prioritize respect and consideration for the comfort of all those sharing this unique hot spring experience.
>> Want to learn more about hot spring etiquette? Check out this guide for hot spring etiquette
Exploring the Abundance of Pools at Travertine Hot Springs:
Travertine Hot Springs is a hotbed of relaxation, boasting an impressive array of 11 distinct pools for you to luxuriate in. As you arrive, you'll immediately encounter the main pool, conveniently located in the parking area. But the adventure doesn't stop there.
For those who enjoy a short stroll, a series of four inviting pools awaits just a brief walk away, accessible via well-marked paths. And for those in search of a more secluded and serene experience, there's a hidden treasure trove of pools accessible by following the trail that begins behind the restroom facilities. These, personally, are some of my favorite pools.
In total, I've counted 11 pools that offer a delightful soaking experience at Travertine Hot Springs. If you're feeling especially adventurous, there are whispers of even more hidden pools awaiting discovery in the landscape. So, if you're up for a challenge and crave the thrill of exploration, consider embarking on a quest to uncover these hidden gems.
Year-Round Relaxation at Travertine Hot Springs:
Travertine Hot Springs in Bridgeport is a sanctuary of relaxation that welcomes visitors throughout every season, including winter. These natural pools are your oasis, offering respite for your tired muscles after a day of adventures in the mountains.
What makes a winter visit particularly enticing is the tranquility you'll experience. With fewer fellow soakers around, you'll have the luxury of choosing your preferred pool, ensuring a peaceful and rejuvenating soak.
A brief note: While it's a rarity, on the off chance of a bacterial outbreak, the pools may temporarily close. Rest assured, such occurrences are infrequent, and the blissful soak you seek is typically available year-round.


Facilities at Travertine Hot Springs:
Yes, there is a restroom facility conveniently located at the main parking area of Travertine Hot Springs. This restroom is equipped with a pit toilet and is often stocked with toilet paper for your convenience. To ensure your comfort, it's advisable to bring your own toilet paper, just as a precaution.
Please note that there are no handwashing facilities available at this restroom. To maintain good hygiene, it's a good idea to bring some hand sanitizer along with you to enhance your experience at these rejuvenating hot springs.
What to expect when visiting Travertine Hot Spring:
Expectation 1: Natural Beauty and Serenity
When you venture to Travertine Hot Springs, prepare to be captivated by the natural beauty and serene ambiance that awaits you. Nestled amidst the breathtaking landscape of the Eastern Sierra, these hot springs offer a tranquil escape from the hustle and bustle of everyday life. Surrounded by rustic wilderness and set against the stunning backdrop of the Sierra Nevada mountains, you'll find yourself immersed in a pristine environment that encourages relaxation and reflection.
Expectation 2: Soothing Soaks and Choice of Pools
At Travertine Hot Springs, the main attraction is, of course, the therapeutic hot springs themselves. Expect to enjoy soothing soaks in mineral-rich waters that provide relief for tired muscles and a respite for your soul. With a variety of pools to choose from, ranging in depth and temperature, you'll have the freedom to select the perfect one to suit your preferences. Whether you're seeking a warm soak, a refreshing dip, or a serene moment of solitude, these pools cater to all your relaxation needs.
Expectation 3: Respectful and Considerate Atmosphere
Visiting Travertine Hot Springs also means immersing yourself in a community of fellow soakers who share a love for nature and relaxation. Expect a respectful and considerate atmosphere, where clothed and nude visitors coexist harmoniously. The unspoken etiquette encourages communication and respect, particularly when it comes to nudity in the presence of others. Overall, anticipate a welcoming environment that encourages you to unwind and connect with nature, all while respecting the peaceful coexistence of everyone who visits this natural treasure.
Tips for Maximizing Your Travertine Hot Springs Experience:
Arrive with a Smile and Refreshments: Bring a positive attitude and some beverages to enhance your visit. Sharing a friendly demeanor can lead to great conversations and connections with fellow visitors.
Engage in Friendly Interactions: Embrace the camaraderie of the hot springs by being open to sharing your tub and engaging in conversations with others. Remember, we're all humans seeking relaxation.
Nudity is Natural: Feel free to shed your inhibitions along with your clothes if you're comfortable. Nudity at Travertine Hot Springs is welcomed, and it's a reminder of our shared human nature.
Timing is Everything: To secure a pool all to yourself, consider arriving early or coming during quieter hours later in the day, especially if you prefer a more tranquil experience.
Winter Wonder: Don't miss the magic of Travertine Hot Springs in the winter. The experience takes on a unique charm, and the pools are often less crowded.
Prepare for a Bumpy Ride: While all cars can navigate the road, be prepared for a somewhat bumpy journey. You might occasionally touch the bottom, but the destination is worth it.
BYOTP (Bring Your Own Toilet Paper): While there's a restroom at Travertine Hot Springs, it's a good idea to carry your own toilet paper just in case supplies run low.
Explore Pool Variety: Try out different pools! Each one offers a distinct temperature, allowing you to find your perfect soaking spot.
Stay Hydrated: Ensure you have drinking water with you since there isn't any available at the hot springs. Staying hydrated is essential for a comfortable and enjoyable visit.
Enjoying free camping on BLM land not far from Travertine Hot Springs in Bridgeport, CA. Photograph by Dalton Johnson
Travertine Hot Springs offers a rejuvenating escape amid the serene beauty of the Eastern Sierra. Whether you prefer solitude or engaging with fellow soakers, these pools welcome all. Embrace the freedom of nudity, arrive early or late for a more private experience, and savor the unique charm of winter visits. While the road may be bumpy, the journey is rewarding. So pack a smile, some refreshments, and your sense of adventure, and discover the blissful oasis of Travertine Hot Springs—a sanctuary for both body and soul, nestled in nature's warm embrace.
Discover More of the Eastern Sierra

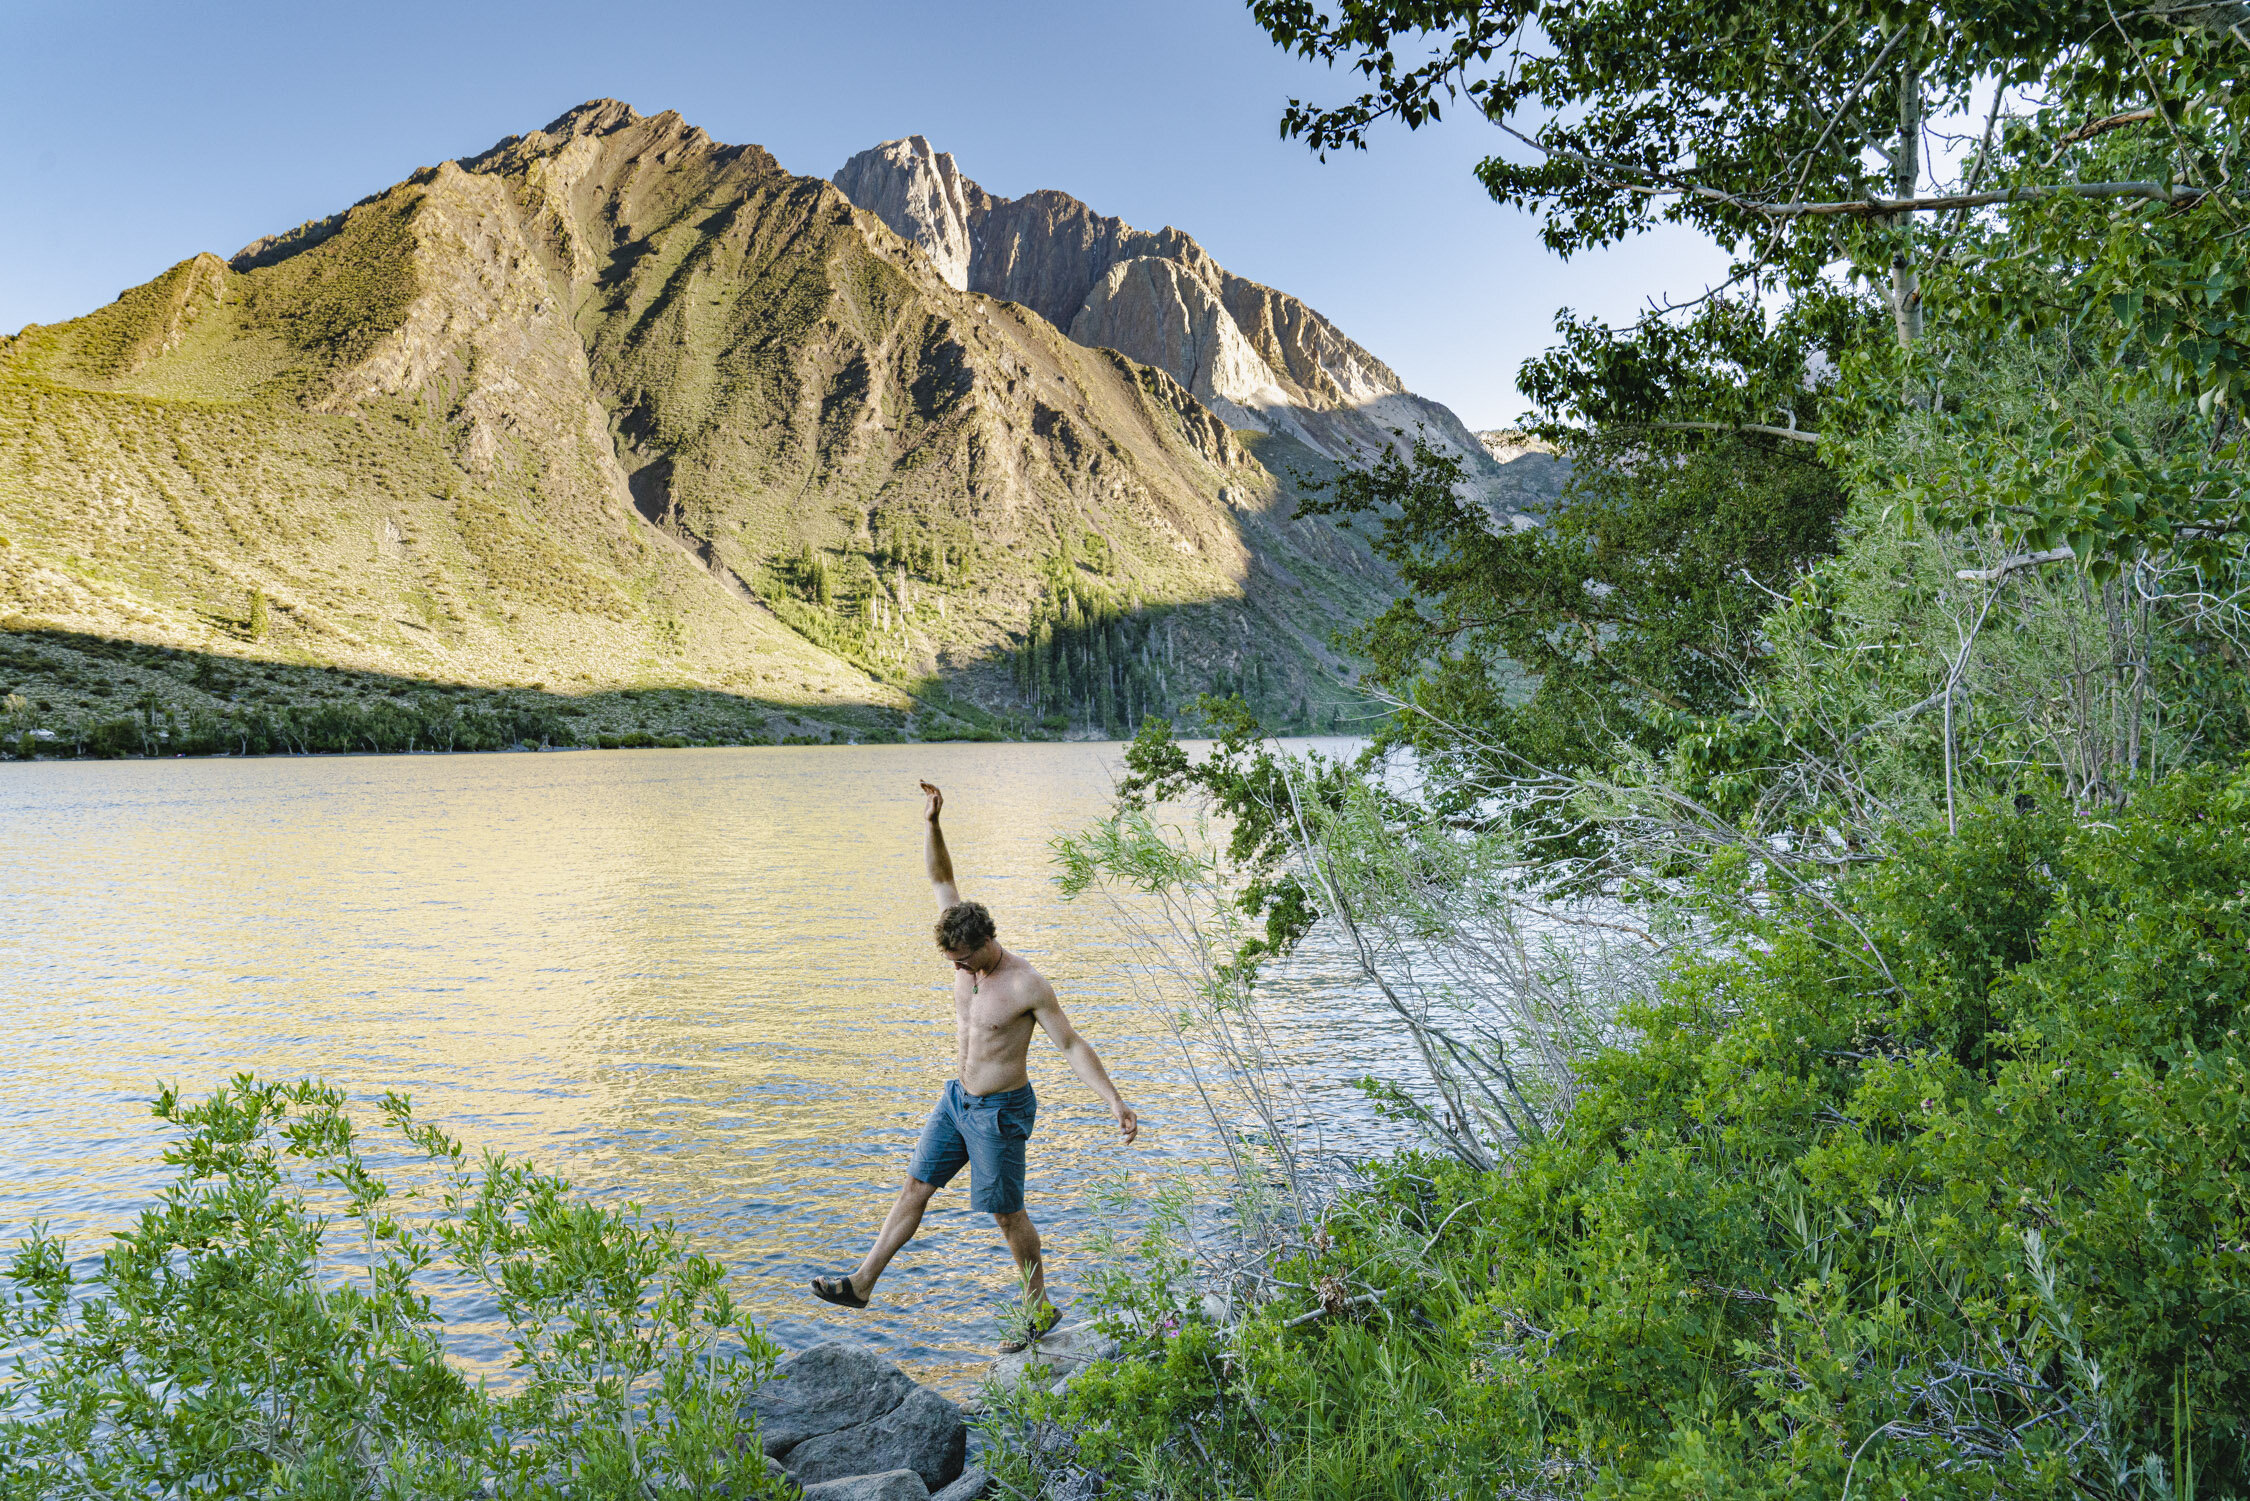


A Weekend Away from the City - A camping story
Living in a city is full of noise. Beeps, honks, sirens, birds, people… you name it, a city has a sound for that. Well, almost. What a city doesn’t have is a sound for silence. To seek that, we packed our backpacks, sleeping bags, a few meals, and headed out to the woods for a weekend get away.
Life get’s busy, escape to the woods
Living in a city is full of noise. Beeps, honks, sirens, birds, people… you name it, a city has a sound for that. Well, almost. What a city doesn’t have is a sound for silence. To seek that, we packed our backpacks, sleeping bags, a few meals, and headed out to the woods for a weekend get away.
Tips for a successful camping trip:
Manage your weight
Know where you can find and filter water
Get your permits in advance
Plan your route before going
Go with friends
Have a destination with a view so the hiking is worth it
Enjoying the last light from atop a mountain on a camping trip just outside the city limits. Photograph by Dalton Johnson
Slowing down to a walking pace, from the hustle of daily routine, the pitter patter of our feet fill our ears. Our bodies feel something different as we set our pace slow enough to look around at the trees and notice squirrels chasing each other. Life is different at a walking pace. Life is different outside of the city. Life is different when you go camping.
Tips for better than usual camping meals:
Bring two lighters and a cook stove
You don’t have to eat dehydrated meals and trail mix for every meal
Instant rice and Indian food packets are a great idea
Macaroni and Cheese is a light and quick option… try bringing some pre-cooked sausages
While escaping the city, a group of friends enjoy a meal as the sunsets. Photograph by Dalton Johnson
A practice in patience, waiting for our meals as our bellies growled. We wanted take-out from our favorite place, but that wasn’t an option. We only had what we carried in on our backs. Thankfully, the meal was salmon and instant rice. WOW! That was a great camping meal that brought a smile to my face. Now, it was time for the sleeping bag, the stars, and some shut eye.
This camping trip is what we needed to escape the busy life of the city.