Dreamland
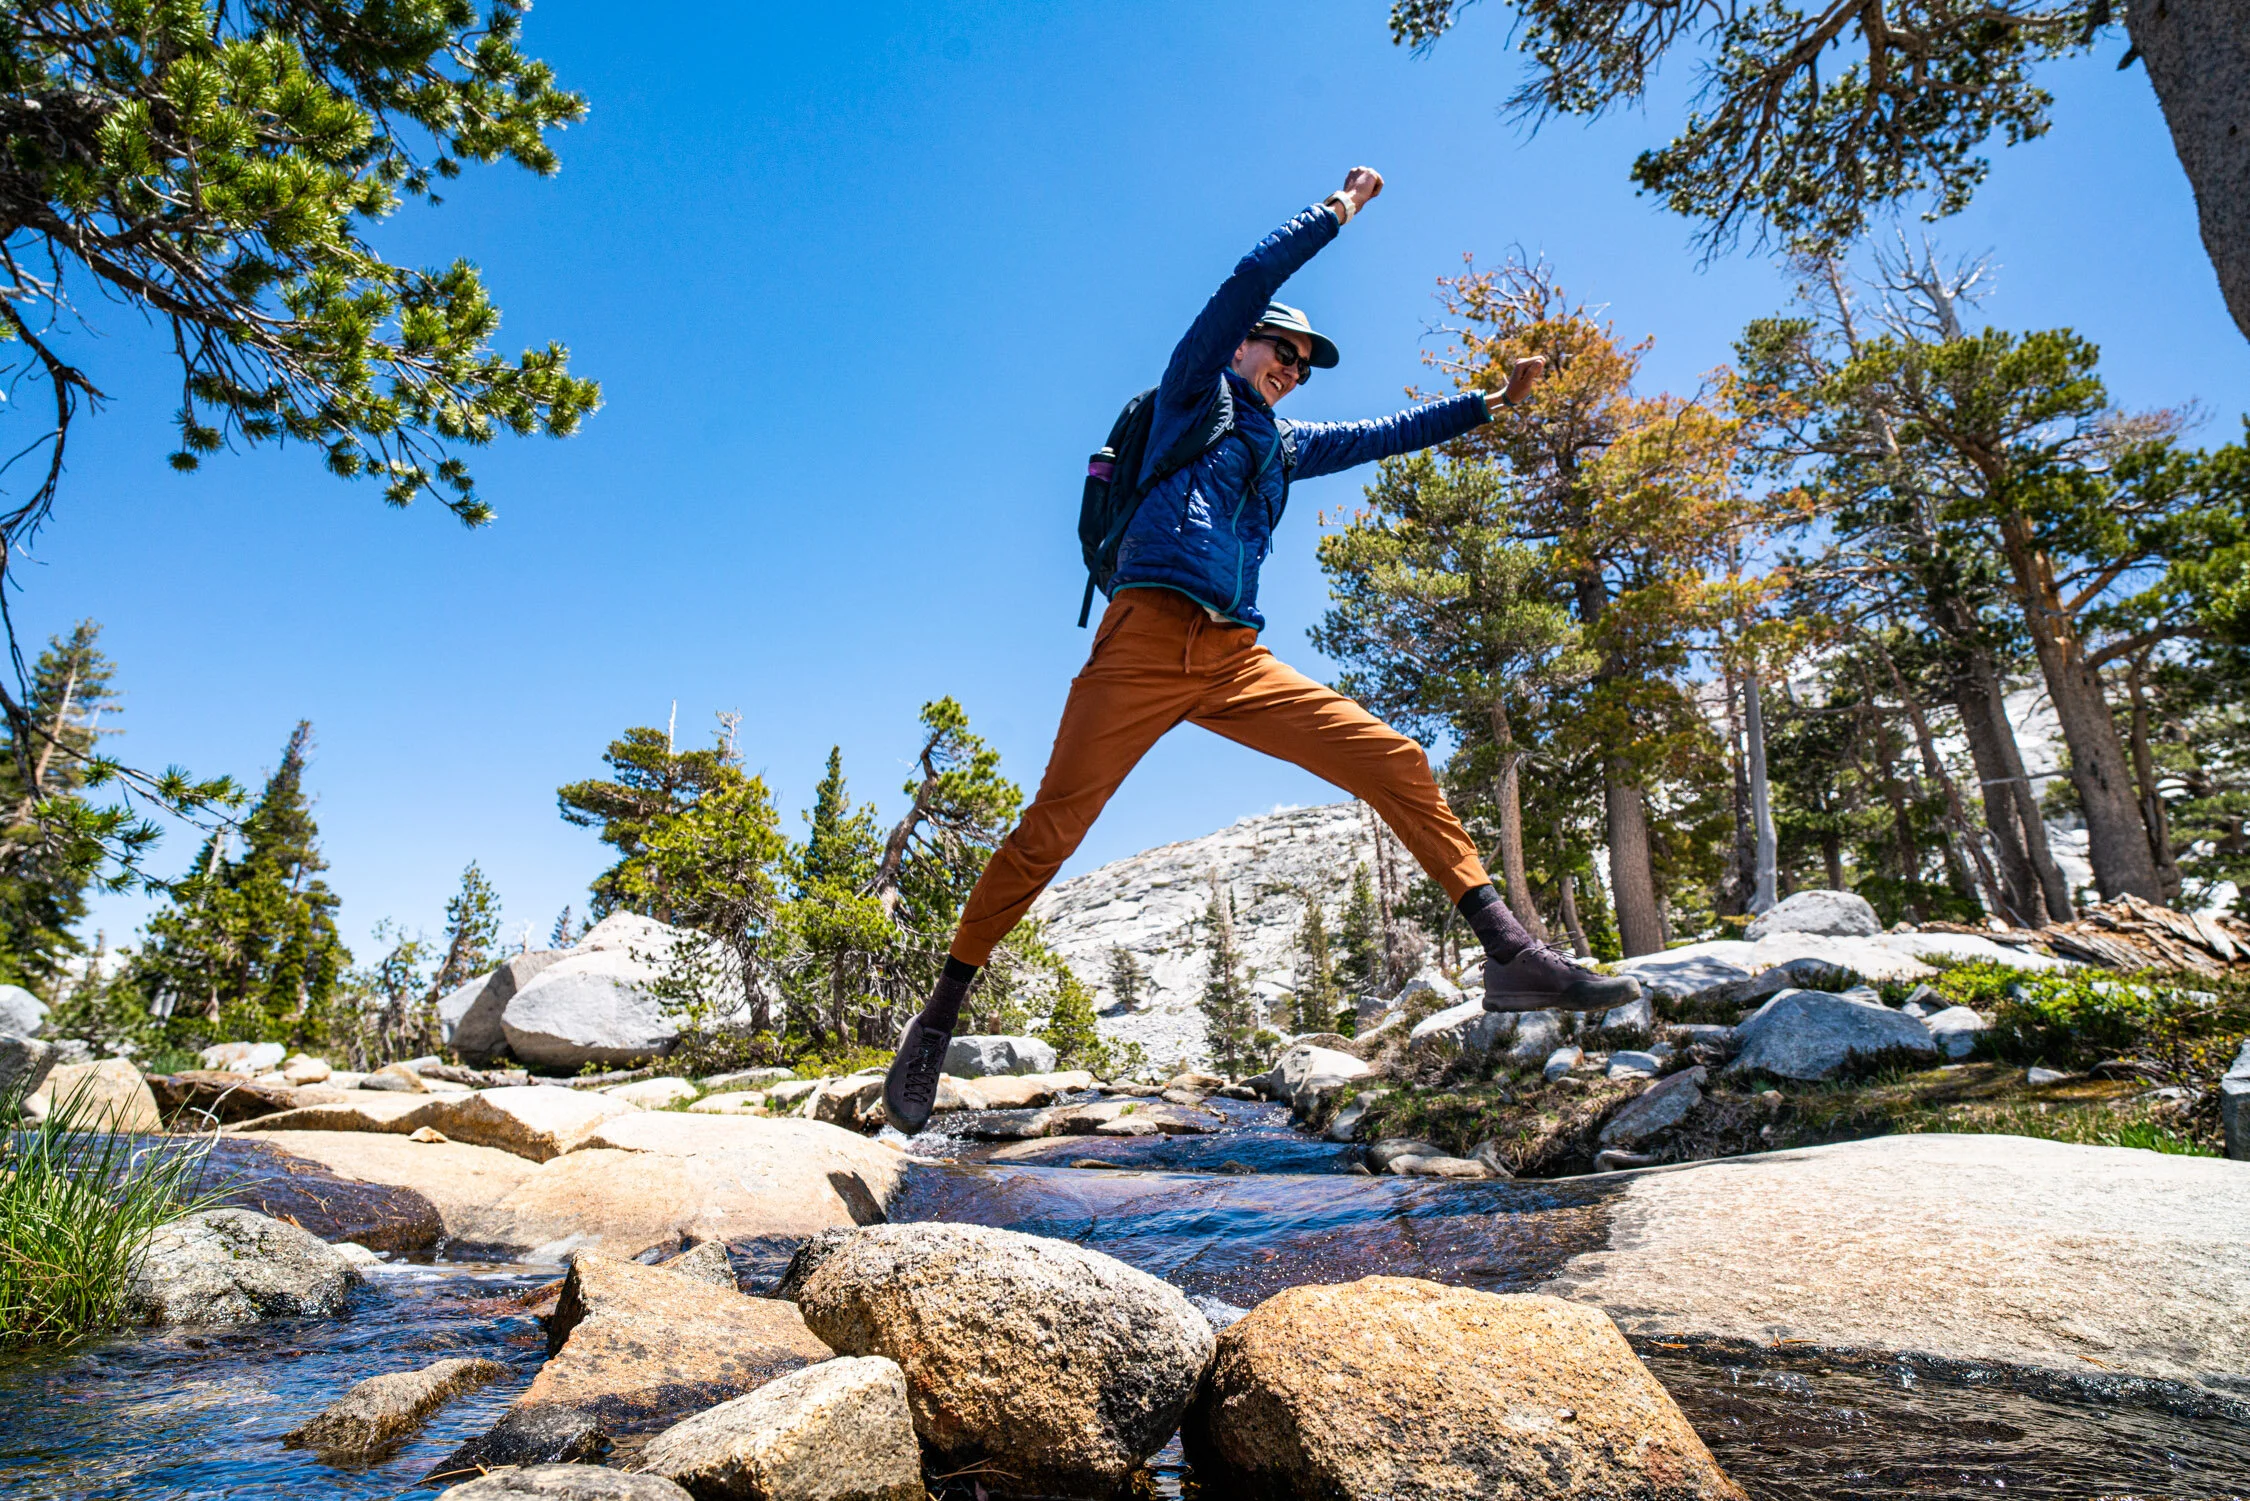
We headed to places like Baja and Joshua Tree to surf, rock climb, high-line, and engage with the natural world instead of feeding into the addition of consumerism. We traded new clothes for dirty ones that smelled of sweat from a fun day out in the sun. There wasn’t a whole lot of computer time, but, boy oh boy, was it stressful as we learned to place our lives in cams and nuts while climbing cracks.
Have you ever gone to bed and dreamed about the life you wish you had?
Well, this video is a play on that concept, but we lived it. Instead of just dreaming about the life we could live, together, we accepted the challenge and made those dreams a reality.
We headed to places like Baja and Joshua Tree to surf, rock climb, high-line, and engage with the natural world instead of feeding into the addition of consumerism. We traded new clothes for dirty ones that smelled of sweat from a fun day out in the sun. There wasn’t a whole lot of computer time, but, boy oh boy, was it stressful as we learned to place our lives in cams and nuts while climbing cracks.
Overall, we all are not the strongest group of dirtbags, nor are we the dirtiest, but we are a group of humans that love getting outside and living our dreams.
Discover other creative works by dalton


5 Reasons Kenai Lake Should Be On Everyone's Alaska Bucket List
We turned the corner and pointed our headlights for Cooper’s Landing. We didn’t totally have a destination, but knew we wanted to explore the Kenai Peninsula. We got lucky. As we passed Cooper’s Landing, Kristin suggested we take a left down a dirt road to quickly check out this massive lake we just saw. Bumping down the road, we found beaches, free camping, great hiking, and a magical place called Kenai Lake.
We turned the corner and pointed our headlights for Cooper’s Landing. We didn’t totally have a destination, but knew we wanted to explore the Kenai Peninsula. We got lucky. As we passed Cooper’s Landing, Kristin suggested we take a left down a dirt road to quickly check out this massive lake we just saw. Bumping down the road, we found beaches, free camping, great hiking, and a magical place called Kenai Lake.
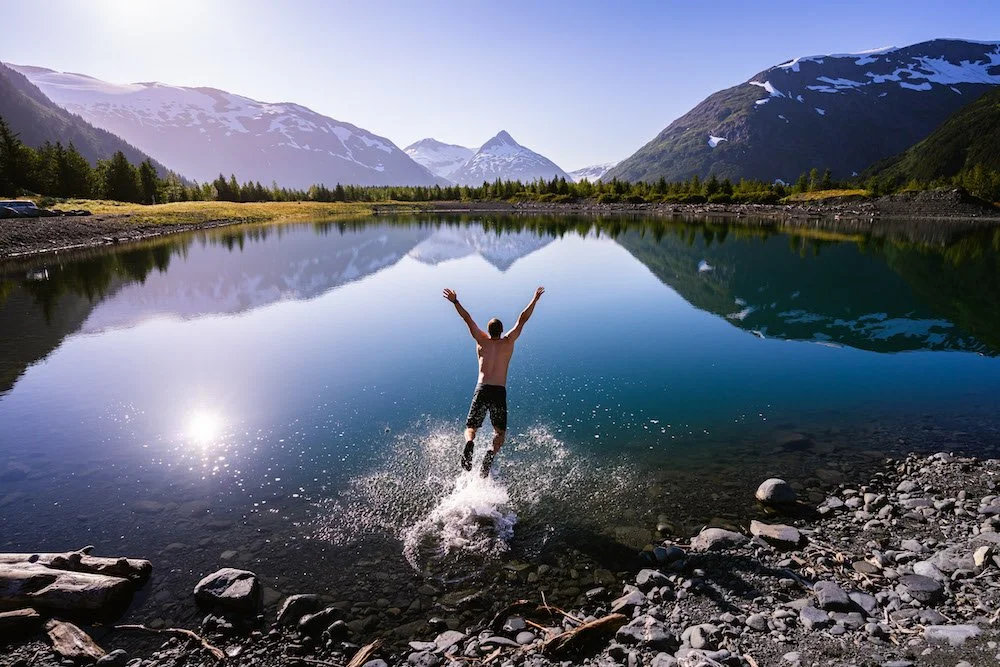
Kenai Lake is the largest lake on the Kenai Peninsula in Alaska. Covering 21 square miles, this glacially fed lake has brilliant blue water and is a hub for water enthusiasts. The banks of the lake offer great camping while the water is clean and is a great place for family outings. Many visitors fish on Kenai Lake during the summer months, or bring floats to hang out in the cool water.
Read on to discover camping spots, fun beaches, directions to Kenai Lake, and so much more!
Sunset light landing on the mountains while flying over Kenai Lake and Rainbow Lakes. Photograph by Dalton Johnson
1) Swimming at Kenai Lake
Kenai Lake is a wonderland for those who enjoy swimming. The water is clean and there are several beaches where water enthusiasts head to play in the water. Kenai Lake is family friendly and a splendid place for kids to swim. When I was at Kenai Lake, almost everyday I would see new faces and families showing up to play in the water. Most would bring some inflatable device to sit in the water while basking in the summer sun. During the summer months, Kenai Lake can be a cool reprieve from the warm summer days.
Tips for a good time at Kenai Lake:
Bring some snacks, as you will want to be here all day
Go for a hike nearby, then take a dip into the water to cool down
2) Discovering Freedom at Kenai Lake
I never thought I would have the opportunity to go Alaska in my lifetime, it just seemed out of reach. Being from California, Alaska seemed so far away and way to pricey to visit. But, in 2022, I received a phone call that went a little something like:
“Hey Dalton! I heard you can climb mountains and hold a camera while doing it. Is that true?”, Bill questioned.
“Yeah, that is very true.” I responded
“Do you have any interest in making a movie on North Americas tallest mountain?”
“I’ve never made a movie before, but that sounds rad!” I quickly answered.
”Cool, let’s do a training trip to see if you will cut the mustard.”
I passed, Alaska here I come!
Kristin enjoying a the moody afternoon lakeside at Kenai Lake in Alaska. Photograph by Dalton Johnson
Fast forward five months, I arrived in Alaska to shoot a documentary, but this story doesn’t cover Denali. If you want to read about my time on Denali, head over to the blog series about climbing Denali here.
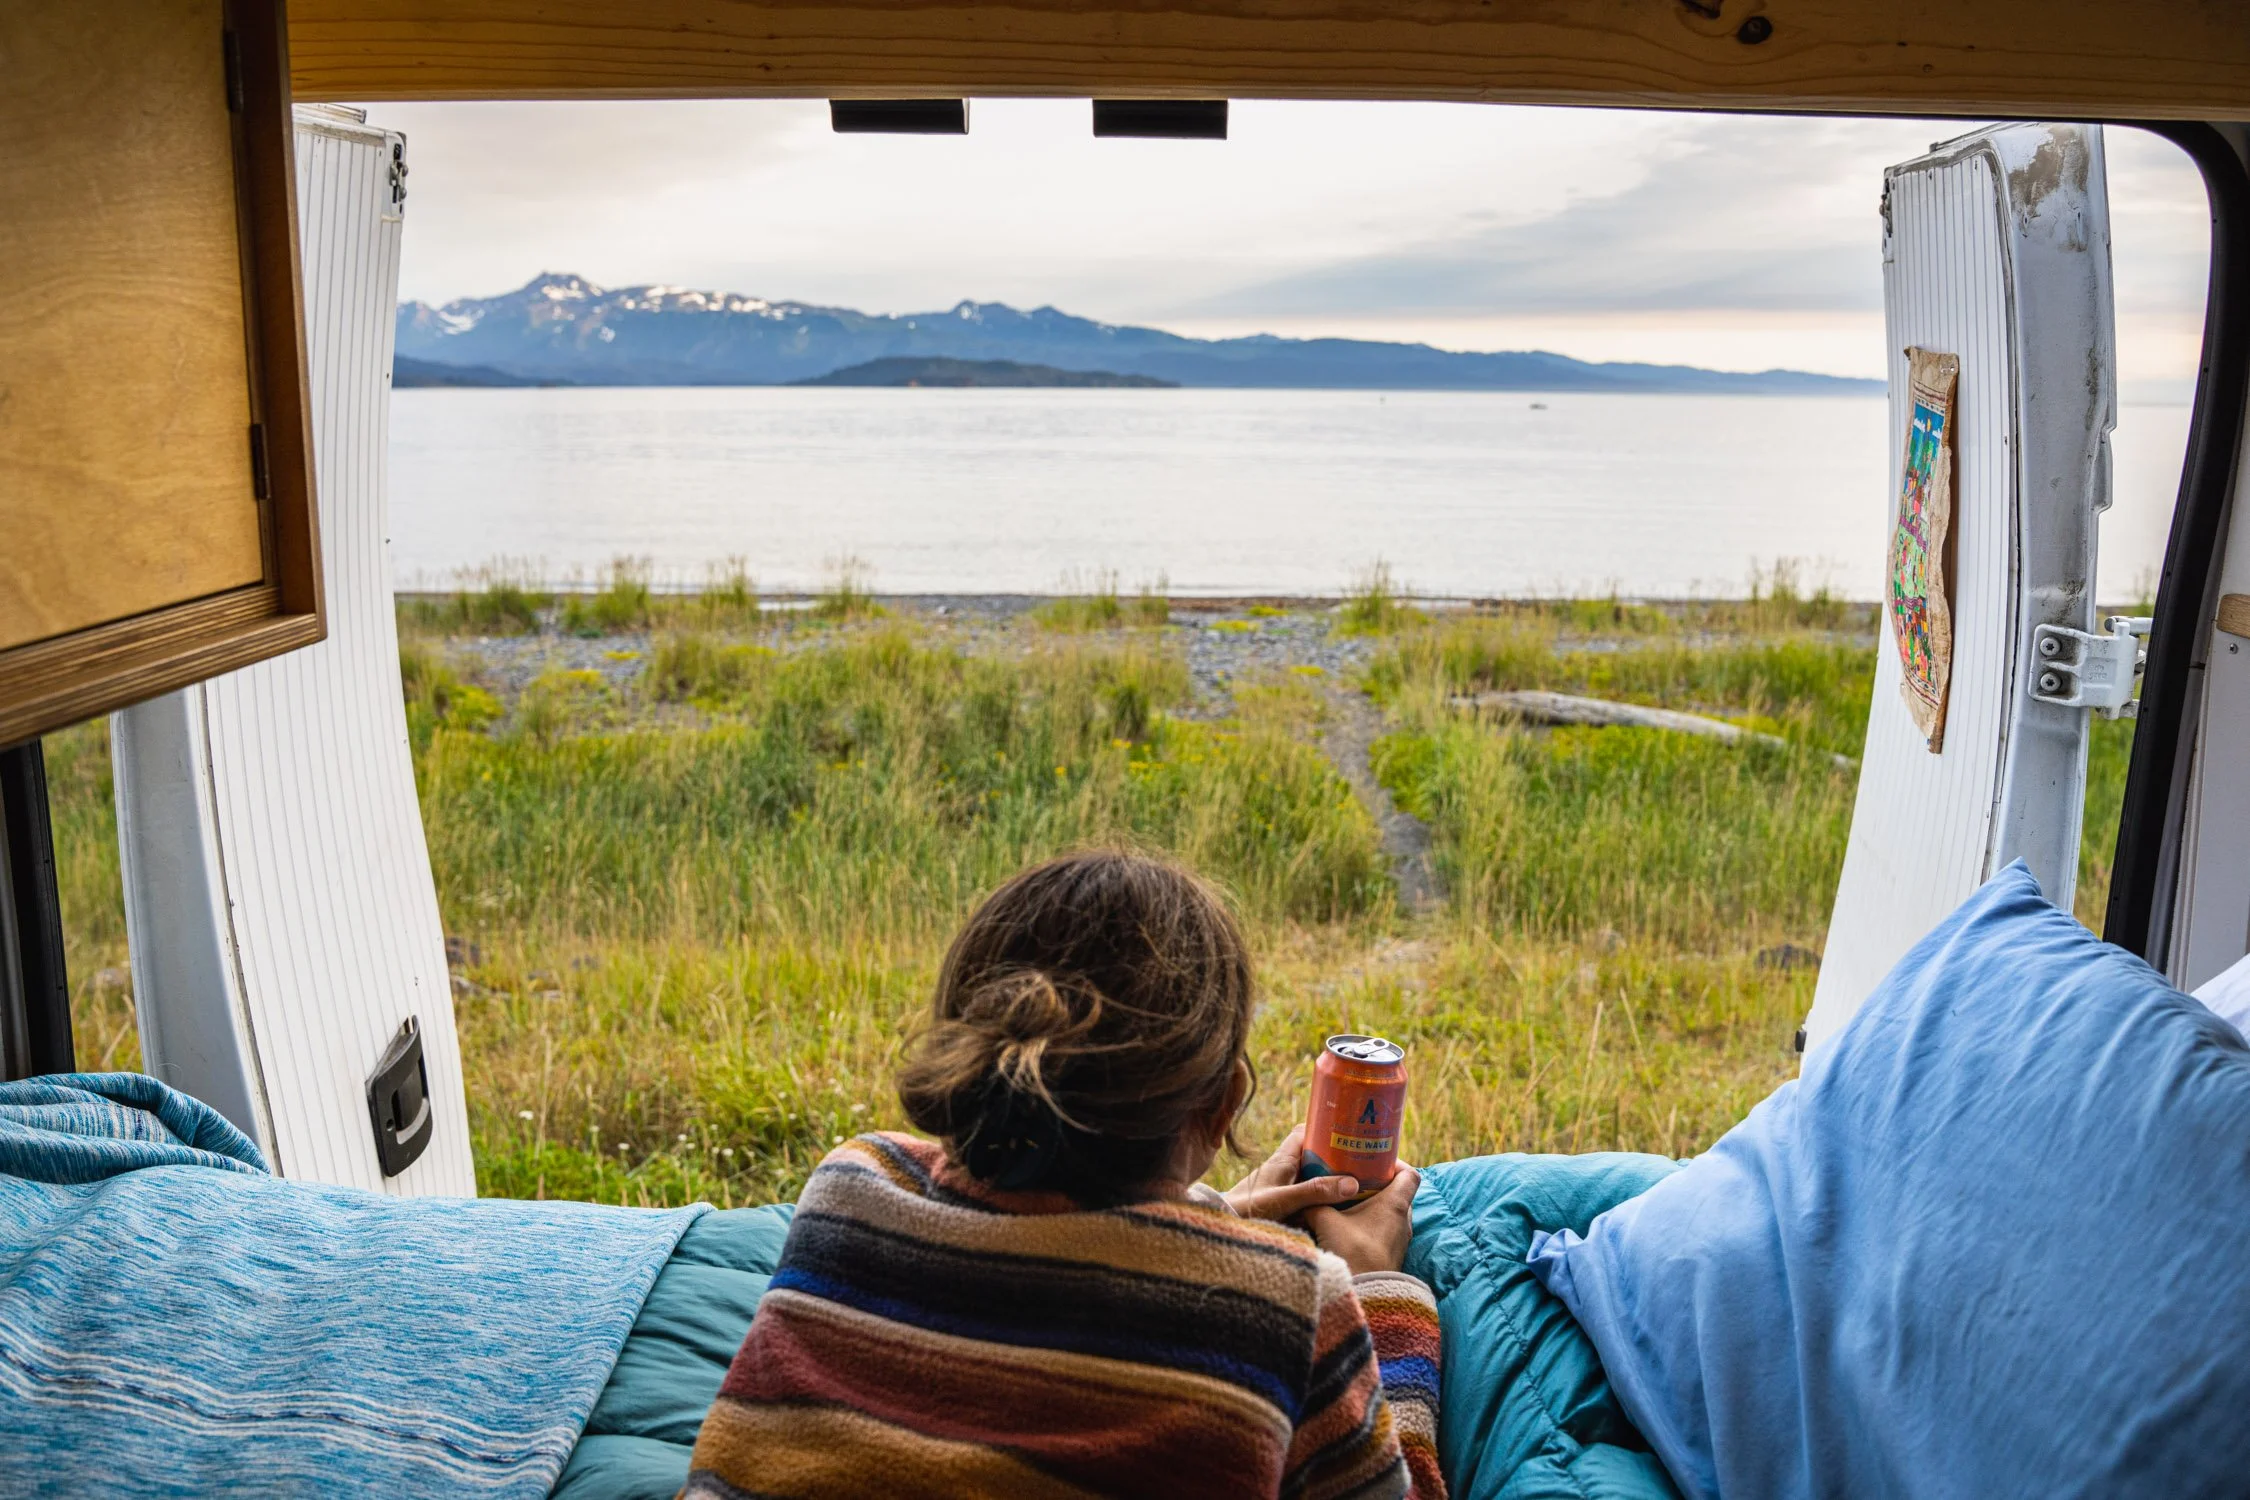
Once off of Denali, safe and sound, I knew that I needed to spend more time in the area to just understand what made Alaska so desirable. So, I had my girlfriend, Kristin, fly up to Alaska so we could spend some time, work a few freelance photography jobs (Kristin would be the model), and explore Alaska by van for three and a half months.
Want to learn more about vanlife in Alaska? We put together this series of helpful blogs and vlogs on vanlife in Alaska, check it out!
So, where does Kenai Lake play into all of this?
During our time in Alaska, we somewhat made Kenai Lake our “home base” as the lake is centrally located on the Kenai Peninsula, has free camping, great swimming, and a meditative atmosphere that allows you to regroup, meanwhile remain in a beautiful location. So, Kristin and I found ourselves parked lakeside for 4 to 6 days while traveling the Kenai Peninsula.
Our days at Kenai Lake were simple. We would wake up to a slow morning of coffee and journaling, if it wasn’t raining outside we sit by the lake. When the rain was full on, we would get in our bathing suits, brave the rain, and go for a cold dip into this gorgeous, blue lake. After a long morning, we would both do some yoga, maybe go for a run, and explore the surrounding area by foot. Living in a van can feel stuffy if you are in it to long. Then, we would both do some work, mostly editing image, or videos, into the early evening. At that point, both of our bellies would be grumbling, so we would make dinner and enjoy it lakeside.
Overall, our time next at Kenai Lake was focused on recharging our batteries as we traveled all over the map, doing random adventures. Still, I look back with fond memories at our time lakeside.
The blue waters of Kenai Lake are created from glacial silt that is collected in this lake as glaciers in the distance melt. Photograph by Dalton Johnson
3) The water of Kenai Lake is blue beyond belief
Kenai Lake is glacially fed, which means all of the water in lake comes from the melting glaciers nearby. As the glaciers melt, they tear into the earth creating glacial silt. When glacial silt and water mix, you get a brilliant blue colored water. As you can see from the image above, the water of Kenai Lake is a blue unlike anything else, this is from glacial silt.
One downside of this glacial silt is that after you go swimming, you are coated with a very thin layer of mineral, so you don’t feel clean and refreshed. However, this mineral coating is good for your skin!
4) Camping at kenai Lake
Kenai Lake is a hot spot for free, and paid, camping along the Kenai Peninsula. There are several beaches that you can pull into along the north-west shoreline and camp. You will often find locals here on the weekend with a tent and a bonfire, especially during salmon season. Located close to Cooper’s Landing, Kenai Lake also provides a variety of paid camping options as well. Either way, the longer you can spend lakeside at Kenai Lake, the less you will want to leave.
My camping suggestion:
There is a free beach camping that is perfect for 3-4 vehicles at this beach along Kenai Lake. When we parked here, there were several Alaskan locals who would come on the weekend with the family. During one of our visits, the beach was totally overrun by wedding, but the people were super kind and offered to make room for us.
This spot is not suitable for RV’s and I would suggest having 4-wheel drive if the dirt road is wet. If the road isn’t wet, a high clearance 2-wheel drive vehicle would get the job done.
5) Kenai Lake Overview:
Where is Kenai Lake?
Kenai Lake is located on the Kenai Peninsula in Alaska. You can access this lake from either of the two main highways, Sterling Highway and Seward Highway, but is most often accessed from Cooper’s Landing off of the Sterling Highway.
Click here for directions to Kenai Lake
How big is Kenai Lake?
Kenai Lake is a very large lake that covers 21.58 square miles and is 22 miles in length. This lake is most known for its “zig-zag” shape that winds between mountains. To put this into perspective, this would be 20 central parks, or half the size of San Francisco.
How deep is Kenai Lake?
Kenai Lake has a max depth of 540 feet. To put this into perspective, a traditional SCUBA diver can not go to the depth of 500 feet with standard oxygen.
How was Kenai Lake Made?
Kenai Lake is a natural lake created by glaciers receding. As the glaciers receded they gouged the earth leaving behind this massive lake where now the glacial melt collects in a brilliant blue.
What fish are in Kenai Lake?
When fishing at Kenai Lake, you will find a diverse grouping of fish you can catch. The species available include silver, pink, king and red salmon, rainbow trout, Arctic char, Dolly Varden, lake trout, steelhead, kokanee and grayling fish.
Other adventures to do near kenai lake
Kenai Lake is centrally located on the Kenai Peninsula, so you can access many great adventure from this lake. Some of my favorites were:
Now that you have discovered camping spots, fun beaches, places to swim, and directions to Kenai Lake, it is your turn to get outside and dip into this glacially fed lake. Please, if this blog was helpful for you, or you have additional information to share, drop a comment below to help out fellow adventurers within this community.
Discover more of Alaska


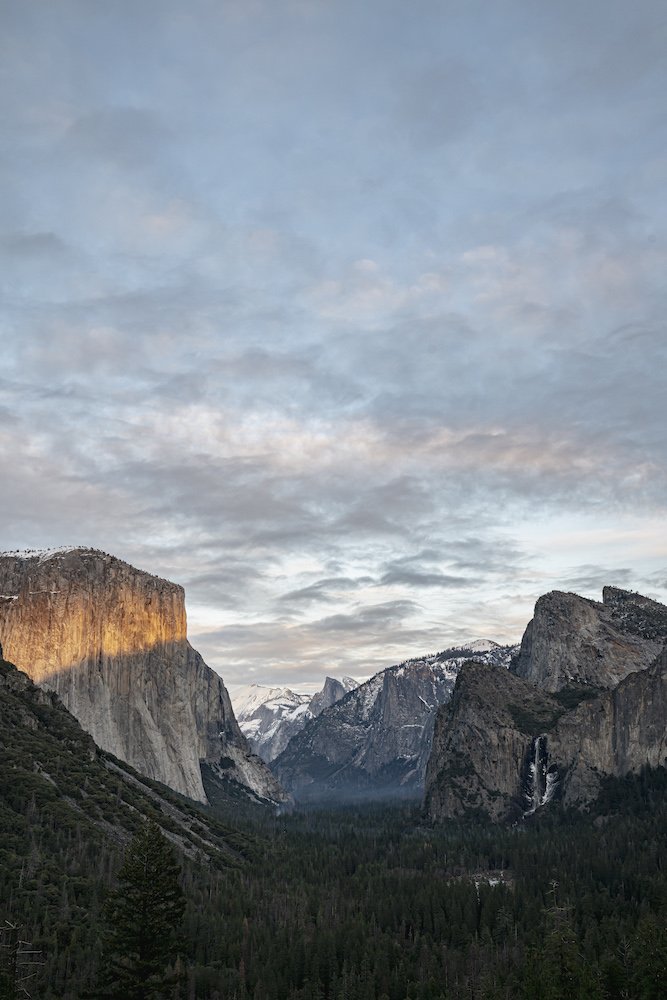
Why Crocker Point Is the Most Incredible View In Yosemite National Park
Have you ever stumbled upon a place without knowing what it is supposed to look like and are left completely dumbfounded by its beauty? Well, when I decided to make the hike out to Crocker Point for the first time, that was exactly what happened to me. I didn’t even know this vista point had a name, but I was taken back by its beauty, its grandeur, and the alignment of El Capitan and Bridalveil Fall. All together, my first experience seeing Crocker Point made me realize this underrated vista point might actually be the most incredible view in all of Yosemite Valley.
Have you ever stumbled upon a place without knowing what it is supposed to look like and are left completely dumbfounded by its beauty? Well, when I decided to make the hike out to Crocker Point for the first time, that was exactly what happened to me. I didn’t even know this vista point had a name, but I was taken back by its beauty, its grandeur, and the alignment of El Capitan and Bridalveil Fall. All together, my first experience seeing Crocker Point made me realize this underrated vista point might actually be the most incredible view in all of Yosemite Valley.
Crocker Point is the most incredible view point in Yosemite National Park because the alignment of Bridalview Fall and El Capitan can only be seen from here, this point is often secluded, and the sunsets breathtaking. When you visit Crocker Point you often have the entire area to yourself, as most people stop their hike at Dewey Point. Additionally, on clear days you can see well into the Yosemite High Country from Crocker Point.
Read on to discover how to get to Crocker Point, what makes Crocker Point special, what you can see from Crocker Point, and so much more!
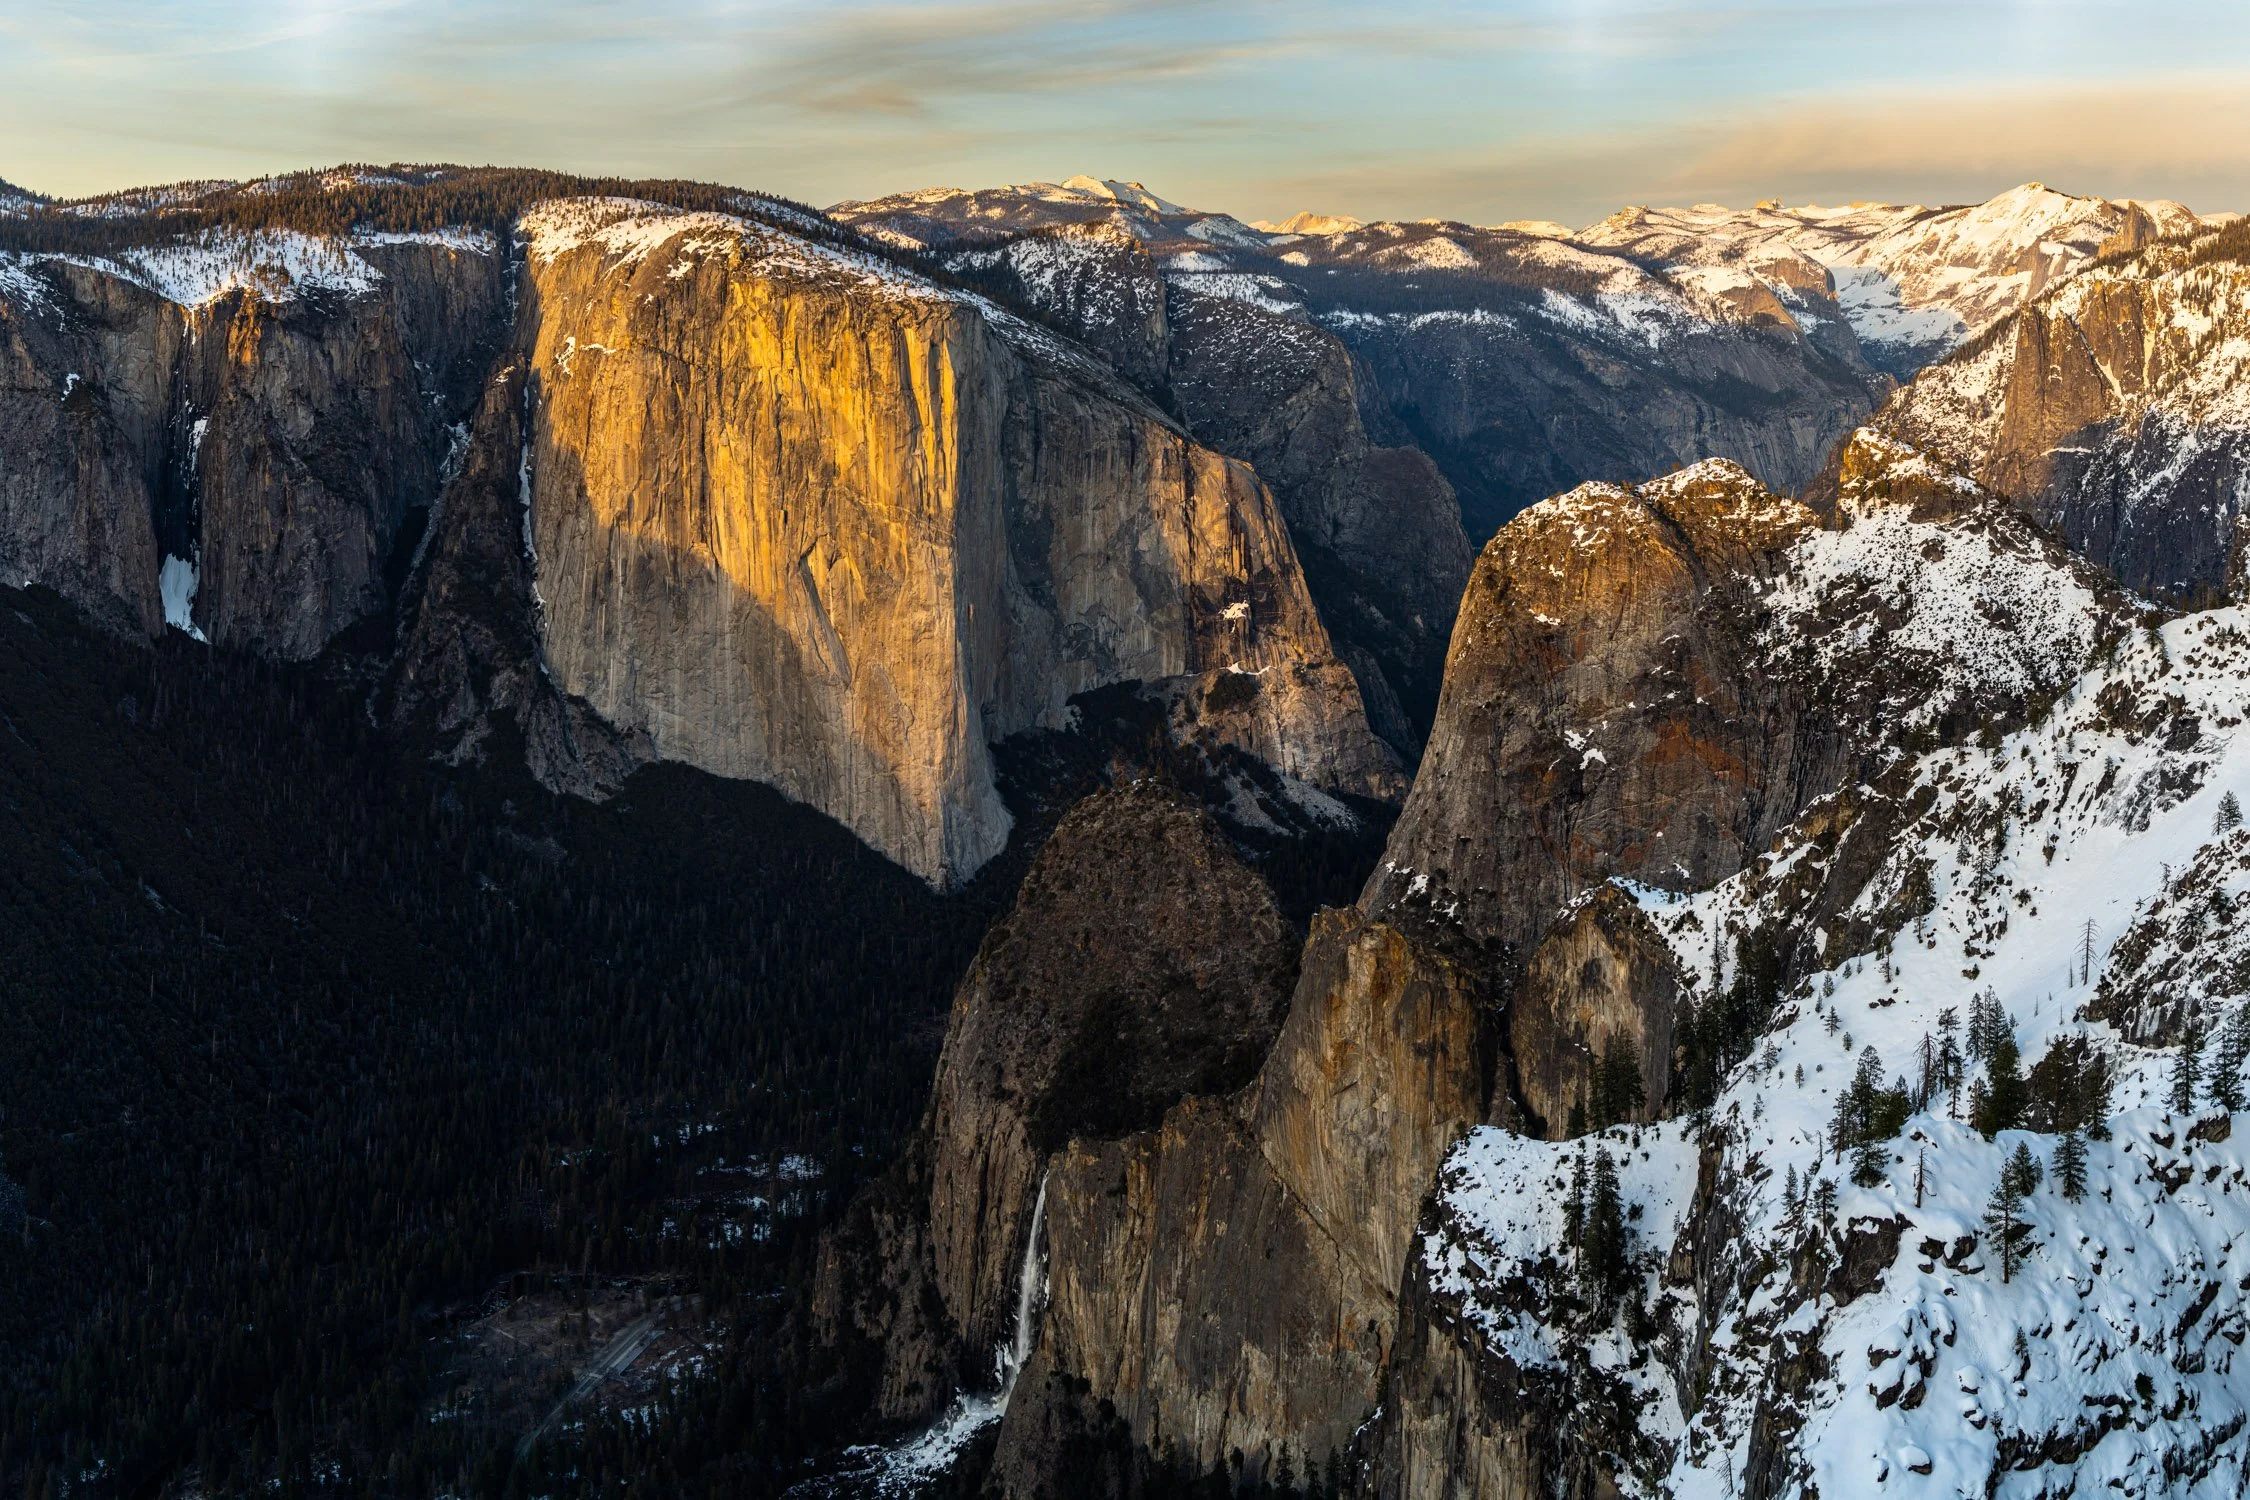
Orange-red sunset light glowing on El Capitan and Bridalveil Fall from Crock Point. Photograph by Dalton Johnson
Hiking to Crocker Point
There are several ways to hike to Crocker Point, but the two main routes are from Tunnel View and along the Ponoho Trail. Below
Hiking to Crocker Point from Tunnel View
Distance: 4.5 miles one way, 9 miles round trip
Elevation Gain: 2,700 feet of gain
Average Time: 4-6 hours round trip
Hiking to Crocker Point along the Ponoho Trail from Glacier Point Road
Distance: 5.4 miles round trip
Elevation Gain: 190 feet of gain
Average Time: 2-3 hours round trip
Discovering Crocker Point by Chance
In a naiveté and somewhat overconfident state of mind, I decided to hike from Tunnel View to Taft Point during the winter in hopes of taking some beautiful photographs along the way. At the time, my mindset was simple. I looked up from the floor of Yosemite Valley towards Tunnel View then turned my head tracing the ridge to Taft Point, “That shouldn’t take more than two day. Tops three.” So, I went to the ranger station and talked to them about winter camping permits. They are free and self-assigned.
Within a few hours my 100L pack was overflowing, my snowshoes were under my feet, and I was working my way up the Ponoho Trail towards Taft Point from Tunnel View. I honestly didn’t even know that there were other named points along the journey, but I was excited to be outside and continue developing my winter camping skills for the mountains. So, I walked, and walked, and walked. “Gosh, this hill is no joke!”
The climb from Tunnel View to the valley rim is roughly 1000 vertical feet. I didn’t know this. I honestly didn’t know much. Following a gut feeling and knowing that I could rely on the winter camping skills I had developed over the last 12 years of backpacking, I just pushed onward and upward. Ducking under fallen trees branches, dodging post holes other people had fallen into without snow shoes, and singing to myself as I walked. The snow was dampened most of the sounds, but the crunch of my snowshoes was deafening.
After a couple of miles, I noticed the trail was going to be covered with snow. I accepted the challenge. In the back of my mind, I could hear my Mom, “You have gotten lost in snow before, don’t make the same mistakes.” But, have no worries, this winter hiking trip has a happy ending.
A few more hours passed, but I made it to the rim and saw a really cool vista off in the distance.
I want to make a note here, I was moving quite slow as I attempted to slog up this hill with roughly 70lbs on my back all while taking several stops to photograph everything that was new, and pretty, to me along the journey. There was no rush on my end.
That vista looked really awesome, especially because there was a point that jutted out into the skyline and looked like it would be an amazing place for a photograph, but my pack was heavy and I would have to retrace my steps just to stand there, so I opted to just admire from afar. Actually, I remember telling myself, “When the summertime comes, you need to come back with a few friends and check that place out.”
As that point faded over my shoulder and behind some trees, my phone BINGED. I guess I have service up here, which was a surprise. My heart told me not to look, as it would ruin my immersion into this beautiful place, but my brain got the best of me. It was my girlfriend checking in on me. That was nice.
While I was on my phone, a thought popped into my head, “I wonder if anyone has ever gone to that point?” Naiveté, yes, but also remember I have not had a trail for several miles nor have I seen a single foot print for at least two hours. So, I googled it. To my surprise, this spot was Stanford Point. “Hmmm. I will keep that in the back of my head for this coming summer.”
As I carried on between the trees my belly grumbled. Eager to set my pack down and eat a peanut butter and jelly sandwich, I looked for another view point, but nothing. “I want to eat and enjoy this view,” I told myself. Okay, let’s go find a view. So, I did the only logical thing to make my way to a view as fast as possible. I ran downhill towards the cliff.
Bobbing and weaving between the trees, getting smacked in the face every so often from a low hanging evergreen, I did everything I could not to face plant into the snow. One minute, five minutes, gosh I am out of breath. “Okay, it is time to walk.” So, I walked for another 10 minutes only to find a sliver opening that contained both El Capitan and Bridalview Fall.
“What is this view?!” I shouted with excitement. “This is crazy sauce, how have I never seen a photograph from here?” Honestly, this was incredible. The alignment of these two is gorgeous and I can’t believe I am here to enjoy this view without a soul around. Dropping my pack, I walked around for a short while to find a better opening, this view was worth at least 5 minutes of searching.
“Found it!”
Grabbing my pack and moving towards an opening, I sat and enjoyed my sandwich. Feeling like an explorer who just discovered the most incredible view of Yosemite ever, I was proud of myself as I chomped down on my sandwich. Crunching the frozen bits between my teeth, sitting on my pack, I enjoyed this view more than any other view in a long time.
“I wonder if this spot has a name?”
Pulling out my phone, I looked on google maps. Where I was didn’t have a name, but if I climb the hill and walked another .25 miles I would be at Crocker Point. Looks like I wasn’t the first person to discover this view, but that is okay.
Grabbing my things, I headed up the hill to stand on the true Crocker Point, which was just as good, if not a better view.
What can you see at crocker point
Crocker Point has one of the most breathtaking with an alignment of El Capitan and Bridalveil Fall. While these two massive granite walls stand out anywhere in Yosemite Valley, there is no other vista where these two are aligned. This alignment is due to the way the glacier carved Yosemite Valley. Another awesome sight to see while standing at Crocker Point is a look deep into the Yosemite High Country. There are several more prominent Yosemite feature you can spot like:
Mount Hoffman
Leaning Tower
Yosemite High Country
Ribbon Falls
Best time of year to visit Crocker Point in Yosemite
Crocker Point is a unique vista as every season has a different look and feel. The most popular time to visit Crocker Point is in the late spring just after Glacier Point Road opens. My personal favorite is the winter because the seclusion and solitude at this time of year is at an all time high. So, what are the seasons like Crocker Point?
What is Crocker Point like in the Winter?
In the winter, Crocker Point is very snowy. Sitting at 7,128 feet above sea level, Crocker Point fills up with snow and holds onto the white blanket for several months because it is shaded for most of the year.
What is Crocker Point like in the Spring?
In the spring, Crocker Point is a magical place, but wet. As the snow melts, this area holds onto its moisture and can have several small pools of water that become a breeding ground for bugs. However, when you visit in the spring season, the waterfall on Bridalveil Fall is at its highest flow, so the view is incredible.
What is Crocker Point like in the Summer?
In the summer, Crocker Point is a dry and cool place to relax. Most of the water has dried by the summer months and the evergreens are holding onto all of their needles, creating a substantial amount of shade during midday. So, if you have hiked here from Tunnel View, or Glacier Point Road, you can relax in the shade and enjoy a few snacks.
What is Crocker Point like in the Fall?
In the fall, Crocker Point is beginning to cool down. As the warm summer days are giving way to fall, the landscape becomes brown as the ground plants drop all of their leaves for the coming winter months. But, this time of year is a great time to visit Crocker Point because this is the season with the least amount of visitors visiting Yosemite Valley.
Other Beautiful Vistas Close to Crocker point
Stanford Point, about 1.2 miles away
Taft Point (you will need to work for this one!), about 10 miles away
Now that you have discovered how to get to Crocker Point, what makes Crocker Point special, and what you can see from Crocker Point, it is your turn to get outside and enjoy this incredible view in Yosemite National Park. Please, leave a comment if you have any additional information that could/would be helpful for other Yosemite Valley visitors.
Discover more of Yosemite


Is Inspiration Point Worth the Hike?
Just a few miles up from Tunnel View is a similar view called Inspiration Point. Some people swear it is better, while others say the hike is not worth the trek. They are both correct. Yosemite Valley has tons of view points that are all similar with just a little bit of difference. Some views are slightly more aligned and some are a bit higher than others, but provide the “same” view. But, that is only if you care about the view at the destination. If you are in Yosemite Valley to hike and explore different spots, taking in the changing views as they come, then does it really matter what the end view is?
Just a few miles up from Tunnel View is a similar view called Inspiration Point. Some people swear it is better, while others say the hike is not worth the trek. They are both correct. Yosemite Valley has tons of view points that are all similar with just a little bit of difference. Some views are slightly more aligned and some are a bit higher than others, but provide the “same” view. But, that is only if you care about the view at the destination. If you are in Yosemite Valley to hike and explore different spots, taking in the changing views as they come, then does it really matter what the end view is?
Inspiration Point is a 2.6 mile hike that starts and ends at Tunnel View along the Ponoho Trail. This vista point is regarded as one of the premier photography locations in Yosemite National Park, but many say the hike is not worth it, as the view from Tunnel View is just as good. Well, everyone is correct. If you are only interested in the view, there is no need to hike up 1000 vertical feet, for the view is practically the same. However, if you are interested in a better experience, fewer people, a great hike, and stellar views, then the hike to Inspiration Point is one of the best hikes in Yosemite Valley.
Read on to discover the hike details, the difference between Artist point and Inspiration Point, how hard the hike is to Inspiration Point, and so much more!
Inspiration Point, all to myself, overlooking Yosemite Valley on a sunny winter day. Photograph by Dalton Johnson
Hiking to Inspirtaion point overview:
Distance: 2.6 miles round trip
Elevation Gain: 990 feet of gain
Trailhead: Ponoho Trail at Tunnel View
Average time to hike to Inspiration Point: 1.5 to 2 hours round trip
What is the difference between artist point and Inspiration point?
Artist Point and Inspiration Point are both older iconic stops that were utilized before the Wowana Tunnel was built and opened. Both of these view points were well known among travelers of the past, but have been fading in popularity as they now require hiking several miles to reach. Artist Point is a shorter hike, so many hikers stop here, meanwhile the more dedicated hikers continue up the trail to Inspiration Point. Both view point have a similar view, but they are different.
The biggest differences between Artist Point and Inspiration Point is the tree growth reclaiming the vista. As the years pass and the trees continue to grow, both of these views are starting to get “blocked”, which is why most claim Tunnel View is best. However, each point, Artist and Inspiration, offer unique views that are slightly different.
Artist Point is more slanted and towards the southern valley wall. This makes the spot a bit cooler as it stays in the shade longer. Also, this spot is more integrated into the slope of the cliff, providing only standing space in dirt for those who hike to Artist Point.
Meanwhile, Inspiration Point is squared to Yosemite Valley and sits on a granite outcropping. This allows more space and a solid surface to hikers to stay longer. Additionally, Inspiration Point is the highest of all the points, so it gives the most dramatic view in terms of feeling elevated in the sky.
What is the difference between tunnel view and inspiration point?
There is a hot debate between the differences of Tunnel View and Inspiration Point, but what really are the differences? To be honest, not much, but it is rooted in the history of Yosemite Valley. Before the Wowana Tunnel was built, getting down into the valley was a difficult and dead challenge for travelers as the slopes and roads were not conducive to travel via cart and buggy. However, along the way, there were gorgeous view points that stood out to most travelers. One of those views was Inspiration Point. However, after the tunnel was opened, travelers stopped visiting Inspiration Point because a new vista was created, Tunnel View. That is when the Tunnel View vs Inspiration Point debate started.
Now, I know that doesn’t answer the question, “What is the difference between Tunnel View and Inspiration Point?” So, let me dive in.
Tunnel View is a convenient outlook with a stunning view. At Tunnel View, you put your car in park, step out of the vehicle and take a look at an iconic view surrounded by 50 to 100, sometimes more, people all gwaking at that same view. I do it too!
Meanwhile, Inspiration Point used to be that same thing, until Wowana Tunnel was built. Since the opening of the tunnel, Inspiration Point has been a hiking destination for those looking to escape the crowds and enjoy the same view. Yup, that is right, it is the same view, just a different experience. So, head up to Inspiration Point and stand there like you just traveled here via horse and buggy.
Now, if you want to dive into the nitty gritty, the difference between Inspiration Point and Tunnel View is mainly the angle and tree growth. Tunnel View does not have any tree blockage, meanwhile Inspiration Point has a few trees in the way. Also, Inspiration point is slightly more squared to Yosemite Valley and elevated, compared to Tunnel View, so the showcases the valley floor better.
How hard is the hike to Inspiration point?
Hiking to Inspiration Point, in Yosemite Valley takes a little bit of grit, if you do not hike regularly. The trail is steep with several switchbacks and often takes about an hour to reach Inspiration Point. If you hike regularly, at least once a week, this hike will be a moderate outing. The 2.6 mile round trip journey climbs about 1000 feet and offers great views of Yosemite Valley without the crowds.
From time to time, when hiking to this look out I ran out of breath, but the good news, there are several places to stop. Yup, that is right, almost every switchback has a great place to sit and enjoy the view. For many, you don’t even need to go all the way to Inspiration Point because the views along the way are good enough. With that said, I suggest making the trek to the look out becasue there wont be very many people.
History of Inspiration Point in Yosemite
Early in Yosemite’s history, the routes into the park were quite different from those today. The two primary routes, Old Big Oak Flat Road and Old Wawona Road, took higher paths with a steeper descent into the valley. These dusty stagecoach roads sufficed for sporadic, slow-moving horse-drawn carriages, but they never would have managed today’s automobile traffic – many sections of Old Big Oak Flat Road have vanished under rock slides, so there’s that too.
But like today, those roads featured turnouts that allowed stunning “welcome to Yosemite” views that incoming travelers enjoyed the same way people today enjoy Tunnel View. However, when the park service completed the “new” Wawona Road in 1933, the old road, along with its popular viewpoints, quietly sank into obscurity, leaving its once-popular viewpoints abandoned.
Tunnel View assumed the mantle of “quintessential Yosemite Valley viewpoint” as Inspiration and Artists Points were relegated primarily to hikers. And today, you can reap the benefits of the relative obscurity of both spots to enjoy views that are, in some ways, superior to Tunnel View all while also basking in relative silence and solitude.
**this block comes from Modern Hiker, which is a great additional resource for hikers
Other great hikes near inspiration point:
Yosemite Valley has countless wonderful great hikes, but here a select few that are worth hiking:
Half Dome via the Cables
Dewey Point
Four Mile Trail to Glacier Point
Taft Point
Now that you have discovered the hike details, the difference between Artist Point and Inspiration Point, and how hard the hike is to Inspiration Point, it is your turn to get outside and enjoy this incredible hike in Yosemite Valley. Please, if you found this article to be helpful, or you have additional information that would/could be helpful to other, drop a comment below!
Discover more of Yosemite Valley
Tackling Lake Tahoe's Triple Link Up | Freel Peak, Jobs Sister, and Jobs Peak
Bumping down the dirt road to the Freel Peak Trailhead, we had a crazy idea in mind. My climbing partner and I, for our rest day, decided it was time to give peak bagging, aka hiking to the top of a peak, a try. Not really sure what we were getting ourselves into we were giddy with excitement. Sleeping the van, I am not sure if either of slept. Maybe it was the lentil soup that bloated our bellies, or maybe, it was the excitement. Regardless, we knew attempting to tackle the Tahoe Triple would be an adventure.
Bumping down the dirt road to the Freel Peak Trailhead, we had a crazy idea in mind. My climbing partner and I, for our rest day, decided it was time to give peak bagging, aka hiking to the top of a peak, a try. Not really sure what we were getting ourselves into we were giddy with excitement. Sleeping the van, I am not sure if either of slept. Maybe it was the lentil soup that bloated our bellies, or maybe, it was the excitement. Regardless, we knew attempting to tackle the Tahoe Triple would be an adventure.
The Tahoe Triple is an advanced hiking loop that summits Freel Peak, Jobs Sister, and Jobs Peak along a 12 mile loop with significant elevation gain. This challenging hike is often tackled in a day taking anywhere from 10 hours to 22 hours. The terrain is loose sand, trail walking, and scree fields. Many who attempt the Tahoe Triple find the challenge to be difficult, but manageable.
Read on to read about our journey, an overall route description, great photos, and some helpful tips for hiking the Triple.


The Triple overview:
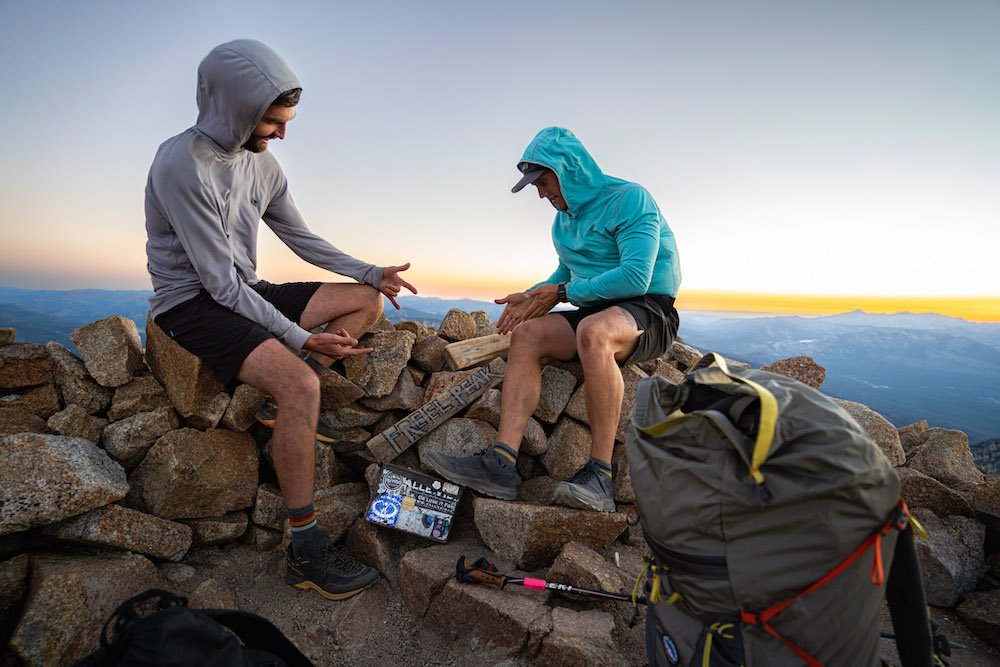
Freel Peak: 10,881' (highest summit in Lake Tahoe)
Jobs Sister: 10,823' (2nd highest summit in Lake Tahoe)
Jobs Peak: 10,633 (4th highest summit in Lake Tahoe)
Distance: Roughly a 12 mile loop
Route: Starting at the Freel Peak Trailhead to access the Tahoe Rim Trail (TRT). This lead us to some "class 3" hiking so we could summit Freel Peak, Jobs Sister, and Jobs Peak in order.
Scott enjoying the sunrise from the top of Freel Peak in Lake Tahoe. Photograph by Dalton Johnson
Our Journey Doing the Triple
Kinda sandbagging my climbing partner on his first alpine start (3:30 am), we headed out of the van with the hope of catching sunrise atop Freel Peak (10,881 feet). We didn’t do to much research about the Triple, but we did read a couple of trip reports that mostly said follow the trail and then turn off the Tahoe Rim Trail at the saddle, then follow the ridge.
That was about all the information we really needed.
Roughly six miles from the van, we pushed our way to the top of the saddle and found the sign, which makes the beginning of the class 3 section. Once we embarking upon the class 3 (really class 2 because the route is so well traversed) terrain, I made Scott lead the way, his first time walking off trail.
He got us to the top!
Just in time for the sunrise as well! Stoked on the top out, Scott broke out his "victory apple". Yup, breakfast atop the highest peak in the Tahoe basin watching the sunrise... not too shabby!
As breakfast finished up, we signed the registry, packed our bags. Since it was late in the summer, most of the flowers had dried out, but there were some patches on the northern slopes, so I had to take some photos of the wildflowers.
Now that we had finished that break, we took off for the other two peaks. Cruising along, we just kept walking. Kinda laughing at ourselves, for this day was our rest day. The effort level was much higher than expected, this hike is difficult.
Reaching the summit of Jobs Sister was quick, maybe taking 30 minutes max, to our surprise. We took some silly photos (that can’t be shared) and just hung out for a short bit before moving on.
As we slid down the beach—this is what Scott and I were calling the sand slog— on the south side of Jobs Sister, we headed for Jobs Peak, our last peak of the day. We were tired. Not sure as to why we were so tired, but we both acknowledged that we were tired to each other. It could have been for a variety of reasons, but let’s speculate it could have been the lack of food, maybe the elevation, the lack of sleep, or really the lack of training that Scott halfway up Jobs Peak.
Sitting down for a few minutes helped him recoup. He was feeling a bit dizzy and didn’t know if he wanted to keep going, but, at this point, there really isn’t much of a choice. So, we pushed for the summit.
At 9:00 am, we reached our third summit.
We had topped out all three peaks and were ready to relax. So, kicking back, snacking a wee bit, and journaling is what we did. We both
After a bit, we headed back to the van for a nap!
What Gear should you have to Hike the Tahoe Triple
While the list of gear could be endless, I narrowed down what the essentials are for hiking the triple in a single day. If you plan to do this over several days, your list will look different:
Hiking Shoes or Boots: Hiking boots and shoes is a preference that changes for every person. Many people who do the Triple use trail running shoes, but I used La Sportiva approach shoes to have extra grip during the scrambling. These worked well for me.
A Day Pack: From the pictures you will see that Scott used a school backpack, that will work. On the flipside, I used a hydration pack that also had 14L of space called the Mule by Camelbak.
Sunshirt: For the last few years I have been exclusively hiking in sun-shirts because the lightweight material, long sleeves, and hood make them perfect for hiking/being outdoors. My favorite has been Belay Sun Hoodie from The North Face.
Snacks: I would bring a couple of bars, my favorite are ProBar Meal Bars, and maybe some nuts. I am not a huge fan of energy gu, but I do know that other hikers use these and enjoy them.
Camera: Overall a phone will do just fine, but if you are looking to carry a camera I would suggest using a Sony a6000 if you are new to photography. If you are looking for a professional camera, I would suggest using the Sony A7r5 with the Tamron 28-200 zoom lens.
Lots of Water: I would suggest bringing 3 to 4 liters of water because there isn’t any water along this route.
How Long Does Hiking the Lake Tahoe Triple Take?
I took a pull from those who have hiked the triple in a day and almost everyone was around 8 to 10 hours. Now, I do think this is on the faster side and if you are hoping to hike this as a personal challenge know that it could take you up to 15 hours, but most likely not more than that. If you are worried about the hike you can prepare for it by hiking Freel first, so you know the route. Additionally, if you can hike Mount Rose in a day, you will be able to do the Tahoe Triple, they are about the same in terms of effort level.
Other Hikes to Consider in Lake Tahoe:
Lake Tahoe is home to some of the most diverse hiking trails in California, so make sure to explore around the area to find something you like:
Mount Rose
Mount Tallac
Are you looking for other challenging hikes in Lake Tahoe? If so, I wrote an article about 5 Enjoyable Challenge Hikes of Lake Tahoe that you can check out here.


Now that you read about our journey, an overall route description, great photos, and some helpful tips for hiking the Triple it is your turn to get out and experience this challenging hike for yourself! If you have any additional information that would/could be helpful to other adventuers in this community, please drop a comment below.
Discover More about Lake Tahoe


Outside Rock Climbing Near Anchorage | Sunshine Ridge (5.7) and More
If you are an avid rock climber and are itching to climb on rock outside, Sunshine Ridge is your answer. Located close to Anchorage, Alaska along the Seward Highway is a wonderful rock climb to gain confidence and learn how to place trad gear. This route is rated 5.7, however most would claim it is something more like 5.5. Without getting into the weeds about grades, the route is fun and has quality rock, which is a surprise for the area.
If you are an avid rock climber and are itching to climb on rock outside, Sunshine Ridge is your answer. Located close to Anchorage, Alaska along the Seward Highway is a wonderful rock climb to gain confidence and learn how to place trad gear. This route is rated 5.7, however most would claim it is something more like 5.5. Without getting into the weeds about grades, the route is fun and has quality rock, which is a surprise for the area.
Sunshine Ridge is a four pitch, 450 foot, mixed rock route, meaning traditional climbing and sport climbing, that takes you to the top of a prominent prow along the Seward Highway. Many climbers will enjoy this climb after work, or on the way to work, and usually takes 30 to 60 minutes car to car.
Read on to discover what gear you need, the route description, how to know if you are ready for this climb, and so much more!
The pitch description goes as such:
Pitch 1: 5.5, from some boulders about 50ft up the scree slab, climb past a few bolts (button head) and up onto the ridge. After about 60-70ft from the deck there is small ledge to belay off of with some gear. You can also keep climbing to one bolt one chain anchor above that. 150ft.
Pitch 2: 5.7 From the anchor climb up and to the left and climb a small bulge with some bolts. Climb up past bolts to a large boulder on a ledge. Belay from here. 120ft.
Pitch 3: 5.6 From the boulder climb up the face with some bolts. Climb the 5.6 moves to more easy climbing. There is a two bolt anchor above this. 100ft.
Pitch 4: 5.6 Climb up and left from the anchor to a left to a leftwards leaning crack, climb this and cut back right past a bolt to a two bolt anchor on a small ledge. There are also opportunities to belay from gear above the anchor. 100ft
Gear Needed to Climb Sunshine Ridge near Anchorage, Alaska?
If you are new to multi-pitch rock climbing, Sunshine Ridge will be a wonderful route to practice and develop your skills. I suggest bringing the following protection:
2x cordelettes for anchors
A set of stoppers (aka nuts)
Walkie talkies
2x gri-gris
Note: this rock climb suggest bringing cams and nuts, however I did not place any and only used quick-draws. I think there has been some retro-bolting in recent years.
Other Rock Climbs Close to Sunshine Ridge:
If you have more time I suggest exploring other rock climbs in the area. There has been a large boom of rock climb develop in the area and here are some of the classics:
Make sure to enjoy the sunset views from the summit of Sunshine Ridge, the views are absolutely incredible! Photograph by Dalton Johnson
Now that you have discovered what gear you need, the route description, and how to know if you are ready for this climb it is your turn to get out and enjoy this fun climb. If you have any additional information that could/would be helpful for other climbers, please drop a comment below.
Discover more of Alaska


Everything You Need to Know to Kayak on Twin Lakes, Bridgeport
Halfway between Lake Tahoe and Mount Whitney there are two lakes tucked away in the Eastern Sierra mountains filled with fish, readily available fishing, and a glassy waters that are asking to be paddled upon. Located in Bridgeport, California, Twin Lakes are a hidden gem perfect for a weekend get away, or a week long family camping trip. Not only does Twin Lakes have some of the best flatwater kayaking, accessible to all levels of kayakers, but there is stellar hiking, hot springs to soak in, and trees to hang a hammock.
Halfway between Lake Tahoe and Mount Whitney there are two lakes tucked away in the Eastern Sierra mountains filled with fish, readily available fishing, and a glassy waters that are asking to be paddled upon. Located in Bridgeport, California, Twin Lakes are a hidden gem perfect for a weekend get away, or a week long family camping trip. Not only does Twin Lakes have some of the best flatwater kayaking, accessible to all levels of kayakers, but there is stellar hiking, hot springs to soak in, and trees to hang a hammock.
Twin Lakes in Bridgeport, California is a premier flatwater kayaking destination for outdoor enthusiast and fisherman alike. These two lakes, tucked in the Eastern Sierra mountains, have a stunning mountainous view from anywhere on the lake. Many kayakers come to Twin Lakes because you can bring your own kayak and launch for free. The calm waters make this lake accessible for families and beginner kayakers as well.
Read on to discover where to access Twin Lakes, places to camp, boating rules, and so much more.
DIRECTIONS TO TWIN LAKES:
Twin Lakes is located off of Highway 395 in the town of Bridgeport. To get here, turn on Twin Lakes Road and drive the twelve miles until it dead ends into the lakes. You’ve made it!
Driving directions to Twin Lakes
WATER ACCESS TO TWIN LAKES:
Twin Lakes in Bridgeport, California has some of the easiest accessed flat water kayaking. You can launch a kayak, for free, from the shore as most pull outs have a trail leading to the water. If you would like a dock and a ramp, you can go to the campground for paid launch.
One of the main attractors to kayaking on Twin Lakes in California is that you can bring your own kayak and launch it for free. This option significantly cuts down the cost and allows paddlers to enjoy the public lands in the Eastern Sierra.
WHY IS TWIN LAKES ONE OF THE BEST FLAT WATER KAYAKING LOCATIONS:
Kayaking on Twin Lakes is one of the best flat water kayaking spots of Northern California because the mountain backdrop is one of a kind. The jagged peaks to the west of Twin Lakes is called the Sawtooth Range, which is home to some of the best rock climbing in the High Sierra. Additionally, Twin Lakes and the town of Bridgeport are “off the map” for mainstream tourism, so the area is quiet and tranquil.
After a long day of kayaking on Twin Lakes you can soak your sore muscles in Travertine Hot Springs or Buckeye Hot Spring.
Lastly, Twin Lakes is an amazing area to kayak in because there is splendid free camping in the area as well as several paid campgrounds with bathrooms.
Can you Kayak on Twin Lakes in California?
Kayaking on Twin Lakes in California is free and open to the public. When you arrive at these two lakes, you will find several families and outdoor enthusiasts enjoying the lake in a variety of way. Many use kayaks to access the larger fish in the middle of the lake, as well as for fun with kids. Twin Lakes in a fantastic flat water lake that can be paddled on by any level kayaker.
Can you rent kayaks at Twin Lakes?
Twin Lakes has a variety of places to rent kayaks by the hour, for the day, or several days. Some of the kayak rental places will require you to return the kayak each night, so make sure to ask what the rules are if you are renting for several days. Some of the most popular places to rent kayaks at Twin Lakes are:
Are motorboats allowed on Twin Lakes in Inyo National Forest?
Upper Twin Lake has a 35 mph boat speed limit and allows jet and waterskiing, whereas Lower Twin Lake’s boat speed limit is 5 mph. The only boats I saw on either lake while I was there were a couple of small fishing boats and a number of kayaks pulled up on the shore. Otherwise, I had these two lakes entirely to myself. After a satisfying paddle on the water, this superb kayaking experience will leave you full, rested and wanting more.
Is there camping at Twin Lakes?
There are three options for camping at Twin Lakes. All three options provide a unique experience and are varied in prices. Your options for camping in the Twin Lakes area are:
The U.S. Forest Service has built several campsites that are “first come, first serve” that come with a fire pit, a parking spot (this usually fits two vehicles), a bench, bathroom, and a tent spot. These spots range from $15-25 a night.
Twin Lakes Resort offers two different campsites with several amenities for $40-55 a night for RV campsites. These campsites come with power and bathrooms.
In the surrounding areas of Twin Lakes there is free dispersed camping located on BLM land. The rules of these free camp sites are constantly changing, so please make sure you are following the ever changing rules.
DON’T MISS OUT ON THESE OTHER ADVENTURES NEARBY:
Climb Matterhorn Peak
Hot Spring at Buckeye

Kayaking on the breath taking Twin Lakes of Bridgeport, California. Photograph by Dalton Johnson
Now that you have discovered where to access Twin Lakes, places to camp, and the boating rules it is your turn to get out and paddle on these gorgeous lakes. Please, if you have any additional information that you think would/could be helpful to other kayakers, please, leave a comment and share your knowledge to help build a better community.
Discover More of the Eastern Sierra

9 Must Do Vacation Ideas in Baja Sur
Fish tacos, a few beers, and sunburns, that is often what Baja Mexico gets its name for, but that isn’t all this 1000 mile peninsula has to offer. The golden beaches often have surf-able waves, the mountains contain waterfalls, and the salty-waters are home to one of the most diverse aquatic biospheres. When you come down to Baja for vacation, you could sit on the beach, or you could make memories that will last you a lifetime when you step a little outside of your comfort zone and head out on an epic adventure.
Fish tacos, a few beers, and sunburns, that is often what Baja Mexico gets its name for, but that isn’t all this 1000 mile peninsula has to offer. The golden beaches often have surf-able waves, the mountains contain waterfalls, and the salty-waters are home to one of the most diverse aquatic biospheres. When you come down to Baja for vacation, you could sit on the beach, or you could make memories that will last you a lifetime when you step a little outside of your comfort zone and head out on an epic adventure.
The best vacation adventures in Baja Sur are:
Learn to Surf at Cerritos Beach
Kiteboard in La Ventana
Hike the Abandoned Sugar Mill
Spearfish in El Canejo
Road Trip the East Cape
Snorkle at Cabo Pulmo
Ocean Fishing in a Panga
Release Turtles in Todos Santos
Camp on the Beach
Read on to discover how much these adventures cost, how to get there, what to expect, and so much more!
Enjoying the sunset view from the top of the Old Port hike in Todos Santos. Photograph by Dalton Johnson
Learn to Surf at Cerritos Beach
The warm waters of Cerritos Beach, the sand bottom, and consistent waves makes Playa los Cerritos a perfect surf spot. With three distinct areas to surf, Cerritos Beach has a break for every level of surfer. Pack a long board or short board, or rent one once at the beach, for there is an area to surf every style at Playa los Cerritos. Almost everyday, there will be ridable waves and friendly faces. So, if you are looking to surf in while in Baja, come to Cerritos Beach to catch waves for yourself.
How much does Learning to surf cost?
Learning to surf at Cerritos Beach ranges from $100-200 depending on the skill level, number of lessons, group lesson vs private lesson, and board rental costs.
If you want to learn how to surf at Cerritos Beach, I suggest going to CRT and ask for Juan or Carlos. They are great surf instructors, offer fair prices, and have been around the longest. Additionally, if you tell them “DALTON sent me” they will most likely give you a discount on lessons or board rentals.
Where is Cerritos Beach?
If you are staying at one of the many AirBnB’s or VRBO’s in Cerritos Beach, getting there from the Cabo airport will take about an hour and half if you take the toll road. However, since Cerritos Beach has fewer amenities than Cabo San Lucas or San Jose del Cabo, many visitors stop to grocery shop along the way, making the trip about a 2.5 hour journey.
Drive time Los Cabo airport to Cerritos Beach via toll road, without stops, is about an hour and 30 minutes
Drive time Los Cabo airport to Cerritos Beach via toll road, with stops, is about two hours and 30 minutes
Wait! Before you move on, are you interested in learning more about surfing at Cerritos Beach? If so, I wrote a full article with everything you need to know about surfing Cerritos Beach, check it out here.
Kiteboard in La Ventana
La Ventana is a special place for kiteboarding. The large island seen off-shore, Isla La Ventana, creates a wind channel making for the most consistent kiteboarding in all of Baja. The nice part about La Ventana is that the community is built around kiteboarding and everyone is willing to help each other out. Additionally, there are several areas you can kiteboard that provide a varitey of different styles of kiteboarding.
How much does it cost to learn how to kiteboard?
In La Ventana kiteboarding lessons range from $100-150 per lesson based on a skill level and gear rental. If you are a beginner, you will need more hands on instruction and will need to practice flying a kite on the beach with a trainer kite. Until you are proficient with flying a kite on the beach, you should not enter the water.
Where is la ventana?
La Ventana is located on the east cape close to La Paz. From La Paz, you will head south along BCS 268 for 40 kilometers, then take a left turn into the town.
Click here for driving directions to La Ventana
Hike the Abandoned Sugar Mill
If you are looking for a good leg stretcher while traveling in Baja, Mexico with views of the Pacific Ocean, hiking to the abandoned Sugar Port is a must! This hike takes you to a “secluded” beach, which is growing in popularity. If you arrive around low tide, you can lay on the beach without any worries. However, if the tide is rising, make sure to NOT leave your things on the beach, as the tide might consume them.
How much does it cost?
The beautiful part of hiking the abandoned sugar mill is that it is free to hike and free to park.
Old Port of Todos Santos Hike Overview:
Distance: 4.6 miles round trip
Elevation Gain: 900 feet
Are dogs allowed? Yes, dogs are allowed and welcomed on the Old Port hike
Where is the Abandoned Sugar Port hike in Baja?
If you are looking for a good hike along the beach while you are in Baja Sur make your way to Todos Santos and hike to the abandoned sugar port. Parking for this 5 mile hike is near the Hotel San Cristobal at Punto Lobos.
Spearfishing in the tidal zone of El Canejo in Baja Sur. Photograph by Dalton Johnson
Spearfish in El Canejo
If you have spearfishing gear while traveling in Baja Mexico, you should suit up and hit the waters. While I say Canejo is the spot to go, you can honestly catch your dinner in most spots along the coastline. Fish are ample and as long as you are not in a preserve, you can catch as much as you would like. Have a fish fry, make ceviche, make some sushi, heck… do it all! It’ll taste better in a taco, I promise.
How much does it cost?
El Canejo does not offer much, if anything, it terms of goods and services, but this means it is still free to visit El Canejo. The beach camping is free and there are no amenities. I have heard there is a toilet being built, but I can not confirm.
Where is el canejo?
El Canejo is an hour and a half drive north from La Paz. After driving 75 kilometers you will turn left and head down a dirt road to the beach. The turn off can be hard to find, so keep an eye out for a gap in the roadside shrubs and a small sign with lots of stickers. As you drive down the dirt road, you will eventually make it to the beach. Find a spot the suits you!
Click here for driving directions to El Canejo
Additional Places to Spearfish in Baja Sur:
La Ventana
The Cabo Area
The greater La Paz area
San Juanico
Interested in spearfishing in Baja? I wrote up a full article on where to spearfish, the fish you can catch, and so much more here in this article!
Road Trip the East Cape
The East Cape Road is where I learned how to dive. My Dad took me out there when I was roughly 12 years old, plopped me in the front seat of his Ford 250, and asked if I could reach the pedals. The East Cape is littered with beach camping and its development has been slow. With that said, several ex-pat communities have popped up and on a recent trip up this road, I noticed several UTVs in use. The roads out here are dirt, often washboarded out, but well worth the tour. I would not recommend an RV take this road, but my 2-wheel drive van made it no problem—we only got stuck in the sand once.
WHY SHOULD I VISIT EAST CAPE ROAD?
Access to the Cabo Pulmo National Marine Park
A sense of adventure and untouched land
The pace is slower and people rely on each other
Wildlife is around, keep an eye out
Access to great surfing
Beach Camping
How much does it cost?
Depending on if you have a car, or not, will determine the cost of the trip. Overall, a road trip through the East Cape can be as short as a day and one tank of gas which would cost $250-300, including car rental. However, several people are interested in doing this trip over 2 or 3 days, which substantially increases the costs.
Where is the east cape in Baja?
When you are looking at a map of Baja the East Cape is found at the very bottom of the peninsula and is considered the stretch of road that travels from San Jose del Cabo to La Paz along the coastal road. Much of this road is not paved.
Snorkle at Cabo Pulmo
Cabo Pulmo is a national marine sanctuary that is home to one of the most diverse and flourishing aquatic-life zones in the world. Controversial at first, Cabo Pulmo’s protection has now become a hot spot for tourism, focused on SCUBA and snorkeling trips. The warm and clear waters of the Sea of Cortez are create an ideal breeding ground for the fish in this area. Also, throughout the year a migration pattern with larger fish has made it so tourist return several times to see different life.
How much does it cost?
Snorkeling trips Cabo Pulmo cost between $75-150/person, however, if you can snorkel for free if you have a mask and swim from shore. The cost of snorkeling trips is mainly for the boat.
Where is cabo pulmo?
Cabo Pulmo is located 167 kilometers from La Paz and 98 kilometers from San Jose del Cabo. Regardless of where you are coming from, Cabo Pulmo is a must see aquatic oasis.
The captain showing off the days catch while ocean fishing in a panga in Baja Sur. Photograph by Dalton Johnson
Ocean Fishing in a Panga
There is nothing more exciting than loading up a panga (which is a small fiberglass boat) and heading out into the open ocean with a local fisherman. When I was younger, I would immediately fall asleep as we headed out to sea and would wake up to 360 degrees of ocean, that was always a bit frightening. In recent years, I have enjoyed watching the fisherman set up their boats, take down notes, and talking with them about fishing (most speak some English, but it is better if you can speak Spanish).
How much does it cost?
As fishing becomes a popular tourist attraction, the cost has substantial increased. Growing up, we used to leave San Jose for around $50/person. Now, the cost can run $300-600/person. These prices change based on the number of people you going, but note this is not a inexpensive trip. The good news, however, is that I always come home with a freezer full of fish!
Where is to go ocean fishing in a panga?
There are several places to go fishing in a panga, as well as several fishing charters you can hire. I have enjoyed my time fishing with a variety of fisherman leaving from these three spots:
Punta Lobos in Todos Santos
San Jose del Cabo
San Juanico
Release Turtles in Todos Santos
Park your van on the beach and halt your road trip through Baja for a couple of days at Tortugueros Las Playitas just outside of Todos Santos. While this beach might not be the friendliest to swim in or play in, the beach itself is home to the a turtle sanctuary. What feels like daily occurrences throughout the winter, turtles are released at sunset. If you are sleeping at this beach, or just here for an outing, I suggest taking a picnic. You can eat your food, laugh with friends, and hang out while you wait for the turtles to be released. Once the sun sets, the night will get cold, so go crawl back into your van.
How much does it cost?
There is no cost to release turtles in Todos Santos, however there is an option to donate to the turtle rescue to keep the turtle conservation going.
WHERE CAN YOU RELEASE TURTLES IN TODOS SANTOS?
Just north of the town of Todos Santos you will find a long stretch of beaches that are unpopulated. It is here that Tortugueros Las Playitas has its conservation center with turtle releases.
Directions to Tortugueros Las Playitas
Camp on the Beach
Beach camping in Baja, Mexico is dreamlike. Where else can you; wake up to the sound of waves crashing, making a cup of coffee, and taking it out to your chair planted in the sand to watch the sunrise for free? Yes, using “dreamlike” is over-done, but it fits, I promise. After 7 years of living on the road, I’ve realized there isn’t much out there which compares to Baja. More specifically, Baja Sur. While several beaches have become over-populated in recent years, Baja’s coastline is still relatively unpopulated. The beaches that are crowded are often close to a main road with easy access. My guess, if you just go a few turns north, or south, you will find something similar, if not better, without anyone.
How much does it cost to camp on the beach?
The cost of camping on the beaches in Baja will depending on the area. Most of the beach camping in Baja is free, however as some of these spots grow up and gain amenities, a small fee of $3-10 a night is becoming the norm. Also, as the coastline in popular place, like Cerritos Beach, gets developed RV and vanlife parks are becoming the new home. I have found these parks to be in the $10-20 a night range.
Which beaches can i camp on in baja?
At the end of the day, the beaches of Baja are open to all by federal law. The access can be restricted, but the beach itself is public land. With that said, here are my favorite beaches to camp at:
Along the East Cape road, ideally near Cabo Pulmo or a surf break
Planning to camp on the beaches in Baja? I wrote a helpful article about what to expect when beach camping, read it by clicking here.

A surfer takes in an extraordinary sunset while surfing at Cerritos Beach in Baja Sur. Photograph by Dalton Johnson
Now that you have discovered how much these adventures cost, how to get there, and what to expect when embarking on these adventures in Baja Sur it is your turn to get outside and explore for yourself. If you have any additional information that would be helpful for others in this community please drop a comment below.
Discover more of Baja Mexico


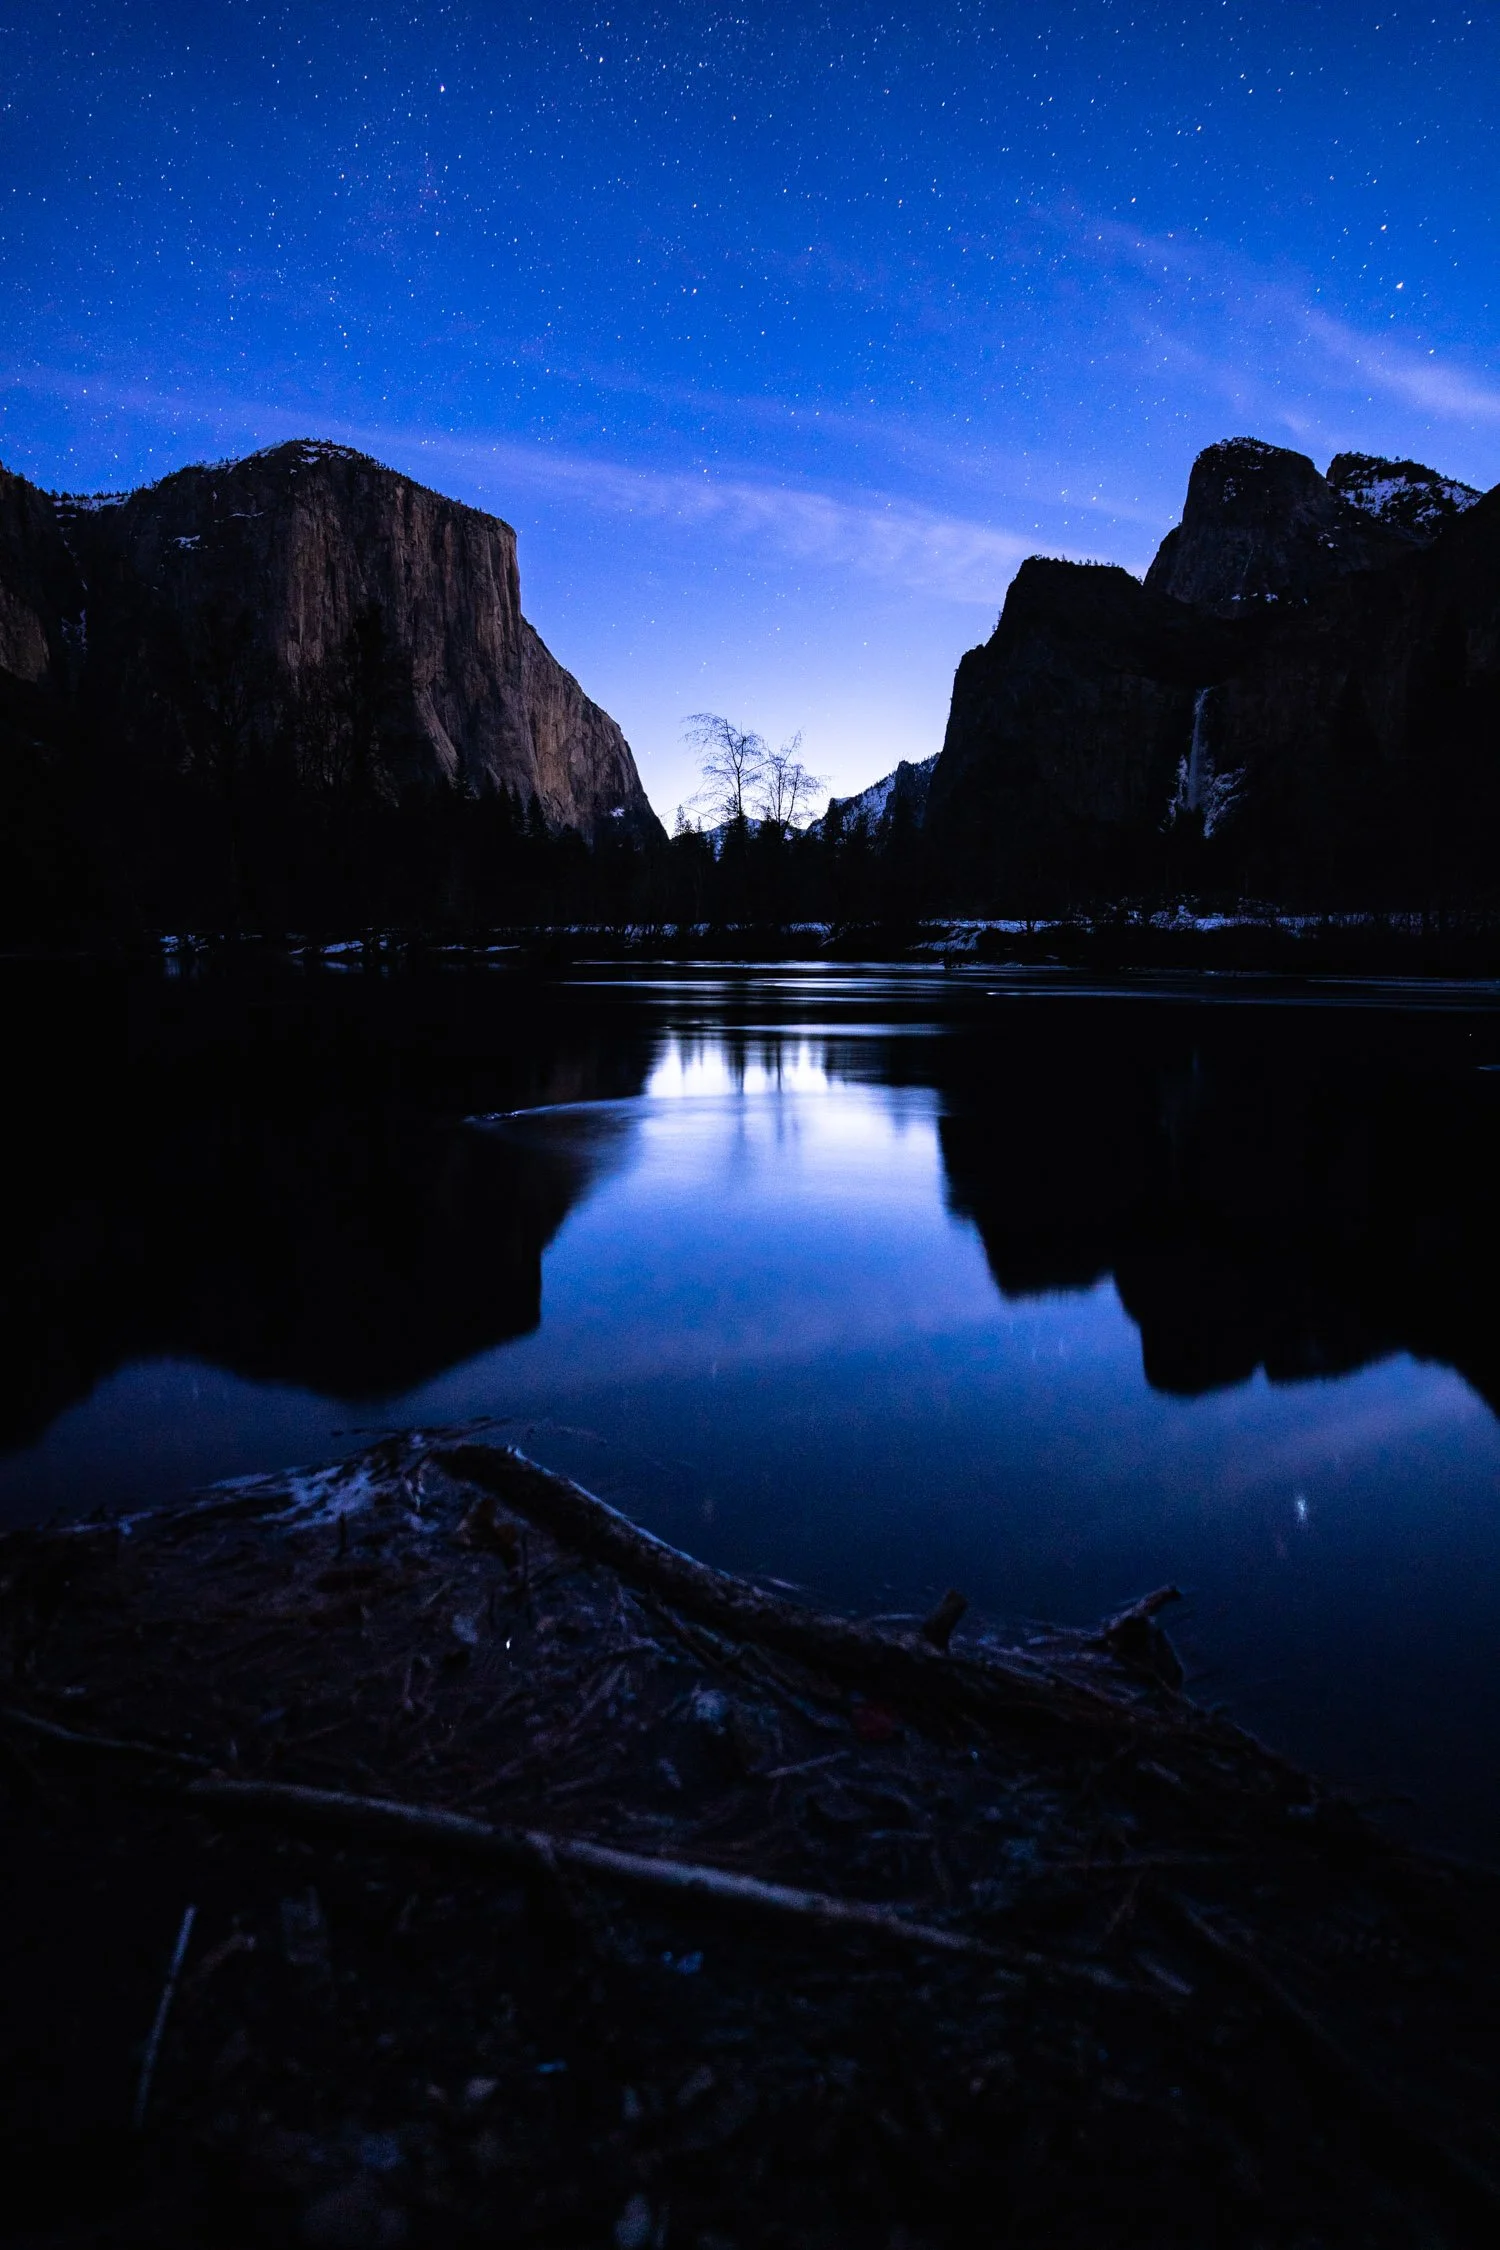
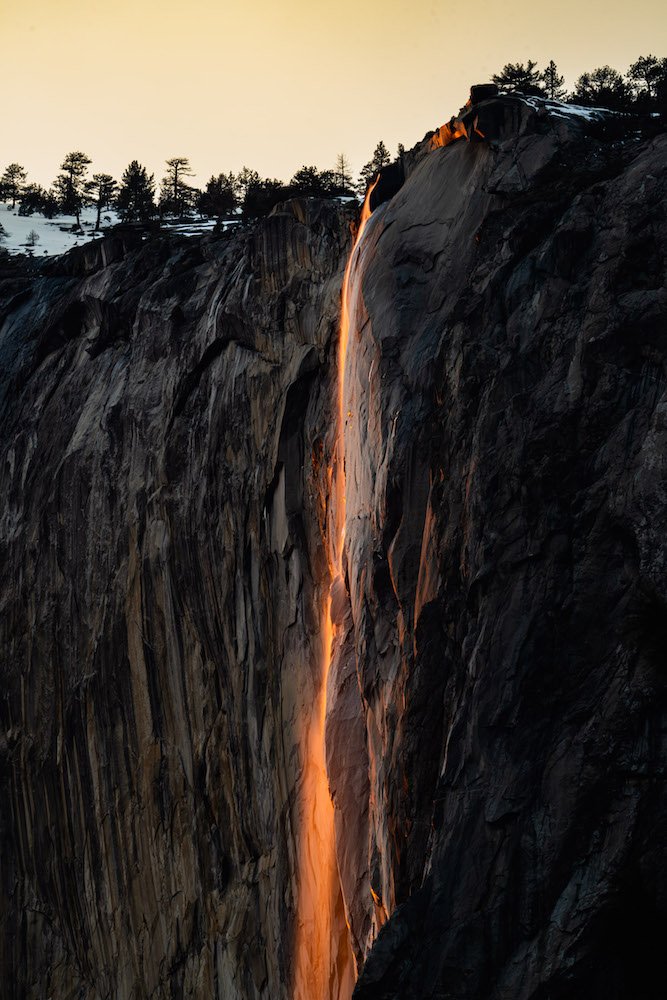
Bridalveil Fall | Yosemite Valley Waterfall Guide
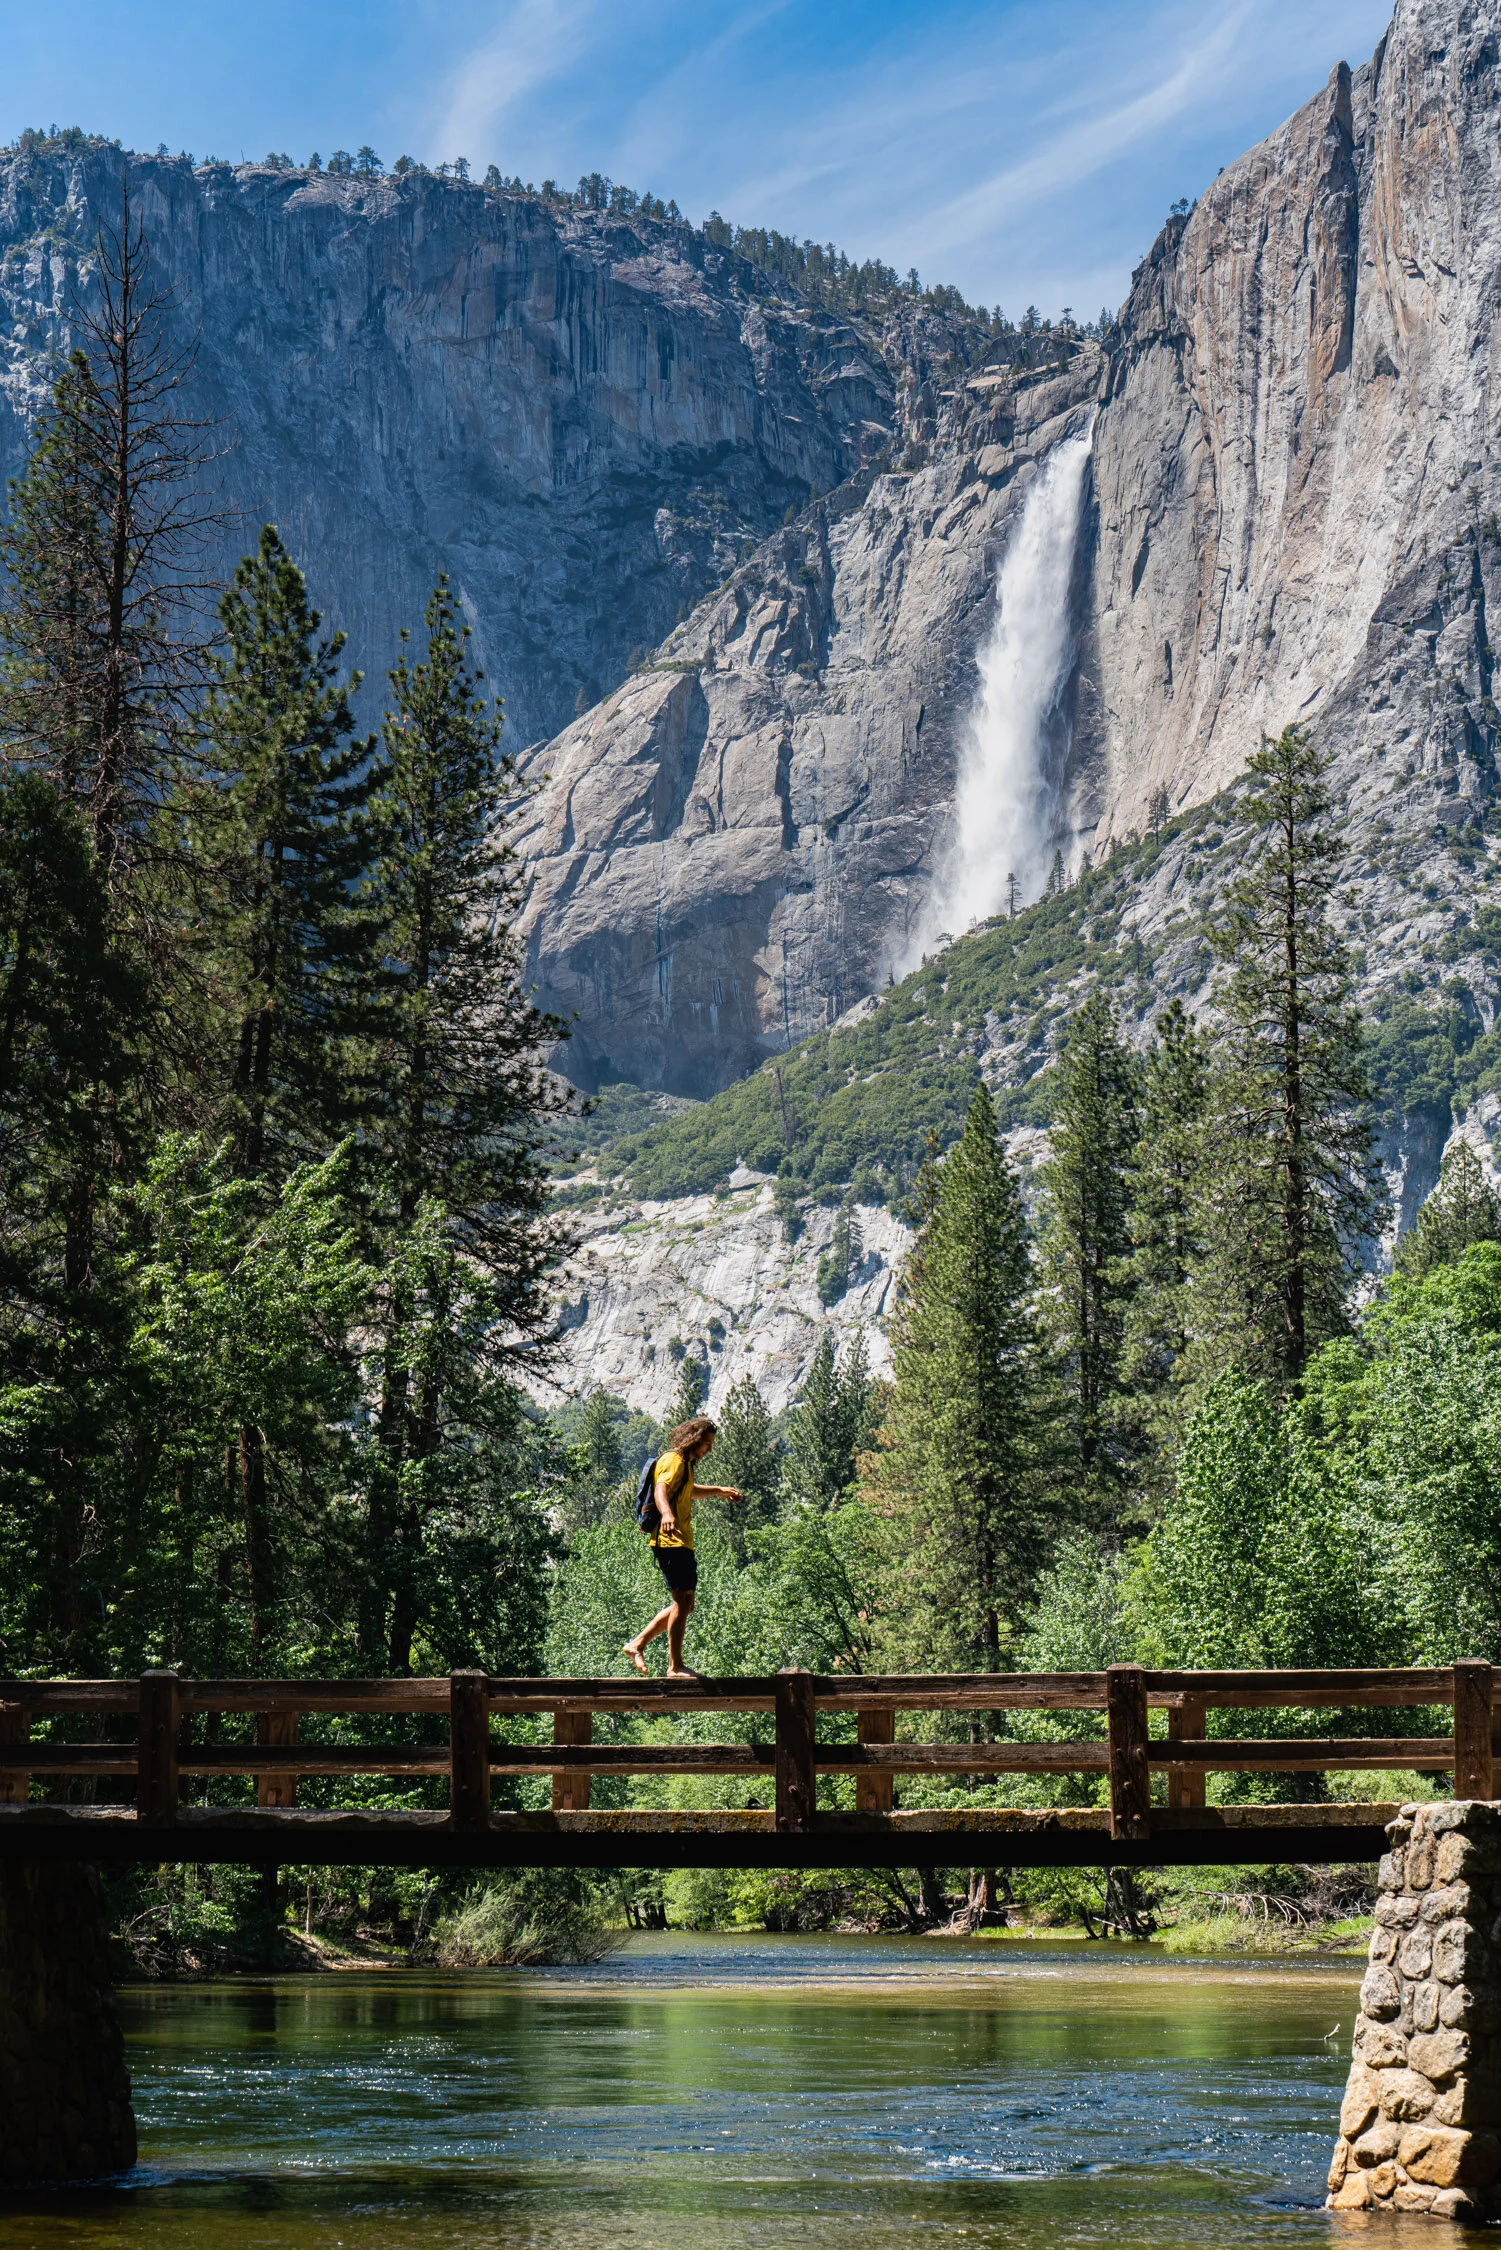
Bridalveil Falls in Yosemite Valley is the second most popular waterfall in Yosemite National Park. Before plummeting the 620 feet, the water travels 10 miles from Ostrander Lake located in the high country. Many recognize Bridalveil Falls from photographs of Tunnel View.
When we think of Yosemite Valley, what comes to mind more than massive granite walls and water spewing over cliffs? For myself, not much. Actually, my mind begins to name some of the most iconic, and tallest, waterfalls in the world. Bridalveil Falls in Yosemite Valley is the second most popular waterfall in Yosemite National Park. Before plummeting the 620 feet, the water travels 10 miles from Ostrander Lake located in the high country. Many recognize Bridalveil Falls from photographs of Tunnel View.
Bridalveil Fall is one of the most prominent waterfalls in the Yosemite Valley in California plunging 620 feet. With its highest flow being in the spring months, this waterfall flows year round and is the most photographed waterfall in Yosemite Valley. Many do not know this, but you can hike to the base of this waterfall and feel the mist spray you by hiking 0.6 miles down the Bridaveil Fall trailhead.
Read on to discover where Bridalveil Fall is in Yosemite Valley, the best season to see the fall, a few fun facts and so much more!
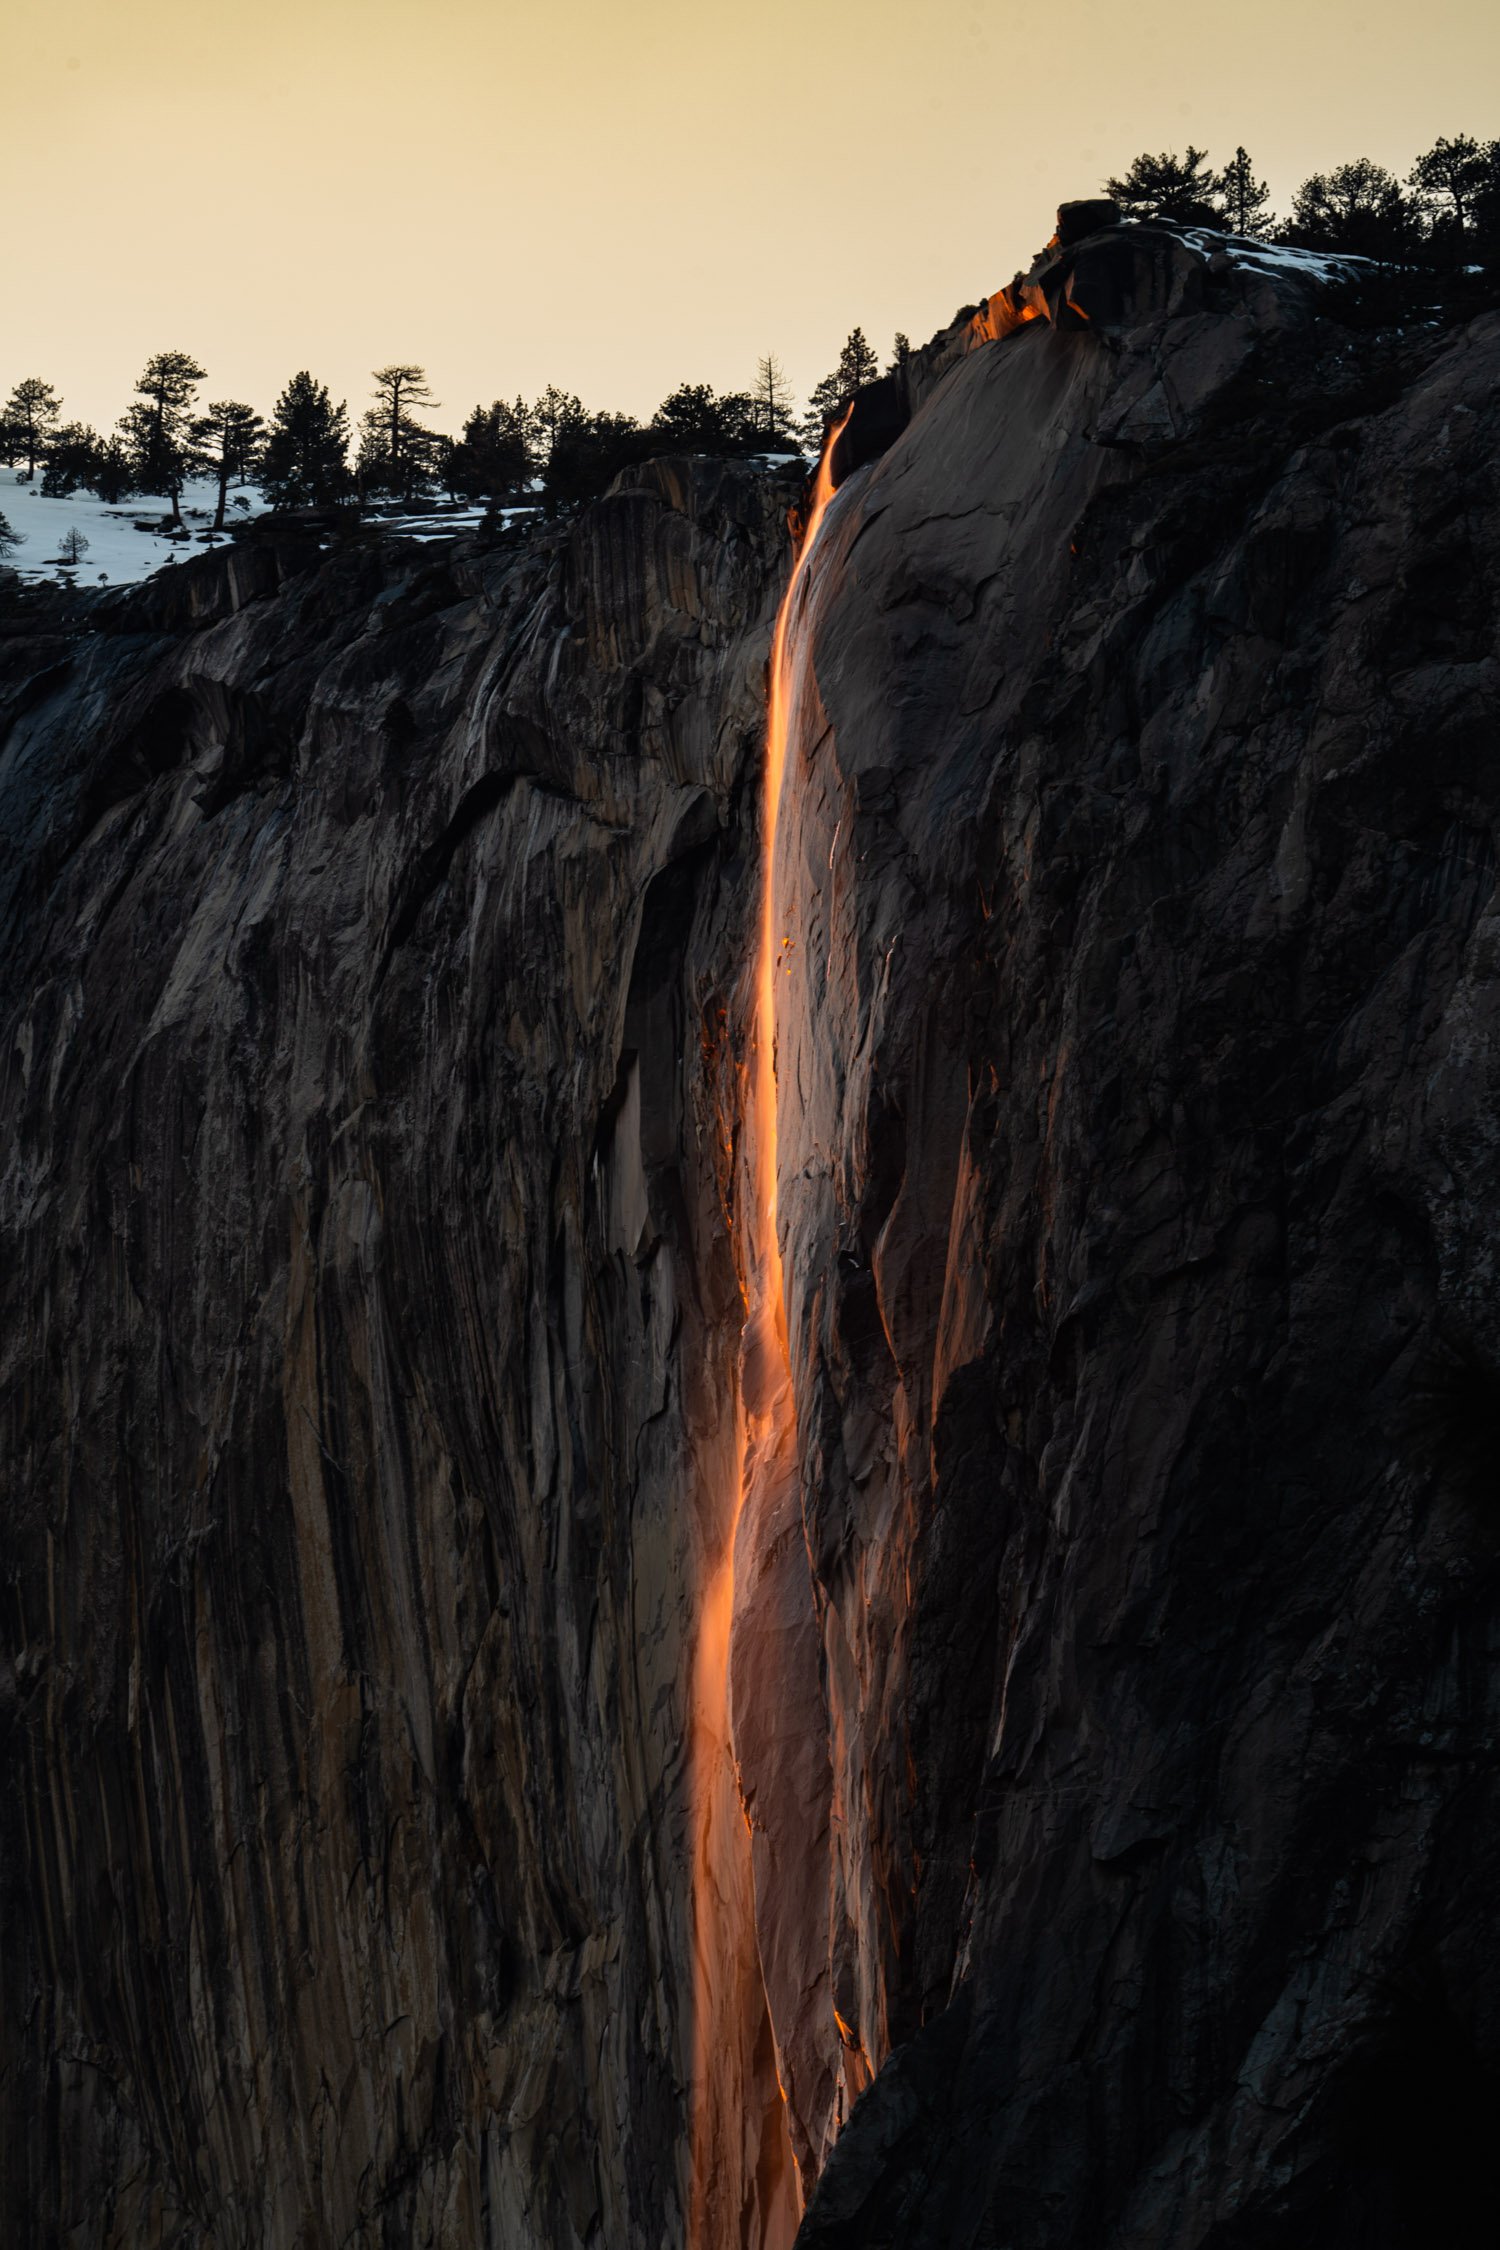
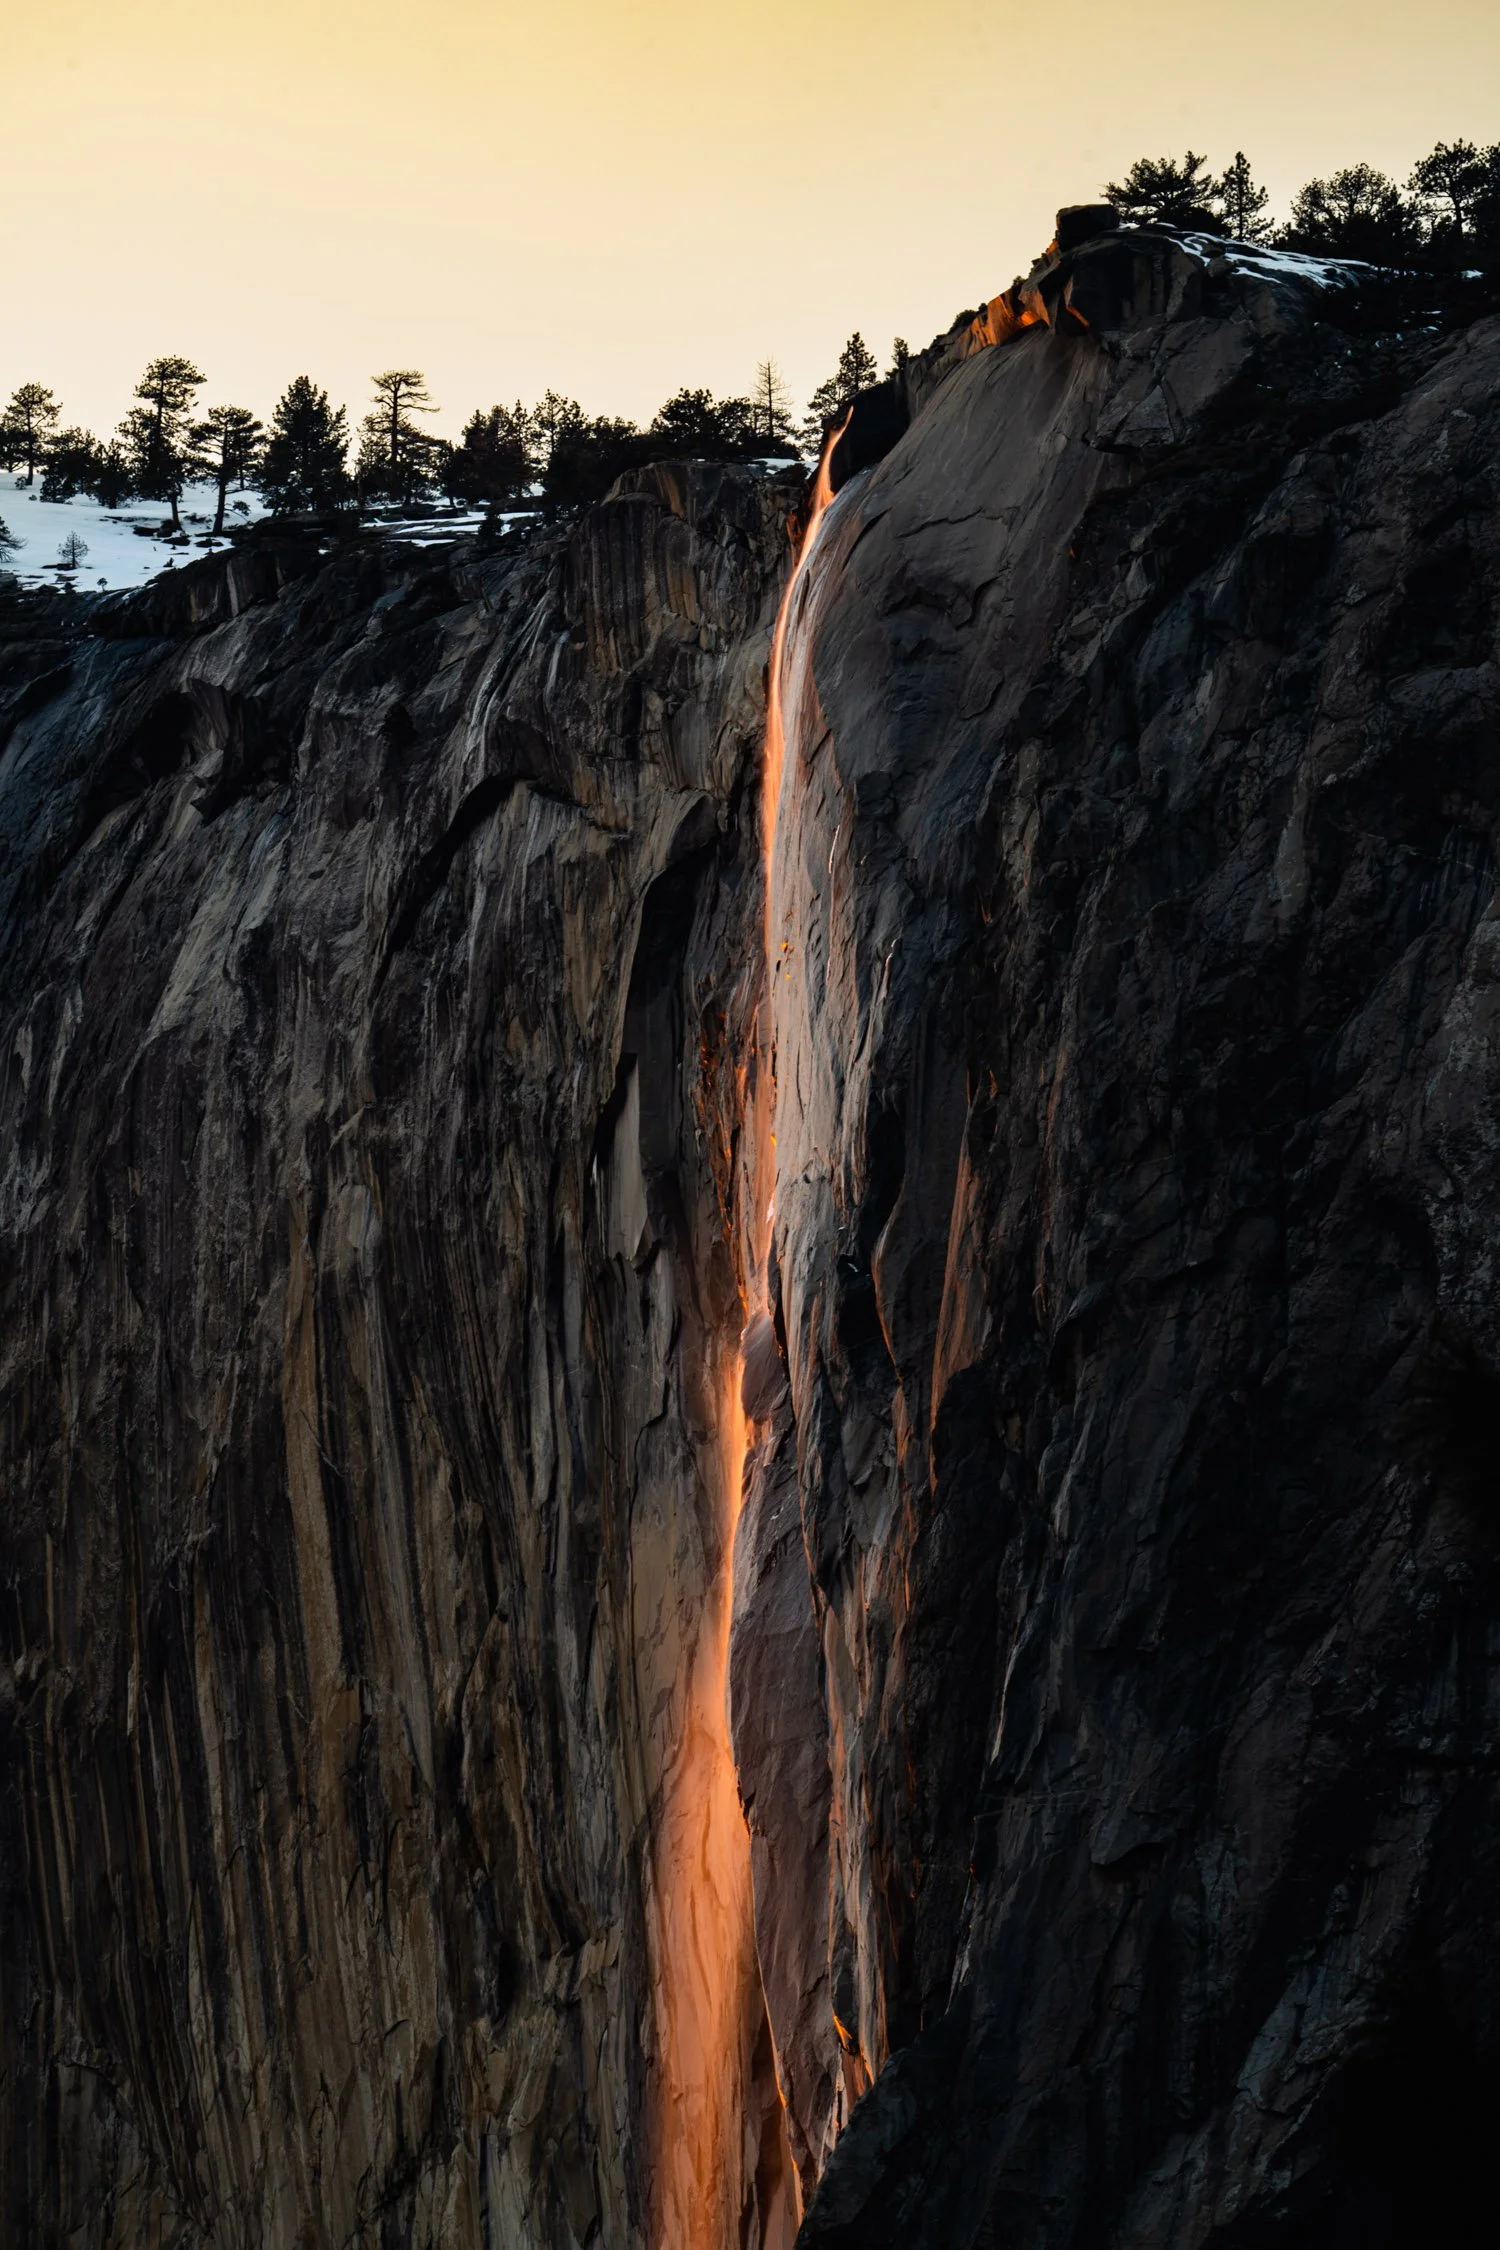
Tunnel View showcases Bridalveil Fall, which is on the right, Photograph by Dalton Johnson
WHERE IS BRIDALVEIL FALL?
Bridalveil Fall is located near Leaning Tower, across the valley from El Capitan. Many recognize this iconic Yosemite waterfall from photographs of Tunnel View, which makes it is the most photographed waterfall in Yosemite Valley.
If you would like to see Bridalveil Fall up close and personal, park your car at Bridalveil Fall trailhead and hike 0.6 miles to the base of the fall.
CLICK HERE to discover which waterfall is Bridalveil Fall
BEST SEASON FOR BRIDALVEIL FALL:
The best season to watch Bridalveil Fall is during the spring months, however this Yosemite waterfall runs year round.
Spring time has the highest flow for Bridalveil Fall
In the winter, this falls is often coated with ice, making the sight aesthetically pleasing
BEST PLACES TO SEE BRIDALVEIL FALL:
Bridalveil Fall is a spectacular waterfall that you can see from several places throughout Yosemite Valley. The most popular place to see Bridalveil Fall is from Tunnel View, however there are several other places to see this gorgeous falls:
Bridalveil Fall trailhead
Valley View
Southside Drive
CAN YOU HIKE TO BRIDALVEIL FALL?
Yes, you can easily hike to Bridalveil Fall. This hike is short, roughly a mile round trip, on a paved path. There is a gentle uphill slope rising 200 feet, but this should not deter you as most hikers wont notice the incline.
Hiking to the base of Bridalveil Fall
Distance: 1.2 miles round trip
Elevation gain: 200 feet
Difficulty: Easy
Time: 15 to 20 minutes

Stormy Bridalveil Fall in Yosemite Valley. Photograph by Dalton Johnson
Learning to Love Bridalveil Waterfall in Yosemite:
My first exposure to grand landscapes was Yosemite Valley. “Magnificent!” Most might say, but I am not quite sure. Since I did not have much nature exposure to compare what I saw in Yosemite to other places in the world, I thought Yosemite was normal. I thought waterfalls were a normal sight, I thought granite cliffs were normal, and I couldn’t comprehend the beauty that surrounded me. Until I had the chance to sit with it.
For the majority of my visits and time spent in Yosemite National Park, one of the structures I didn’t understand the most was Bridalveil Fall. Often I would ask myself, “This waterfall is so easy to get to and you can see if from everywhere, why is it important?” Yes, I could blame being young and naive on my thought process, but I don’t think that is the case. I truly looked up at the Bridalveil Fall and wondered why people cared so much about this waterfall.
Bridalveil fall isn’t the largest waterfall in Yosemite Valley. It doesn’t have the grandest flow, but it does flow year round. I often enjoyed the rock features that surrounded the fall, but Bridalveil fall seemed too romanic for me to understand. For instance, the name Bridalveil didn’t make sense to me. I had not ever been to a wedding, so I didn’t understand what a brides veil looked like, and I surely didn’t connect the dots that the name came from a wedding. Like I said, maybe it was just too romantic for me to understand.
I grew up in a working class household. My Dad did construction and my mom was a stay-at-home-mom who worked on the weekends/nights when I was younger. I played in the dirt, the creeks in my backyard, climbed trees, and pretended to be an explorer. I escaped the world through my imagination and toys.
Yet, as I grew up and re-entered this natural world in college, I started to grasp just how different this world actually is in comparison to my childhood, but why?
Call it the boom in technology, sure. Call it the rise in the creator economy, sure. Call it whatever you want.
For myself, the difference was my connection to imagination, the outdoors, and a self of discovery.
So, I began taking trips all around Yosemite. Into the high country, up the granite walls, deep into the backcountry, hiking every trail I could, and snapping photographs to document my exploits. During that process I began to sit with the grand landscape of Yosemite National Park and started to understand this place isn’t like everywhere else. But, what about the overcrowded Yosemite Valley? What about Bridalveil Fall?
Shutting my van door with a backpack loaded with a pen and journal, I headed for the misting base of Bridalveil Fall. I knew that I needed to sit with this waterfall and embrace it, so I could begin understanding.
Finding a spot tucked between the rocks, the roar of the springtime flow surrounded me. My face embraced the wind created by the water pounding into the rocks and covered up, with an extra layer, to accept the misting spray. For a while, I just sat. Looking up at Bridalveil Fall and observing. No judgement, no questions, Just open eyes and an open heart. Looking, as though the waterfall were the eyes of a lover. Then, a warmth began to fall over me, I closed my eyes, and breathed.
“Love Under the Bride’s Veil”
I look at you, yet you surely do not look back
For I am just a simple man, taking a rest on the rocks which lay at your feet.
I wish I could say, that I could offer you the world, but really, all I own fits in a sack
For I am just a simple man, a plebeian, a dirtbag, a wanderer escaping the days heat.
Your beauty, oh gosh, I want to tell you just how beautiful you are, but how do I find the right words?
How can I contort the English language to describe a sight so unadulterated, so pure?
Maybe, hmmm, maybe if I could only see you from above, like the birds,
I wouldn’t need to contort the words, for they would just come to me with vigor.
But, alas, here I am at your feet, looking up at you, wishing we could talk,
Wishing we could look into each others eyes, and open our heart to one another.
Then, the unthinkable happens. You turn and bend down towards me, extending a hand, your mouth starts to move, but I try not to gwak,
“Would you like to go for a walk?” she said, lifting me up, from the rocks to my feet, standing side-by-side together.
As I breathed with my eyes closed, this idea for the poem came to me. So, I quickly pulled out my journal and pen to scribble the words down, got up, and went for walk. Now, anywhere I go that I can see Bridalveil Fall, I tip my head and open my heart, for I know this beautiful waterfall is here to share love with all.
FUN FACTS ABOUT BRIDALVEIL FALL:
As you enter Yosemite Valley from Tunnel View, one of the first falls you’ll see if Bridalveil. It should come as no surprise it's one of the most prominent within the granite walls of the valley. As the name describes it, when there’s a breeze flowing, the mist that wafts off it creates something that would be similar to a 'bride's veil' and thus the name Bridalveil.
Total Height of Bridalveil Fall: 620 feet
Bridalveil Fall is the 431st tallest waterfall in the world
he Ahwahneechee Native Americans called this waterfall "Pohono", which means "Spirit of the Puffing Wind"
The primary source of Bridalveil Fall is Ostrander Lake, some 9.9 miles (16 km) to the south

Crocker Point is known for its perfect alignment of Bridalveil Fall and El Capitan. Photograph by Dalton Johnson
Now that you have discovered where Bridalveil Fall is in Yosemite Valley, the best season to see the fall, and a few fun facts it is your turn to get outside and embrace the beauty of this planet. Please, leave a comment below with any additional information that could/would help others in this community.
Discover More of Yosemite Valley


7 Adventurous Things To Do Near Girdwood, Alaska
Forty miles southeast of Anchorage, on the Seward Highway, lies the small town of Girdwood, Alaska. Full of character and outdoor enthusiasts, this seemingly sleepy town has some of the best access to adventures big and small. With the Chugach Mountains as a backyard and the Turnagain Arm as the front yard, the options for adventure are endless, so you just have to decide what you want to do. Which can be hard. So, I tried to make it easy for you and created this of the best adventurous things to do near Girdwood, Alaska.
Forty miles southeast of Anchorage, on the Seward Highway, lies the small town of Girdwood, Alaska. Full of character and outdoor enthusiasts, this seemingly sleepy town has some of the best access to adventures big and small. With the Chugach Mountains as a backyard and the Turnagain Arm as the front yard, the options for adventure are endless, so you just have to decide what you want to do. Which can be hard. So, I tried to make it easy for you and created this of the best adventurous things to do near Girdwood, Alaska.
Girdwood, Alaska is an adult playground waiting to be explored, so here are some of my favorite adventures:
Hike Chutes and Ladders
Birdwatch at the Mudflats of Turnagain Arm
Surf the Bore Tide
Rock Climb Sunshine Ridge
Bike the Bird Point to Girdwood Path
Hike Byron Glacier Ice Caves
Kayak on Portage Lake
Read on to discover little bit about all these adventures, how to access them, additional resources, and so much more!
Kristin enjoying the sunset after climbing Sunshine Ridge near Girdwood, Alaska. Photograph by Dalton Johnson
Bike the Bird Point to Girdwood Path
The “Bird to Gird Challenge”, as the locals call it, is a 24 mile round trip along a paved path which overlooks the Turnagain Arm the entire time. This path stretches from Bird Point to Girdwood and is often biked, or run, as a way to get out into nature without taking to much risk. The path is very nice and you will surely see lots of wildlife along the way. On the path you could see eagles, moose (though very rare), beluga whale, and many other common animals.
Some say the Bird to Gird path is the most beautiful bike path in all of Southcentral Alaska!
Hike Chutes and Ladders
There are waterfall hikes and then there is the Chutes and Ladders waterfall hike. Just outside of Girdwood, AK is a technical hike that requires the use of five rope ladders, one wooden ladder, and some good shoes (the ground is wet and slippery). The rope and wooden ladders remain in place year round, but please make sure to inspect them out before use, I am not sure how often they are replaced. Chutes and Ladders is a short hike to a powerful waterfall, but hikers often spend a couple hours enjoying the view and process getting to the waterfall.
Before moving on, are you interested in doing this awesome hike in Girdwood? If so, I wrote a full article with everything you need to know to hike Chutes and Ladders safely, click here to read.
Birdwatch at the MudFlats of Turnagain Arm
When you driving along the Seward Highway towards the Kenai Peninsula keep an eye over your shoulder at the Turnagain arm, you might be in for a treat! During low tide, the Turnagain arm turns into a mudflat that attracts a lot of wildlife, especially birds. As the tide rolls out to sea fish get trapped in small pools of water, which becomes the perfect snack for birds soaring high in the sky. If you are lucky you will get to watch an eagle swoop down and pick up dinner from the trapped fish in the shallow waters of the mudflats.
Please, be careful when exploring the mudflats as there have been some recent fatalities from individuals getting get stuck in the mud as the tide rises.
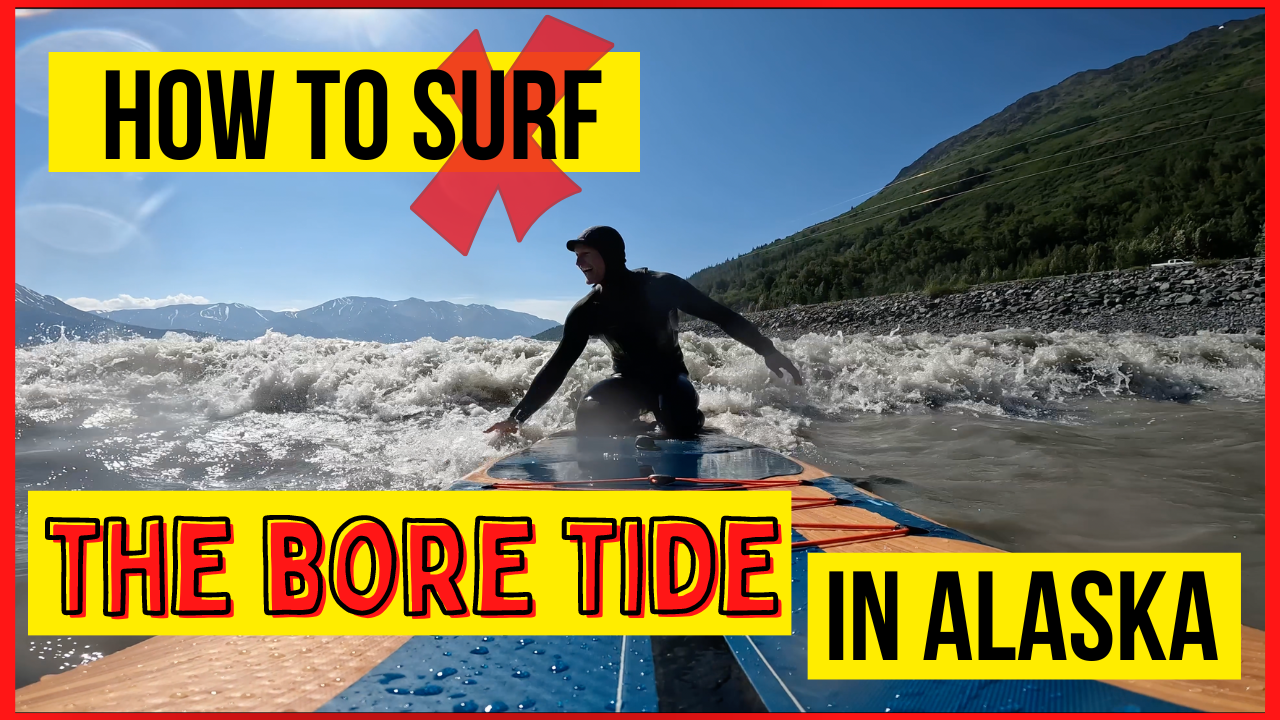
Surf the Bore Tide
Along the Seward Highway, just south of Anchorage, Alaska, there is a surfable wave created by the Bore Tide in the Turnagain Arm. Surfing the bore tide takes a mix of skill, luck, and local knowledge but this friendly wave is accessible to all. This wave is created by the changing of the tide and can be ridden one time a day.
Surfing the bore tide takes practice, however there is only one wave a day, so practice is few and far between. However, if you know how to surf, riding this wave won’t be an issue for you. The bore tide is an average size wave that requires local knowledge of where and when the wave will break. So, to surf the bore tide, you need a little luck on your side and local knowledge.
Do you want to try to surf the bore tide yourself? I wrote a helpful article explaining how to ride this crazy wave that will help you not make the same mistake that I did, read it by clicking here.
Hike Byron Glacier Ice Caves
Hiking Byron Glacier during the summer is a treat. From the trailhead, the cool breeze from the glacier and the rushing river sounds draw you into a mystical mindset as you approach the ice cave. After hiking for a .08 miles, you reach the entrance to the cave. Looking dark and daunting, as you enter, your eyes quickly adjust and reveal the magic that is the Byron Glacier Ice Cave hike.
Hiking to the ice cave of Byron Glacier will take 20-30 minutes along a flat, dirt trail for 0.8 of a mile. This short hike has a subtle uphill grade that most will not notice. Once your reach the vista point for Byron Glacier, you will start hiking on an well worn, but non-maintained trail to the mouth of the ice caves. In total, your trip to Byron Glacier could be as short as 45-60 minutes round trip. However, several people take 2-3 hours as they explore deep into the ice cave at Bryon Glacier.
Are you interested in exploring the Byron Glacier Ice Caves? I wrote a full article on the best times and season to explore these caves, check out the article by clicking here.
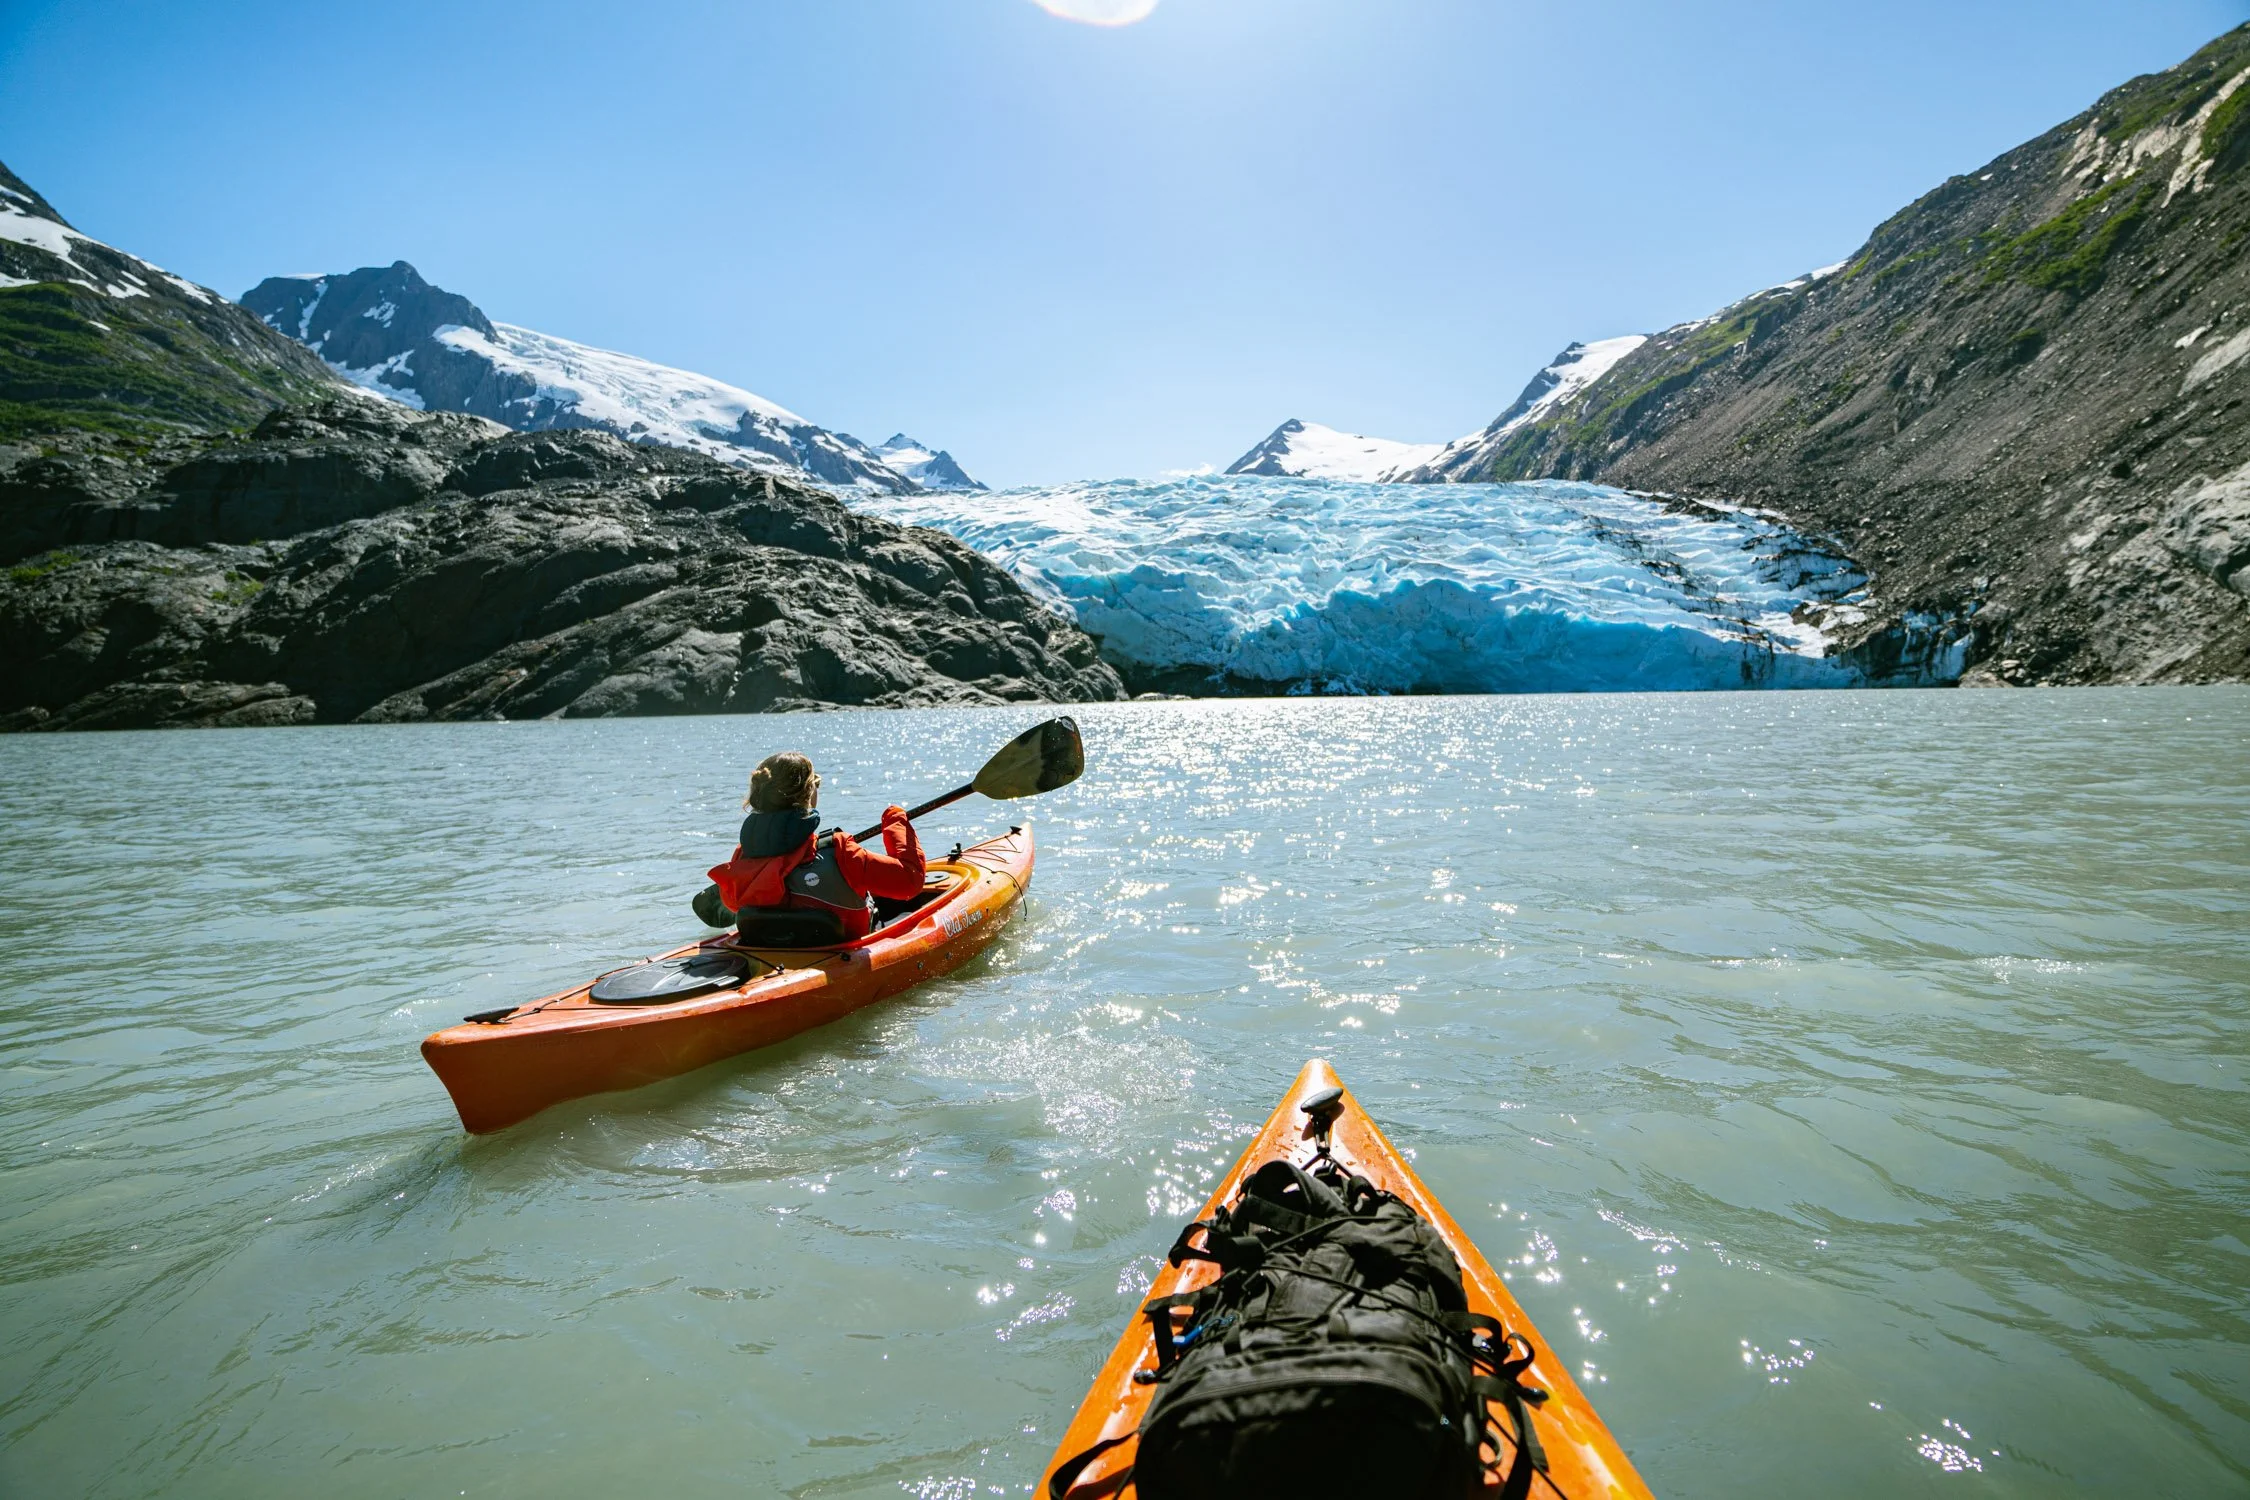
Kayak on Portage Lake
Kayaking to Portage Glacier is one of the most memorable adventures I have ever been on. Why? Well, this challenging kayak trip takes a full day as you are often paddling into a headwind, in both directions, you get to kayak among icebergs, and you can reach the glacier all in your kayak. This trip is not for the faint of heart, nor a person who has never kayaked before!
To begin this kayaking trip, you will start at the visitors center. From here the paddle is roughly 4 miles, one way. Along the way you will want to stop often for waterfalls and icebergs. The iceberg ice is very tasty! As you paddle your way towards the glacier, the chilly wind will pick up, so make sure to bring a jacket. For myself, rounding the corner and seeing the Portage Glacier from the water for the first time was a moment that will be with me forever. I was awe-struck.
Are you interested in kayaking to Portage Glacier? I wrote a full article on how to safely kayak across Portage Lake while you are exploring the Kenai Peninsula.
Rock Climb Sunshine Ridge
Sunshine Ridge is a four pitch mixed (meaning traditional climbing and sport climbing) rock route that takes you to the top of a prominent prow along the Seward Highway. This route is rated 5.7, however most would claim it is something more like 5.5. Without getting into the weeds about grades, the route is fun and has quality rock, which is a surprise for the area. If you are an avid rock climb and are itching to get out, this is a wonderful rock climb to get you outside and moving on rocks.
The pitch descriptions goes as such:
Pitch 1: 5.5, from some boulders about 50ft up the scree slab, climb past a few bolts (button head) and up onto the ridge. After about 60-70ft from the deck there is small ledge to belay off of with some gear. You can also keep climbing to one bolt one chain anchor above that. 150ft.
Pitch 2: 5.7 From the anchor climb up and to the left and climb a small bulge with some bolts. Climb up past bolts to a large boulder on a ledge. Belay from here. 120ft.
Pitch 3: 5.6 From the boulder climb up the face with some bolts. Climb the 5.6 moves to more easy climbing. There is a two bolt anchor above this. 100ft.
Pitch 4: 5.6 Climb up and left from the anchor to a left to a leftwards leaning crack, climb this and cut back right past a bolt to a two bolt anchor on a small ledge. There are also opportunities to belay from gear above the anchor. 100ft
Note: this rock climb suggest bringing cams and nuts, however I did not place any and only used quickdraws. I think there has been some retro-bolting in recent years.
Kayaking to Portage Glacier near Girdwood, Alaska. Photograph by Dalton Johnson
Now that you have discovered little bit about all these adventures, how to access them, and where to find additional resources for each adventure in Girdwood, Alaska, which one are you going to start with? Let me know in the comments below which adventure caught your eye. Also, if you have any other recommendations for others, please share those for the community in the comments below.
Discover more of Alaska

How to Surf the Bore Tide in Alaska
For years, I have been itching to surf the bore tide in Alaska, but I never thought the opportunity would arise, but today was the day! By some miracle I was in Alaska and had the opportunity to surf the bore tide with a college buddy, so we inflated his paddle boards and headed out in the Turnagain Arm for some bore tide surfing. The joke was kinda on me as I epically failed, but you have to watch this video to find out how I failed!
For years, I have been itching to surf the bore tide in Alaska, but I never thought the opportunity would arise, but today was the day! By some miracle I was in Alaska and had the opportunity to surf the bore tide with a college buddy, so we inflated his paddle boards and headed out in the Turnagain Arm for some bore tide surfing. The joke was kinda on me as I epically failed, but you have to watch this video to find out how I failed!
Along the Seward Highway, just south of Anchorage, Alaska, there is a surfable wave created by the Bore Tide in the Turnagain Arm. Surfing the bore tide takes a mix of skill, luck, and local knowledge but this friendly wave is accessible to all. This wave is created by the changing of the tide and can be ridden one time a day.
Where to catch the bore tide?
You can catch the bore tide in several locations along the Seward Highway along the Turnagain Arm. Some of the most popular places to catch the wave are the 4th and 5th turn outs along the highway. Many surfers will put in at a turnout further down the arm and float towards the bore tide tide. Then ride back to their car.
What board is needed to surf the bore tide?
The bore tide in the Turnagain Arm changes in its size daily, so which board to chose is a difficult question. Most people will have success surfing the board tide on a longer and more buoyant board. Many people will use an inflatable stand up paddle-board. However, when the wave is large you will see several people surfing shortboard and making turns while on the wave.
Who can surf the bore tide?
Surfing the bore tide takes practice, however there is only one wave a day, so practice is few and far between. However, if you know how to surf, riding this wave won’t be an issue for you. The bore tide is an average size wave that requires local knowledge of where and when the wave will break. So, to surf the bore tide, you need a little luck on your side and local knowledge.
Bore tide surf report:
If you are in the area and looking for the surf report for the bore tide, click here.
What is a Bore Tide?
The Turnagain Arm bore tide is a wave formed when a super low tide and a super high tide crash into each other in the narrow and shallow waters of the Turnagain Arm.
The wave can come twice a day, typically only one is ridable, and is often surfed by local riders who are sometimes able to surf a very long time. Some have recorded the wave to be as long as two miles and as large as 5-10 foot faces. Usually, a minus low tide and a high tide of about 27 feet are required to make a wave big enough to surf.
Discover More of Alaska
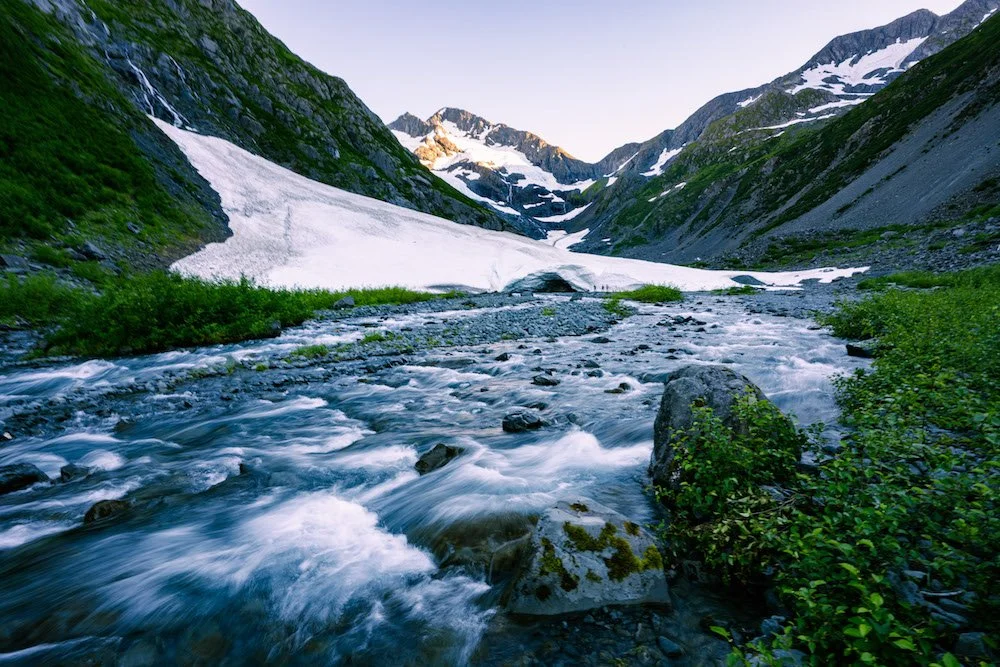
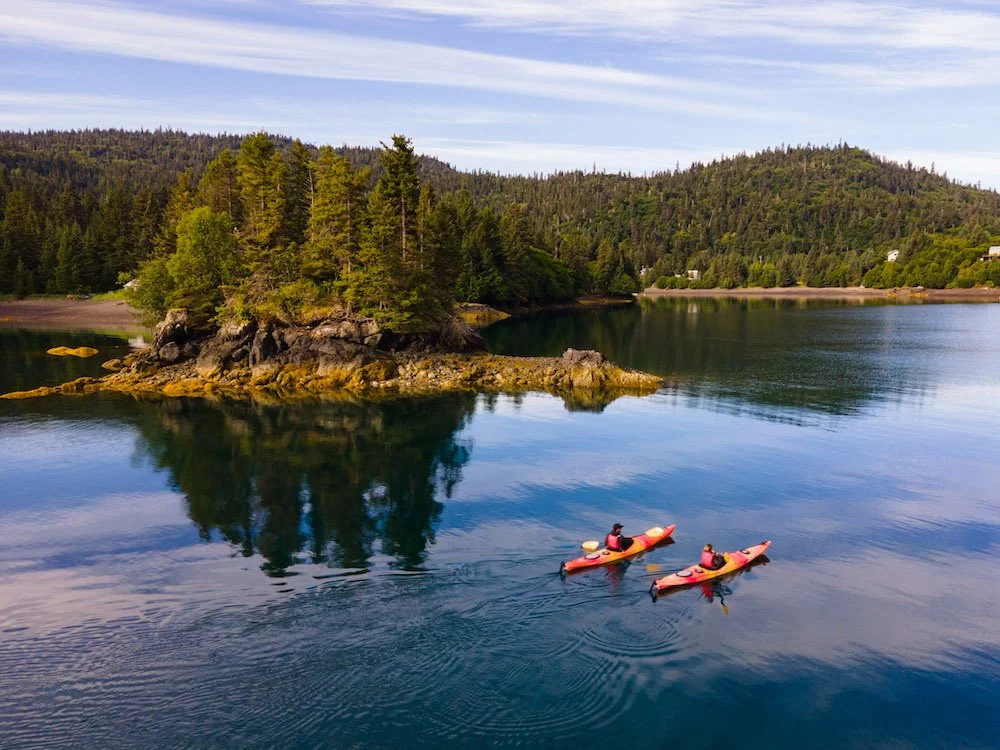
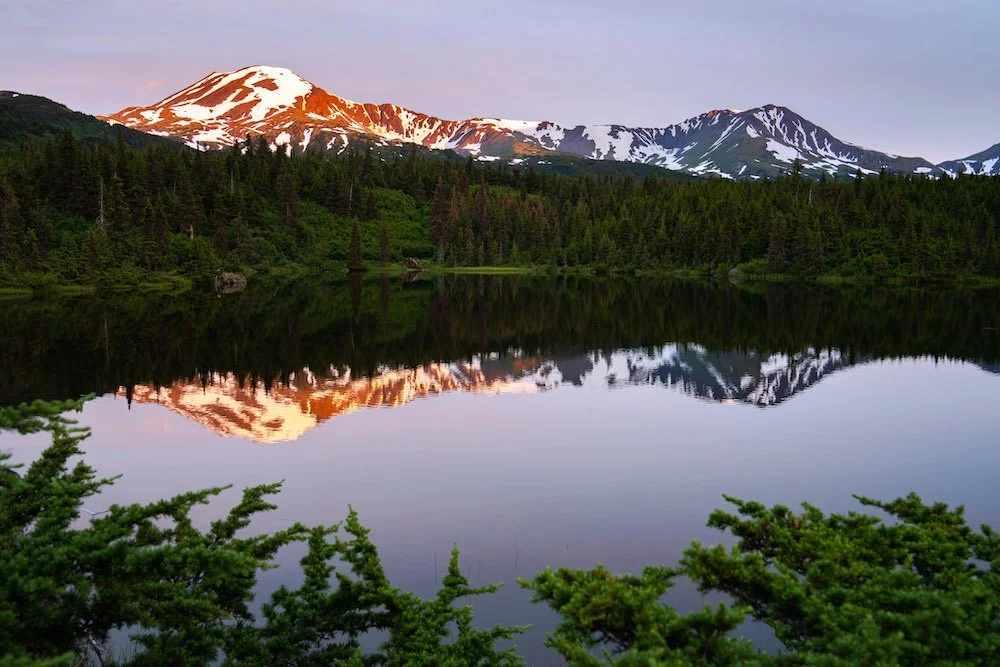

Explore Ice Caves and Hike to Byron Glacier | Hike Alaska
Hiking Byron Glacier during the summer is a treat. From the trailhead, the cool breeze from the glacier and the rushing river sounds draw you into a mystical mindset as you approach the ice cave. After hiking for a 1.5 miles, you reach the entrance to the cave. Looking dark and daunting, as you enter, your eyes quickly adjust and reveal the magic that is the Byron Glacier Ice Cave hike.
Hiking Byron Glacier during the summer is a treat. From the trailhead, the cool breeze from the glacier and the rushing river sounds draw you into a mystical mindset as you approach the ice cave. After hiking for a .08 miles, you reach the entrance to the cave. Looking dark and daunting, as you enter, your eyes quickly adjust and reveal the magic that is the Byron Glacier Ice Cave hike.
Byron Glacier is the most accessible glaciers on the Kenai Peninsula with a short 0.8 mile hike with the reward of ice caves at the end. The Byron Glacier ice caves are considered relatively safe to explore, if you follow the best practices, but children are not recommended to bring. Many visitors of Alaska seek out the Byron Glacier ice cave for their beauty and access.
Read on to discover driving directions to Byron Glacier, how to access the ice caves, what to bring while hiking, safety considerations, and much much more.
Seeing the entrance to the Byron Glacier Ice Cave for the first time, notice the tiny people just to the right of the entrance. Photograph by Dalton Johnson
BYRON GLACIER ICE CAVE HIKE OVERVIEW:
Distance: 1.6 miles round trip
Time needed: 1-2 hours
Elevation change: 100 feet
Type of terrain: Maintained trail to rocky river bed in the ice cave
Difficulty of hike: Easy
WHERE IS BYRON GLACIER?
Byron Glacier is located in Girdwood, Alaska on the Kenia Peninsula, sitting adjacent to Portage Lake and Portage Glacier, this ice cave hike is often paired with a visit to Portage Lake.
Directions to Byron Glacier Ice Caves from Anchorage, you will take the Seward Highway towards Whittier, turning off on Portage Glacier Road (the same turn off for Whittier Tunnel). After roughly five miles of driving, turn right onto Portage Lake Loop. Then you will follow the signs to Byron Glacier Trailhead to start your hike.
Click here for direction to Byron Glacier Trailhead
HOW LONG DOES IT TAKE TO HIKE BYRON GLACIER ICE CAVE?
Hiking to the ice cave of Byron Glacier will take 20-30 minutes along a flat, dirt trail for 0.8 of a mile. This short hike has a subtle uphill grade that most will not notice. Once your reach the vista point for Byron Glacier, you will start hiking on an well worn, but non-maintained trail to the mouth of the ice caves. In total, your trip to Byron Glacier could be as short as 45-60 minutes round trip. However, several people take 2-3 hours as they explore deep into the ice cave at Bryon Glacier.
IS byron Glacier hike kid friendly?
Byron Glacier hike is a family friendly outing and hiking to the vista point is safe for all ages. Meanwhile, hiking into the ice caves is dangerous, as the cave could collapse at any time. So, taking children into the ice caves is often viewed as unsafe and not kid friendly. With that said, I did see several kids, 8 years old and older, exploring the ice caves at Byron Glacier with their family.
Is the Byron Ice Cave Safe?
Byron Ice Cave is considered safe, but there is always the risk of the cave collapsing while you are inside. If a cave collapses when you are inside of it, most do not survive. So, mitigating your risk and exposure inside the ice cave is important. To increase your safety when exploring the ice cave follow these best practices:
only visit the cave when the outside temperatures are close to freezing
avoid entering the cave when sunlight is directly on the cave
do not enter the cave after a heavy snow
if the cave is sagging, exit


Best Seasons to visit Byron Ice Caves?
There are two main seasons for best viewing purposes of the Byron Ice Caves; the summer and the winter. During the summer months, this hike is easiest and the cave has the most light shinning through, giving that gorgeous blue glow to the walls. During the winter months, the Byron Glacier is frozen solid and provides the safest conditions to enter the cave.
Best time of day to visit Byron Ice Caves?
The best time of day to visit Byron Glacier Ice Caves is during the early morning for safety reasons. In the morning, the glacier and ice caves are thier most stable as the sun has not yet began warming, and melting, the glacier. However, if you are looking to take iconic images, with glowing blue walls, from inside of the ice cave, you will need to visit the ice cave when the sun is overhead. Be aware, this time of day is the most dangerous.
What to bring while hiking Byron Glacier?
Hiking the Byron Glacier Ice Caves is the most accessible glacier hike on the Kenai Peninsula and requires the least amount of equipment. You should bring:
Other Adventures Near Byron Glacier Hike:
From inside of the ice cave, looking out. Photograph by Dalton Johnson
Now that you have discovered how to drive to Byron Glacier, how to access the ice caves, what to bring while hiking, and safety considerations it is your turn to get out and explore this magnificent hike in Alaska. Please, if you have additional information that would be helpful for other hikers leave a comment below. Also, any and all safety tips are heavily encouraged.
Discover more of Alaska

Ribbon Fall | Yosemite Valley Waterfall Guide
When you arrive in Yosemite Valley, one thing you will immediately notice are the waterfalls. In every direction, you will find waterfalls that can, and will, take your breath away as you stare at their beauty. Many of them have names and one of my favorites is Ribbon Fall near El Capitan. This waterfall is often “hidden” in plain sight as Ribbon Fall is often in the shadow of El Capitan. However, once you start to spend some time in Yosemite National Park, you will realize this delicate waterfall dances with the wind and shimmers in the sunset light, unlike any other waterfall in Yosemite.
When you arrive in Yosemite Valley, one thing you will immediately notice are the waterfalls. In every direction, you will find waterfalls that can, and will, take your breath away as you stare at their beauty. Many of them have names and one of my favorites is Ribbon Fall near El Capitan. This waterfall is often “hidden” in plain sight as Ribbon Fall is often in the shadow of El Capitan. However, once you start to spend some time in Yosemite National Park, you will realize this delicate waterfall dances with the wind and shimmers in the sunset light, unlike any other waterfall in Yosemite.
Ribbon Fall is a delicate waterfall, found to the left of El Capitan, that is best observed from March until June and boasts being the North America’s longest, single-drop waterfall. The water plummeting off of Ribbon Fall drops 1,612 feet without hitting any objects. That is incredible!
Read on to discover what Ribbon Fall looks like, where to find it, the best time of year to see the fall, and so much more!
Ribbon Fall just after sunset showing off that orange glow that the walls of of Yosemite Valley exude. Photograph by Dalton Johnson
WHERE IS RIBBON FALL?
Ribbon Fall is a delicate waterfall, found to the left of El Capitan, that runs for a couple of months every year as the snow melts. Many often confuse Ribbon Fall with Horsetail Fall when they are visiting Yosemite Valley to watch Firefalls (aka Horsetail Fall at sunset in February).
CLICK HERE to discover which waterfall is Ribbon Fall
BEST SEASON FOR RIBBON FALL:
The best season to watch Ribbon Fall is during the spring months, March until June. On a high snow year, Ribbon Fall will run throughout the year, but on a low snow year, Ribbon Fall will dry up. So, if you want to see the longest free falling waterfall in North America at its peak, head to Yosemite Valley during the spring and watch the water of Ribbon Fall plunge over the edge and free fall for 1,612 feet.
Funny Story About Ribbon Fall:
Besides a handful of waterfalls in Yosemite Valley, like Bridaveil Fall and Yosemite Falls, most people can not spot most named waterfalls. Heck, there are so many waterfalls in Yosemite Valley that every direction you turn in the spring time there seems to be water flowing off of the granite walls. Well, I’ll admit, before I dedicated time to being in and learning about Yosemite Valley, I was a person who couldn’t spot a single waterfall. This was actually comical!
During one of my early visits to Yosemite Valley in the winter, I was wandering the valley admiring the snowy landscapes, take back by the raw beauty. As I walked around, doing my best not to slip and fall on the ice, I came across a few really kid humans near the Bridalveil Fall trailhead and overhead their conversation:
“Do you think Firefalls is going to happen tonight?” one asked their friend.
“I am not sure, but I am excited to see it.” the other responded.
In a very honest manner, I approached and asked, “What is firefall? That sounds very exciting.”
“You haven’t heard of this? Do you live under a rock?”
“Sorry. My friend forgets not everyone is a national park geek like us. Firefalls is when Horsetail Fall turns red at sunset. If you are short on time, you can actually watch it from the meadow behind you.” The kinder friend pointed said to me.
“Awesome, well thank you!” I said an went on my way to grab a chair to post up so I could watch this spectacle.
Little did I know that while you can see Firefalls from Hanging Valley meadow, it is not obvious if you don’t know where to look.
So, there I was, at sunset staring up at Ribbon Fall watching the sunset fade over my left shoulder. Brilliant oranges were glowing and El Capitan was glowing, but the waterfall that I was looking at, Ribbon Fall, was tucked into a bowl shape rock out-cropping that cocooned the waterfall, blocking any of this brilliant glow.
Then, I received a tap on my shoulder. “Are you trying to watch Firefall?” A random human asked.
“Yeah, I was told I could see it from here, but it doesn’t look like it is going to happen I guess.” I claimed.
“Right now, you are looking at Ribbon Fall. Firefall will is actually about to start. Come over here and look through these trees, you’ll be able able to see it through my camera.”
Embarrassed, I got up and headed over to the random photographers camera to see what this was all about.
“Wow! I was about to miss that!” I said allowed, “That is incredible, thank you for showing me!”
So, long story short, it is easy to get all of the waterfalls mixed up in Yosemite Valley. But, the good news is that you have taken the time to read this blog and learn a little bit more about Ribbon Fall.
BEST PLACES TO SEE RIBBON FALL:
Ribbon Fall is tucked away in the shadow of El Capitan, making it difficult to see when walking around Yosemite Valley. However, there are several great places to see Ribbon Fall like:
El Cap Meadow
Bridalveil Fall Trailhead
Northside Drive
CAN YOU HIKE TO RIBBON FALL?
Ribbon Fall does not have an established trail to the base, nor the top, but you can still enjoy fantastic hiking around Ribbon Fall.
To get to the base of Ribbon Fall, you will need to scramble off of a trail, potentially on loose rock, to reach the base or top of the waterfall. Please be careful if you decide to make this hike. If you are a rock climber, there are a few iconic climbs in the area with some climbers trails leading to the climbs.
To reach the top of Ribbon Fall, you will need to hike off trail over dangerous terrain for several miles. This is not well advised.
FUN FACTS ABOUT RIBBON FALL:
While Yosemite Falls is the tallest, Ribbon Fall has something it doesn’t. It’s the highest free-leaping fall in all of North America. Primarily fed by snowmelt over granite rock, this is a great one to see in early spring.
Total Height of Ribbon Fall: 1,612 feet
Ribbon Fall is the longest single drop waterfall in North America
Many visitors often confuse Ribbon Fall for Horsetail Fall during the Firefalls season in Yosemite Valley
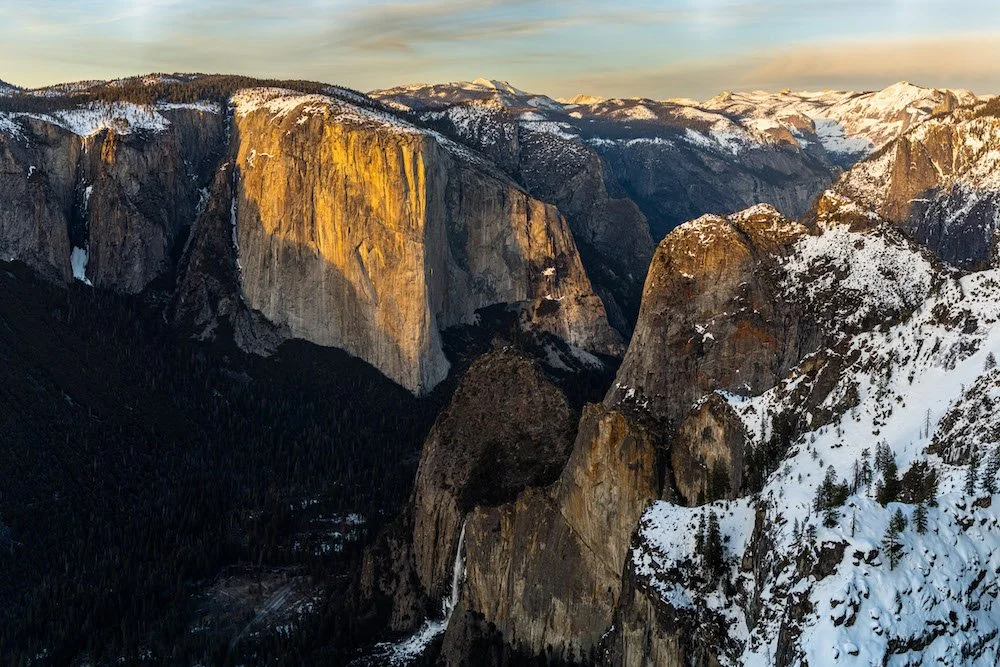
Ribbon Fall is located on the very left side of this image and is about half the size of El Capitan. Photograph by Dalton Johnson
Now that you have discovered what Ribbon Fall looks like, where to find it, and the best time of year to see the fall, it is your turn to get outside and experience this grand waterfall for yourself. Please, drop a comment below with any additional information, or updates, that would be helpful for the community to know when visiting Ribbon Fall.
Discover More of Yosemite Valley
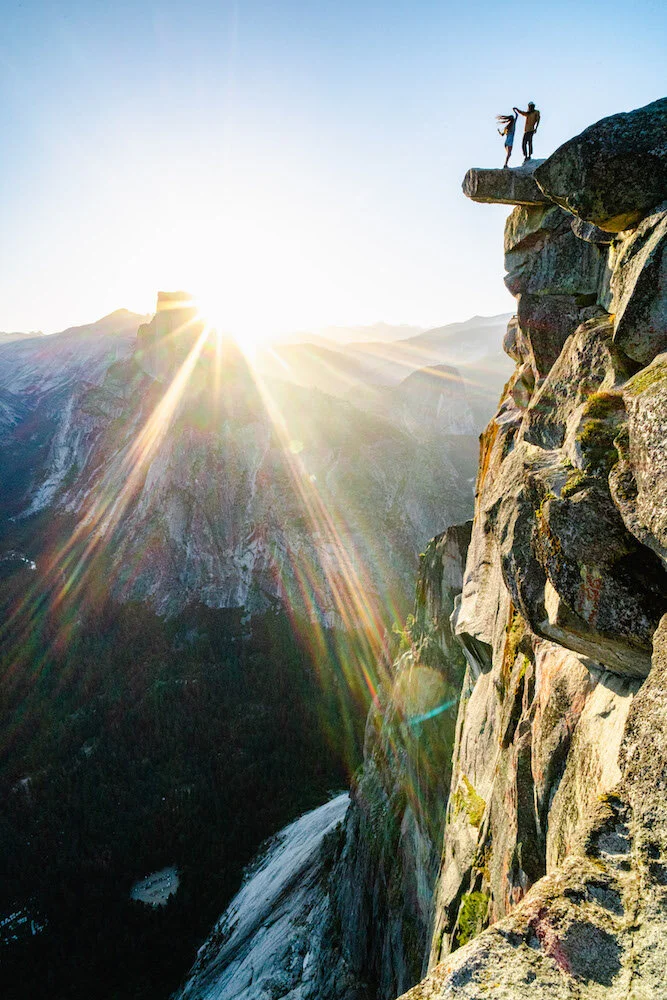
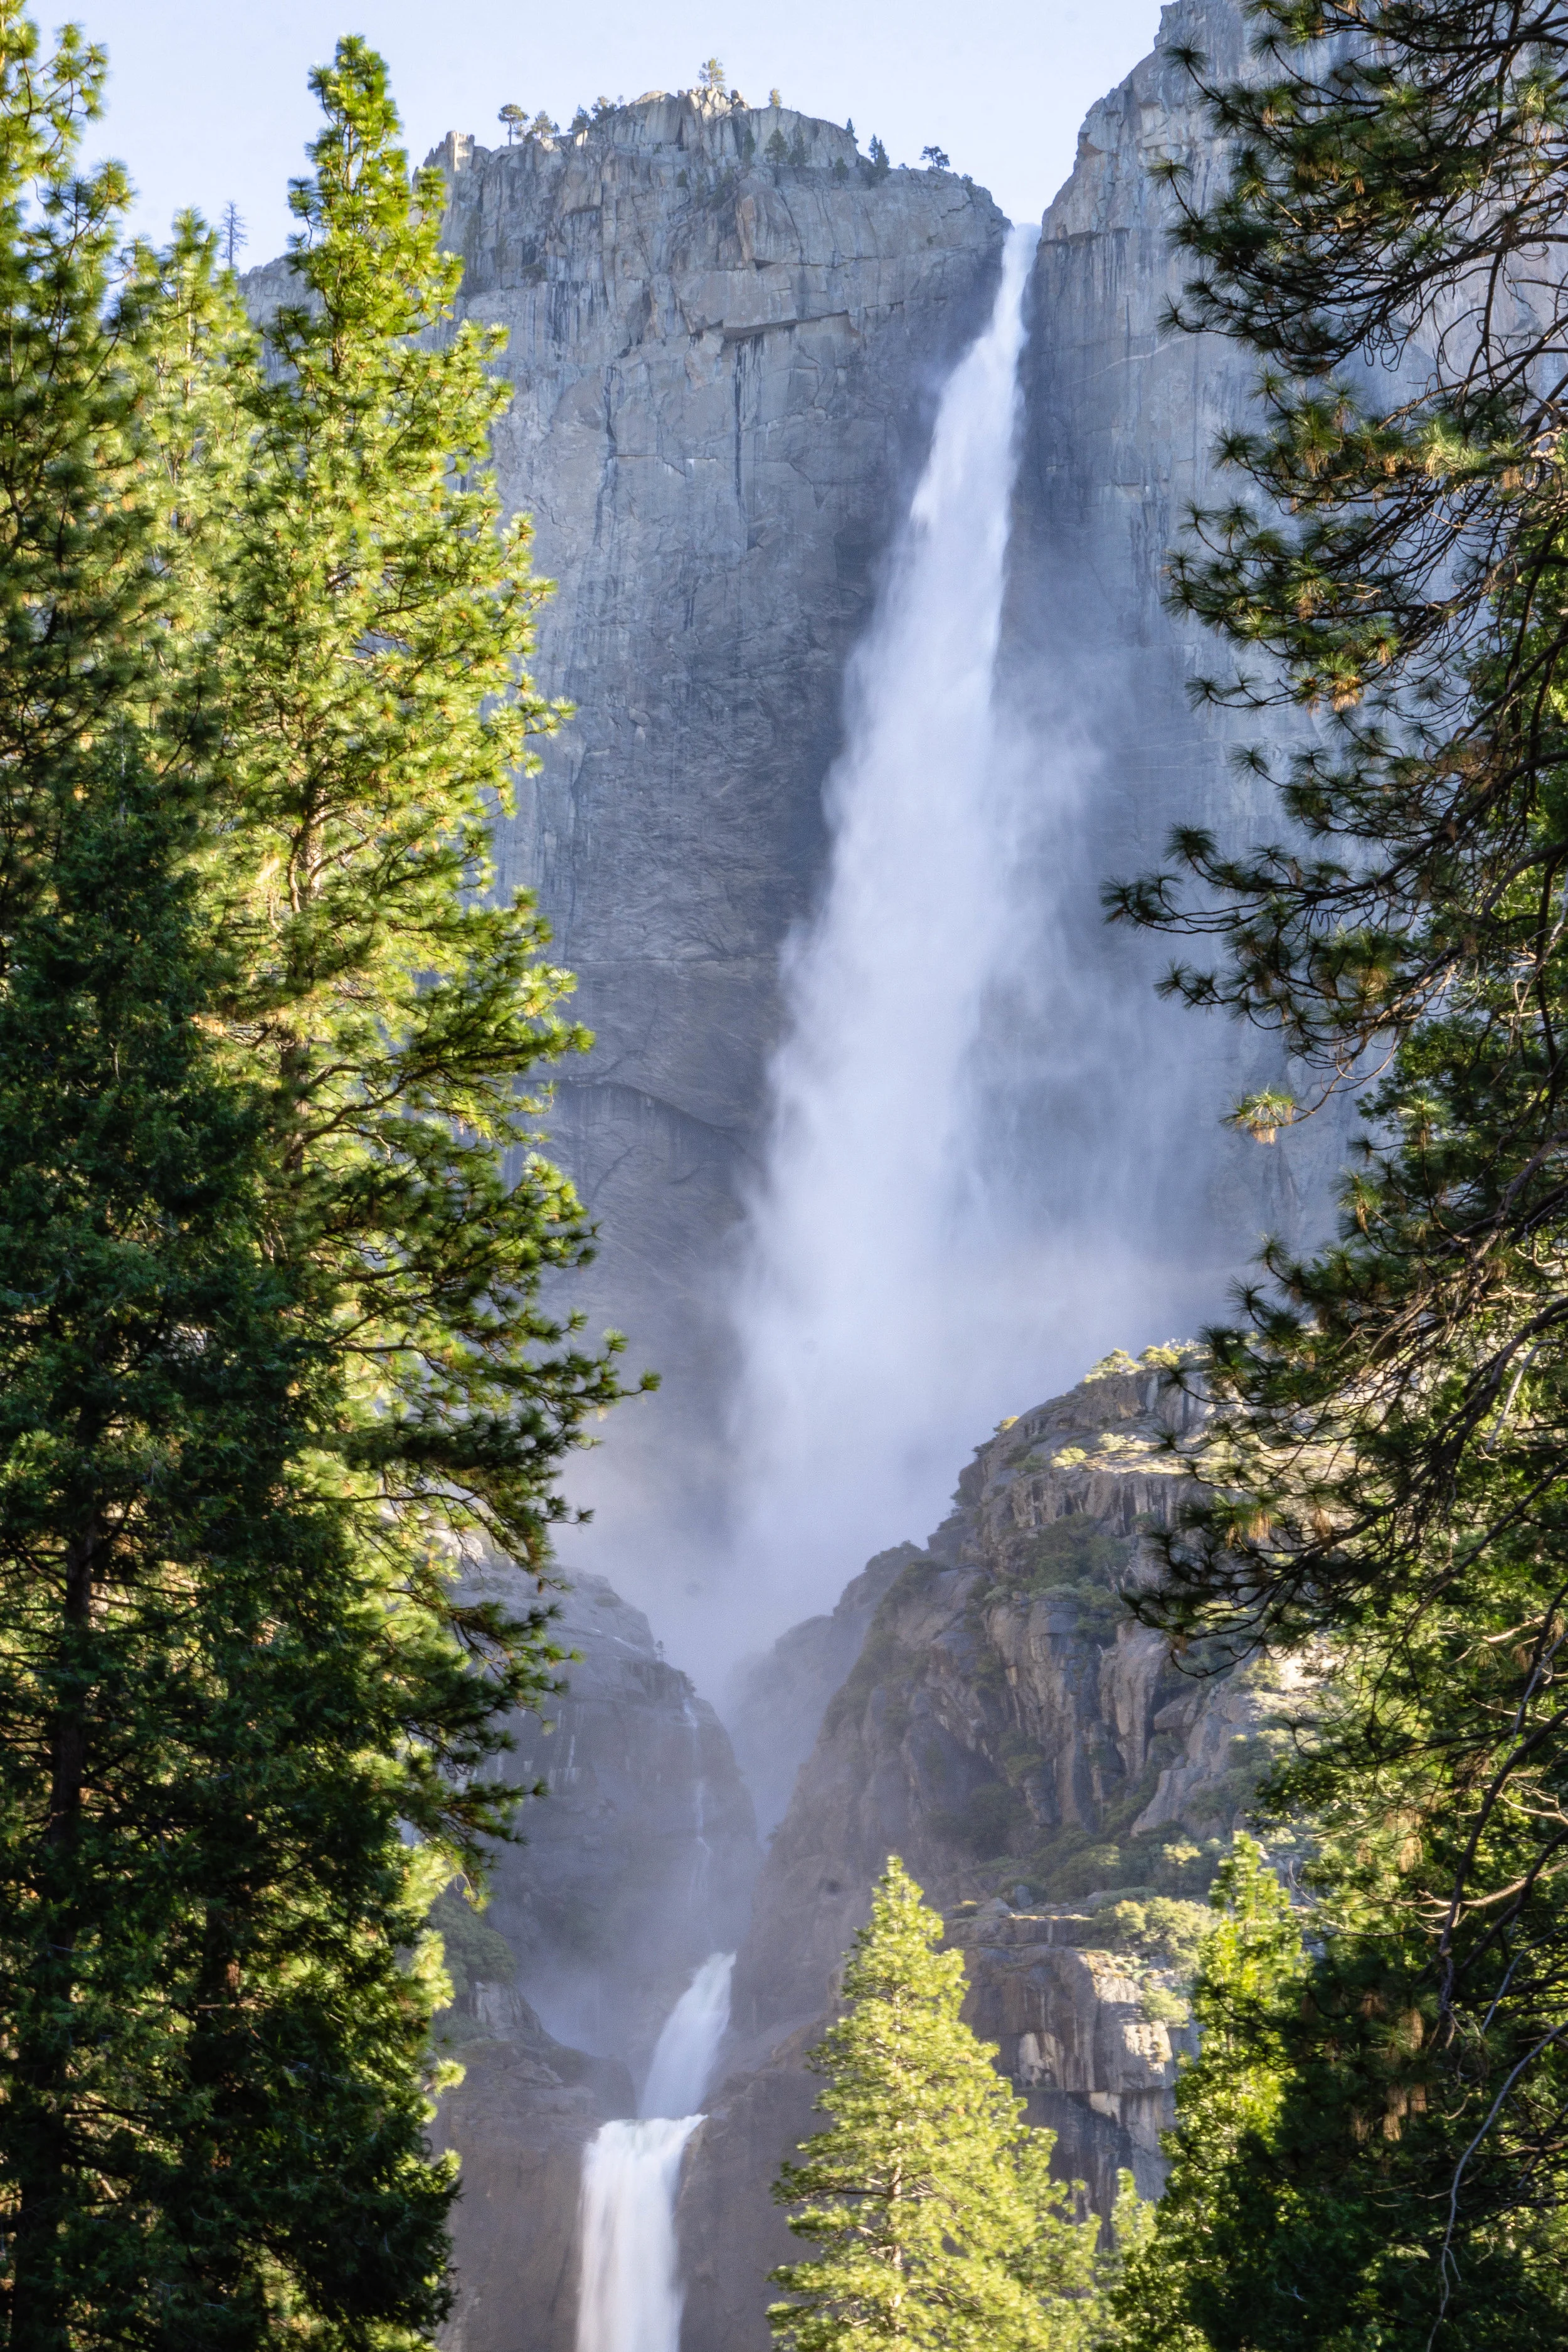


Kayaking and Paddle-boarding in Zephyr Cove
With Lake Tahoe being such a huge lake, surely you are asking yourself, “Where the best spots to kayak and paddle-board around Lake Tahoe?” Well, look no further because Zephyr Cove is one of the best places to kayak and SUP in all of Lake Tahoe, giving you access to those giant boulders everyone is posting about on social media.
With Lake Tahoe being such a huge lake, surely you are asking yourself, “Where the best spots to kayak and paddle-board around Lake Tahoe?” Well, look no further because Zephyr Cove is one of the best places to kayak and SUP in all of Lake Tahoe, giving you access to those giant boulders everyone is posting about on social media.
Zephyr Cove is a free beach to kayak and paddle-board on in Lake Tahoe. Located on the Eastern shore of Lake Tahoe, Zephyr Cove is a fantastic beach to swim, kayak, paddle-board, and soak in the evening sun. One of the main attractions to Zephyr Cove are the massive granite boulders that are just under surface of the crystal clear, blue waters of Lake Tahoe.
Read on to discover how to access the water at Zephyr Cove, where to park, safe places to swim, and so much more!
A cute couple kayaks in Zephyr Cove at sunset. Photograph by Dalton Johnson
Can you kayak in zephyr cove?
Zephyr Cove on the eastern shore of Lake Tahoe is a fantastic starting point for a host of water sports and activities such as kayaking. Given the protected nature of the cove, many kayakers, both beginners to advance kayakers, use Zephyr Cove as a launching spot for many paddling adventures on Lake Tahoe. The cove is sandy, making the launch easy on your boat, but quickly gives access to the iconic granite boulders just below the surface of the water.
Depending on the time of year and the water level on the northern end of the beach there are several rock islands which can be explored. If you have the time, consider paddling up and down the coastline to explore this beautiful, and often non-populated, portion of Lake Tahoe.
Can you Paddle-board in zephyr cove?
Offering fantastic views across Lake Tahoe into the Sierra Nevada mountains, Zephyr Cove is a fantastic place for paddle-boarding. Located on the Southeastern shore, this Lake Tahoe paddle boarding location is easier to access again while still offering amazing views, crystal clear water, and stunning rock formations.
One bonus of paddle-boarding in Zephyr Cove is that the cove is, for the most part, protected from the wind. This makes paddle-boarding easier and allows for all levels of paddle-boarders to enjoy this beautiful spot in Lake Tahoe.
can you swim in zephyr cove?
Zephyr Cove is the perfect sandy beach for a refreshing dip in Lake Tahoe's incredibly clear alpine water. You can sun yourself, get a tan, and relax while lazily soaking in the cool waters of Zephyr Cove. If you are feeling up for a swim, head out past the boulders and swim for as long as your heart desires.
Many visitors coming to Zephyr Cove sun bath on the beach, or the granite boulders, during the summer months. Once they get to warm, they enjoy a refreshing swim in the cool waters. It is this balance of swimming and sun bathing that makes Zephyr Cove a popular destination for Tahoe locals. Additionally, when you pair swimming with kayaking, Zephyr Cove become an ideal spot for recreation!
How much does Zephyr Cove Cost to Visit?
Zephyr Cove is on public land and is free to visit, however there is a parking fee in the lot nearest the beach. However, when the lot fills up you will be directed to park at the high school across Highway 50 where there is no fee and you can take a shuttle to the beach. Additionally, there is free parking on the Highway 50 near the entrance to Zephyr Cove.
DIRECTIONS TO ZEPHYR COVE:
Driving directions to Zephyr Cove
WATER ACCESS TO ZEPHYR COVE:
Accessing Zephyr Cover with a kayak will take some strength because the hike in is roughly a half mile. I suggest bringing a dolly to carry your kayak. Once to the cove, you will need to take a flight of stairs to the sandy beach. From there, launching is easy, just watch out for the shallow rocks on a low water year.
WHY IS ZEPHYR COVE ONE OF THE BEST FLAT WATER KAYAKING LOCATIONS:
Zephyr Cove is one of the best flat water kayaking locations because the crowds are small, the water is clear enough to see granite boulders underneath you, and the sunsets are one’s that make you stop and watch.
Positioned on the east shore of Lake Tahoe, Zephyr Cove often offers calm waters that can be paddled on easily. Additionally, the cove has several large boulders that get your heart pumping as you paddle overtop of them. I mean, how cool is it that you get to kayak over boulders while flat water kayaking?
Lastly, what makes Zephyr Cover kayaking special for me is that fact that you can watch the sunset, with very few people around you. You can’t say this very often while at a beach in Lake Tahoe.
DON’T MISS OUT ON THESE OTHER ADVENTURES NEARBY:
Rock Climb at Lover’s Leap
Now that you have discovered how to access the water at Zephyr Cove, where to park, and the safe places to swim it is your turn to get outside and enjoy the beauty that Zephyr Cove has to offer. Please, drop a comment below with trip reports and updates about Zephyr Cove for others in this community.
Discover More of the Eastern Sierra

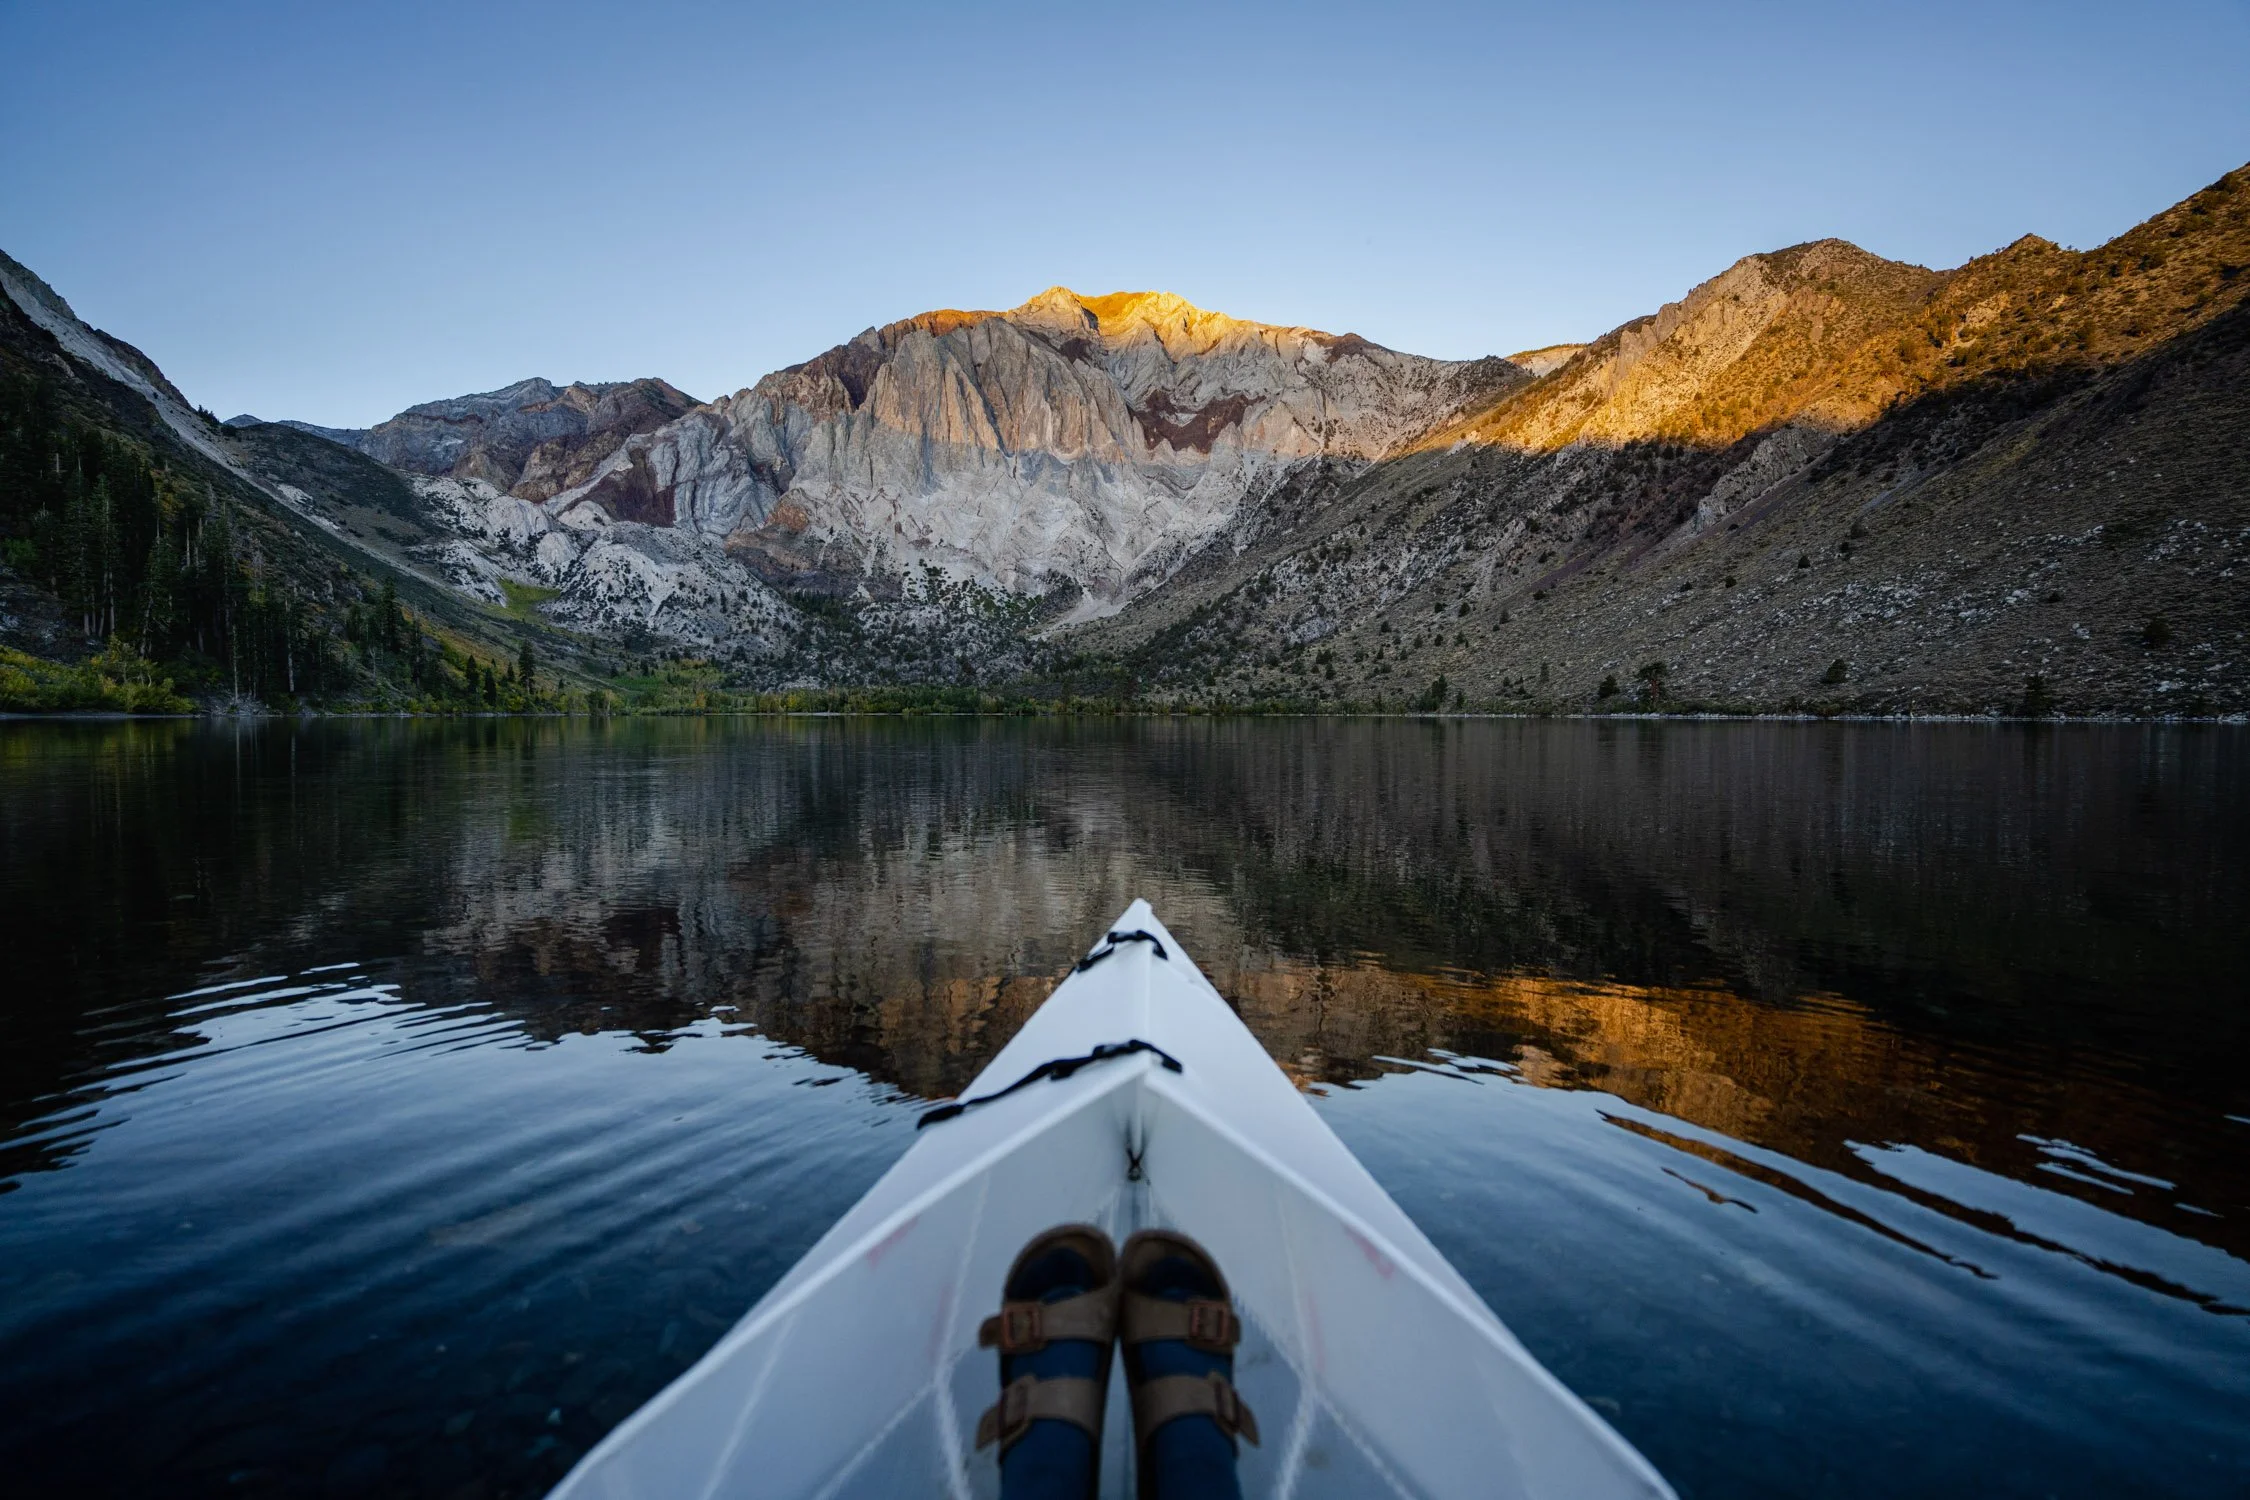

Four Reasons to Road Trip to Moab, Utah
Red dirt, a history of cowboys, landscapes stretching as far as the eye can see, and sandstone towers reaching towards the sky are all iconic concepts of the American West. However, there are few cities that demand the respect of adventurers alike more than Moab, Utah. It is here, in this desert oasis, where you will find an adult playground that will blow your mind when you visit for the first, or the 10,000th, time.
Red dirt, a history of cowboys, landscapes stretching as far as the eye can see, and sandstone towers reaching towards the sky are all iconic concepts of the American West. However, there are few cities that demand the respect of adventurers alike more than Moab, Utah. It is here, in this desert oasis, where you will find an adult playground that will blow your mind when you visit for the first, or the 10,000th, time.
Hiking, rock climbing, canyoneering, and adventure photography are just four, of the many reasons, to road trip to Moab, Utah. Moab is an adult playground where you can seek out new adventures daily, for an entire lifetime, and never cover all that Moab has to offer. Because of the ample amounts of adventures, you should pack your car and start a road trip to Moab today.
Read on to discover where to hike, which rock climbs to try, which landscapes to no miss, and so much more about Moab, Utah.
Castletone Tower glowing bright red in the sunset light of Moab, Utah. Photograph by Dalton Johnson
Hiking and Trail Running
Whether you are into short hikes, or ultra marathons, Moab has it all. When I say that, I truly mean you can run the Moab 240 (yes, that is a 240 miles race) or you can hike .4 of a mile to the base of the Windows arches in Arches National Park. Of course, there is everything in-between as well. As the topography of Moab is relatively level, most hikes do not have significant climbs.
Another beautiful part of adventuring around is the trail system. As the desert environment is fragile, the trails often follow erosion-resistant paths such as slick rock. At times, the slick rock trails can be difficult to follow for those not accustom to cairns, but you will learn quickly.
For myself, I found packing a day pack, ideally one with a hydration system like the Arrio 24, to be the best way to hit the trail. Often, these hikes are gorgeous and the trails have offshoots that take you to great views not listed on the maps. If you have that curiosity and want to explore deeper, the desert can be a hot place, so make sure to have water with you at all times!
Trail Run Suggestions:
Landscape Arch in Arches National Park
Aztec Butte in Needle District of Canyonlands
Canyoneering
Do you have a fear of heights or tight places and are looking to outgrow that? If so, you should look into canyoneering! Canyoneering is one of those awesome adventures where the difficulty ranges from non-technical canyons to very-technical canyons where you will be repelling in waterfalls using not-the-most-inspiring natural anchors.
Sometimes you need a wetsuit to endure the cold, while there are canyons that get sun for most of the day. Regardless of the adventure you chose, you are bound to have a great time and get a new perspective on the outdoors.
Canyoneering Suggestions:
Elephant Butte
U-Turn Canyon
Not Tierdrop
Rock Climbing
As if Utah didn’t already have enough to offer in terms of climbing, but between Moab proper, Canyonlands National Park, Arches National Park, Joe’s Valley, and Indian Creek there are over 2,500 routes to choose from.
Now, the question is, “what do you like to climb?” If you want to plug gear and summit a few towers, then Indian Creek is your spot. If you want to pull hard, but stay close to the ground, check out Joe’s Valley for some bouldering. Are you a bolt clipper? If so, check out Potash road just outside of Moab. Luckily, there is climbing for all… even those aid climbers!
Rock Climbing Suggestions:
Neat on Optimtor Wall
Blue Sun on Way Rambo Wall
Spaghetti Western on Pistol Whipped Wall
Astro Photography in Arches National Park
As Arches National Park is a registered International Dark Sky Park, meaning the light pollution from the surrounding cities is so minimal (a combination of low-population and blue-light regulation) that the possibilities with astro photography is literally out of this world!
While Arches may get the fame for the area, if you venture into Castle Valley or down to Looking Glass Road, the skies are equally as clear and there are less people.
Astrophotography Ideas:
Behind an arch
Next to a desert tower
In a slot canyon
A massive rappel from the center of Hourglass Arch to set up a rope swing near Moab, Utah. Photograph by Dalton Johnson
Now that you have discovered where to hike, which rock climbs to try, and the landscapes not to miss in Moab, Utah it is your turn to get out and discover the wonderful adventures that Moab has to offer. Please, drop a comment below to share additional information with other readers that could be helpful to them!
Discover More of the American Southwest
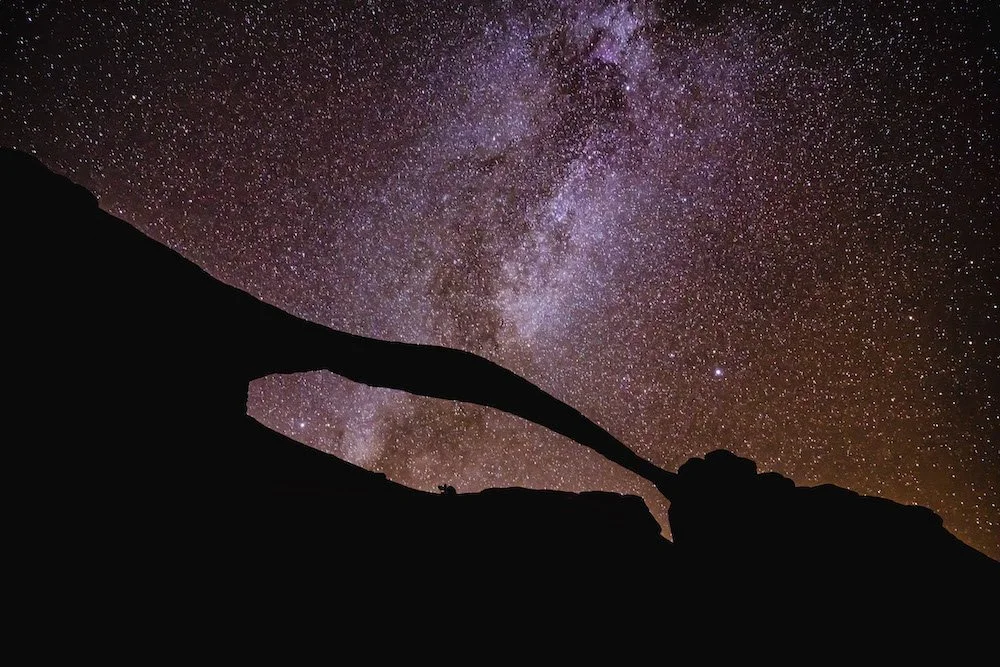


Surfing in Santa Cruz
What better thing to do during the weekend than go surfing. Austin Smith Ford and I did just that. Heading north four miles out of Santa Cruz to surf a fun, local wave. We avoided the crowds, we had an epic surf session during the sunset even though the waves were small.
What better thing to do during the weekend than go surfing? Well, Austin Smith Ford and I did just that. Heading north four miles out of Santa Cruz to surf a fun, local wave. We avoided the crowds and had an epic surf session during the sunset even though the waves were small.
Best Places to Surf in Santa Cruz, California
Santa Cruz, California is spotted with excellent surfing spanning the entire coastline of the city, and beyond. So what are these spots? Below is a list of the best places in Santa Cruz to surf.
Steamer Lane
Pleasure Point
26th Avenue
Cowells
The Hook
Four Mile
The Harbor
Jack’s
When is the Best time of year to surf in Santa Cruz, CA?
Generally speaking, the best time of the year to surf in Santa Cruz are the winter months, November until March, because it is during these months that the waves are the most consistent and the largest. One of the downsides of surfing during the winter is that the water is cold, with an average low of 53F to 55F.
Discover More Adventures Along Highway One


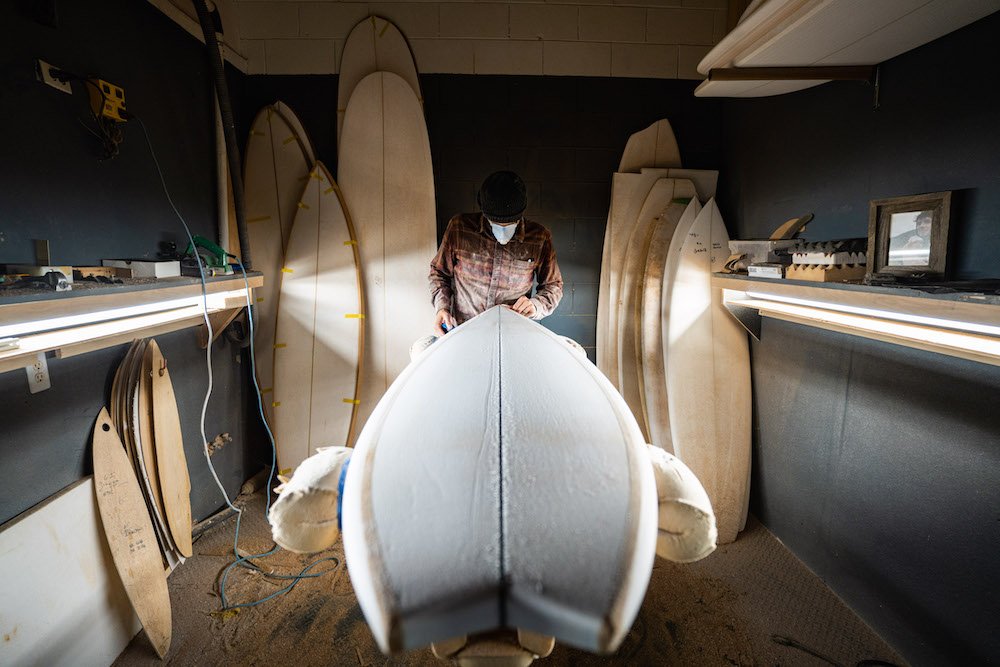
Best Places to Relax with Friends in Yosemite Valley
As you plan your visit to Yosemite Valley, make sure to add in some time to just sit and relax. Soaking up the scenery and embrace the opportunity you have to be in Yosemite Valley. Try not to run around from dusk till dawn, so you can hang with friends and appreciate the gorgeous views Yosemite Valley has to offer.
When visiting Yosemite Valley, there is often a desire to try to see everything; I’ll be frank with you, you just can’t see it all in a single trip. Yosemite Valley is special because of this fact, drawing us back time and time again. The views never get old. In fact, the views of Yosemite are like a fine wine, getting better with age.
As you plan your visit to Yosemite Valley, make sure to add in some time to just sit and relax. Soaking up the scenery and embrace the opportunity you have to be in Yosemite Valley. Try not to run around from dusk till dawn, so you can hang with friends and appreciate the gorgeous views Yosemite Valley has to offer.
The best places to hang with friends in Yosemite Valley are Glacier Point, the Merced River Bank, and the El Capitan Meadow.
Read on to discover how to avoid crowds, why these spots are the best places to relax, and ideas to help you and your friends have a wonderful visit to Yosemite Valley.

Skateboard down the winding road of Glacier Point with Half Dome in the background. Photograph by Dalton Johnson
GLACIER POINT
WHY IS GLACIER POINT A GOOD PLACE TO relax WITH FRIENDS?
Glacier Point is a fantastic place to hang with friends because there are fewer people in the area with several places to kick back and enjoy. Additionally, Glacier Point offers several locations with 360 degree views to see the magnificent Yosemite Valley from above. These views often leave me speechless.
Is Glacier Point Crowded?
Glacier Point is a crowded area, however you, and your friends, can escape the crowds by hiking a little ways. The National Park’s put out a survey that concluded most visitors do not go more than a half mile from their vehicle. So, be one of those visitors who wander a ways to find seclusion.
Best Ways to Relax at Glacier point?
There are several ideal ways to relax at Glacier Point, but the best ways are to:
Hike a half mile either direction to sit along the cliff alone, or with friends
Pack a picnic and watch the sunset
Arrive early and enjoy coffee with a view
Skateboard down the winding road leading to Glacier Point
Spending time relaxing on the Merced River Bank by playing a game of chess with Yosemite Falls in the background. Photograph by Dalton Johnson
MERCED RIVER BANK
WHY IS MERCED RIVER BANK A GOOD PLACE TO relax WITH FRIENDS?
The Merced River winds through the entire Yosemite Valley, acting as the center piece. During the summer, you can find several people swimming, jumping off bridges, and enjoying a picnic on any of the many beaches along the Merced River. It is here, along the Merced River Bank, that I have had some of my favorite conversations and most relaxing times in Yosemite Valley. Make sure you bring a towel… just in case you feel the urge to take a dip.
Is the Merced River Bank Crowded?
The Merced River Bank is often not crowded. Several people wander past the swimming holes and beaches, looking at the spots, but rarely stop. Most visitors who come to Yosemite Valley have a jam packed itinerary, preventing them from sitting down and enjoying the nature beauty Yosemite Valley is known for.
Best Ways to Relax at the Merced River Bank?
There are many ways to relax at the Merced River Bank alone, or with friends, such as:
Go swimming!
Bring a camp chair and read a book on the beaches
Play chess, or any game, with friends
Hanging out in the El Capitan Meadow with friends, watching rock climbers scale El Cap in Yosemite Valley. Photograph by Dalton Johnson
EL CAPITAN MEADOW
WHY IS EL CAPITAN MEADOW A GOOD PLACE TO relax WITH FRIENDS?
For climbers and tourists alike, the El Capitan Meadow can feel like the center of the universe while visiting Yosemite Valley. This large green meadow is a place where you can escape the crowds gawking at the rock climbers on El Cap or join them. Often you will find rock climbers sitting with binoculars looking up at the massive granite wall and pointing out their friends. Many other climbers will come here just to relax and soak up the sun on a rest day. Tourist are very welcome in the meadow as well because it is here that you can learn all about rock climbing in Yosemite Valley. Additionally, this is the best picnic spot in all of Yosemite Valley.
Is the El Cap Meadow Crowded?
El Cap Meadow is one of the most crowded places in Yosemite Valley, but you can always find a spot for yourself, and friends, to relax. As visitors, and rock climbers, seek out the El Cap Meadow to stare up at the people climbing El Capitan, the front of the meadow fills up. However, the meadow is very large, so if you wander to the back, you will find places to lay down a blanket and hang out with friends.
Best Ways to Relax in the El Cap Meadow?
El Capitan Meadow might be one of the most crowded places in Yosemite Valley, but the meadow is so large you, and your friends, can find solitude to relax and do things like:
Lay down a blanket and take a nap
Paint a painting of the beauty surrounding you
Bring some wine and watch the sunset
Have a romantic date night at the back of the meadow
Feeling a bit risky? Friends soaking in the sunrise at Glacier Point on the diving board. Photograph by Dalton Johnson
Now that you have discovered how to avoid crowds, why these spots are the best places to relax, and ideas to help you and your friends have a wonderful visit to Yosemite Valley it is your turn to experience the beauty and relaxation Yosemite Valley has to offer. If you read this and have more ideas for others to relax in Yosemite, please leave a comment and help others out. Additionally, if you have any tips, or feedback, on this article please drop that in the comments below to help us improve!
Discover More of Yosemite Valley


Rainbow Lakes Hike | Hike Alaska
Rainbow Lakes are a hidden gem between Kenai Lake and Cooper Lake. This chain of lakes is not very large, but Rainbow Lakes offers wonderful views—especially at sunset— and short hikes accessible to all. The trails are maintained and many of the lakes have a bench you can sit at to enjoy the view. Additionally, there is camping and fishing at all of these lakes, so bring a tent and stay for the weekend.
Rainbow Lakes are a hidden gem between Kenai Lake and Cooper Lake. This chain of lakes is not very large, but Rainbow Lakes offers wonderful views—especially at sunset— and short hikes accessible to all. The trails are maintained and many of the lakes have a bench you can sit at to enjoy the view. Additionally, there is camping and fishing at all of these lakes, so bring a tent and stay for the weekend.
Hiking Rainbow Lakes near Cooper’s Landing, Alaska is an easy one mile loop around around a chain of lakes that is known for camping, family friendly activities, fishing, swimming, and picnicking. If you have the time, make sure to stay for sunset, as the light show on the mountains surrounding Rainbow Lakes light up in a variety of colors.
Read on to discover where the hike starts, what to bring, all the hiking facts, and so much more about hiking to Alaska’s Rainbow Lakes.
RAINBOW LAKES HIKE OVERVIEW:
Distance: 1 mile round trip
Time needed: 10-20 minutes
Elevation change: 30 feet
Type of terrain: Maintained trail
Difficulty of hike: Easy
WHERE ARE RAINBOW LAKES?
Rainbow Lakes are located halfway between Kenai Lake and Cooper Lake. The nearest town is Cooper’s Landing, AK on the Kenai Peninsula. To reach Rainbow Lakes you will need to drive down a dirt road for a long while, between 30-40 minutes. The pullout for this chain of lakes comes upon you quickly, so keep your eyes peeled for the forest service sign.
Click here for direction to Rainbow Lakes Trailhead
HOW LONG DOES IT TAKE TO HIKE RAINBOW LAKES?
Rainbow Lakes offers several short hikes that are all less than a mile and take roughly 10 to 20 minutes. However, many hikers visiting Rainbow Lakes come for the views and easy access to the lakes for swimming and fishing.
IS RAINBOW LAKES hike kid friendly?
Rainbow Lakes hike is the perfect kid friendly hike. From the parking lot to the lakes is less than a half mile on flat ground, so the kids will be able to make the hike without worries. Once you get to the lakes, there is a lot of room for the kids to run around, yet you will be able to keep an eye on the kids from the lakeshore. Additionally, there is fishing and swimming at Rainbow Lakes, so the kids will always be entertained.
What to bring while hiking RAINBOW LAKES?
You do not need to bring much when hiking rainbow lakes, however I would suggest that you bring a few day hiking essentials in Alaska like:
Bear Spray
Bug Spray
Water
A small backpack
Snacks
Hiking shoes with good tread
Other Adventures Near RAINBOW LAKES Hike:
Camping at Cooper’s Lake
Rafting, or kayaking, down the Kenai River
Flight Seeing over the Kenai Peninsula
Hiking Exit Glacier
Camping at Kenai Lake
Beginning the hike into Rainbow Lakes near Cooper’s Landing, Alaska. Photograph by Dalton Johnson
Now that you have discover where the hike starts, what to bring, all the hiking facts, and so much more about hiking to Alaska’s Rainbow Lakes it is your turn to embark on the journey to this beautiful spot! Please, let me know in the comments below if this blog was helpful for you and/or if there is anything else you feel would be helpful for other readers.