Type 2 Fun | A Cinematic Adventure
Now that we understand what type 2 fun is, where does inspiration come from behind this video? My adventures. Since 2016, I have dedicated my life to adventures that range from the grand to the micro. Just the idea of adventure get’s me excited and I often read books about adventures just to get the ideas flowing.
Type 2 Fun Script
I have no idea why I keep going on these adventures. Half the time I am asking myself, “what the hell am I doing?”
Things are always breaking, often I am shivering alone in a sleeping bag, pedaling into a horrific head wind, or puking my guts out from altitude sickness… Like, does that even sound fun to you?
If it does, I think you are kinda messed up. But, the good kind of messed up because it means you and I are alike.
Ehhh then again, maybe that’s a bad thing. Does the world really need two of us?
We are the weirdos. Lovers of monotony. Freaks of nature who fancy a good a ole fashioned suffer fest.
Pedaling down dirt roads in search of something, anything really. If we are lucky, it’ll be a hot spring or a pretty view, but most of the time it, is nothing more than some flat ground to lay our heads.
Even if that’s the case, you’ll find me dancing like a fool. It’s just one of those things that brings me joy.
The funny part of these trips, I hate them. Like really, I don’t enjoy it. Yet, I love them once the trip is over and find myself asking, “what stupid thing is next?”
A trip to the mountains, another bike packing trip, endurance trail run, who knows?
For now, I’ll just keep scrolling though the memory bank, happy I elected to suffer for week.
I guess that is why they call it type two fun.
Idea Behind the Video
As a lover of type 2 fun, the script above landed on a piece of paper as I journaled one morning. Most of the video content had already been shot, so I just needed to have the editing work done, but where did the inspiration come from? First, let’s answer the basic question, what is type 2 fun?
Type 2 fun occurs when a task is difficult at the time, but feels rewarding afterward, often because it challenges the practitioner to test their limits and grow.
Now that we understand what type 2 fun is, where does inspiration come from behind this video? My adventures. Since 2016, I have dedicated my life to adventures that range from the grand to the micro. Just the idea of adventure get’s me excited and I often read books about adventures just to get the ideas flowing.
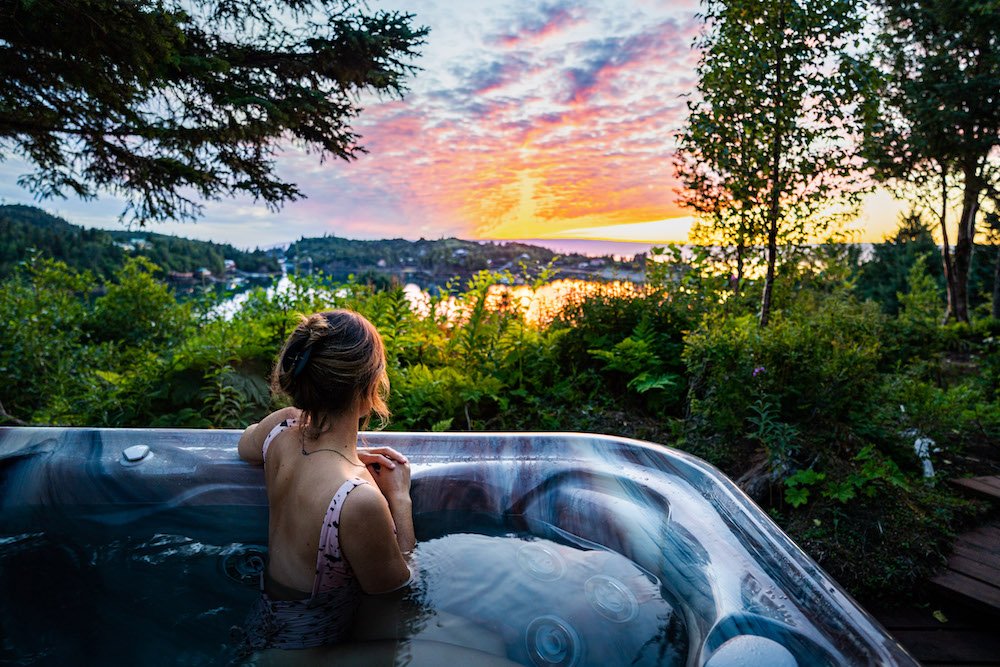
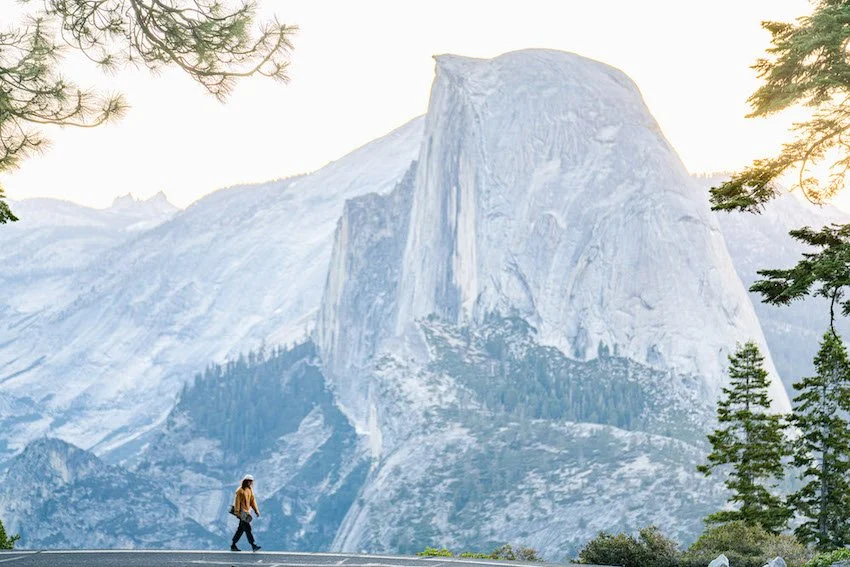
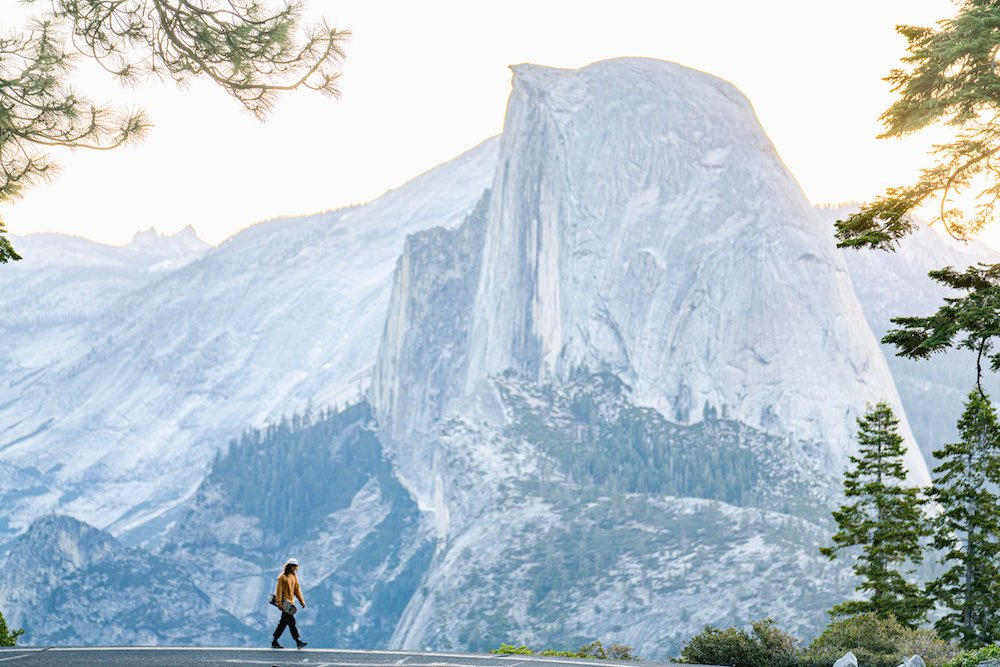
Yet, this video predominantly comes from a semi-recent supported bikepacking adventure that I did from Lake Tahoe to Mount Whitney, where I bikepacked and tried to hike to the summits of both peaks.
Shooting the Video
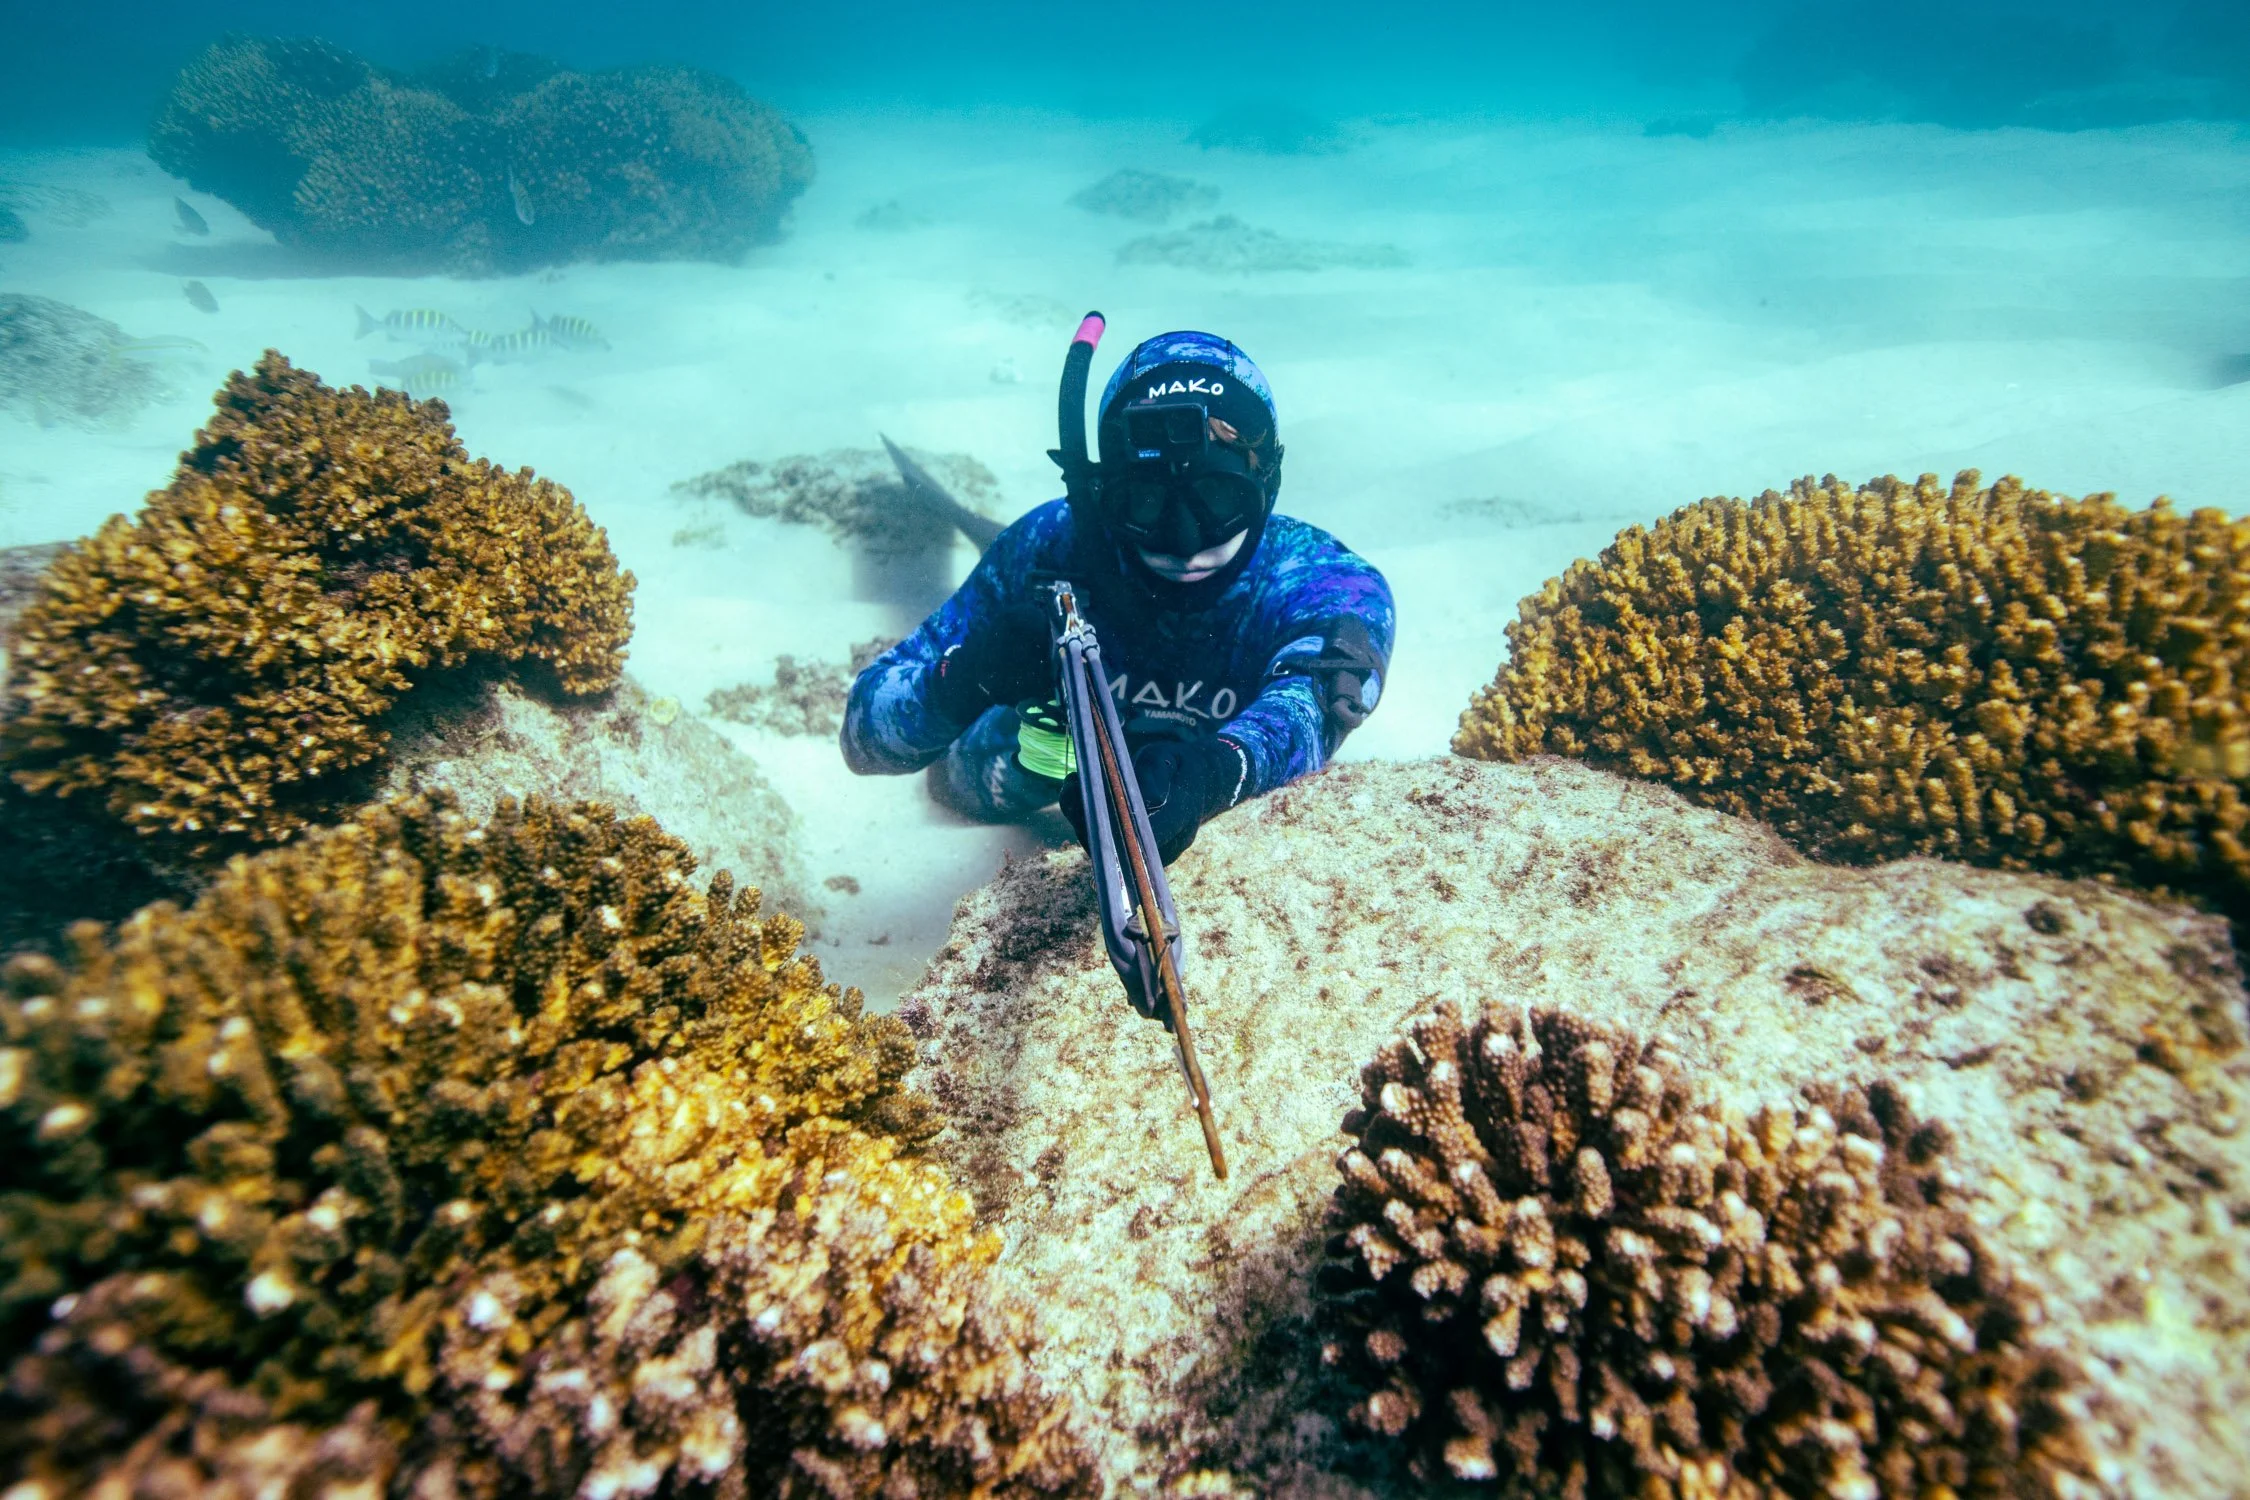
I wish I could say that this was filmed on a high end camera, but the reality is I used a GoPro because I didn’t want to carry much weight, as this trip was a personal project. The content for this video was shot during a supported bikepacking trip from Freel Peak to Mount Whitney. Honestly, this video was kind of one of those “what do I do with this footage” kind of videos, which gives the video its raw and authentic feeling.
In many ways, some of the best adventure movies in the world are created this way.
The goal with this video was to take the content from the trip and showcase the spirit of type 2 fun, aka the suffering an adventurer goes through on an adventure. Mostly, this is a mental battle, but sometimes this is a physical one as well. In my case for this trip, it was both.
Discover More Creative Works By Dalton


Day Hike the Mist Trail | Yosemite Hiking
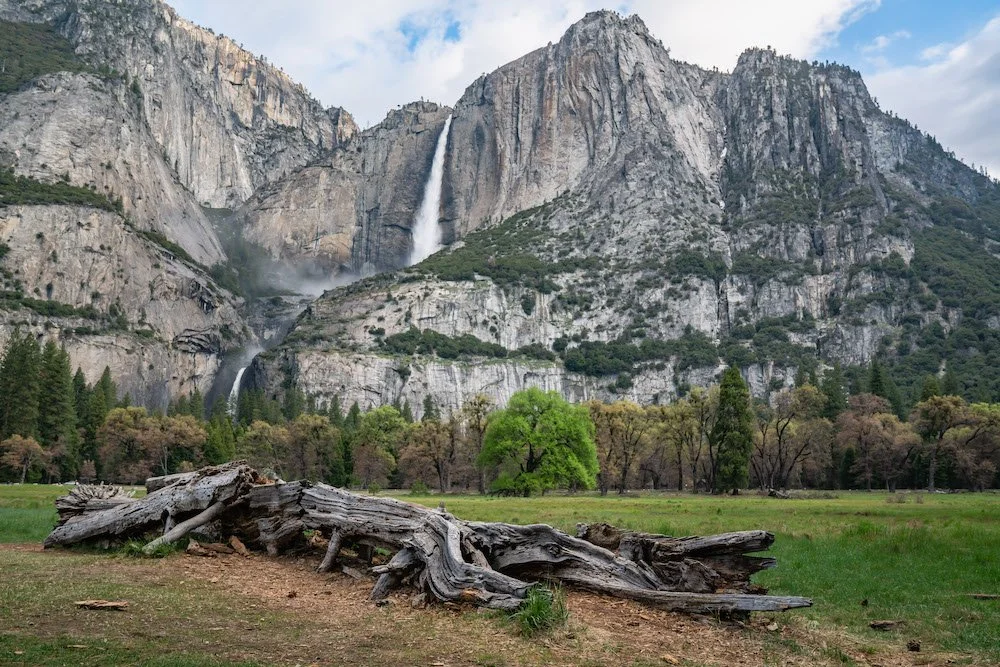
If you only have time for one hike while in Yosemite look no further - the Mist Trail is the hike for you. During this hike you will get up close and personal with two breathtaking waterfalls, Vernal and Nevada Falls. You will know Vernal Fall is getting close as you feel a cool breeze of mist get stronger as you power up the steep incline. You may get wet from the mist, so make sure to bring a rain jacket.
If you only have time for one hike while in Yosemite look no further - the Mist Trail is the hike for you. During this hike you will get up close and personal with two breathtaking waterfalls, Vernal and Nevada Falls. You will know Vernal Fall is getting close as you feel a cool breeze of mist getting stronger as you power up the steep incline. You may get wet from the mist, so make sure to bring a rain jacket.
The Mist Trail is an iconic 6.4 mile hiking loop in Yosemite National Park that passes and summits Vernal Fall and Nevada Fall. A difficult and gorgeous hike that begins at the Happy Isle trailhead taking all hikers on a journey up the granite landscape to the top of Nevada Fall where you can look down into the heart of Yosemite Valley.
Read on to discover what you can see along this trail, how long it will take, the best season to go, and so much more!
Enjoy the view of Mount Broderick and Nevada Fall while hiking down the Mist Trail in Yosemite National Park. Photograph by Dalton Johnson
Hiking the Mist Trail Overview:
Distance: 6.4 mile loop
Elevation Gain: 2,200 feet
Difficulty: Strenuous
How long does it take to hike: 4-5 hours
Terrain: steep, maintained trail
HOW LONG IS THE MIST TRAIL DAY HIKE?
Day hiking the Mist Trail is a 6.4 mile loop that begins at Happy Isle trailhead and ascends a steep, winding trail passing two waterfalls, Vernal and Nevada Falls. Most hikers complete the Mist Trail hike in 4 to 5 hours.
WHAT IS THE ELEVATION GAIN OF THE MIST TRAIL DAY HIKE?
The total elevation gain of the Mist Trail is 2,162 feet up a well maintained trail. Hiking the Mist Trail is difficult, but can be done by all hikers. There are many switch backs with large rocks that you can sit on to rest while going up.
HOW LONG DOES IT TAKE TO DAY HIKE THE MIST TRAIL?
On average, hikers take 4 hours to hike the full trail; 3 hours up and 1 hour down. This hike is a loop with a gorgeous lunch/picnic spot at the top of Nevada Fall. I suggest bringing enough snacks to sit at the top and enjoy the view for little while.
HOW HARD IS THE MIST TRAIL DAY HIKE?
The Mist Trail is a moderate to difficult hike because the first half is uphill. Although the Mist Trail is a difficult hike, there are plenty of places to stop and rest along the way to the top.
When is the best season to Hike the Mist Trail?
The best time to hike the Mist Trail is in Spring, or early Summer, while the snow runoff is high and the falls are full of water. The outside temperatures will be modest, 60s-70s, keeping you cool during this hard hike.
WHY HIKE THE Mist Trail?
If you are coming to Yosemite Valley to see the sights, hiking the Mist Trail should be on your bucket list. Where else in the world can you hike past two waterfalls, stare at granite monoliths, and embrace the burn in your thighs from a difficult hike? No where else. While this hike is one of the most popular day hikes in Yosemite Valley, the design and sights are unparalleled. When you stop for breaks, look over your shoulder, I promise you wont be disappointed. Soak in the beauty and challenge yourself to reach the top of Nevada Falls.
Once you reach Nevada Falls, take a load off by sitting down. Pack a lunch and have a picnic.
WHAT TO SEE ALONG THE mist trail?
Vernal Fall
Nevada Fall
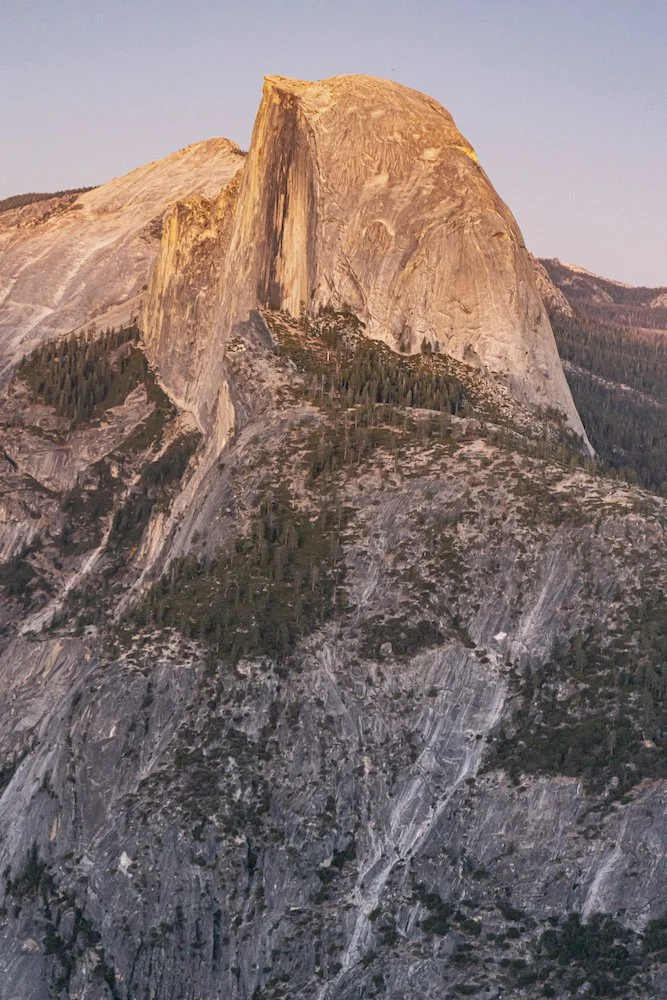
Half Dome
Liberty Cap
Mount Broderick
Hiking up the Mist Trail with friends near Vernal Fall in Yosemite National Park. Photograph by Dalton Johnson
Now that you have discovered what you can see along this trail, how long it will take, and the best season to go, it is your turn to get outside and start hiking the Mist Trail. If you know of any other helpful information, please leave a comment below to help out your fellow hikers. If you found this article to be helpful, please share it among your friends, or on social media, so others can learn as well.
Discover More of Yosemite Valley

The Best Summer Hikes in Alaska
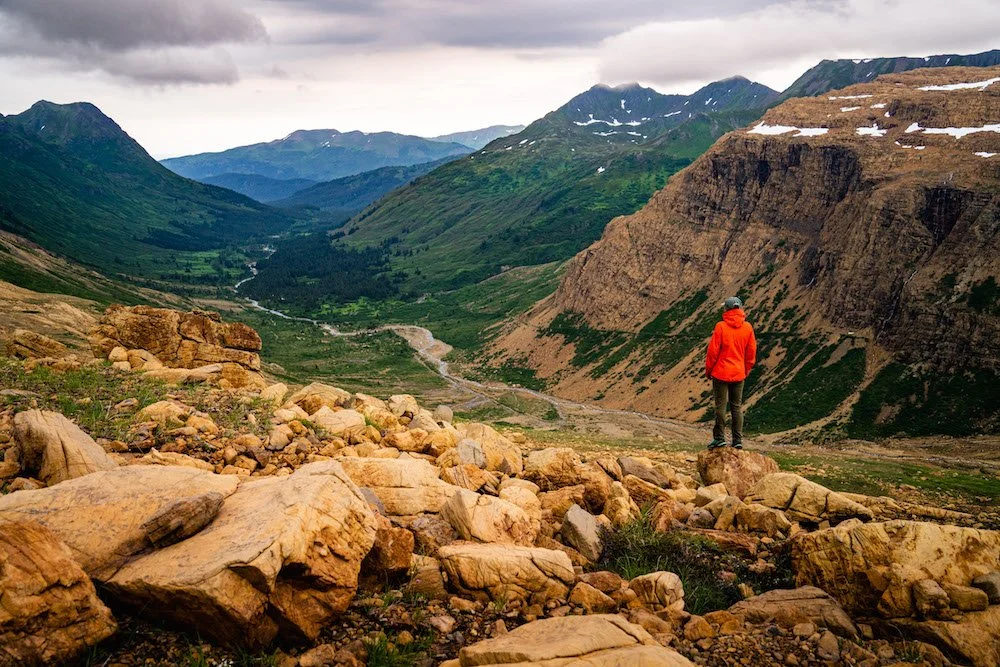
Covering more than 665,000 square miles, Alaska is massive. Earning the number one spot for being the largest state in the United States, Alaska’s landscape is still untouched and remote, accounting for two-thirds of the country’s national parklands, roughly 80% of wildlife refuges and houses the two largest national forests. For most, these numbers are incomprehensible, so, to put it simply, Alaska offers more outdoor adventures than any other state. Making Alaska one of the most diverse places to hike in the United States. But, which hikes should you start with?
Covering more than 665,000 square miles, Alaska is massive. Earning the number one spot for being the largest state in the United States, Alaska’s landscape is still untouched and remote, accounting for two-thirds of the country’s national parklands, roughly 80% of wildlife refuges and houses the two largest national forests. For most, these numbers are incomprehensible, so, to put it simply, Alaska offers more outdoor adventures than any other state. Making Alaska one of the most diverse places to hike in the United States. But, which hikes should you start with?
The best summer hikes in Alaska are:
Byron Glacier Ice Cave Hike
Grewingk Glacier Lake Hike
Rainbow Lakes Hike near Kenai Lake
Chutes and Ladders Hike
Exit Glacier and Harding Icefield Hike
Read on to discover where these hikes are located, how long they take, and an overview of the best summer hikes in Alaska.
Seeing the entrance to the ice cave of Byron Glacier for the first time while hiking in Alaska. Photograph by Dalton Johnson
Byron Glacier Ice Cave Hike
Hiking Byron Glacier during the summer is a treat. From the trailhead, the cool breeze from the glacier and the rushing river sounds draw you into a mystical mindset as you approach the ice cave. After hiking for a 1.5 miles, you reach the entrance to the cave. Looking dark and daunting, as you enter, your eyes quickly adjust and reveal the magic that is the Byron Glacier Ice Cave hike.
Where is Byron Glacier?
Byron Glacier is located in Girdwood, Alaska on the Kenia Peninsula. Sitting adjacent to Portage Lake and Portage Glacier, this ice cave hike is often paired with a visit to Portage Lake.
Click here for direction to Byron Glacier Trailhead
How long does it take to hike Byron Glacier Ice Cave?
Hiking to the ice cave of Byron Glacier will take 20-30 minutes along a flat dirt trail. Several people stay for 2-3 hours as they explore deep into the ice cave.
Byron Glacier Ice Cave Hike Overview:
Distance: 1.6 miles round trip
Time needed: 1-2 hours
Elevation change: 100 feet
Type of terrain: Maintained trail to rocky river bed in the ice cave
Difficulty of hike: Easy
Interested in learning more about the Byron Glacier Ice Caves? I wrote a full article about how to hike and explore the ice caves at Byron Glacier safely.
Grewingk Glacier Lake Hike
Stepping off the boat onto solid ground, the Grewingk Glacier Lake hike begins. Up a wooden ladder to a vertical trail, the start to this hike can be brutal. However, once you are over the hump it’s all downhill to Grewingk lake. Arriving at Grewingk Lake is a special event as the beach often has ice chunks and iceburgs floating close to shore.
Where is Grewingk Glacier Lake?
Gerwingk Glacier Lake is located in Kachemak Bay across the from Homer, Alaska. To reach the trailhead, you will need to charter a water taxi, I suggest Mako Water Taxi, across the bay.
Click here for direction to Grewingk Glacier Lake Trailhead
How long does it take to hike Grewingk Glacier Lake?
Hiking Grewingk Glacier Lake takes about 6 hours to hike out and back and the water taxi is roughly 1 hour, so this hike is a full day adventure. With that said, several hikers bring camping supplies and stay at Grewingk Glacier Lake for 1 to 2 nights.
Grewingk Glacier Lake Hike Overview:
Distance: 12.6 miles round trip
Time needed: 5-6 hours
Elevation change: 2,100 feet
Type of terrain: Well maintained trail
Difficulty of hike: Strenuous
Rainbow lakes Hike near Kenai Lake
Rainbow Lakes are a hidden gem between Kenai Lake and Cooper Lake. This chain of lakes is not very large, but Rainbow Lakes offers wonderful views—especially at sunset— and short hikes accessible to all. The trails are maintained and many of the lakes have a bench you can sit at to enjoy the view. Additionally, there is camping and fishing at all of these lakes, so bring a tent and stay for the weekend.
Where Are Rainbow Lakes?
Rainbow Lakes are located halfway between Kenai Lake and Cooper Lake. The nearest town is Cooper’s Landing, AK on the Kenai Peninsula. To reach Rainbow Lakes you will need to drive down a dirt road for a long while, between 30-40 minutes. The pullout for this chain of lakes comes upon you quickly, so keep your eyes peeled for the forest service sign.
Click here for direction to Rainbow Lakes Trailhead
How long does it take to hike Rainbow Lakes?
Rainbow Lakes offers several short hikes that are all less than a mile and take roughly 10 to 20 minutes. However, many hikers visiting Rainbow Lakes come for the views and easy access to the lakes for swimming and fishing.
Rainbow Lakes Hike Overview:
Distance: 1 mile round trip
Time needed: 10-20 minutes
Elevation change: 30 feet
Type of terrain: Maintained trail
Difficulty of hike: Easy
Chutes and Ladders Hike
Just outside of Anchorage, AK in town called Girdwood there is a local waterfall hike called Chutes and Ladders. This incredible waterfall hike is tricky to find, as it is unmarked on any map and there are no trail signs to get there. However, once you find the first rope, leading down into the canyon, the fun begins.
Where is Chutes and Ladder?
The Chutes and Ladders hike in Girdwood begins and ends at the Winner Creek Gorge Trailhead. This loop hike has a large parking lot, a pit toilet, and it is easy to find the initial trail, but getting to Chutes & Ladders can be difficult because there is not a marked trail that will lead you to the start.
Click here for direction to Chutes and Ladders Trailhead
How long does it take to hike Chutes and Ladder?
Chutes and Ladders in Girdwood, Alaska is a quick hike, 30 minutes round trip, but most hikers take between 90-120 minutes to complete. This waterfall hike is unique and technical, so hikers prefer to take their time to increase their safety and enjoy the journey of the hike. I suggest taking your time, Chutes and Ladders is a lot of fun!
Chutes and Ladder Hike Overview:
Distance: 2.5 miles
Time needed: 1-2 hours
Elevation change: 350 feet
Type of terrain: Non-maintained trail, wet rock
Difficulty of hike: Moderate, but technical
Exit Glacier and Harding Icefield Hike
The Exit Glacier and Harding Icefield hike is a one-two hit combo in the Kenai Fjord National Park just outside of Seward, Alaska. Most hikers decide to day hike to Exit Glacier to see this massive frozen river up close, but few push onward and upward to the Harding Icefield. If you have the time and energy, you should hike up the switchbacks to the Harding Icefield so you can soak in the United States largest icefield.
Where is Exit Glacier and Harding Icefield?
Exit Glacier and the Harding Icefield trail begins outside of Seward, Alaska at the Kenai National Park Nature Center.
Click here for direction to Exit Glacier and Harding Icefield Trailhead
How long does it take to hike Exit Glacier and Harding Icefield?
Hiking both Exit Glacier and Harding Icefield will take 6-7 hours, so make sure to pack some water and snacks for the trail. If you are only interested in hiking to Exit Glacier, this 2.2 mile hike will take about an hour to complete.
Exit Glacier and Harding Icefield Hike Overview:
Distance: 9.2 miles round trip
Time needed: 6-7 hours
Elevation change: 3,600 feet
Type of terrain: Maintained trail
Difficulty of hike: Hard
Also consider these other Amazing ALaskan Summer hikes:
Red Mountain near Homer
Kenai Lake beach walk
Portage Pass
An avid hiker takes a look at where she came from while hiking Red Mountain along the Kenai Peninsula in Alaska. Photograph by Dalton Johnson
Now that you have discovered where these hikes are located, how long they take, and an overview of the best summer hikes in Alaska it is your turn to start exploring the trails of Alaska.
Discover More of Alaska


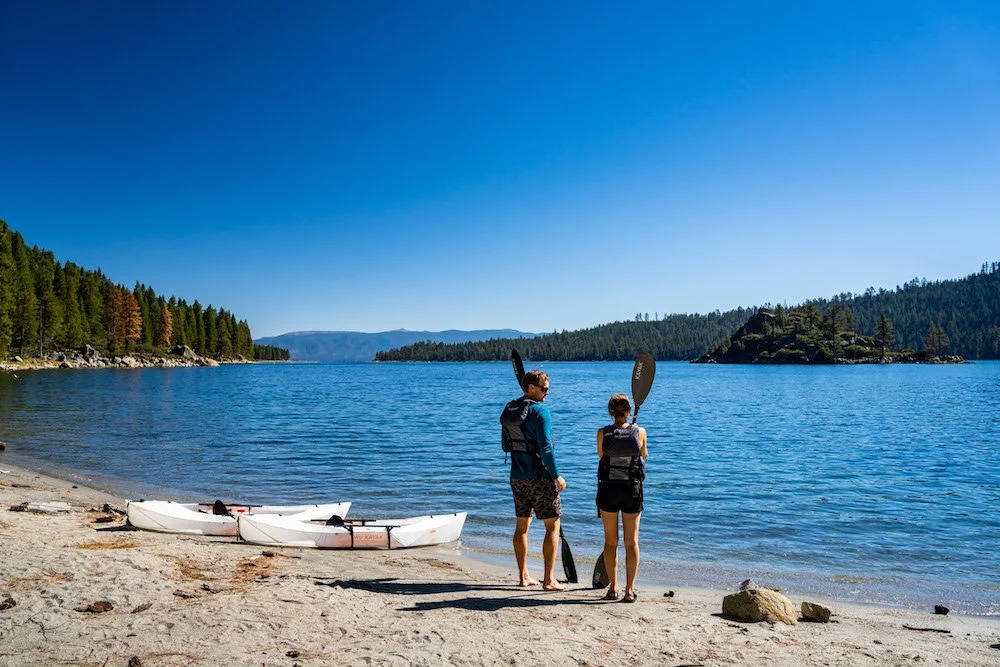
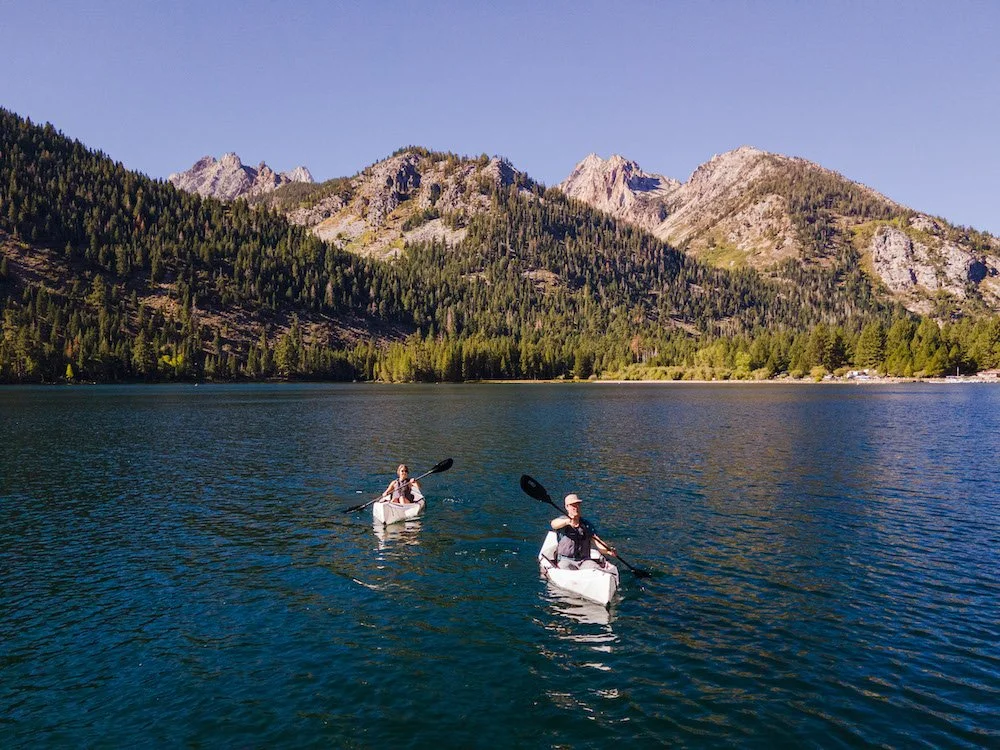
Kayaking on Emerald Bay
Emerald Bay is an iconic location on Lake Tahoe. Located on the southwest shore within California, this California State Park, offers one of the most diverse grouping activities. One of the most popular activities at Emerald Bay is kayaking. The waters are flat and protected from the wind, so many outdoor enthusiasts come to Emerald Bay to kayak. Also, there is an island in the middle of the lake, called Fannette Island, that has a tea house on it.
Emerald Bay is an iconic location on Lake Tahoe. Located on the southwest shore within California, this California State Park, offers one of the most diverse grouping activities. One of the most popular activities at Emerald Bay is kayaking. The waters are flat and protected from the wind, so many outdoor enthusiasts come to Emerald Bay to kayak. Also, there is an island in the middle of the lake, called Fannette Island, that has a tea house on it.
Kayaking on Emerald Bay in Lake Tahoe is free and open to everyone. You can access the water by hiking your kayaks 2 miles down to Emerald Bay Beach and launch directly into the clear blue water from the white sandy beach. To reach and explore the tea house on Fannette Island, the island in the middle of Emerald Bay, allot yourself 30-40 minutes one way for kayaking.
Read on to discover where to launch your kayak, how to kayak to Fannette Island, places to park for Emerald Bay, and so much more.
Hiking down to kayak on Emerald Bay in Lake Tahoe during a gorgeous sunrise. Photograph by Dalton Johnson
Where to launch a Kayak in Emerald Bay:
Emerald Bay Beach and Baldwin Beach are the best spots to launch a kayak for Emerald Bay. Most kayaker chose to launch at Emerald Bay Beach because this is the closest water access to Emerald Bay, however this launch requires a 2 mile hike (one way) to reach the launch. For those who would rather kayak more and walk less, launching your kayak at Baldwin Beach is the next best option.
WATER ACCESS TO EMERALD BAY:
Water access to Emerald Bay requires a two mile hike. So, if you are bringing your own kayak, make sure to bring a dolly or a foldable kayak so you do not have to make two trips. The hike to the water is downhill on your way to the beach and all up hill to return to your vehicle. NOTE: if you do not want to carry your own kayaks, there are some for rent at the beach.
Once you are at the beach of Emerald Bay, the launch is easy from a sandy beach.
WHY IS EMERALD BAY ONE OF THE BEST FLAT WATER KAYAKING LOCATIONS:
Emerald Bay is a protected bay on the west shore of Lake Tahoe. The waters are an emerald color, hence the name, and is protected from the wind. Surrounded by evergreens, this bay is a popular destination in Lake Tahoe, however few actually spend time kayaking on the blue waters.
Additionally, Emerald Bay has an island you can explore, by kayaking to, in the center of the bay. If you are feeling adventurous, you can cliff jump off the island into the crisp waters.
Another cool thing to do while kayaking the flat waters of Emerald Bay is to find the sunken ship along the south-east shore of Emerald Bay. This ship is a hot spot for SCUBA divers and free-divers. If you can find the red bouy, this marks the spot of the sunken ship in Emerald Bay.
Can you kayak to the island in the middle of Emerald Bay?
Kayaking to Fannette Island in the middle of Emerald Bay is open to everyone. On average, a kayaker will take 30-45 minutes to reach the island from Emerald Bay Beach, which is located inside of Emerald Bay State Park. Accessing and launching a kayak is free for all visitors, but parking has a fee.
When you kayak to the island in the middle of Emerald Bay, named Fannette island, you can dock your kayak and hike to a tea house built by Lora Josephine Knight. Knight was a widow who also had the Vikingsholm constructed as a summer home. The tea house on the island was her escape into nature and solitude. Now, the tea house only has four stone walls and a few open windows that attract thousands of visitors every year.
How Deep is the water of Emerald Bay?
The depth of Emerald Bay ranges from 10-60 feet deep. Because of this depth, and the surplus of sunken ships, Emerald Bay is an attraction for SCUBA divers and snorkelers alike. Many of these divers will use a kayak to reach the four dive sites throughout the bay, marked with a red buoy.
Where is EMERALD BAY in Lake Tahoe
Emerald Bay in Lake Tahoe is a large bay located along the southwest shore of Lake Tahoe in California. The most popular parking location is the Vikingsholm Parking Lot, or the Eagle Falls Trailhead.
Driving directions to Emerald Bay
DON’T MISS OUT ON THESE OTHER ADVENTURES NEARBY:
Kayaking on the clear blue waters of Emerald Bay in Lake Tahoe, CA. Photograph by Dalton Johnson
Now that you have discover where to launch your kayak, how to kayak to Fannette Island, places to park for Emerald Bay, and so much more, it is your turn to get out and kayak on Emerald Bay. If you have any additional information that others should know about kayaking on Emerald Bay, please drop a comment below to help others out. Additionally, if this blog was helpful, please help us by sharing this blog and/or leave us a comment.
Discover More of the Eastern Sierra


Vernal Fall | Yosemite Valley Waterfall Guide
Vernal Fall is an awe inspiring waterfall to watch upclose, or from afar. If you would like to get intimate with Vernal Fall, I suggest hiking the Mist Trail to get up close and personal with this misty falls. If you would like to see Vernal Fall from afar and understand how it is woven into the landscape, I suggest checking Vernal Fall out from Glacier Point or the John Muir Trail.
Yosemite Valley is home to more than 25 rushing waterfalls, but few are as powerful and memorable as Vernal Fall. This wonderful waterfall releases a cooling mist to all the visitors who hike to its base, or summit, via the Mist Trail. A year round splendid mixture of granite and water makes this 318 foot waterfall a must see.
Vernal Fall is a 318 foot waterfall, located in Yosemite National Park, that can be hiked to via the difficult Misty Trail. Leaving from Happy Isles trailhead, hiking Vernal Fall will take 3-5 hours round trip and offers some of the most spectacular year round views in Yosemite Valley. Yup, that is right, Vernal Fall flows year round, with its strongest flow during the spring season.
Read on to discover where Vernal Fall is at, the best season to visit Vernal Fall as well as how to hike to the top, and the best places to see Vernal Fall.
Water plunging over the lip of Vernal Fall in Yosemite National Park. Photograph by Dalton Johnson
WHERE IS VERNAL FALL?
Vernal Fall is located 2.4 miles along the Mist Trail when hiking from Happy Isles in Yosemite Valley. This very popular hike offers spectacular, up-close views Vernal Fall and is a must see for all visitors of Yosemite Valley.
CLICK HERE to discover which waterfall is Vernal Fall
BEST SEASON FOR VERNAL FALL:
The best season to watch Vernal Fall is during the spring months, because the flow will be at its strongest. However, this popular Yosemite waterfall runs year round, even during the winter.
Spring time has the highest flow
Summer time is great because the mist while hiking the iconic Mist Trail will cool you down
BEST PLACES TO SEE VERNAL FALL:
Vernal Fall is an awe inspiring waterfall to watch upclose, or from afar. If you would like to get intimate with Vernal Fall, I suggest hiking the Mist Trail to get up close and personal with this misty falls. If you would like to see Vernal Fall from afar and understand how it is woven into the landscape, I suggest checking Vernal Fall out from Glacier Point or the John Muir Trail.
Hiking the Mist Trail
Hiking the John Muir Trail
CAN YOU HIKE TO VERNAL FALL?
Hiking to Vernal Falls is a difficult and often wet 2.4 mile hike that acsends 1000 feet from Yosemite Valley via the Mist Trail. Often taking hikers 2-3 hours to complete this hike, Vernal Fall is well worth the challenge.
Quick details on hiking to Vernal Fall:
Distance: 2.4 mi (3.9 km) round trip (via Mist Trail)
Elevation gain: 1000 ft (300 m)
Difficulty: Strenuous
Time: 3 hours
FUN FACTS ABOUT VERNAL FALL
Just below the frothy Nevada fall is Vernal Fall. The first of the waterfalls in the legendary Mist Trail. Especially in the spring, you’ll truly understand why this hike is called the “Mist Trail.” In short, be sure to bring a raincoat even if it’s sunny. These two mighty waterfalls form a cascade in which the Merced River flows down into the valley and create what is called the “giant staircase.”
Total Height of Vernal Fall: 317 feet
Vernal Fall is the 860th tallest waterfall in the world
Atop Vernal Fall there is a chain of pools you can swim in
The Vernal Fall hike is the shortest waterfall hike in Yosemite
Vernal Fall flows year round
An icy Vernal Fall flowing during the winter in Yosemite Valley, CA. Photograph by Dalton Johnson
Now that you have discovered where Vernal Fall is at, the best season to visit Vernal Fall as well as how to hike to the top, and the best places to see Vernal Fall it is your turn to check out this magnificent Yosemite Valley waterfall. If this blog helped you out, please leave a comment below. Additionally, if you know of some other helpful information others should know about Vernal Fall, please let them know in the comments below!
Discover More of Yosemite Valley


Best Waterfalls of Yosemite Valley
Bridalveil and Yosemite Falls are two of the most famous Yosemite waterfalls, but there are several others you’ll want to check out when you visit Yosemite National Park. Plunging hundreds of feet into rivers and creeks below, the waterfalls at Yosemite National Park thunder past a smooth granite backdrop.
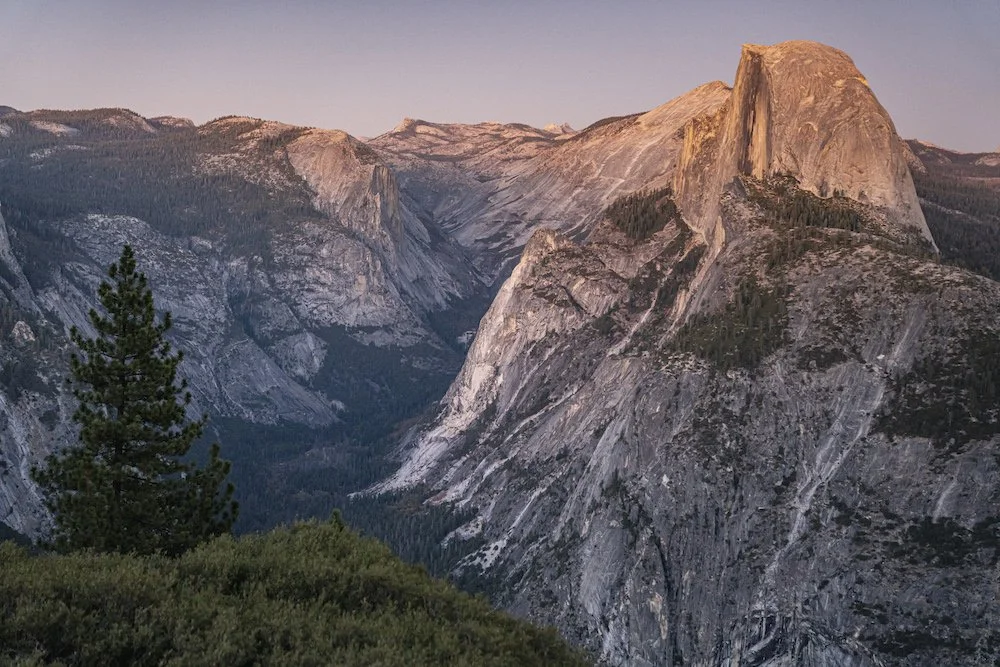
While Yosemite National Park is forever linked to Half Dome, the massive granite monolith immortalized by landscape photographer Ansel Adams, it’s also home to many fabulous flowing waterfalls. Bridalveil and Yosemite Falls are two of the most famous Yosemite waterfalls, but there are several others you’ll want to check out when you visit Yosemite National Park. Plunging hundreds of feet into rivers and creeks below, the waterfalls at Yosemite National Park thunder past a smooth granite backdrop.
The best Yosemite waterfalls are powered by melting snow and spring rains, so the flowing falls are at their prime in May. Most of the waterfalls in Yosemite Valley are easily spotted from designated viewpoints, or after a short walk along paved paths. While it’s difficult to see all of the waterfalls in Yosemite, the most spectacular waterfalls to add to your Must See List are:
Nevada Fall
Vernal Fall
Bridalviel Fall
Yosemite Fall
Illilouette Falls
Ribbon Fall
Sentinel Fall
Silver Strand Fall
Royal Arch Falls
Horsetail Falls (Aka Firefalls)
Read on to discover which waterfalls are worth seeing, the best season for the waterfall, how to get there, and so much more about each Yosemite waterfalls.
Bridalveil Fall as seen from Tunnel View during a chilly winter morning. Photograph by Dalton Johnson
BRIDALVEIL FALL
Where is BRIDALVEIL FALL?
CLICK HERE to discover which waterfall is Bridalveil Fall
Best Season for BRIDALVEIL FALL:
The best season to watch Bridalveil Fall is during the spring months, however this Yosemite waterfall runs year round.
Spring time has the highest flow for Bridalveil Fall
In the winter, this falls is often coated with ice, making the sight aesthetically pleasing
Best Places to see BRIDALVEIL FALL:
Bridalveil Fall is a spectacular waterfall that you can see from several places throughout Yosemite Valley. The most popular place to see Bridalveil Fall is from Tunnel View, however there are several other places to see this gorgeous falls:
Bridalveil Fall trailhead
Valley View
Southside Drive
Can you hike to BRIDALVEIL FALL?
Yes, you can easily hike to Bridalveil Fall. This hike is short, roughly a mile round trip, on a paved path. There is a gentle uphill slope rising 200 feet, but this should not deter you as most hikers wont notice the incline.
Hiking to the base of Bridalveil Fall
Distance: 1.2 miles round trip
Elevation gain: 200 feet
Difficulty: Easy
Time: 15 to 20 minutes
FUN FACTS ABOUT BRIDALVEIL FALL:
As you enter Yosemite Valley from Tunnel View, one of the first falls you’ll see if Bridalveil. It should come as no surprise it's one of the most prominent within the granite walls of the valley. As the name describes it, when there’s a breeze flowing, the mist that wafts off it creates something that would be similar to a 'bride's veil' and thus the name Bridalveil.
Total Height of Bridalveil Fall: 620 feet
Yosemite Falls rushing in the background while walking to the Merced River bank to hang with friends. Photograph by Dalton Johnson
YOSEMITE FALLS
Where is YOSEMITE FALLS?
CLICK HERE to discover which waterfall is Yosemite Falls
Best Season for YOSEMITE FALLS:
The best season to watch Yosemite Falls is during the spring months, however this Yosemite waterfall runs year round.
Spring time has the highest flow
Best Places to see YOSEMITE FALLS:
You can see Yosemite Falls from almost everywhere in Yosemite Valley, but here are some of my favorite places to sit back and enjoy the views of this magnificent waterfall.
Merced River Bank
Yosemite Chapel
Looking over your should while hiking the 4 Mile Trail
Can you hike to YOSEMITE FALLS?
Yes, you can hike to all three waterfalls that make up Yosemite Falls.
FUN FACTS ABOUT YOSEMITE FALLS:
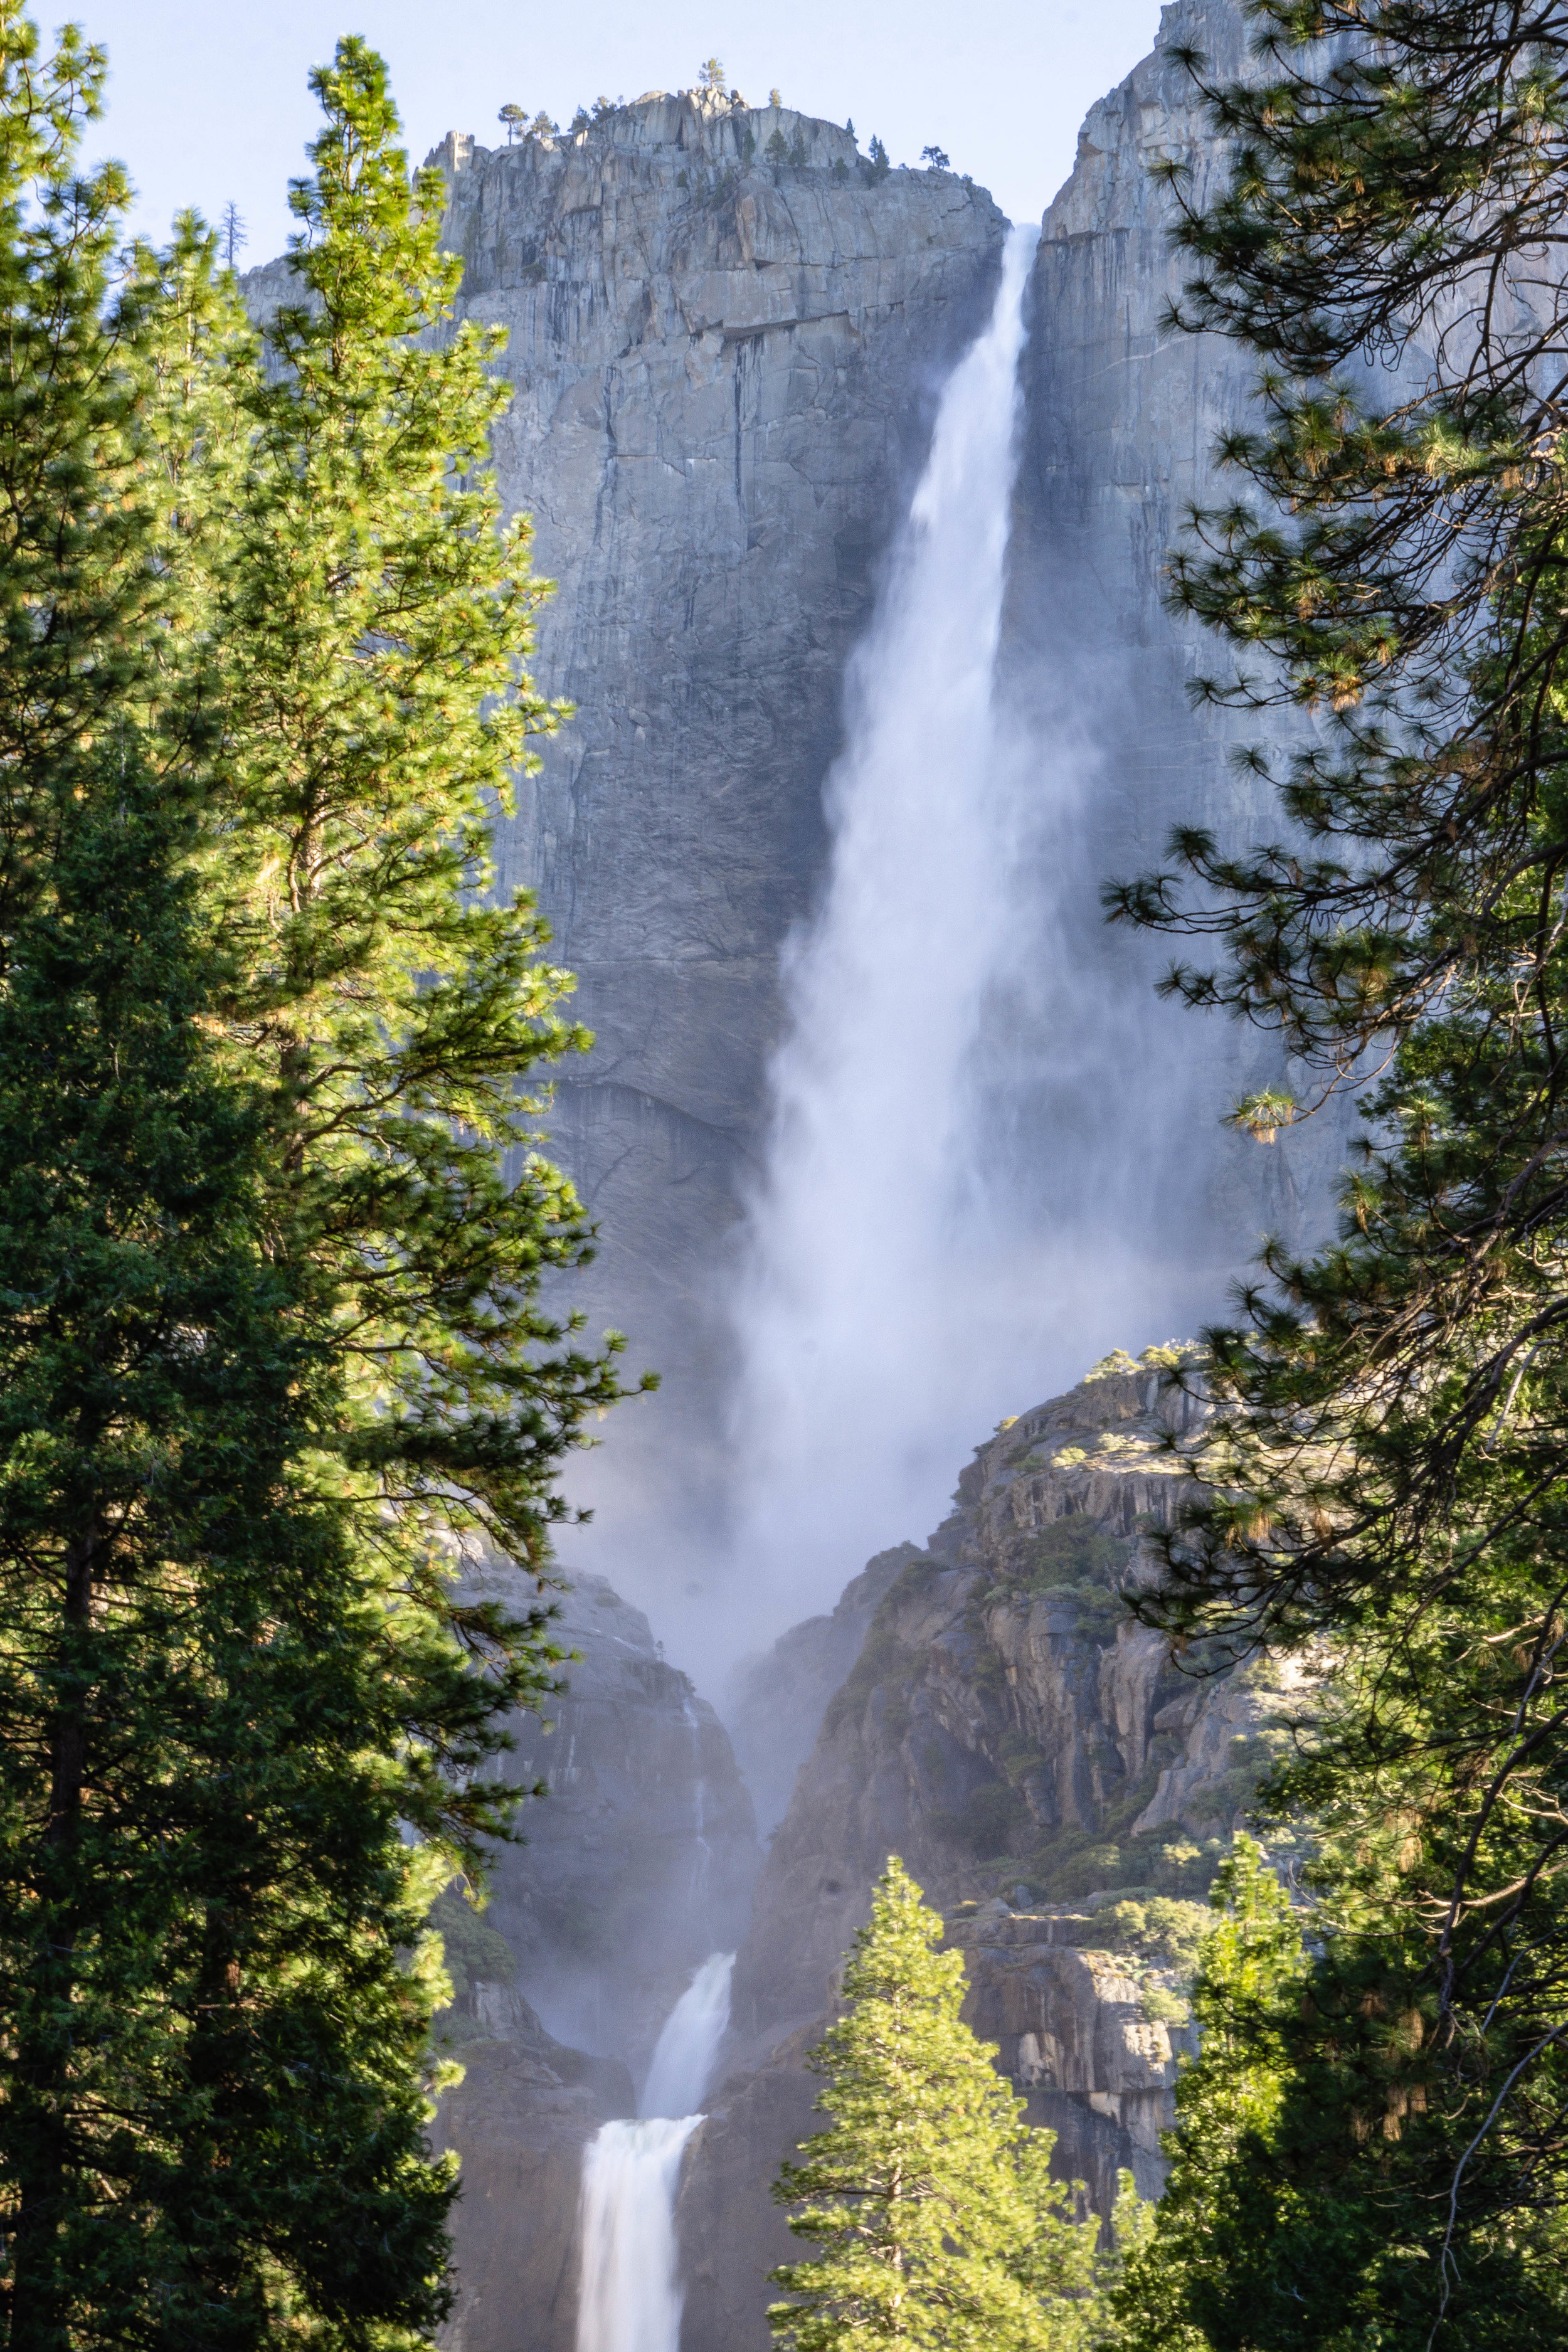
Yosemite Falls can be seen throughout a large portion of Yosemite Valley including from the Yosemite Chapel, Merced River Bank Yosemite Valley Lodge and even high above the valley from Glacier Point. One of the tallest waterfalls in the world at a total of 2425 feet and the tallest in all of North America, it is actually made up of three separate drops:
Upper Yosemite Fall (1,430 feet)
Middle Cascades (675 feet)
Lower Yosemite Fall (320 feet)
Total Height of Yosemite Falls: 2,425 feet
Tallest waterfall in North America
5th tallest waterfall in the World
VERNAL FALL
Where is VERNAL FALL?
CLICK HERE to discover which waterfall is Vernal Fall
Best Season for VERNAL FALL:
The best season to watch Vernal Fall is during the spring months, however this Yosemite waterfall runs year round.
Spring time has the highest flow
Summer time is great because the mist while hiking the iconic Mist Trail will cool you down
Best Places to see VERNAL FALL:
Hiking the Mist trail
Hiking the John Muir Trail
Glacier Point
Can you hike to VERNAL FALL?
Yes, you can hike to Vernal Falls via the Mist trail. Mist trail details below:
Hiking to the Top of Vernal Fall
Distance: 2.4 mi (3.9 km) round trip (via Mist Trail)
Elevation gain: 1000 ft (300 m)
Difficulty: Strenuous
Time: 3 hours
FUN FACTS ABOUT VERNAL FALL
Just below the frothy Nevada fall is Vernal Fall. The first of the waterfalls in the legendary Mist Trail. Especially in the spring, you’ll truly understand why this hike is called the “Mist Trail.” In short, be sure to bring a raincoat even if it’s sunny. These two mighty waterfalls form a cascade in which the Merced River flows down into the valley and create what is called the “giant staircase.”
Total Height of Vernal Fall: 317 feet
Atop Vernal Falls there is a chain of pools you can swim in
The Vernal Falls hike is the shortest waterfall hike in Yosemite
Illilouette Falls
Where is Illilouette Falls?
CLICK HERE to discover which waterfall is Illilouette Falls
Best Season for Illilouette Falls:
The best season to watch Illilouette Falls is during the spring months, however this Yosemite waterfall runs year round.
Spring time has the highest flow
Best Places to see Illilouette Falls:
Hiking the Mist trail
Hiking the John Muir Trail
Glacier Point
Panorama Trail
Can you hike to Illilouette Falls?
You can hike to the top of Illilouette Falls using the Panormama Trail. Here are the details for hiking to the top of Illilouette Falls:
Hiking to the Top of Illilouette Falls
Distance: 4 miles round trip
Elevation gain: 1400 ft (3420 m)
Difficulty: Medium
Time: 2-4 hoursThere is no trail to safely walk to the base of the Illilouette Falls
FUN FACTS ABOUT Illilouette Falls:
Another one of our hidden gems in Yosemite, Illilouette Fall can be glimpsed from the legendary Mist Trail, but to really get a good view of it, you need to do some hiking. From Glacier Point, you’ll descend down about two miles to get to the top of the falls. But be forewarned. The trek back up to Glacier Point is quite the climb.
Total Height of Illilouette Falls: 370 feet
The origin and meaning of the waterfall's name has been lost to time
Illilouette Falls is one of the least visited falls in Yosemite Valley
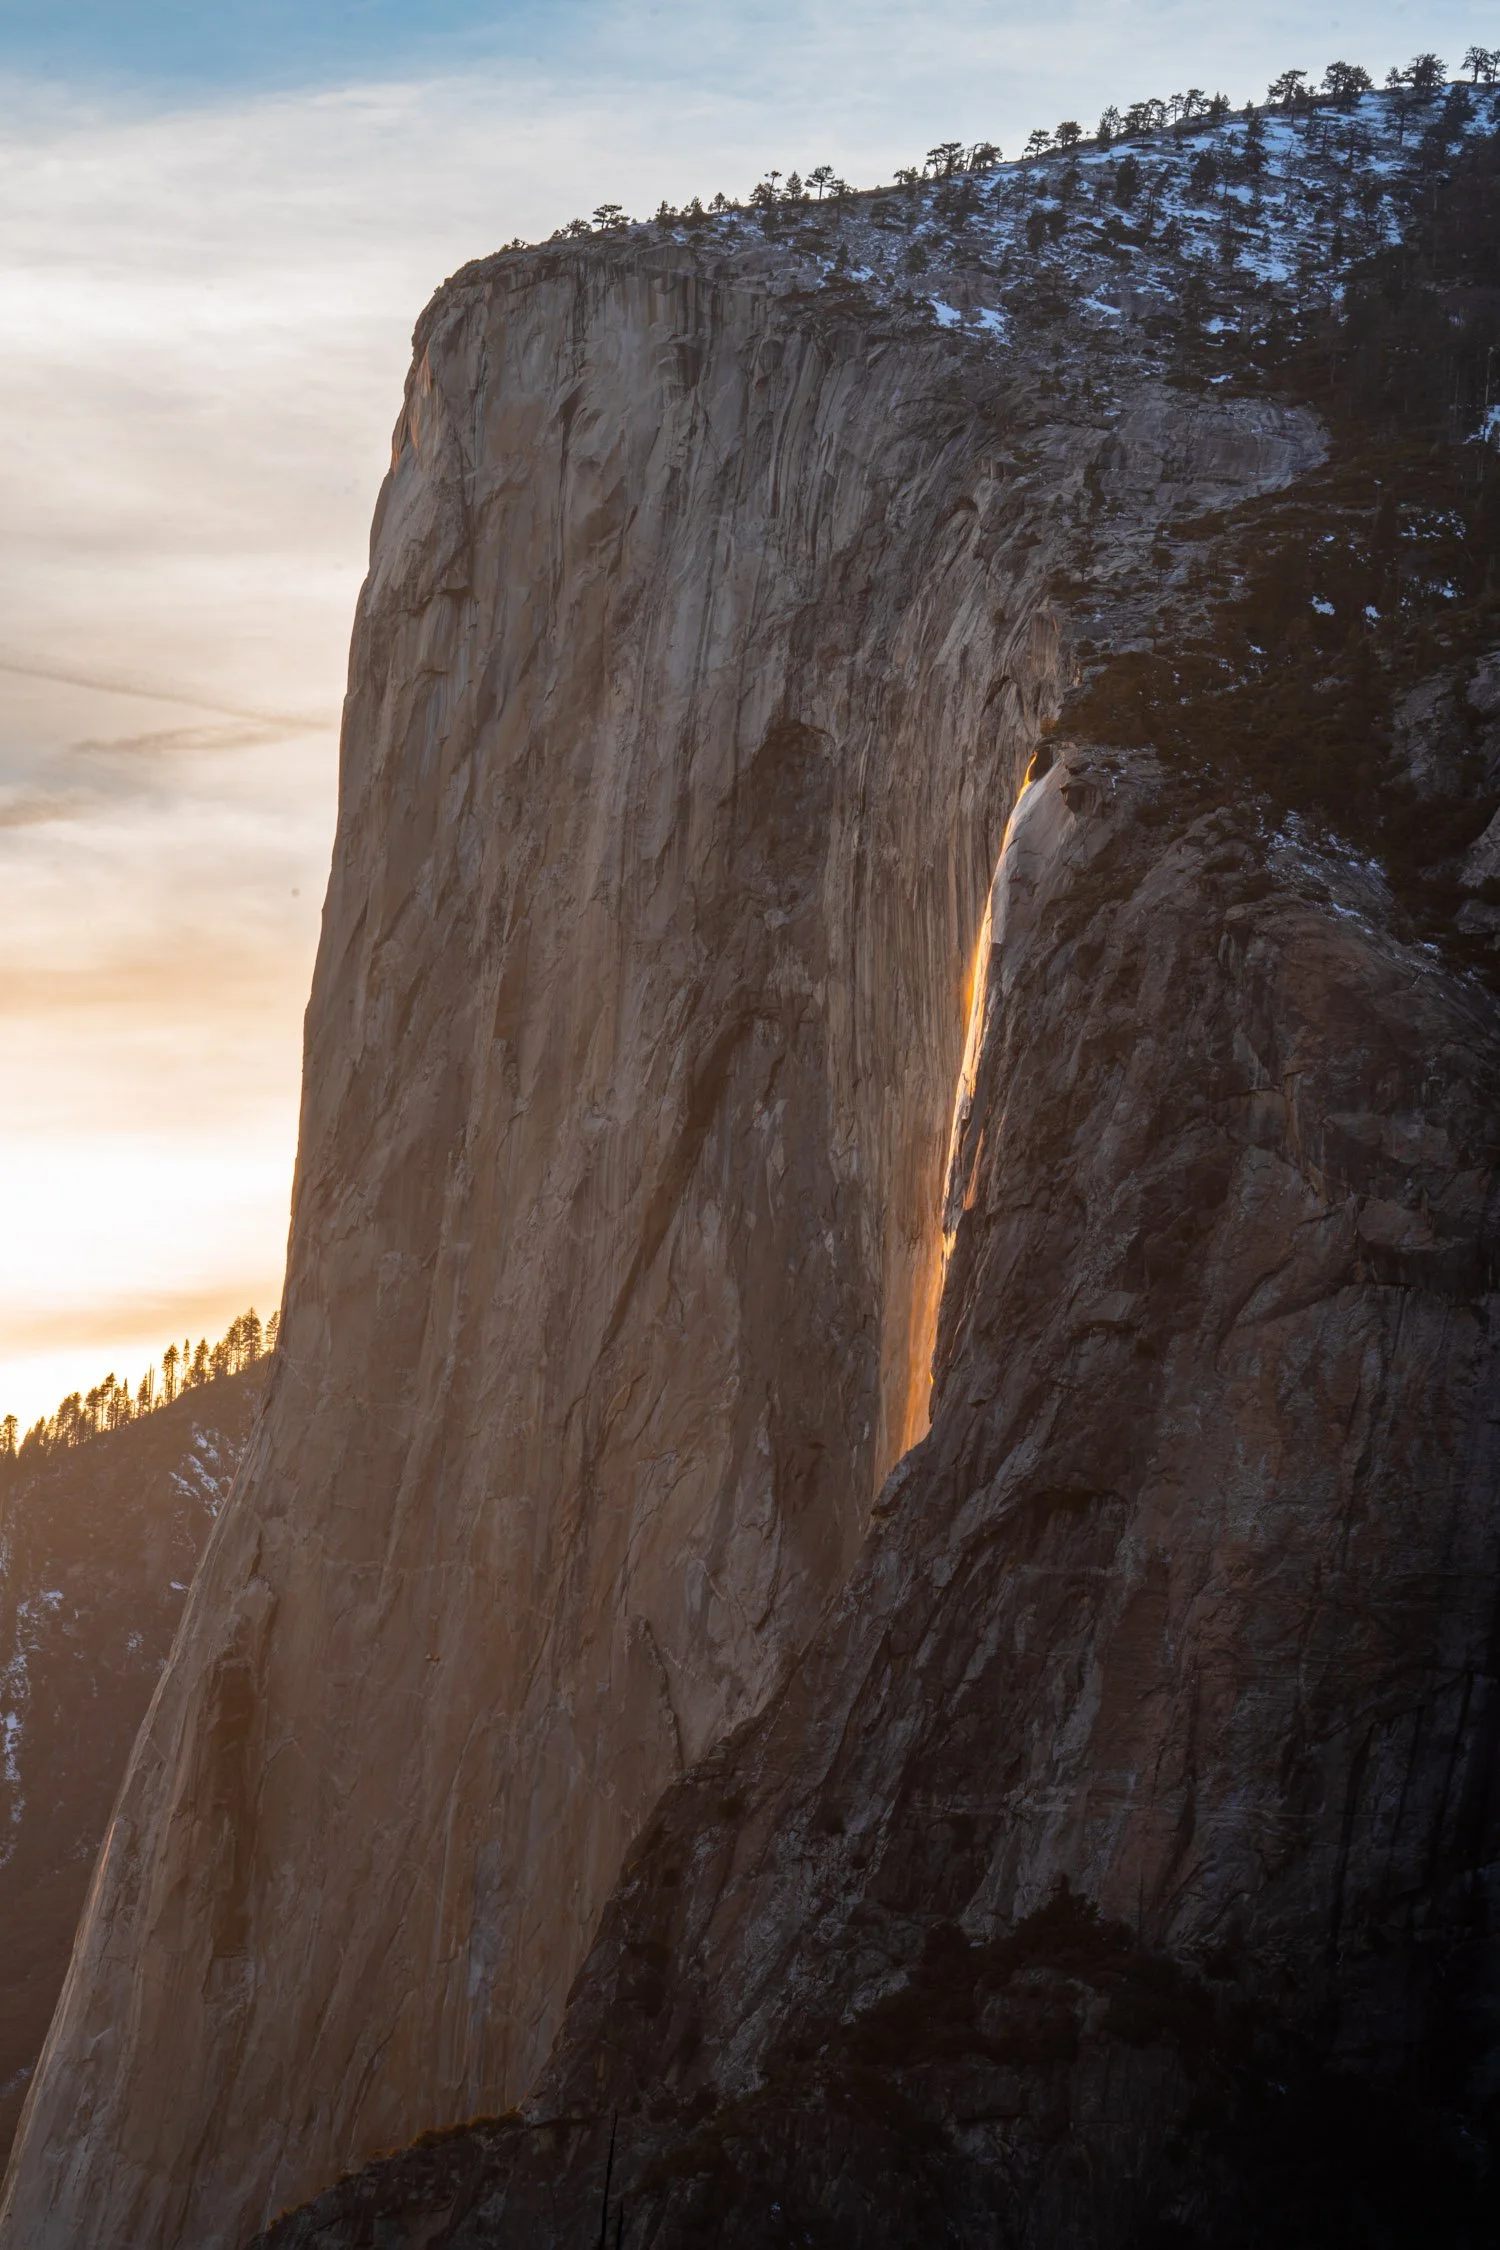
Fire falls, a waterfall in Yosemite Valley, glowing red during sunset in February. Photograph by Dalton Johnson
HORSETAIL FALL (AKA FIRE FALL)
Where is HORSETAIL FALL?
CLICK HERE to discover which waterfall is to Horsetail Fall
Best Season for HORSETAIL FALl:
The best season to watch Horsetail Fall is during the winter months. This Yosemite waterfall does not flow year round as it depends on snowmelt to flow. If there is a light snow year in California, Horsetail Fall might now be running come summer.
Winter season after a snow storm to guarantee Horsetail Fall is flowing
For the last two weeks of February, Horsetail Fall, at sunset flows lava red creating Fire Falls
Spring season if California has a hardy snow year
Best Places to see HORSETAIL FALl:
Four Mile Trail
Glacier Point
El Cap Meadow
Can you hike to HORSETAIL FALl?
There is no established trail to the base, or top, of Horsetail Fall. I would not suggest trying to hike to this falls unless you have a good plan of action and experience blazing your own trail.
FUN FACTS ABOUT HORSETAIL FALLS:
Horsetail Fall's claim to fame is the legend of the Horsetail Fall Event. It's a natural phenomenon that occurs typically in mid-February when all meteorological and hydrological formations align to create what looks like a ribbon of fire when the rays of the setting winter sun light up the water and mist first golden and then fiery red Horsetail Fall drops off the east side of El Capitan and was known in Ansel Adams's time as El Capitan Fall. Now, this event is called Firefall.
Total Height of Horsetail Fall: 1,000 Feet
Fire Fall only occurs during the last two weeks of February
Horesetail Falls is second highest fully airborne waterfall in Yosemite
Sentinel Falls
Where is Sentinel Falls?
CLICK HERE to discover which waterfall is Sentinel Falls:
Best Season for Sentinel Falls:
The best season to watch Sentinel Falls is during the spring months. This Yosemite waterfall does not flow year round as it depends on snowmelt to flow. If there is a light snow year in California, Sentinel Falls might now be running come summer.
Early spring season, Sentinel Falls has a strong flow
Winter season, after a snow storm to guarantee Sentinel Falls is flowing
Best Places to see Sentinel Falls:
The best places to see Sentinel Falls is from Yosemite Valley floor on the opposite side of the glacially carved Sentinel Dome. Some of the best places to see Sentinel Falls are:
Yosemite Valley Loop Trail
Merced River Bank
Can you hike to Sentinel Falls?
Hiking to Sentinel Falls can be done if the trails are open due to winter conditions. Since Sentinel Falls do not flow year round, on certain years the falls will stop before you can hike to the top. However, if you can hike to the top of you will take the 4 Mile Trail and hike towards Taft Point:
Hiking to the Top of Sentinel Falls
Distance: 14.3 miles round trip
Elevation gain: 4,900 feet
Difficulty: Strenuous
Time: 9.5 hours
FUN FACTS ABOUT Sentinel Falls:
Just west of Sentinel Rock, this precipitous peak of rocks was named by the Whitney Party because of the high tower-like position it occupies. This long series of cascades consists of six major drops with the largest being over 500 feet tall. Despite its immense height, in most years it’s usually dry by the end of July.
Total Height of Sentinel Falls: 2,000 feet
Nevada and Vernal Falls as seen from Glacier Point in Yosemite Valley. Photograph by Dalton Johnson
Ribbon Fall
Where is Ribbon Fall?
CLICK HERE to discover which waterfall is Ribbon Fall
Best Season for Ribbon Fall:
The best season to watch Ribbon Fall is during the spring months, however this Yosemite waterfall runs year round.
Spring time has the highest flow for Ribbon Fall
Best Places to see Ribbon Fall:
Ribbon Fall is tucked away in the shadow of El Capitan, making it difficult to see when walking around Yosemite Valley. However, there are several great places to see Ribbon Fall like:
El Cap Meadow
Bridalveil Fall Trailhead
Northside Drive
Can you hike to Ribbon Fall?
Ribbon Fall does not have an established trail to the base, nor the top. To get there, you will need to scramble off of a trail, potentially on loose rock, to reach the base or top of the waterfall. Please be careful if you decide to make this hike.
FUN FACTS ABOUT Ribbon Fall:
While Yosemite Falls is the tallest, Ribbon Fall has something it doesn’t. It’s the highest free-leaping fall in all of North America. Primarily fed by snowmelt over granite rock, this is a great one to see in early spring.
Total Height of Ribbon Fall: 1,612 feet
Silver Strand Fall
Where is Silver Strand Fall?
CLICK HERE to discover which waterfall is Silver Strand Fall
Best Season for Silver Strand Fall:
The best season to watch Silver Strand Fall is during the spring months. This Yosemite waterfall does not flow year round as it depends on snowmelt to flow. If there is a light snow year in California, Silver Strand Fall might now be running come summer.
Early spring season, Silver Strand Fall has a strong flow
Winter season, after a snow storm to guarantee Silver Strand Fall is flowing
Best Places to see Silver Strand Fall:
Silver Strand Fall is “hidden” in plain sight, as most people do not look over their shoulder at Tunnel View to see this fall.
Artist Point
Can you hike to Silver Strand Fall?
You can hike to Silver Strand Falls, but be ready for a long one! To reach Silver Strand, you will take the Pohono Trail to either Old Inspiration Point or Stanford Point.
Hiking to the Top of Silver Strand Fall
Distance: 9 miles round trip
Elevation gain: 3,415 feet
Difficulty: Strenuous
Time: 5-6 hours
FUN FACTS ABOUT Silver Strand Fall:
In a valley with so many amazing falls there’s of course going to be a few that are overlooked. One of them that’s on the top of this list is the Silver Strand Falls. Due to its location when visitors peer from the Tunnel View Overlook their gaze focuses on El Capitan and Bridalveil Fall. If you do make it this spot made famous by Ansel Adams be sure to look up above the Wawona Tunnel and you’ll be gifted an opportunity most others miss – the Silver Strand Falls.
Total Height of Silver Strand Fall: 574 feet
NEVADA FALL
Where is NEVADA FALL?
CLICK HERE to discover which waterfall is Nevada Fall
Best Season for Nevada Fall:
The best season to watch Nevada Fall is during the spring months, however this Yosemite waterfall runs year round.
Spring time has the highest flow for Nevada Fall
Best Places to see Nevada Fall:
To see Nevada Fall up close, you will need to put in a lot of effort as the hike to the base of Nevada Fall takes 5-6 hours round trip. Meanwhile, if you drive and walk to the Glacier Point vista, you can easily see Nevada Fall from a distance.
While hiking the Mist Trail
While hiking the John Muir Trail
Glacier Point
Can you hike to Nevada Fall?
Yes, you can hike to the top of Nevada Falls. Hiking details are below:
Hiking to the Top of Nevada Fall
Distance: 5.4 mi (8.7 km) round trip (via Mist Trail)
Elevation gain: 2000 ft (610 m)
Difficulty: Strenuous
Time: 5-6 hours
FUN FACTS ABOUT NEVADA FALL:
The pinnacle of the Mist Trail, it is one part of what many call nature’s “giant staircase.” Located below the giant granite dome known as Liberty Cap, Nevada’s unique shape is one that will help you identify it quickly. The first third of the water falls freely finishing off on a steep slick-rock slope. The water hits the granite with such a force creating a turbulent, whitewater appearance and a great deal of mist... which led to its current name (Nevada is a Spanish word meaning "snowy").
Total Height of Nevada Fall: 594 feet
Royal Arch Cascade
Where is Royal Arch Cascade?
CLICK HERE to discover which waterfall is Royal Arch Cascade
Best Season for Royal Arch Cascade:
The best season to watch Royal Arch Cascade is during the spring months. This Yosemite waterfall does not flow year round as it depends on snowmelt to flow. If there is a light snow year in California, Royal Arch Cascade might now be running come summer.
Early spring season, Royal Arch Cascade has a strong flow
Winter season, after a snow storm to guarantee Royal Arch Cascade is flowing
Best Places to see Royal Arch Cascade:
Royal Arch Cascade is a unique waterfall as it is “hidden” in comparison to most waterfalls in Yosemite Valley. The best place to see this waterfall is from afar, along the valley rim, like Glacier Point. However, there are several places to see this 1,250 foot cascading waterfall like:
Glacier Point
Stoneman Meadow
Ahwahnee Hotel
Can you hike to Royal Arch Cascade?
You can hike to the base of the Royal Arch Cascade, however this waterfall is best observed from afar. To reach the cascade, there is no trail and you will need to scramble across a large, steep, and slippery boulder field. I would not recommend this unless you are experienced at this kind of things.
FUN FACTS ABOUT Royal Arch Cascade:
Within walking distance of the famous Ahwahnee Hotel typically a stringy ephemeral fall that lightly dances it way down a granite wall. If you’re lucky enough to visit during a heavy thunderstorm be sure to head here. The sudden downpour can expand this normally tranquil and ephemeral fall to where it takes up the majority of the granite wall it resides on. A sight to behold that’s for sure!
Total Height of Royal Arch Cascade: 1,250 feet
Upper Yosemite Fall frozen on a cold winter day in Yosemite National Park. Photograph by Dalton Johnson
Now that you have discovered which waterfalls are worth seeing, the best season for the waterfall, and how to get to the best waterfalls of Yosemite Valley it is your turn to visit this magical place. Please, leave a comment below if this article was helpful, or if there is additional information that others should know.
Discover More of Yosemite Valley


Driving in Baja Mexico
Driving in Baja Mexico became accessible to all drivers with the completion of Mexico Federal Highway 1, also called, Trans-Peninsula Highway. While the old highway was more of a dirt path with steep cliffs and boulder filled arroyos, Mexico Highway 1 is a two lane asphalt road that bounces from coast to coast and town to town. For those of us who love to explore the Baja Peninsula, driving the Trans-Peninsula Highway no longer requires nerves of steel.
Driving in Baja Mexico became accessible to all drivers with the completion of Mexico Federal Highway 1, also called, Trans-Peninsula Highway. While the old highway was more of a dirt path with steep cliffs and boulder filled arroyos, Mexico Highway 1 is a two lane asphalt road that bounces from coast to coast and town to town. For those of us who love to explore the Baja Peninsula, driving the Trans-Peninsula Highway no longer requires nerves of steel.
There are two major roads when driving in Baja Mexico: Highway 1 (crossing from Tijuana all the way south to Cabo) and Highway 5 (crossing from Mexicali). Both highways have potholes and narrow, so be sure to take it slow. The best practices for driving in Baja Mexico are to drive during the day, obey the speed limit, follow the road signs, pay close attention on corners, and don’t use your phone. Following those best practices while road tripping Baja Mexico you will be safe.
Read on to learn about the road conditions, who can drive in Baja, where to get gas, and so much more about driving in Baja.
Driving down a dirt road on a clear morning in Baja Mexico. Photograph by Dalton Johnson
HOW ARE THE ROAD CONDITIONS WHEN DRIVING in baja Mexico?
The road conditions in Baja Mexico are vary greatly. When you are on the highway, the overall condition is safe, fully asphalted, occasional pot holes, and has some modern safety features. However, as time progresses, the lack of regular maintenance is causing the roads to degrade. I have noticed an increase in maintenance over the last few years, but several roads are heavily pot holed. Once off of the highway, let go of any expectations of a road. Some of the roads will be amazing, better than the highway, and some of them will be a washboard dirt road.
Can American’s Drive in baja mexico?
Driving in Baja is legal for any international driver with a license. The rules of the road in Baja are similar to that of the United States, but image a wild west version. Local drivers are recommended to get a license, but it is not the same process as it is in America.
Note for American drivers: the speed limits and distances while driving are in kilometers, not miles.
DO I NEED TO KNOW SPANISH TO drive in BAJA?
After a full day of driving in Baja Mexico, it is nice to make a campfire on the beach. Photograph by Dalton Johnson
To drive in Baja, you do not need to speak Spanish, however, if you know the language, the experience will be better! Below is a list of common words you should know while driving in Baja Mexico:
ALTO - STOP
TOPE - SPEED BUMP
PELIGROSO - DANGEROUS
CUIDADO - CAUTION
DESPACIO - SLOW
DERECHA - RIGHT
IZQUIERDO - LEFT
DERECHO - STRAIGHT
ENTRADA - ENTRANCE
SALIDA - EXIT
DESVIACION - DETOUR
CURVA PELIGROSA - DANGEROUS CURVE
CRUSE DE PEATONES - PEDESTRIAN CROSSING
ZONA ESCOLAR - SCHOOL ZONE
ZONA DE GUANDO - LIVESTOCK ZONE
NO UTILIZAR FRENO CON MOTOR - NO ENGINE BREAKING
NO MANEJE - DO NOT DRIVE WHEN TIRED
NO MALTRATE LAS SENALES - DO NOT DISREGARD THE SIGNS
NO TIRAR BASURA - DO NOT THROW TRASH
NO HAY PASO - ROAD CLOSED
NO REBASE - NO PASSING
PROHIBIDO EL PASO - DO NOT PASS
GUARDE SU DISTANCIA - WATCH YOUR DISTANCE
DISMINUYA SU VELOCIDAD - SLOW DOWN
REDUCTOR DE VELOCIDAD - REDUCE YOUR SPEED
RESPETE LIMITE DE VELOCIDAD - RESPECT THE SPEED LIMIT
IS DRIVING IN BAJA MEXICO SAFE?
Driving in Baja Mexico is less safe than driving in the United States, but it is not unsafe to drive in Baja. Your safety while driving in Baja Mexico is mostly dependent on your approach to driving. When you drive the speed limit, during the day, follow the road signs, pay close attention on corners, and stay focused on the road, you will be safe. However, if you are distracted by the views, or your phone, at any point while driving in Baja, just know that you are decreasing your own safety.
Not all cops are corrupt in Baja, regardless getting pulled over in Baja Mexico isn't fun, but it does happen from time to time. Photograph by Dalton Johnson
ARE THE POLICE CORRUPT IN BAJA?
Should you be stopped for a traffic violation, you will be asked for your driver’s license, registration and told what you did wrong. My advice is to try to talk your way out of it. If that doesn’t work, you will need to go to the police station where you will pay a fine and get your license back. For minor traffic infractions, there is the Mexican ‘mordita.’ Simply put, it is a bribe and technically, you shouldn’t do it. However, you will not be arrested for trying it, like in the States. Discreetly show the officer 100 or 200 pesos and see what they do. They will either take it, or not. I’ve been stopped twice in Baja. My Mexican friend was able to talk the officers out of the tickets, one included a mordita and one did not.
What are the Military Checkpoint for when driving in Baja?
There are 4 or 5 military checkpoints along the Baja Peninsula. Don’t let the sight of uniforms and machine guns alarm you. These are young military men whose job it is to deter crime. They will ask you where you are from and where you are going. Have your answer prepared: "Hello, I am from California and I’m a tourist driving to La Paz." They will ask you to step out of the vehicle so they can perform a routine inspection. Take your wallet and/or purse with you, secure or remove any pets, and casually watch your belongings as they inspect. Be courteous and cooperative and you will be on your way in no time.
Where to get gas while driving in Baja Mexico?
Mexico has several gas stations but the most prominent, and typically the cheapest, is PeMex. This gas station is run by the government and is focused on keeping gas prices low for Mexican residents. If you decide to stop at Chevron, or an American company, expect to pay more for your fuel.
If you are going to drive through Cataviña, make sure to have extra gas with you. This stretch of road goes 200 miles without a gas station!
Cataviña is a 200 mile stretch without gas stations along the Baja Peninsula, occasionally you will see trucks like this, selling gas to those in need. Photograph by Dalton Johnson
How Much extra gas should I carry with me while driving in Baja?
When driving in Baja Mexico, try to carry 50 to 100 miles worth of gas. The extra fuel will give you peace of mind while traveling and allow you to explore any side roads that look of interest to you.
Is Insurance required to drive in Baja Mexico?
When driving in Mexico, it is a law that you have Mexican Insurance. There are several companies out there, but the most prominent is Baja Bound. Baja Bound is based in San Diego and offer several different plans for American drivers who wish to venture into Baja Mexico with their own vehicle.
If you drive into Baja, and only Baja, you do not need an temporary import permit, or TIP. However, if you plan to visit the mainland of Mexico, you will need a TIP.
Why do people avoid driving in Baja at night?
In preparation for my first Baja trip, I read everything I could about driving in Mexico. Every article said, ‘don’t drive after dark’ but no one ever said why. I thought if I drove at night, I might be kidnapped, given all the negative press I’d read. I carefully planned my stops so that I would not be driving at nighttime. But, my last two nights on the road, I had to drive after dark. That is when I learned the real reason for the caution. It’s not kidnappers, it is cows! Highway 1 runs through rural areas where livestock freely roam. The heat of the day makes grazing more comfortable at night. If you come over a hill to encounter a small group of cows, you will be in trouble, not to mention the cows. It is a terrible sight to see a dead horse on the side of the road, hit by a traveler the night before. There are no street lights, so it is impossible to see your surroundings, therefore, avoid driving after dark, but let go of the fear of the big, bad kidnapper in the bushes!
Is Highway 1 in Baja a narrow road to drive?
A major challenge of Baja’s Highway 1 is that it is very narrow. It is the north – south road for the entire 1000 miles, traveled by 18 wheelers delivering goods from the north, as well as Aquila buses, the Mexican equivalent of Greyhound. It is frightful when an enormous vehicle comes straight at you on a narrow road, or goes around a curve at the bottom of a mountain at the same time you do. I recommend adjusting your speed to avoid driving around curves or cliffs at the same time as an oncoming large vehicle. In addition, it is not uncommon to encounter cyclists sharing the road with you, weighted down with gear that all but topples them over. Encounters like these are amplified at night time.
A stickered road sign covering up the name to a popular surfing destination in Baja, Mexico. Photograph by Dalton Johnson
Now that you have learned about the road conditions, who can drive in Baja, where to get gas, and so much more about driving in Baja the time has come for you to plan your road trip down the Baja Peninsula. If this blog has helped you, I would love to hear what was useful in the comments below. Additionally, if you have any additional information that would be helpful, drop it in the comment section for others! Have a great trip and be safe.
Discover More of Baja Mexico


The Best Day Hikes Of Yosemite National Park
Embarking on a journey to Yosemite National Park is a dream for adventure travelers seeking the ultimate hiking experience. Yosemite, renowned for its breathtaking landscapes, iconic granite cliffs, and cascading waterfalls, offers an array of exhilarating day hikes that cater to every adventurer's desire. Whether you find yourself in the iconic Yosemite Valley or the serene Tuolumne Meadows, this guide is tailored for those asking, "Which hikes should I do in Yosemite?" Let's lace up our boots and explore the best hikes this national treasure has to offer.
Embarking on a journey to Yosemite National Park is a dream for adventure travelers seeking the ultimate hiking experience. Yosemite, renowned for its breathtaking landscapes, iconic granite cliffs, and cascading waterfalls, offers an array of exhilarating day hikes that cater to every adventurer's desire. Whether you find yourself in the iconic Yosemite Valley or the serene Tuolumne Meadows, this guide is tailored for those asking, "Which hikes should I do in Yosemite?" Let's lace up our boots and explore the best hikes this national treasure has to offer.
While day hiking on the Yosemite Valley Loop trail make sure to soak in views of Yosemite Falls. Photograph by Dalton Johnson
Best HIkes of Yosemite Valley
1) SENTINEL DOME TRAIL:
Distance: Approximately 2.2 miles round trip.
Time to Hike: Allow 1.5 to 2 hours.
Difficulty: Moderate.
Trailhead: Sentinel Dome trailhead is located near Glacier Point Road. Begin at the trailhead, and follow the well-marked path.
Embark on the Sentinel Dome Trail for a captivating Yosemite experience. This moderate 2.2-mile hike leads to a summit offering a mesmerizing 360-degree panorama. Marvel at the majesty of Half Dome and El Capitan, two of Yosemite's most iconic granite formations. The trail winds through a fragrant forest, gradually revealing breathtaking views as you ascend. Once atop Sentinel Dome, visitors are rewarded with a vast, uninterrupted spectacle of Yosemite Valley and the High Sierra peaks. The unique perspective of Half Dome, seemingly at arm's reach, makes this hike an essential adventure for those seeking a moderate yet rewarding trek in the heart of Yosemite.
2) UPPER YOSEMITE FALLS TRAIL:
Distance: Approximately 7.2 miles round trip.
Time to Hike: Allow 6 to 8 hours.
Difficulty: Strenuous.
Trailhead: Begin at the Lower Yosemite Fall trailhead, continuing to the Upper Yosemite Falls Trail.
Prepare for an awe-inspiring journey on the Upper Yosemite Falls Trail, a strenuous 7.2-mile round trip ascent. As you ascend, the roaring cascade of North America's tallest waterfall accompanies your climb. The trail unveils stunning vistas of Yosemite Valley, Half Dome, and the surrounding wilderness. Be immersed in the thundering sounds of Yosemite Falls and experience the grandeur of the granite cliffs. This challenging hike promises a sense of accomplishment as you reach the summit, where unparalleled views await. Upper Yosemite Falls Trail stands as a testament to the raw power and beauty of Yosemite's natural wonders, making it a must for those seeking a physically demanding adventure.
3) MIST TRAIL TO VERNAL AND NEVADA FALLS:
Distance: Approximately 3 miles round trip to Vernal Fall, 7 miles round trip to Nevada Fall.
Time to Hike: Allow 2 to 4 hours depending on the destination.
Difficulty: Moderate to Strenuous.
Trailhead: Begin at the Happy Isles trailhead in Yosemite Valley.
Embark on the Mist Trail, a captivating journey through lush scenery and cascading waterfalls. This moderate to strenuous trail begins at Happy Isles and leads hikers to the base of Vernal Fall, where mist from the powerful cascade envelops the surroundings. Continue to Nevada Fall for a higher vantage point, reveling in panoramic views of the valley and distant peaks. The Mist Trail lives up to its name, offering a refreshing and immersive experience as you navigate misty staircases and rocky terrain. Witness the breathtaking beauty of two iconic waterfalls, surrounded by vibrant greenery, making this trail a memorable and invigorating adventure for those seeking the essence of Yosemite's natural splendor.
4) MIRROR LAKE LOOP:
Distance: Approximately 2 miles round trip.
Time to Hike: Allow 1 to 1.5 hours.
Difficulty: Easy.
Trailhead: The trailhead is located at Shuttle Stop #17 in Yosemite Valley.
Discover tranquility on the Mirror Lake Loop, an easy 2-mile round trip journey. Nestled in the heart of Yosemite Valley, this family-friendly trail unveils Mirror Lake, a serene water body reflecting the majesty of Half Dome. The flat and well-maintained path takes hikers through lush meadows and shaded woodlands, providing a peaceful escape from the bustling valley. Immerse yourself in the mirrored reflections of granite peaks and enjoy the crisp mountain air. Mirror Lake Loop offers a perfect blend of accessibility and scenic beauty, making it an ideal choice for a leisurely stroll or a serene moment of contemplation in the midst of Yosemite's iconic landscapes.
5) FOUR-MILE TRAIL:
Distance: Approximately 9.6 miles one way.
Time to Hike: Allow 6 to 8 hours.
Difficulty: Strenuous.
Trailhead: Begin at the Four-Mile Trailhead near Sentinel Bridge.
Challenge your senses on the Four-Mile Trail, a strenuous 9.6-mile journey renowned for its sweeping vistas. Ascend through dense forests and rocky terrain, each step revealing new perspectives of Yosemite Valley, El Capitan, and Sentinel Rock. The trail's steep switchbacks lead to Glacier Point, providing a bird's-eye view of Half Dome and the surrounding peaks. Experience the thrill of conquering elevation as you reach higher ground, capturing the grandeur of Yosemite's granite monoliths. Four-Mile Trail offers a physically demanding yet immensely rewarding adventure, making it a top choice for those seeking a challenging hike with unparalleled panoramic rewards.
6) LOWER YOSEMITE FALL TRAIL:
Distance: Approximately 1 mile round trip.
Time to Hike: Allow 30 minutes to 1 hour.
Difficulty: Easy.
Trailhead: Begin at the Lower Yosemite Fall trailhead.
Embark on the Lower Yosemite Fall Trail, an easy 1-mile round trip hike delivering a close-up encounter with the iconic Lower Yosemite Fall. The trail begins near Yosemite Lodge, guiding visitors through lush forested pathways with the powerful sound of cascading water growing louder with each step. As you approach the base of the fall, feel the refreshing mist on your face and witness the sheer force of nature. This family-friendly stroll provides a captivating introduction to Yosemite's natural wonders, offering a brief yet immersive experience with one of the park's most iconic waterfalls.
7) COOKS MEADOW LOOP:
Distance: Approximately 1 mile round trip.
Time to Hike: Allow 30 minutes.
Difficulty: Easy.
Trailhead: Begin at the Lower Yosemite Fall trailhead.
Embark on the Lower Yosemite Fall Trail, an easy 1-mile round trip hike delivering a close-up encounter with the iconic Lower Yosemite Fall. The trail begins near Yosemite Lodge, guiding visitors through lush forested pathways with the powerful sound of cascading water growing louder with each step. As you approach the base of the fall, feel the refreshing mist on your face and witness the sheer force of nature. This family-friendly stroll provides a captivating introduction to Yosemite's natural wonders, offering a brief yet immersive experience with one of the park's most iconic waterfalls.
Looking down at the Mist Trail day hike from Glacier Point. Photograph by Dalton Johnson
Best Hikes of Tuolumne Meadows
1) LEMBERT DOME TRAIL:
Distance: Approximately 2.8 miles round trip.
Time to Hike: Allow 2 to 3 hours.
Difficulty: Moderate.
Trailhead: The Lembert Dome trailhead is located near the Tuolumne Meadows Visitor Center. Begin your journey from here and follow the well-marked path to the dome's summit.
Embark on the Lembert Dome Trail for a moderate 2.8-mile round trip adventure in Tuolumne Meadows. This scenic hike begins near the Tuolumne Meadows Visitor Center and gradually ascends to the summit of Lembert Dome. The highlight of this trail is undoubtedly the breathtaking panoramic views of the High Sierra peaks and the vast expanse of Tuolumne Meadows. As you reach the dome's summit, the landscape unfolds, revealing a tapestry of meadows, alpine lakes, and rugged peaks. Lembert Dome Trail offers a perfect balance of challenge and reward, making it an ideal choice for those seeking stunning vistas in the heart of Yosemite's high country.
2) GLEN AULIN TRAIL:
Distance: Approximately 11 miles round trip.
Time to Hike: Allow 5 to 7 hours.
Difficulty: Moderate.
Trailhead: Start your adventure at the Lembert Dome trailhead, continuing on the Glen Aulin Trail. The trailhead is easily accessible near the Tuolumne Meadows Visitor Center.
Explore the beauty of Tuolumne Meadows on the Glen Aulin Trail, a moderate 11-mile round trip adventure. Starting at the Lembert Dome trailhead, this trail meanders along the Tuolumne River, treating hikers to picturesque riverside views. The highlight of this journey is the Glen Aulin High Sierra Camp, where hikers can rest and admire the surrounding waterfalls and cascades. The trail's moderate difficulty ensures an enjoyable experience as you traverse through meadows adorned with wildflowers. Glen Aulin Trail stands as a testament to the pristine beauty of Tuolumne Meadows, offering a perfect blend of riverside serenity and alpine grandeur.
3) CATHEDRAL LAKES TRAIL:
Distance: Approximately 7 miles round trip.
Time to Hike: Allow 4 to 6 hours.
Difficulty: Moderate.
Trailhead: The trail begins near the Tuolumne Meadows Visitor Center, taking hikers on a picturesque journey through alpine landscapes.
Embark on the Cathedral Lakes Trail, a moderate 7-mile round trip hike that unveils the stunning alpine landscapes beneath Cathedral Peak. Starting near the Tuolumne Meadows Visitor Center, the trail ascends through pine forests, eventually opening up to reveal Lower and Upper Cathedral Lakes. These pristine alpine lakes, surrounded by granite peaks and vibrant meadows, create a postcard-worthy scene. The moderate difficulty of this trail allows hikers to savor the breathtaking beauty of Cathedral Lakes while immersing themselves in the tranquility of Yosemite's high country. This trail is a must for those seeking alpine serenity and captivating mountain vistas in Tuolumne Meadows.
4) POTHOLE DOME TRAIL:
Distance: Approximately 2.5 miles round trip.
Time to Hike: Allow 1.5 to 2 hours.
Difficulty: Easy to Moderate.
Trailhead: Begin your exploration near the Tuolumne Meadows Visitor Center. The trailhead is easily accessible, starting hikers on a journey to the summit of Pothole Dome.
Discover the unique landscapes of Tuolumne Meadows on the Pothole Dome Trail, an easy to moderate 2.5-mile round trip adventure. Beginning near the Tuolumne Meadows Visitor Center, this trail leads to the summit of Pothole Dome, offering panoramic views of the surrounding meadows and distant peaks. The highlight of this hike is the exploration of unique granite formations, including the iconic "potholes" that dot the landscape. Pothole Dome Trail is a family-friendly option, allowing hikers to marvel at the geological wonders of Yosemite's high country while enjoying a manageable and visually rewarding journey.
5) ELIZABETH LAKE TRAIL:
Distance: Approximately 4.8 miles round trip.
Time to Hike: Allow 3 to 4 hours.
Difficulty: Moderate.
Trailhead: Begin near the Tuolumne Meadows Campground, embarking on a picturesque journey through meadows and peaks.
Embark on the Elizabeth Lake Trail, a moderate 4.8-mile round trip adventure that leads to a remote alpine lake nestled amidst meadows and peaks. Starting near the Tuolumne Meadows Campground, this trail takes hikers through picturesque landscapes, offering views of granite peaks and vibrant wildflowers. The highlight of the journey is reaching Elizabeth Lake, where the serene waters reflect the surrounding beauty. This moderate hike allows for a deeper immersion into the tranquility of Yosemite's high country, making it an excellent choice for those seeking a more secluded and rewarding alpine experience.
6) TUOLUMNE MEADOWS TO LYELL CANYON:
Distance: Approximately 8 miles round trip.
Time to Hike: Allow 4 to 6 hours.
Difficulty: Moderate.
Trailhead: Begin near the Tuolumne Meadows Visitor Center, starting your journey through expansive meadows.
Embark on the Tuolumne Meadows to Lyell Canyon hike, a moderate 8-mile round trip adventure that unveils the expansive meadows and the Lyell Fork of the Tuolumne River. Beginning near the Tuolumne Meadows Visitor Center, this trail winds through pristine meadows, offering unobstructed views of the surrounding granite peaks. The highlight of this hike is the Lyell Fork, where hikers can enjoy the soothing sounds of the river and the breathtaking beauty of the High Sierra. The moderate difficulty of the trail allows for a leisurely exploration of Yosemite's high country, providing an opportunity to connect with nature in a serene and expansive alpine setting.
Additional Yosemite National Park Hiking Gems
1) CLOUDS REST TRAIL:
Distance: Approximately 14.5 miles round trip.
Time to Hike: Allow 7 to 9 hours.
Difficulty: Strenuous.
Trailhead: The Clouds Rest trailhead begins at Tenaya Lake, offering a challenging yet rewarding ascent to the granite peak.
Embark on the Clouds Rest Trail for an exhilarating and strenuous adventure. This 14.5-mile round trip hike takes you to the summit of a granite peak adjacent to Half Dome, providing unparalleled and breathtaking views of Yosemite Valley, Half Dome, and the High Sierra. The strenuous climb is met with the ultimate reward as you stand on the precipice of Clouds Rest, offering a unique perspective of the iconic Half Dome and the vast expanse of Yosemite's wilderness.
2) TEN LAKES TRAIL:
Distance: Approximately 12 miles round trip.
Time to Hike: Allow 6 to 8 hours.
Difficulty: Strenuous.
Trailhead: The Ten Lakes Trailhead is located near Yosemite Creek Campground, leading hikers to the remote backcountry lakes.
Explore the pristine beauty of Yosemite's backcountry on the Ten Lakes Trail. This strenuous 12-mile round trip journey takes you through the remote wilderness, unveiling a series of stunning backcountry lakes and providing panoramic vistas of the surrounding landscapes. Immerse yourself in the tranquility of nature as you navigate challenging terrain, and be rewarded with the serenity of remote alpine lakes, making the Ten Lakes Trail a must for those seeking a strenuous and immersive backcountry experience in Yosemite.
3) MONO PASS TRAIL:
Distance: Approximately 8 miles round trip.
Time to Hike: Allow 5 to 7 hours.
Difficulty: Strenuous.
Trailhead: The Mono Pass trailhead starts at the Mono/Parker Pass Trailhead near Tioga Road.
Venture off the beaten path on the Mono Pass Trail, a strenuous 8-mile round trip journey that unveils the beauty of alpine landscapes. This trail takes hikers through rugged terrain, showcasing breathtaking views of high mountain peaks and providing glimpses of Mono Lake in the distance. The strenuous climb is well-rewarded with expansive vistas, making the Mono Pass Trail a hidden gem for those seeking a challenging and less-traveled route in Yosemite's wilderness.
4) GAYLOR LAKES TRAIL:
Distance: Approximately 2.5 miles round trip.
Time to Hike: Allow 2 to 3 hours.
Difficulty: Moderate.
Trailhead: Begin your adventure at the Gaylor Lakes trailhead near the Tioga Pass Entrance Station.
Discover the secluded beauty of the Gaylor Lakes Trail, a moderate 2.5-mile round trip journey that takes hikers through alpine meadows and unveils stunning views of the Cathedral Range. The trail offers a perfect blend of accessibility and scenic reward, showcasing alpine lakes surrounded by rugged peaks. Gaylor Lakes Trail provides a serene and less crowded alternative, making it an ideal choice for those seeking a moderately challenging hike with captivating views in Yosemite's high country.
5) LOWER CATHEDRAL LAKE TRAIL:
Distance: Approximately 3.5 miles round trip.
Time to Hike: Allow 2 to 3 hours.
Difficulty: Easy to Moderate.
Trailhead: The Lower Cathedral Lake trailhead is located near the Tuolumne Meadows Visitor Center.
Experience the beauty of Lower Cathedral Lake Trail, an easy-to-moderate 3.5-mile round trip hike that offers family-friendly terrain with stunning lake views. This accessible trail takes you through meadows adorned with wildflowers and leads to the tranquil Lower Cathedral Lake. Ideal for families, the trail provides a perfect balance of ease and scenic beauty, making it an excellent choice for those seeking a relaxing and rewarding hike in Yosemite's high country.
6) LOWER CHILNUALNA FALLS TRAIL:
Distance: Approximately 2.6 miles round trip.
Time to Hike: Allow 1.5 to 2 hours.
Difficulty: Easy to Moderate.
Trailhead: The Lower Chilnualna Falls trailhead is situated in Wawona, near the historic Wawona Hotel.
Embark on the Lower Chilnualna Falls Trail, an easy-to-moderate 2.6-mile round trip hike that offers cascading waterfall views and family-friendly terrain. This scenic trail provides a gentle ascent through a lush forest, leading to the base of Chilnualna Falls. The soothing sounds of the waterfall and the ease of the trail make it an excellent choice for families, providing a delightful and accessible nature experience in Yosemite's enchanting landscapes.
Marie about to enter the spray zone while day hiking the Mist Trail in Yosemite Valley. Photograph by Dalton Johnson
In the heart of Yosemite National Park, a tapestry of trails awaits adventure travelers seeking to forge a deeper connection with the natural wonders of this iconic destination. From the granite peaks of Yosemite Valley to the pristine meadows of Tuolumne, each trail tells a story of grandeur, challenge, and breathtaking beauty. As we've journeyed through the best day hikes, uncovering hidden gems and well-trodden paths, the essence of Yosemite's diverse landscapes comes to life.
For those yearning for elevated perspectives, the strenuous trails to Sentinel Dome, Upper Yosemite Falls, Clouds Rest, and Mono Pass promise unparalleled vistas. The moderate paths, such as Mist Trail to Vernal and Nevada Falls, Glen Aulin Trail, Cathedral Lakes Trail, and Gaylor Lakes Trail, invite hikers into the heart of alpine landscapes and serene lakes.
Family-friendly excursions to Mirror Lake, Lower Cathedral Lake, and Lower Chilnualna Falls ensure that the wonders of Yosemite are accessible to all. And for those seeking remote backcountry adventures, the Ten Lakes, Elizabeth Lake, and Tuolumne Meadows to Lyell Canyon trails beckon with their pristine wilderness.
As your footsteps echo through these trails, may the memories of sweeping panoramas, cascading waterfalls, and tranquil lakes linger. Yosemite National Park, with its diverse trails, invites every adventurer to carve their own path, weaving unforgettable stories amid the granite cliffs and alpine meadows. Whether you're conquering a summit or strolling through a meadow, Yosemite's beauty remains, an eternal testament to the untamed wonders of the great outdoors. So, lace up your boots, breathe in the mountain air, and let Yosemite's trails become the chapters of your own remarkable journey.
Discover More of Yosemite National Park


Best Flat Water Kayaking in Northern California
Now that you have discover where these flat water locations are, what makes them special, and additional activities in the area, it is time for you to explore the best flat water kayaking in Northern California for yourself.
Northern California houses more than 3,000 lakes that contain flat water kayaking. WOW! That is a lot of opportunity, so where should you begin?
The best flat water kayaking in Northern California is found in Lake Tahoe, around Mammoth Lakes, in Bridgeport, and along highway 395. The best bodies of water to flat water kayak on are Emerald Bay, Twin Lakes, Convict Lake, Zephyr Cover, and Maggies Lake. All of these lakes are protected from the wind, have easy water access to launch your boat, and have views that will leave you speechless.
Read on to discover where these flat water locations are, what makes them special, and additional activities in the area.
Emerald Bay in Lake Tahoe
Directions to Emerald Bay:
Driving directions to Emerald Bay
Water Access to Emerald bay:
Water access to Emerald Bay requires a two mile hike. So, if you are bringing your own kayak, make sure to bring a dolly or a foldable kayak so you do not have to make two trips. The hike to the water is downhill on your way to the beach and all up hill to return to your vehicle. NOTE: if you do not want to carry your own kayaks, there are some for rent at the beach.
Once you are at the beach of Emerald Bay, the launch is easy from a sandy beach.
Why is emerald bay one of the best flat water kayaking locations:
Emerald Bay is a protected bay on the west shore of Lake Tahoe. The waters are an emerald color, hence the name, and is protected from the wind. Surrounded by evergreens, this bay is a popular destination in Lake Tahoe, however few actually spend time kayaking on the blue waters.
Additionally, Emerald Bay has an island you can explore, by kayaking to, in the center of the bay. If you are feeling adventurous, you can cliff jump off the island into the crisp waters.
Another cool thing to do while kayaking the flat waters of Emerald Bay is to find the sunken ship along the south-east shore of Emerald Bay. This ship is a hot spot for SCUBA divers and free-divers. If you can find the red bouy, this marks the spot of the sunken ship in Emerald Bay.
Don’t miss out on these other adventures nearby:
Twin Lakes in Bridgeport
Directions to Twin Lakes:
Driving directions to Twin Lakes
Water Access to Twin Lakes:
Twin Lakes in Bridgeport, CA has some of the easiest accessed flat water kayaking. You can launch a kayak, for free, from the shore as most pull outs have a trail leading to the water. If you would like a dock and a ramp, you can go to the campground for paid launch.
Why is Twin Lakes one of the best flat water kayaking locations:
Kayaking on Twin Lakes is one of the best flat water kayaking spots of Northern California because the mountain backdrop is one of a kind. The jagged peaks to the west of Twin Lakes is called the Sawtooth Range, which is home to some of the best rock climbing in the High Sierra. Additionally, Twin Lakes and the town of Bridgeport are “off the map” for mainstream tourism, so the area is quiet and tranquil.
After a long day of kayaking on Twin Lakes you can soak your sore muscles in Travertine Hot Springs or Buckeye Hot Spring.
Lastly, Twin Lakes is an amazing area to kayak in because there is splendid free camping in the area as well as several paid campgrounds with bathrooms.
Don’t miss out on these other adventures nearby:
Climb Matterhorn Peak
Hot Spring at Buckeye
Mammoth Lakes
Directions to Mammoth Lakes:
Driving directions to Mammoth Lakes
Water Access to Mammoth Lakes:
Accessing the flat waters of Mammoth Lakes is incredibly easy via boat ramps, docks, and sandy beaches. Boasting as one of the premier winter and summer destinations in the Eastern Sierra, Mammoth Lakes is a hot spot for flat water kayaking.
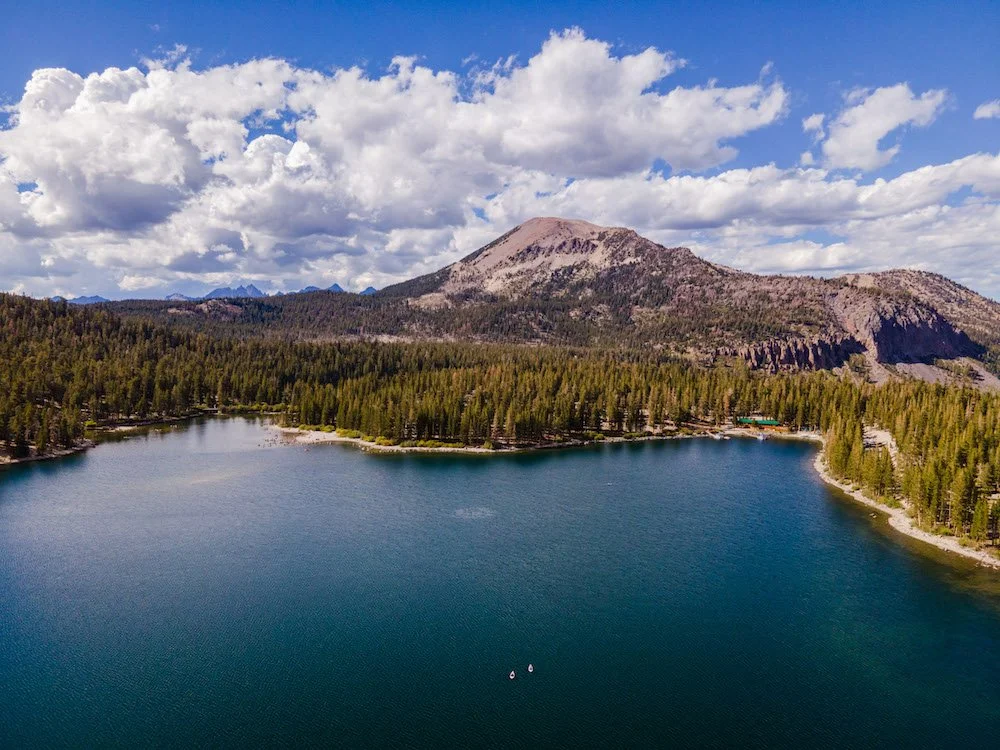
Why is Mammoth Lakes one of the best flat water kayaking locations:
Mammoth Lakes is one of the most visited destination of the Eastern Sierra because this mountain town boast of the calmest waters to flat water kayak upon. The chain of five lakes are all incredibly well protected from the wind by the Eastern Sierra Mountains and the large evergreens that inhabit the shores of these lakes. Additionally, all of the lakes you can kayak on have access to camping and bathrooms.
Much of Mammoth Lakes is on a first come, first serve basis. Since Mammoth Lakes is a popular place for tourism, make sure to show up early and claim a parking spot alongside these stunning mountain lakes.
Don’t miss out on these other adventures nearby:
Soak in Wild Willy’s Hot Spring
Rock Climb at Crystal Crag
Mountain Bike in the Eastern Sierra
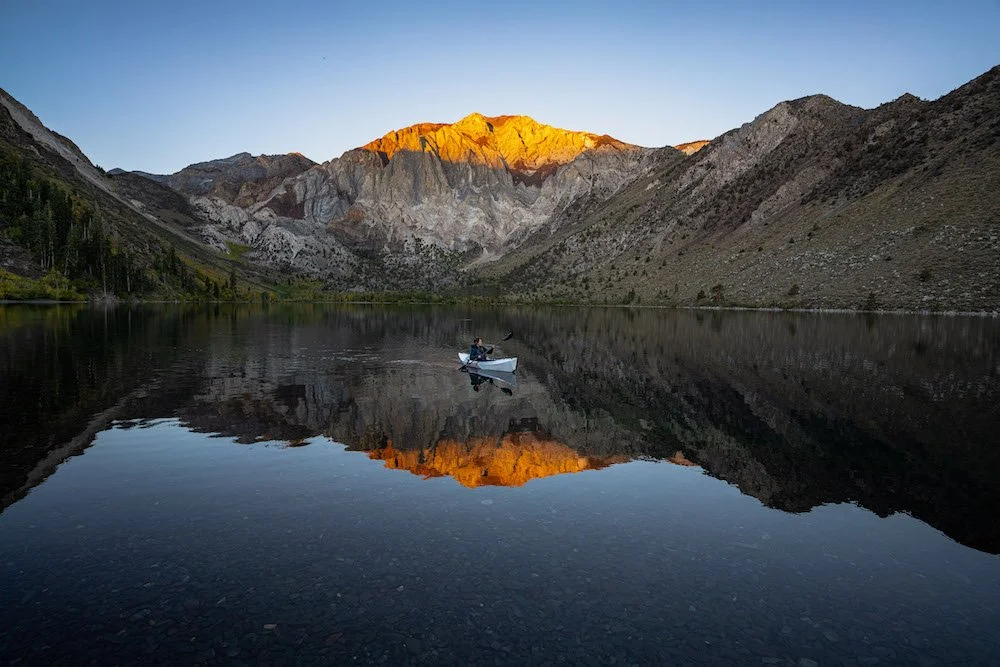
Convict Lake
Directions to Convict Lake:
Driving directions to Convict Lake
Water Access to Convict Lake:
Accessing the waters at Convict Lake are easy. There is a dock you can launch your boat from and there is a shale beach on the far side of the lake where you can also launch. With a road lining the south banks of Convict Lake, all access to the water is a short walk.
Why is Convict Lake one of the best flat water kayaking locations:
Convict Lake has some of the most beautiful sunrises I have ever seen. The morning light lands upon the swirled colored granite peak in the distance, shining a burnt red. The stillness of the morning creates a reflection on the lake that goes undisturbed, unless you are kayaking on the water.
The origin of this lakes name, Convict lake, comes from a community of outlaws who used this lake as a hide out. For years, they were able to remain hidden from the law and often took in other convicts who were on the run. Today, this lake is a campground for adventure seekers.
What makes Convict Lake one of the best flat water kayaking destinations in California is the calm and clear water. Often this lake is so smooth it reflects the mountains. In addition to the reflection, there is an aspen grove alongside the lakes south bank, making the colors in the fall exquisite.
Don’t miss out on these other adventures nearby:
Soak in Wild Willy’s Hot Spring
Hike to Convict Lake Waterfall
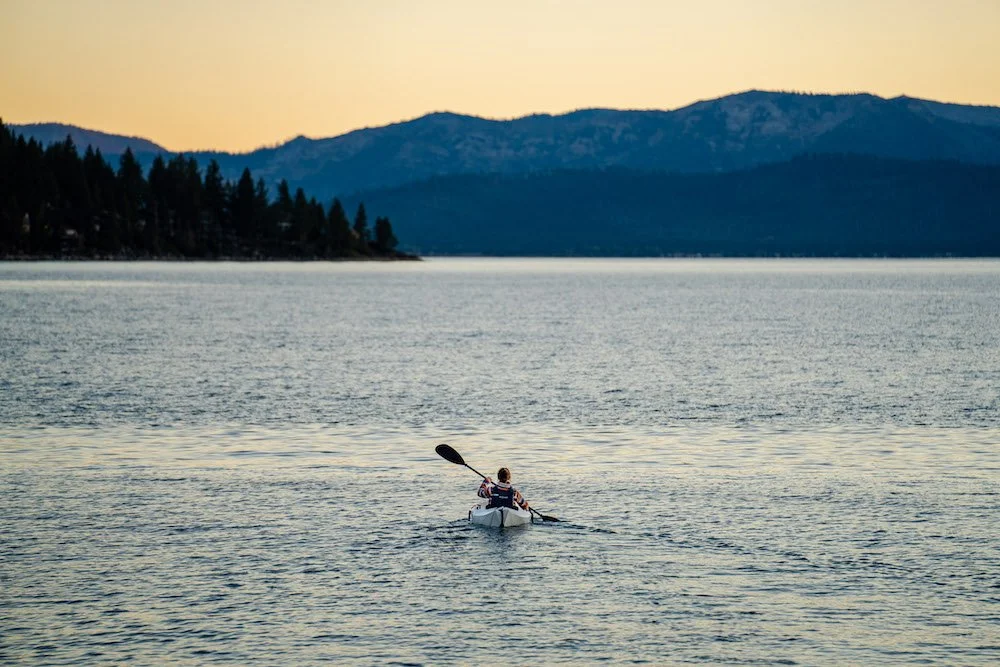
Zephyr Cove in Lake Tahoe
Directions to Zephyr Cove:
Driving directions to Zephyr Cove
Water Access to Zephyr Cove:
Accessing Zephyr Cover with a kayak will take some strength because the hike in is roughly a half mile. I suggest bringing a dolly to carry your kayak. Once to the cove, you will need to take a flight of stairs to the sandy beach. From there, launching is easy, just watch out for the shallow rocks on a low water year.
Why is Zephyr Cove one of the best flat water kayaking locations:
Zephyr Cove is one of the best flat water kayaking locations because the crowds are small, the water is clear enough to see granite boulders underneath you, and the sunsets are one’s that make you stop and watch.
Positioned on the east shore of Lake Tahoe, Zephyr Cove often offers calm waters that can be paddled on easily. Additionally, the cove has several large boulders that get your heart pumping as you paddle overtop of them. I mean, how cool is it that you get to kayak over boulders while flat water kayaking?
Lastly, what makes Zephyr Cover kayaking special for me is that fact that you can watch the sunset, with very few people around you. You can’t say this very often while at a beach in Lake Tahoe.
Don’t miss out on these other adventures nearby:
Rock Climb at Lover’s Leap

Now that you have discover where these flat water locations are, what makes them special, and additional activities in the area, it is time for you to explore the best flat water kayaking in Northern California for yourself. Drop a comment below with some of your favorite flat water kayaking adventures, or with additional information that would be helpful for others.
Explore More of the Eastern Sierra
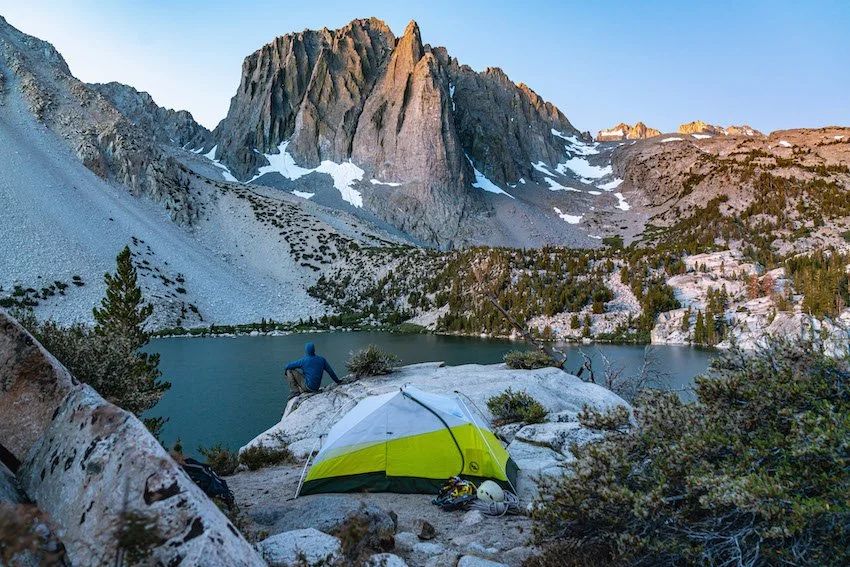
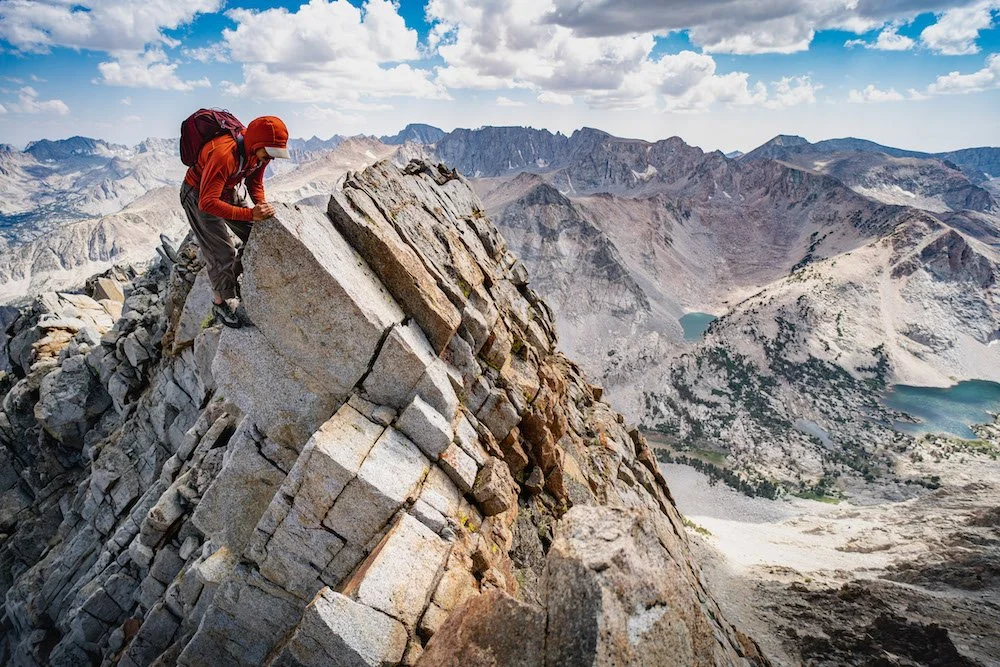
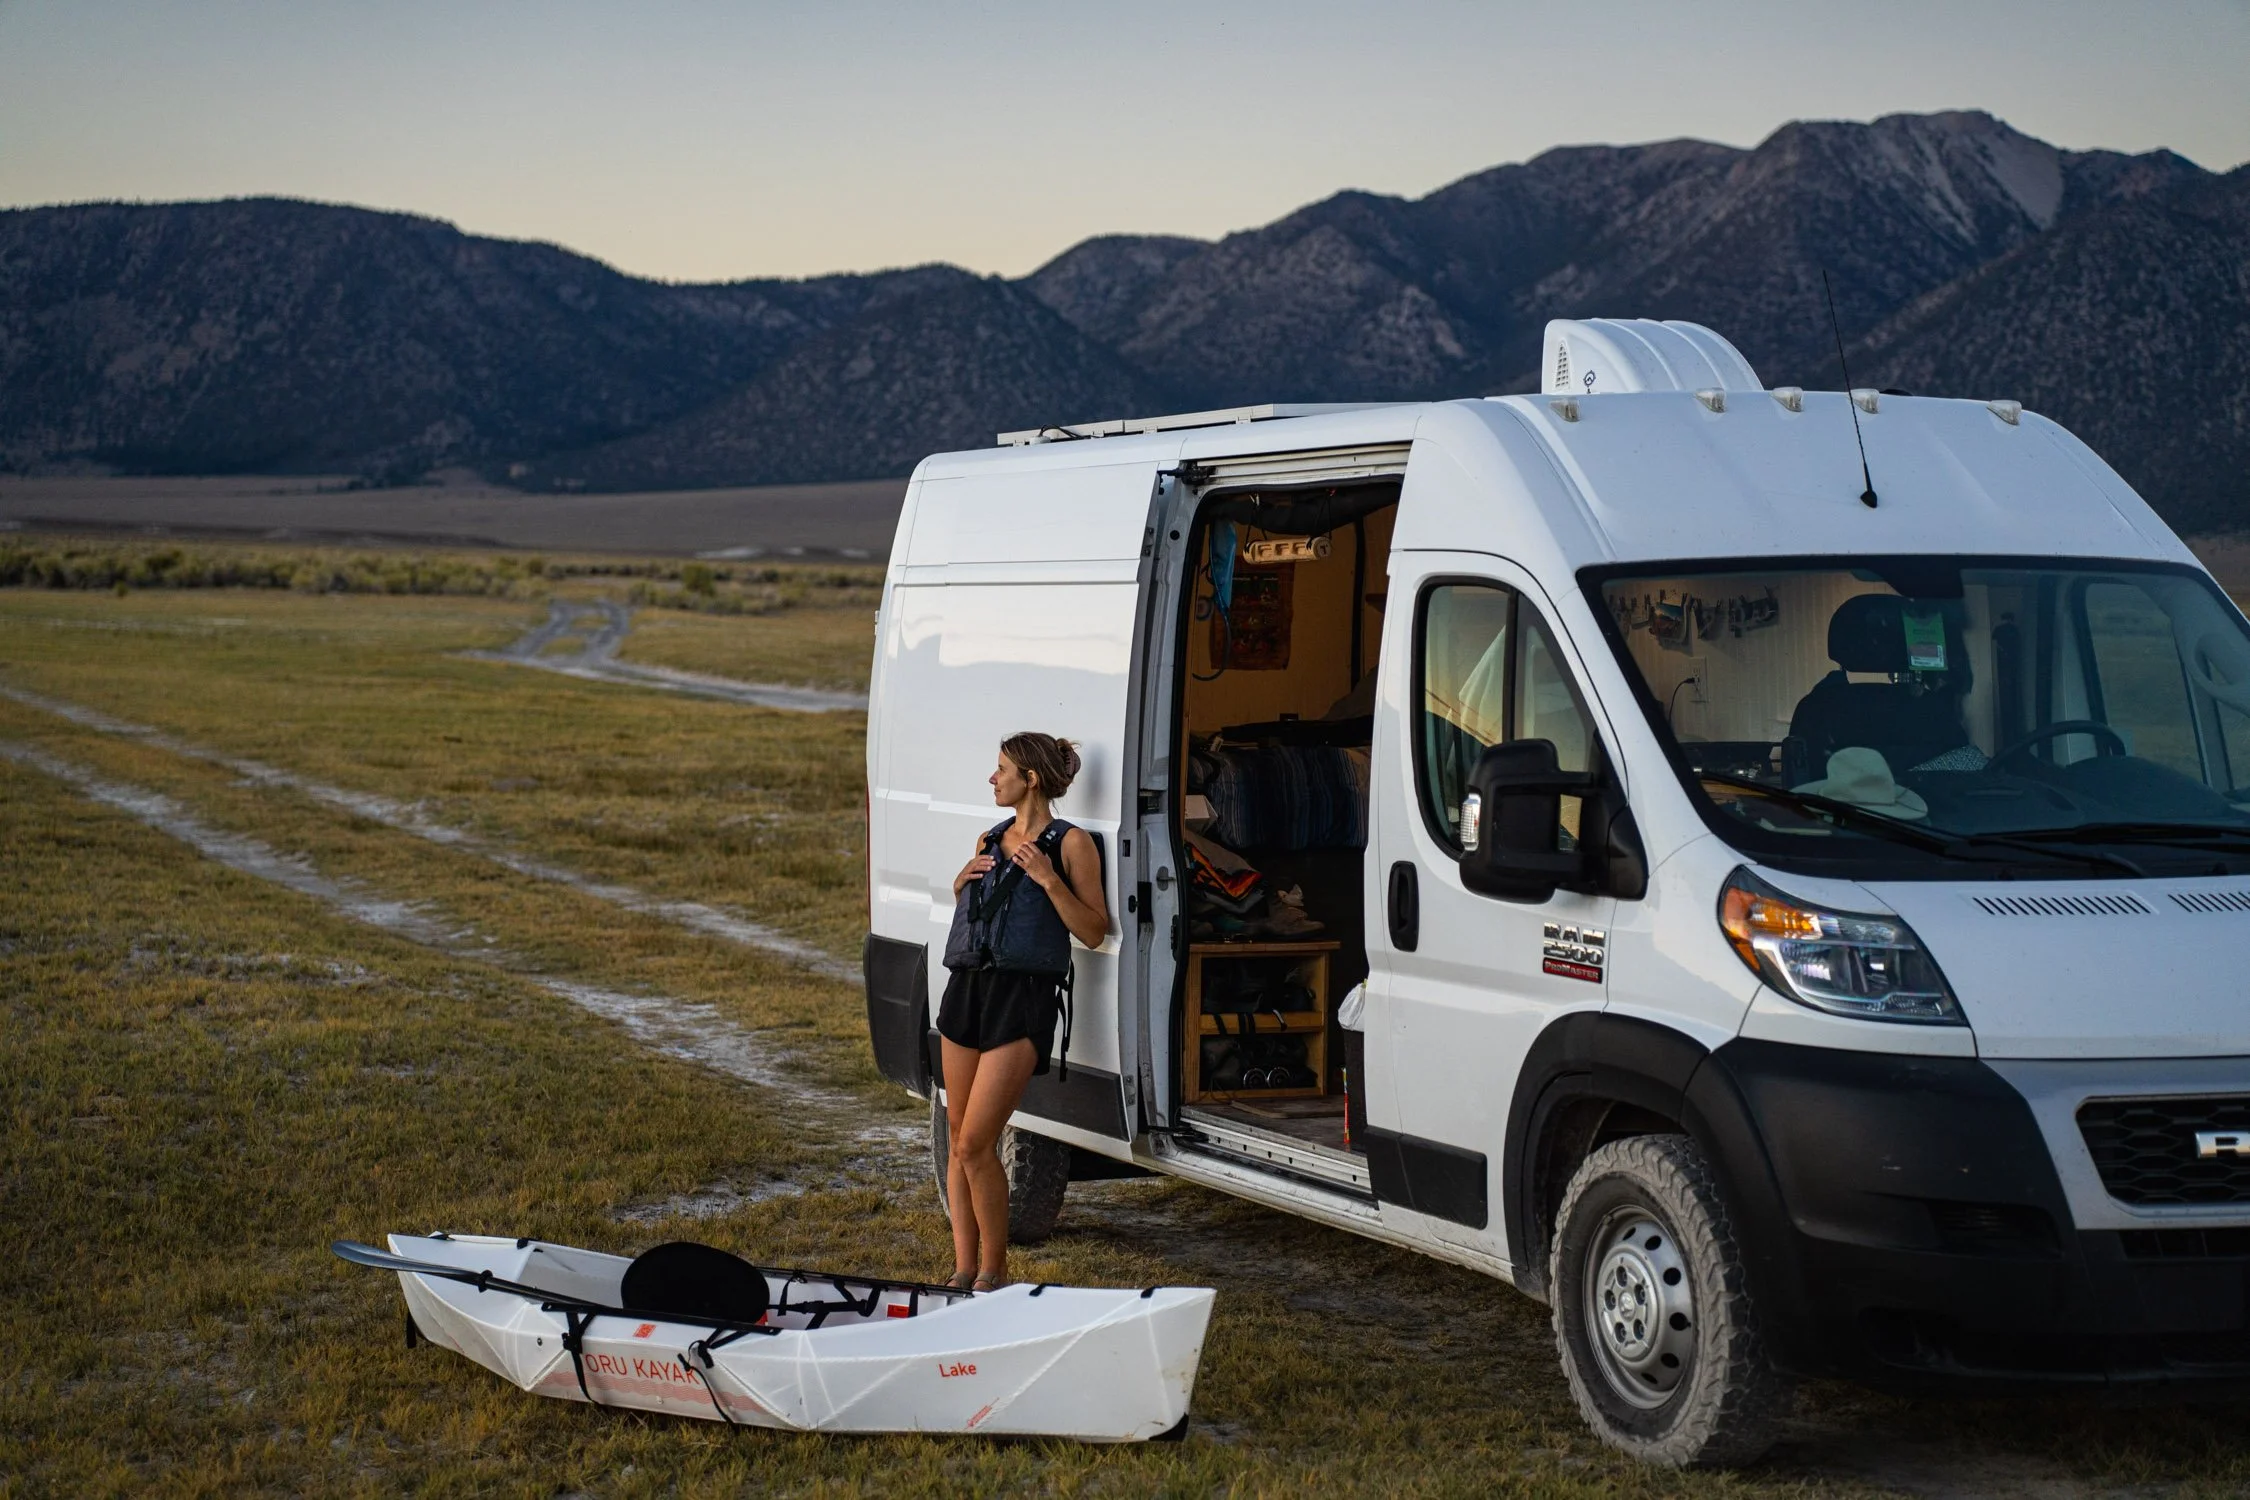

Hiking Eagle Falls in Lake Tahoe
Hiking Eagle Falls in Lake Tahoe is special because the sunrise view is extraordinary when the waterfall is flowing. A golden glow, few people, the grandiose blue waters of Lake Tahoe, and the brisk air make a splendid combination for all hikers visiting Eagle Falls. Also, as you walk around Eagle Falls, you will notice a few spots that make the falls look as though the cascading water pours directly into Emerald Bay… mind blowing!

Overview for hiking Eagle Falls in Lake Tahoe
DISTANCE: .25 MILE
DIFFICULTY: EASY
AVERAGE TIME TO HIKE: 5 to 10 minutes
WHAT DO YOU SEE WHILE: YOSEMITE FALLS, HALF DOME, MERCED RIVER, SENTINEL PEAK
WHERE CAN YOU SEE THIS EAGLE FALLS IN LAKE TAHOE VIEW?
Eagle Falls is a cascading waterfall that can been seen from the road, or hiked to, from the Eagle Lake trailhead.
Hiking Eagle Falls for sunrise in Lake Tahoe, CA. Photograph by Dalton Johnson
BEST SEASON TO hike EAGLE FALLS in Lake Tahoe?
The best season to hike Eagle Falls is in the spring. Eagle Falls flow is created by snow melt, making spring season (February to April) the best time to see Eagle Falls flowing into Emerald Bay of Lake Tahoe.
HOW LONG IS THE HIKE TO SEE EAGLE FALLS IN LAKE TAHOE?
The hike to Eagle Falls is about .5 of a mile and takes 5-10 minutes depending on where you park. Hiking to Eagle Falls in the Eastern Sierra Mountains is a well maintained trail that is easy to hike. With that said, this hike is not wheelchair accessible.
The parking lot and road side parking fills up fast, so make sure to get there early if you want a get a spot.
THE BEST TIME OF DAY TO Hike to EAGLE FALLS IN LAKE TAHOE?
My favorite time to hike Eagle Falls in Lake Tahoe is at sunrise. Why sunrise? If you look at the image above, the sun rises off in the distance, creating a golden glow on the waterfall. This effect makes sunrise special. Additionally, if you arrive for sunrise there will be very few people at Eagle Falls.
WHAT MAKES HIKING EAGLE FALLS IN LAKE TAHOE SPECIAL?
Hiking Eagle Falls in Lake Tahoe is special because the sunrise view is extraordinary when the waterfall is flowing. A golden glow, few people, the grandiose blue waters of Lake Tahoe, and the brisk air make a splendid combination for all hikers visiting Eagle Falls. Also, as you walk around Eagle Falls, you will notice a few spots that make the falls look as though the cascading water pours directly into Emerald Bay… mind blowing!
Discover More of Lake Tahoe
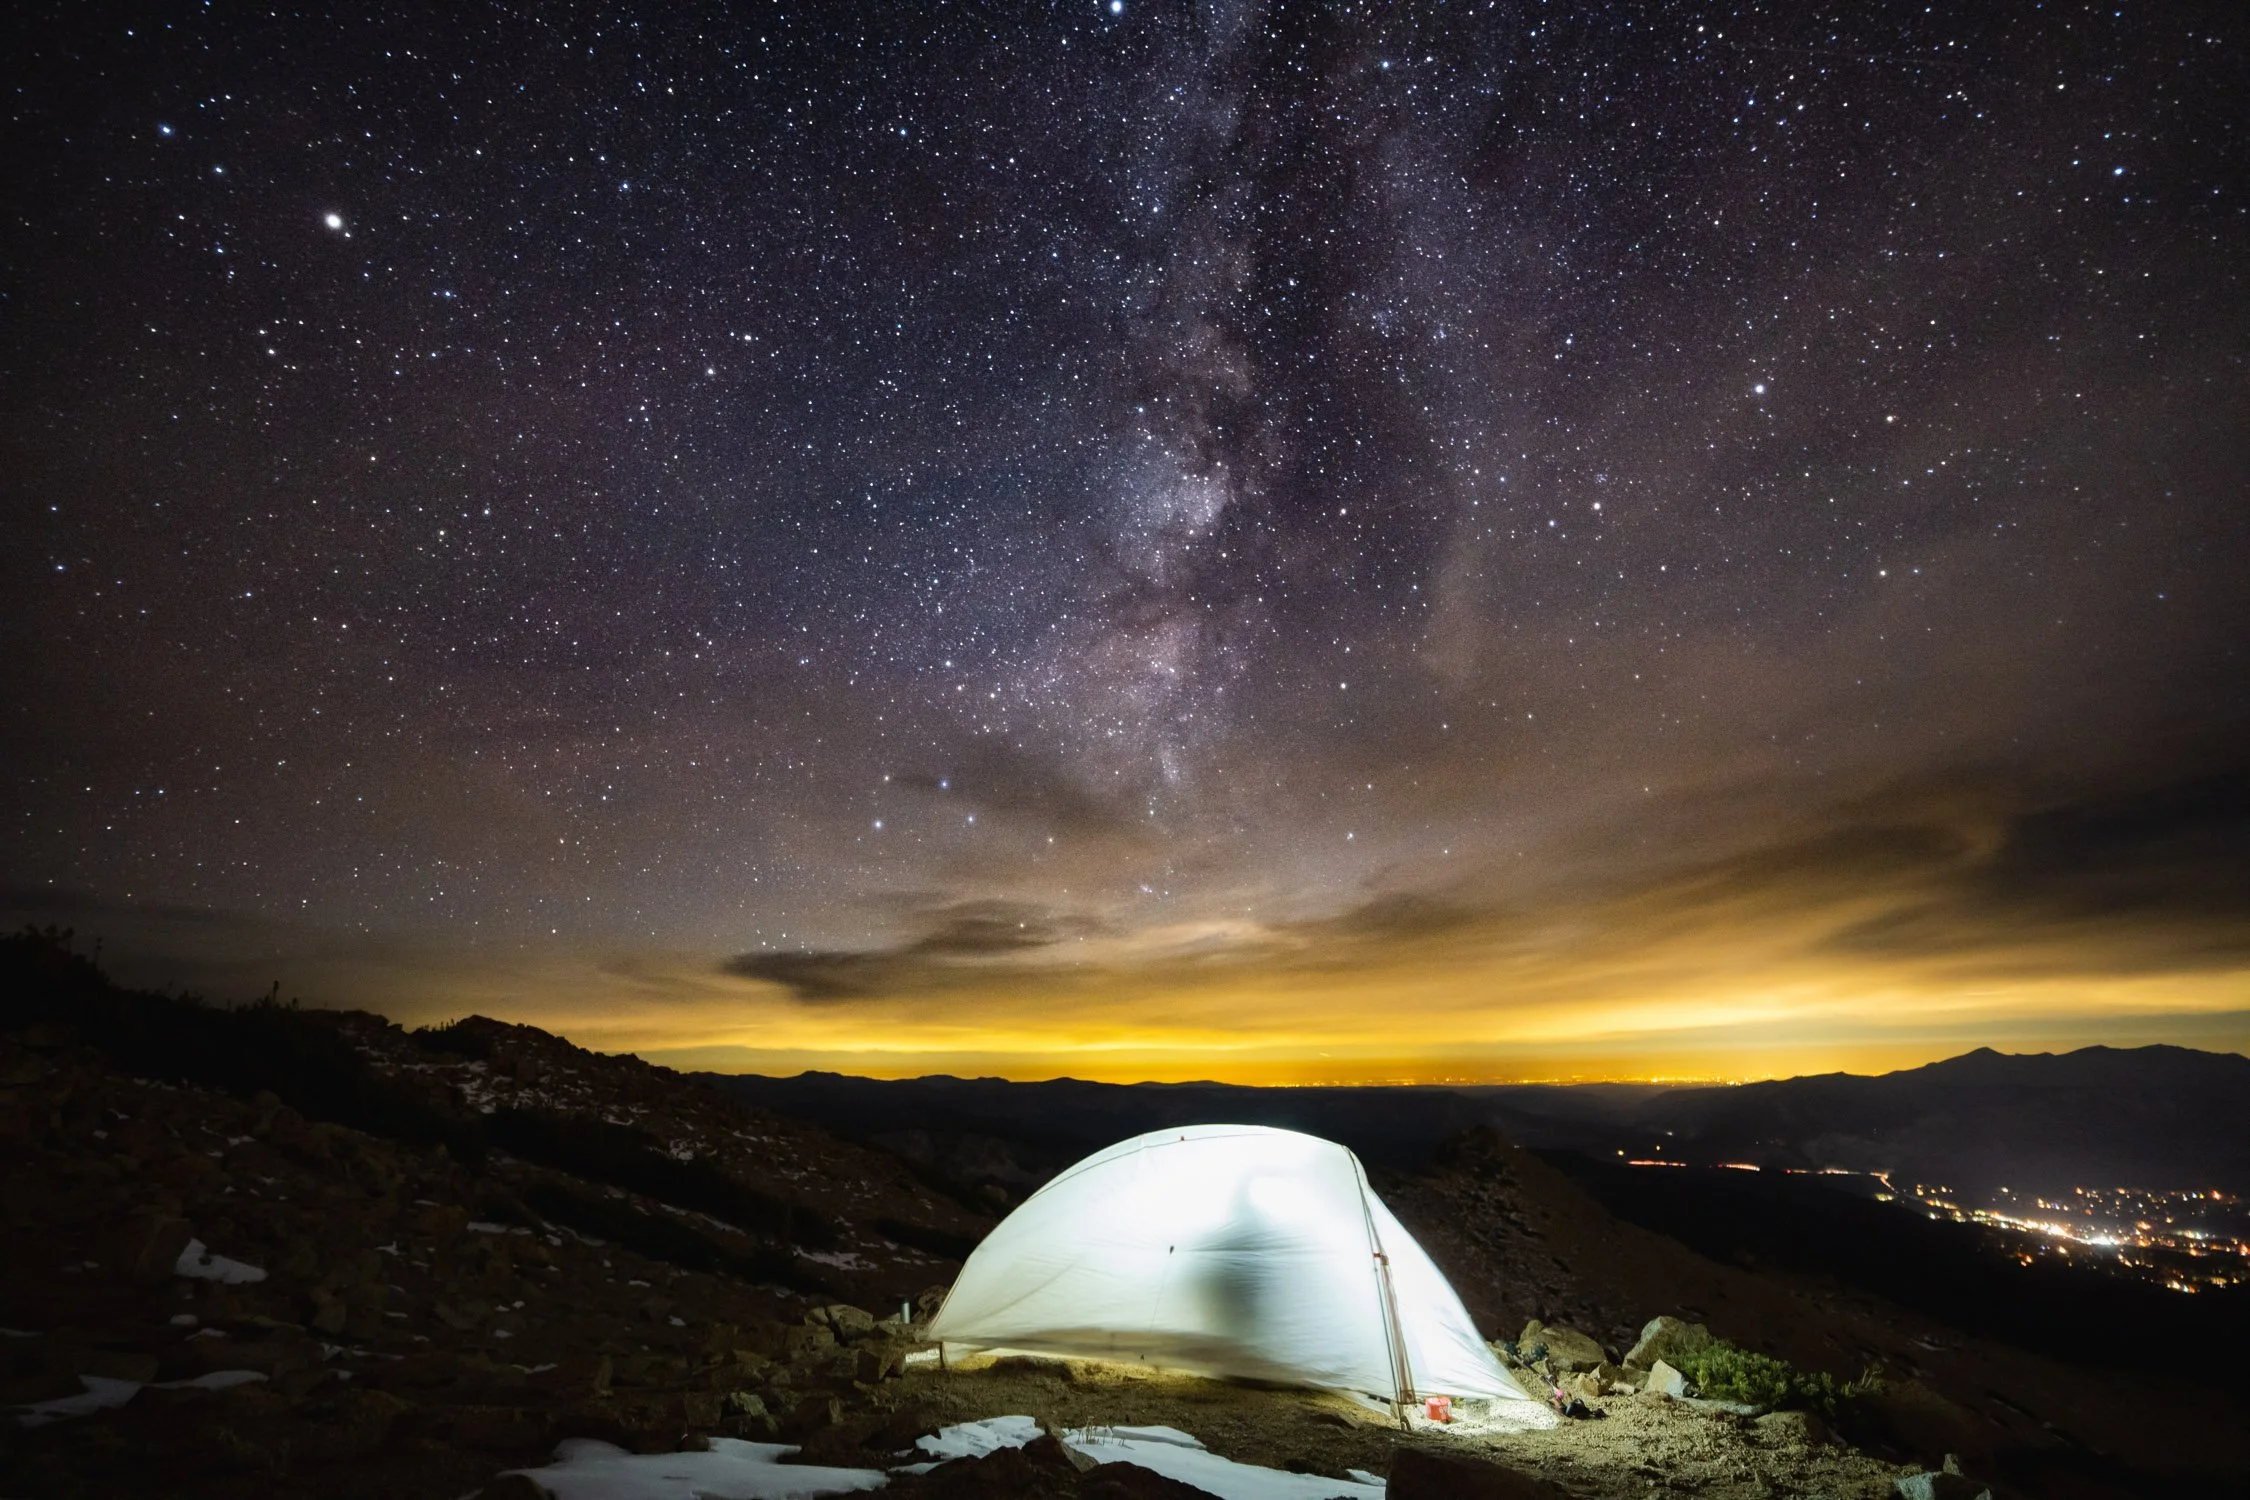
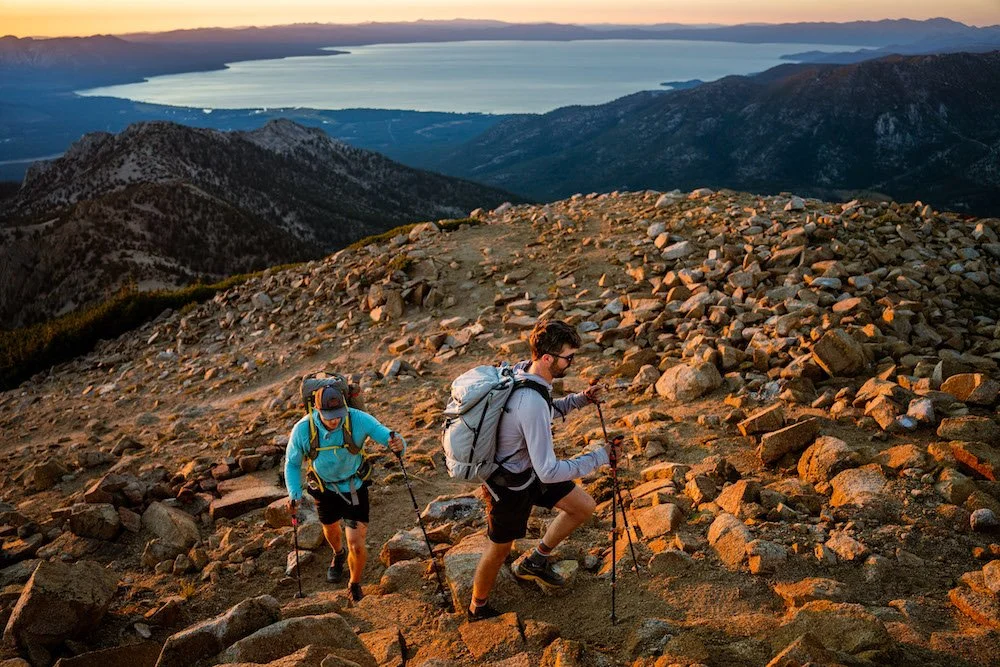
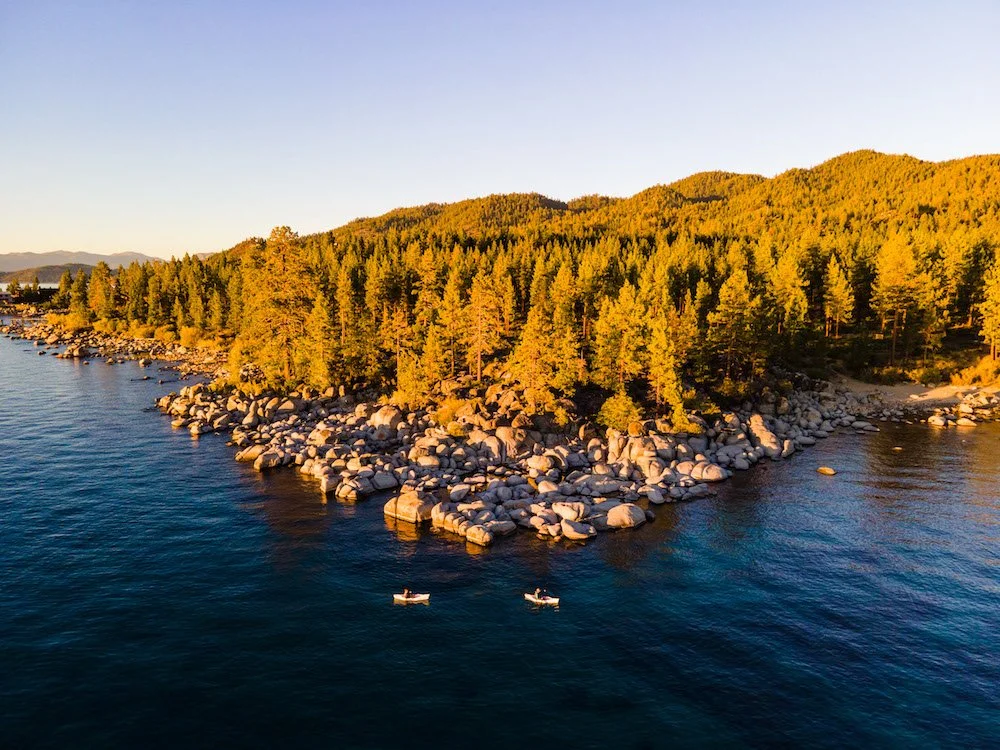

Guide to Surfing Cerritos Beach
Cerritos Beach is one of the premier surf spots in Baja Mexico. Known locally as Playa Los Cerritos, this quaint and off the grid beach has boomed into a surf oasis with an ever growing population of surfers. The good news, the vibe in the line-up is retaining its friendly and welcoming demeanor. This kindness in the line-up while surfing at Cerritos Beach makes for a fun time as well as a welcoming spot to beginner surfers.
Cerritos Beach is one of the premier surf spots in Baja Mexico. Known locally as Playa Los Cerritos, this quaint and off the grid beach has boomed into a surf oasis with an ever growing population of surfers. The good news, the vibe in the line-up is retaining its friendly and welcoming demeanor. This kindness in the line-up while surfing at Cerritos Beach makes for a fun time as well as a welcoming spot to beginner surfers.
The warm waters of Cerritos Beach, the sand bottom, and consistent waves makes Playa los Cerritos a perfect surf spot. With three distinct areas to surf, Cerritos Beach has a break for every level of surfer. Pack a long board or short board, or rent one once at the beach, for there is an area to surf every style at Playa los Cerritos. Almost everyday, there will be ridable waves and friendly faces. So, if you are looking to surf in while in Baja, come to Cerritos Beach to catch waves for yourself.
Read on to learn about where to surf at Cerritos Beach, wave size, where to get surf lessons, and answers to other frequently asked questions about surfing Cerritos Beach.
A motion blur photograph of a surfer catching a wave at Cerritos Beach. Photograph by Dalton Johnson
Where can I surf in Cerritos Beach?
Playa los Cerritos has three distinct waves for surfing; the point, the inside, and beach break. If you are new, or learning, to surfing, the inside is the perfect spot for you. If you are searching to ride big waves, or favor long board surfing, the right off of the point will be your favorite spot. For short boarders and experienced surfers, the left at the beach break barrels consistently.
The inside is the area closest to the big yell hotel on the hill. The inside is for beginners.
The point is the area beyond the inside break where larger waves break for a long right hand ride. The point is for long boards and those seeking to ride big waves, I’ve seen and ridden double overhead waves off the point.
The beach break is located in the the middle Cerritos beach and has both a left and right barrel, the left is better. The beach break is for experienced surfers and short boarders alike.
One of the local pros, Luca, surfing a double overhead wave at Cerritos Beach. Photograph by Dalton Johnson
How big do the waves get at Cerritos Beach?
Wave size at Cerritos Beach changes on the daily and with the seasons, but you can expect waist high waves almost daily. With that said, the biggest waves at Cerritos Beach comes around Christmas time and can be as large as triple overhead. On the flip side, the smallest waves at Cerritos Beach come in late November and are at most waist high.
What is the upcoming surf forecast for Cerritos Beach?
You can check the upcoming surf forecast at Cerritos Beach BY CLICKING HERE
Where to get surf lessons in Cerritos Beach?
If you want to learn how to surf at Cerritos Beach, I suggest going to CRT and ask for Juan or Carlos. They are great surf instructors, offer fair prices, and have been around the longest. Additionally, if you tell them “DALTON sent me” they will most likely give you a discount on lessons or board rentals.
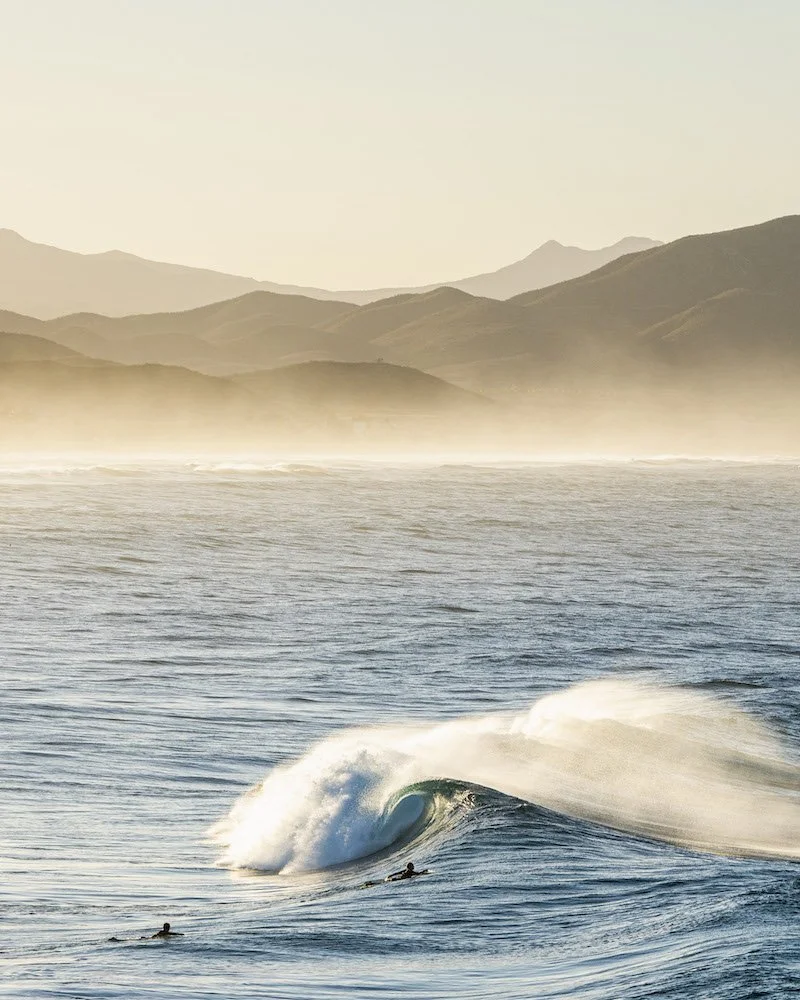
Two surfers enjoy barrels during a sunrise surf session at Cerritos Beach. Photograph by Dalton Johnson
Are there nearby surfboard rentals at Cerritos Beach?
There are several surfboard rentals in the area that will do hourly, daily, and weekly rentals. Most of the places are located directly on the beach, but you can find a few a short walk from the main entrance of Cerritos. The main places to rent surfboards are:
CRT
Mario Surf School
West Side
Costa Azul
All of the board rental places also offer surf lessons.
Are there a lot of surfers at Cerritos Beach?
Cerritos Beach is growing in popularity, so there are several surfers in the line-up at every break. However, in comparison to surf breaks in the United States, there are not very many surfers. Additionally, if the waves are big, you can often surf alone as most surfers in the area are beginners. There are a few local professional surfers who are kind in the line up, but also catch a lot of the waves.
Do I need a wetsuit to surf Cerritos Beach?
To surf at Cerritos Beach, you do not need a wetsuit. The water is warm, roughly 70 degrees. This temperature does not warrant a wetsuit, however you will see several surfers wearing a 1mm suit, a spring suit, or just a thermal top. The people wearing the suits are most likely going to be locals who surf here often and have become accustomed to the warm water, but use a wetsuit to remain in the water to surf for several hours.
How to get to Cerritos Beach from Los Cabos Airport (SJD)?
If you are staying at one of the many AirBnB’s or VRBO’s in Cerritos Beach, getting there from the Cabo airport will take about an hour and half if you take the toll road. However, since Cerritos Beach has fewer amenities than Cabo San Lucas or San Jose del Cabo, many visitors stop to grocery shop along the way, making the trip about a 2.5 hour journey.
Drive time Los Cabo airport to Cerritos Beach via toll road, without stops, is about an hour and 30 minutes
Drive time Los Cabo airport to Cerritos Beach via toll road, with stops, is about two hours and 30 minutes

One of the many perfect barrels you can find at Cerritos Beach. Photograph by Dalton Johnson
What Surfing is like at Cerritos Beach in Baja
In 2001, my parents, a local friend, my brother, and myself (at 8 years old) piled into a red rental car stacked with surfboards and headed to Cerritos Beach to surf. The toll road from San Jose del Cabo was not completed yet, so the commute across the peninsula was long. But, once we turned off Highway 1 and began bouncing down the dirt road to Cerritos Beach the excitement couldn’t be contained.
Peaking out the cracks between the window and the passenger’s shoulder, I looked for waves. I was astonished to see how big the waves were. I was just a beginner surfer and these waves seemed huge.
Arriving at the sandy beach, we parked just before the soft sand started. In 2001, the only building in the area was the big yellow one on the cliff. Jumping out of the car, we started to take off the boards and head to beach. My mom put sunscreen on me and Richar, our local friend, took me out to the point.
“Keep an eye out for the rocks,” Richar said as he pushed me into a wave.
At the time, there wasn’t a single person in the water. There weren’t any building, restaurants, bathrooms, condos, anything. At the time, Cerritos Beach was an oasis where people would come and hope to score waves. People would sleep on the beach in tents for weeks at a time and live without care. Now, that is a little bit different, but the waves haven’t changed.
Fast forward 20 years to today.
The wave is the same, but the crowds are different. As the influx of condos and restaurants boom, the line-up now consists of ex-pats who try to maintain the rules of the WSL meanwhile the locals surf circles around the old men who grumble. There are areas where beginner surfers go to ride the white water and stand on their first wave and receive surf lessons. A young group of surfers have also grown up and developed here, becoming the best surfers in the area. Yet, when the waves get big, almost nobody paddles out, even-though the point will break with faces ranging from 10-20 foot.
Regardless if you have surfed here in the past, or are new to the area, there are enough waves for everyone of every style.
Today, the key is to get out in the water and carry good vibes. Share waves and help each other out. Keep an eye on each other as you surf and respect the waves.

Surfer enjoying the sunset colors Cerritos Beach has to offer. Photograph by Dalton Johnson
Now that you have learned about where to surf at Cerritos Beach, the wave size, where to get surf lessons, and answers to your frequently asked questions about surfing Cerritos Beach, it is time for you to hit the beach and catch some waves. Please, leave a comment below with any additional information you have around surfing Cerritos Beach to help others out!
Discover more of Baja Mexico


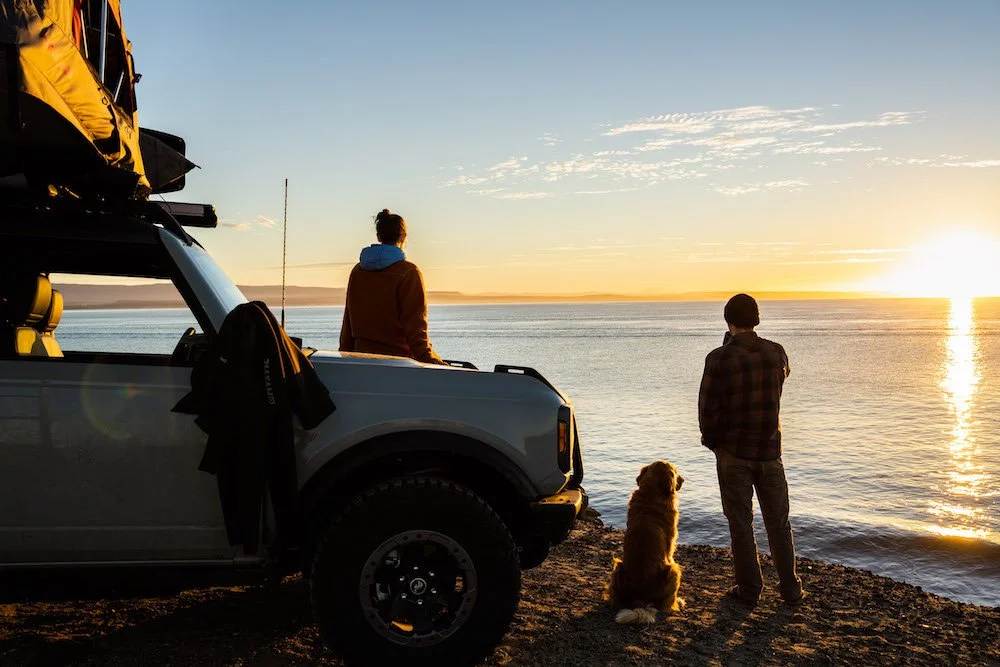

Day Hike the Yosemite Valley Loop
If you want to hike the entirety of Yosemite Valley, the Yosemite Valley Loop is your ideal trail. Fully paved, the Valley Loop Trail was created to allow visitors a path to explore the entire valley by foot, or bike. While on this hike, you will find hidden gems along the Merced River, wildlife, and be able to soak in the gorgeous granite views Yosemite offers.
If you want to hike the entirety of Yosemite Valley, the Yosemite Valley Loop is your ideal trail. Fully paved, the Valley Loop Trail was created to allow visitors a path to explore the entire valley by foot, or bike. While on this hike, you will find hidden gems along the Merced River, wildlife, and be able to soak in the gorgeous granite views Yosemite offers.
The Yosemite Valley Loop Trail is a choose your own adventure day hike that is often explored in small sections to see the exquisite sites Yosemite Valley offers. However, some hikers take on the 21.1 miles which make up the entire Loop trail, so they can see all of the sights in a single day. Day hiking the Yosemite Valley Loop offers up-close views of Yosemite Falls, El Capitan, Sentinel Rocks, Ribbon Falls, the famous Valley View, and many other iconic views. So, what are you waiting for? Put on your hiking boots and get walking.
Read on to discover the best views of this day hike, quick facts about the trail, how long the trail will take, and more use information on day hiking the Yosemite Valley Loop.
Enjoying the view from one of the many bridge views while day hiking the Yosemite Valley Loop Trail. Photograph by Dalton Johnson
HOW LONG IS THE VALLEY LOOP TRAIL DAY HIKE?
The Valley Loop trail is just short of a full marathon, totaling 21.1 miles.
WHAT IS THE ELEVATION GAIN OF THE VALLEY LOOP TRAIL DAY HIKE?
The Yosemite Valley Loop has no significant hills to climb, but the elevation gain is 1,335 feet as the trail ungulates up and down with hills.
HOW LONG DOES IT TAKE TO DAY HIKE THE VALLEY LOOP TRAIL?
The Yosemite Valley loop trail typically takes 7 hours and 23 minutes on average to walk. Since this trail is flat and fully paved, some people chose to trail run this in a single day, so they can see the entire Yosemite Valley in just a few hours.
On a snowy visit to Yosemite, I went to the Three Brothers view while day hiking along the Yosemite Valley Loop Trail. Photograph by Dalton Johnson
HOW HARD IS THE YOSEMITE VALLEY LOOP TRAIL DAY HIKE?
The Yosemite Valley Loop trail is the easiest trail to walk on in Yosemite Valley. Walking the entire loop is difficult, but walking a short section is a great way to immerse yourself in the beautiful nature Yosemite offers.
Are there Bathrooms along the Yosemite Valley Loop?
While day hiking the Yosemite Valley Loop you will come across several bathrooms. Most of the bathrooms are pit toilets, but there are a few hotels and shops you can stop at that have running water.
Why Hike the Yosemite Valley Loop?
The Yosemite Valley Loop is the ideal day hike for the visitor who is looking to see ALL of Yosemite Valley. Walking the full loop will take time, but you will have the opportunity to see the largest waterfalls in North America, in addition to wildlife, the Merced River, and so much more. In addition to the amazing views, this day hike is accessible to all, which means there wont be any huffing and puffing up a large hill! Instead, you will be able to leisurely explore Yosemite Valley in its full grandeur!
What To See along the Yosemite Valley Loop?
While day hiking the Yosemite Valley Loop, you will be able to see the most stunning views Yosemite Valley has to offer. Now, what are those amazing views? Below are 7 must see views while hiking the Yosemite Valley Loop:
El Capitan from the El Cap Meadow
Half Dome from the Sentinel Bridge
Yosemite Falls from Cook’s Meadow
Yosemite Valley View
Bridalveil Falls
Mirror Lake Reflection
Ribbon Falls
Three Brother’s View along the Merced
Yosemite Falls rushing during the spring while day hiking on the Yosemite Valley Loop Trail. Photograph by Dalton Johnson
Now that you have discover the best views of this day hike, quick facts about the trail, how long the trail will take, and so much more, it is time for you to hit the trail and start hiking. If you found any of this information helpful, or if you feel something should be added to this blog, let me know in the comments below.
Discover More of Yosemite Valley


How to Bootstrap a Summer in Alaska
Our morning was the start to a perfect Alaskan day. The sun was out and a cool breeze from the Arctic Ocean kept the fog away as we commuted across Kachemak Bay. Stepping off The Far Side, a two story boat, onto Stillpoint Lodge’s dock in Halibut Cove, Alaska where we were greeted by the staff – they already knew our names – and escorted us to the main lodge. We enjoyed any drink of our choice and a charcuterie board as we learned about the float plane flights, glacial kayaking, and wildlife tours in store for us this week. A quick tour of the grounds, ending at our private cabin overlooking the cove. My girlfriend, Kristin, and I were out of place. A single night at the lodge cost more than I make in a month, yet we were here for a week and it wouldn’t cost us a dime. So, how is that possible?
Our morning was the start to a perfect Alaskan day. The sun was out and a cool breeze from the Arctic Ocean kept the fog away as we commuted across Kachemak Bay. Stepping off The Far Side, a two story boat, onto Stillpoint Lodge’s dock in Halibut Cove, Alaska where we were greeted by the staff – they already knew our names – and escorted us to the main lodge. We enjoyed any drink of our choice and a charcuterie board as we learned about the float plane flights, glacial kayaking, and wildlife tours in store for us this week. A quick tour of the grounds, ending at our private cabin overlooking the cove. My girlfriend, Kristin, and I were out of place. A single night at the lodge cost more than I make in a month, yet we were here for a week and it wouldn’t cost us a dime. So, how is that possible?
Pros of work trades
You get to be creative! You can extend your trip
You feel appreciated and wanted, as your collaborator is investing in you as well
You might build a side hustle to fuel your passions
CONS of work trades
You might have to take work home from vacation
It’s possible everyone will say no, but that rarely happens
Jumping into Halibut Cove while on a van life road trip in Alaska. Photograph by Dalton Johnson
Connecting with Potential Clients
Flash back one month. I had just gotten off Denali, where I was making a mini-documentary on a climber attempting to summit North America’s tallest peak, and was beginning to sort through the footage in my van, in a grocery parking lot, waiting for Kristin to land in Anchorage. Our plan was simple: a road trip around the Kenai Peninsula for a month, then begin the 3,200 mile drive back to California.
For the past seven years, I had been building a sustainable career in the outdoor space as a content creator focused mainly on adventure sports, like surfing and mountaineering. During these seven years, I had been dreaming of visiting Alaska, but the cost was always far too great for me to afford on my own. With a bit of luck, I landed the job to film on Denali, but I knew I wanted to stay longer. I wanted to explore the vastness of Alaska and I wanted to expand my work into the tourism industry. I mean, come on, who doesn’t want to be paid to go around the world and do fun things?! So, before our road trip began, I gave myself the goal of building a portfolio for tourism, specifically adventure tourism. But, I kept asking myself, “Where do I start?”
Thinking back to when I started creating content, I recalled starting with speculation work. Work that you do for free, to build the thing you want, in hopes of making money later. Once this memory popped into my head, I realized I just needed to accept Alaska is big and full of more opportunities than I can do in a single trip, so I should just reach out to potential clients and see who is open to an exchange.
Tips for connecting with clients:
Reach out three different ways; social media, email, phone call
This is a numbers game, so reach out to anyone that interests you
Follow up, several times if needed, people are busy and forget easily
Connecting and getting a yes takes time, so begin this process 2-3 months in advance
I’ve found showing up, in person, and asking it’s likely to be a yes
Shifting gears from sorting footage, I pulled out my phone and layed on the bed in the back of my van to start hunting for tourism clients. Starting on Google with a simple search, “must do adventures near anchorage” I found a few lists that linked to touristy things to do. At first, wildlife tours seemed to pop up most, so I started to copy and paste a template pitch to every company that would be along our route via Instagram DM’s, but I really wanted to get on a float plane ride and see some glaciers. Eventually, I found a company and started to send a message, but… buzz, buzz, buzz, my phone was ringing.
“Hey! We landed a bit early. I am headed to grab my bags now. How far away are you?” Kristin asked.
“Not far, I’ll be there in 20 minutes.”
Our adventure was about to begin.
Looking out the window while on a bush plane flight in Alaska. Photograph by Dalton Johnson
Playing the Long Game
During our first week on the road, we did a multi-pitch rock climb, surfed the bore tide, went on several hikes, sought out waterfalls, and filmed everything along the way. Why? I’m playing the long game and investing in my future. What do I mean?
Kristin and I are both on this road trip to have fun, but it is also work. Alaska isn’t cheap and paying for the gas to drive the 3,200 miles home is going to hurt the bank account. Additionally, I don’t want this trip to end once I get back to California. So, I have to think about the long term and the sellability of most things we are doing. This means staging photo shoots, hiking to drastic landscapes to snap photographs that could sell as prints, finding wildlife, filming everything to make Youtube videos in the future, and taking notes in my journal at the end of everyday so I can reference them later for blogs like this.
Before coming to Alaska, I pitched over 150 companies the idea of an adventurous road trip around Alaska. By the numbers, roughly 15 responded asking for me details, two wanted to create something together after Alaska, and one said yes. Overall, I would say this is the standard response rate for outdoor content creation. That job I secured was a glacial kayaking trip on Portage Lake.
The budget was small, but that didn’t matter. We loaded up the van with two kayaks from Anchorage and made our way to Portage Lake to enjoy ourselves and create a couple pieces of content for Dermatone, a sunscreen company. The skies were a clear blue, unusual for Alaska, and we paddled on calm water for half a day to reach the glacier. Hooting and hollering to each other, Kristin and I splashed around, ate iceberg ice, and attempted taking in the glacier view. This single day of creating content would yield the start to the portfolio I had been hoping to build on this trip.
What was the best part of this day? Ending it with a charcuterie board and drinking tea with the back doors to the van open, allowing us to drink in the midnight sunset that occurs during the Alaskan Summers.
Sea kayaking in Halibut Cove, Alaska while on a van life road trip. Photograph by Dalton Johnson
How Long Does it Take to Land a Client? But wait, do you even need a client?
Returning the kayaks to Anchorage felt like a metaphor for a new beginning as we officially had no more clients to offset the costs of the trip. Meaning, it was time to bootstrap. Yes, I have money, but I am not made of money. This trip is an investment in my future, but I didn’t want to tap into my savings unless I had to. Which meant I needed to come up with a way to go for flightseeing tours, get on fishing boats, and see wildlife without it costing me my savings. So, I was back on social media hunting for clients, but that wasn’t going to be enough.
We had roughly three more weeks before summer would turn to fall, signaling it was time for Kristin and I to head home. With a burning desire to share rad experiences, we committed three full days at a cafe to shop ideas to potential companies. Thankfully, we had the time as we were fully committed to Alaska at this point. So, we drank our coffees and searched google for wildlife excursions, flightseeing tours, and unique stays – the van was getting stinky and a house would be nice – to refresh ourselves. However, on the third day, we had no responses, which is expected, so we loaded up the van and headed for Homer, Alaska to go on a week-long backpacking trip we had been planning.
We tossed our backpacking bags into a Mako’s Water Taxi and met our captain, Lance. A friendly soul who pulled out a map and genuinely wanted to learn about our trip, as well as share his local knowledge of the area. There seemed to be a recurring theme I had noticed during my Alaskan experience, everyone looked out for each other. Lance was a talker and loved to share anything you had an interest in. During the hour-long taxi across Kachemak Bay, Lance stopped several times for me to snap images of sea otters, told us about the history behind peak names, pointed out ski lines that we needed to come back for in the winter, and rerouted us to see a few whales.
Walking up the dock, we looked over our shoulders as Lance motored away. Then it hit, we had no quick way of getting back if something were to happen. Kristin and I wandered into the woods for our week of walking, getting scared by bears, getting soaked by the rain, finding a remote cabin with a sauna, attempting to summit peaks in high winds, and cooking a gifted salmon filet over a propane stove. Needless to say, this trip was what we were looking for out of our Alaskan Adventure. But, a week goes quick!
Kristin enjoying a hot tub during sunset in Alaska. Photograph by Dalton Johnson
Becoming VIP Guests
To our surprise, Lance picked us up. Sitting down inside the cabin of the Mulligan, his boat, Lance offered us a beer in exchange for stories. Laughing and smiling, we recapped our week in the woods, away from our computers, and our attempt to stay dry during the storm which rolled through.
Once back in Homer, Alaska, we checked our emails for the first time in a week. A couple of no’s and thankfully one email that read:
Hey Dalton!
Thank you for reaching out. We would love to hear more about your ideas. Can you hop on a call soon?
Best,
Beka
A maybe, yes! Excited to share this potential with Kristin, I quickly responded to the email to set up a call. Within 10 minutes, I was chatting with Beka and setting dates for us to visit in just a few days. Kristin was excited, she wanted a week of pampering after our last week in the woods. Turns out, we would have to stay in their only room available during our stay, the VIP cabin, which rents between $10-15,000 a night per person. Yup, if you did that mental math, that means it would have cost $20-30,000 a night for both Kristin and I to stay there. I don’t have that kind of money, but I do have the skill to create content for them. So, a few days later, Kristin and I were stepping off The Far Side and being escorted to our cabin.
Perfect light in halibut cove while on a van life road trip to Alaska. Photograph by Dalton Johnson
Conclusion:
With trips like this, you don’t know how the trip will end. Are you broke, or did you make out ahead? What I have come to realize is that it doesn’t totally matter. I went to Alaska to make a documentary about an athlete climbing Denali, then took a chance by spending all the money I had made into a personal trip adventuring Alaska’s Kenai Peninsula in my van. Yes, I did come back with a portfolio that I am happy to share, once I edit it. Yes, I did get to experience things I never thought would be possible, like staying at Stillpoint Lodge. And yes, I was given the opportunity to do it all with the love of my life. But, after five months on the road, I returned with terabytes of content to edit and $200 richer. Depending on your priorities, this might not be okay for you. For me, this was a good way to spend five months of my life.
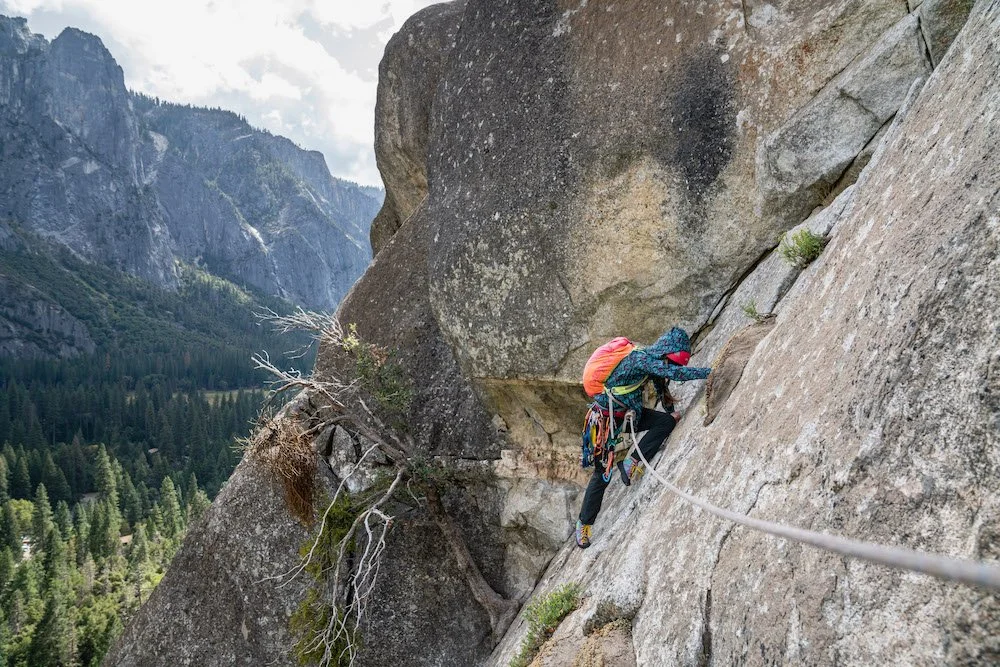
The Surprise 10a | Route Beta, Accessible Yosemite Rock Climb, Five Open Books
The rock climb The Surprise (5.10a) is a stellar first Yosemite Valley 10 rock climb. Why? Well, if you are looking to break into the 5.10 climbing in Yosemite Valley as one of your “To-Do’s” while you visit, this crack climb is perfect because you get a few warm up pitches to get your head screwed on. Then, you start up the final finger crack all the way to the top.
Taylor coming across the traverse pitch of The Surprise while rock climbing in Yosemite Valley. Photograph by Dalton Johnson
THE SURPRISE (5.10A)
The rock climb The Surprise (5.10a) is a stellar first Yosemite Valley 10 rock climb. Why? Well, if you are looking to break into the 5.10 climbing in Yosemite Valley as one of your “To-Do’s” while you visit, this crack climb is perfect because you get a few warm up pitches to get your head screwed on. Then, you start up the final finger crack all the way to the top.
Topping out The Surprise is an exciting time in a climbing career because you open the door to a new milestone in a rock climbing. The finger crack was really fun and what a surprise, hence the route’s name The Surprise, it is when the crack just disappears for a hot second and you make a few moves across some slab to a jug.
Taylor on the 5.8 hand crack before the money pitch of The Surprise. Photograph by Dalton Johnson
WHERE IS THE ROCK CLIMB SURPRISE LOCATED?
The Surprise is located on the Five Open Books
Who were the climbers who established The Surprise?
In 1965, Pete Spoecker & Steve Herrero established the first ascent of The Surprise
RECOMMENDED CLIMBING RACK:
Double cams .4 to 3 and one set of nuts, bring extra slings
HOW MANY PITCHES IS THE SURPRISE?
The Surprise can be done in 3 long pitches, but 5 are recommended
Pitch One of The Surprise: Climb a 5.6 corner up to tree anchor.
Pitch Two of The Surprise: Traverse 5.5 right and down to a flake/stem below the splitter. You can link P1 and P2 but committing for the follower as they pull out gear.
Pitch Three of The Surprise: Climb 5.8 face/stem and hand crack to a single bolt. I suggest linking P2 and P3 since this is a better spot to belay and less committing for the follower on the traverse.
Pitch Four of The Surprise: Excellent 5.10a tight hands/fingers splitter to a bouldery face move to a ledge and tree anchor.
Pitch Five of The Surprise: Starting left of the tree, climb 5.7 stem to 4th class to the top.
HOW LONG DOES IT TAKE TO CLIMB THE SURPRISE (INCLUDING THE APPROACH AND DESCENT)?
The Surprise will take 4-7 hours to climb from car to car for a new climber
The Surprise will take 2.5-5 hours to climb from car to car for a seasoned climber
What is the descent Route for The Surprise rock climb?
The descent takes about 15 minutes back to the base (not fun in climbing shoes). Walk west and a little down for a few hundred yards on a climbers’ trail until you reach the open slabs area. Continue west across the slabs to a 3rd/4th class descent trail. Consider rappelling this section when wet with one 60m rope (or 50m rope by staying a bit to the left at the bottom). Below the slabs, follow the trail east and downward along the base, then slightly back uphill to the last carabiner post at the start of Munginella. Reverse the approach.
OTHER Yosemite Rock CLIMBS CLOSE TO THE SURPRISE:
Discover more of Yosemite Valley
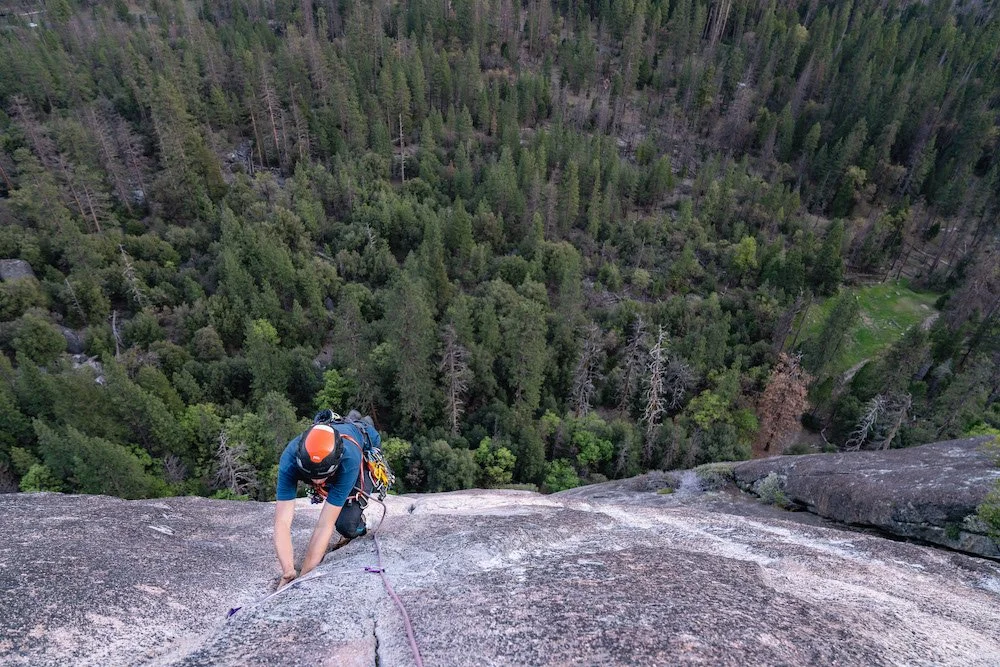
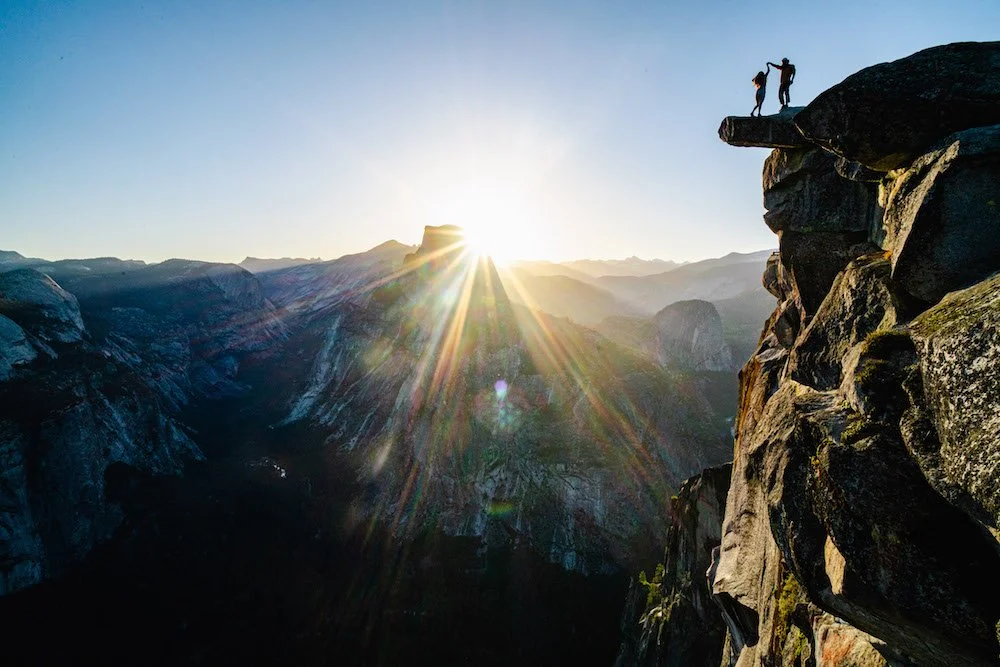

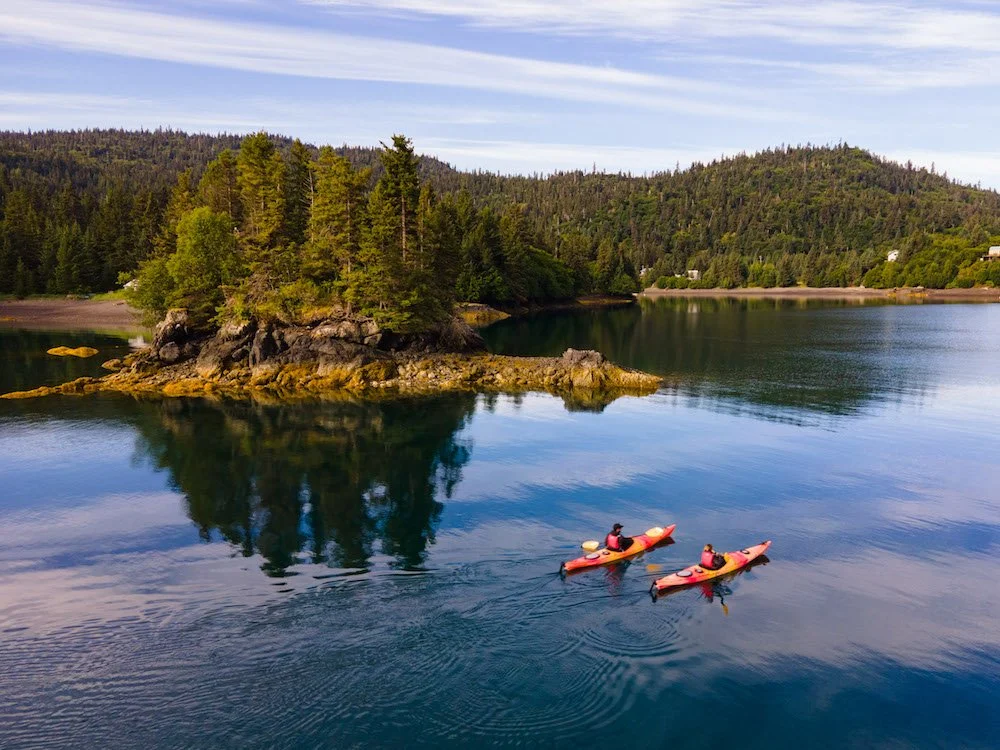
What To Do in Alaska During Summer
Going to Alaska during the summer is the best time to visit because the weather is great, the wild life is active, and the days are long. One of the first things you will notice when you arrive for summer in Alaska is the length of the days, which are 20-22 hours long. These long summer days give the time needed to explore the largest state. So, what should you do during a summer trip to Alaska?
Going to Alaska during the summer is the best time to visit because the weather is great, the wild life is active, and the days are long. One of the first things you will notice when you arrive for summer in Alaska is the length of the days, which are 20-22 hours long. These long summer days give the time needed to explore the largest state. So, what should you do during a summer trip to Alaska?
Alaska offers more activities than one can do in a lifetime, so trying several activities will be key to having a great trip to Alaska during the summer. Your options vary drastically based on your fitness level, however there will be something for everyone at all levels of fitness. I suggest you hike, go on wildlife tour, climb a mountain, see a glacier, and go kayaking while visiting Alaska in the summer.
Keep reading this article to discover your hiking option, wildlife viewing opportunities, how to itch your mountain climbing urges, where to see a glacier, and how to go kayaking during the Alaskan summer.
hiking to a swing with a waterfall view on the Kenai Peninsula in Alaska during the summer. Photograph by Dalton Johnson
Hiking During the Alaskan Summer
Alaska's vast and pristine landscapes beckon adventurers to embrace the untamed allure of its wilderness, especially during the enchanting summer months. The remoteness and sparse population of the state contribute to a hiking experience that is truly unparalleled, setting Alaska apart from the more trail-laden terrains found in the lower 48.
In the lower 48, hiking often follows established trail systems, providing convenient paths for enthusiasts to traverse. However, Alaska defies such norms. With its rugged terrains and well-protected lands, the Last Frontier offers a unique freedom to explore the wilderness, allowing hikers to chart their own course. Once the snow retreats in the summer, a vast expanse of open land becomes a canvas for adventure.
Alaska's distinctive hiking culture encourages a primal connection with the environment. There's no need to meticulously plan routes or adhere to designated trails. Instead, visitors are encouraged to tap into their instinctual wanderlust and embark on a journey where the path unfolds with every step. It's a liberating experience that beckons hikers to discover hidden gems and scenic vistas off the beaten track.
For those venturing into the wild for the first time, the prospect of choosing a starting point might seem daunting. The truth is, there's no need to overthink it. Simply step outside, breathe in the crisp Alaskan air, and let the vastness of the landscape guide your exploration. Whether you're on the iconic Kenai Peninsula or amidst the rugged terrains of Denali, each step is an opportunity to discover the untouched beauty that defines Alaska.
However, a word of caution resonates through the wild: be prepared. Alaska's wilderness is as unforgiving as it is captivating. As you set out on your expedition, ensure you carry essentials like bear spray—your steadfast companion in the presence of Alaska's majestic wildlife. While the prospect of wandering into the unknown is exhilarating, safety should always be a priority.
So, embrace the spirit of the Alaskan summer, where every hike is a journey into the heart of true wilderness. Allow the rugged landscapes to guide your footsteps, and let the untamed beauty of Alaska captivate your adventurous spirit. After all, in the Last Frontier, the best hikes are the ones where you simply let the wilderness be your guide.
A whale tail splashing in the Kenai Fjords during the summer in Alaska. Photograph by Dalton Johnson
Viewing Alaskan Wildlife During Summer
As the brief Alaskan summer emerges, it orchestrates a symphony of natural events that beckon both seasoned adventurers and curious travelers. This fleeting season, spanning mid-May to mid-July, becomes a crucial period for wildlife in the Last Frontier. Against the backdrop of blooming berries, surging salmon, and relatively "warm" waters, Alaska's inhabitants engage in a race against time, fervently consuming resources to fortify themselves for the impending winter.
Understanding the urgency of this seasonal feast provides visitors with a unique opportunity to witness Alaska's diverse wildlife in action. The rugged landscapes become a stage for a remarkable display of survival instincts and natural rhythms, making wildlife viewing a quintessential experience during an Alaskan summer sojourn.
With the brevity of the summer season, animals diligently seize the chance to replenish the pounds shed during the harsh winter months. The lush vegetation and teeming waterways become a banquet, attracting a myriad of creatures, from majestic bears to agile otters and playful dolphins.
For those seeking to partake in this extraordinary spectacle, there are two primary avenues: guided tours or independent exploration. Opting for a guided tour ensures not only safety but also insider knowledge from experienced guides who know where to find the best wildlife viewing opportunities. Many reputable services operate in key wildlife hotspots, providing a seamless and enriching experience.
Alternatively, the adventurous spirit may choose to blaze their own trail, armed with research and a keen sense of adventure. While this option allows for a more personalized experience, it comes with the responsibility of ensuring safety in the unpredictable wilderness.
Among the recommended experiences, a sea tour stands out as an immersive way to witness Alaska's marine and coastal wildlife. Aboard these excursions, participants may marvel at the grandeur of breaching whales, the charming antics of sea otters, the acrobatics of dolphins, and the comical flights of puffins. The vastness of the ocean becomes a canvas for nature's spectacle, an experience often difficult to replicate independently, especially for those without access to a boat.
Reflecting on personal experiences, the yearning for a bear viewing tour surfaces, a sentiment shared by many visitors. While glimpsing a grizzly bear from a distance provides a taste of the wild, a dedicated bear viewing tour can offer an intimate encounter with these majestic creatures, allowing for a deeper connection with the untamed beauty of Alaska.
In essence, exploring Alaska's wildlife during the summer is an invitation to witness the dance of nature, a symphony of survival and abundance that paints the Last Frontier in hues of wonder and awe. Whether guided or independent, on land or at sea, the opportunity to observe Alaska's wildlife in their natural habitat is an indelible part of the Alaskan summer narrative, an experience that resonates long after the season fades into the crisp embrace of approaching winter.
Climb a Mountain in Alaska During Summer
Alaska, a realm of towering peaks and untamed wilderness, invites intrepid souls to embark on a summer adventure that transcends the ordinary—the challenging yet exhilarating pursuit of mountain climbing. At the forefront of this lofty endeavor stands Denali, a colossus that proudly claims the title of the highest summit in North America and a member of the esteemed 7 Summits, a collection of the tallest peaks on each continent. Often mentioned in the same breath as Everest, Denali presents an unparalleled mountaineering challenge, and for those seeking the pinnacle of summer mountain objectives, this iconic peak beckons.
Strapping on your boots becomes a symbolic initiation into a realm where the air is thin, the vistas are breathtaking, and the journey unfolds over a span of 15 to 20 intense days. Climbing Denali is not merely a physical feat; it's a profound journey of endurance, resilience, and connection with the raw beauty of the Alaskan wilderness. The ascent requires meticulous planning, skillful navigation through unpredictable weather, and a tenacious spirit to conquer the formidable challenges that Denali presents.
For a glimpse into the realities of scaling Denali, one can delve into personal stories, each narrative woven with triumphs, setbacks, and the indomitable human spirit striving to touch the sky. These tales encapsulate the essence of Alaskan mountaineering and offer a vicarious experience for those who dare to dream of conquering the towering giant.
However, recognizing that Denali's mighty summit may be a goal for the most seasoned climbers, there are alternative summits on the Kenai Peninsula that beckon to those seeking awe-inspiring vistas and a taste of mountaineering glory. The Kenai Peninsula, adorned with climbable mountains, offers a more approachable yet equally gratifying experience. As you ascend these peaks, panoramic views of the Harding Icefield and the vast expanse of the ocean unfold, creating a sensory tapestry that captures the essence of Alaska's untamed beauty.
Here, the mountains become both a challenge and a reward, providing a sense of accomplishment as you stand atop their summits, surrounded by the rugged landscapes that define the Alaskan wilderness. The Kenai Peninsula's climbable peaks serve as gateways to the extraordinary, offering a glimpse into the heart of Alaska's grandeur without the prolonged commitment required for Denali.
In essence, climbing a mountain in Alaska during the summer transcends a mere physical feat—it becomes a transformative journey, an intimate dance with the elements, and an opportunity to touch the sky in a land where mountains stand as timeless sentinels, silently witnessing the bold spirit of those who dare to ascend.
Kayaking to Portage Glacier is a splendid way of seeing a glacier in Alaska. Photograph by Dalton Johnson
How to See a Glacier While in Alaska During the Summer
In the rugged expanse of Alaska's wilderness, where nature's grandeur takes center stage, the allure of glaciers stands as a testament to the Earth's ancient and awe-inspiring legacy. With 664 named glaciers and countless more unnamed, this pristine landscape offers a canvas upon which these frozen giants etch their majestic tales. Experiencing a glacier in Alaska during the summer is not just a sightseeing adventure; it's an encounter with a dynamic force of nature, a frozen river in perpetual motion, forever changing and evolving.
The sheer scale and majesty of Alaska's glaciers redefine one's perspective on the planet. Whether it's your first encounter or you're adding to a repertoire of glacier experiences, each sighting leaves an indelible mark on the soul. Witnessing the monumental ice fields, sometimes referred to as frozen rivers, imparts a profound appreciation for the forces that have sculpted and shaped these colossal formations over millennia.
During the Alaskan summer, a variety of options unfold for those eager to commune with glaciers. One of the most exhilarating choices is glacial flightseeing. Soar above the Alaskan landscape in a small aircraft, and marvel at the expansive sheets of ice beneath you. Glacial flightseeing provides a panoramic perspective that showcases the vastness and intricate details of these frozen wonders, revealing crevasses, seracs, and the timeless beauty of glacial landscapes.
For those who prefer to ground themselves in the midst of this frozen splendor, glacier hiking presents an intimate and immersive experience. The Kenai Peninsula, in particular, offers opportunities to lace up your boots and embark on a journey that leads to the very feet of these ancient ice masses. Guided glacier hikes provide insights into the geology, history, and ecology of the glaciers, transforming each step into a narrative of the Earth's enduring legacy.
Alternatively, the cool embrace of an ocean breeze and the rhythmic dance of the waves set the stage for glacial encounters through ocean cruises. Sail along the Alaskan coastline, where glaciers cascade into the sea, creating a dynamic spectacle that reverberates with the echoes of nature's grandeur. The juxtaposition of icy blue against the ocean's depths is a visual symphony that captivates the senses.
For those seeking a more hands-on approach, kayaking to a glacier offers an intimate connection with the glacial environment. Paddle through serene waters, navigating among icebergs and witnessing the towering glacier face from the unique vantage point of the sea. The rhythmic paddling becomes a harmonious dance with nature, providing an experience that is both invigorating and humbling.
In Alaska's summer, the options to witness glaciers are as diverse as the glaciers themselves. Whether soaring above in a small aircraft, hiking to their icy toes, cruising along the coastline, or paddling through glacial waters, each avenue unveils a unique facet of these frozen wonders. Whichever option you choose, rest assured that the encounter with an Alaskan glacier is not just a visual spectacle; it's an immersion into the timeless beauty of a world shaped by the relentless dance of ice and time.
Go Kayaking During the Summer in Alaska
As summer unfolds its vibrant tapestry across Alaska, a symphony of kayaking opportunities emerges, transforming the Last Frontier into a haven for paddlers seeking diverse and unparalleled experiences. What sets Alaska apart as a kayaking paradise is the harmonious blend of flat-water, ocean, and white-water kayaking, a trifecta rarely found in a single destination. This convergence creates a kayaking utopia, offering enthusiasts a spectrum of aquatic wonders to explore.
Flat-Water Kayaking: Embark on tranquil waters that mirror the surrounding beauty of the Alaskan landscape. Whether gliding through serene lakes or meandering down gentle rivers, flat-water kayaking provides a peaceful immersion into the pristine wilderness. The stillness of the water allows for contemplative moments, where the majestic scenery unfolds at a leisurely pace.
Ocean Kayaking: Alaska's extensive coastline becomes a playground for ocean kayakers, where the rhythmic ebb and flow of the tides accompany each paddle stroke. Explore hidden coves, navigate through archipelagos, and witness the untamed beauty of the open sea. The ocean kayaking experience in Alaska offers encounters with diverse marine life, from playful otters to majestic whales, creating a dynamic and awe-inspiring journey.
White-Water Kayaking: For those seeking an adrenaline-fueled adventure, Alaska's rivers present exhilarating white-water kayaking opportunities. Rushing through narrow canyons and navigating tumultuous rapids, kayakers can feel the pulse of nature's raw energy. The challenge and thrill of white-water kayaking in Alaska add an electrifying dimension to the summer paddling experience.
Glacial Kayaking: A crowning jewel of kayaking in Alaska during the summer lies in the unique access to glaciers. Paddling through pristine waters, kayakers can approach iconic glaciers such as Portage Glacier and Grewingk Glacier. These frozen giants become a backdrop to the kayaking journey, offering an unmatched panorama of icy grandeur. Witnessing the distant calving of a glacier into the water is an awe-inspiring spectacle, a reminder of the ever-changing dynamics of Alaska's glacial landscapes.
The accessibility of glacial kayaking adds a distinctive layer to the Alaskan paddling experience. Navigating through glacial waters, surrounded by towering ice walls and floating icebergs, creates a sense of communion with the forces that shape the wilderness. The juxtaposition of the kayak against the colossal backdrop of a glacier is a visual testament to the indomitable spirit of exploration that defines Alaska's summers.
In essence, kayaking in Alaska during the summer is not merely a recreational activity; it's a voyage into the heart of a pristine wilderness, where every paddle stroke unveils a new facet of nature's grandeur. Whether seeking tranquility on flat waters, embracing the challenges of white-water rapids, or marveling at the majesty of glaciers, the Alaskan kayaking experience transcends the ordinary, offering a liquid pathway to unforgettable adventures.
Roped together we begin our 15 day journey to summit Denali. Photograph by Dalton Johnson
So there you have it! When you visit Alaska this summer you now know where your hiking options are, what kind of wildlife viewing opportunities are out there, how to itch your mountain climbing urges, where to see a glacier (maybe even an ice-cave), and how to go kayaking during the Alaskan summer. Thank you for reading and make sure to leave a comment below with any additional thoughts about what to do during the Alaskan summer.
Discover More of Alaska


Hiking Cook's Meadow Loop in Yosemite Valley
The best time of day to hike Cook’s Meadow Loop is late morning into the afternoon. During sunrise and sunset, Yosemite Falls is in the shade, so to have the best view of Yosemite Falls in full light, hike the Cook’s Meadow Loop around 9 or 10am.

Yosemite Falls from Cook's Meadow Loop. Photograph by Dalton Johnson
Cook’s Mead Loop Overview:
Distance: 1 mile
Difficulty: Easy
Average time to hike: 1 to 2 hours stopping for views
What do you see while: Yosemite Falls, Half Dome, Merced River, Sentinel Peak
Where the cook meadows loop?
Cook Meadows is located in the heart of Yosemite Valley with splendid views of Yosemite Falls.
Click here for directions to Cook Meadow
Best Season to Hike Cook Meadow:
The best seasons to enjoy this hike around Cook Meadow is during the spring season. During the spring months, the snow melts and creates a small flood filling the pond centered in Cook Meadow creating a breathtaking reflection of Yosemite Falls.
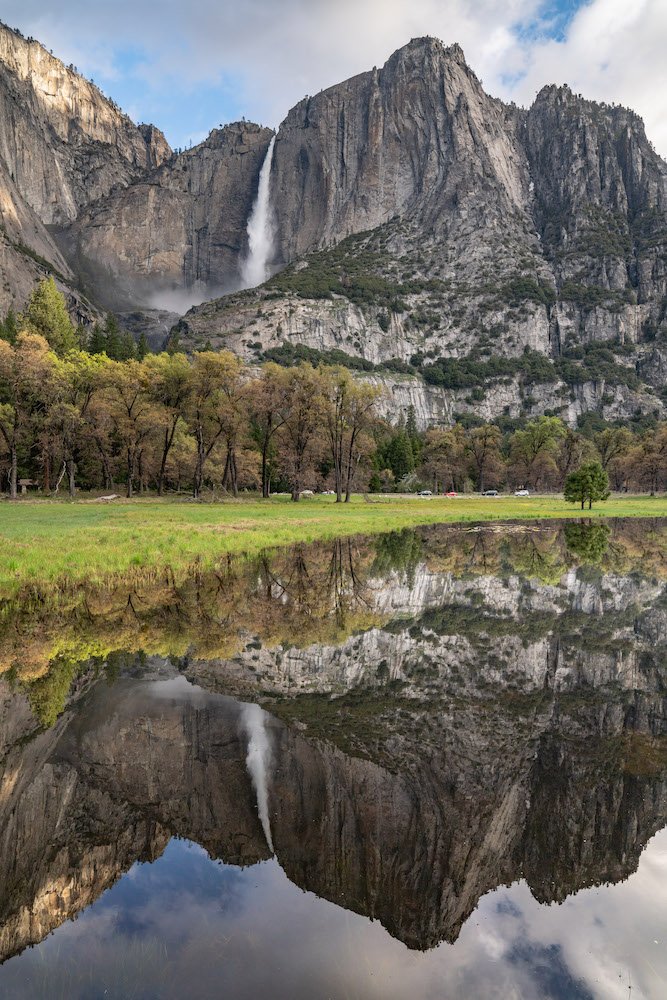
Yosemite Falls reflected in a seasonal pond while hiking Cook's Meadow Loop in Yosemite Valley. Photograph by Dalton Johnson
What can you see while hiking cook’s Meadow Loop?
During high snow years, Yosemite Valley floods creating pools of water that often reflect Yosemite Falls. While you hike the Valley Loop trail into Cook Meadow, this reflection will leave you breathless.
If you are facing Yosemite Falls, look over your right shoulder and Half Dome will be peaking out just above the treeline.
Across the Merced River, in the opposite direction from Yosemite Falls, Sentinel Peak will be standing tall.
How long is the hike to Cook Meadow Pond?
You can access this seasonal pond in Cook Meadow several different ways, but the hike, regardless of where you park, should not take more than 30 minutes. With that said, most people hiking Cook’s Meadow Loop often stop to take in the magnificent views.
The hike is 1 mile long, flat, and paved path circling Cook’s Meadow. This loop is wheel chair accessible.
The best Time of Day to hike cook’s meadow loop:
The best time of day to hike Cook’s Meadow Loop is late morning into the afternoon. During sunrise and sunset, Yosemite Falls is in the shade, so to have the best view of Yosemite Falls in full light, hike the Cook’s Meadow Loop around 9 or 10am.
What makes hiking Cook’s Meadow loop special?
Yosemite National Park is a national icon that attracts a record number of tourists annually. Luckily, most tourists enjoy their morning cup of coffee, warm shower, and time with a significant other. If you are chasing the sights, skip the shower, convince your partner to join you, and hike with your coffee to see the beautiful reflections that are abundant during a flood year in the late spring of Yosemite Valley. Most likely, you will only see a few others who brave the morning chill.
Discover More in Yosemite Valley

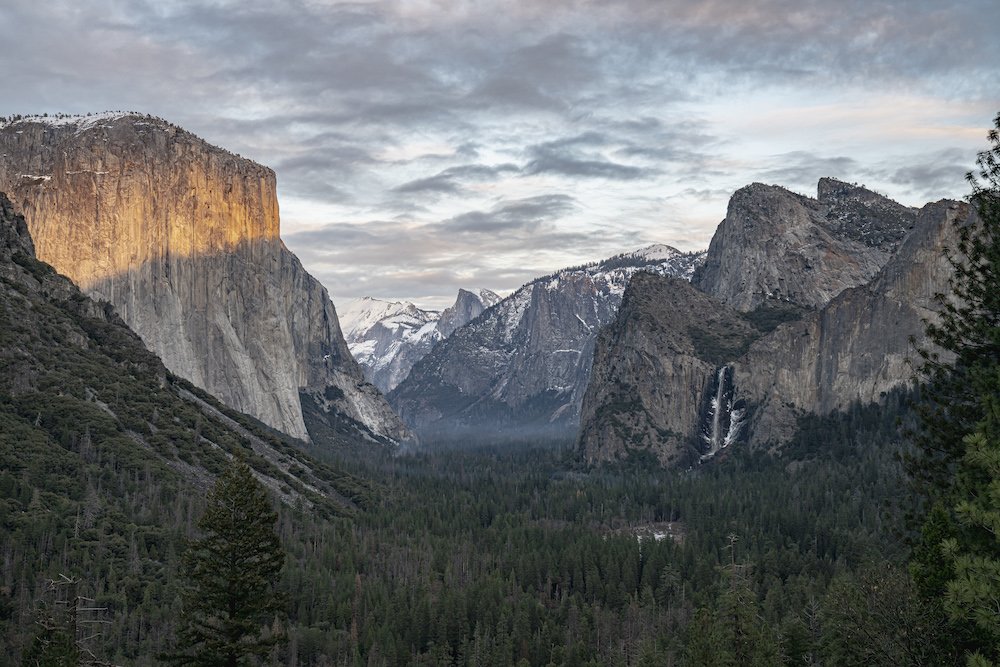
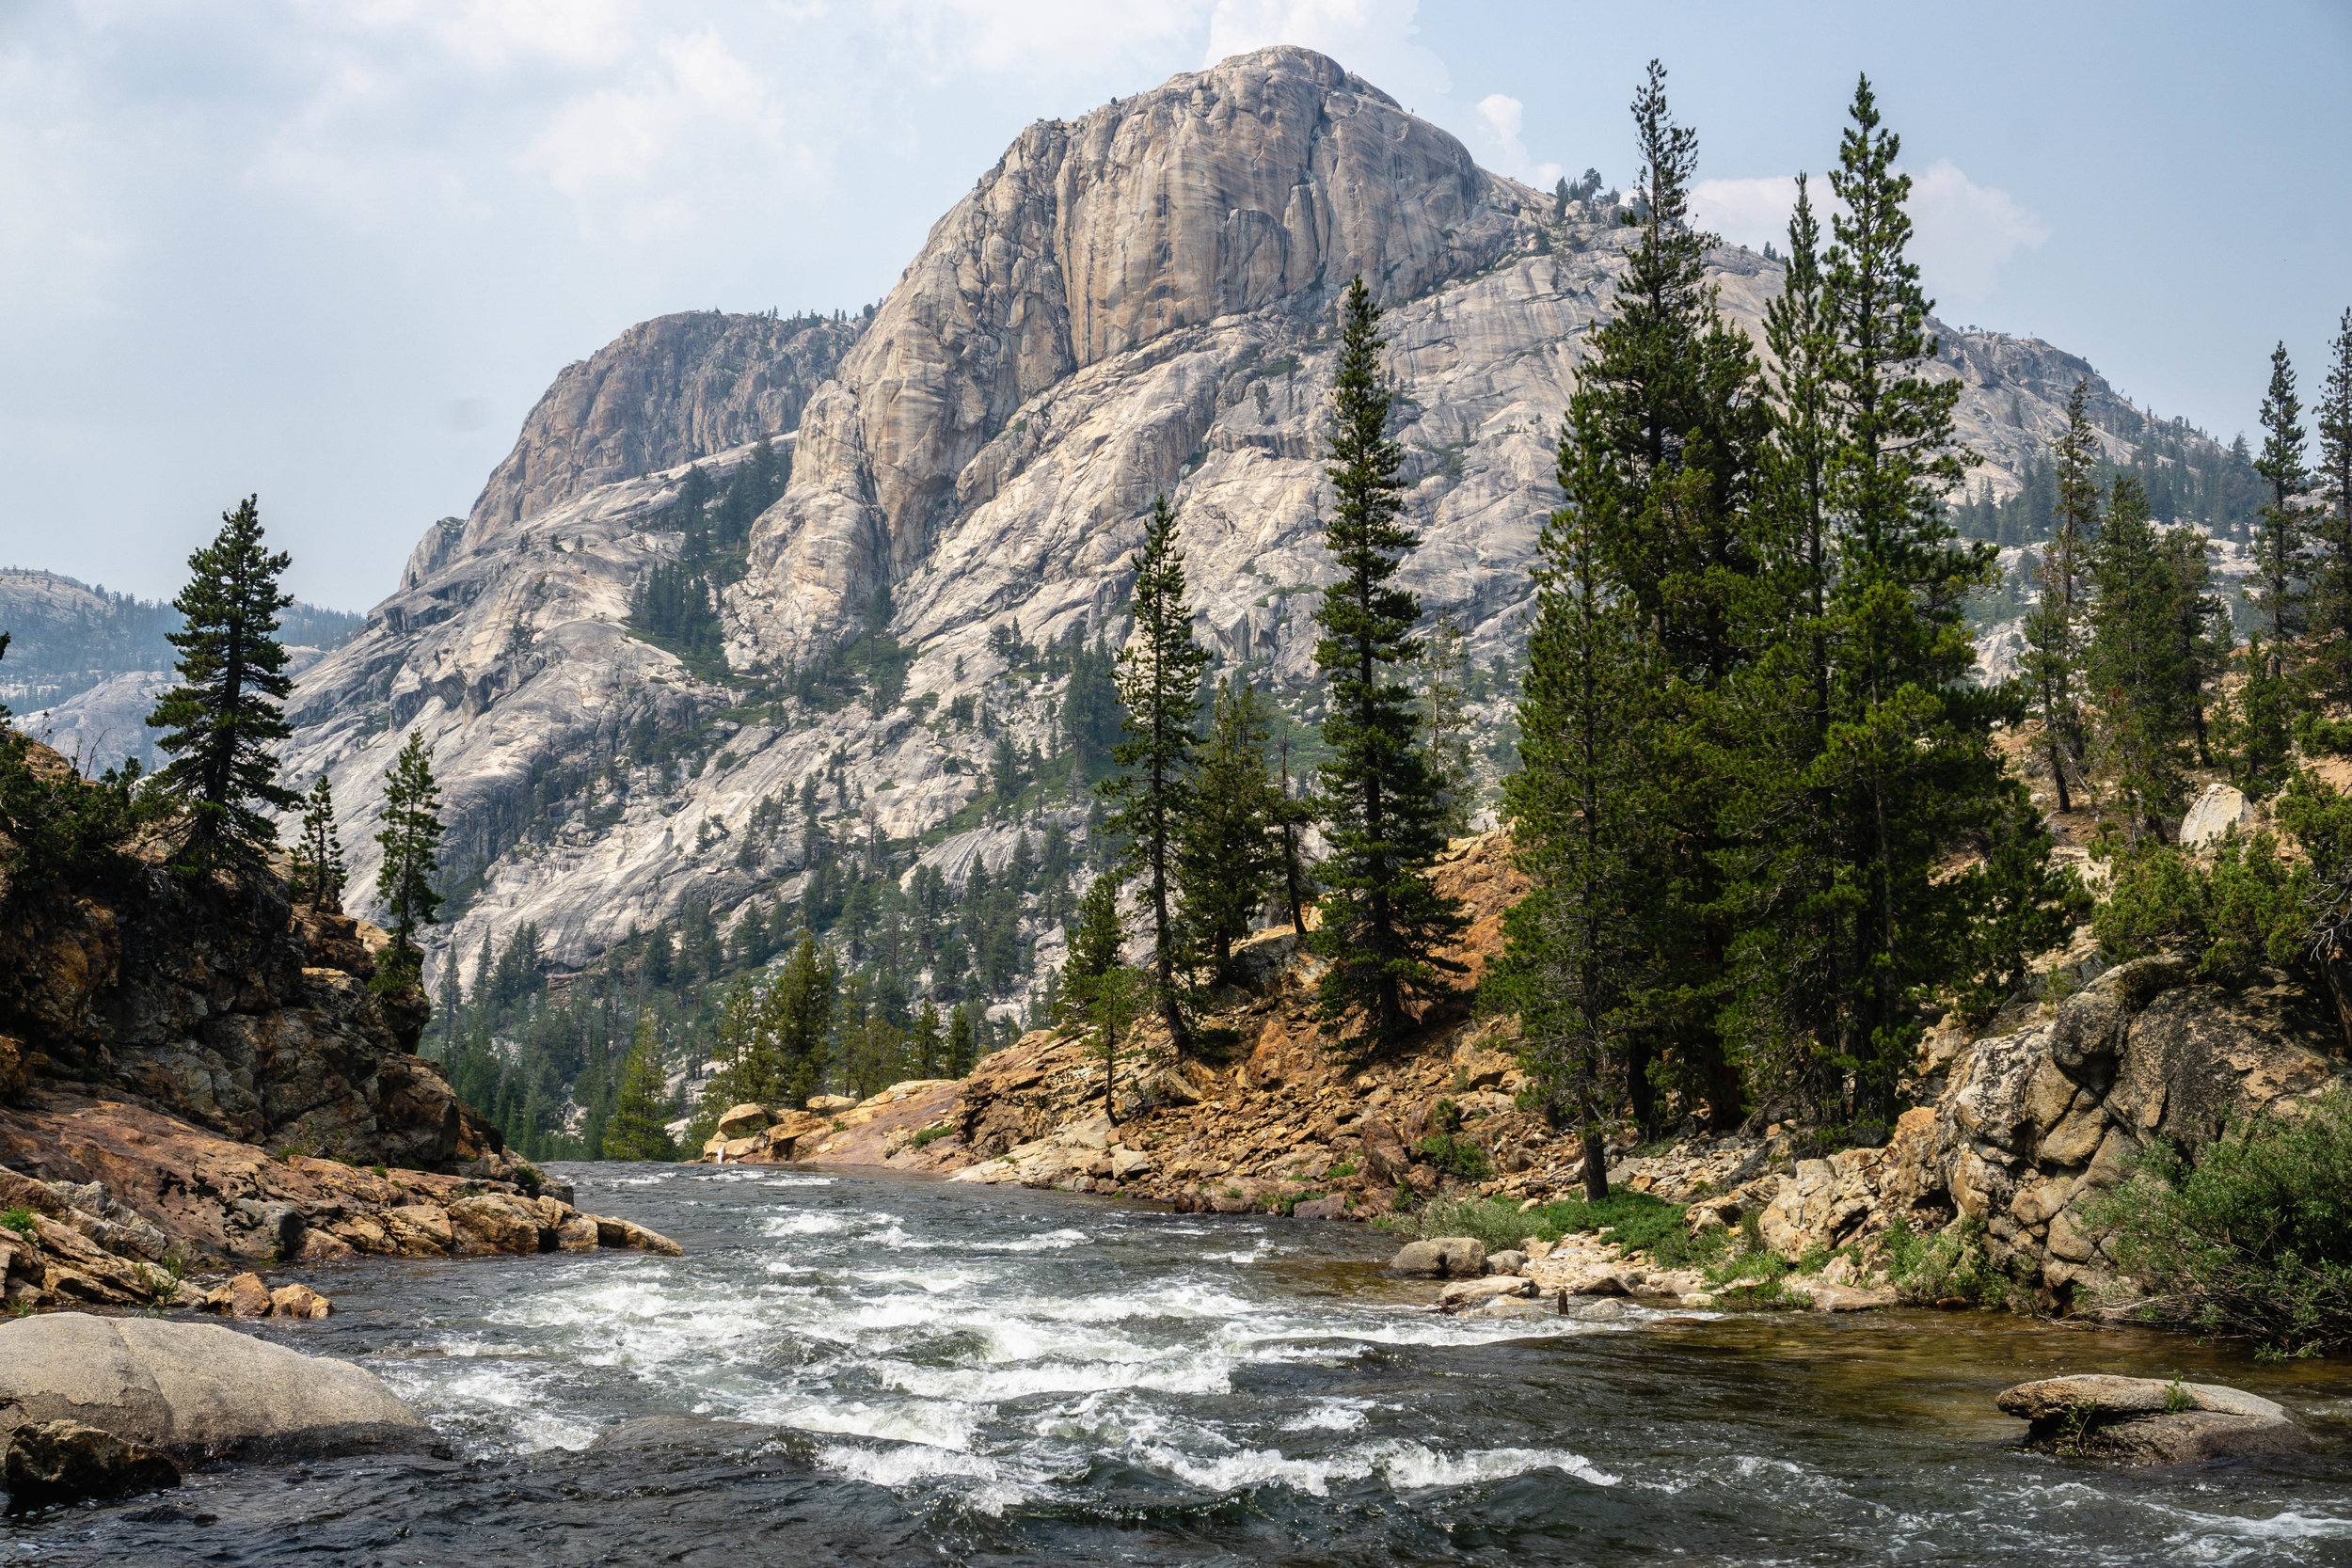

Bikepacking Freel Peak to Mount Whitney | Day 2
Five years have passed since my last cycle tour, it was new again. Pavement moved under me as I zipped downhill. Wind froze my hands. Trees and a river whipped passed at 15 miles an hour. Freedom, smiles, energy pumping through my body I have not felt in years. I’m where I am supposed to be.
Waking up on top of Freel Peak, I wanted to watch the sunrise, but altitude sickness got me. After throwing up about five times, I headed down from the summit of Freel Peak, the tallest peak in Lake Tahoe, to my van at the trail head. After lumbering back to the van I got on my bicycle and began the bikepacking section of the Freel Peak to Mount Whitney Challenge.
Bikepacking in California from Lake Tahoe to Mount Whitney. This article covers the second day of a five day bikepacking ride from Freel Peak to Mount Whitney. Additionally, this blog dives into the essential bikepacking gear and definition of bikepacking for a beginner looking to begin their first ride.
Since this trip is supported (by the lovely Kristin Riegel in the van), I was able to cycle 52 miles and climb Monitor Pass on my bicycle. As this was the first day of cycling on this trip, my legs and butt where not used to the saddle. Towards the end of the day, I became very tired.
From the Journal
Rushing out of my tent before the sun had risen, I projectile vomited, then again, and again. My hands on my knees, I stand, wipe my mouth, and go back to my sleeping bag for the warmth I didn’t get all night.
My plan was to enjoy a slow morning, capture some content at sunrise, then head down to my bicycle to start the bicycle touring section of the trip.
That didn’t happen.
Instead, I vomited another time, stuffed my backpack as quickly as possible, and began walking back to the van defeated. Was this trip going to be done before it even started? I thought to myself as I lumbered down from the summit.
“What could be the reason for this sickness?” I asked myself, confused and curious.
Nothing
Three miserable hours later, I was back at the van and met up with Kristin. Coffee, some breakfast, and settling on the idea of altitude sickness, I couldn’t give up. Bike packing from Freel Peak to Mount Whitney was my idea, my vacation, I had turned down jobs to do this, and I wanted to push myself. Sitting there in the van, misable, I continually thought to myself what I could do to make my life better. There was nothing. I just needed to suck it up and get on my way.
Two hours passed while I sat roadside in the van, working up my courage. I packed my bike. Exhausted, I focused on a mental shift and set off into the relative unknown, swooshing down Luther Pass headed towards Monitor Pass.
Five years have passed since my last cycle tour, it was new again. Pavement moved under me as I zipped downhill. Wind froze my hands. Trees and a river whipped passed at 15 miles an hour. Freedom, smiles, energy pumping through my body I have not felt in years. I’m where I am supposed to be.
Quickly, I realized the level of attention I needed to regain as I missed my first turn. Cars passed me and I was getting distracted. All I wanted to do was cycle in the middle of the road without hands and feel the wind in my face, but I needed focus. There wasn’t cellphone service on the road, so I had to read signs. I forgot to download Google maps for offline viewing. Collecting my head, I found the correct turn and met some uphill. My legs were not happy.
The good news about an uphill, the downhill. Clocking in at 35 miles per hour, I passed Markleeville and started to see signs for Monitor Pass, a 3,000 foot climb that I was hoping to tackle today.
Then… my chain fell off my bike.
Not a big deal, but I am sure happy the chain fell off when it did. I came to a quick stop, pulled off, and got the chain back in working order. Nothing was wrong with it, just a slip while shifting. I am not the smoothest shifter. With everything back in working order, I turned legft and befgan my journey of climbing Monitor Pass.
I cursed. I sang. I succeeded in not pushing my bike up the hill. I danced at the summit.
As my body began to bonk from a lack of calories, I scarfed down some food. A sandwich. Then, hopped back on my bike and started the downhill section. Speeding past signs reading “curve ahead 25MPH” I am a daredevil. Leaning into the curves as if I was in a full leather suit on a motorcycle, I took each bend like a champ. Risking my skin to the asphalt. Looking down at my watch, I was zipping past these turns between 35-38mph. I was estatic.
4:30pm hit. Soon, Kristin would pick me up. My watch read 37 miles on the day, I wanted to get to 40. My ego wanted to be able to say I rode 40 miles, my body didn’t. My butt didn’t. But, I pushed on to feed my ego.
4:56pm my phone buzzed, “I’ll be a bit late,” Kristin said. So, I checked her location and my watch, she was roughly 50 minutes away. Could I make 50 miles before she arrived?
Turns out, I made it 52 miles.
Kristin and the sun are insync. She arrived as the light faded from the sky and the darkness set in.
Loading my bike into the van, I moaned and growned; my body hurt. Good thing a hot spring was in my near future :-)
Enjoying the view while bikepacking around New Zealand’s South Island.
What is Bike packing:
Bikepacking is a new style of travel within adventure cycle-touring or expedition touring that involves exploring remote regions of the world on sturdy bicycles designed for the purpose. Off-road adventure cycling with lightweight gear, and often a rackless system, is now known as bikepacking. Bikepacking is not a new phenomenon though, as lightweight, soft-luggage touring has been in use for well over a century.
If you are still confused on what Bikepacking is, here is the definition created by Bikepacking.com: “Simply put, bikepacking is the synthesis of all-terrain cycling and self-supported backpacking. It evokes the freedom of multi-day backcountry hiking and travel off the beaten path, but with the range and thrill of riding a nimble bicycle. It’s about venturing further into places less traveled, both near and far, via singletrack trails, gravel, and forgotten dirt roads, carrying the essential gear, and not much more.”
Bikepacking vs Cycle-touring
There are many definitions of what bikepacking is and what your bike set up should look like. Because of this you will often find the water is muddied between cycle-touring and bikepacking, however there is an obvious difference; what is your bike capable of doing. If you can go off paved roads, maybe down single track, you have a bikepacking set up. If you are restricted to cycling on the road, you are cycle-touring.
Bike packing Essentials:
When you go Bikepacking the goal, at least for myself, is to bring as little as possible to rekindle the connection I have with mother nature, without sacrificing, too much, comfort. This balance between to much gear and not enough is a serious issue, but it shouldn’t be if you plan well. Why? Well, you never want your bike to be too heavy, but you also don’t want to freeze/go hungry, so do your research and find that middle ground. Here are some of the bikpacking essentials I suggest you always consider bringing with you:
Going very light on a supported bikepacking trip.
Bicycle
Bike bags
Tent
Sleeping bag
Cooking
Warm Jacket
Rain Gear
Coffee
Bikeshorts
Water Purifier
Sleeping pad
Discover other BikePacking Adventures


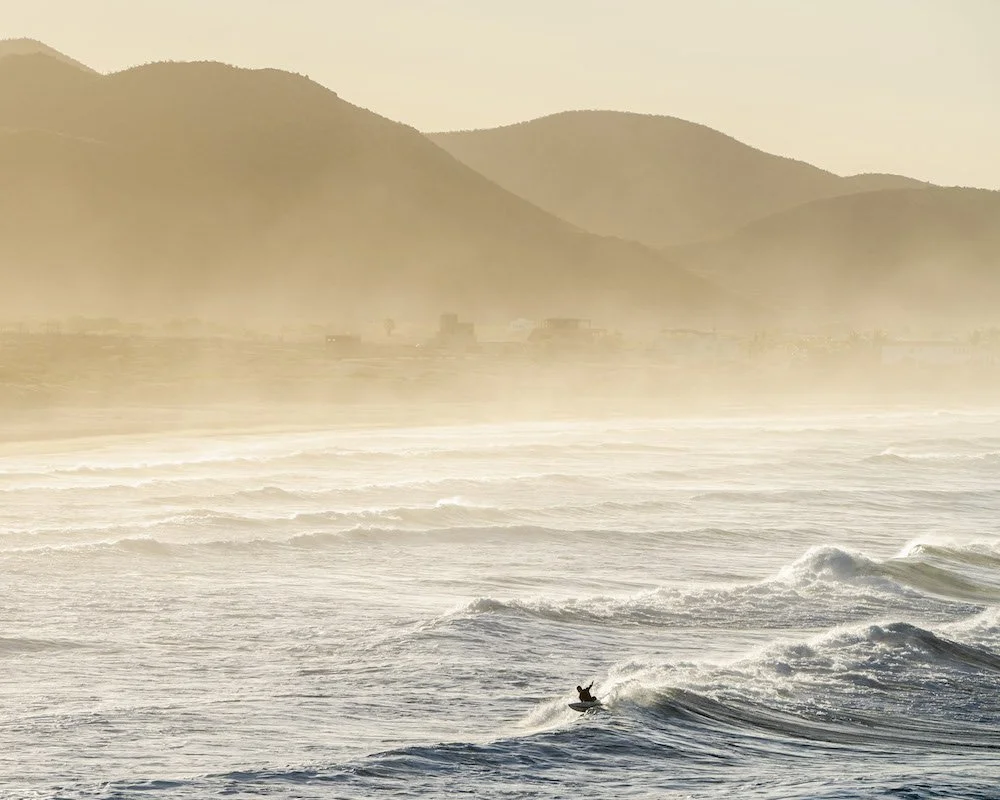
Best Surf Spots in Baja California Mexico
Baja California has been a surfing hub since the 1940s, where both the northern and southern tips of the 1000 mile peninsula offer incredible right-hand swells and barreling beach breaks. And the best bit? Despite worldwide recognition, lineups still remain beautifully empty. So, whether you’re new to surfing or a wave-riding veteran, here’s where you should be heading for the best surf breaks in Baja California Mexico.
Baja California has been a surfing hub since the 1940s, where both the northern and southern tips of the 1000 mile peninsula offer incredible right-hand swells and barreling beach breaks. And the best bit? Despite worldwide recognition, lineups still remain beautifully empty. So, whether you’re new to surfing or a wave-riding veteran, here’s where you should be heading for the best surf breaks in Baja California Mexico.
In this blog, I take on the challenge of sharing the best breaks in both Baja Norte and Baja Sur. Overall, there are 11 breaks outlined in this article. Now, there are several more breaks throughout the Baja Peninsula, but these are the best breaks that I have surfed while in Baja. The goal here is to share some of needed formation for you to visit and surf waves while down in Baja.
Read on to discover the best surf spots in all of Baja.
A surfer sitting alone on a big wave while surfing in Baja, Mexico at a secluded break. Photograph by Dalton Johnson
Best Surfing in Baja Norte:
Baja California Norte may not have the glamour and glitz of the south, but it has something even better: uncrowded lineups, year-round surf and the biggest waves on the peninsula. Remote beaches, fast point breaks and epic reef breaks make northern Baja the perfect spot for intermediate to experienced surfers. The water here can be pretty chilly all year round and facilities limited, so you’ll need to come prepared with your own wetsuit, board and, in some cases, camping gear. Here are the best surf spots of Baja Norte:
Baja Malibú
Known for constant beach breaks and some of the biggest waves along the peninsula, Baja Malibu beach is the first popular surfing hotspot once you cross the border. Located in Rosarito just 18 miles south of the US-Mexico border, Baja Malibu is a quick day trip from San Diego. When all the elements line up, the beach is known as a world-class surfing spot for intermediate and advanced surfers. Winter months are when the waves really shine with huge barrels thanks to northwest swells. Summer months can see decent, albeit inconsistent, beach breaks. Most surfers bypass Baja Malibu for the classic Baja spots like K38, La Fonda and San Miguel 30 minutes south meaning the water is never overly crowded and there is always room in the lineup.
K-38
This famous cluster of excellent surf breaks is known as K-38 because it is located at Kilometer 38 of the Baja Highway 1. January is the best month for K-38 where according to the Surf Forecast about half of the time the waves hold up well for longer rides in prevailing cross-offshore, offshore or light wind conditions. That said, the exposed reef break produces surf-able waves year round. Because K-38 is famous for its consistent, high-quality waves, the beach is known to get packed during weekends. A midweek Baja surf trip is ideal if you don’t want to fight for waves.
One downfall is the rocky surfaces. Booties to protect feet from rocks, reef and sea urchins are always a good idea. Also, try to find secure parking at a hotel or paid parking lot with a security guard. The area is known for break-ins and vehicle theft.
Rosarito
With a long stretch of varied beach breaks, Rosarito is a great option if you want surf suitable for all levels. The biggest waves – which will keep even the experienced surfer entertained – break at the south end of the bay, but there are also some fun beginner waves on the north side. In the summer, Rosarito is one of Northern Baja’s most popular tourist beaches. This means that, whilst you may not have the place to yourself, there’ll be a lively nightlife scene and plenty of board shops, restaurants and places to stay nearby.
San Miguel
For those brave enough to take it on, San Miguel offers some of the best right-hand point breaks in Mexico. Waves here are consistently fast and break over a reef, so should only be tackled by experienced surfers. Despite its difficulty – or maybe because of it – San Miguel sees a lot of surfers, particularly during July and August. However, compared to lineups in US waters, this is still relatively quiet. Please note there is no board rental here and only a very basic campsite, so come prepared and stock up on supplies from the nearest town, Ensenada.
Isla Todos Santos
Directions to Isla Todos Santos
Swell Report for Isla Todos Santos
Not to be confused with the town of Todos Santos at the southern tip of Baja, Isla Todos Santos is an island 10 miles off the coast of Ensenada. Waves here are not for the casual surfer. The break—known as Killers—produces some of the most powerful waves in the world. Waves in the area can reach a potential of 50-foot faces. Strong currents, rocks and huge waves make the water unsuitable for anyone but the most experienced big wave riders. The infamous point-break can only be accessed by boat.
The best time to surf Todos Santos’ Killers is early in the morning from November through March. Even if you are not a big wave surfer, hopping a charter boat from Ensenada to watch surfers battle the big waves is a great way to spend a day.
Scorpion Bay
In recent years the small fishing village of San Juanico, better known as Scorpion Bay, has transformed into a classic Baja surf spot. The long, sweeping beach has four point breaks that produce vastly different types of waves making the spot perfect for groups of surfers with varying degrees of skill levels. The first and second points are typically smaller waves making it exceptional for beginner surfers and longboarders. The third and fourth breaking points are steeper creating long barrels where surfers can ride waves for a minute or more.
When all the conditions are on point the bay can produce world-class waves, although Scorpion Bay is known for inconsistent surf conditions. In general, spring and summer offer the most consistent surf. If waves are not pumping, charter a fishing boat and go fishing with local fishermen. Because of its remote location, the water is never overly crowded. Nearby campsites and one hotel house overnight guests.
If you want to learn more about surfing, camping, and hanging out in San Juanico, I wrote a full blog on San Juanico (the town’s actual name of Scorpion Bay).
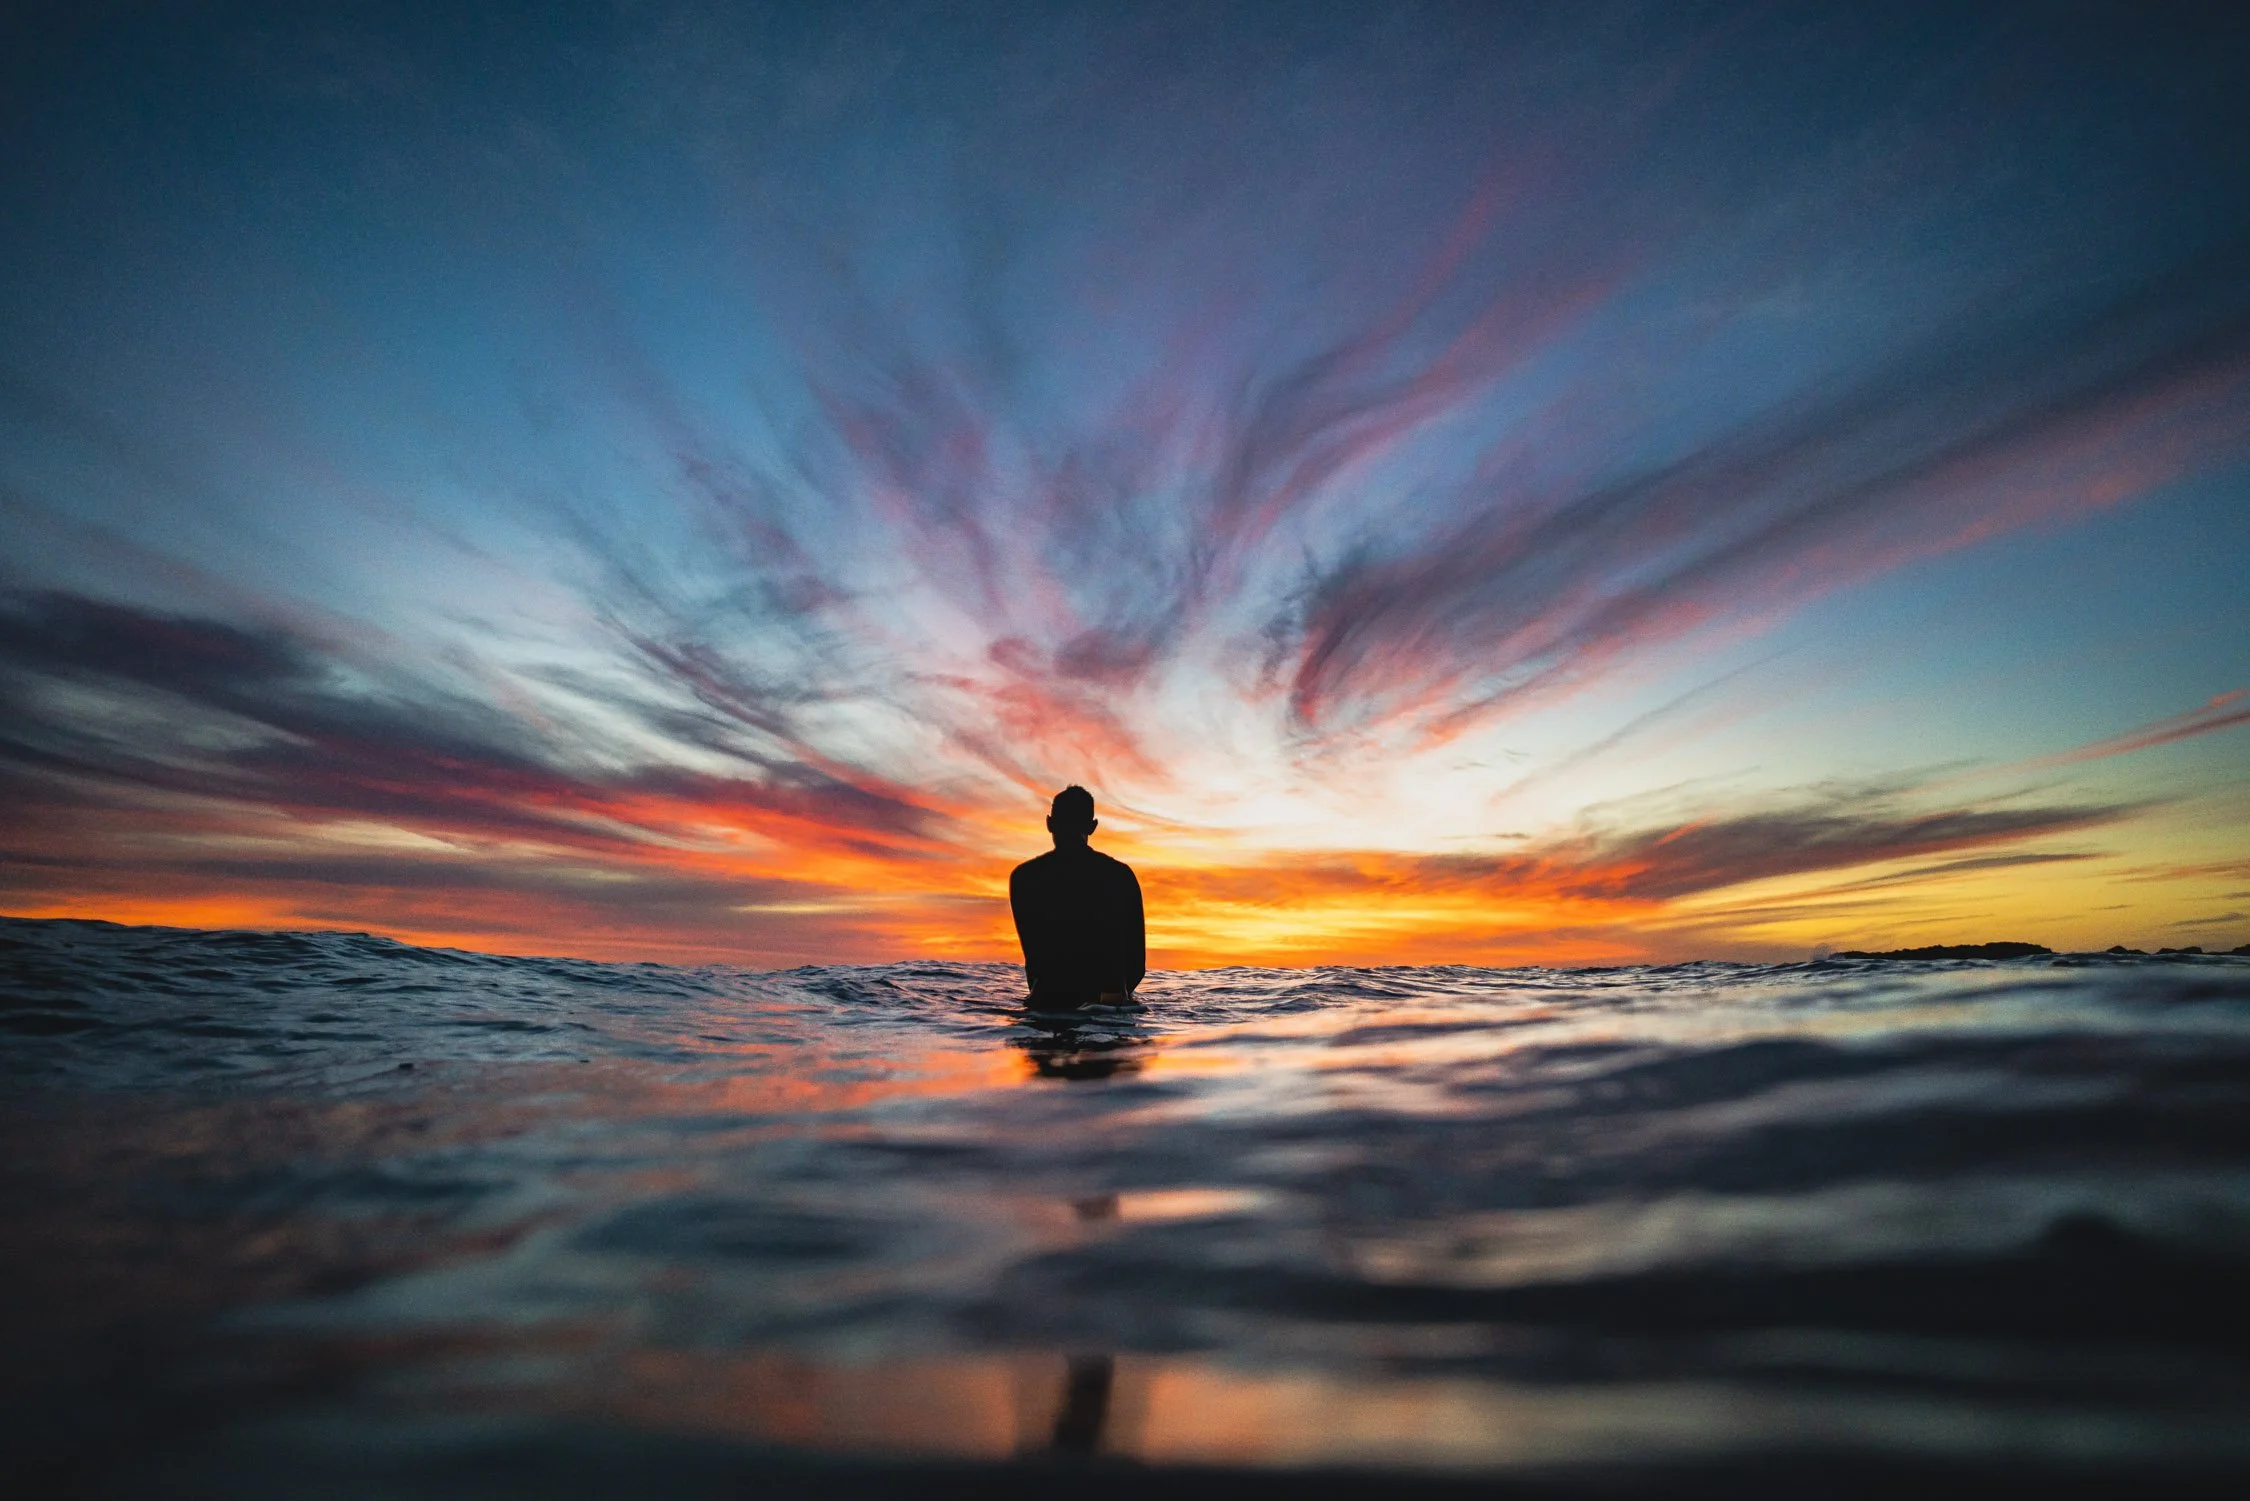
A surfer enjoying the last light while surfing one of Baja California Mexico’s best surf spots. Photograph by Dalton Johnson
Best Surfing in Baja Sur:
If you’re looking for warmer waters, a lively surf scene, and luxury accommodation options, Southern Baja is your ticket. The south is also a better option for beginners and improvers, as there are smaller, slower beach breaks on offer. Be warned though: with a growing number of tourists every year, expect busier lineups and pricier accommodation. Here are the best surf spots of Baja Sur:
Cerritos Beach
Swell Report for Cerritos Beach
About 20 minutes from the popular artist town of Todos Santos is Playa Los Cerritos. The long sandy beach butts up next to the rocky point of a cliff. The beach is known for its highly constant surf making every day of the year a great day to go surfing. Because of the consistency, surf schools gravitate towards this beach to teach newbie surfers how to catch a wave.
The beach caters to both beginners and experienced surfers depending on how big the swell is. Because of increasing tourism in the area the beach can get quite crowded. To escape the crowds, head away from the rocky point to a secluded area on the northside of the beach. Despite the crowded water, the area still maintains a laid-back, friendly vibe. The sunsets are a spectacular reason to stick around after a long day of surfing.
If you want to learn more about surfing, camping, and hanging out in Cerritos beach, I wrote a full blog on Cerritos Beach that you can find here.
Isla Natividad
Swell Report for Isla Nativadad
For those hardcore surfers in search of the perfect empty wave in the middle of nowhere, Isla Natividad is the answer. If conditions are right, you’ll be met by one of the best beach barrels in the world, known as Open Doors. However, you’ll have to work for it: the wave can only be accessed by a small private plane or boat ride. The break here is extremely powerful, fast, hollow and can reach up to double overhead, so it goes without saying – this is strictly for the pros.
Punta Abreojos
Swell Report for Punta Abreojos
Known for its epic right reef breaks and 200m-long (656ft) rides, Punta Abreojos is always on the top of every Baja surf veteran’s list. If you’re just starting out, there are also some easier beach breaks here. After your surf, make sure you stop by the local fishermen boats to buy the fresh catch of the day for your barbecue back at the campsite.
Playa La Pastora
Directions to Playa La Pastora
Swell Report for Playa La Pastora
Known as Cabo San Lucas’ premier big wave, La Pastora has been known to reach triple overhead. In other words, huge – and usually reserved for the pros. Those who do manage to take on this break, however, say it’s absolutely perfect. The best time to surf here is during mid-low tide. Expect both left and right breaks over a sandy bottom.
East Cape
In the far south of the Baja California peninsula, where the Pacific meets the tranquil Sea of Cortez, East Cape is famous for its right point breaks. They’re so popular you can expect to wait your turn to catch them – especially between December and April, when tourists flood into the big resorts in San Jose del Cabo and Cabo San Lucas. From June to August things are quieter, with the best surf, but with ever more condos and a burgeoning expat population, it’s never quiet.

Now that you have discover the best surf spots in all of Baja, it is your turn to hit the road and start surfing these breaks! Please, if you found this blog helpful, or have something to add, please drop it in the comments below for other surfers headed to Baja.