UnBound
For those seeking their next outdoor adventure


The Ultimate Visitors Guide To Lake Tahoe's Bonsai Rock
For the last decade, I have called Lake Tahoe my home and there are few spots that I return to several times throughout a year. However, Bonsai Rock, on the northeast shore of the lake, is one of those places.

A Bob Ross Like Morning At Wild Willy Hot Springs In Mammoth, CA
Before the sun rose, we had our shorts on, bags packed, and towels slung over our shoulder. Andrew has the behemoth Muse Roamer that allows for a very plush life on the road, meanwhile I have modest comforts with a converted van. So, I crawled out of the van and headed into the heated Muse Roamer to enjoy coffee to wait for the best lighting.

Photographing Olmstead Point In Yosemite At Sunset
Photographing Olmsted Point in Yosemite National Park is an overcrowded tourist experience I pretty much never pass up. While I have been to this spot roughly 20 times, each stop is different, so I always bring my camera. With its sweeping views of Half Dome, Tenaya Lake, and Clouds Rest, this spot is a favorite among landscape photographers. Equipped with a Sony A7R IV and a Tamron 70-180mm f/2.8 lens, you can make the most of this location's photographic potential.
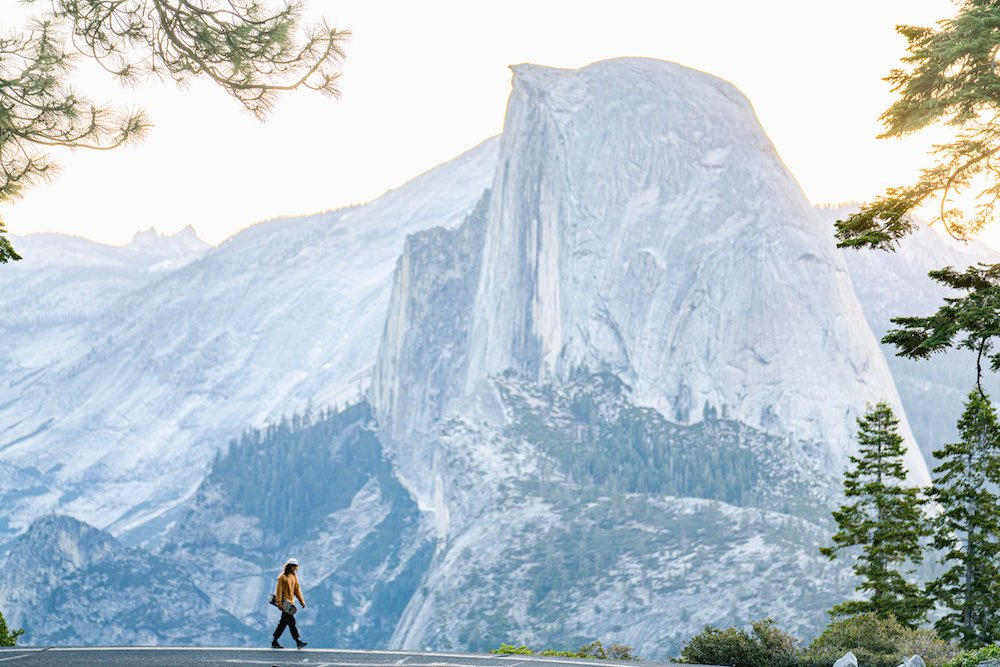
The Complete Photography Guide to Yosemite's Glacier Point
As passionate photography enthusiasts, we had delved into the works of modern greats who had immortalized Yosemite's breathtaking vistas. However, we aimed to add our own unique twist to this iconic location. Surveying our array of gear and props, we hatched an ambitious plan: to capture a skateboarding photograph careening down the serpentine road leading to Glacier Point. Join us on this journey as we blend the adrenaline of skateboarding with the tranquil majesty of Glacier Point's sunrise, creating a photographic masterpiece of our own.

Movie Road In The Alabama Hills Should Be On Every Hollywood Buff's Must See List
Movie Road stands as a testament to the enduring allure of cinematic history in the Alabama Hills of California. This iconic road has played a pivotal role in numerous Hollywood productions, attracting filmmakers, photographers, and nature enthusiasts alike. From its rich history to its captivating scenery, Movie Road offers a unique blend of nostalgia and natural beauty that continues to captivate visitors from around the world.

Discover Photography Spots in Alabama Hills, CA
Are you a photography enthusiast, or seasoned pro, seeking awe-inspiring landscapes to capture with your lens? Look no further than the enchanting Alabama Hills in California! Nestled in the shadow of the magnificent Sierra Nevada mountains, this unique destination offers an abundance of picturesque locations for photographers of all skill levels. Join us on a virtual journey as we explore the must-visit photography spots in Alabama Hills, CA.

How To Create a Time-Lapse Video | Tips, Gear List, and Importance of Location
On a monthly cycle, I spend most of my nights not sleeping and looking up at the stars. Moving across the sky throughout the night, I imagine an alien looking back upon us. If we spoke in the same language—odds are we wouldn’t—what would they say? Would they know our planet as the blue planet? Would we be friends?