
The Best Adventure Travel Gifts Under $50
The best gifts don’t have to break the bank, at least that is what we think here at The Adventure Travel Network. To show this, we put together a list of our favorite gifts for 2025 that are all under fifty bucks. These gifts are perfect for birthdays, stockings, or just anytime gifts. One thing is common between all the gifts, they help you adventure!
The best gifts don’t have to break the bank, at least that is what we think here at The Adventure Travel Network. To show this, we put together a list of our favorite gifts for 2025 that are all under fifty bucks. These gifts are perfect for birthdays, stockings, or just anytime gifts. One thing is common between all the gifts, they help you adventure!
Our standards for testing and reviewing gear at The Adventure Travel Network:
Here at The Adventure Travel Network we have a dedicated group of gear testers who put hands on all the products we recommend below. Our recommendations are not sponsored, unless noted, and speak from the heart about every product. We share both the good and the bad. If you have any questions or comments about the products or reviews, you can write us at editors@the-adventure-travel-network.com

Luno Camping String Lights:
Order Your Camping String Lights [$39.99]
These lightweight and durable string lights are a game-changer for any adventure. Perfect for vanlife or car camping, they add a warm, inviting glow to your space, transforming the outdoors into a cozy retreat. They’re compact enough to toss in your backpack for extra ambiance during a trail-side dinner or overnight trek. Whether you’re lighting up your van, tent, or favorite campsite, these lights make every adventure shine brighter.

No Normal Coffee:
Order your coffee now [$17.00]
Coffee paste might sound unconventional, but one sip will have you hooked! This portable, easy-to-use paste makes a delicious cup of joe wherever your adventures take you. Simply squeeze some onto a spoon, mix it with hot water, and enjoy a flavorful caffeine boost. For those extra-long days when energy levels dip, dab a little on your finger and rub it on your gums for an instant pick-me-up. Perfect for hikers, vanlifers, and caffeine addicts alike, it’s a must-have for staying energized on the go.
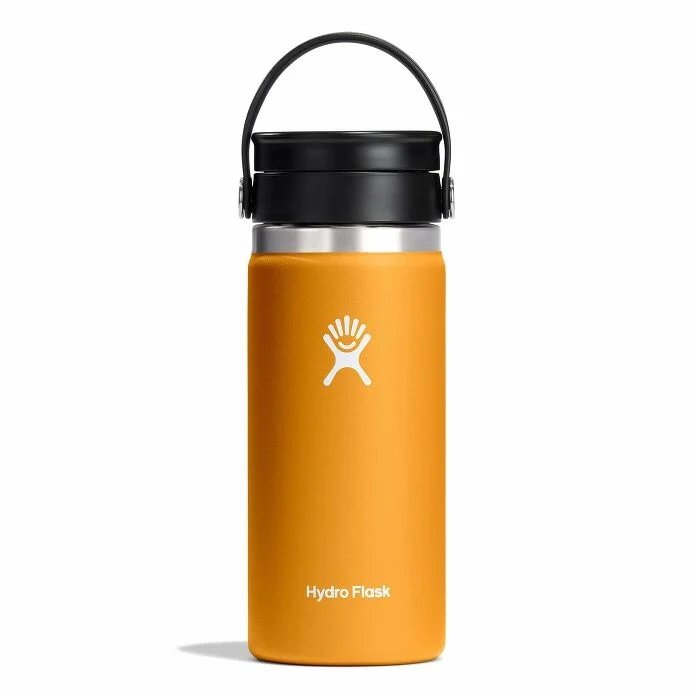
Hydroflask 16 oz Coffee with Flex Sip Lid:
Order your coffee mug today [$32.95]
Say goodbye to burnt tongues and spilled drinks! This insulated bottle is designed specifically for hot beverages like coffee and tea, keeping them warm for hours. The Flex Sip Lid allows for smooth, controlled sips, so you can enjoy your drink at the perfect pace. Whether you’re on the trail, in the car, or at camp, this durable, leak-proof bottle ensures your favorite brew is always ready to fuel your next adventure.

CRumps’ Natural Dog Treats:
Order your dog treats [$12.99]
Adventures are better with your four-legged friend, so why not treat them too? Crumps’ Natural Dog Treats are a healthy and tasty way to reward your pup after a day of exploring. My dog can’t get enough of the Sweet Potato Chews—they’re delicious, nutritious, and perfect for keeping tails wagging. Made with simple, natural ingredients, these treats are a thoughtful gift for any dog-loving adventurer.

Paka Mountain Sock:
Order your mountain socks [$20]
Treat your feet to the comfort they deserve with these ultra-soft alpaca socks. Designed to keep your feet warm, dry, and happy, the Paka Mountain Sock is perfect for everything from lounging at home to conquering a summit. Their moisture-wicking and insulating properties make them ideal for any adventure, while the fun, eye-catching designs add a touch of personality. Your feet will thank you every step of the way!

Jim Bean Winter reserve:
Even if you’re not a big drinker, a few sips of Jim Beam Winter Reserve can bring a touch of adventure to your holiday season. This smooth and warming bourbon is perfect for cozying up after a long day on the slopes or adding a rugged edge to your mountaineering trips. Ideal for parking lot après-ski or as a thoughtful gift for the outdoorsy type, it’s a little bottle of warmth and spirit for any winter adventure.

Alpine sea co mini pocket
Order your mini pocket [$28.00]
The Alpine Sea Co Mini Pocket is the ultimate multi-purpose pouch for all your adventure needs. Currently, it’s my go-to stash for dog treats, but its versatility knows no bounds. I’ve used it as a wallet, pen holder, cool rock collector, battery organizer, snack bag, and even a coin purse. Compact yet durable, this little pouch is perfect for keeping your essentials organized, no matter where your adventures take you. A small but mighty gift for the adventurer who loves practicality and style!

Discover More Gear
How to Avoid Common Mistakes as a Beginner Stargazer
My passion for stargazing started on a 30-day backpacking trip with friends through Escalante National Monument. Each night, after long days of hiking through the desert, we’d pull out a night sky book and try to identify new stars and constellations. Lying in our sleeping bags, we watched the stars slowly move across the sky, talking and pondering the vastness of space. Those late nights sparked my love for the night sky that has stayed with me for over a decade. Since then, stargazing has become a way for me to connect with nature, friends, and the immense beauty of the universe.
My passion for stargazing started on a 30-day backpacking trip with friends through Escalante National Monument. Each night, after long days of hiking through the desert, we’d pull out a night sky book and try to identify new stars and constellations. Lying in our sleeping bags, we watched the stars slowly move across the sky, talking and pondering the vastness of space. Those late nights sparked my love for the night sky that has stayed with me for over a decade. Since then, stargazing has become a way for me to connect with nature, friends, and the immense beauty of the universe.
Over the years, I’ve learned how to make stargazing an enjoyable experience while avoiding common beginner mistakes. If you’re just starting out, here’s what you need to know to make the most of your nights under the stars.

Camping under the stars is the best way to access the night sky. Photo by Dalton Johnson
1. Dress for the Weather
One of the easiest ways to ruin a stargazing night is not dressing warmly enough. You're not going to think straight if you are shivering. Even in the summer, nights can get chilly, especially in open areas like deserts or mountains. On my backpacking trips, layering up became second nature, often having my sleeping bag ready for extra warmth. Now, I always bring extra blankets and hand warmers when stargazing with friends or family, to make sure everyone is comfortable. It’s better to overprepare than to cut your night short because you’re too cold.
Pro Tip: A thermos of hot tea, hot chocolate, or coffee can make all the difference on those colder nights. Pair it with a comfortable chair and a cozy blanket for an even better experience.
2. Start with a Plan
When I first started stargazing, we relied on a simple night sky book to guide us. It was exciting but often frustrating when we couldn’t find what we were looking for. Now, I use apps like PhotoPills, which is a game-changer for photography. Its AR viewing feature helps me line up shots of the Milky Way at the exact time and location I want. Planning your night can save you frustration and make the experience more rewarding. Research celestial events, like meteor showers or eclipses, and use stargazing apps to identify constellations and planets in advance.
Tip: Create a small checklist of essentials—star maps, a flashlight with a red filter, binoculars, snacks, and a comfortable setup to ensure you have everything you need.

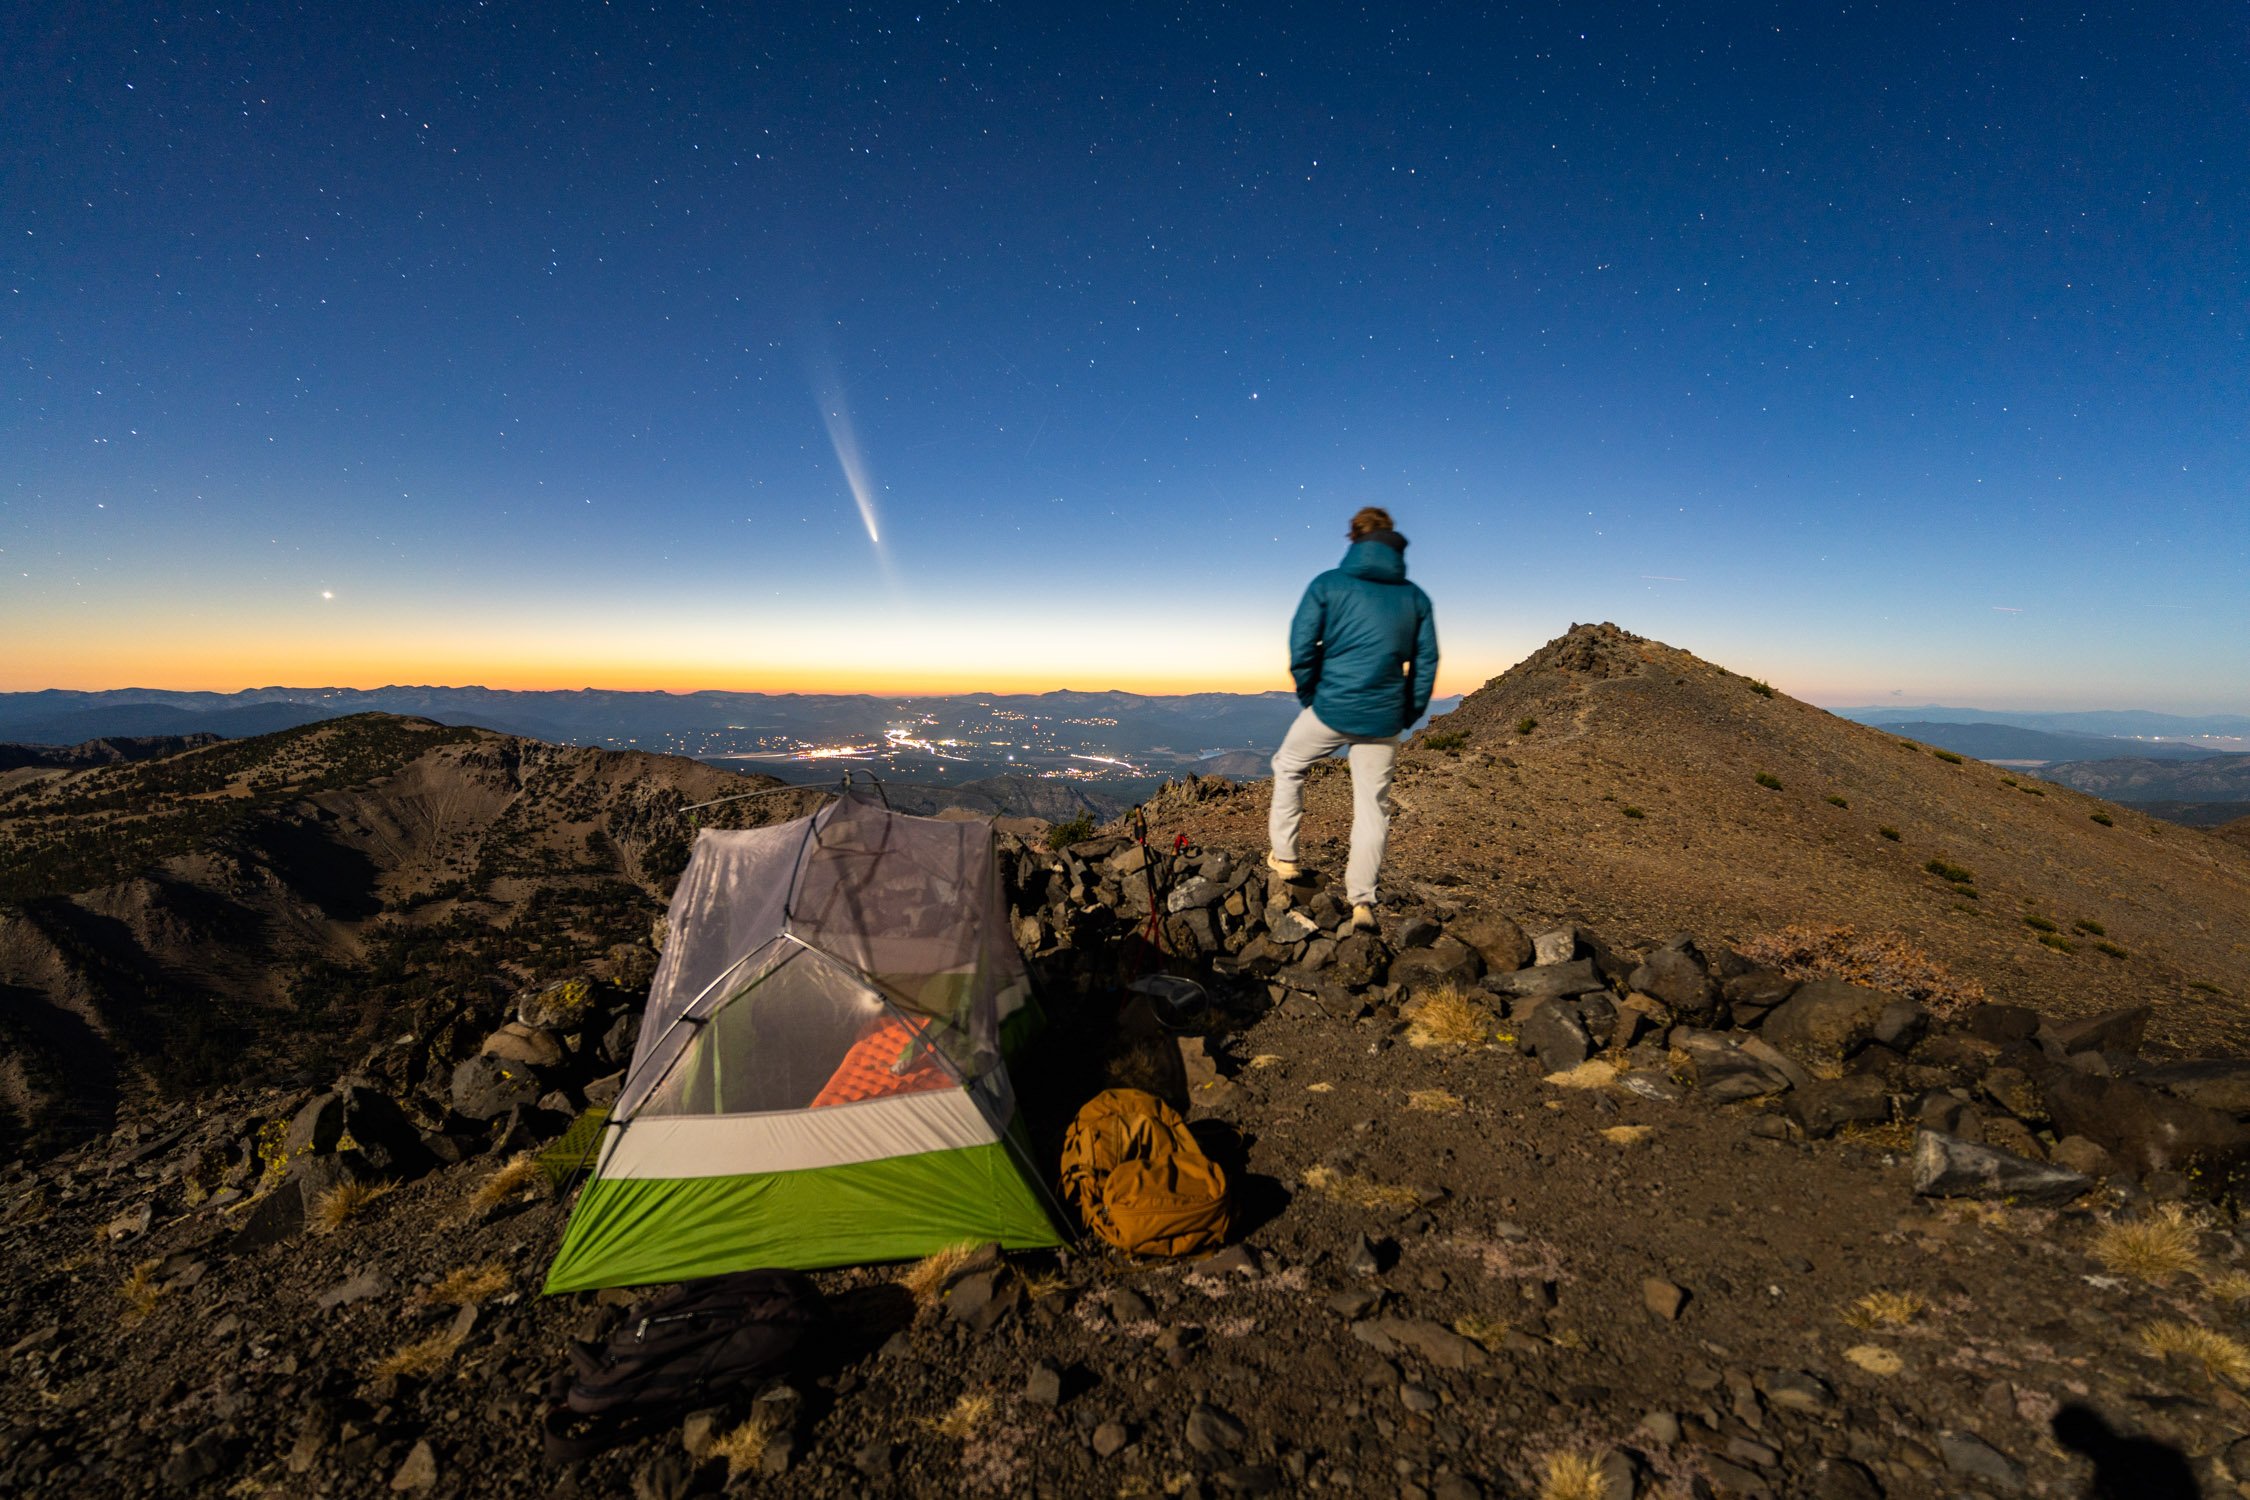
Taking in the Milky Way from the summit of Tallac in Lake Tahoe, CA. Photo by Dalton Johnson
3. Choose the Right Location
Light pollution is one of the biggest barriers to seeing the night sky clearly. If you can, visit a designated dark-sky area. Some of my favorites include Moab, Yosemite National Park, and spots across the American Southwest. These places offer incredible views that make the effort worth it. The fewer city lights, the more stars you’ll see.
Tip: Use a light pollution map online to find the darkest skies near you. Arrive before sunset to scout out a good spot and let your eyes adjust to the dark naturally.


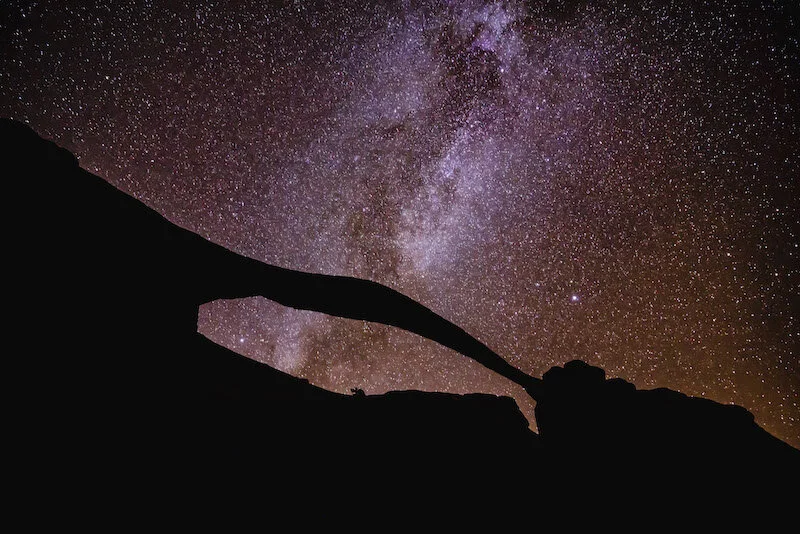
The Milky Way creeping our from behind Landscape Arch in Arches National Park. Photo by Dalton Johnson
4. Be Patient
One mistake I’ve seen time and again is impatience. Beginners often expect to find constellations or spot shooting stars right away. But stargazing is a slow process. It takes time for your eyes to adjust to the dark, and finding constellations requires practice. I’ve also learned to start with the easiest constellations first—Orion and the Big Dipper are great ones to begin with. Once you’ve mastered the basics, you can work on identifying more complex formations.
Tip: Don’t forget that constellations change with the seasons and your location. If a constellation isn’t visible, it’s not your fault—it’s just not the right time of year or hemisphere.
5. Bring the Right Gear
You don’t need an expensive telescope to start stargazing. For years, I used just my eyes and a pair of binoculars. Binoculars are a great starting point because they’re portable and can give you a closer view of the moon and larger celestial objects. As a photographer, I now rely on tools like PhotoPills and sturdy tripods for night photography. But even with advanced gear, basics like a blanket, folding chair, and bug spray can make or break the experience.
Tip: If you’re thinking of investing in gear, start with binoculars. They’re much easier to use than telescopes when you’re beginning and can open up a whole new level of detail in the night sky.

A Milky Way bow, which can be captured during Nov - April in North America. Photo by Dalton Johnson
6. Pick the Right Time
One mistake I made early on was stargazing during a full moon. A bright moon can wash out faint stars, making it harder to see constellations. Now, I always check the lunar calendar and aim for nights around the new moon. Meteor showers and special celestial events are also fantastic times to plan your outing. Timing is everything when it comes to stargazing—you’ll get the best results when the conditions are optimal.
Tip: If you’re planning to photograph the stars, timing is everything. Use apps to track the Milky Way’s position for the best results, and plan your night accordingly.
7. Learn the Basics First
I’ll admit, when I started, I got overwhelmed trying to find advanced constellations or identify faint stars. What I’ve learned is that stargazing is much more fun when you start with the basics. Learn to identify a handful of bright stars or constellations, and build from there. Don’t rush into complicated star charts—keep it simple and enjoy the process of discovery.
Tip: Apps like SkySafari and Star Walk are beginner-friendly and can guide you through the sky step by step. They’ll even show you which stars and planets are visible from your location and time.
The milky way over my van in the Alabama Hills of CA. Photo by Dalton Johnson
Stargazing is one of the simplest joys in life, but it does take a bit of preparation and patience to fully enjoy it. Whether you’re lying under the stars in a dark desert or snapping photos of the Milky Way, the key is to approach it with curiosity and an open mind. After all, the night sky is always full of surprises—if you know how to look. So grab a blanket, head to a quiet spot, and let the stars remind you of the beauty and vastness of our universe.
Discover more Adventures


We Found A Vortex While Hiking, It Made Us Late For The Best Brunch Spot Sedona, AZ Has To Offer
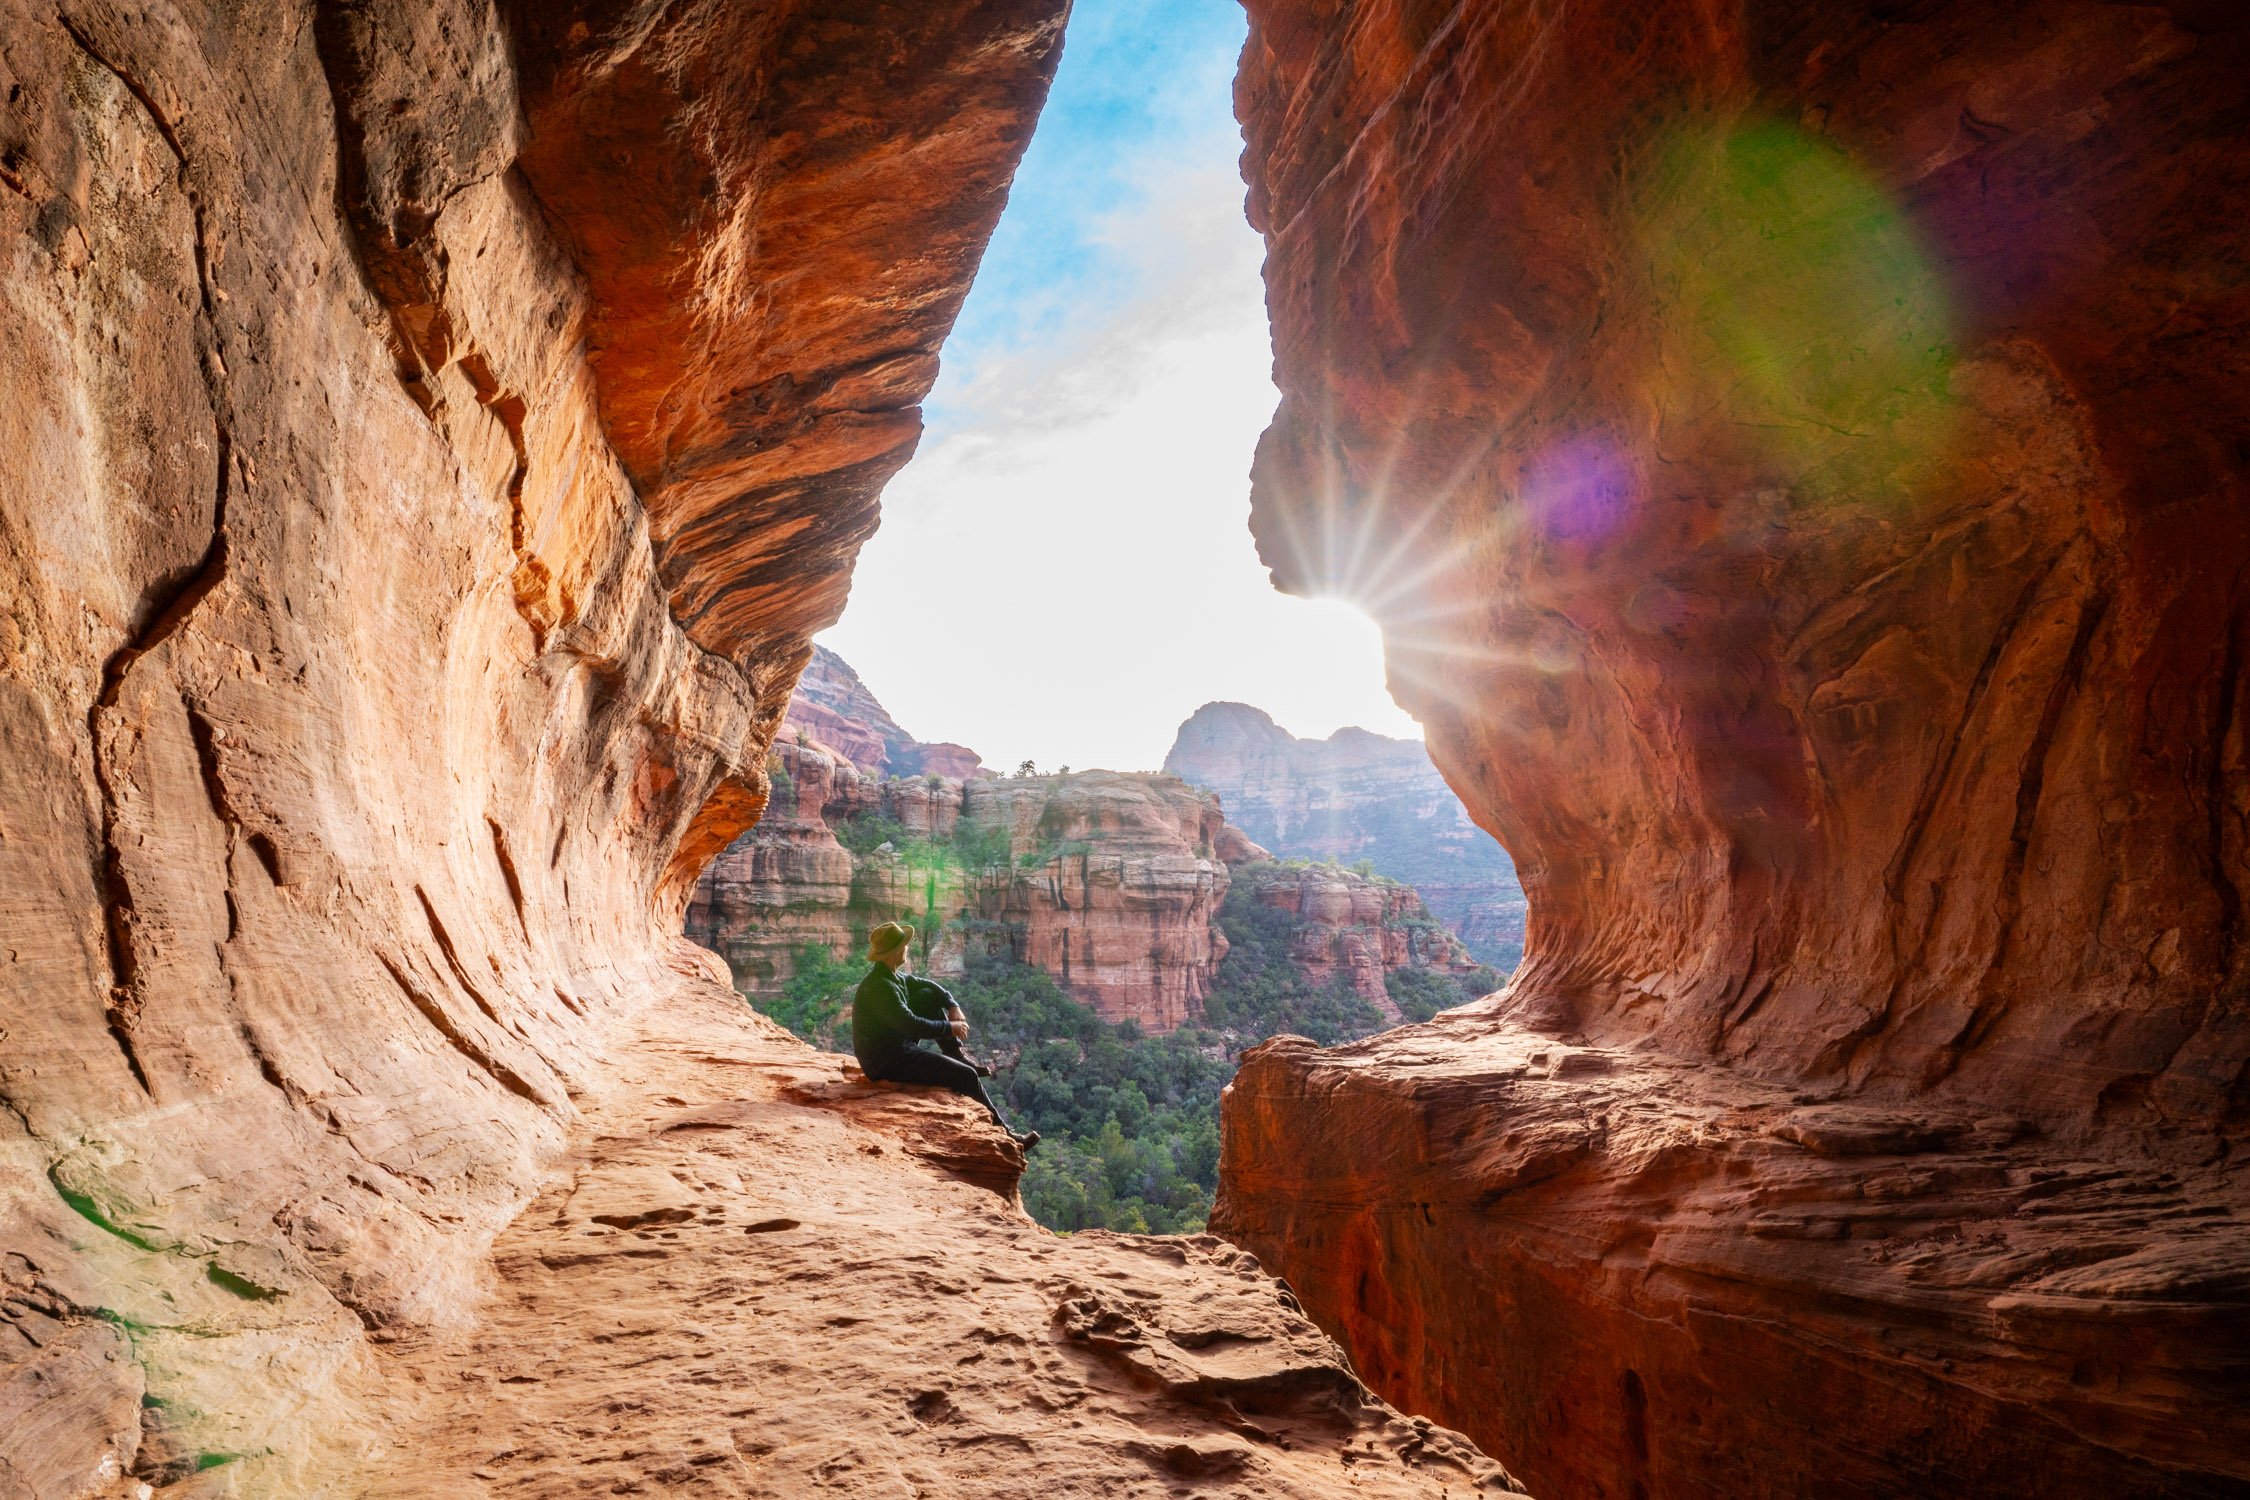
Reds and oranges filled the sky as the sunrise light reflected off the clouds, a welcome sign some warmth was on the way. This morning in Sedona, Arizona was cold as we hiked to find the Subway Cave, which is said to be the home of a vortex. While I am not totally sure what a vortex is, I wanted to find one. So, down the trail we went.
Reds and oranges filled the sky as the sunrise light reflected off the clouds, a welcome sign some warmth was on the way. This morning in Sedona, Arizona was cold as we hiked to find the Subway Cave, which is said to be the home of a vortex. While I am not totally sure what a vortex is, I wanted to find one. So, down the trail we went.
My partner and I wandered down the trail, a left at the first sign, a right at the second, and then we kept our eyes peeled for a “random” turn off on our right that may, or may not, have a large arrow on the ground. This hike felt like a treasure hunt.
In the distance we could hear voices echoing off the cliff, but the trees formed a tunnel of green that we could not see through. Were we on the right path? Not sure. A quarter of a mile past. A half a mile past. Then, on our right, a big arrow, made of sticks, pointed towards the cliff. I guess this is it, I said to myself.
Within a few minutes, we were on our hands and knees scrambling up the cliff, to find the subway tunnel, all to ourselves. Silent, calm, an unfamiliar energy lingered. Maybe that was the vortex? The sun had not popped over the cliffs, but soon it would.
As the sun rose, we took some photos in the iconic locations that are all over Instagram these days. Then, put our cameras away so we could wander around the landscape, explore a few of the indigenous structures that still exist, and sit, together, on the cliff soaking in the red and green landscape.

Before we knew it, swarms of people started flooding in. Competing to stand in “the spot” a line was forming. Some wanted a selfie, others were setting up tripods. Music was blasting from speakers all around us. A different kind of energy was now present. Our morning tranquility was gone, but at the perfect time.
A friend of a friend swore they had eaten at the “best brunch spot in all of Sedona” and we had a reservation at L’Auberge de Sedona rapidly approaching, so it was time to head out.
Discover More Adventure

These Are The 7 Prettiest Beach Camping Spots In Baja
Baja is a paradise for road trippers seeking unforgettable beach camping experiences. From secluded coves to bustling surf towns, the peninsula offers something for everyone—whether you're rolling in a van, RV, or car. Over the years, I’ve explored Baja’s coastline, discovering hidden gems and learning the ins and outs of camping in this beautiful region. The sheer diversity of landscapes and activities makes it a must-visit destination for anyone looking for an adventurous escape. Here are seven beach camping spots you don’t want to miss, along with what makes each one special and the best activities to enjoy in the area.
Baja is a paradise for road trippers seeking unforgettable beach camping experiences. From secluded coves to bustling surf towns, the peninsula offers something for everyone—whether you're rolling in a van, RV, or car. Over the years, I’ve explored Baja’s coastline, discovering hidden gems and learning the ins and outs of camping in this beautiful region. The sheer diversity of landscapes and activities makes it a must-visit destination for anyone looking for an adventurous escape. Here are seven beach camping spots you don’t want to miss, along with what makes each one special and the best activities to enjoy in the area.

A motion blur sunset at El Canejo. Photo by Dalton Johnson
1. El Conejo
If you’re craving solitude, El Conejo is the beach for you. To get there, you drive down a dusty one-lane dirt road that feels like it leads to the edge of the world. The sense of anticipation builds as you navigate the rugged terrain, and eventually, you’ll find a grove of trees that makes for the perfect parking and camping spot. Once you’ve set up, the only things that limit your stay are your food and water supplies.
El Conejo is a haven for surfers and spearfishers. The waves are consistent, and the underwater life is teeming with fish, making it an excellent spot for an afternoon of catching your dinner. In the evenings, the sunsets paint the sky in stunning hues of orange and pink—it’s a view you won’t forget. There’s a primitive pit toilet nearby, but it can be tricky to locate, so keep an eye out. Pro tip: Find a shady spot under the trees to escape the midday heat. During the day, take some time to hike along the surrounding hills for panoramic views of the coastline—the isolation only adds to the magic of this place.
Related Read: Making Homemade Ceviche While Beach Camping At El Conejo
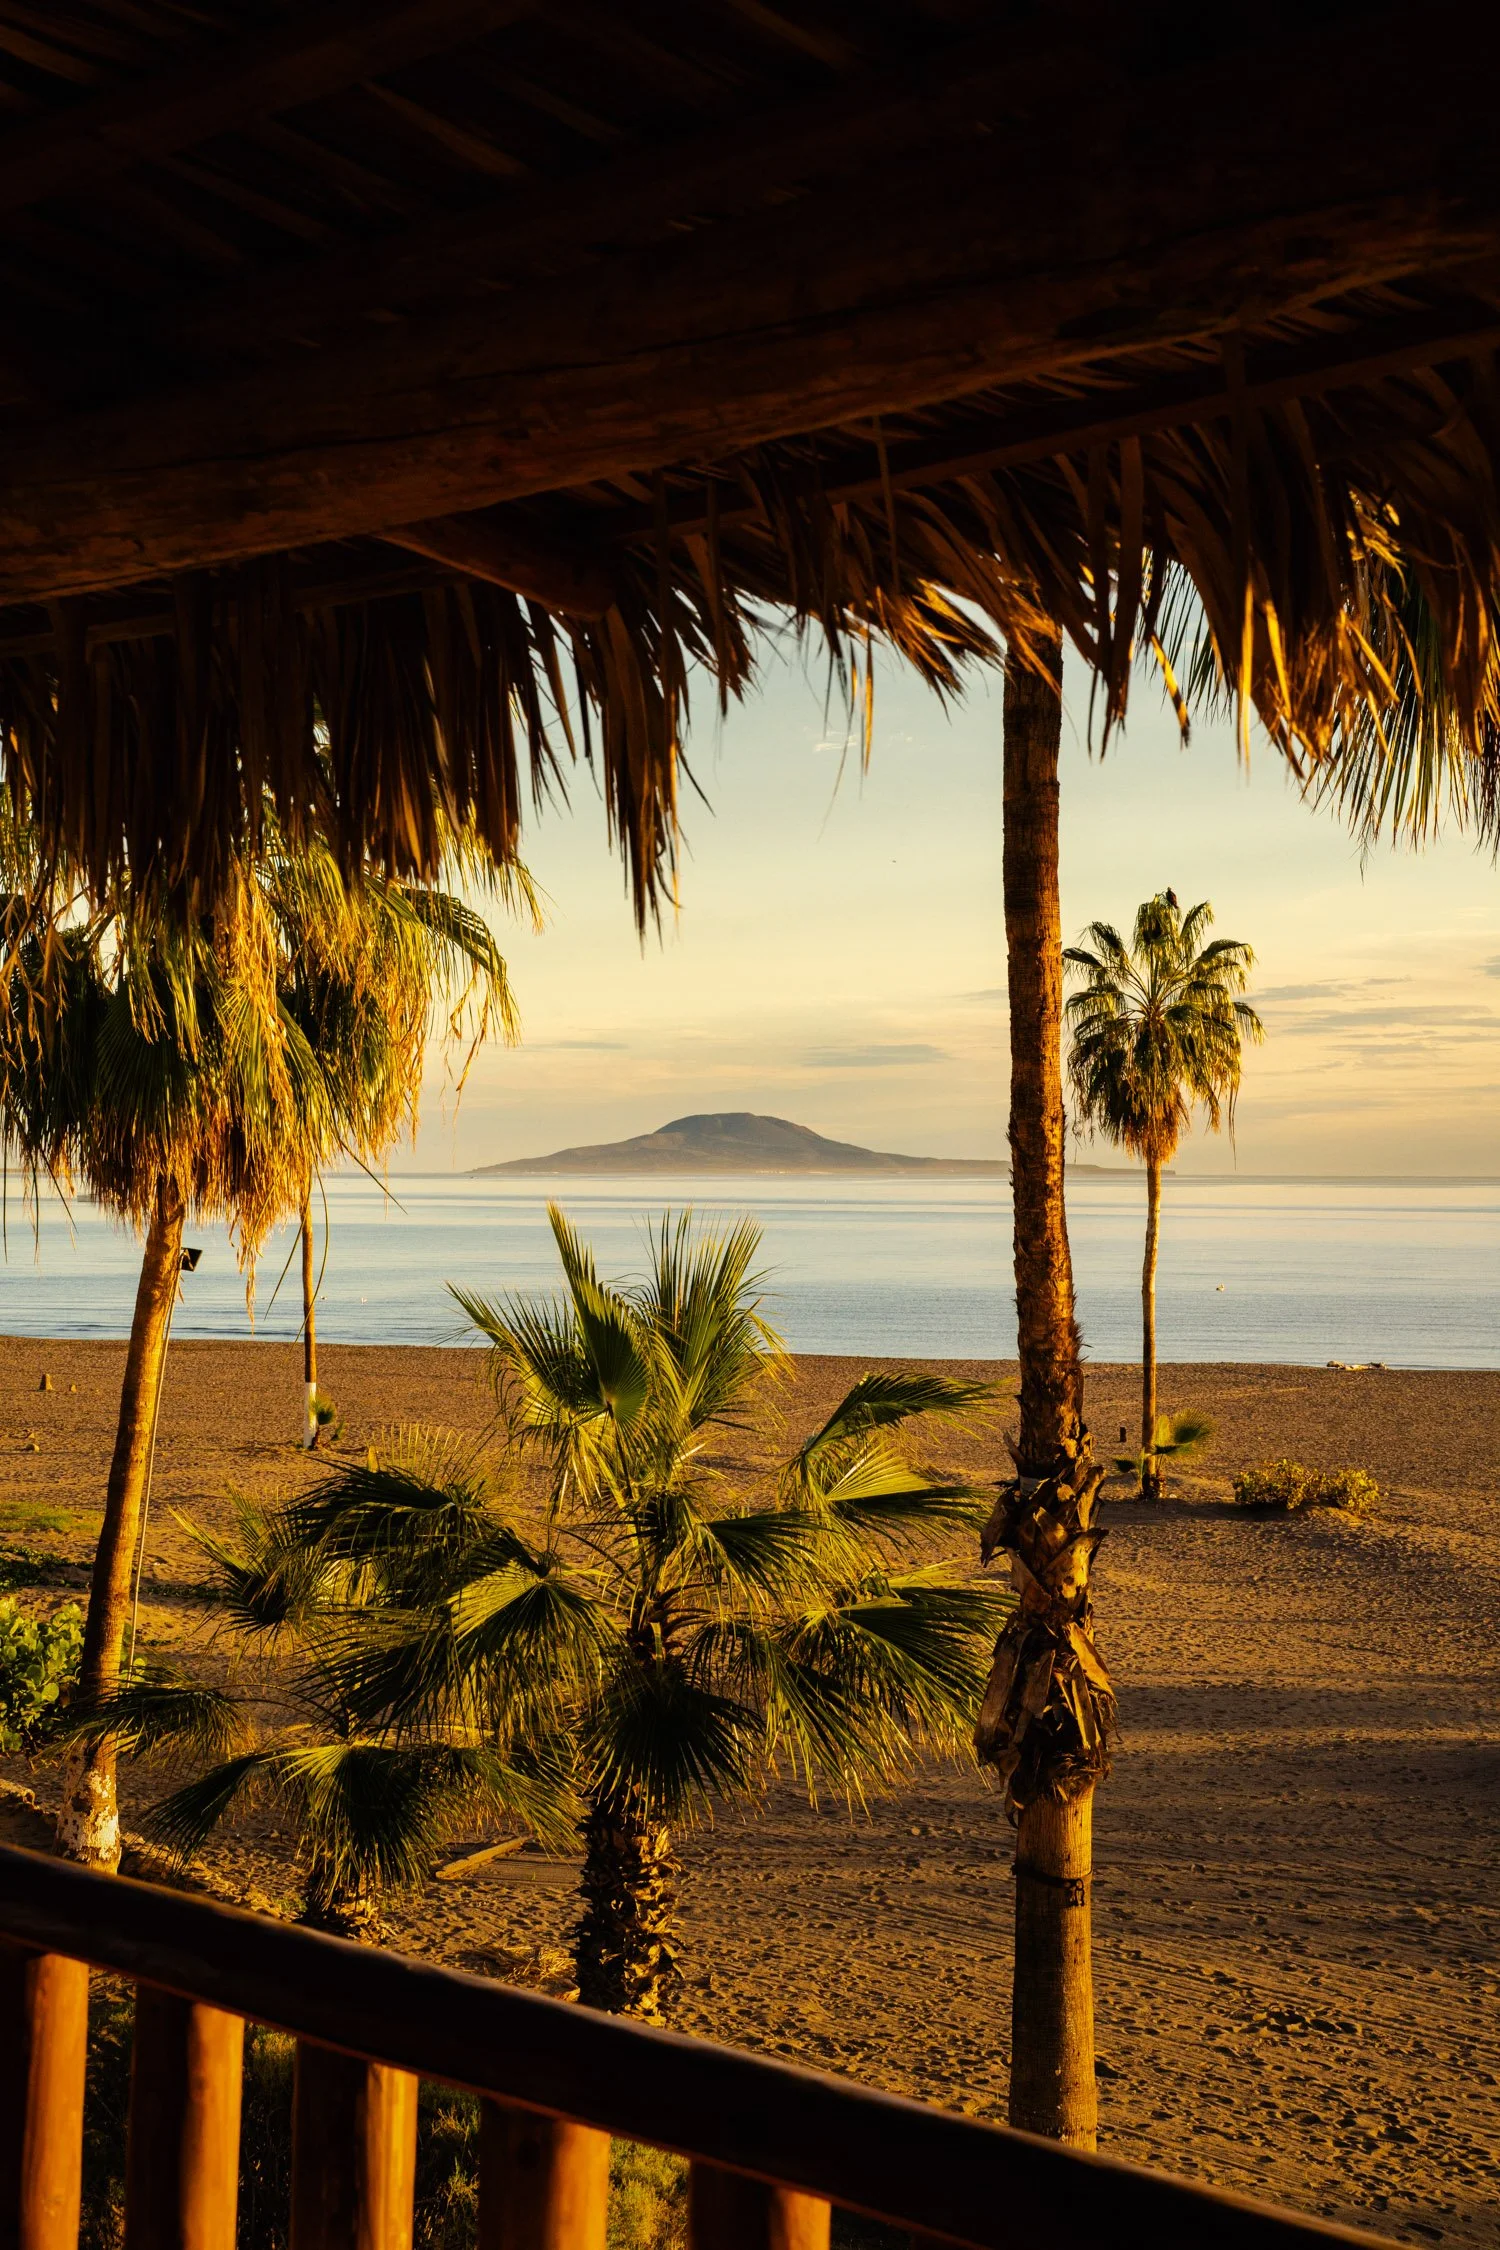
Sunrise while beach camping in La Ventana. Photo by Dalton Johnson
2. La Ventana
La Ventana, located just north of the city, is a hot spot for wind sports enthusiasts. It’s famous for its consistent winds, making it a go-to destination for kiteboarding and windsurfing. But even if you’re not into wind sports, the area offers a ton of free beach camping spots where you can soak in the natural beauty and enjoy a slower pace of life.
While much of the beach is rocky, you’ll still find access points to the water for a refreshing swim. The waves here are gentler than in other parts of Baja, making it ideal for families or those just looking to relax. One of the highlights of camping here is the natural hot spring right on the beach. Make sure to find it and enjoy a soak during low tide—it’s a unique experience you won’t want to miss. When the sun sets, you can sit around a campfire and watch the stars, as La Ventana is known for its clear night skies.

Sleeping with the back doors open on the beach in Conception Bay. Photo by Dalton Johnson
3. Conception Bay
Conception Bay is hands down my favorite place to camp with the back doors of my van wide open. The turquoise water stretches out before you, creating the perfect backdrop for a peaceful retreat. Most camping spots along the bay require a small fee, but it’s worth every penny. The beaches here are postcard-perfect, with soft sand and crystal-clear waters.
This area is ideal for kayaking and stand-up paddleboarding. The calm waters make it easy to spend hours exploring hidden coves and rocky outcroppings. If you’re lucky, you might catch the red tide and witness the breathtaking bioluminescence lighting up the water at night. It’s an almost otherworldly experience that will stay with you forever. For those looking for adventure, snorkeling here reveals an underwater paradise with schools of fish darting between coral formations. Whether you’re paddling around or just relaxing on the beach, Conception Bay is a slice of heaven.

A short walk from our campsite in Cabo Pulmo. Photo by Dalton Johnson
4. Cabo Pulmo
Cabo Pulmo is a marine sanctuary and one of the best spots in Baja for snorkeling and SCUBA diving. Camping here allows you to immerse yourself in the underwater world while enjoying the rugged beauty of the beach. The marine life in this area is incredibly diverse, and the protected coral reefs make it a top destination for eco-tourism.
Spend your days exploring the coral reefs, swimming with vibrant marine life, and soaking up the sunshine. The peaceful atmosphere makes Cabo Pulmo perfect for a multi-day stay. While amenities are limited, the pristine environment and incredible activities more than make up for it. In the evenings, walk along the shoreline to take in the unspoiled beauty of this protected area. Bring your camera—the sunsets here are something special. If you’re up for a short drive, nearby trails offer a chance to explore the desert landscape that surrounds this incredible spot.

Balandra Beach outside of La Paz. Just around the corner there is free beach camping. Photo by Dalton Johnson
5. La Paz
While La Paz itself doesn’t offer much in the way of beach camping, there are some great spots just outside the city. Drive towards Balandra Beach—but keep in mind that camping is not allowed there—and you’ll find beachside parking areas. Some spots are free, while others charge $5-20 per night. The proximity to La Paz makes it an excellent choice for those who want to enjoy the city while still having access to beachside tranquility.
La Paz is an excellent base for exploring nearby attractions. Head into the city for fresh seafood and authentic Mexican cuisine—try the fish tacos, they’re some of the best in Baja. You can also explore the vibrant local markets or take a stroll along the malecón (boardwalk) for stunning views of the bay. If you’re feeling adventurous, book a boat tour to swim with whale sharks or visit Isla Espíritu Santo, a UNESCO World Heritage site. After a day of exploring, retreat to your campsite and enjoy the calm sound of waves as you relax under the stars.

Beach camping just north of Todos Santos and playing games well into the night. Photo by Dalton Johnson
6. Todos Santos
Todos Santos might not have much beach camping right in town, but if you drive 10 minutes north or south, you’ll find quiet, undeveloped beaches perfect for setting up camp. The northern beaches have less surf but stronger undercurrents, while the southern beaches are busier and more suited for socializing. The contrast means you can choose your vibe depending on what you’re looking for.
This artsy town is known for its galleries, boutique shops, and vibrant food scene. Spend the day wandering the charming streets, visiting local artisans, and sampling the delicious cuisine. Don’t miss the chance to try fresh ceviche or a craft beer from one of the local breweries. After a day of exploring, retreat to your beach camp and enjoy the sound of crashing waves under a blanket of stars. It’s the perfect blend of culture and nature. For those interested in surfing, the nearby breaks are legendary, offering consistent waves for all skill levels.

Few things are better than waking up on the cliffs of San Juanico and checking the surf. Photo by Dalton Johnson
7. San Juanico (Scorpion Bay)
San Juanico, also called Scorpion Bay, is a world-renowned surf destination. Depending on the swells, the area can be packed with surfers or blissfully empty. Parking on the cliffs costs about $10 per night, and you’ll pay at the nearby restaurant, which also provides access to toilets and showers.
The waves here are long and peeling, making it a dream for surfers of all levels. Even if you’re not surfing, the vibe is laid-back and welcoming. Spend your evenings watching the surfers or taking in the stunning ocean views from your campsite. If you’re lucky enough to be there during a quiet period, you’ll feel like you’ve stumbled upon a hidden paradise. Beyond surfing, the area offers opportunities for hiking and exploring the rugged cliffs that surround the bay. It’s a must-visit for anyone seeking a true Baja adventure.
Campfire on the beach while drying our wetsuits in La Ventana. Photo by Dalton Johnson
Beach camping in Baja is an adventure like no other. Each spot offers its own unique charm, from the secluded tranquility of El Conejo to the vibrant underwater world of Cabo Pulmo. Whether you’re a surfer, paddler, or someone who just loves waking up to the sound of waves, Baja has something for you.
Pack your gear, load up on supplies, and hit the road. These six camping spots are waiting to show you the magic of Baja’s coastline. Trust me, you won’t regret it. And remember, the journey is just as important as the destination—so take your time and soak in every moment of this unforgettable adventure.
Discover more Adventures
The Complete Guide to Beach Camping in Baja, Mexico
In this comprehensive guide, we'll take you on a virtual tour of Baja's beachside wonders, covering everything you need to know for an unforgettable camping experience. From discovering the best RV and vanlife spots to ride the waves at world-class surfing destinations, ensuring your safety in this enchanting environment, and highlighting the fun-filled activities that shouldn't be missed, we've got you covered.
Picture this: the rhythmic sound of crashing waves, the salty breeze in your hair, and the warm embrace of the sun as it sets over the horizon. Welcome to beach camping in Baja, a dreamy escape that combines the allure of pristine shores with the freedom of the open road. Whether you're a seasoned camper or a novice adventurer, the Baja Peninsula beckons with its stunning coastline, rich surf culture, and an abundance of activities to make your beachside getaway unforgettable.
In this comprehensive guide, we'll take you on a virtual tour of Baja's beachside wonders, covering everything you need to know for an unforgettable camping experience. From discovering the best RV and vanlife spots to ride waves at world-class surfing destinations, ensuring your safety in this enchanting environment, and highlighting the fun-filled activities that shouldn't be missed, we've got you covered.
So, fasten your seatbelts and get ready to get sandy on a journey that will introduce you to the magic of beach camping in Baja. Whether you're seeking solitude, adventure, or simply a taste of the good life by the sea, Baja's beaches have it all. Let's dive in and explore the secrets of this captivating coastline.
Enjoying morning coffee in Baja, Mexico while camping on a beach during a surf trip. Photograph by Dalton Johnson
Pros
Scenic Beauty: Baja's coastline offers stunning, unspoiled natural beauty with pristine beaches, rugged cliffs, and crystal-clear waters that provide a breathtaking backdrop for your camping experience.
Diverse Landscapes: From the Pacific Ocean to the Sea of Cortez, Baja boasts diverse coastal landscapes, providing a range of camping environments to suit different preferences, from tranquil coves to expansive sandy beaches.
Affordability: Many beach camping spots in Baja are budget-friendly or even free, making it an economical option for travelers seeking a cost-effective way to enjoy the oceanfront.
Adventure Opportunities: Baja's beaches are a gateway to a wide array of outdoor activities, including surfing, snorkeling, kayaking, fishing, hiking, and wildlife watching.
Remote Getaways: Baja offers a sense of isolation and tranquility, allowing you to disconnect from the hustle and bustle of daily life and immerse yourself in nature.
Friendly Locals: Baja's residents, known as Bajacalifornianos, are renowned for their warm hospitality and willingness to share their culture and traditions with visitors.
Cons
Limited Amenities: While some beach camping spots offer basic amenities, many are primitive with no facilities. Access to fresh water, electricity, and waste disposal may be limited or non-existent.
Language Barrier: Not all locals speak English, so a basic knowledge of Spanish can be helpful for communication and navigation.
Isolation: Baja's remote beaches can mean limited access to medical facilities and services in case of emergencies. Adequate preparation and a well-stocked first-aid kit are essential.
Environmental Responsibility: Responsible camping and Leave No Trace principles are crucial in preserving Baja's natural beauty. Some travelers may not adhere to these practices, potentially impacting the environment.
Crowds in Popular Spots: During peak seasons, popular beach camping areas can become crowded, reducing the sense of solitude and tranquility.

Campfires are allowed, but finding firewood in Baja is hard. Photograph by Dalton Johnson
Things to Know Before Driving South of the Border
As you prepare for your epic camping adventure in Baja, there are several essential factors to consider before crossing the border into Mexico. While Baja California's breathtaking landscapes and endless coastline await, a successful journey starts with proper planning and awareness of what lies ahead. Here's a rundown of key things to know before embarking on your Baja camping experience:
1. Passport Requirement:
To venture into Mexico and, more importantly, to return to the United States, you'll need a valid passport. Ensure your passport is up-to-date before hitting the road.
2. Mexican Insurance:
Don't forget to acquire Mexican insurance for your vehicle. Mexican law requires all drivers to carry liability insurance from a Mexican insurer. This coverage is vital to protect yourself and others in case of accidents.
3. Length of Stay:
As a tourist, you can spend up to 180 days in Mexico before being required to return by law. Plan your itinerary accordingly, whether it's a shorter stay or an extended winter escape.
4. Embrace Adventure:
Baja camping is tailor-made for adventurous souls who understand that the journey itself is just as exciting as the destination. Embrace the spirit of adventure and be prepared for the unexpected.
5. Safety in Baja:
Contrary to some misconceptions, Baja Mexico is generally safe for travelers. However, like any travel destination, exercise common sense and stay away from situations that could lead to trouble. Most travelers enjoy their time in Baja without any issues.
6. Isolation on the Road:
One of the unique aspects of driving in Baja is the sense of isolation, even on highways. Services can be sparse, so ensure you have essentials like extra water, food, and vehicle maintenance tools in case you encounter unexpected delays.
7. Baja's Two States:
Baja California is divided into two separate Mexican states: Baja California and Baja California Sur. Each offers its own distinct charms and attractions, so be sure to plan your route accordingly based on your interests and desired experiences.
Related Read: Baja California vs Baja California Sur… What’s the difference?
Remember, while Baja camping promises unforgettable moments and natural beauty, preparation is key to ensuring a smooth and enjoyable journey. With the right mindset and awareness of these important factors, you'll be well-prepared to embrace the magic of Baja's coastal paradise.

Enjoying the winter sunset along the Pacific Coast of Baja. Photograph by Dalton Johnson
Choosing the Right Season for Baja Camping
Baja California's allure as a camping destination is timeless, but choosing the right season to begin on your adventure can significantly impact your experience. Whether you're a snowbird seeking warmer climates during the winter or an intrepid traveler looking to explore the peninsula's wonders throughout the year, understanding the seasonal nuances is essential. Below, we'll help you navigate the calendar, taking into account weather conditions, crowds, and the opportunities to witness Baja's magnificent wildlife.
1. Winter:
Best Time for Snowbirds and Sun Seekers
For many North Americans escaping the chill of winter, Baja's warm embrace is a welcome respite. Winter, spanning from December to February, is considered the high season for Baja camping, particularly in the southern regions like Baja California Sur. Here's what you need to know about camping in Baja during the winter months:
Weather: Winter in Baja offers pleasantly mild temperatures, making it ideal for camping, hiking, and outdoor activities. Coastal areas enjoy daytime highs in the 70s and 80s Fahrenheit (20-30°C), while the evenings may require a light jacket.
Crowds: Expect larger crowds, especially around popular tourist destinations like Cabo San Lucas and La Paz. Plan your reservations in advance if you intend to stay in established campgrounds.
Wildlife: Winter is prime whale-watching season, with gray whales migrating to Baja's coastal lagoons to give birth to their calves. Don't miss the chance to witness this awe-inspiring natural spectacle.
2. Spring:
Balancing Mild Weather and Fewer Crowds
As spring unfolds in Baja from March to May, you'll find a near-perfect balance between pleasant weather and fewer visitors. This shoulder season is a favorite among outdoor enthusiasts looking to explore the peninsula's beauty. Here's what you can expect:
Weather: Spring brings comfortable temperatures, with warm days and cooler nights. It's an ideal time for activities like hiking and water sports, as the water is still relatively warm.
Crowds: Crowds start to thin out compared to the winter months, allowing for a more tranquil camping experience. Popular campgrounds may still require reservations.
Wildlife: Spring is a fantastic time for birdwatching as migratory birds return to Baja's lush oases and coastal habitats. Keep an eye out for unique avian species.
3. Summer:
Sun, Surf, and Desert Adventures
Summer, spanning from June to August, beckons adventure seekers and beach enthusiasts with its sunny days and exciting water activities. However, be prepared for warmer temperatures and the occasional rain shower. Here's what to consider:
Weather: Summers in Baja can get hot, especially in the desert regions. Coastal areas offer relief with sea breezes, but inland temperatures can soar. Be sure to stay hydrated and take precautions against sunburn.
Crowds: While not as crowded as the winter months, Baja can still see an influx of visitors during the summer vacation period. Plan accordingly and book campgrounds ahead of time.
Wildlife: Summer is a prime time for marine activities like snorkeling, scuba diving, and swimming with whale sharks in La Paz Bay. It's also when sea turtles come ashore to lay their eggs; some conservation programs offer opportunities to witness this phenomenon.
4. Fall:
Autumnal Tranquility and Mild Temperatures
As the summer heat gradually subsides, fall, from September to November, brings a sense of tranquility to Baja. The weather remains pleasant, unless there is a hurricane, making it an excellent time for camping and exploring the region. Here's what you should know:
Weather: Fall offers comfortable temperatures, making it an ideal season for hiking, mountain biking, and outdoor adventures. Daytime temperatures are warm, and evenings are pleasantly cool.
Crowds: With the summer vacation rush behind, Baja sees fewer tourists in the fall. Campgrounds and beaches are less crowded, allowing for a more peaceful experience.
Wildlife: Fall marks the return of gray whales to Baja as they begin their southward migration. Birdwatching opportunities continue as well, with various species preparing for their winter sojourn.

Sometimes you find those remote campsites that will blow your mind, especially at sunrise. Photograph by Dalton Johnson
Essential Camping Gear: Your Comprehensive Checklist
Packing for a camping trip in Baja, whether you're planning to explore the pristine beaches or the rugged desert, requires careful consideration. Having the right camping gear can make all the difference in your comfort and enjoyment. From the basic essentials to specialized equipment, here's a comprehensive checklist to ensure you're well-prepared for your Baja camping adventure:
Tent Camping Essentials:
Tent: Choose a tent that suits your needs, whether it's a spacious family tent, a compact backpacking tent, or a durable all-season tent.
Ground Tarp or Footprint: Protect your tent's floor from moisture and wear by using a ground tarp or footprint.
Sleeping Bags: Select sleeping bags appropriate for the season and climate. Consider using a liner for added warmth and cleanliness.
Sleeping Pads or Air Mattresses: Provide insulation and cushioning for a good night's sleep.
Pillows: Don't forget pillows or inflatable camping pillows for added comfort.
RV and Vanlife Gear:
RV or Camper: Ensure your RV or camper is in good working order, with all systems functioning correctly.
RV Accessories: Pack necessary RV accessories, such as leveling blocks, wheel chocks, and hoses for water and sewage.

Breakfast burritos anyone? Photograph by Dalton Johnson
Cooking Equipment:
Camp Stove: Bring a portable camp stove for cooking meals. Consider a multi-burner stove for more extensive meal preparation.
Cookware: Pack pots, pans, and utensils suitable for campfire or camp stove cooking.
Cooler: Keep food and beverages fresh with a reliable cooler, and don't forget ice packs.
Food and Cooking Supplies: Plan your meals and bring non-perishable ingredients, condiments, and spices. Don't forget a can opener and a set of reusable plates, cups, and utensils.
Campfire Essentials:
Firewood and Firestarter: Check local regulations regarding campfires and bring firewood or firestarter if permitted.
Fire Extinguisher: Safety first – have a fire extinguisher on hand.
Clothing and Personal Items:
Appropriate Clothing: Pack clothing suitable for the season and expected weather conditions. Don't forget waterproof and windproof layers.
Footwear: Choose comfortable, sturdy shoes or hiking boots for outdoor activities.
Hygiene Essentials: Bring personal hygiene items, including soap, toothbrush, toothpaste, and towels.
First Aid Kit: Assemble a first aid kit with essential supplies, including bandages, antiseptic wipes, and any necessary medications.
Navigation and Lighting:
Maps and Compass/GPS: Ensure you have maps of the area and navigation tools for exploring off the beaten path.
Headlamps and Flashlights: Pack reliable lighting sources with extra batteries.
Miscellaneous Items:
Multi-Tool or Knife: A multi-tool or a sturdy camping knife can be incredibly useful.
Backpacks: If you plan on hiking or day trips, bring backpacks to carry essentials.
Camping Chairs: Portable camping chairs provide comfortable seating around the campfire.
Entertainment: Consider books, board games, or other entertainment options for downtime.
Trash Bags: Practice Leave No Trace principles by packing out all trash and waste.
WHAT TO EXPECT WHEN BEACH CAMPING IN BAJA, MEXICO:
No matter your style, Baja camping is possible in an RV, car, truck, van and even with a tent or hammock. Many formal Baja RV parks are scattered throughout the peninsula, but even the biggest rigs can find a secluded spot for beach camping. This section focuses on the more secluded and off the beaten path expectations:
First come, first served: There are no reservations for most Baja California beach camping – simply show up and pick a spot.
Toilets: DO NOT expect clean, maintained toilets. DO expect dilapidated wooden sheds with a seat above a hole in the ground.
Vendors: Friendly locals arrive in the morning and throughout the day selling food, water, firewood, trinkets and tours.
Bugs: Sand flies (chitres) and regular houseflies haunt the beaches here. Come prepared with fly paper and repellent.
Heat: There is little to no natural shade when Baja camping. Have an awning on your rig or seek out beaches with palapas (see below).
Lack of organization: Baja camping is often free of any real restrictions or oversight.
Crowds: Winter months see plenty of snowbirders in RVs – beach camping in Baja Mexico is VERY popular this time of year.
No hook-ups: Looking for hook-ups for your RV in Baja California? Head to a proper RV campground instead.
Haggling: The price of Baja camping is often negotiable – and always get a receipt after paying.
Litter: Trash barrels are provided but efficient means to dispose of the litter is sorely lacking. Trash barrels are often overflowing.
Additionally, if you are hoping to camp on a beach without any amenities, that is typically fine. Just make sure to follow Leave No Trace ethics and check in with any land owners in the area to see if it okay to camp on the beach.

Sometimes, a dirt road leads to great camping with stellar sunrises. Photograph by Dalton Johnson
RV and Van life Spots: Your Roadmap to Baja's Coastal Paradise
If the freedom of the open road and the allure of beachside camping beckon you, Baja California's RV and vanlife spots are a dream come true. From pristine shores to secluded coves, Baja offers a diverse range of camping options for adventurers seeking to embrace the vanlife or RV lifestyle. In this section, we'll delve into popular spots that cater to road-trippers, complete with amenities, nearby attractions, and the optimal times to visit.
1. Playa La Gringa (Free Camping):
Amenities: Playa La Gringa is a fantastic free camping spot with basic amenities, including pit toilets and trash disposal. Electricity and water hookups are limited, so be prepared for off-grid living.
Nearby Attractions: Explore the charming town of San Felipe nearby, renowned for its fresh seafood and vibrant local culture.
Best Time to Visit: Fall and winter offer pleasant weather and fewer crowds, making it an ideal time to camp at Playa La Gringa.
Leaving the van doors open to enjoy the view at Conception Bay. Photograph by Dalton Johnson
2. Bahía Concepción Beaches (Free to $20 USD/night):
Amenities: The beaches along Bahía Concepción offer a range of camping experiences, from primitive beachfront sites to more developed campgrounds with amenities like showers, restrooms, and restaurants. Prices vary accordingly.
Nearby Attractions: Discover the pristine waters of Bahía Concepción, perfect for kayaking, paddleboarding, and snorkeling. The nearby town of Mulegé is worth a visit for its historic mission and tranquil ambiance.
Best Time to Visit: Fall and spring provide comfortable temperatures, and the beaches are less crowded than during the peak winter season.
Read our full guide to Conception Bay
3. Playa Los Cocos ($10 USD/night):
Amenities: Playa Los Cocos offers a tranquil beachfront camping experience with basic facilities, including restrooms and outdoor showers.
Nearby Attractions: Explore the nearby town of Loreto, known for its rich history, marine life, and opportunities for fishing and diving.
Best Time to Visit: Winter and early spring provide pleasant weather, and you can witness the migration of gray whales along the coast.
4. Playa El Coyote ($5-15 USD/night):
Amenities: Playa El Coyote offers a mix of camping options, from primitive sites to those with more amenities like showers and electricity.
Nearby Attractions: Don't miss the chance to visit the picturesque town of Todos Santos, known for its vibrant arts scene, historic architecture, and excellent surf.
Best Time to Visit: Fall and spring are ideal, as the weather is mild, and you can catch the region's renowned surf breaks.
5. Playa Balandra (Free Camping):
Amenities: Playa Balandra offers free camping with minimal facilities. It's a true escape into nature, so come prepared with all the essentials.
Nearby Attractions: Explore the stunning Playa Balandra, a natural wonder with shallow turquoise waters and a serene atmosphere. La Paz, a short drive away, offers cultural experiences and wildlife encounters.
Best Time to Visit: Year-round camping is possible, but consider avoiding the hottest summer months.

Living large on the beach of San Juanico. Photograph by Dalton Johnson
6. San Juanico ($10 USD/night):
Amenities: San Juanico offers a comfortable RV and vanlife experience with amenities such as restrooms, showers, and a restaurant.
Nearby Attractions: San Juanico, also known as Scorpion Bay, is a surfer's paradise with long, rideable waves. It's a must-visit for surf enthusiasts.
Best Time to Visit: Winter is the peak surf season, but you can enjoy San Juanico's relaxed vibe year-round.
Read our full guide to San Juanico aka Scorpion Bay
These RV and vanlife spots in Baja California are gateways to unforgettable coastal adventures. Whether you're seeking pristine natural beauty, water activities, or cultural experiences, Baja's diverse landscapes and camping options cater to all tastes. Plan your journey, hit the open road, and discover the magic of Baja's coastal paradise.

Cerritos Beach firing on an epic winter swell. Photograph by Dalton Johnson
Surfing Spots: Riding the Waves of Baja's Coastline
Baja California's sun-kissed shores and Pacific swells beckon surf enthusiasts from around the world. Whether you're a seasoned pro or just dipping your toes into the world of surfing, Baja's diverse coastline offers waves suitable for all levels of experience. In this section, we'll dive into an overview of some of Baja's renowned surfing spots and towns, share insights on surfboard rentals, surf schools, and immerse you in the vibrant local surf culture.
1. Playa San Miguel:
Surfer's Paradise: Playa San Miguel is a mecca for surfers, offering consistent and powerful waves that cater to all levels. It's known for its long right-hand point breaks and lefts that peel perfectly.
Surf Schools: Local surf schools provide lessons and board rentals for beginners looking to catch their first wave or improve their skills.
Local Surf Culture: Experience the laid-back and friendly surf culture that characterizes this area. Join surfers from around the world as they chase the perfect wave.
2. Scorpion Bay (San Juanico):
World-Class Waves: San Juanico, also known as Scorpion Bay, is legendary for its long, rideable waves that seemingly go on forever. This spot is ideal for more experienced surfers seeking lengthy rides.
Surf Schools: While San Juanico caters more to experienced surfers, you can still find surf schools and rentals for those looking to conquer these world-class waves.
Local Surf Culture: San Juanico embodies the soul of Baja's surf culture, with a relaxed atmosphere, friendly locals, and an appreciation for the beauty of the waves.
3. Punta San Carlos:
Remote Beauty: Punta San Carlos is an isolated gem offering consistent surf conditions. It's an excellent choice for intermediate and advanced surfers seeking adventure off the beaten path.
Surf Camps: Several surf camps operate in Punta San Carlos, providing all-inclusive surf experiences, including board rentals, lessons, and accommodations.
Local Surf Culture: This remote location exudes a rugged charm that attracts surfers who relish the thrill of discovering untouched waves.
4. Playa Los Cerritos (Todos Santos):
Beginner-Friendly: Playa Los Cerritos is perfect for beginners, thanks to its consistent, mellow waves and sandy bottom. It's an excellent place to take your first surf lesson.
Surf Schools: Numerous surf schools and rental shops cater to novices, offering lessons and equipment for a memorable surfing debut.
Local Surf Culture: Embrace the welcoming atmosphere and camaraderie among surfers, as Playa Los Cerritos fosters a sense of community among beachgoers.
Baja's surf spots are as diverse as its landscapes, making it a surfer's paradise for all skill levels. Whether you're riding the long waves of Scorpion Bay or catching your first break at Playa Los Cerritos, Baja's surf culture and coastal beauty will leave an indelible mark on your surfing journey. So, wax up your board, catch some waves, and become part of the dynamic surf scene in this sun-soaked paradise.

There is safety in numbers, camping alone looks cool but having others around is helpful. Photograph by Dalton Johnson
Safety in Baja:
Contrary to certain misconceptions, Baja Mexico stands as a welcoming and generally safe destination for travelers eager to explore its breathtaking landscapes and vibrant culture. While your Baja camping experience is poised to be an unforgettable adventure, ensuring your safety should always be a top priority. In this section, we'll shed light on the safety landscape in Baja, driving safety, offering valuable insights and tips to help you navigate with confidence.
1. The Reality of Safety in Baja:
Overall Safety: Baja California, both in the northern and southern regions, boasts a reputation for being safe and friendly toward tourists. The vast majority of visitors to Baja enjoy their time without encountering any safety issues.
Friendly Locals: Baja's locals, known as "Bajacalifornianos," are renowned for their warmth and hospitality. You'll likely find the locals to be helpful and welcoming throughout your journey.
2. Common-Sense Safety Tips:
Exercise Caution at Night: Like in many destinations worldwide, it's advisable to exercise caution when venturing out after dark. Stick to well-lit areas and stay in groups if possible.
Keep Valuables Secure: Petty theft can occur in crowded places or tourist areas, so keep your belongings secure. Use lockers if available and avoid displaying expensive items.
Stay Informed: Stay updated on local news and any travel advisories issued by your government. Knowledge is a powerful tool for staying safe.
Use Reputable Services: Whether it's accommodations, tour operators, or transportation, opt for reputable and licensed providers to ensure a safe experience.
Respect Local Customs: Familiarize yourself with local customs and traditions, and show respect for the local way of life. This cultural awareness can enhance your safety and enrich your journey.

Paragliding high above the dunes outside of Scorpion Bay. Photograph by Dalton Johnson
3. Adventures Beyond Your Campsite:
Outdoor Safety: If you're planning outdoor adventures like hikes or water sports, research the specific safety precautions for those activities and follow guidelines diligently. Baja's remote landscapes can pose unique challenges.
Wildlife Encounters: While wildlife sightings are a highlight of Baja, remember to observe animals from a safe distance. Don't feed wildlife, and exercise caution when encountering creatures like snakes or scorpions.
Driving Safety: If you're embarking on a road trip through Baja, ensure your vehicle is in good condition, and follow traffic rules diligently. The roads can vary from well-paved highways to rugged trails, so drive accordingly.
4. Emergency Preparedness:
Communication: Carry a working cell phone and consider purchasing a local SIM card for reliable communication. In remote areas, satellite phones can be invaluable.
First Aid: Pack a comprehensive first aid kit and familiarize yourself with its contents. It's a valuable resource for minor injuries and unexpected situations.
Know Emergency Numbers: Be aware of local emergency numbers and contact information for the nearest medical facilities.

Try to always camp in “established” sites to prevent destruction of an area. Photograph by Dalton Johnson
Sustainability and Leave No Trace: Protecting Baja's Natural Treasure
Camping in Baja's pristine landscapes is not just about enjoying the great outdoors; it's also about preserving the beauty and ecological richness of this unique region for generations to come. Responsible camping and adherence to Leave No Trace principles are essential to ensuring that the natural environment of Baja remains unspoiled. In this section, we provide guidance on how to camp sustainably and minimize your impact on Baja's fragile ecosystems.
1. Campsite Selection:
Stick to Designated Areas: Whenever possible, camp in established campgrounds or designated camping areas to minimize your impact on the environment.
Respect Buffer Zones: Stay away from fragile ecosystems, such as sand dunes, coastal vegetation, and nesting sites. Avoid trampling on sensitive areas.
2. Waste Management:
Pack It In, Pack It Out: Be diligent about collecting and properly disposing of all trash and waste. Bring trash bags and recycling containers with you, and never leave trash behind.
Human Waste: Use established restroom facilities when available. In more remote areas, use a portable toilet or follow Leave No Trace principles for digging a cat hole for waste disposal.
3. Campfire Responsibility:
Follow Fire Regulations: Observe local fire regulations and restrictions. In some areas, campfires may be prohibited due to the risk of wildfires.
Use Established Fire Rings: If campfires are allowed, use established fire rings or fire pans, and keep fires small. Use only dead and downed wood for fuel.

A coyote saying hello while we camped in Baja. Photograph by Dalton Johnson
4. Wildlife Interaction:
Observe from a Distance: Respect wildlife by observing from a distance and not feeding them. Feeding wildlife can disrupt natural behaviors and harm the animals.
Secure Food: Store food and trash securely to prevent wildlife from accessing it. This helps protect both you and the animals.
5. Minimize Noise and Light Pollution:
Keep Noise Levels Down: Be mindful of noise levels, especially during quiet hours. Keep radios and other loud devices at a considerate volume.
Reduce Light Pollution: Use minimal outdoor lighting to preserve the beauty of the night sky and avoid disturbing wildlife.
6. Respect Local Communities:
Cultural Awareness: Learn about the local culture and customs, and show respect for the communities you visit. Support local businesses and artisans.
Community Interaction: Ask for permission before entering private property, and be mindful of local residents and their privacy.
7. Education and Outreach:
Educate Yourself: Familiarize yourself with Leave No Trace principles and other sustainability guidelines before your trip. Share this knowledge with your camping companions.
Lead by Example: Set a positive example for others by practicing responsible camping and respecting the environment.
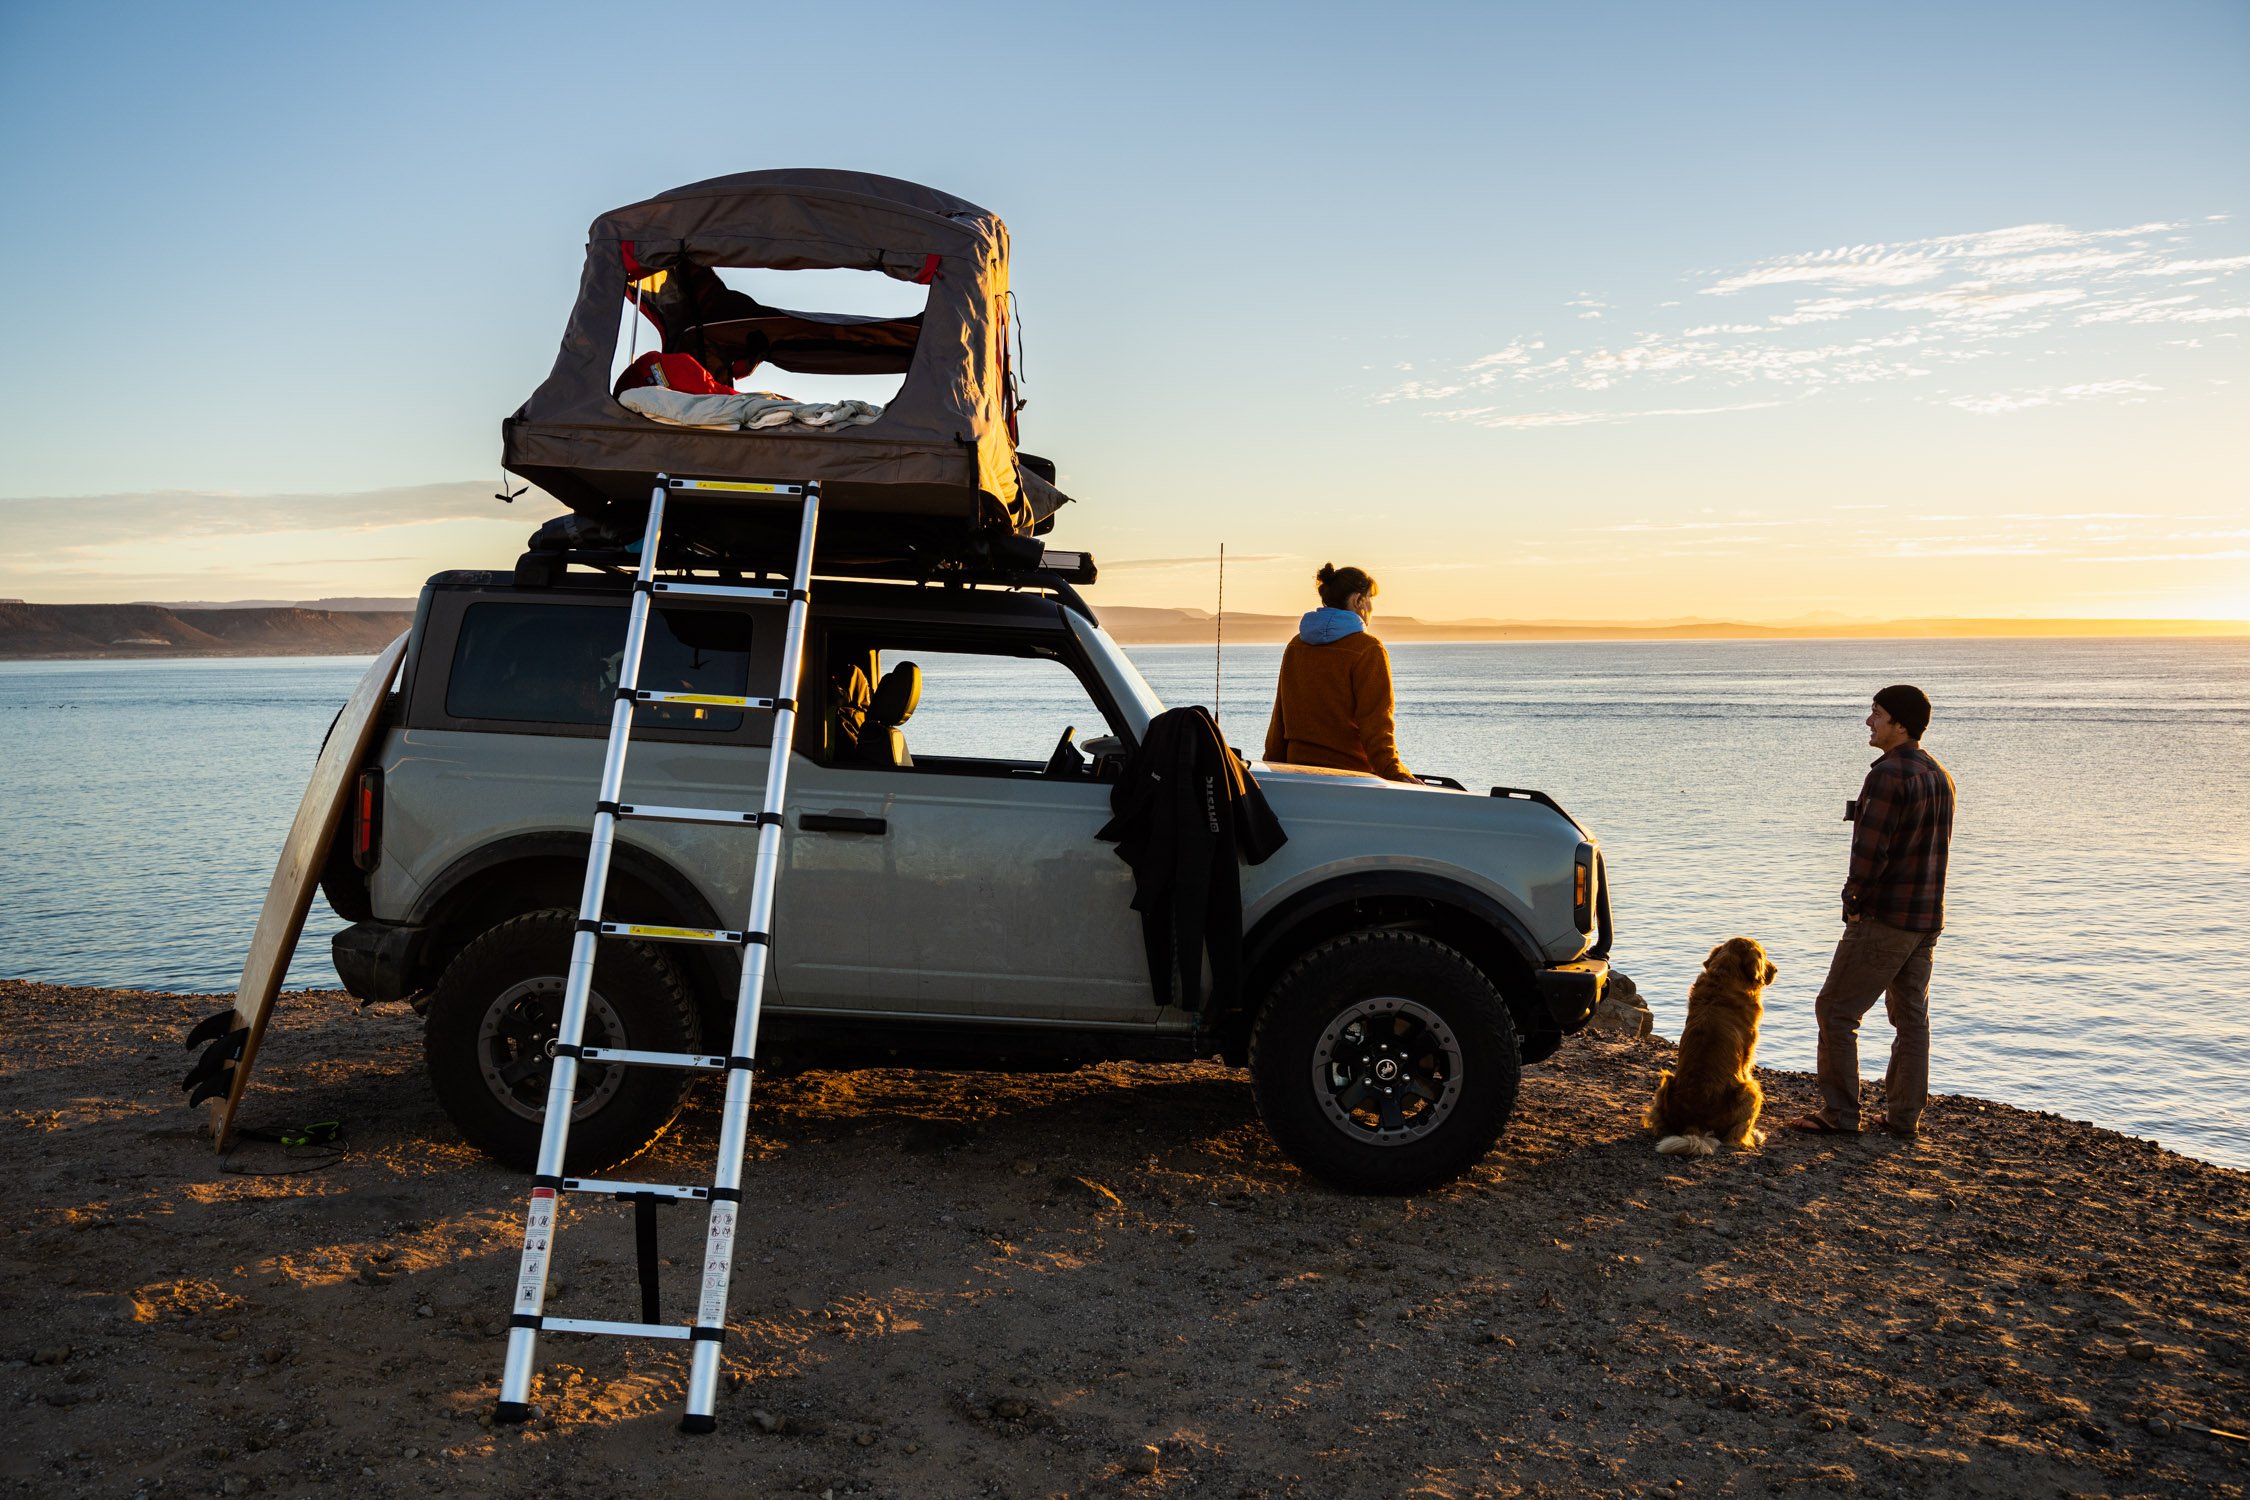
Kristin and Andrew enjoying the sunrise while camping on the beach in Baja Sur, Mexico. Photograph by Dalton Johnson
Baja California, with its sun-drenched shores, rugged landscapes, and vibrant culture, stands as an alluring canvas for adventurers seeking the ultimate beach camping experience. From the rolling waves of renowned surf spots to the tranquil coves and hidden gems along its coastlines, Baja offers a diverse range of camping environments to suit every traveler's taste.
As we've explored in this guide, embarking on a Baja camping adventure is not just about finding the perfect spot to pitch your tent or park your RV; it's a journey that encompasses responsible camping, respect for the environment, and an appreciation for the local culture.
Whether you're catching world-class waves at Scorpion Bay, gazing at the star-studded skies over Playa Balandra, or simply savoring the warmth of a campfire along the Sea of Cortez, Baja's coastal paradise promises unforgettable moments and lasting memories.
As you venture forth into Baja's natural wonders, remember to tread lightly, leave no trace, and immerse yourself in the warmth of the local culture. In doing so, you not only ensure the preservation of this magnificent region but also contribute to the ongoing legacy of those who have fallen in love with its beauty.
So, pack your bags, wax your surfboard, and hit the open road to discover the magic of Baja's beach camping. Whether you seek adventure, relaxation, or a bit of both, Baja California welcomes you with open arms and endless horizons. Embrace the journey, savor every moment, and let the rhythm of the ocean waves guide your soul in this coastal paradise.
Discover More Baja Adventures

The Only Lens You Need For Glacier Point Is The Tamron 17-28mm f/2.8
When you’re planning a sunrise shoot at Glacier Point, simplicity can be your greatest ally. During an ambitious morning shoot at Glacier Point I embraced this concept with the Tamron 17-28mm f/2.8 mounted on my Sony camera, and that's it. Despite my usual inclination to carry multiple lenses, this lightweight zoom delivered everything I needed—and nothing I didn’t.
When you’re planning a sunrise shoot at Glacier Point, simplicity can be your greatest ally. During an ambitious morning shoot at Glacier Point I embraced this concept with the Tamron 17-28mm f/2.8 mounted on my Sony camera, and that's it. Despite my usual inclination to carry multiple lenses, this lightweight zoom delivered everything I needed—and nothing I didn’t.
Waiting around for the sun to rise at Glacier Point. Photo by Dalton Johnson
Lightweight and Nimble for Glacier Point’s Sprawling Beauty
We parked the car and started unloading our gear in the predawn chill. Glacier Point’s is big and we wanted to cover a lot of ground quickly, so I made a bold decision: I left the rest of my lenses behind, clicked on the Tamron 17-28mm, stuffed an extra battery in my pocket, and set off. With just one lens, I could focus entirely on capturing the moment rather than second-guessing my setup.
Our first location was a winding road near Glacier Point, perfect for a dynamic skating shot at sunrise. As we climbed the hill, my camera swung lightly at my side, and I was reminded of how freeing it is to travel light. The Tamron’s compact size and featherweight design were key, letting me keep up with my friends and focus on creativity instead of gear.
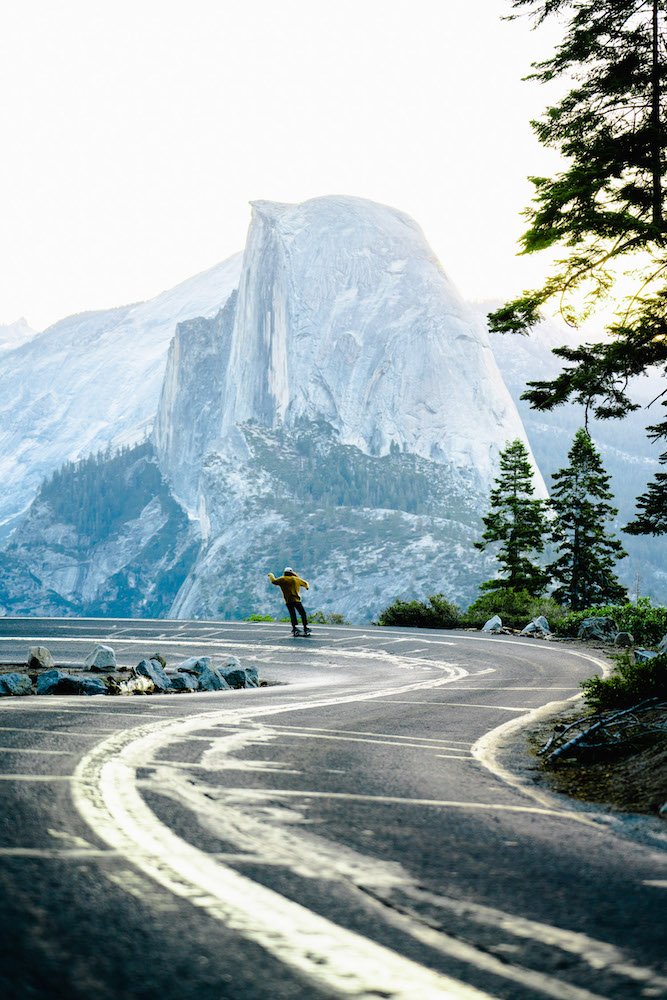
Skating Glacier Point Road at sunrise. Photo by Dalton Johnson
Skateboarding Glacier Point Road At Sunrise
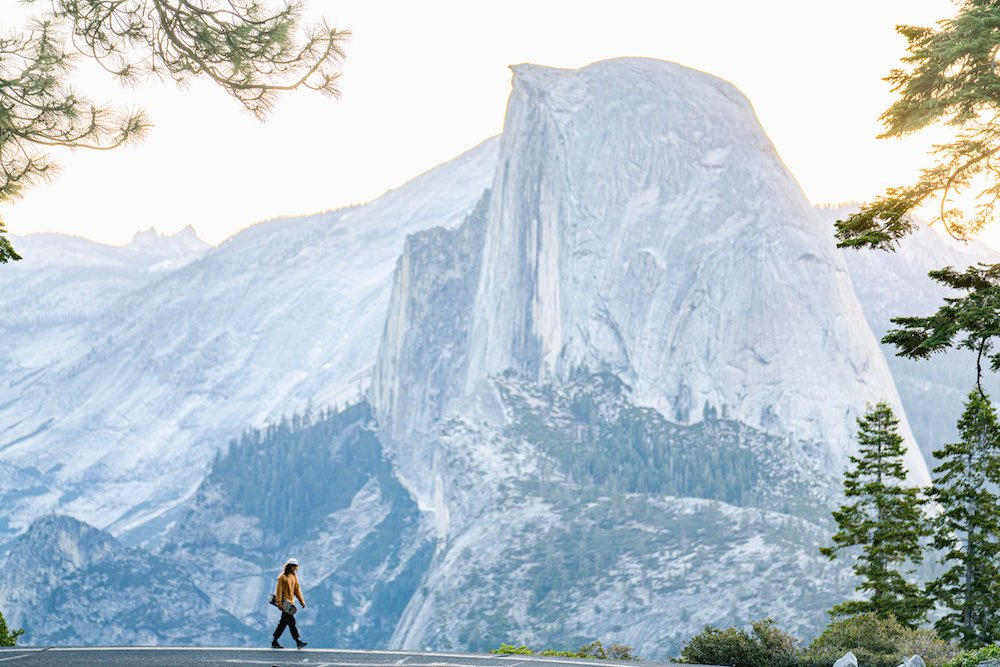
The scene was set: a skater ready to carve down the winding road just as the sun crested Half Dome. The Tamron 17-28mm’s ultra-wide-angle perspective captured the grandeur of the moment, from the twisting road to the warm light washing over the iconic granite peak, using the road as the leading line.
I called out, "Go, go, go!" The skater pushed forward, carving the turn with perfect timing as I snapped away. The f/2.8 aperture let in just enough light to keep the shot crisp and clear, even in the low-light moments before full sunrise. But, I also wanted a star burst, so we did it a second time at f/18.
“Got it!” I shouted, and we hustled to the next spot.

Dancing on the diving board for sunset. Photo by Dalton Johnson
Capturing Silhouettes Dancing on the Diving Board
Our next stop was Glacier Point’s famous “diving board,” a perch that perfectly frames Half Dome in the background. Sunrise was well underway, and the light was changing fast. Jogging across Glacier Point with just the essentials, I was glad I didn’t have to fumble with extra lenses or a heavy bag.
At the diving board, I directed my friends—acting as models—to stand silhouetted against the rising sun. The Tamron 17-28mm’s wide field of view allowed me to capture their swirling dance while showcasing the vast expanse of Yosemite Valley below. The lens’s edge-to-edge sharpness made even the tiniest details pop, creating striking contrast between the silhouetted figures and the glowing backdrop. Again, I cranked the f-stop so the sun would look like a star and snapped.
Why the Tamron 17-28mm f/2.8 Is Perfect for Glacier Point
Looking back, I realized the success of this shoot hinged on the Tamron 17-28mm. Here’s why:
Wide Focal Range for Yosemite’s Grandeur
Glacier Point demands a lens that can capture sweeping vistas, and the 17-28mm range does just that. From tight shots of Half Dome to the sprawling valley below, this lens delivered every time.Portability and Simplicity
At just over 14 ounces, the Tamron 17-28mm is light enough to carry all day, making it ideal for a shoot requiring constant movement. Its compact size also allowed me to focus on composition rather than lugging heavy gear.Fast Aperture for Low-Light Moments
The f/2.8 aperture was crucial during the low-light moments before sunrise. Whether capturing motion or sharp landscapes, this lens handled every challenge with ease.Sharp, Edge-to-Edge Clarity
Every shot was tack-sharp, even at the edges of the frame—a feature that’s critical when photographing iconic landscapes where details matter.

Looking over the edge at a 3000 foot drop. Photo by Dalton Johnson
The Verdict
Shooting sunrise at Glacier Point with only the Tamron 17-28mm f/2.8 taught me that sometimes, less is more. This lens not only simplified my setup but also inspired me to focus on the moment rather than the equipment. From dynamic skating shots to artistic silhouettes, it delivered everything I needed for a memorable morning in Yosemite.
If you’re planning a visit to Glacier Point—or any landscape photography adventure—leave the heavy bag behind. The Tamron 17-28mm f/2.8 might just be the only lens you need.
Discover More Gear

Sunrise or Sunset at Glacier Point in Yosemite, I Prefer Sunrise
Glacier Point in Yosemite National Park is a photographer's paradise, offering breathtaking vistas that beckon camera enthusiasts from around the world. However, the eternal debate among photographers remains: sunrise or sunset at Glacier Point?
Both options have their unique charm, and the choice depends on your photography goals and style. In this blog, we'll explore the merits of both sunrise and sunset photography at Glacier Point to help you make an informed decision.
There’s a timeless debate among Yosemite visitors: Is Glacier Point better at sunrise or sunset? My personal favorite is sunrise, but everyone’s experience will differ. Having visited Glacier Point more than 20 times across different seasons (except winter, which I’m eager to change), I’ve gathered insights to help you decide when to visit. Here are some personal stories, pros, cons, and tips to make the most of your visit.
Skating at sunrise along Glacier Point Road. Photo by Dalton Johnson
Sunrise at Glacier Point: Golden Light and Adventure
If you love the calm of peaceful mornings, where soft, golden light bathes the landscape in warmth, sunrise at Glacier Point is an extraordinary experience. The serenity, paired with the majestic views of Yosemite Valley and Half Dome, makes the early wake-up call worthwhile. Beyond the stunning scenery, sunrise here offers a unique opportunity to connect with nature in a quieter, more personal way. Here’s why I highly recommend making the effort to witness this magical time of day:
1. Quiet Mornings with Unique Adventures
One of my favorite sunrise visits was with a few friends. We brought a skateboard and spent the morning snapping photos as they skated down the winding roads. The soft morning light created a magical backdrop. Afterward, we ventured to the diving board area to capture some fun images of them dancing close to the edge. It was thrilling yet serene—a memory etched in my mind forever.
2. Fewer Crowds and Tranquility
At sunrise, Glacier Point is nearly empty. Most visitors are still asleep, giving you a rare opportunity to enjoy the breathtaking views without interruptions. It’s the perfect time to reflect and fully immerse yourself in the natural beauty of Yosemite.
3. Potential for Hang Gliding Sightings
Occasionally, a group of hang gliders will appear, launching off the cliffs and soaring over Yosemite Valley and Half Dome. The sight of them gliding gracefully adds an unexpected thrill to an already stunning morning. I’ve always wanted to try it myself after watching them.
Dancing at sunrise at the diving board of Glacier Point. Photo by Dalton Johnson
4. Starting Your Day Right
The peaceful atmosphere and golden light make sunrise an energizing way to begin your Yosemite adventure. The distinct shadows and highlights add depth to the landscape, making the experience feel even more special.
5. A Chance for Creative Photos
The soft light of sunrise provides the perfect conditions for capturing unique photos. Whether it’s landscapes, portraits, or action shots like the skateboarding session I enjoyed, the lighting is ideal for experimentation.
Related Read: The Complete Photography Guide to Yosemite's Glacier Point
Cons of Sunrise:
Early Wake-Up Call: You’ll need to wake up very early, often in the dark, to make it to Glacier Point before sunrise. This can be challenging, especially after a long day of hiking or exploring Yosemite. Preparing the night before with all your gear packed can help mitigate the stress.
Cold Morning Temperatures: Early mornings at Glacier Point can be quite chilly, especially in spring or fall. Dressing in layers is essential to stay comfortable while you wait for the sun to rise.
Limited Wildlife Sightings: Wildlife sightings are rare here due to the number of visitors. If you were hoping for a peaceful encounter with Yosemite's animals, sunrise at Glacier Point may not be the best option.
Road Conditions: Depending on the time of year, the drive to Glacier Point can be more challenging in the pre-dawn hours. Fog or icy conditions might require extra caution and preparation.

Sunset alpine glow on Half Dome from Glacier Point. Photo by Dalton Johnson
Sunset at Glacier Point
If you’re drawn to vivid colors, awe-inspiring skies, and the dramatic close of a day, sunset at Glacier Point offers a truly mesmerizing experience. There’s something magical about watching the sky transition from warm hues of gold and orange to deeper purples and blues, all while the landscape reflects these changing tones. Sunset brings an energy and vibrancy that contrasts beautifully with the serenity of sunrise, creating moments that feel both grand and intimate. Here’s what makes it an unmissable experience:
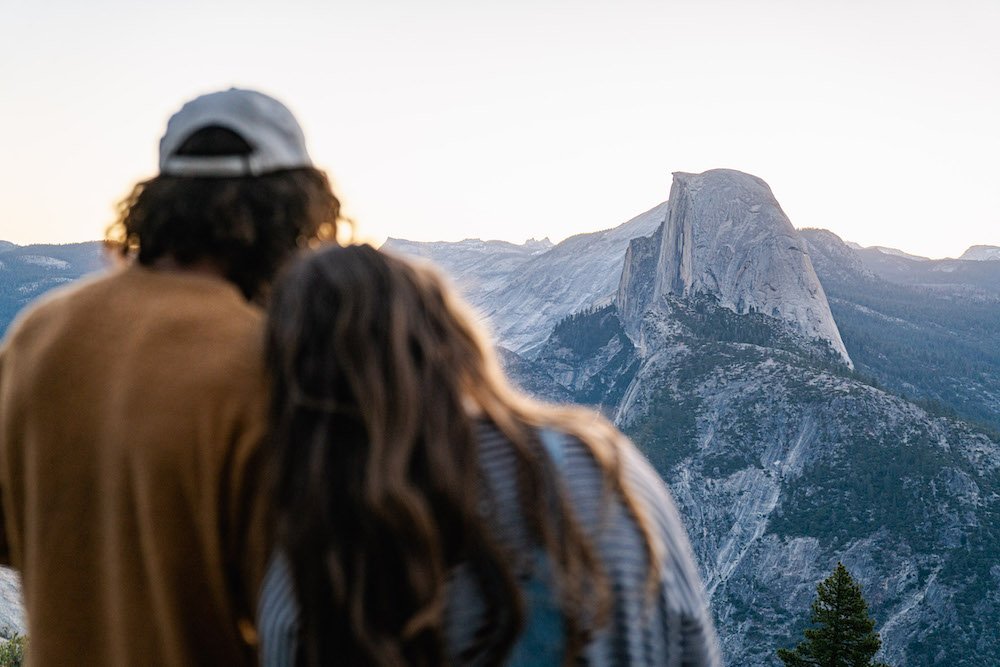
1. Romantic Evenings with Stunning Views
One unforgettable sunset was with my girlfriend. We watched as the alpenglow lit up Half Dome, painting the landscape in rich, warm hues. Later, we stayed to photograph the Milky Way over Half Dome—a perfect blend of romance and awe-inspiring beauty.
2. Dynamic and Dramatic Skies
Sunsets often bring striking cloud formations, creating a dramatic contrast with the serene landscapes below. Depending on the weather, you might even witness colorful alpenglow on the surrounding peaks. It’s the kind of moment that stays with you long after the sun has set.
3. Starry Nights Await
After sunset, stick around for stargazing. Glacier Point’s elevation and minimal light pollution make it one of the best spots in Yosemite to view the Milky Way and constellations. Bring a blanket and some hot cocoa for an unforgettable evening under the stars.
4. A Photographer’s Dream
The changing hues of the sky and the glow on Half Dome create incredible photography opportunities. Whether you’re an amateur or a seasoned pro, you’ll find endless inspiration.
Cons of Sunset:
Crowds and Noise: Sunset tends to draw larger crowds compared to sunrise, especially during the summer and on weekends. The bustling environment can detract from the serene experience many visitors seek.
Finding Parking: With more people visiting at this time, parking can become a significant challenge. Arriving early is critical to secure a spot, especially during peak tourist seasons.
Long Drive Back: After a full day of exploring, the drive back to camp or your lodging can feel exhausting. Navigating the winding roads in the dark also requires extra caution.
Cooler Temperatures After Sunset: While the temperature is usually pleasant during sunset, it drops quickly once the sun goes down. If you stay for stargazing, you’ll need extra layers to stay warm.
Limited Dining Options: If you plan to stay late, note that many of Yosemite’s dining options close early, so having snacks or a packed meal is essential to avoid hunger after sunset.


Hidden Gems and Quiet Spots Around Glacier Point
While sunrise and sunset are magical, Glacier Point offers incredible experiences at other times too. Exploring during different hours can reveal Yosemite’s beauty in new and unexpected ways.
Midday Exploration
Midday light highlights the rugged textures and vibrant colors of Yosemite’s granite cliffs. It’s also an excellent time for a picnic or relaxed sightseeing. This is particularly suited for families or visitors who prefer a more flexible schedule.

Crocker Point with no one else around. Photo by Dalton Johnson
Less Busy Areas to Explore
If Glacier Point feels too crowded, try these quieter spots:
Taft Point: A short drive and hike from Glacier Point, this spot offers stunning views with fewer visitors. It’s my favorite place to watch the sunset.
Crocker Point: Lesser-known but equally beautiful, it’s another great choice for a serene sunset experience.
Sentinel Dome: While some of its views are partially blocked, it’s much quieter and still offers a unique perspective of Yosemite.
Washburn Point: Located just before Glacier Point, this spot provides similar views with a quieter atmosphere.
Stargazing
Glacier Point’s stargazing opportunities are unmatched. Yosemite’s minimal light pollution ensures clear skies, making it a prime spot for viewing the Milky Way and constellations. Check Yosemite’s calendar for ranger-led astronomy programs to enhance your experience.
Seasonal Highlights
Each season brings something special to Glacier Point. Spring offers blooming wildflowers and rushing waterfalls, while fall provides vibrant foliage. Summer skies are often clear for stargazing, and winter, though challenging to access, transforms Yosemite into a snowy wonderland.
Tips for a Memorable Visit TO Glacier Point
Arrive Early: Whether visiting at sunrise or sunset, arrive at least 30 minutes beforehand to secure a good viewing spot.
Pack Essentials: Dress in layers, bring snacks, water, and a flashlight if you plan to stay after dark.
Scout Locations: Familiarize yourself with Glacier Point during the day to find the best spots.
Check Weather Conditions: Weather can greatly influence the experience, so plan accordingly.
Be Respectful: Stay on marked trails and leave no trace to preserve Yosemite’s beauty.
Stay Safe: Be cautious near cliff edges and supervise children in these areas.
Bring Binoculars: For a closer view of Half Dome, wildlife, or hang gliders, binoculars can add to your experience.
Skating the road to Glacier Point. Photo by Dalton Johnson
Whether you visit at sunrise or sunset, Glacier Point offers unforgettable experiences. Sunrise provides peace, soft light, and tranquil moments, while sunset delivers vibrant colors and dramatic landscapes. Both times have their charm, and you truly can’t go wrong.
Don’t limit yourself to just these golden hours. Explore during midday, embrace the quiet serenity of lesser-known spots, or marvel at the night sky. Each visit to Glacier Point reveals something new, making it a destination you’ll want to return to again and again. With some planning and a sense of adventure, your visit to Glacier Point will leave you with lasting memories of Yosemite’s breathtaking beauty.
Discover more Adventures in Yosemite
The Complete Photography Guide to Yosemite's Glacier Point
As passionate photography enthusiasts, we had delved into the works of modern greats who had immortalized Yosemite's breathtaking vistas. However, we aimed to add our own unique twist to this iconic location. Surveying our array of gear and props, we hatched an ambitious plan: to capture a skateboarding photograph careening down the serpentine road leading to Glacier Point. Join us on this journey as we blend the adrenaline of skateboarding with the tranquil majesty of Glacier Point's sunrise, creating a photographic masterpiece of our own.
Yosemite National Park, renowned for its world-class rock climbing, drew us in with its promise of granite adventures. Yet, amidst the challenging ascents and vertical escapades, the park's awe-inspiring landscapes beckoned us to explore a different form of expression — photography.
During our well-deserved rest days from conquering the granite cliffs, a close-knit group of friends and I embarked on a quest to discover the most picturesque corners of Yosemite Valley. Among our coveted destinations, one stood out like a beacon — Glacier Point. Why? For the chance to witness the ethereal beauty of a Glacier Point sunrise.
As passionate photography enthusiasts, we dove into the works of modern greats who had immortalized Yosemite's breathtaking vistas. However, we aimed to add our own unique twist to this iconic location. Surveying our array of gear and props, we hatched an ambitious plan: to capture a skateboarding photograph careening down the serpentine road leading to Glacier Point. Join us on this journey as we blend the adrenaline of skateboarding with the tranquil majesty of Glacier Point's sunrise, creating a photographic masterpiece of our own.
Glacier Point is an iconic location to photograph while visiting Yosemite National Park. Photograph by Dalton Johnson
Pros
Stunning Vistas: Glacier Point offers breathtaking panoramic views of Yosemite Valley, Half Dome, and the High Sierra peaks, providing ample opportunities for landscape photography.
Iconic Landmarks: You can capture iconic landmarks like Half Dome and Yosemite Falls from a unique perspective, creating memorable images.
Golden Hours: The location is perfect for sunrise and sunset photography, with soft, warm lighting that enhances the beauty of the landscape.
Seasonal Variety: The park's diverse seasons offer different photography opportunities, from lush greenery in spring to vibrant fall foliage and snow-covered landscapes in winter.
Wildlife: Yosemite is home to diverse wildlife. You might spot animals like mule deer, squirrels, and birds, providing chances for wildlife photography.
Accessibility: Glacier Point is easily accessible by car, making it convenient for photographers of all skill levels.
Astro Photography: The dark skies at Glacier Point are great for astrophotography, allowing you to capture the Milky Way and stars.
Cons
Crowds: Glacier Point is a popular tourist destination, which means it can get crowded during peak seasons. This may limit your ability to set up your equipment or find a quiet spot for photography.
Limited Parking: The parking lot at Glacier Point can fill up quickly, and finding parking during peak hours can be challenging.
Changing Weather: Weather conditions at Glacier Point can be unpredictable, and fog, rain, or high winds can affect your photography plans.
Distance: Depending on where you're staying in the park, Glacier Point may require a significant drive, which could limit your time for photography, especially during sunrise or sunset.
Limited Facilities: There are limited facilities at Glacier Point, including restrooms and food options. Be prepared with essentials for your photography session.
Permit Requirements: If you plan to shoot commercially or use drones, you may need permits, so be sure to check and comply with park regulations.
Photographing Glacier Point Basics
Photographing at Glacier Point in Yosemite National Park is an awe-inspring experience, offering a plethora of composition options for landscape photographers. To simplify your approach and ensure you make the most of your photography expedition, consider these essential considerations:
Composition Exploration: Glacier Point provides numerous vantage points to explore. Take the time to wander around the area to discover the composition that resonates most with your vision. Try different angles, heights, and perspectives to craft a unique shot.
Timing and Weather: Timing and weather are paramount for capturing breathtaking landscape shots. Clouds can add drama and texture to your images, but be mindful of the sunset being obscured by thick cloud cover. Conversely, a completely cloudless sky can result in a less captivating shot. Pay attention to weather forecasts and aim to shoot during the golden hours—shortly after sunrise and before sunset.
Arrival Time: Arriving at Glacier Point well in advance is crucial. It allows you ample time to explore the area, set up your equipment, and scout for your preferred composition while patiently awaiting the perfect lighting conditions during sunset.
Sun Position: Understanding the sun's position throughout the year is key. In the summer months, the sun sets to the left, casting its warm light on the landscape. In late fall, it sets behind you, creating different lighting dynamics. Choose your shooting time according to your desired lighting effect.
Consider Additional Elements: Besides Half Dome, consider whether you want to include Vernal and Nevada Falls, situated to the right of Half Dome, in your shot. Including these elements can add depth and scale to your composition, providing a sense of the vastness of the Yosemite landscape.
In essence, photographing at Glacier Point is an art that combines patience, timing, and a keen eye for composition. Embrace the ever-changing weather, lighting conditions, and seasonal nuances to create your own stunning images of this iconic location. Whether you're a seasoned photographer or a novice, Glacier Point's beauty is sure to inspire your creativity.
Looking over the edge at Glacier Point during sunrise. Photograph by Dalton Johnson
Best Time of Day to Photograph at Glacier Point:
Choosing the best time of day to photograph at Glacier Point depends on your photography goals and the style of shots you want to capture:
Sunrise:
Best for Lifestyle and Instagram Photography: The soft, warm light of sunrise bathes the landscape in a golden glow, creating a magical atmosphere. This lighting is excellent for lifestyle and portrait photography, as it imparts a flattering warmth to your subjects.
Fewer Crowds: Sunrise tends to be less crowded, allowing you to capture the tranquil beauty of Glacier Point without many distractions.
Unique Perspective: The morning light can cast unique shadows and highlights, adding depth and character to your images.
Sunset:
Best for Landscape Photography: Sunset is a prime time for capturing stunning landscape photographs at Glacier Point. The warm, low-angle light enhances the natural beauty of the surroundings, illuminating Half Dome and the valley in breathtaking fashion.
Dramatic Skies: As the day transitions into evening, you're more likely to encounter dramatic cloud formations that can add intrigue and mood to your landscape shots.
Longer Golden Hour: Sunset often provides a longer golden hour compared to sunrise, giving you more time to experiment with different compositions.
While sunrise and sunset offer distinct advantages, don't limit yourself to just these times. Glacier Point's beauty can be appreciated throughout the day, and each moment presents unique opportunities for photography. Consider exploring the location during the day to capture the changing light and explore creative angles. Ultimately, the "best" time to photograph depends on your vision and the story you want to tell through your images.
Related Read: Which Is Better Sunrise or Sunset at Glacier Point
Dancing on the diving board of Glacier Point. Photograph by Dalton Johnson
Photography Equipment for a lifestyle or Elopement shoot at Glacier point:
For a lifestyle or elopement shoot at Glacier Point, your selected photography equipment is well-rounded and suitable for capturing a variety of shots. Here's a gear list that complements your existing setup:
The Zoom Lens Trio: For any lifestyle shoot, I like to bring the trio of zoom lenses by Tamron that give me a range from 17mm to 180mm all at f/2.8.
Tamron 17-28: The Tamron 17-28mm is a versatile wide-angle zoom lens, perfect for capturing expansive landscapes and dramatic vistas at locations like Glacier Point in Yosemite.
Tamron 28-75: The Tamron 28-75mm is a popular standard zoom lens, offering a practical range for various shooting scenarios, from portraits to candid moments during a lifestyle or elopement shoot.
Tarmon 70-180: The Tamron 70-180mm is a compact telephoto zoom lens that allows you to get closer to your subjects, making it suitable for capturing intimate details and candid emotions during lifestyle or elopement photography sessions.
Camera: You can’t go wrong with a mirrorless camera from any of the top brands today, my go-to camera body is the Sony a7rV
External Flash or Speedlight: Even though natural light can be incredible at Glacier Point, having an external flash can be beneficial for filling in shadows during portraits, especially in challenging lighting conditions.
Tripod: Since you'll be doing lifestyle and elopement photography, having a tripod is still essential. It will help you stabilize your camera for group shots or long-exposure images if needed.
Reflector or Diffuser: These tools can help you manipulate and control natural light, which is important for achieving the desired look in your lifestyle shots.
Extra Batteries and Memory Cards: Ensure you have spare batteries and memory cards to avoid running out of power or storage space during your shoot.
Lens Cleaning Kit: Dust and weather conditions can affect your gear. A lens cleaning kit with a microfiber cloth, lens cleaning solution, and a blower will help keep your lenses and camera clean.
Rain Cover: Weather at Glacier Point can be unpredictable. Having a rain cover for your camera can protect it from sudden rain showers.
Reflective Umbrella or Softbox: If you plan to shoot during harsh midday sunlight, using a reflective umbrella or softbox with your external flash can help diffuse and soften the light for flattering portraits.
Remote Shutter Release: This is handy for capturing self-portraits or group shots without needing someone to press the shutter button.
Props and Accessories: Depending on the concept and style of your shoot, consider bringing props or accessories like blankets, flowers, or decorative items that can enhance the visual story of your elopement or lifestyle shoot.
Model Releases: If you plan to use the images for commercial purposes, have model release forms ready for any individuals featured in your photographs.
Permits: Be aware of any permit requirements for commercial photography in the park, especially if your shoot involves clients or models.
With these additional items, you'll have a well-equipped kit to capture beautiful lifestyle and elopement images at Glacier Point. Don't forget to plan ahead and communicate with your subjects to make the most of this stunning location.
Photography Equipment for a Landscape shoot at Glacier point:
For a landscape shoot at Glacier Point, the photography equipment you've listed is a good start, but here are a few additional items that can enhance your photography experience and help you capture stunning images:
Camera: You can’t go wrong with a mirrorless camera from any of the top brands today, my go-to camera body is the Sony a7rV
Wide-angle Lens: The Tamron 17-28 is a great choice, but you might also consider a wider lens for capturing the expansive vistas at Glacier Point.
Filters:
Polarizing Filter: A polarizer can reduce reflections and enhance the colors of the sky and water. It's particularly useful for controlling glare on the granite surfaces.
Neutral Density (ND) Filters: ND filters allow you to use longer shutter speeds, which can be beneficial for smoothing out water or capturing cloud movement during daylight hours.
Remote Shutter Release: A remote shutter release or intervalometer can help you take long-exposure shots without introducing camera shake.
Extra Batteries and Memory Cards: Glacier Point may be cold, and cold weather can drain your camera's battery more quickly. Ensure you have spare batteries and enough memory cards for your shoot.
Lens Cleaning Kit: Dust and mist can be prevalent in outdoor locations. Having a lens cleaning kit can help you keep your lens and camera sensor clean.
Backpack or Camera Bag: A sturdy and comfortable backpack or camera bag can make it easier to carry your equipment and protect it from the elements.
Appropriate Clothing: Be prepared for variable weather conditions. Bring warm clothing, especially if you're shooting at sunrise or sunset when temperatures can be chilly.
Headlamp or Flashlight: If you're shooting during early morning or late evening hours, having a headlamp or flashlight can be helpful for navigating the area and setting up your equipment in low light conditions.
Lens Hood: A lens hood can help reduce lens flare and protect your lens from any stray light.
Laptop and Card Reader: If you plan to review and edit your photos on-site, a laptop and a card reader can be handy.
Photo Apps: Consider having photo apps on your smartphone for planning shots, checking the weather, and determining the position of the sun or moon.
Lastly, bug spray, it's a good idea, especially during the warmer months when mosquitoes and other insects can be prevalent in wooded areas around sunset. Always be prepared with essentials like water, snacks, and first-aid supplies when shooting in the great outdoors.
Typically, you drive this road, but why not skate it if you have one? Photograph by Dalton Johnson
How to Get to Glacier Point
To get to Glacier Point in Yosemite National Park, you have several options, depending on your preferences and the time of year. Here are the primary ways to reach Glacier Point:
1. By Car (Summer and Fall):
During the summer and fall months when Glacier Point Road is open (typically late May to early November, but check the current road conditions), you can drive to Glacier Point.
Enter Yosemite National Park through any of the entrances and make your way to Yosemite Valley.
From Yosemite Valley, take the Wawona Road (Highway 41) to the Glacier Point Road, which is located near Badger Pass Ski Area.
Follow Glacier Point Road to its end at Glacier Point.
2. By Hiking (Summer and Fall):
If you're an avid hiker and want a more immersive experience, you can hike to Glacier Point.
There are several trails that lead to Glacier Point, including the Four-Mile Trail (strenuous), Panorama Trail (moderate to strenuous), and the Pohono Trail (moderate to strenuous). Each offers unique perspectives and challenges.
Ensure you have the appropriate gear, maps, and information, as these hikes vary in length and difficulty.
3. By Tour Bus (Summer Only):
Yosemite Valley Shuttle Tours offer guided bus tours to Glacier Point during the summer season.
These tours provide informative commentary and a convenient way to reach the viewpoint without driving or hiking.
Check with the Yosemite National Park Service or authorized tour operators for availability and schedules.
4. By Cross-Country Skiing or Snowshoeing (Winter):
In the winter, when the road is closed to vehicles, you can access Glacier Point by cross-country skiing or snowshoeing.
Glacier Point Road is groomed for skiing, and rental equipment is available at Badger Pass Ski Area.
Be prepared for winter conditions, and check with the park for trail and road status.
Important Tips:
Always check the current road and trail conditions before heading to Glacier Point, as accessibility can change due to weather and maintenance.
Consider arriving early in the day to secure parking, as it can fill up quickly during peak times.
Bring plenty of water, snacks, and clothing layers, as the weather can vary, even during the summer.
Respect park regulations and Leave No Trace principles to protect the environment.
Keep in mind that Glacier Point offers stunning views, so be prepared to capture the beauty of Yosemite National Park with your camera when you arrive.

Consider other photo locations like Yosemite Falls. Photograph by Dalton Johnson
Other Yosemite Photography Spots to Consider:
Yosemite National Park is a photographer's paradise, offering a multitude of stunning photography spots. In addition to Glacier Point, here are some other must-visit photography locations in Yosemite:
1. Yosemite Falls:
Yosemite Falls is North America's tallest waterfall, offering captivating photo opportunities.
Photograph it from various viewpoints, including the Swinging Bridge and Cook's Meadow, for different perspectives.
2. El Capitan (El Cap):
El Capitan is a massive granite monolith and a favorite subject for landscape photographers.
Capture its imposing presence from viewpoints like El Capitan Meadow and the famous Tunnel View.
3. Tuolumne Meadows:
Located in the high country of Yosemite, Tuolumne Meadows is known for its expansive meadows, alpine lakes, and granite peaks.
The meadows provide excellent opportunities for capturing wildflower displays and stunning reflections in the Tuolumne River.
4. Cathedral Peak:
Cathedral Peak is a striking granite formation in the Tuolumne Meadows area.
Hike or find vantage points to photograph this iconic peak against a backdrop of alpine scenery.
5. Tunnel View:
Tunnel View is one of the most iconic viewpoints in Yosemite National Park.
It offers a breathtaking vista of El Capitan, Bridalveil Fall, and Half Dome in the distance, making it a must-visit spot for photographers.

Firefalls in Yosemite Valley during February. Photograph by Dalton Johnson
6. Fire Falls (Horsetail Falls):
Fire Falls, also known as Horsetail Falls, is famous for its natural "firefall" phenomenon that occurs in late February when the setting sun illuminates the waterfall, creating a fiery effect.
Photographers flock to El Capitan Picnic Area to capture this rare and stunning event.
7. Mariposa Grove of Giant Sequoias:
This grove is home to some of the largest trees in the world, including the famous Grizzly Giant.
Photograph the giant sequoias to capture their immense size and ancient beauty.
8. Mirror Lake:
Mirror Lake offers reflections of the surrounding cliffs and Half Dome in calm waters.
Visit during the spring and early summer when the lake is at its fullest for the best mirror-like reflections.
9. Sunrise and Sunset at Various Locations:
Sunrise and sunset throughout Yosemite National Park offer magical lighting for photography.
Explore different spots like Valley View, Olmsted Point, and Sentinel Dome for sunrise and sunset shots.
Remember to check for seasonal conditions, park regulations, and road access when planning your photography trips to these locations. Yosemite's diverse landscapes provide endless opportunities for photographers to capture the beauty of nature in its various forms.
Sunset glow on Half Dome photographed from Glacier Point in Yosemite National Park. Photograph by Dalton Johnson
Whether your photographic journey at Glacier Point in Yosemite National Park leads you to capture the grandeur of its landscapes or the intimate moments of a lifestyle or elopement shoot, this iconic location offers a canvas of endless possibilities. With the right equipment, creativity, and an understanding of the unique challenges and beauty this destination presents, your photography at Glacier Point is sure to yield breathtaking and memorable images.
From the majesty of Half Dome to the warmth of a sunrise, Glacier Point beckons photographers to explore its diverse and awe-inspiring vistas, reminding us that amidst nature's grandeur, there's always a story to tell and a moment to capture. So, grab your camera and embark on a photographic adventure that will leave you with images to cherish and stories to share for years to come.
Discover More Photography Tips
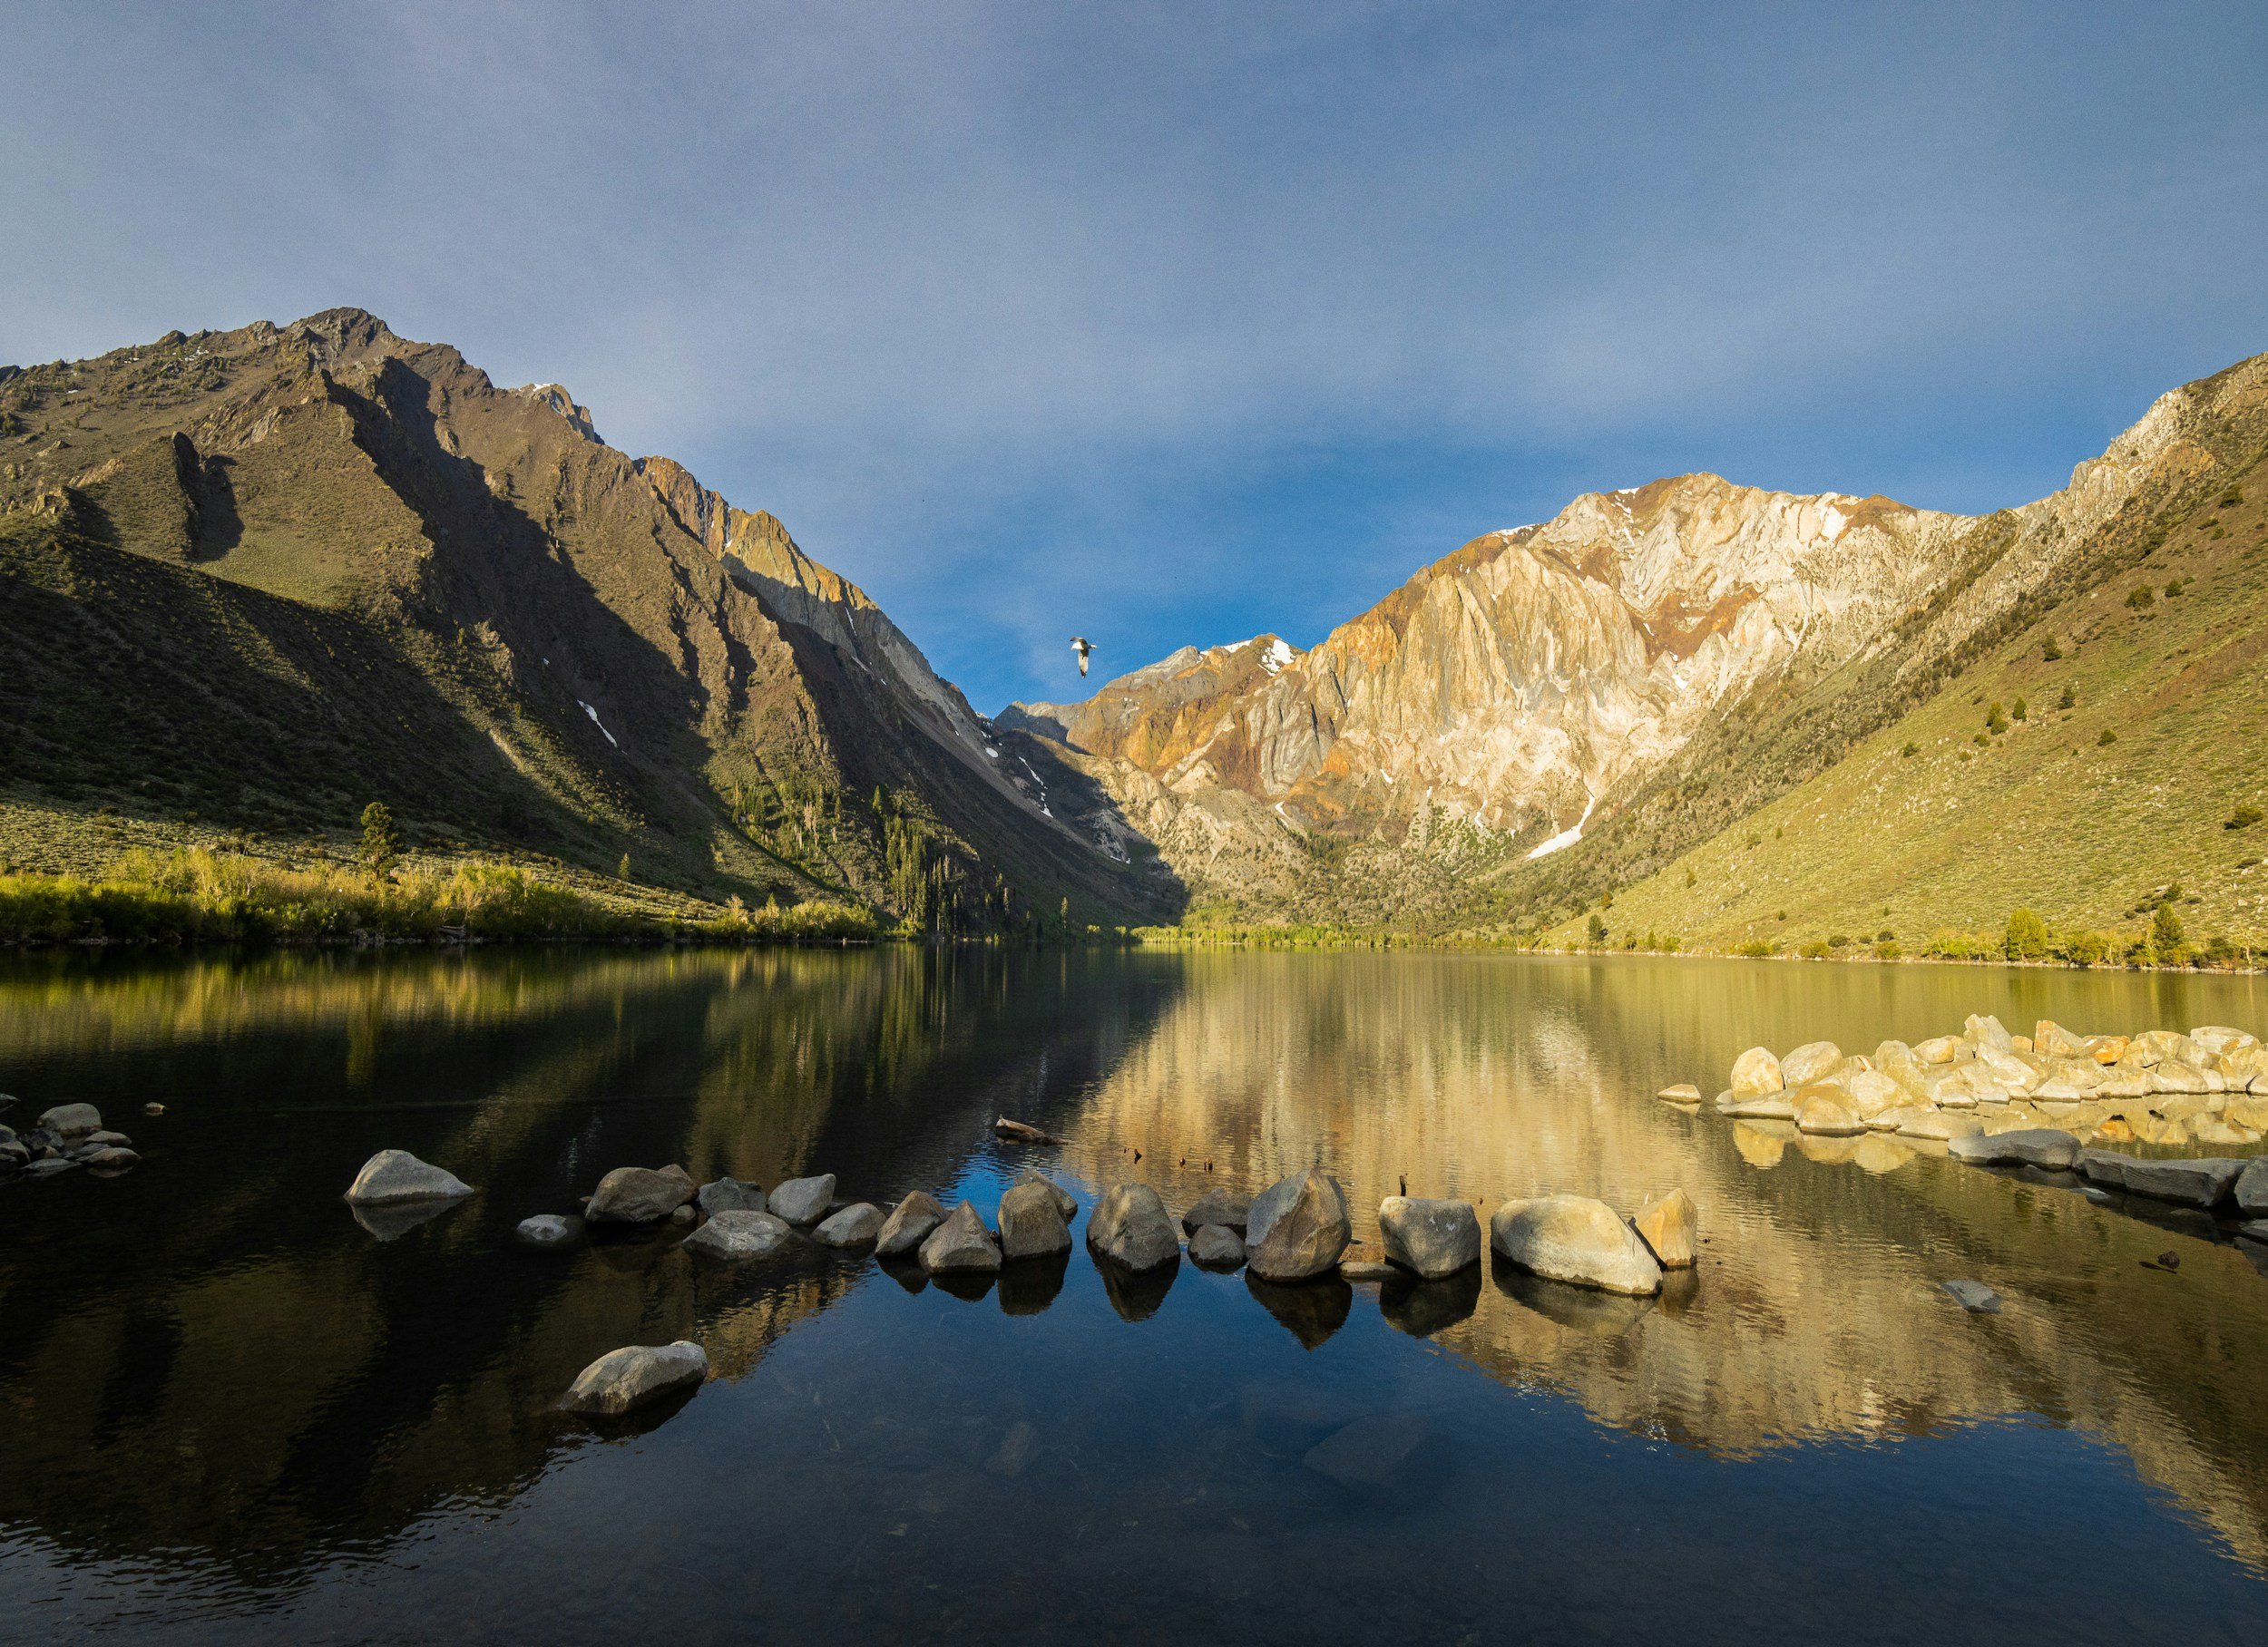
Convict Lake Is Worth Stopping For At Least An Afternoon
If you're planning a road trip along Highway 395, Convict Lake is a must-see destination. Nestled in the Eastern Sierra, this picturesque lake offers a serene escape with activities that make it worth visiting for at least an afternoon or even longer. Whether you enjoy hiking, kayaking, fishing, camping, or simply taking in stunning mountain views, Convict Lake has something for everyone. Its unique combination of natural beauty, historical intrigue, and recreational opportunities makes it a destination that should not be overlooked.
If you're planning a road trip along Highway 395, Convict Lake is a must-see destination. This picturesque lake offers a serene escape with activities that make it worth visiting for at least an afternoon or even longer. Whether you enjoy hiking, kayaking, fishing, camping, or simply taking in stunning mountain views, Convict Lake has something for everyone. Its unique combination of natural beauty, historical intrigue, and recreational opportunities makes it a destination that should not be overlooked.
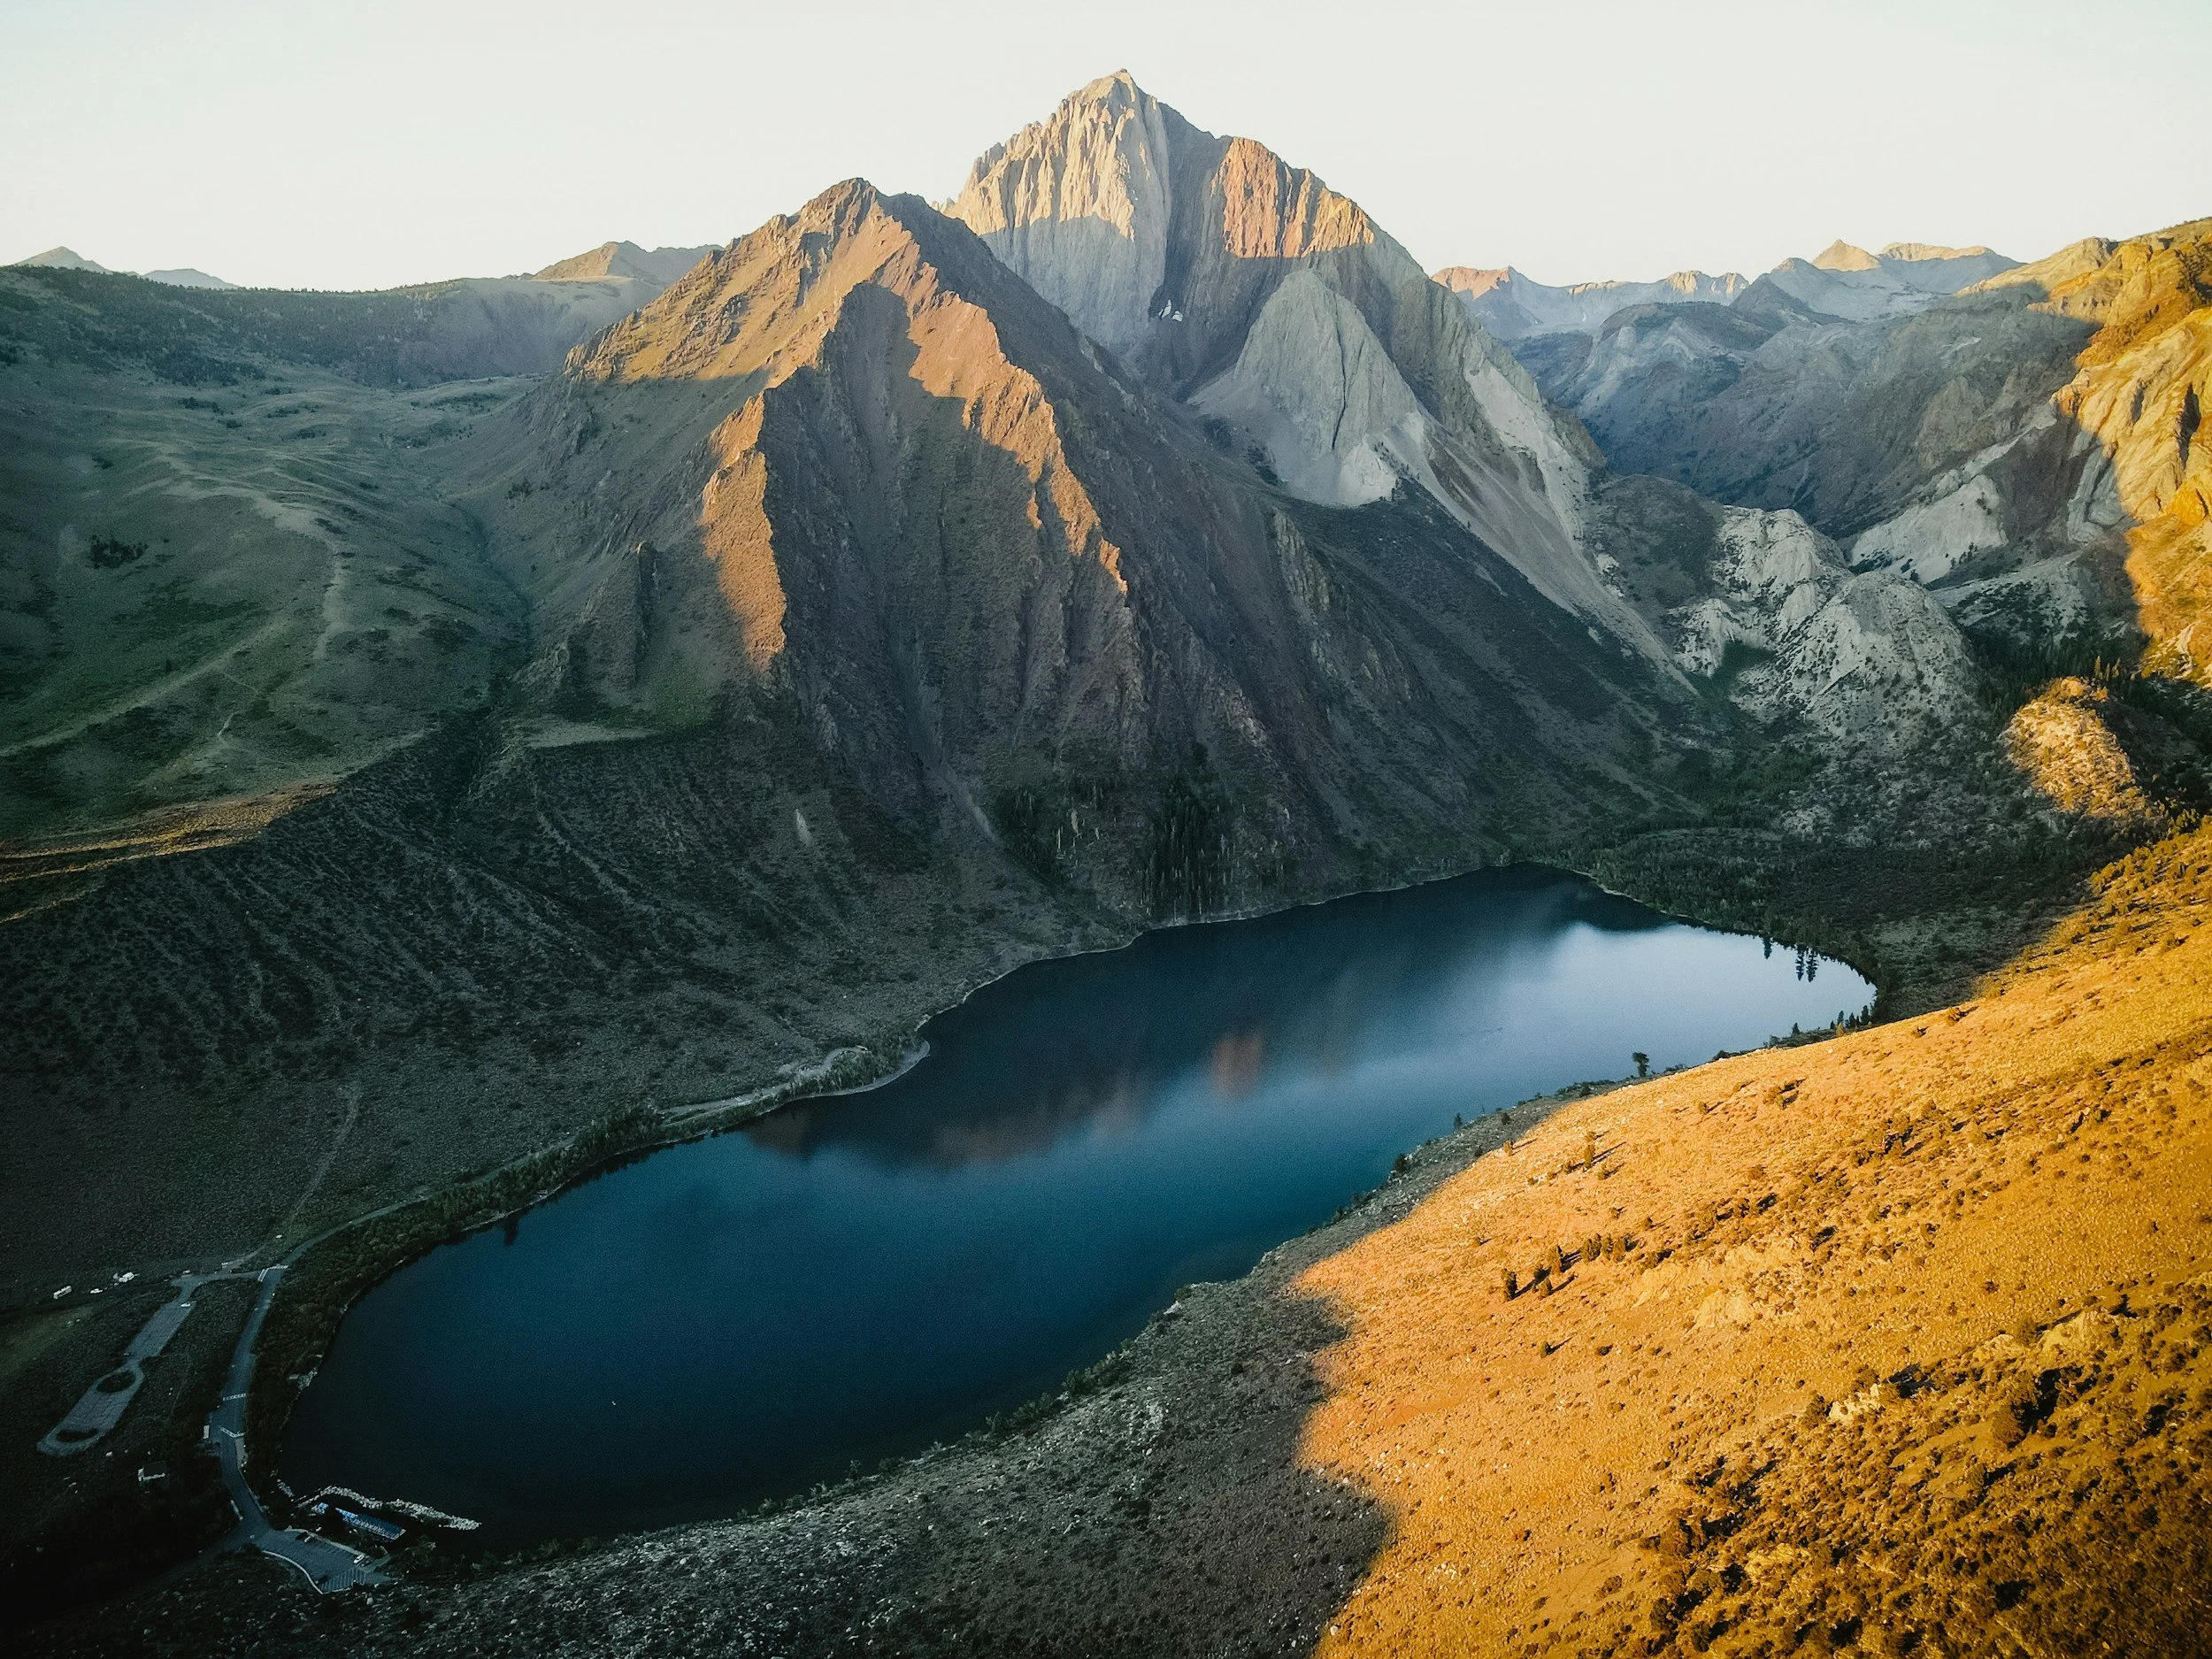
Unsplash
Why Visit Convict Lake?
Convict Lake stands out for its crystal-clear waters, surrounded by dramatic mountain peaks. The lake’s vibrant blue hue and the towering peaks of the Sierra Nevada create a picture-perfect setting that feels almost surreal. For photographers, kayakers, hikers, and road trippers looking to unwind, Convict Lake provides an unbeatable backdrop for relaxation and adventure. Whether you’re traveling solo, with friends, or with family, the lake offers an experience that caters to all interests.
History Behind Convict Lake
The lake gets its intriguing name from an incident in the late 1800s when a group of escaped convicts sought refuge in the area. They were eventually captured after a dramatic standoff, leaving behind a tale that adds historical depth to the lake's natural beauty. This colorful history contrasts with the serene environment, adding an extra layer of fascination to your visit. Learning about this story can make your time at Convict Lake feel even more enriching and unique.
Best Time to Visit Convict lake
Sunrise is the ideal time to experience Convict Lake. As the morning light dances across the water and illuminates the surrounding peaks, the scenery transforms into something magical. Early mornings also mean fewer crowds, providing a tranquil atmosphere for those who prefer quieter experiences. Fall is another exceptional time to visit, as the golden hues of autumn foliage reflect on the lake, creating a breathtaking scene. Winter brings a peaceful stillness with snow-dusted peaks, while spring offers blooming wildflowers and vibrant greenery.
Sunrise kayaking at Convict Lake. Photo by Dalton Johnson
Things to Do at Convict Lake
1. Hiking the Convict Lake Loop
The Convict Lake Loop Trail is a must for visitors. This 2.5-mile trail is relatively easy and takes you around the lake, offering stunning views from every angle. Along the path, you’ll find interpretive signs explaining the area's geology, plant life, and history. It’s also an excellent opportunity for birdwatching, as the area is home to a variety of species. For those seeking a more challenging hike, nearby trails offer access to higher elevations and more rugged terrain.
2. Kayaking and Paddleboarding
For water enthusiasts, kayaking and paddleboarding are fantastic ways to explore Convict Lake. Rentals are available during the warmer months, making it easy for visitors to hit the water. Gliding across the lake allows you to fully appreciate its tranquil beauty and provides a unique vantage point of the surrounding peaks. If you’re bringing your own equipment, be sure to check local regulations and safety guidelines.
Related Read: Kayaking Convict Lake, Make Sure To Go For Sunrise
3. Swimming
Swimming in Convict Lake is a refreshing experience for the adventurous. The water can be chilly, even in summer, but the invigorating dip is worth it, especially on hot days. Make sure to bring a towel and change of clothes to stay comfortable after your swim. Families with children often enjoy wading near the shore, where the shallow waters are slightly warmer.
4. Fishing
Known for its excellent trout fishing, Convict Lake is a favorite spot for anglers. The lake is regularly stocked with rainbow and brown trout, offering plenty of opportunities for a successful catch. Fishing from the shore or a rented boat are both popular options, and the peaceful surroundings make the experience all the more enjoyable. Be sure to acquire the necessary permits and follow local fishing regulations to ensure a hassle-free outing.

Cleaning up after a picnic at Convict Lake. Photo by Dalton Johnson
5. Picnicking
Picnic areas around the lake provide a perfect spot to enjoy a meal amidst nature. Whether you pack your own lunch or grab something from the nearby general store, dining by the lake is a relaxing way to soak in the views. Some picnic spots even have barbecue facilities for those looking to cook outdoors. Don’t forget to bring a blanket or portable chairs to make your picnic even more comfortable.
6. Camping
For those with more time, staying overnight at the Convict Lake Campground is highly recommended. The campground is well-maintained and offers stunning views of the lake and mountains. It’s an ideal base for exploring the area further and enjoying the starlit skies that the Eastern Sierra is known for. Whether you’re in a tent or an RV, the experience of waking up to the sight of Convict Lake is unforgettable.
7. Photography
Photographers will find endless inspiration at Convict Lake. From sunrise to sunset, the changing light transforms the landscape into a dynamic and captivating scene. Whether you’re capturing the reflection of the peaks on the water or focusing on the vibrant colors of fall foliage, the lake provides a wealth of opportunities for stunning shots. Bring a tripod for long-exposure shots of the lake or the stars at night.


Tips for Visiting Convict Lake
Arrive Early: Morning visits not only provide the best lighting for photography but also fewer crowds, giving you a more peaceful experience.
Pack Layers: The weather can change quickly in the Eastern Sierra, especially in the mornings and evenings. Bringing a jacket or extra layers ensures you’re prepared.
Bring Snacks and Water: While there is a general store nearby, having your own supplies makes your visit more convenient and enjoyable.
Plan for Seasonal Activities: Summer is great for water activities, while fall offers stunning foliage. Spring brings blooming wildflowers, and winter provides a peaceful, snow-dusted landscape.
Check Local Regulations: Whether you’re fishing, boating, or hiking, familiarize yourself with any rules and guidelines to ensure a safe and respectful visit.
Why Convict Lake Is Worth It
As someone who has visited Convict Lake more times than I can count, I can confidently say it’s worth every visit. Each time feels like a fresh adventure. Hiking the loop trail provides a chance to reconnect with nature, while paddling on the lake offers a sense of tranquility that’s hard to find elsewhere. Even a simple walk along the shoreline, taking in the crisp mountain air and stunning views, is an experience to cherish. Whether you’re looking for an active outing or a peaceful retreat, Convict Lake delivers.
The lake’s accessible location off Highway 395 and the variety of activities available make it an easy and rewarding stop for travelers. Its beauty is timeless, and the memories made here are unforgettable. For those with a love of nature, history, and outdoor recreation, Convict Lake is a destination that truly stands out.
Unsplash
Convict Lake is a gem in the Eastern Sierra that offers a blend of natural beauty, recreational opportunities, and historical intrigue. Whether you spend a few hours hiking, kayaking, fishing, or simply soaking in the scenery, it’s a destination that deserves a spot on your travel itinerary. Don’t miss the chance to experience this serene and captivating lake—it’s a stop you won’t regret. Plan to visit during your next Highway 395 road trip, and you’ll see why Convict Lake is so beloved by those who stop by. Stay longer if you can—you might find it becomes a place you return to time and again.
Discover more Adventures
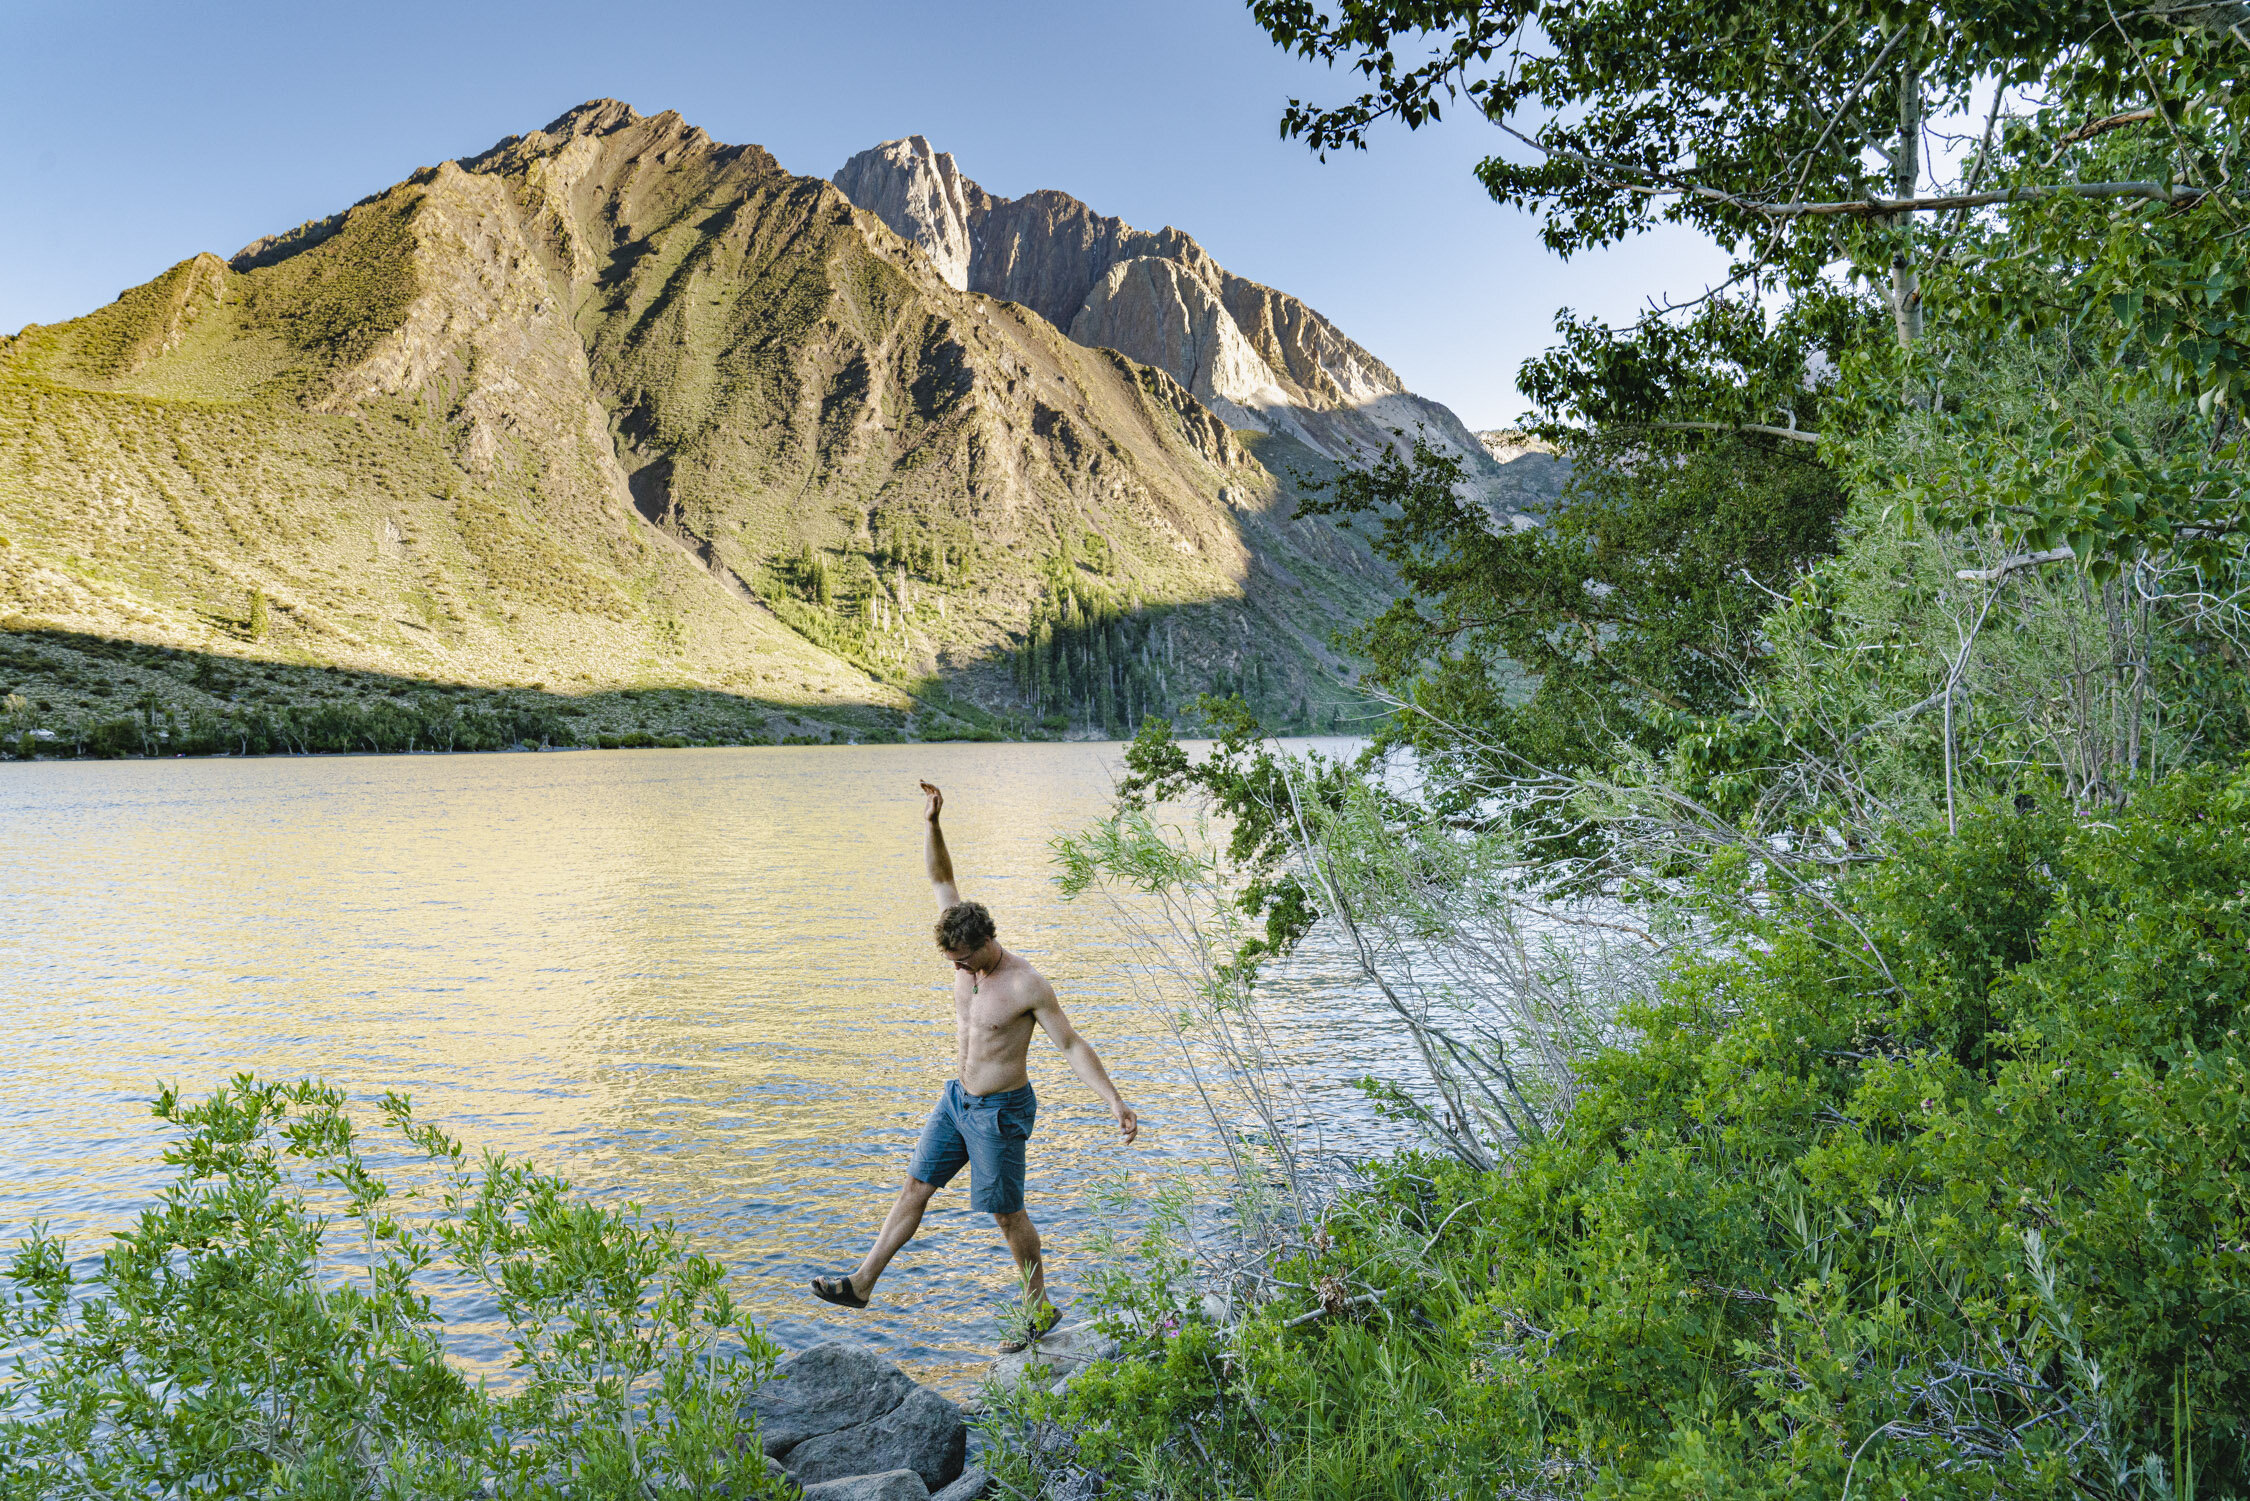
Summer Is the Best Time to Visit Convict Lake Along Highway 395
When planning a trip along California's iconic Highway 395, make sure to stop at Convict Lake. Just 10 miles south of Mammoth Lakes, this Eastern Sierra alpine lake is at its best during the summer months. With warm weather, clear blue skies, and endless activities to enjoy, summer is the ideal season to experience all that Convict Lake has to offer. Whether you're seeking adventure or relaxation, this destination offers something for everyone.
When planning a trip along California's iconic Highway 395, make sure to stop at Convict Lake. Just 10 miles south of Mammoth Lakes, this Eastern Sierra alpine lake is at its best during the summer months. With warm weather, clear blue skies, and endless activities to enjoy, summer is the ideal season to experience all that Convict Lake has to offer. Whether you're seeking adventure or relaxation, this destination offers something for everyone.
Hiking and swimming around Convict Lake during the summer. Photo by Dalton Johnson
Why Summer Is the Perfect Season
Convict Lake truly comes alive in the summer. The lake buzzes with activity as fishermen, boaters, and outdoor enthusiasts flock to its shores to escape the summer heat. The lake is well-stocked with trout, making it a popular destination for anglers of all skill levels. The warm temperatures make it comfortable for hiking, kayaking, and simply relaxing by the water, while the long daylight hours give you more time to enjoy the breathtaking surroundings.
One of the highlights of summer at Convict Lake is the early morning tranquility. The mornings are peaceful and serene, perfect for a sunrise paddle on the calm water. As the day progresses, the lake becomes a lively hub for visitors soaking up the sun and enjoying the variety of activities available. The combination of vibrant energy and natural beauty makes summer an unbeatable time to visit.
Top Activities to Enjoy at Convict Lake During the Summer
Fishing
Summer is prime time for fishing at Convict Lake. Anglers can cast their lines from the shore or rent a boat to explore deeper waters. The lake is known for its rainbow and brown trout, and the biting is especially good during the warmer months. Whether you’re a seasoned fisherman or a beginner, the thrill of reeling in a catch at Convict Lake is unforgettable.
Hiking
The Convict Lake Loop Trail is a must-do for hikers. This 2.5-mile loop circles the lake, offering stunning views of the water and surrounding peaks. Early in the morning, the trail is quieter, making it a great time to explore. Along the trail, you’ll even spot a hidden waterfall—a bonus for those willing to make the trek. For more adventurous hikers, nearby trails lead into the backcountry, providing a more secluded experience and opportunities to immerse yourself in the rugged beauty of the Eastern Sierra.
Kayaking and Paddleboarding
If you love being on the water, bring a kayak or paddleboard. Paddling on Convict Lake at sunrise is an unforgettable experience. The reflection of the mountains on the glassy water creates a picture-perfect moment. Paddleboarding offers a unique perspective of the lake’s crystal-clear waters, allowing you to spot fish and underwater features as you glide across the surface. Rentals are available for those who don’t have their own equipment.
Related Read: How to Kayak at Convict Lake in the Eastern Sierra
Camping
To fully immerse yourself in the beauty of Convict Lake, consider staying overnight at the campground. Reservations fill up fast, so plan ahead. Waking up to the crisp mountain air and enjoying the lake before the crowds arrive is well worth it. The campground is well-equipped with amenities, making it a comfortable base for exploring the area. Sitting around a campfire under the starry night sky is the perfect way to end a day of outdoor adventures.
Photography
Summer is also an excellent time for photography at Convict Lake. The dramatic mountain backdrop, vibrant blue waters, and golden hues of sunrise and sunset create stunning photo opportunities. Don’t forget to bring a tripod to capture long exposures of the lake and surrounding landscape.
Tips for Avoiding Crowds
While summer is the busiest time of year at Convict Lake, it’s easy to find moments of peace. Arrive early in the morning for the quietest experience, or explore the far side of the lake on the Convict Lake Loop Trail. This area tends to be less crowded and offers some of the most scenic views. Additionally, weekdays are generally less busy than weekends, so plan your visit accordingly if you prefer a more tranquil atmosphere.
Another way to escape the crowds is by venturing beyond the main shoreline. Renting a kayak or paddleboard allows you to access quieter areas of the lake, where you can enjoy the serenity and beauty of the surroundings without interruption. For hikers, exploring trails that lead into the backcountry offers a more secluded experience away from the hustle and bustle.
What to Bring for Your Summer Visit
Fishing Gear: The lake is stocked with trout, so don’t forget your tackle box and favorite lures.
Kayak or Paddleboard: The calm, clear waters are ideal for paddling and offer stunning views from the lake’s surface. If you can’t pack one, or don’t own one, no worries. You can always rent them.
Hiking Shoes: The loop trail is accessible, but sturdy shoes are helpful for rocky sections and longer trails.
Camera: You’ll want to capture the breathtaking scenery, especially at sunrise or sunset.
Water and Snacks: Summer days can be hot, so stay hydrated and pack plenty of snacks for your adventure.
Sun Protection: Bring sunscreen, sunglasses, and a hat to shield yourself from the strong summer sun.
Watching the sunrise at Convict Lake from a kayak. Photo by Dalton Johnson
Plan Your Summer Trip
Convict Lake is a hidden gem of the Eastern Sierra, and summer is the perfect time to visit. Whether you’re fishing, hiking, kayaking, or just relaxing by the water, this alpine oasis has something for everyone. Don’t forget to plan your visit early to secure a campsite or arrive early in the day to avoid crowds. Summer weekends can be especially busy, so consider visiting during the week for a quieter experience.
For me, Convict Lake is an annual tradition. Every summer, I look forward to enjoying its beauty, tranquility, and outdoor activities. The combination of stunning scenery, diverse activities, and welcoming atmosphere makes it a must-visit destination. If you’re traveling along Highway 395, make sure to stop by—you won’t regret it!
Discover more Adventures

Kayaking Convict Lake, Make Sure To Go For Sunrise
If you’re wondering, “Can you kayak at Convict Lake?” the answer is an enthusiastic yes! Nestled along the iconic Highway 395, Convict Lake offers an unforgettable sunrise kayaking experience that combines serenity, breathtaking views, and the perfect start to any outdoor adventure. Whether you're a nature lover, a photography enthusiast, or someone seeking a peaceful escape, this lake offers something magical for everyone.
If you’re wondering, “Can you kayak at Convict Lake?” the answer is an enthusiastic yes! Tucked away and hidden from the iconic Highway 395, Convict Lake offers an unforgettable sunrise kayaking experience. Combing serenity, breathtaking views, and the perfect start to any outdoor adventure, I have loved every kayaking session I have had at Convict Lake. Whether you're a nature lover, a photography enthusiast, or someone seeking a peaceful escape, Convict Lake offers something magical for everyone.

Sunrise kayaking at Convict Lake along Highway 395. Photo by Dalton Johnson
Preparing for the Sunrise Adventure
Some adventures make it hard to sleep the night before, and kayaking at Convict Lake was one of those for me. Having visited this stunning Eastern Sierra destination for trail running, hiking, and swimming, I couldn’t wait to experience it from the water. There’s something about the anticipation of paddling on a perfectly still lake, surrounded by towering peaks, that fuels excitement like nothing else.
With my kayak, paddle, and personal flotation device (PFD) loaded the night before, my 5:00 a.m. alarm was my call to action. It was a groggy start, but the thought of missing sunrise over this alpine lake was motivation enough. After brewing a quick cup of coffee, I was on the road, the silence of the early morning broken only by the hum of my car. The drive itself, along Highway 395, was peaceful—a prelude to the beauty that awaited.
The Quiet Before the Glow
Arriving at Convict Lake in the pre-dawn darkness, I wasn’t alone. Photographers lined the marina, waiting to capture the magical moment when sunlight first kissed Laurel Mountain. The faint hum of their chatter and the clicks of camera gear added a quiet energy to the scene. Wanting to avoid disturbing their serene setup, I carried my kayak to the shale beach on the southeast corner of the lake—a quieter spot perfect for launching.
The cool morning air hovered around 35°F, and the stillness was palpable. The only sounds were the soft rustle of gear being prepared and the occasional splash from a fish breaking the water’s surface. Working quickly by the glow of our headlamps, we unloaded the kayaks and placed them at the water’s edge. There was still time to sip warm coffee, taking in the calm before the day truly began. The lake, reflecting the faint light of dawn, was like a mirror—a promise of the incredible paddle ahead.
Paddling Into the Sunrise
As the first streaks of light touched the surrounding peaks, it was time to push off. The water was glassy and calm, creating a perfect reflection of the towering Laurel Mountain and the deep blue sky. Each paddle stroke sent gentle ripples across the lake, breaking the stillness just enough to remind me I was part of this tranquil scene.
The experience was surreal. Fish occasionally broke the surface near my kayak, their sudden movements adding a touch of life to the otherwise serene setting. The golden glow gradually spread across the mountain face, softening the rugged cliffs by casting a warm hue on the lake’s surface. It was as if nature had orchestrated this moment just for me. Sitting in the middle of this natural amphitheater, I realized this wasn’t just kayaking—it was a moment of pure connection with the world around me.
As the sun climbed higher, the light shifted, revealing new details in the landscape. The peaks’ textures became more defined, and the vibrant greens and browns of the surrounding forest came to life. It was a reminder of how dynamic and ever-changing the Eastern Sierra landscape can be. For over an hour, I paddled in quiet awe, circling the lake and soaking in every angle of its beauty.
Tips for Kayaking Convict Lake
If you’re planning your own sunrise paddle at Convict Lake, here are a few tips to make the most of your experience:
Arrive early: Sunrise happens fast, so plan to get there at least 30 minutes before the first light. This will give you time to set up, enjoy the quiet moments, and launch your kayak without rushing.
Pack warm layers: Morning temperatures can be chilly, even in summer. Dress in layers you can shed as the day warms up, and consider bringing gloves if your hands are sensitive to the cold.
Respect photographers: If you see others enjoying the sunrise, keep your launch quiet and move to less crowded spots like the southeast shale beach. Everyone’s there for the magic—a little courtesy goes a long way.
Bring essentials: Don’t forget your kayak, paddle, PFD, and a thermos of coffee or tea to enjoy on shore. A small dry bag for your phone or camera is also a good idea.
Check the weather: While the lake is typically calm in the morning, unexpected winds can arise later in the day. Always prioritize safety.
Watching the light creep down the mountains surrounding Convict Lake from my kayak. Photo by Dalton Johnson
Why Sunrise Is Worth It
The reward for losing a little sleep is experiencing Convict Lake at its most magical. The still water, soft light, and tranquility make it the perfect destination for paddling enthusiasts and nature lovers alike. The combination of solitude and breathtaking scenery is unmatched, and it’s a great way to start a day of exploring the Eastern Sierra.
Kayaking at Convict Lake at sunrise isn’t just an activity—it’s an adventure that stays with you long after you leave the water. Whether you’re a seasoned kayaker or a first-timer, this unique experience along Highway 395 is one you won’t regret. The reflections, the golden light, and the sheer peace of the moment are memories worth making.
Pack your gear, set your alarm, and don’t miss the chance to paddle into the sunrise at one of the Eastern Sierra’s most beautiful destinations. Let the quiet ripples of Convict Lake at dawn remind you of the beauty in simplicity, and take home not just photos but a renewed appreciation for nature’s wonders.
Discover more Adventures

How to Kayak at Convict Lake in the Eastern Sierra
Just ten miles south of Mammoth Lakes along Highway 395, Convict Lake is an alpine lake surrounded by rugged peaks waiting to be kayaked on. This glacially carved gem in Inyo National Forest is a favorite for outdoorsy people, offering year-round kayaking and paddleboarding. The lake’s mirror-like surface reflects the towering mountains, creating a breathtaking backdrop as you glide across the calm waters.
Just ten miles south of Mammoth Lakes along Highway 395, Convict Lake is an alpine lake surrounded by rugged peaks waiting to be kayaked on. This glacially carved gem in Inyo National Forest is a favorite for outdoorsy people, offering year-round kayaking and paddleboarding. The lake’s mirror-like surface reflects the towering mountains, creating a breathtaking backdrop as you glide across the calm waters.
With easy water access on the south side of the lake, kayaking here is free and accessible to all. Once a hideout for fugitives, Convict Lake has become a peaceful summer getaway for those seeking adventure and a rugged winter destination.
Read on to learn the best times to visit, where to launch your kayak, and tips for making the most of your paddling experience.
Kristin enjoying the perfect reflection on Convict Lake while kayaking. Photograph by Dalton Johnson
A dreamy sunrise paddle on Convict Lake
There are those times when you go to bed so excited for the next days adventure you just can’t sleep, well that happened to me the night before kayaking on Convict Lake. I had been to the lake, tucked away in the eastern sierra, several times to trail run, hike, and swim, but I had not been kayaking on this gorgeous lake.
My alarm went off at 5:00 am, I wanted to be up before the summer sunlight landed on the mountain tops at Convict Lake. Groggy and not wanting to get out of bed, I just thought about missing the sunrise. I couldn’t do that! So, I tossed my sheets off of me, made some coffee, and hit the road.
The night before I had already loaded up my kayak, PFD, and paddle, so I was ready to be on top of this glassy lake for sunrise. Selfishly, I wanted to sit in the middle of the lake and enjoy the view.
Watching the sunrise from the kayak on Convict Lake. Photograph by Dalton Johnson
As we pulled into the parking lot, there were a few photographers lined up at the marina, waiting for the orange glow of the sunrise light to hit Laurel Mountain. The night was dark, so we worked by headlamps to get the kayaks down to the water. In hopes of not disturbing the phtoographers, we headed to the shale beach on the southeast corner of Convict Lake.
Nobody was here.
Getting the kayaks down to the beach and ready for our sunrise paddle went quick. We had 10 minutes to sit on the shore and enjoy a few sips of coffee before getting on the water.
The morning was a cool 35f, but I could tell the day was going to heat up. There were very few clouds in the sky, the air was stagnant, so the lake was a perfect reflection. The times was now!
Pushing off the shore, I headed out onto the flat water. It was like a mirror. Occasionally, fish would jump next to me as the sun began making its way down the face of Laurel Mountain. This idea, now a reality, was well worth the loss of sleep!
DIRECTIONS TO CONVICT LAKE:
Convict Lake is located 15 miles south of Mammoth Lakes along Highway 395.
Driving directions to Convict Lake
Water Access to Convict Lake
Getting on the water at Convict Lake is straightforward and convenient, whether you’re kayaking, paddleboarding, or launching a small boat. The lake features a designated dock near the parking area, making it easy to launch directly into the calm, clear waters. For those looking for a more natural entry point, there’s also a shale beach on the far side of the lake. This spot offers a slightly more secluded launching area, ideal for those who prefer a quieter start to their adventure.
The road that runs along the south banks of the lake provides additional access points. No matter where you choose to launch, the proximity of the road ensures you’re never far from the water. With minimal effort, you can carry your gear a short distance and begin your journey surrounded by the breathtaking scenery of this glacially-carved valley.
Whether you’re a first-timer or an experienced paddler, the accessibility of Convict Lake’s shoreline makes it a perfect destination for a stress-free day on the water.

Wandering around the lake, looking for places to swim. Photograph by Dalton Johnson
Best time of year to Kayak on Convict Lake?
Late summer is the best time of year to kayak on Convict Lake in the Eastern Sierra. While this lake is open year round for kayaking, the water and air temperatures during the late summer are warm. One bonus to this time of year is that the crowds begin to fade. Lastly, there are very few bugs during the late summer season. But, everyone has their own favorites, so below is an outline of what each season holds:
Spring at Convict Lake
During the spring, Convict Lake can have a lot of snow, or the lake can be totally free of snow. Depending on the level of snow that fell during the winter will determine this, but I can guarantee one thing, it will be cold. Convict lake sits 7,850 feet and is shaded for most of the day during the spring. Unless you are come prepared for the cold days, spending time on Convict Lake in the spring can be a cold adventure. Additionally, if you plan to camp near the lake, be prepared for the nighttime temperatures to be in the single digits.
Summer at Convict Lake
During the summer, Convict Lake is at its tourism height. Almost everyday of the summer is packed with people, fisherman, boaters, and tourist who have come to the lake to enjoy an escape from the summer heat. Summer is the perfect time to visit, especially if you can reserve a campsite, because the fish are biting, the hiking is great, and the water is fun to play in. Personally, I try to make a trip to Convict Lake every year during the summer just because it is such a great spot!
Fall at Convict Lake
During the fall, Convict Lake begins to quiet down as the days get shorter and summer tourism season dwindles. During this time of year the weather is confused, some days it is very warm meanwhile other days it is freezing cold. The nearby resorts and camping often begin closing their doors during the fall season, so there is not much available in terms of amenities. The restrooms remain open, but the boat rentals are mostly closed, so make sure to bring your own boat if you plan to get on the water.
Winter at Convict Lake
During the winter, do not expect to see another human out here. The road to Convict Lake is often closed, so you will need to park along Highway 395, then take a snow mobile or skis into the lake. If you are looking for an adventure, I highly suggest doing this! The snowpack changes drastically year by year, but the winter in the mountains is unlike anything I have ever experienced. With that said, please understand that you will need to self-sufficient when entering this area during the winter months.

Hanging out at the shoreline of Convict Lake. Photograph by Dalton Johnson
WHY IS CONVICT LAKE ONE OF Highway 395’s BEST FLAT WATER KAYAKING spots:
Convict Lake has some of the most beautiful sunrises I have ever seen. The morning light lands upon the swirled colored granite peak in the distance, shining a burnt red. The stillness of the morning creates a reflection on the lake that goes undisturbed, unless you are kayaking on the water. The origin of this lakes name, Convict lake, comes from a community of outlaws who used this lake as a hide out. For years, they were able to remain hidden from the law and often took in other convicts who were on the run. Today, this lake is a campground for kayakers, anglers, and hikers.
What makes Convict Lake one of the best flat water kayaking destinations in California is the calm and clear water. Often this lake is so smooth it reflects the mountains. In addition to the reflection, there is an aspen grove alongside the lakes south bank, making the colors in the fall exquisite.
Do you have to pay to go to Convict Lake?
Convict Lake is free to visit, park, hike, kayak, and swim. The only times you would need to pay at Convict Lake is to rent a boat and staying overnight.
Can You Swim in Convict Lake?
Convict Lake has several areas that you can swim. The main area to swim is on the southern side of the lake where there is a shale beach that allows for easy access into the water. This beach also has several benches that you can put your things while you swim, like your towels and snacks. If you are feeling more adventurous, head to the northern side of the lake and hike towards the rear of the lake, you will be able to swim without anyone else around, this is my favorite.
DON’T MISS OUT ON THESE OTHER ADVENTURES NEARBY:
Now that you have discover the best time of year to kayak on Convict Lake, where to launch your kayak, and the background to Convict Lake it is your turn to adventure! Let me know in the comments if this blog was helpful. Additionally, if you have any updates please drop those in the comments for others.
Discover More Adventures
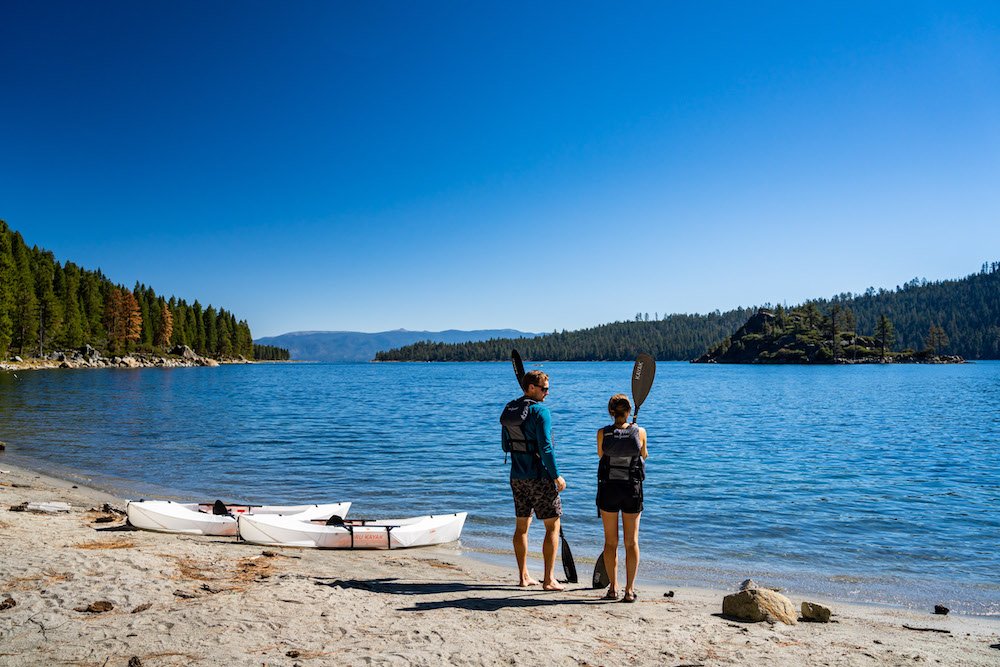
We Took The Oru Kayak Lake For A Road Trip As Beginner Kayakers, It Was Incredible
When I first got my hands on two Oru Kayak Lake, I had little to no kayaking experience. These foldable kayaks instantly reminded me of inflatable stand-up paddleboards because of their portability. They fold down into a compact package that fits in the back of a car, making them perfect for spontaneous adventures. My girlfriend, Kristin, and I decided to load them into our converted van and road trip along Highway 395 to test the Oru Kayak Lake.
When I first got my hands on two Oru Kayak Lake, I had little to no kayaking experience. These foldable kayaks instantly reminded me of inflatable stand-up paddleboards because of their portability. They fold down into a compact package that fits in the back of a car, making them perfect for spontaneous adventures. My girlfriend, Kristin, and I decided to load them into our converted van and road trip along Highway 395 to test the Oru Kayak Lake.
We were determined to learn how to kayak on this road trip and chose to stop at as many lakes as possible. Something about kayaking on a lake attracted us—maybe it was the peaceful connection with nature that comes with gliding across the water. It’s an activity that offers simplicity yet profound serenity, making it a perfect entry point for newcomers.

Kayaking on the calm waters of Zephyr Cove. Photo by Dalton Johnson
Starting On Lake Tahoe For Sunset
Our first stop was Lake Tahoe, right in our backyard. Tahoe’s waters can be unpredictable, but growing up in the area gave us a good sense of where to go. We chose Zephyr Cove for its calm bay, ideal for beginners. The sheltered waters here are less intimidating for those just starting out, making it an excellent choice to get a feel for kayaking.
Setting up the Oru Kayak for the first time was a bit of a challenge. It took us about 20 minutes to assemble, but once we got the hang of it, the process became quicker with each attempt. The folding mechanism is intuitive after some practice, and compared to a traditional sit-on-top kayak, the Oru Lake Kayak's portability was a game-changer. Not needing a roof rack or cumbersome lifting was a relief.
After suiting up with personal flotation devices (PFDs) and assembling our paddles, we launched just as the sun began to set. Paddling over the exposed rocks of Zephyr Cove was a magical experience, and neither of us flipped over—a common beginner fear. That initial confidence set the tone for the rest of our trip. It was clear we had found an activity that was not only beginner-friendly but incredibly rewarding.

Google Maps
Our Kayaking Road Trip Down Highway 395
Day One: Twin Lakes, Bridgeport
We drove to Twin Lakes in Bridgeport, where we kayaked and hiked around the serene landscape. The calm, reflective waters of the lake made it easy to focus on basic paddling techniques without feeling rushed or overwhelmed. The scenery was breathtaking, with towering peaks and lush greenery surrounding the lake, creating a sense of tranquility and adventure. At the end of the day, we soaked in Travertine Hot Springs to ease our muscles. Watching the sunset while relaxing in the warm waters was the perfect way to unwind and reflect on the day’s activities. The mix of physical activity and relaxation was a perfect introduction to a lifestyle centered around outdoor exploration.
Related Read: Everything You Need to Know to Kayak on Twin Lakes, Bridgeport

Staying out late to kayak under the Milky Way in Mammoth Lakes. Photo by Dalton Johnson
Day Two: Mammoth Lakes
Next, we headed to Mammoth Lakes for a full day of kayaking. The lakes in this area are surrounded by stunning alpine scenery, which made the experience even more enjoyable. The shimmering waters were like glass, reflecting the towering mountains and vibrant sky. The flat waters of the lakes were beginner-friendly, allowing us to build confidence with each stroke while soaking in the pristine environment. We paddled from one side of the lake to the other, stopping occasionally to admire the surrounding beauty and snap some photos. That evening, we stayed late to kayak under the Milky Way. Paddling beneath a sky full of stars was awe-inspiring and turned out to be one of the most unforgettable moments of the trip. The Oru Kayaks handled well, even in the darker, cooler conditions of nighttime, giving us confidence in their reliability.
Related Read: The Best Outdoorsy Things To Do Around Mammoth Lakes, CA
Sunrise kayak at Convict Lake, CA. Photo by Dalton Johnson
Day Three: Convict Lake
We woke up early for a sunrise paddle on Convict Lake. The stillness of the morning waters made for an easy and peaceful kayaking experience. As the first rays of sunlight hit the water, the lake’s crystal-clear surface shimmered like a mirror, and the surrounding peaks glowed in soft golden hues. It felt like paddling in a dream. The lake’s serene beauty inspired us to paddle further, exploring every nook and cranny along the shoreline. Later, we treated ourselves to a soak in Wild Willy’s Hot Springs and spent the afternoon cleaning and reorganizing the van—a necessary recharge after days of adventure. It was a good reminder of how easy it is to pack up and store the Oru Kayaks when not in use, leaving plenty of room in the van for other gear. We also took time to plan our next adventures, excited about what lay ahead.
Related Read: Your Year Round Guide to Wild Willy's Hot Spring In Mammoth Lakes, CA

Kayaking Owen’s River along Highway 395. Photo by Dalton Johnson
Day Four: Owens River
The Owens River was the highlight of the trip. This flatwater river winds through stunning landscapes, offering twists and turns that kept things interesting without being overwhelming for beginners. The slow-moving current made it a great place to practice steering and paddling techniques, and we found ourselves laughing as we navigated the winding path. Along the way, we spotted birds and small animals, adding to the sense of immersion in nature. The river’s serene beauty gave us a deeper appreciation for kayaking as a way to explore otherwise hard-to-reach areas. Afterward, we revisited Wild Willy’s Hot Springs for one last relaxing soak. As we sat in the warm waters under the stars, we reflected on how far we’d come as beginner kayakers, feeling a deep sense of accomplishment and gratitude.
Day Five: Heading Home
On our final day, we drove back home to South Lake Tahoe along Highway 395, reflecting on everything we had learned about kayaking and how much we enjoyed using the Oru Lake Kayaks. The trip wasn’t just about learning a new skill; it was also about discovering a new way to connect with nature and each other. We reminisced about the stunning landscapes we’d seen, the challenges we’d overcome, and the peaceful moments on the water. The Oru Kayaks had opened up a world of adventure for us, and we couldn’t wait to plan our next kayaking journey.
Why Oru Kayaks Are Great for Beginners
1. Portability: The Oru Lake Kayak’s foldable design makes it easy to transport and store. You don’t need a roof rack or large storage space, which lowers the barrier to entry for new kayakers. This feature is especially convenient for road trips, where space can be limited. At first, setting up the kayaks took about 20 minutes, but by the end of the trip the time was under 5 mintues.
2. Stability: Despite their lightweight construction, Oru kayaks are very stable. Tipping is hard, even for complete beginners. Kristin and I didn’t flip once during the entire trip, which boosted our confidence and made the learning process less intimidating.
3. Ease of Use: While the initial setup can take some time, the process gets easier with practice. Once assembled, the kayak feels solid and responsive on the water. This ease of use allows beginners to focus on learning paddling techniques rather than worrying about the equipment.
4. Versatility: These kayaks are designed for flatwater environments like lakes and calm rivers, which are ideal for beginners. Their lightweight and foldable design also mean you can take them to a variety of locations, from your local lake to remote rivers and backcountry destinations.
5. Accessibility: The Oru Kayak’s unique design and beginner-friendly features make kayaking an accessible activity for people who might otherwise hesitate to try it. The compact size and ease of transportation eliminate many of the logistical challenges associated with traditional kayaks.

Sunset kayak with Oru Kayak. Photo by Dalton Johnson
Final Thoughts
Our road trip with the Oru Kayaks was a success. These kayaks are beginner-friendly, portable, and stable, making them a great choice for anyone looking to get into kayaking. Their versatility and ease of use allowed us to explore a variety of stunning locations with confidence. Whether you’re exploring your local lake or embarking on a multi-day road trip, the Oru Kayak is a reliable and accessible option to kickstart your kayaking adventures.
For beginners, the Oru Lake Kayak offers an excellent balance of stability, portability, and functionality. If you’re considering starting your kayaking journey, these kayaks are a fantastic way to begin. With each paddle stroke, you’ll find yourself drawn deeper into the joys of kayaking, discovering both the beauty of the water and the satisfaction of mastering a new skill.
Discover More Gear

We're Headed To Southern California
For the first quarter of 2025, The Adventure Travel Network will be heading to Southern California to put our boots on the ground and find stories related to the adventure travel space in iconic locations like Joshua Tree National Park, San Diego, Malibu, Big Bear, Palm Springs, and so many more epic locations.
Why does this matter to you all?
This is an opportunity to reach our growing monthly audience of 450K adventure lovers and get marketing assets from rad locations at an affordable cost.
For the month of March, The Adventure Travel Network will be road tripping to Southern California to put our boots on the ground and find stories related to the adventure travel space. We plan to explore iconic locations like Alabama Hills, Joshua Tree National Park, San Diego, Costa Mesa, and Palm Springs. Our goal for this content trip is collect enough imagery and experiences to publish 100 articles about the area. The stories can be small, or big, but our readers keep asking for Southern California content and we plan to bring it to our already existing 450k readers!
Why does this matter to you all?
This is an opportunity to reach our growing monthly audience of 450K adventure lovers. We are opening up our testing kits and welcoming gear companies, hotel/vacation rentals, and tourism boards that want us to come and review what you have to offer.
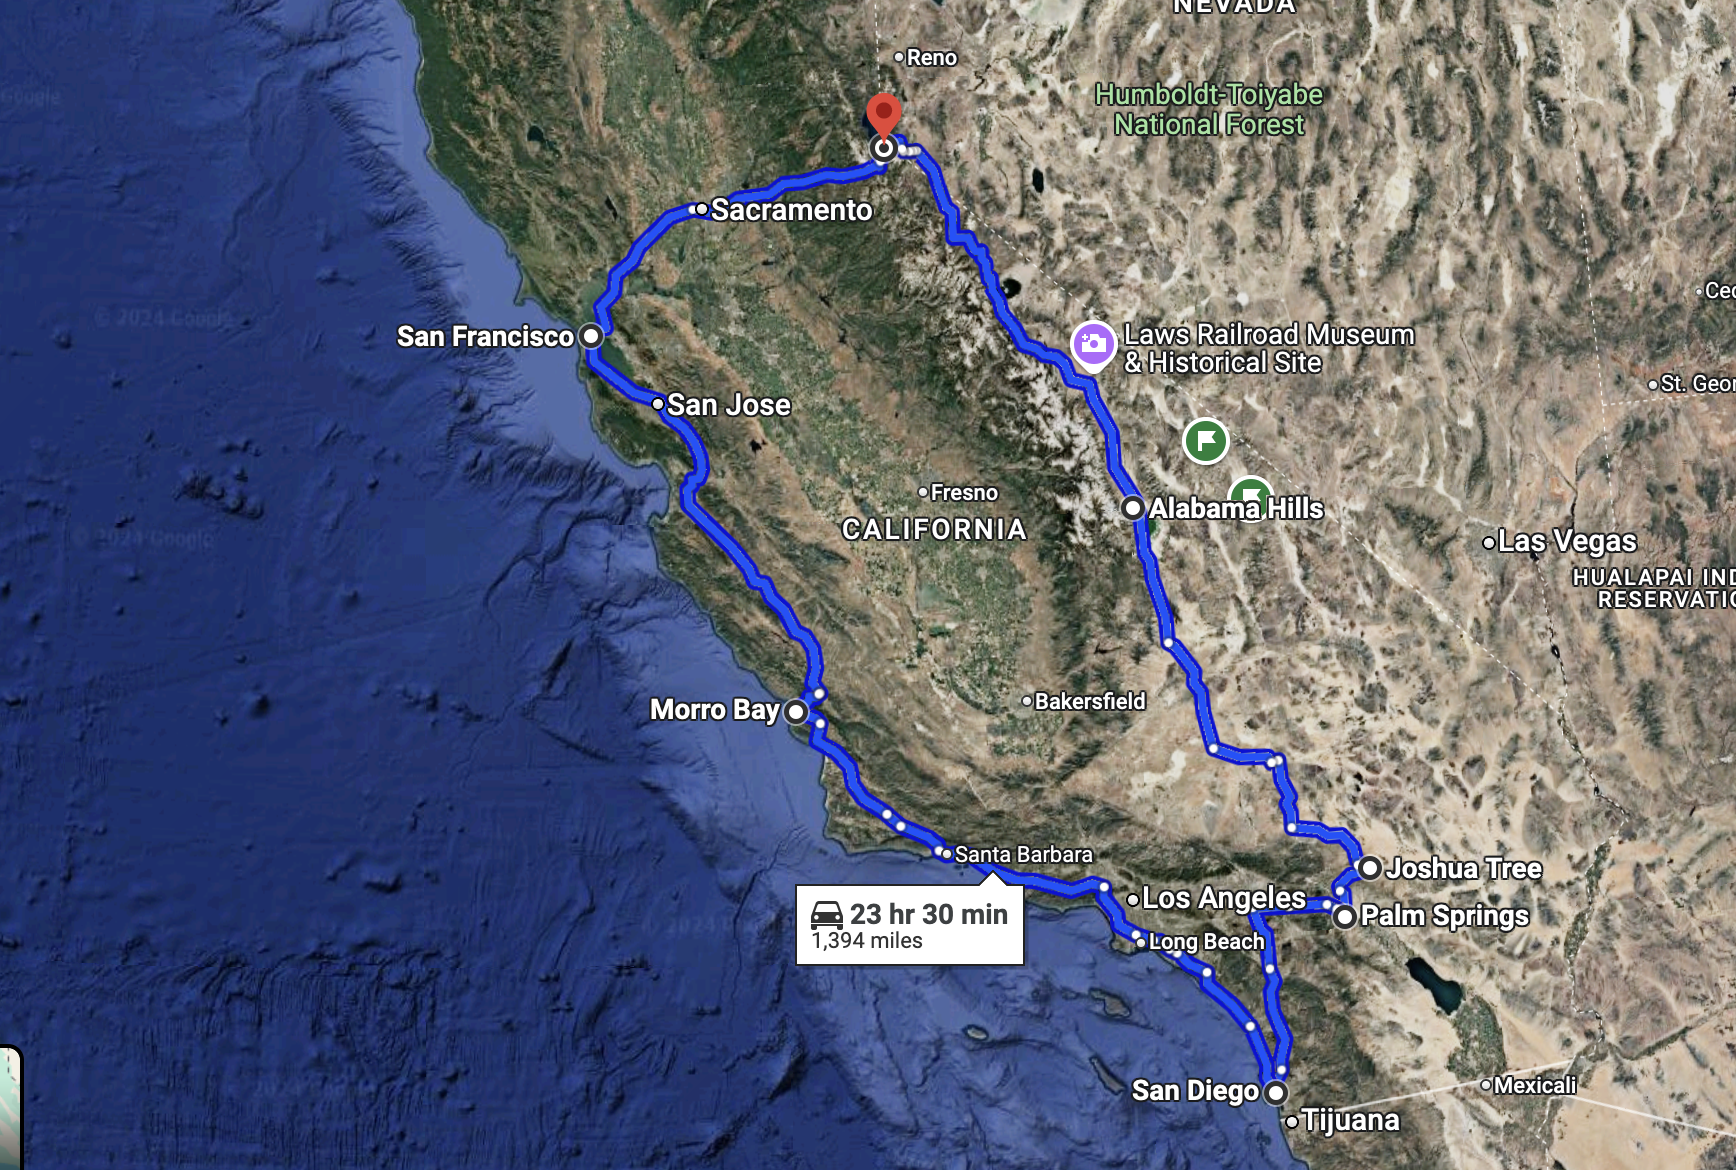
Our Route:
We plan to cover just over 1,400 miles of California on an epic three week long road trip to rock climb, surf, and live vanlife. Yeah, some say vanlife is dead, but we are going to prove it isn’t with this road trip. Our stops are not exact, so if you have a hotel that needs reviewing or a destination that you want featured, let us know and we will see if we can make the detour.
Here’s the rough outline of where we are headed:
Alabama Hills
Joshua Tree
Palm Springs
San Diego
Costa Mesa
Morro Rock
San Francisco
Yes, that is the very awkward circle we plan to make starting and ending in South Lake Tahoe where The Adventure Travel Network is based.

Activities We are covering On this Content Trip:
If you have any gear under these activities, let me know, and we will see if we can get your gear tested!
Camping
Hiking
Photography
Road Trips + Overlanding
Rock Climbing
Running (trail and road)
Surfing
Vanlife / Rental Car / Overlanding Rig
AKA if you have gear you want reviewed, let us know!
“The purpose of life is to live it, to taste experience to the utmost, to reach out eagerly and without fear for newer and richer experience”

Want to pay to play? Here’s what we can provide:
Photo assets for marketing
Video assets for marketing
Article sponsorships and article inclusion
Social media outreach
Need something else? We are open to hearing your needs, just ask!
Estimated Project Reach:
400 - 600K views
Investment:
Included when part of retainer program
Marketing packages start at $1,500
Companies This Is For:
Apparel companies in the adventure travel space
CPG companies
Hotels that offer experiences and excursions to guests
Technical goods for rock climbing, surfing, and yoga
Timeline:
Shooting March 2025
Delivery of marketing assets Q2 ‘25
Articles and videos published late Q2 and early Q3 ‘25

Interested in joining?
Fill out the form and let’s talk
Mood Board


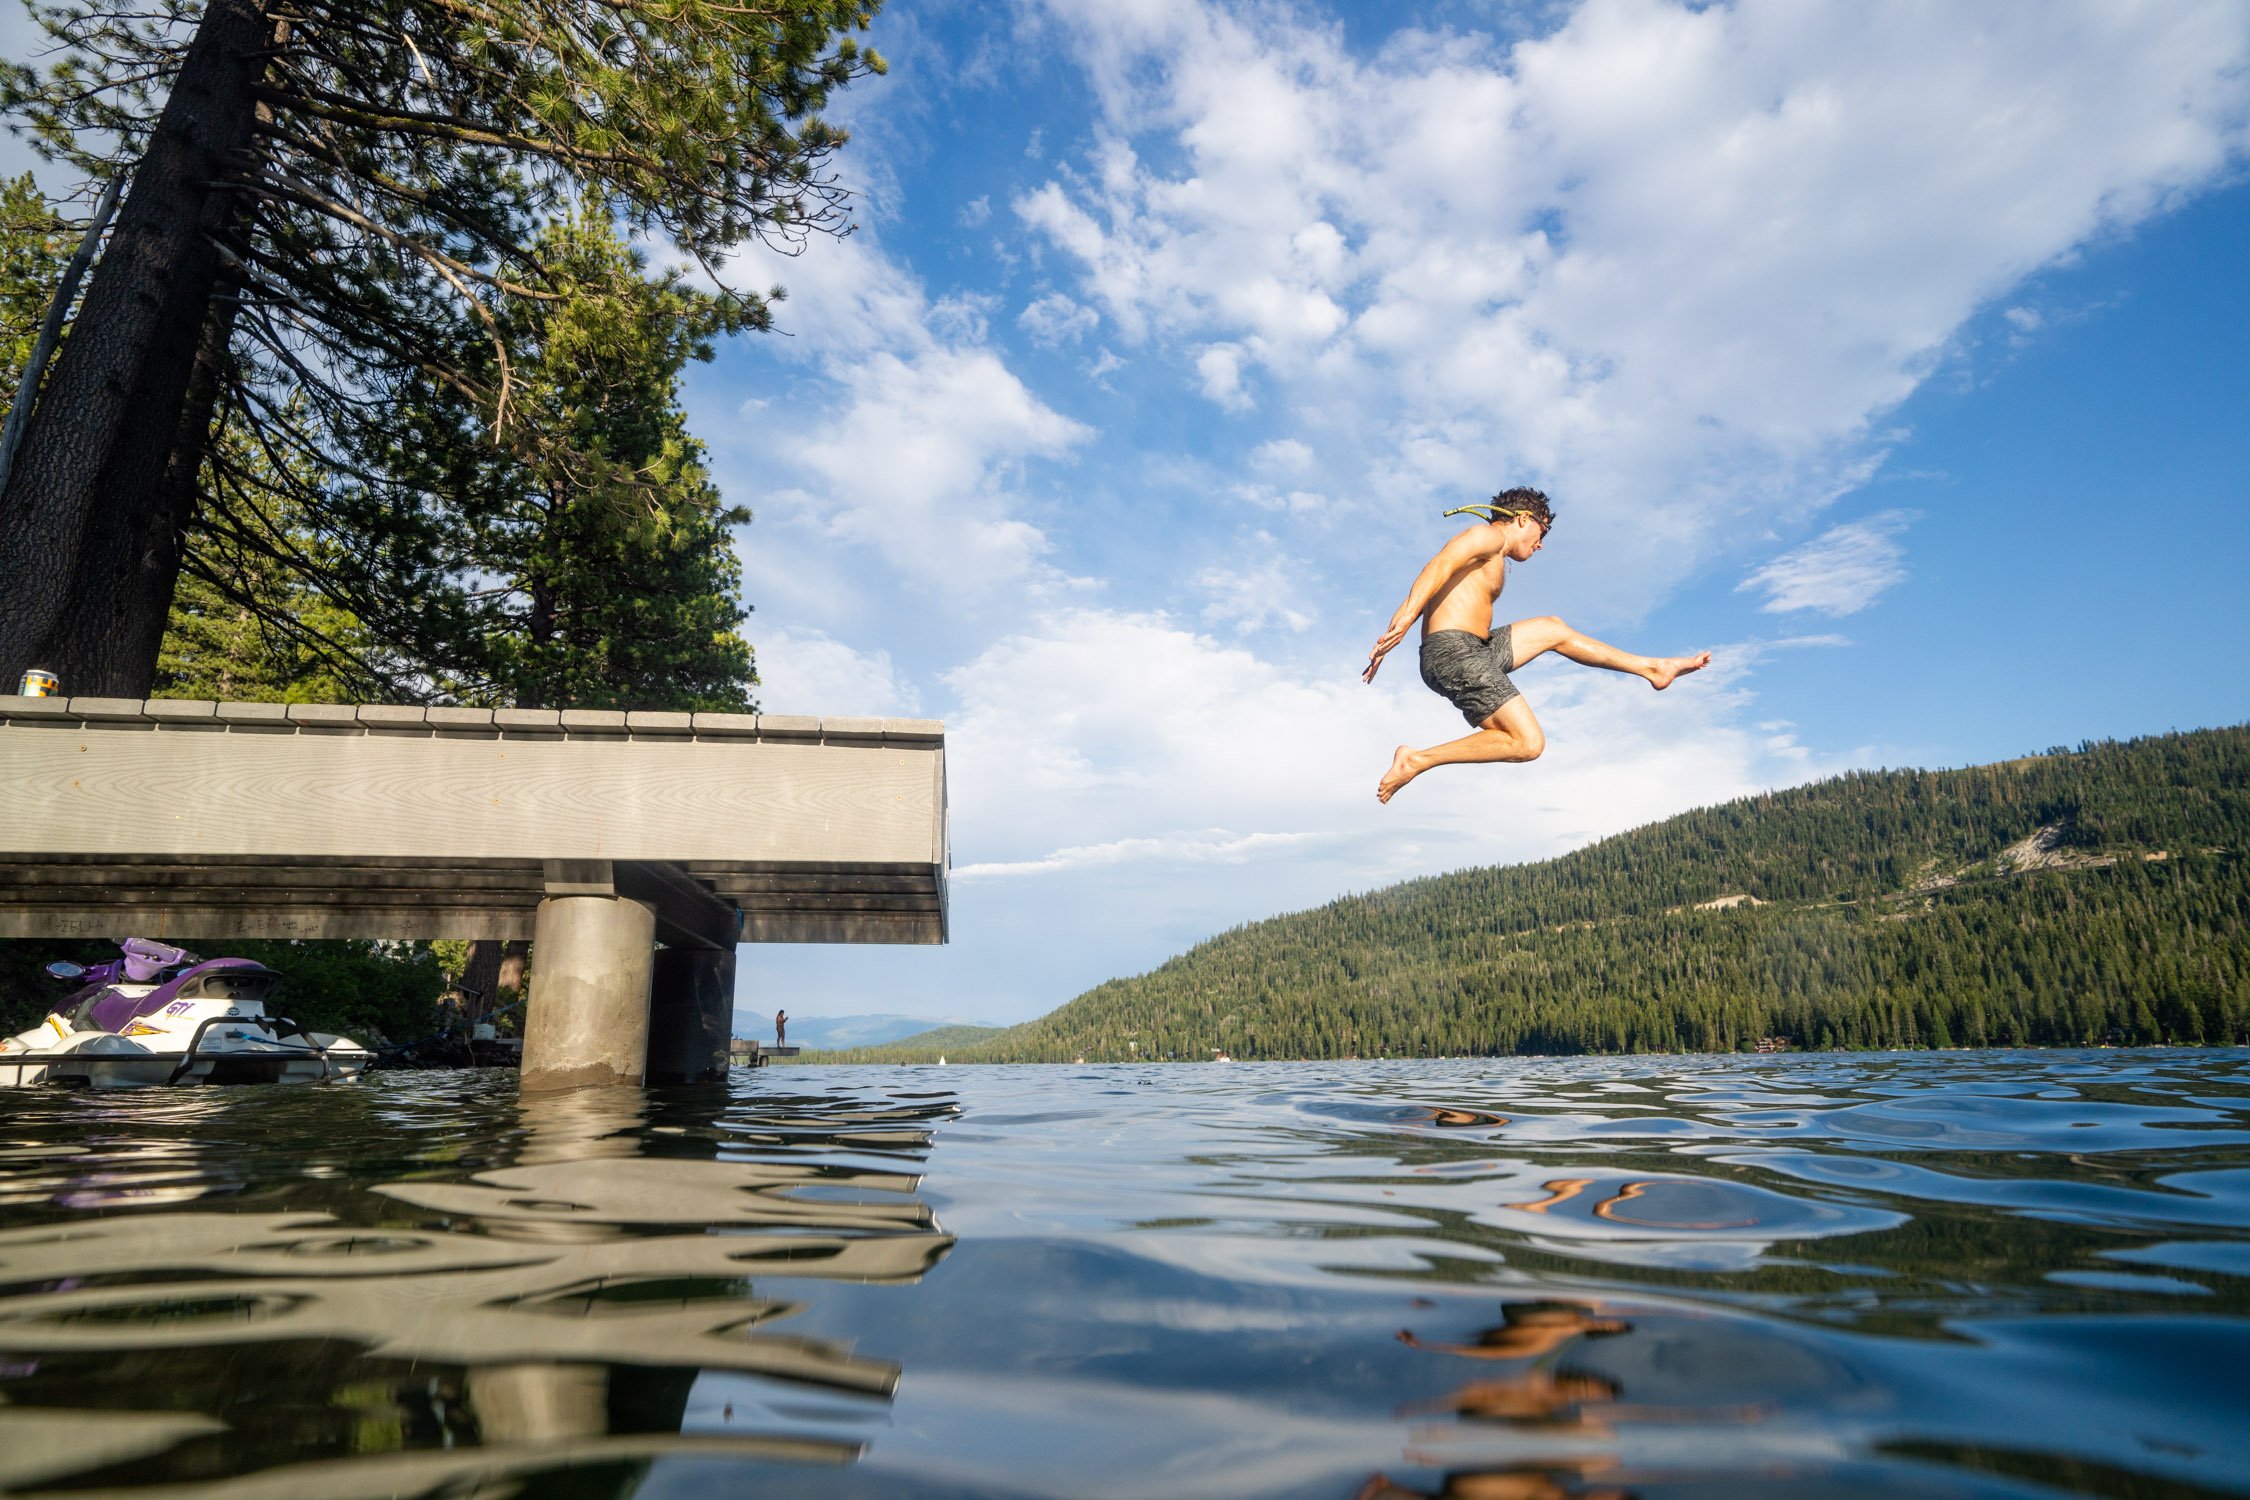


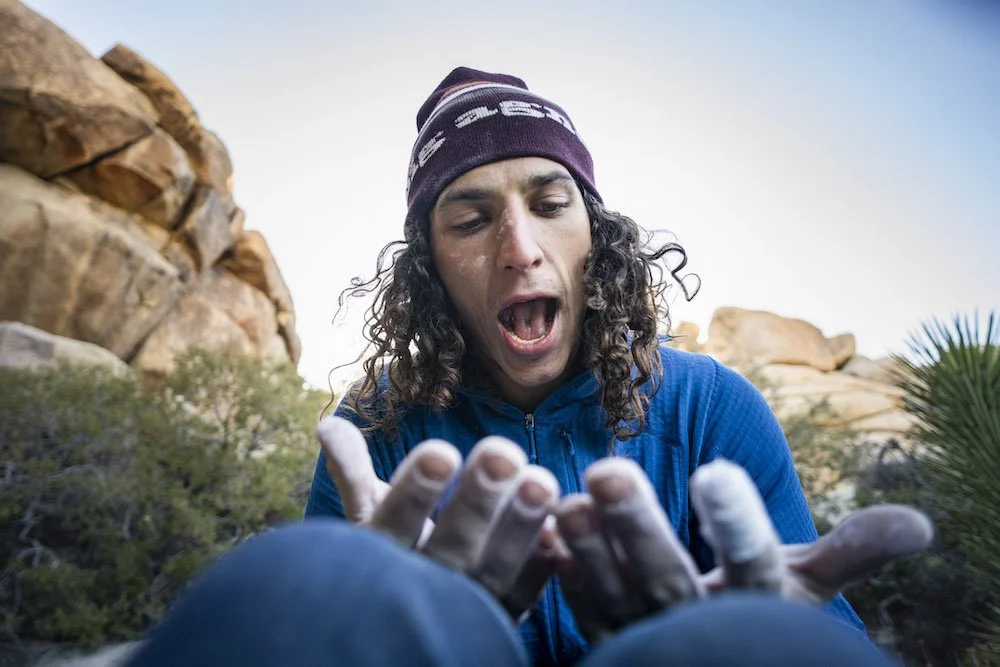


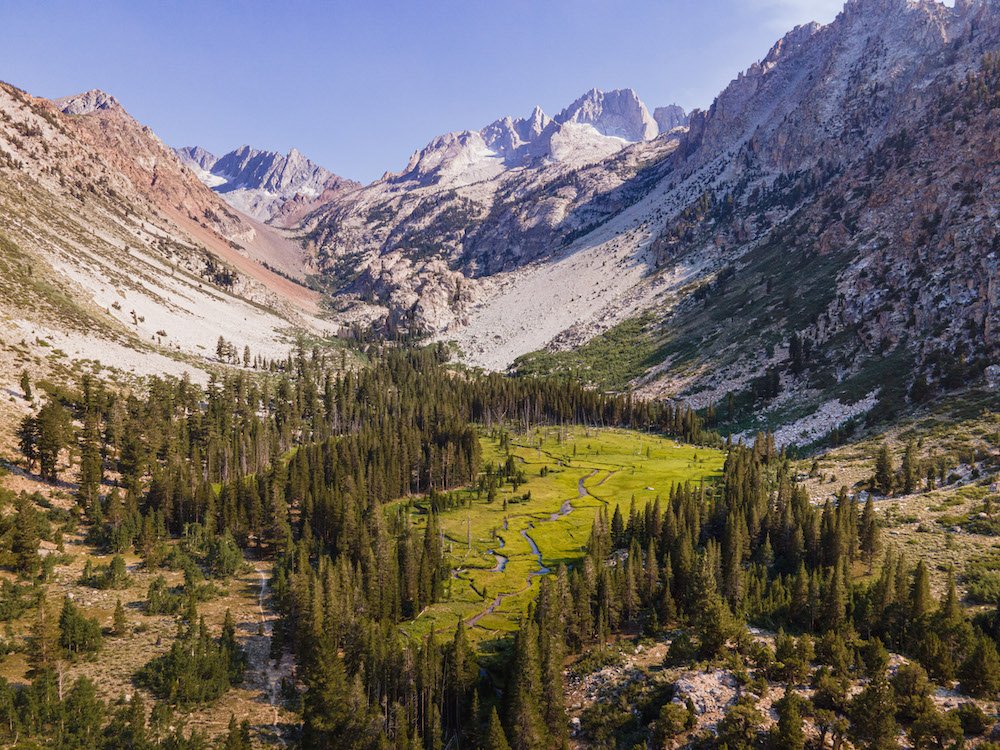
7 Things You Don’t Want to Miss in Bridgeport, CA
Bridgeport, CA is a pass-through town along Highway 395 that’s filled with adventures, if you’re willing to stop. With one overpriced gas station, two coffee shops, a sandwich shop, and a general store that is rarely open, I didn’t think much of this town at first. But over time, a few of my favorite adventures led me to the outskirts of Bridgeport, CA, and I discovered it has much more to offer than meets the eye. This town is packed with activities like kayaking, rock climbing, hot spring soaking, backcountry skiing, camping, stargazing, and so much more. Below are just a handful of reasons to stop in Bridgeport, CA while road-tripping Highway 395.
Bridgeport, CA is a pass-through town along Highway 395 that’s filled with adventures, if you’re willing to stop. With one overpriced gas station, two coffee shops, a sandwich shop, and a general store that is rarely open, I didn’t think much of this town at first. But over time, a few of my favorite adventures led me to the outskirts of Bridgeport, CA, and I discovered it has much more to offer than meets the eye. This town is packed with activities like kayaking, rock climbing, hot spring soaking, backcountry skiing, camping, stargazing, and so much more. Below are just a handful of reasons to stop in Bridgeport, CA while road-tripping Highway 395.
The meadow leading to Matterhorn Peak in Bridgeport, CA. Photo by Dalton Johnson
1. Rock Climbing the Matterhorn or the Incredible Hulk
For climbers, Bridgeport and the Sawtooth Range are excellent places to test your skills in the mountains. The approaches are relatively short, taking only a couple of hours, and many of the climbs in the area can be done car-to-car in a single day. One of my favorite moderate climbs is Matterhorn Peak.
Matterhorn Peak offers an alpine climbing experience that’s rated 5.7, with big exposure and a reasonable approach. If you’re not a rock climber but still want to stand on top of a summit, you can hike the gully to the top of Matterhorn Peak instead.
Additionally, the Incredible Hulk is a favorite among rock climbers for its impressive granite face and challenging routes. Though the approach is longer, the reward is worth it for capable alpine rock climbers. Both locations offer unforgettable experiences for those ready to take on the challenge.
2. Kayaking on Twin Lakes
Twin Lakes, located just a short drive from Bridgeport, is a serene spot for kayaking. Jagged mountains frame the crystal-clear waters, creating a breathtaking backdrop. On calm days, the reflection of the surrounding peaks creates a picture-perfect setting for a relaxing paddle. Bring your own kayak—we used Oru Kayaks during our road trip—or rent one nearby to explore the peaceful waters at your own pace.
Early mornings are especially magical when the lake is calm and wildlife is most active. Although Twin Lakes doesn’t present significant challenges for kayakers, exploring the edges of both lakes makes for a great workout and stunning views. You might also consider bringing a stand-up paddleboard for variety. Keep an eye out for bald eagles, herons, and other wildlife that thrive in this pristine environment.
Related Read: EVERYTHING YOU NEED TO KNOW TO KAYAK ON TWIN LAKES, BRIDGEPORT
3. Soaking in Travertine Hot Springs
No visit to Bridgeport is complete without a soak in the Travertine Hot Springs. If I’m passing through Bridgeport, I’ll stop for 10-20 minutes to enjoy the springs, even if I’m not staying for long.
These natural geothermal pools offer stunning views of the Sierra Nevada mountains, making them the perfect spot to relax and recharge. Accessible via a short dirt road, the springs are a favorite among locals and visitors alike. Don’t forget your camera to capture the incredible scenery! Sunset is the most stunning time of day, as you can watch the sun set behind the Sierra Nevada Mountains while soaking.
The mineral-rich waters are known for their soothing properties, making the springs a popular destination after a long hike or climb. The unique travertine formations create a one-of-a-kind landscape, and the nearby parking area ensures easy access for most visitors. Visit early in the morning or at sunset for a quieter experience and unforgettable views.
Related Read: LOCAL’S GUIDE TO TRAVERTINE HOT SPRINGS

Nearing the base of Matterhorn Peak. Photo by Dalton Johnson
4. Hiking in the High Sierra
Bridgeport serves as a gateway to some of the most breathtaking hikes in the High Sierra. From day hikes to multi-day backpacking adventures, there’s something for everyone. Popular trails include those leading to Barney Lake, Robinson Lakes, and beyond. Pack plenty of water, snacks, and layers to fully enjoy the beauty of the rugged Sierra landscape.
If you’re up for a challenge, try the hike to Twin Peaks for panoramic views of the surrounding mountains and valleys. During summer, wildflowers bloom along the trails, while fall brings golden hues to the aspen trees. Hiking in this region is an unparalleled way to experience the raw beauty of California’s high country.
Here are four hikes to explore near Bridgeport, CA:
Crown Point Loop: This moderate loop takes you through diverse alpine terrain and offers stunning views of the Sierra Nevada. The trail includes sections of serene meadows, rushing creeks, and panoramic mountain vistas. It’s a great choice for hikers seeking a rewarding day hike with plenty of scenic variety.
Peeler Lake: This challenging hike takes you to the stunning Peeler Lake, nestled high in the Sierra Nevada. The trail offers incredible views of alpine scenery and provides opportunities for solitude and exploration. It’s perfect for experienced hikers seeking a full-day adventure and a chance to enjoy pristine mountain beauty.
Matterhorn Peak Hike: This challenging and rewarding hike takes you to the summit of Matterhorn Peak, one of the iconic peaks in the Sawtooth Range. The trail follows Horse Creek Canyon and climbs steeply through alpine meadows and rocky terrain, offering breathtaking views along the way. Reaching the summit is a true accomplishment for experienced hikers, providing panoramic vistas of the surrounding Sierra Nevada mountains.

Camping in Bridgeport with a fire, soon to watch the stars. Photo by Dalton Johnson
5. Camping Under the Stars
Camping in Bridgeport is an unforgettable experience. Whether you prefer the convenience of campgrounds like those at Twin Lakes or a more remote backcountry setting, you’ll be treated to clear night skies brimming with stars. Some campsites are shaded by towering evergreens, which can block the night sky, but the area’s low light pollution still makes it ideal for stargazing.
For families, Twin Lakes campgrounds offer well-maintained facilities and easy access to the lake, while adventurous campers can explore dispersed camping areas for more solitude. At night, the Milky Way often lights up the sky, creating an awe-inspiring spectacle. Combine your camping trip with fishing, hiking, or simply enjoying the quiet serenity of nature.
6. Soaking in Buckeye Hot Spring
Another must-visit hot spring near Bridgeport is Buckeye Hot Spring. Although harder to access—often requiring a 4WD vehicle and a short hike on a steep slope—Buckeye is a great option for a secluded hot spring soak.
Tucked away along Buckeye Creek, this natural spring offers a unique experience with pools that vary in temperature. The soothing sound of the creek and the surrounding forest make this a tranquil spot to relax and cold plunge after a day of outdoor adventures. The main pool is fed by a cascading waterfall of hot water, blending with the cooler creek water to create the perfect soaking temperature.
The rustic, natural setting provides a peaceful escape from everyday stress. It’s less crowded than Travertine Hot Springs, offering a more intimate experience. Remember to pack out everything you bring and leave no trace to preserve this beautiful spot for future visitors.

Headed to the middle of Twin Lakes for a kayak fish. Photo by Dalton Johnson
7. Fishing on Twin Lakes
Fishing enthusiasts will find their paradise at Twin Lakes. Known for its trophy-sized trout, these lakes attract anglers from far and wide. Whether you prefer fly fishing or casting from a boat, the pristine waters and stunning views make for an unforgettable fishing experience. Be sure to check local regulations and secure any necessary permits before heading out. The lakes are regularly stocked, ensuring plenty of opportunities to reel in a catch.
Early morning and late evening are prime times for fishing, when the trout are most active. For a unique experience, try fishing from a kayak or paddleboard, increasing your access to the lakes. If you need a fishing permit, you can grab one in town.
Bonus: Stargazing in Bridgeport
Bridgeport’s dark skies provide an exceptional opportunity for stargazing. Whether you’re camping or simply lying on a blanket at Twin Lakes, the dazzling display of stars will leave you in awe. Keep an eye out for shooting stars and, during the right season, the Milky Way stretching across the sky.
The nearby Bodie State Historic Park is another great spot for stargazing, with its preserved ghost town adding a touch of history to your nighttime adventure. Bridgeport’s high elevation and minimal light pollution create perfect conditions for astrophotography, so bring your camera and tripod for stunning shots of the night sky.
Camping in Bridgeport, CA. Photo by Dalton Johnson
Bridgeport, CA, offers a perfect blend of adventure, relaxation, and natural beauty. Whether you’re climbing towering peaks, soaking in hot springs, or enjoying peaceful moments by the lake, this charming town in the High Sierra is a destination you’ll never forget. Its variety of activities ensures there’s something for every kind of traveler, making it a place you’ll want to return to again and again.
Discover more Adventures
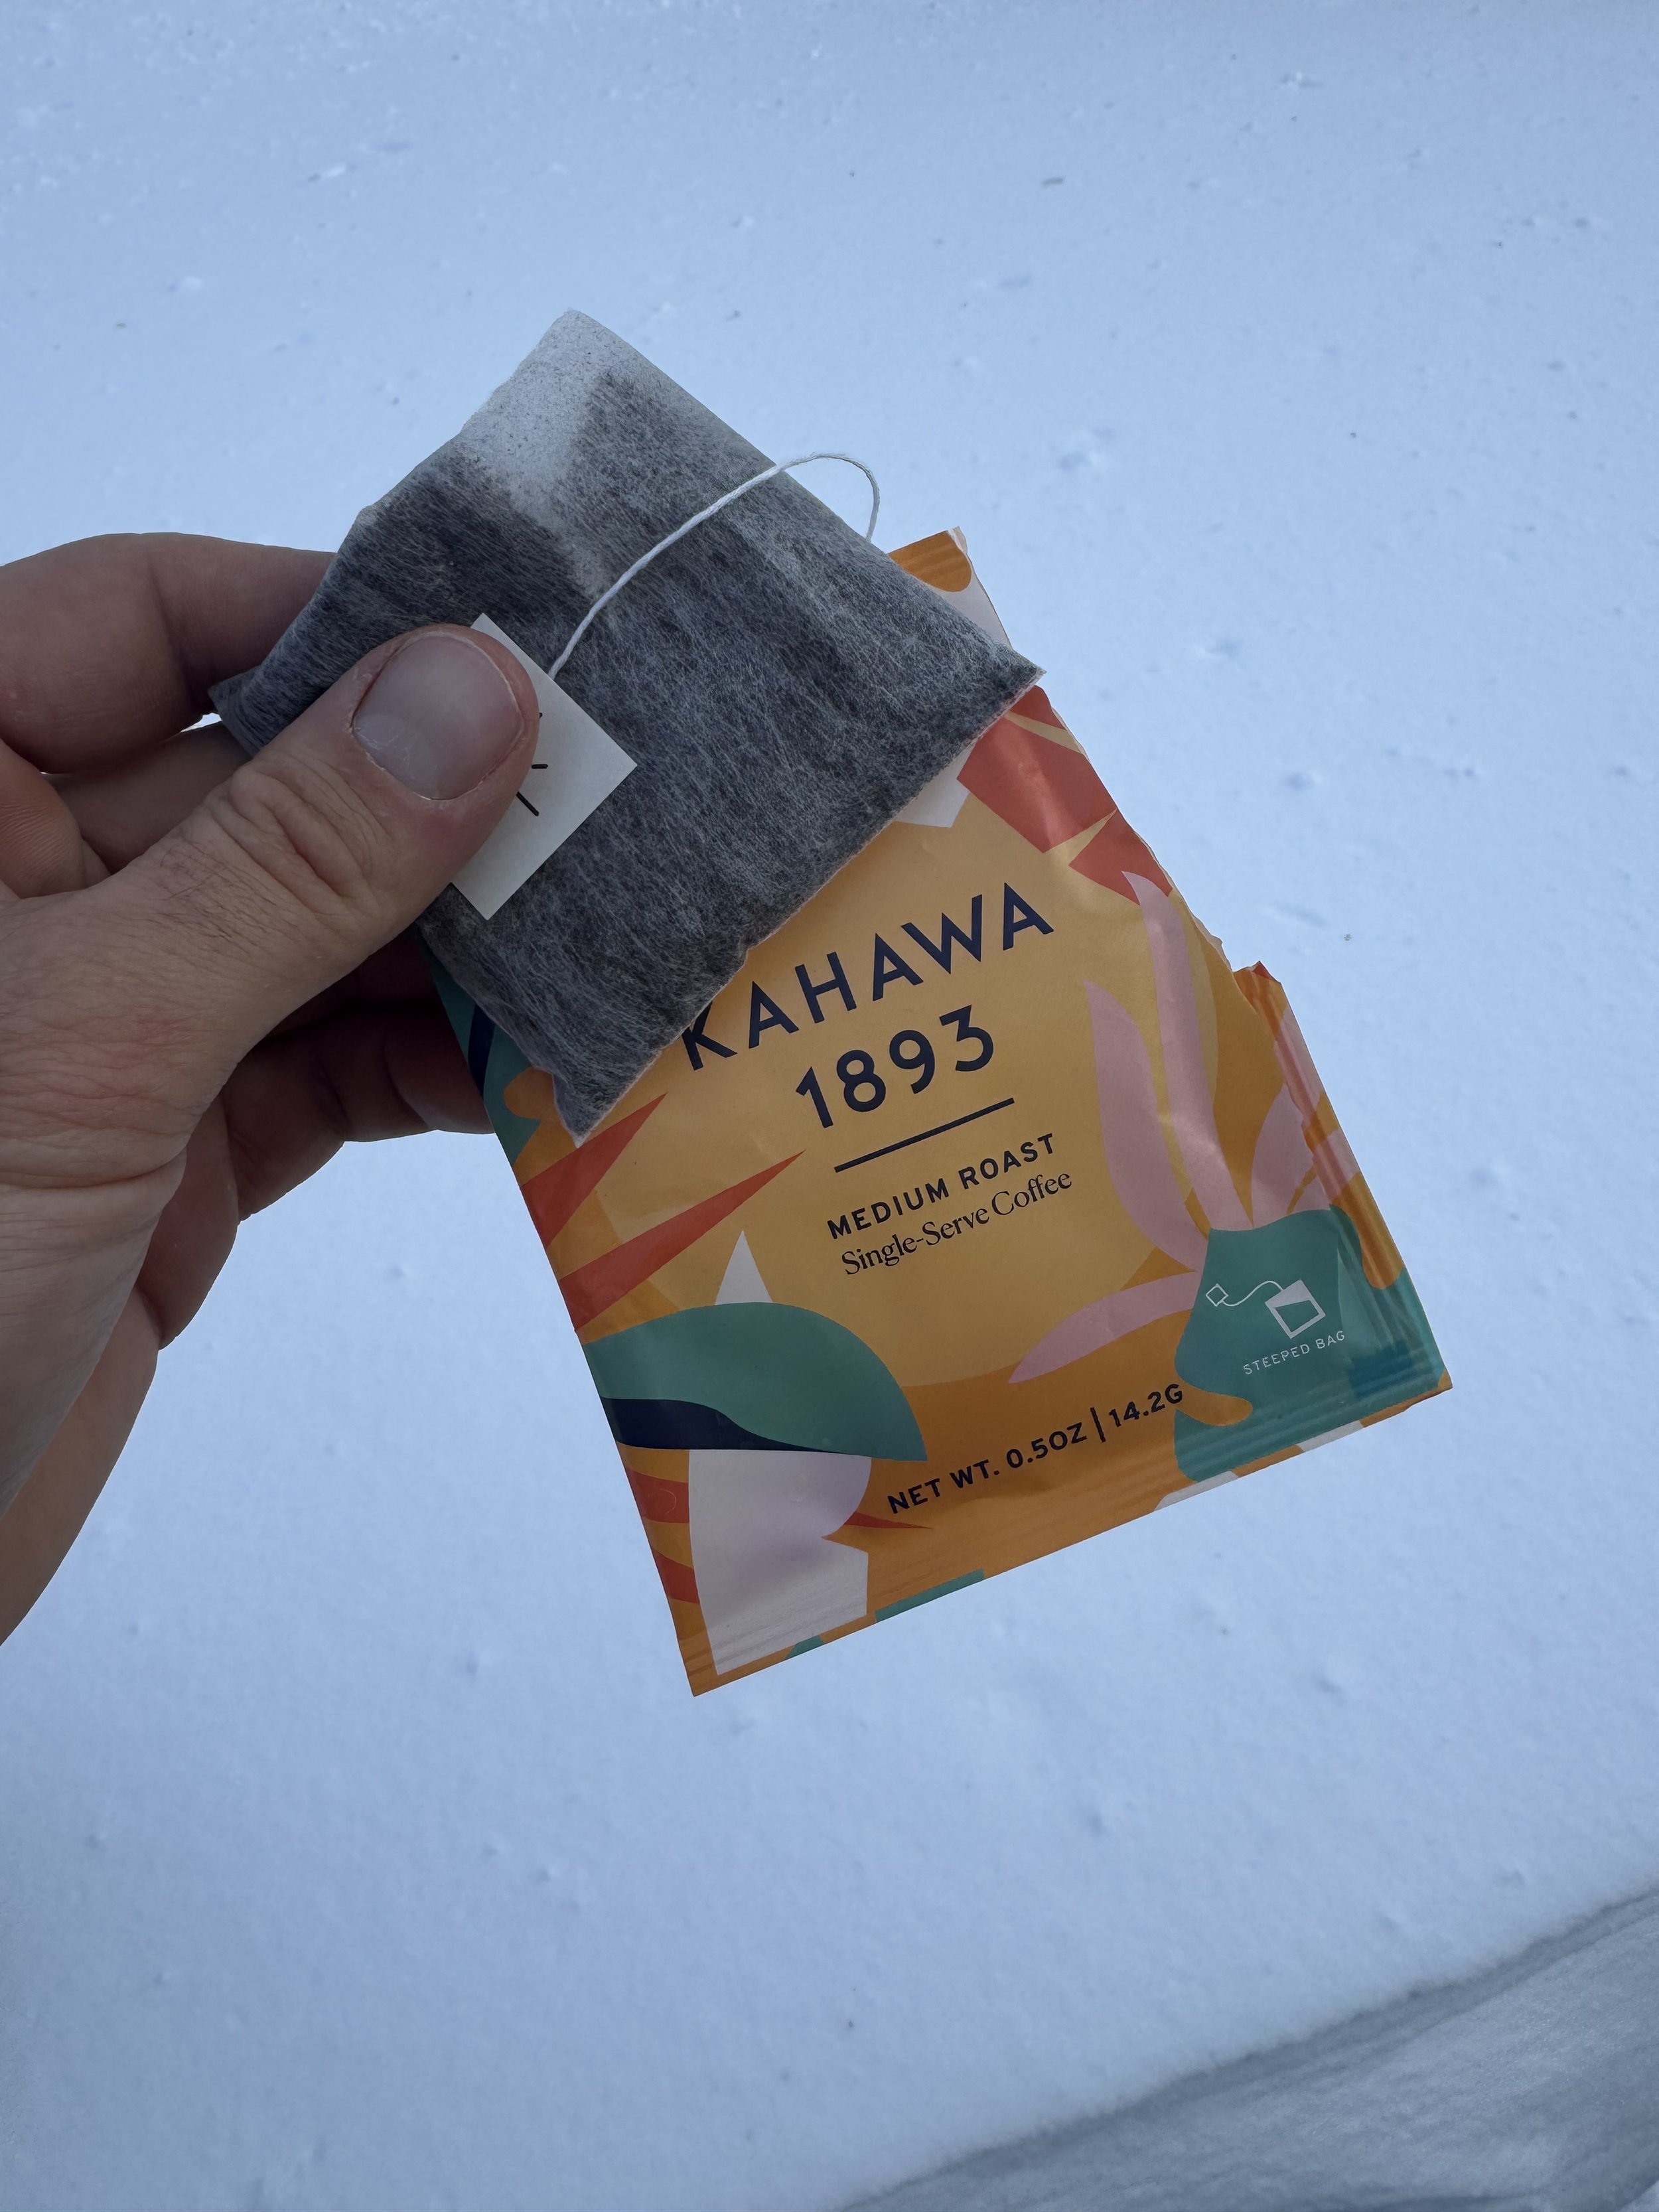
Few Things Go Better Together Than Kahawa 1893 Coffee and Skiing
I woke up well before the winter sun rose, the sky still cloaked in darkness. My day began by boiling water for my Kahawa 1893 bagged coffee. Yes, you read that right: coffee in a tea bag. It’s simple, mess-free, and surprisingly effective. As the water boiled, I loaded my ski gear into the car. Just in time for the kettle to ring, the car was loaded. Pouring my first cup into my travel mug and enough water into a different thermos for more coffee later. Skiing and coffee have become the ultimate pairing—a ritual that kickstarts my day and keeps me fueled for the slopes. This winter, I discovered the joy of caffeinated skiing adventures with Kahawa 1893’s bagged coffee. It’s not as strange as it sounds, so hear me out.
I woke up well before the winter sun rose, the sky still cloaked in darkness. My day began by boiling water for my Kahawa 1893 bagged coffee. Yes, you read that right: coffee in a tea bag. It’s simple, mess-free, and surprisingly effective. As the water boiled, I loaded my ski gear into the car. Just in time for the kettle to ring, the car was loaded. Pouring my first cup into my travel mug and enough water into a different thermos for more coffee later. Skiing and coffee have become the ultimate pairing—a ritual that kickstarts my day and keeps me fueled for the slopes. This winter, I discovered the joy of caffeinated skiing adventures with Kahawa 1893’s bagged coffee. It’s not as strange as it sounds, so hear me out.
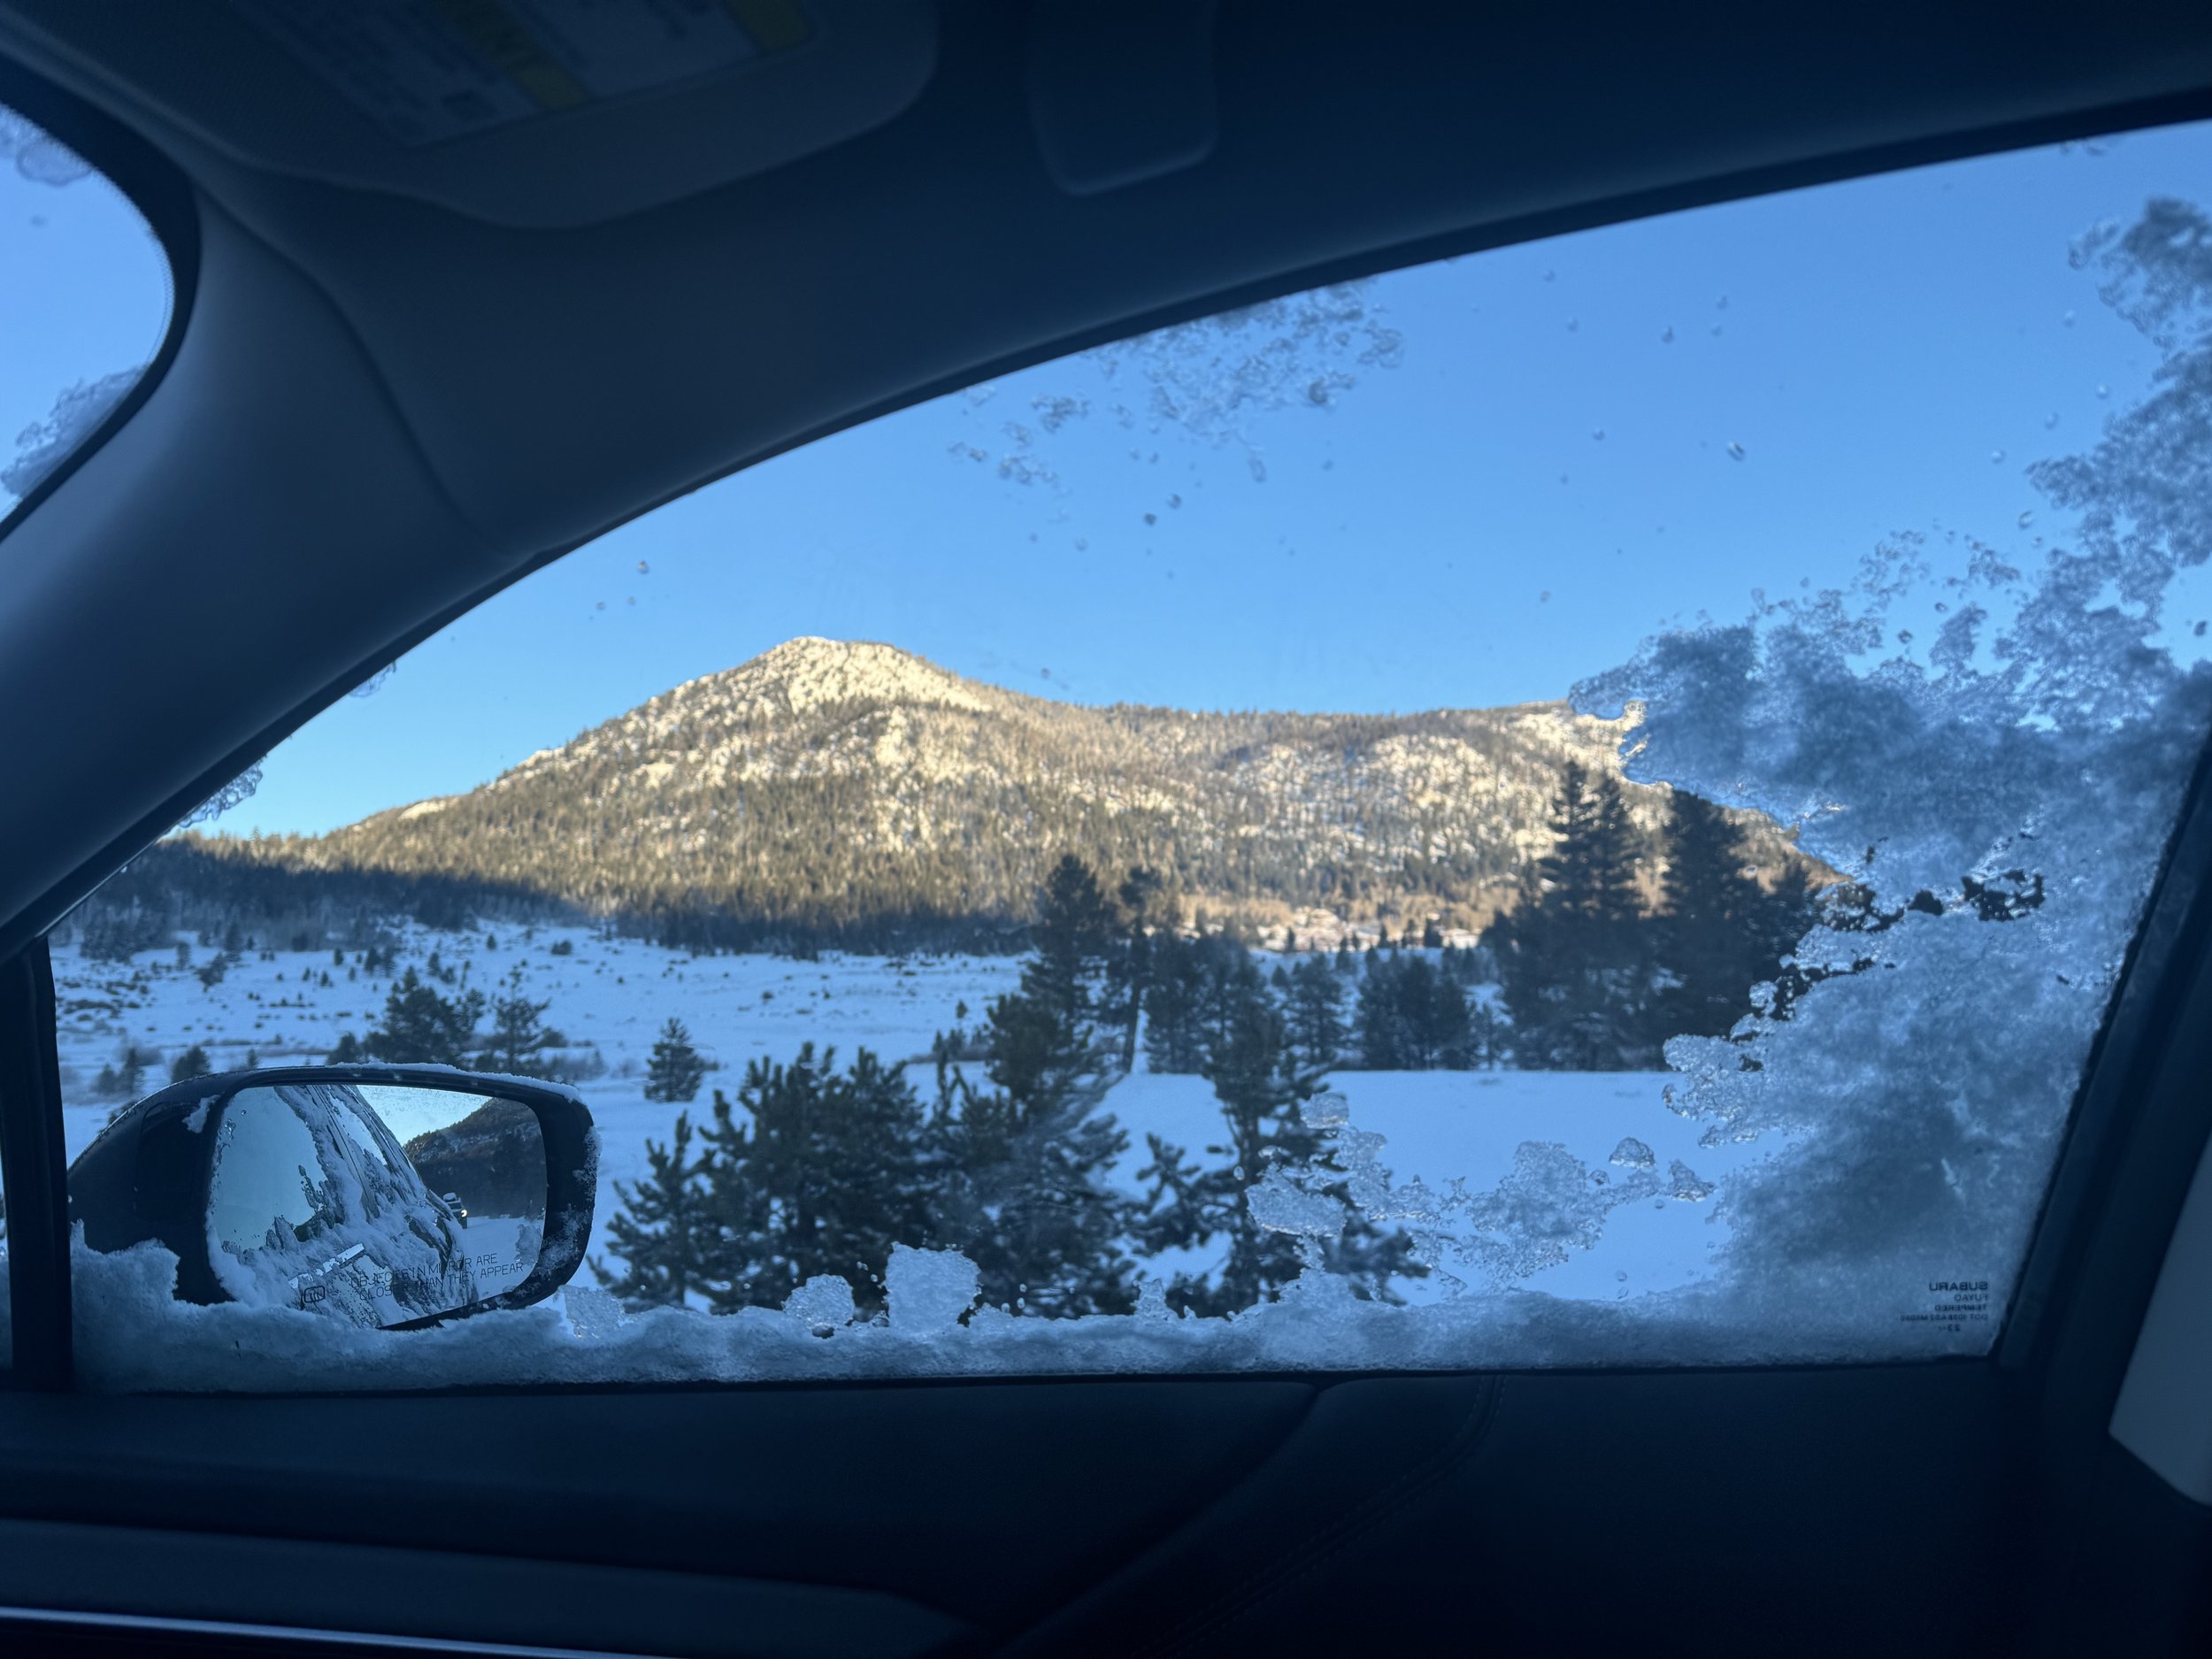
First light from the car window. Photo by Dalton Johnson
With the aroma of fresh coffee filling the car, I hit the road toward Kirkwood, CA. I’m not a scientist and don’t time my steeping, so I sip my coffee until it taste nice and strong. Then I take the bag of coffee out so my coffee doesn't get acidic. The drive—filled with loud music, snowy vistas, and the occasional sip of coffee—put me in my happy place. I was ready to ski.
Making round two of coffee on the side of the road. Photo by Dalton Johnson
A Solo Day Skiing At Kirkwood
Kirkwood has quickly become my favorite mountain in the Lake Tahoe area. It’s a skier’s mountain, with hidden features scattered across its terrain. Thankfully, I have a friend who’s been skiing there for over 20 years and has shown me some incredible spots. But today, I was solo.
As I reached a scenic pull-off, I prepared my second cup of coffee. It was still dark, but the sky had begun to brighten. With my thermos of hot water and another bag of Kahawa 1893, I steeped my second cup of fresh coffee. The rich aroma filled my car and I took a deep inhale, thinking to myself, “Mmmh, that is going to be good.” Moments like these set the tone for a great day.

Searching for fresh snow at Kirkwood. Photo by Dalton Johnson
First Turns of the Day
When I arrived at Kirkwood, I suited up and headed for the lift line. My goal was to be first on the mountain, but being 12th was just fine. The early runs were everything I hoped for: fresh turns on untouched snow, the crisp morning air filling my lungs, and the caffeine buzz keeping my energy high.
While waiting in line for another lift, an employee skied by, shouting, “The backside is open, go get it!” The energy at Kirkwood is infectious, and moments like this remind me why I love this mountain so much.
Exploring the Backside
Transitioning to Kirkwood’s backside feels like a game of strategy. Chair 6 to Chair 10, then a traverse through Eagle Bowl to Chair 2, and finally down to Chair 4—it’s a journey, but the payoff is worth it. The backside’s fresh powder was pristine, and my first lap was unforgettable. Floating through powder with a smile on my face and my thighs burning, I felt the good life.
Navigating Kirkwood takes time, especially when lines are long. If you’re planning to move across the mountain, expect it to take about an hour to an hour and a half. But trust me, the effort pays off with some of the best terrain in the Tahoe area.

On chair two, headed to the backside of Kirkwood. Photo by Dalton Johnson
Coffee and Skiing Are The Perfect Pair
By midday, I was still buzzing—partly from the skiing, partly from the coffee. I’ve found that having a third cup of coffee packed for the drive home is a game-changer. After a full day on the mountain, the warm, rich flavor of Kahawa 1893 keeps me alert and happy as I reflect on the day’s adventures.
While Heavenly is only 12 minutes from my house, the 75-minute drive to Kirkwood was more than worth it. The combination of skiing, fresh powder, and the convenience of Kahawa 1893 bagged coffee elevated my day. As I sipped my last cup of coffee on the drive home, I couldn’t help but smile, already planning my next powder day.
Discover More Gear
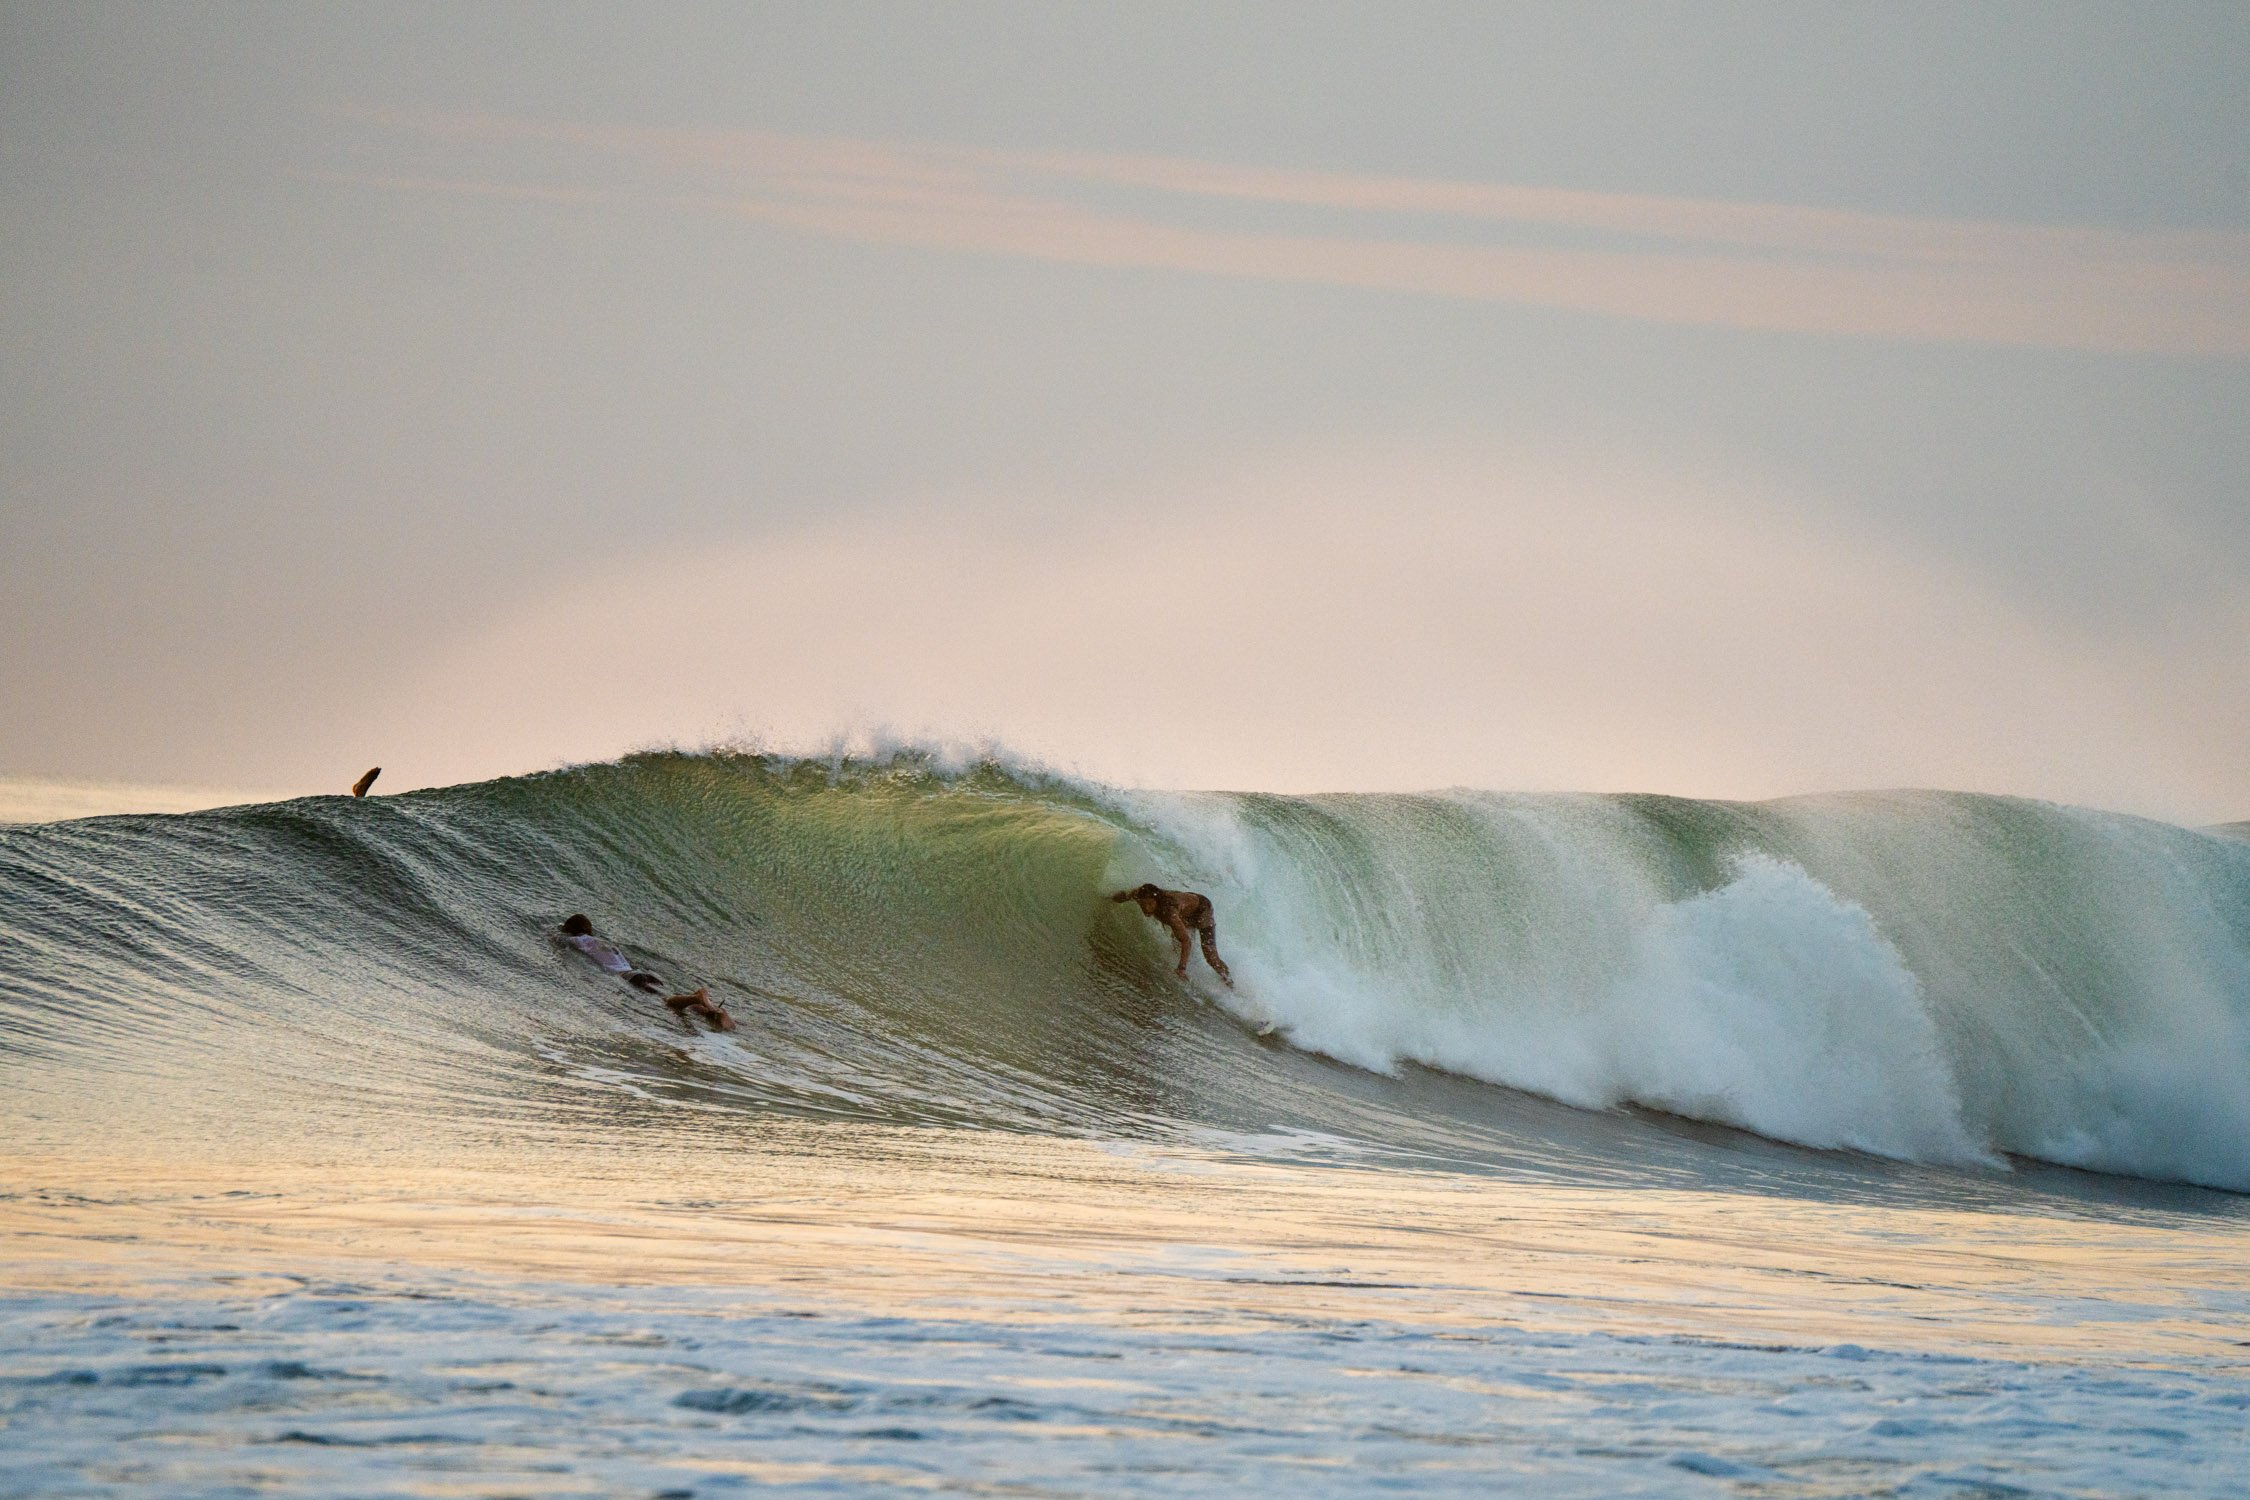
I Caught My First Barrel Surfing Rancho Santana Nicaragua — And You Can Too
When I visited Rancho Santana, Nicaragua, I had one clear goal: surf a barrel. Despite almost 15 years of surfing experience, I had never successfully ridden inside a barrel and been spit out. Surfing Northern California's point breaks rarely presented opportunities for barrel riding, so this felt like my moment. To give myself the best shot, I enlisted the help of a surf instructor. Here’s how it all unfolded.
When I visited Rancho Santana, Nicaragua, I had one clear goal: surf a barrel. Despite almost 15 years of surfing experience, I had never successfully ridden inside a barrel and been spit out. Surfing Northern California's point breaks rarely presented opportunities for barrel riding, so this felt like my moment. To give myself the best shot, I enlisted the help of a surf instructor. Here’s how it all unfolded.
Barrels at the main break of Rancho Santana. Photo by Dalton Johnson
Day One: A Humbling Start
From the first wave, I realized this wasn’t going to be easy. The steep drops were relentless. Sometimes I’d make it to my feet, only to flip upside down and start the session tumbling through the washing machine. My surf instructor quickly identified areas for improvement.
“Use your front foot to steer over the boil,” he suggested. Wipeout.
“Tuck more — these waves aren’t that big,” he coached. Wipeout.
“Find the peak, then drop,” he emphasized. Another wipeout.
By midday, I was exhausted from the endless cycle of paddling, wiping out, and paddling back out. For someone used to long rides and carving turns, barrel riding was an entirely new challenge. It required flexibility, quick reflexes, and a willingness to get thrashed. Fortunately, Rancho Santana’s pool and hot tub offered a relaxing reward for my sore muscles after a tough day.

Scouting the break and showing Kristin where I am surfing. Photo by Dalton Johnson
Day Two: Finding My Groove
Determined to improve, I decided to surf solo the next day. Rancho Santana boasts five beaches, with two prime surfing spots and a few panga drop-off locations. I opted for one of the local breaks, enjoying the vastness of the property. The shuttle rides between beaches highlighted just how expansive and self-contained Rancho Santana is — more like a community than a resort.
Once at the break, I spent another hour getting pounded by waves. But something started to click. My positioning improved, and I began to understand the rhythm of the waves. It wasn’t perfect, but progress was progress.
In the afternoon, my girlfriend and I took a break from surfing and went mountain biking. Rancho Santana’s single-track trails wound through the property, offering scenic routes and thrilling descents. We pedaled to the highest point on the property, then raced downhill, zigzagging through a mix of terrain. By the end, we were both exhausted but exhilarated. After a quick nap, I paddled out for a mellow sunset surf in front of the property. It was the perfect end to the day — easy waves and a breathtaking view.
Day Three: Achieving the Goal
Refreshed and ready, I returned to the original spot with my surf instructor. This time, I felt more prepared. A hearty breakfast and strong coffee had me energized as we paddled out to the peak. I noticed another surfer effortlessly catching barrels; he only had one leg. Inspired, I focused on making it happen.
Wave one: I nose-dived and got a sinus rinse.
Wave two: I stood up but got tomahawked by the lip.
Wave three: A complete disaster.
Then, on wave four, everything clicked. I stood up, angled my board toe-side, and tucked down, dropping my back knee. As the wave curled over me, I found myself inside the barrel. Time seemed to slow down as I sped through the tunnel, and then, just like that, I was spit out. I’d done it — I rode my first barrel.
I kept trying for the rest of the session, but nothing matched that initial success. While I wasn’t catching barrels left and right, breaking the ice gave me the confidence and knowledge to improve.
Almost getting clocked by a surfboard, but catching a barrel at Rancho Santana Nicaragua instead.. Photo by Dalton Johnson
Why Rancho Santana?
Rancho Santana is the ideal place to chase barrels. The variety of breaks ensures waves for all skill levels, and the surf instructors are invaluable for shortening the learning curve. Beyond surfing, the property offers a range of activities, from mountain biking to dining, making it a perfect destination for surf trips and beyond.
If barrel riding is on your bucket list, I can’t recommend Rancho Santana enough. With patience, practice, and a good instructor, you’ll be riding inside the tube in no time. Who knows? Maybe you’ll catch your first barrel here too.
Discover more Adventures

I Turned The North Face Gear Box Into A Boot Bag—and You Should Too
When I upgraded to a new backcountry ski setup, I faced a problem familiar to many: shuttling gear to and from the car in a haphazard, inefficient way. Enter The North Face Base Camp Gear Box. What started as a general-purpose gear hauler has become my ultimate boot bag, streamlining my ski days into a grab-and-go dream. But there’s more to this gear box than meets the eye, and it’s worth exploring its features and versatility before deciding if it’s right for you.
When I upgraded to a new ski setup, I faced a problem familiar to many: shuttling gear to and from the car in a haphazard, inefficient way. Enter The North Face Base Camp Gear Box. What started as a general-purpose gear hauler has become my ultimate boot bag, streamlining my ski days into a grab-and-go dream. But there’s more to this gear box than meets the eye, and it’s worth exploring its features and versatility before deciding if it’s right for you.
Is The North Face Base Camp Gear Box a Box or a Duffel Bag?
The Base Camp Gear Box is a hybrid between a durable box and a flexible duffel bag. It’s a direct competitor to products like the RUX, combining the best of both worlds. Its soft-shell design makes it easy to carry, yet it stands upright like a traditional plastic box. The secret? Reinforced metal inserts that provide structure without adding unnecessary weight.
This design lets you dig through your gear without the frustration of tipping it over or dumping everything out like you might with a standard duffel. Internal pockets are a standout feature, perfect for keeping smaller items like gloves or snacks organized. If you’re tired of the chaos of traditional bags, this structured approach is a game-changer. It’s both practical and user-friendly, blending durability and convenience into a single package.
The box’s ability to adapt to different environments is another highlight. Unlike a duffel, it doesn’t collapse under pressure, and unlike a hard-shell box, it’s not rigid or cumbersome. This balance makes it versatile and appealing for outdoor enthusiasts who need reliability without sacrificing flexibility.

The North Face Base Camp Gear Box as a boot bag. Photo by Dalton Johnson
Why Use It as a Boot Bag?
While not marketed as a boot bag, the Base Camp Gear Box shines in this role. It’s larger than most standard boot bags, offering space not only for my ski boots but also for essentials like extra layers, a beacon, probe, shovel, goggles, and gloves. Everything stays in one place, and I never have to worry about forgetting something important.
Its durable, water-resistant material keeps gear protected from the elements, and the hard top and bottom make it easier to load and unload without worrying about squishing or damaging what’s inside. The internal pockets further enhance its utility by keeping smaller items organized and easily accessible.
However, there are a few trade-offs. The larger size means it takes up more room in your car, and while the soft sides are great for flexibility, they don’t offer the same rigid protection as a hard-shell case. Another minor inconvenience is the lack of a shoulder strap, which could have made carrying the bag over longer distances more comfortable. Despite these drawbacks, the added space and versatility make it a fantastic option for anyone needing more than a traditional boot bag can offer.
Uses Beyond a Boot Bag
The versatility of The North Face Base Camp Gear Box is what makes it truly special. Here are a few additional ways I see myself putting the Base Camp Gear box to good use:
Car Camping
The hard top doubles as a sturdy surface for preparing meals or organizing camp essentials. I’ve used it as a makeshift kitchen box, packing utensils, food, and cookware. While the material isn’t heatproof (don’t try cooking on it!), it makes tailgate setups significantly more organized and functional. Plus, the waterproof design means you don’t have to worry about setting it down on wet or muddy ground. It’s a game-changer for keeping your camp kitchen neat and tidy.
Climbing Gear
If you’re a climber, the large gear box has plenty of room for ropes, harnesses, helmets, chalk bags, and shoes. It keeps all your climbing gear in one spot and is easy to toss in the back of your car without worrying about wear and tear. The structured design prevents your gear from shifting around too much, which can be a lifesaver when you’re in a rush. Whether you’re heading to the gym or an outdoor crag, this box ensures your gear stays organized and ready to use.
Mountaineering
With “base camp” in the name, this gear box is designed for hauling gear to big objectives. Whether loaded onto a yak, strapped to a horse, or carried by you, it can handle the rough treatment of outdoor adventures. Its durability is perfect for packing bulky mountaineering gear like crampons, ice axes, and extra layers. The waterproof and abrasion-resistant material ensures that even in harsh conditions, your gear remains secure and dry.
Daily Storage and Transport
Beyond outdoor activities, the gear box is perfect for daily use. Whether you’re heading to the gym, taking the kids to practice, or just organizing the trunk of your car, its spacious design makes it a versatile choice. The ability to stand upright and the easy-access opening are features you’ll appreciate in any setting.
The Downsides of the Base Camp Gear Box
No product is perfect, and the Base Camp Gear Box has its limitations. First, the lack of a shoulder strap can make carrying it over longer distances a bit cumbersome. While it’s not a dealbreaker, it’s something to consider if you plan on hauling heavy loads frequently.
Second, there’s no drain at the bottom, which could have been useful for wet or snowy gear. Since the box is waterproof, any water or moisture trapped inside will stay there until you manually dry it out. This isn’t a huge issue, but it’s worth noting if you plan to use it for wet activities like skiing or kayaking.

Changing into boots with the North Face Basecamp Gear Box
Final Thoughts
The North Face Base Camp Gear Box has quickly become a favorite in my lineup of outdoor gear. As a boot bag, it simplifies my ski days, keeping everything I need in one durable, easy-to-carry container. Beyond skiing, its versatility makes it a reliable companion for car camping, climbing, and mountaineering adventures.
If you’re tired of juggling multiple bags or looking for a durable, multi-functional gear hauler, consider giving this box a try. Its thoughtful design, spacious interior, and rugged construction make it a must-have for anyone who values organization and efficiency. Whether you’re packing boots, ropes, or cookware, it might just become your new favorite piece of outdoor gear.