
An Evening Surf With Santa Cruz Local Pro Austin Smith Ford And Dermatone
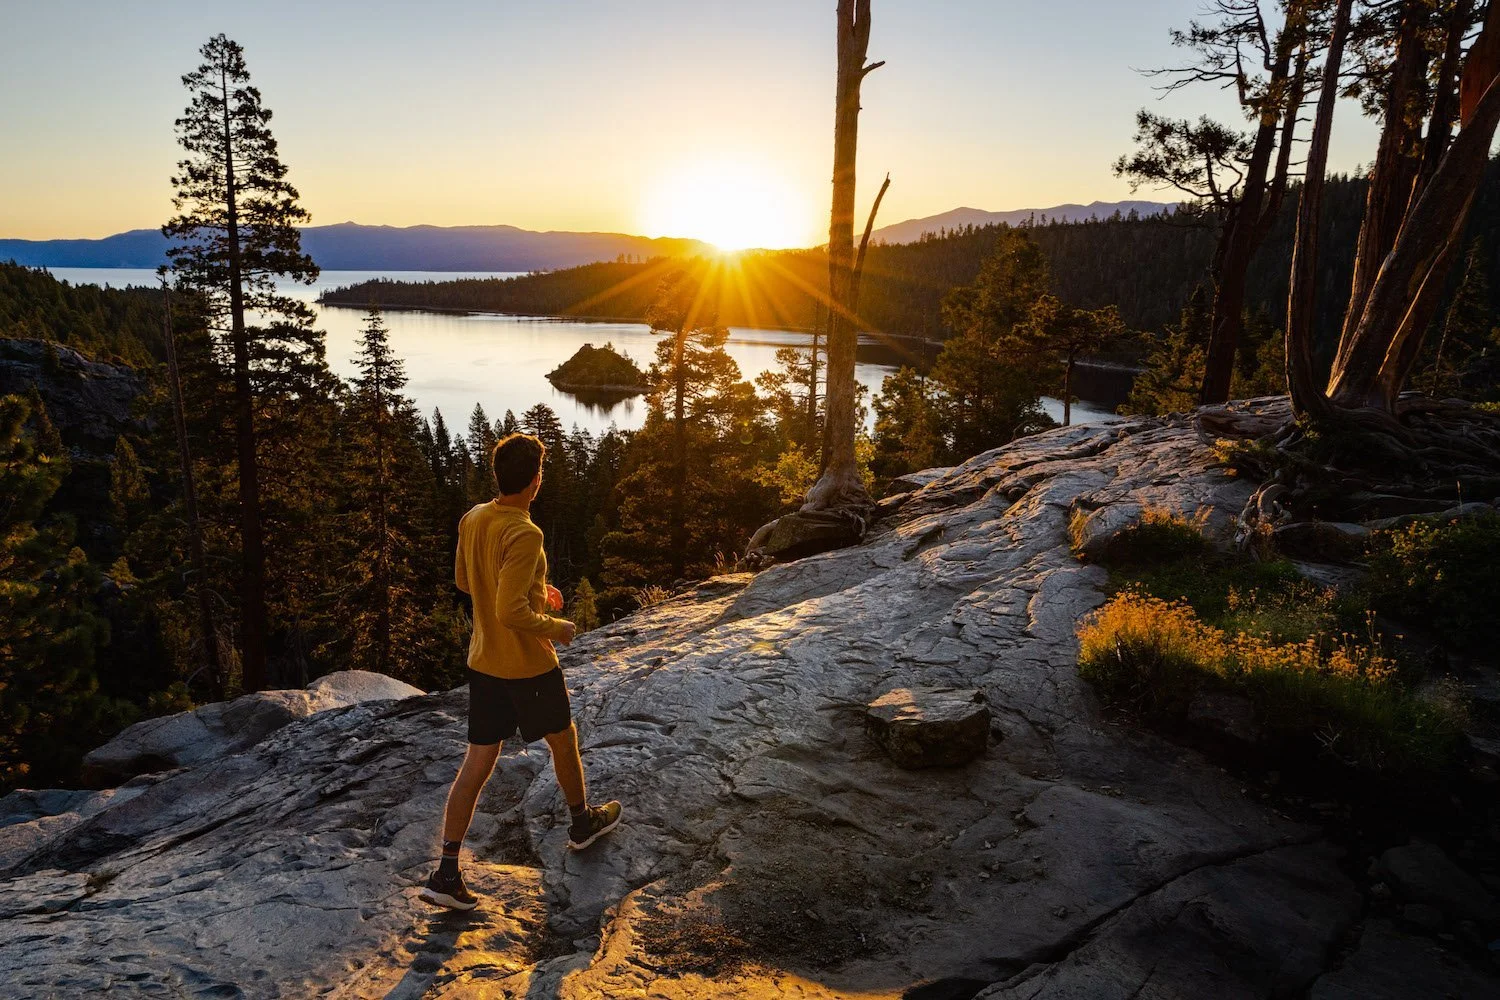
Without much daylight left, local surf-pro, Austin Smith-Ford, waxes his board for an evening of surf a few miles north of Santa Cruz, CA. A local’s only spot where you’ll surely be yelled at if you can’t say “hey” to at least a few surfers in the line up.
Sunscreen… check
Wetsuit… check
Surfboard… check
Waves… check
Sunset… soon to come
Without much daylight left, local surf-pro, Austin Smith-Ford, waxes his board for an evening of surf a few miles north of Santa Cruz, CA. A local’s only spot where you’ll surely be yelled at if you can’t say “hey” to at least a few surfers in the line up.
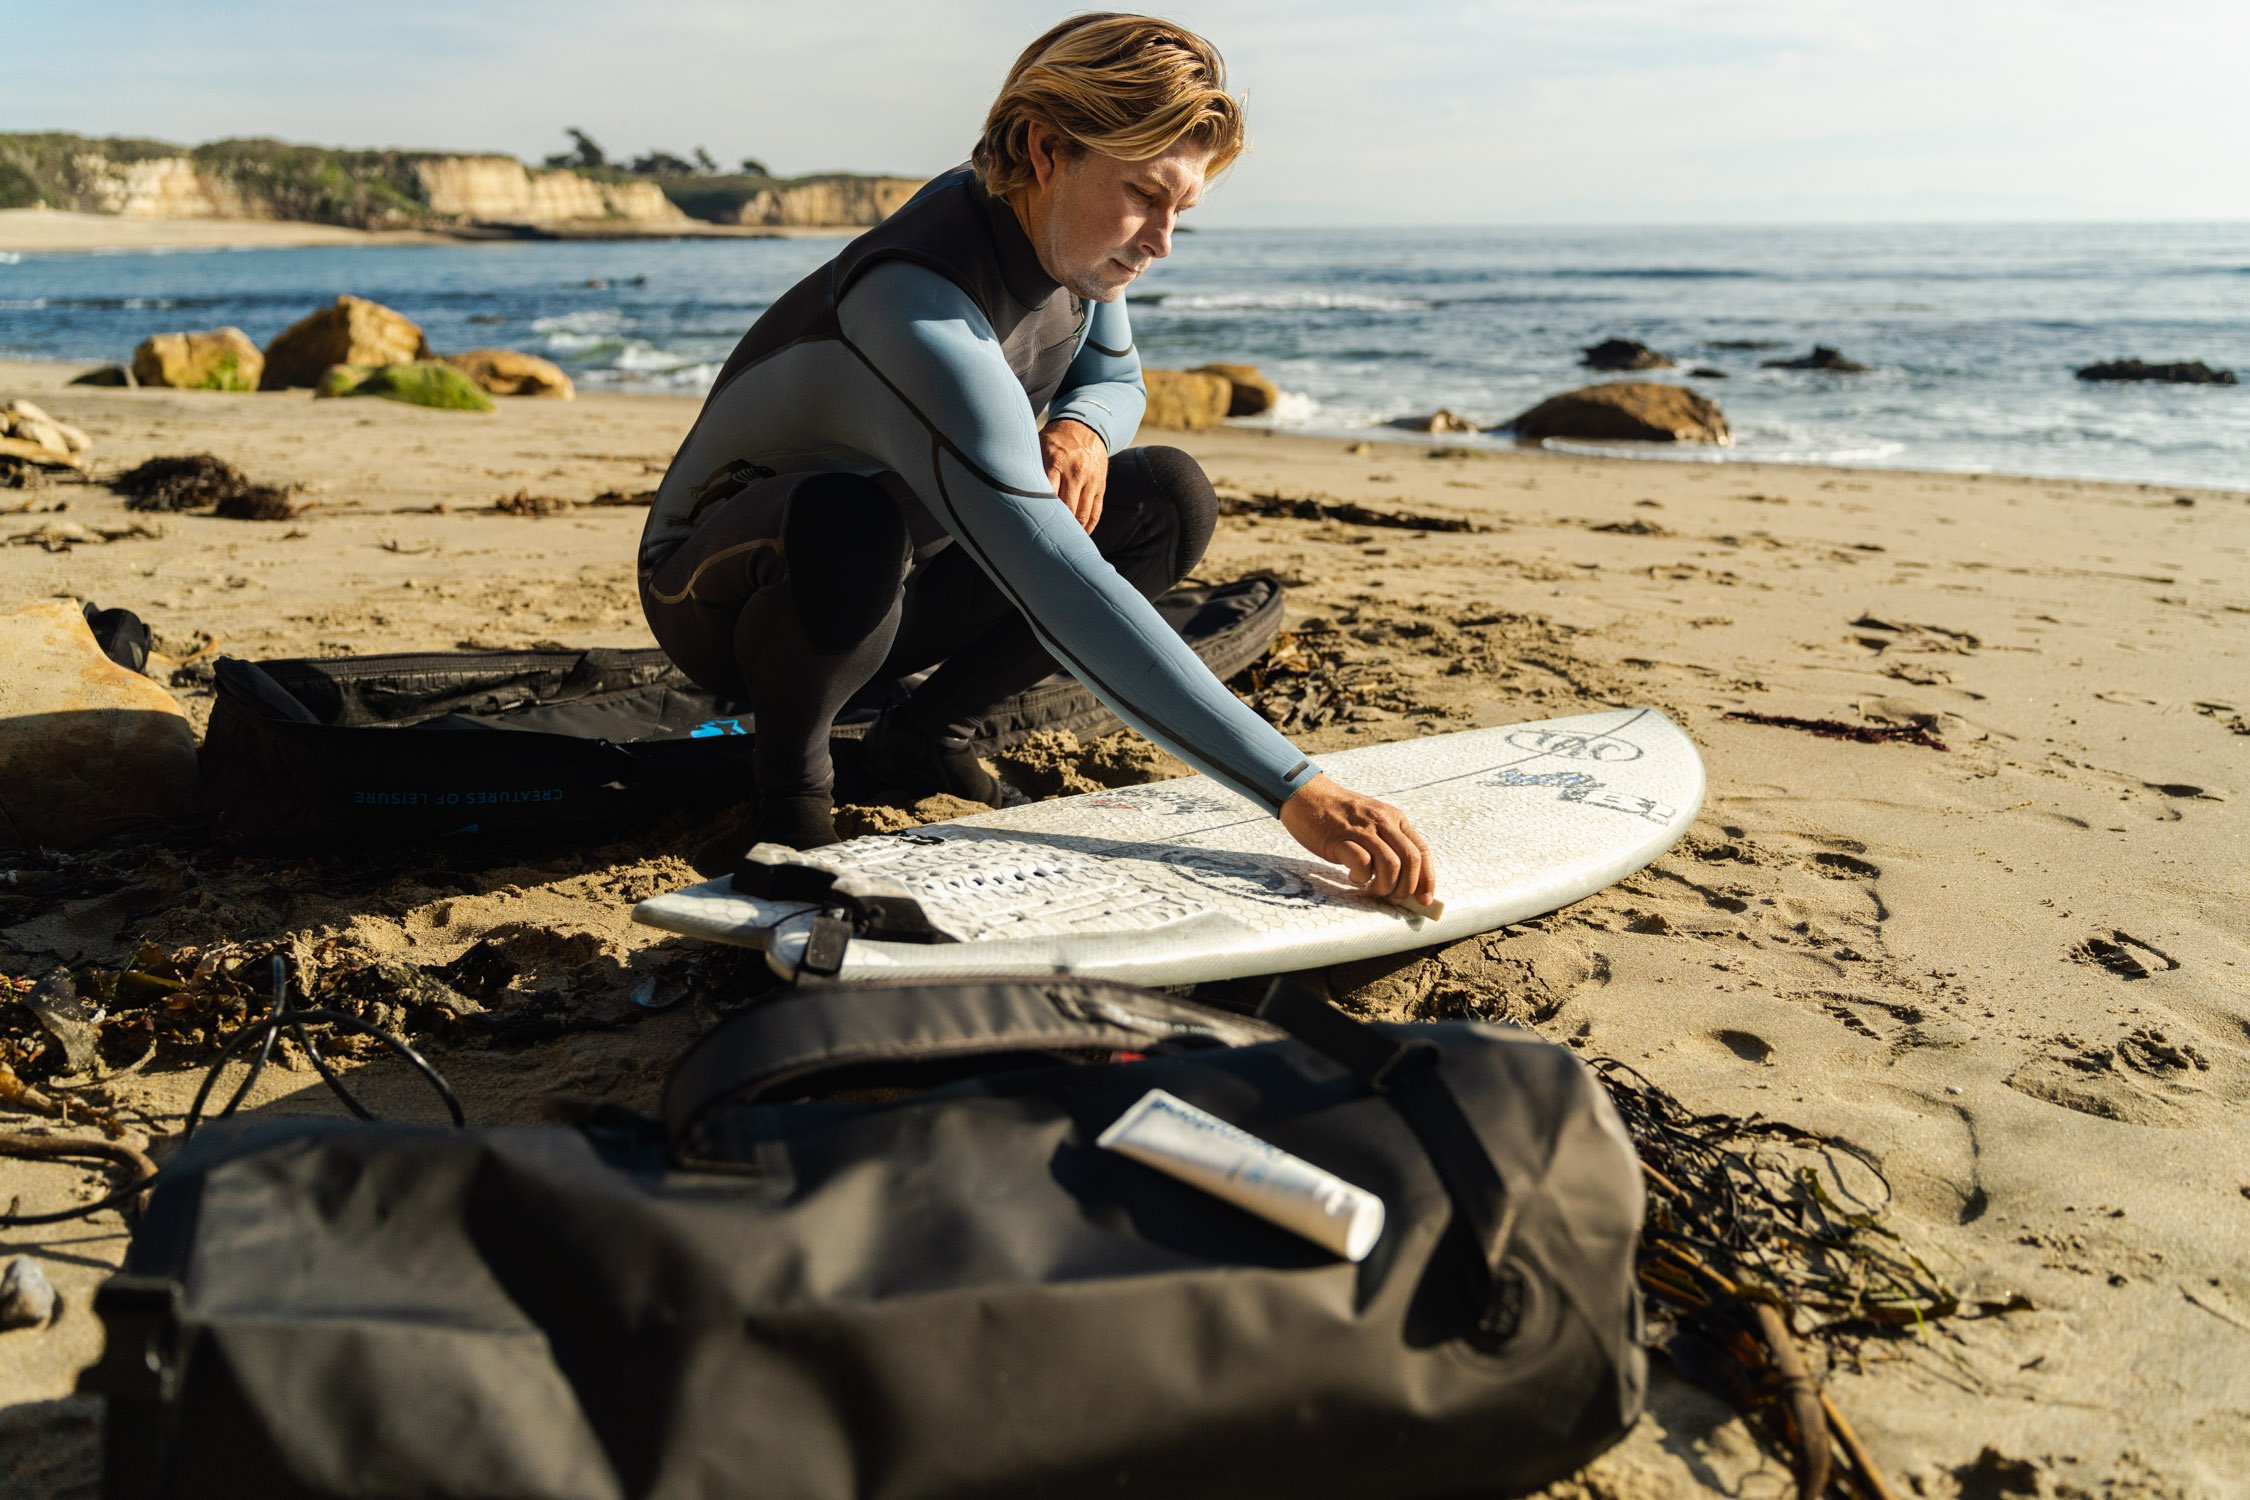
Austin Smith-Ford waxing his surfboard before heading into the ocean to surf. Photo by Dalton Johnson, follow him on IG


Product image of Dermatone Sunscreen, the sponsor of this adventure photography shoot. Photo by Dalton Johnson, follow him on IG

Austin taking in the sunset views between sets of waves, he’s the last one out. Photo by Dalton Johnson, follow him on IG


Staying late rewarded Austin with stellar golden light. Photo by Dalton Johnson, follow him on IG
One final wave to catch before nightfall. Photo by Dalton Johnson, follow him on IG


The motion of the ocean over 1 second. Photo by Dalton Johnson, follow him on IG
How to Avoid Common Mistakes as a Beginner Stargazer
My passion for stargazing started on a 30-day backpacking trip with friends through Escalante National Monument. Each night, after long days of hiking through the desert, we’d pull out a night sky book and try to identify new stars and constellations. Lying in our sleeping bags, we watched the stars slowly move across the sky, talking and pondering the vastness of space. Those late nights sparked my love for the night sky that has stayed with me for over a decade. Since then, stargazing has become a way for me to connect with nature, friends, and the immense beauty of the universe.
My passion for stargazing started on a 30-day backpacking trip with friends through Escalante National Monument. Each night, after long days of hiking through the desert, we’d pull out a night sky book and try to identify new stars and constellations. Lying in our sleeping bags, we watched the stars slowly move across the sky, talking and pondering the vastness of space. Those late nights sparked my love for the night sky that has stayed with me for over a decade. Since then, stargazing has become a way for me to connect with nature, friends, and the immense beauty of the universe.
Over the years, I’ve learned how to make stargazing an enjoyable experience while avoiding common beginner mistakes. If you’re just starting out, here’s what you need to know to make the most of your nights under the stars.

Camping under the stars is the best way to access the night sky. Photo by Dalton Johnson
1. Dress for the Weather
One of the easiest ways to ruin a stargazing night is not dressing warmly enough. You're not going to think straight if you are shivering. Even in the summer, nights can get chilly, especially in open areas like deserts or mountains. On my backpacking trips, layering up became second nature, often having my sleeping bag ready for extra warmth. Now, I always bring extra blankets and hand warmers when stargazing with friends or family, to make sure everyone is comfortable. It’s better to overprepare than to cut your night short because you’re too cold.
Pro Tip: A thermos of hot tea, hot chocolate, or coffee can make all the difference on those colder nights. Pair it with a comfortable chair and a cozy blanket for an even better experience.
2. Start with a Plan
When I first started stargazing, we relied on a simple night sky book to guide us. It was exciting but often frustrating when we couldn’t find what we were looking for. Now, I use apps like PhotoPills, which is a game-changer for photography. Its AR viewing feature helps me line up shots of the Milky Way at the exact time and location I want. Planning your night can save you frustration and make the experience more rewarding. Research celestial events, like meteor showers or eclipses, and use stargazing apps to identify constellations and planets in advance.
Tip: Create a small checklist of essentials—star maps, a flashlight with a red filter, binoculars, snacks, and a comfortable setup to ensure you have everything you need.

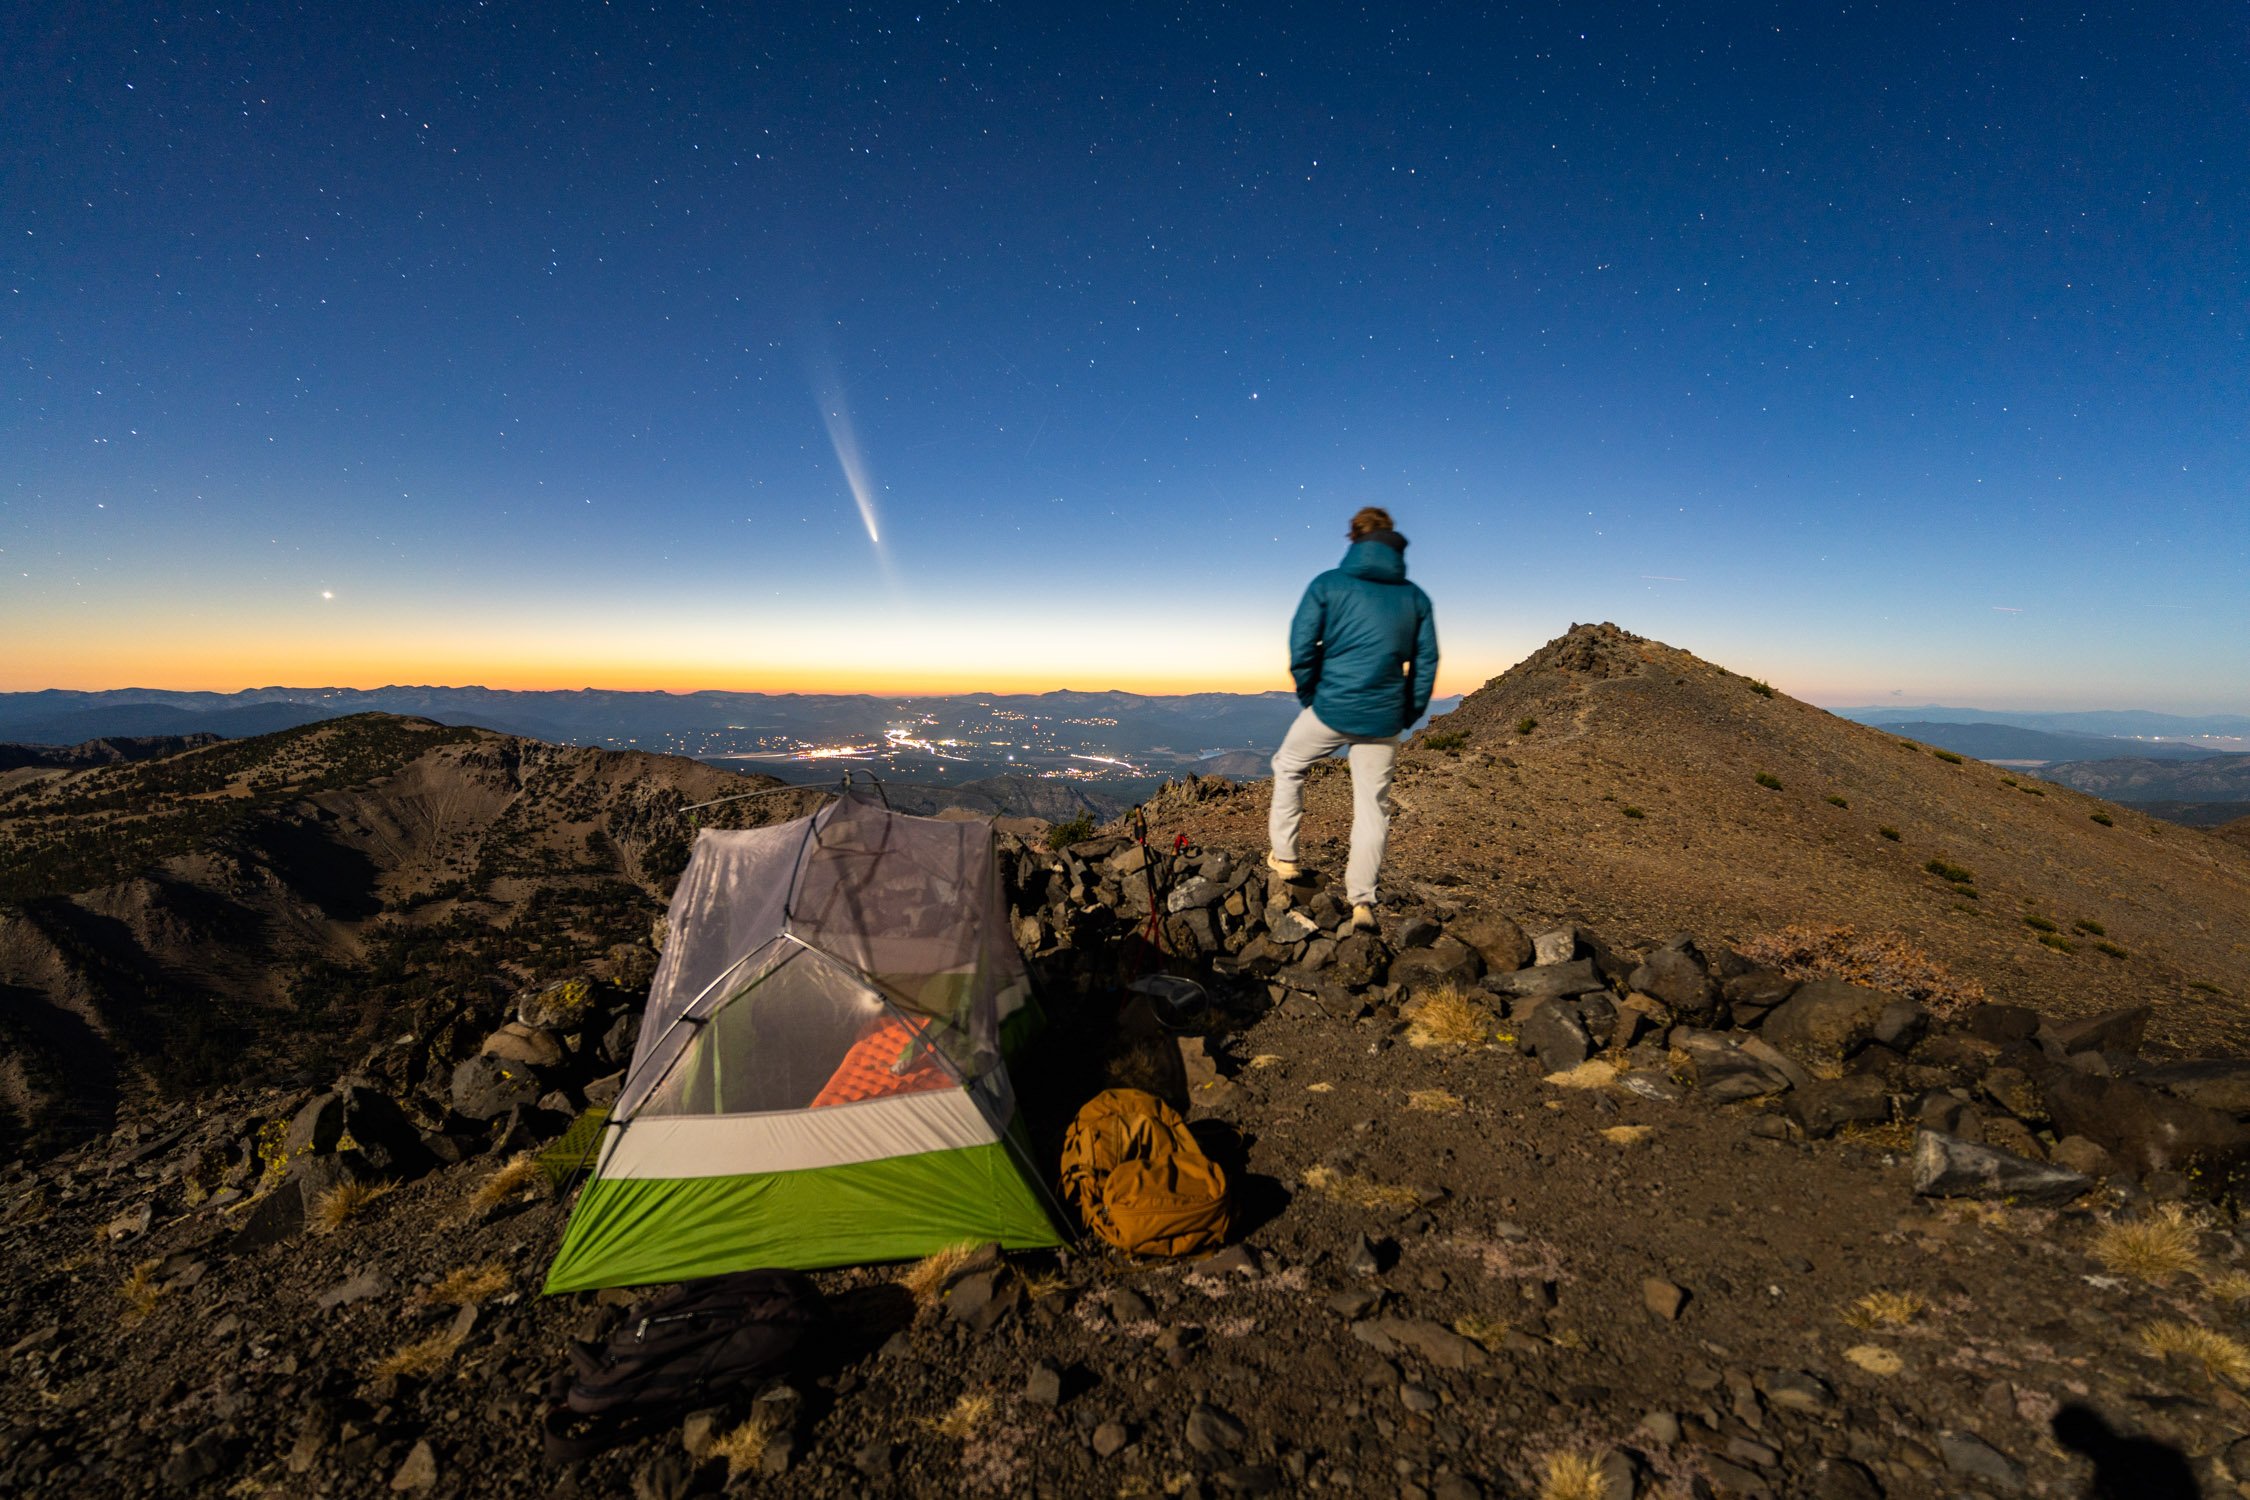
Taking in the Milky Way from the summit of Tallac in Lake Tahoe, CA. Photo by Dalton Johnson
3. Choose the Right Location
Light pollution is one of the biggest barriers to seeing the night sky clearly. If you can, visit a designated dark-sky area. Some of my favorites include Moab, Yosemite National Park, and spots across the American Southwest. These places offer incredible views that make the effort worth it. The fewer city lights, the more stars you’ll see.
Tip: Use a light pollution map online to find the darkest skies near you. Arrive before sunset to scout out a good spot and let your eyes adjust to the dark naturally.


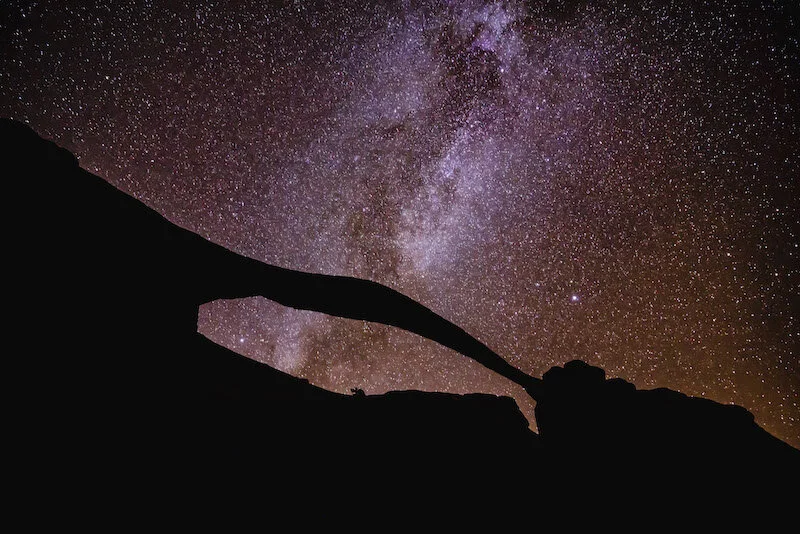
The Milky Way creeping our from behind Landscape Arch in Arches National Park. Photo by Dalton Johnson
4. Be Patient
One mistake I’ve seen time and again is impatience. Beginners often expect to find constellations or spot shooting stars right away. But stargazing is a slow process. It takes time for your eyes to adjust to the dark, and finding constellations requires practice. I’ve also learned to start with the easiest constellations first—Orion and the Big Dipper are great ones to begin with. Once you’ve mastered the basics, you can work on identifying more complex formations.
Tip: Don’t forget that constellations change with the seasons and your location. If a constellation isn’t visible, it’s not your fault—it’s just not the right time of year or hemisphere.
5. Bring the Right Gear
You don’t need an expensive telescope to start stargazing. For years, I used just my eyes and a pair of binoculars. Binoculars are a great starting point because they’re portable and can give you a closer view of the moon and larger celestial objects. As a photographer, I now rely on tools like PhotoPills and sturdy tripods for night photography. But even with advanced gear, basics like a blanket, folding chair, and bug spray can make or break the experience.
Tip: If you’re thinking of investing in gear, start with binoculars. They’re much easier to use than telescopes when you’re beginning and can open up a whole new level of detail in the night sky.

A Milky Way bow, which can be captured during Nov - April in North America. Photo by Dalton Johnson
6. Pick the Right Time
One mistake I made early on was stargazing during a full moon. A bright moon can wash out faint stars, making it harder to see constellations. Now, I always check the lunar calendar and aim for nights around the new moon. Meteor showers and special celestial events are also fantastic times to plan your outing. Timing is everything when it comes to stargazing—you’ll get the best results when the conditions are optimal.
Tip: If you’re planning to photograph the stars, timing is everything. Use apps to track the Milky Way’s position for the best results, and plan your night accordingly.
7. Learn the Basics First
I’ll admit, when I started, I got overwhelmed trying to find advanced constellations or identify faint stars. What I’ve learned is that stargazing is much more fun when you start with the basics. Learn to identify a handful of bright stars or constellations, and build from there. Don’t rush into complicated star charts—keep it simple and enjoy the process of discovery.
Tip: Apps like SkySafari and Star Walk are beginner-friendly and can guide you through the sky step by step. They’ll even show you which stars and planets are visible from your location and time.
The milky way over my van in the Alabama Hills of CA. Photo by Dalton Johnson
Stargazing is one of the simplest joys in life, but it does take a bit of preparation and patience to fully enjoy it. Whether you’re lying under the stars in a dark desert or snapping photos of the Milky Way, the key is to approach it with curiosity and an open mind. After all, the night sky is always full of surprises—if you know how to look. So grab a blanket, head to a quiet spot, and let the stars remind you of the beauty and vastness of our universe.
Discover more Adventures


What's The Difference: Day Hike vs. Backpacking vs. Trekking
Embarking on an outdoor adventure is a wonderful way to disconnect from the bustling city life, reconnect with nature, and challenge yourself physically and mentally. When it comes to exploring the great outdoors, day hikes, backpacking trips, and trekking expeditions are popular choices. Each option offers a unique experience, catering to different preferences, skill levels, and time commitments.
When I got into the outdoors I started to hear terms like day hikes, backpacking trips, and trekking. Honestly, I had no idea what people were talking about and found it hard to understand. So, I wrote this article for you all in the same position, wondering, what the heck is the difference between day hikes, backpacking trips, and trekking.
The short answer to the question, “What really is the difference between day hiking, backpacking, and trekking?” Day hiking involves completing a trail within a single day, covering shorter distances and requiring minimal gear. Backpacking, on the other hand, includes spending one or more nights in the wilderness, carrying camping gear and supplies for longer trips. Trekking is a more intense and extended form of hiking, often lasting weeks or months, covering extensive distances, and involving challenging terrains and higher physical demands.
However, there is more to the story, so below you will find the differences between day hikes, backpacking, and trekking.
Backpacking in Washington. Photo by Dalton Johnson
What Really Are the Differences?
While day hiking, backpacking, and trekking all involve outdoor exploration, key differences set these activities apart. Understanding these distinctions can help you choose the adventure that aligns with your goals, preferences, and abilities. Each offers unique challenges and rewards, making them suitable for various fitness levels, time commitments, and personal goals.
Duration and Distance
Day Hiking: Typically completed within a single day, these excursions cover shorter distances ranging from a few miles to a dozen miles. They are ideal for quick getaways or testing your fitness without extensive preparation. Day hikes are great for exploring local trails, enjoying a scenic spot, or introducing beginners to outdoor activities.
Backpacking: This involves spending one or more nights in the wilderness, often covering longer distances that can span multiple days. Backpacking trips can range from a weekend adventure to a week-long journey, depending on the destination and itinerary. Multi-day hikes allow for deeper immersion in nature and the opportunity to explore remote areas that day hikers cannot reach.
Trekking: These are longer and more demanding journeys that can last for weeks or even months. Treks often cover extensive distances, traversing rugged terrains such as mountain ranges, deserts, or jungle trails. Treks like the Appalachian Trail or Everest Base Camp require sustained endurance, planning, and often a deep appreciation for cultural and environmental exploration.

Backpacking in Lake Tahoe, CA. Photo by Dalton Johnson
Self-Sufficiency and Gear
Day Hiking: Requires carrying essential items like water, snacks, a first-aid kit, and extra layers. Day hikers rarely need camping gear or extensive supplies, keeping their packs light and manageable. This simplicity makes day hikes an accessible option for individuals of all experience levels.
Backpacking: Necessitates carrying all the gear required for overnight stays, including a tent, sleeping bag, cooking equipment, and sufficient provisions. Backpackers must also consider weather conditions and prepare accordingly with items such as rain gear, thermal clothing, or navigation tools. A well-packed backpack can make the difference between a comfortable adventure and a challenging one.
Trekking: Similar to backpacking but may involve additional specialized equipment depending on the terrain, altitude, and climate. For example, trekkers in high-altitude areas might need crampons, trekking poles, or portable oxygen systems. Some treks also involve logistical support such as porters or guides, which can influence the type and amount of gear carried.
Accessibility and Location
Day Hiking: Day hikes are often located near populated areas, with accessible trails in local parks, nature reserves, or nearby mountain ranges. These trails are designed to be beginner-friendly and convenient for quick escapes into nature. Some popular day hiking spots even offer well-marked paths and facilities like restrooms and parking.
Backpacking: This activity can take place in a variety of settings, including designated backpacking routes, national parks, or remote wilderness areas. Backpackers often seek trails that provide a balance between challenge and scenic rewards. National parks frequently have dedicated backpacking routes with established campsites, offering both adventure and safety.
Trekking: Treks often occur in remote and less-accessible regions. Locations such as high mountain passes, deep forests, or isolated villages provide unique cultural and natural experiences. Trekkers may need to rely on guides, porters, or pre-arranged logistical support. Iconic trekking destinations often combine challenging routes with opportunities to experience local traditions and breathtaking landscapes.

Day hike in Sedona, AZ to a cave. Photo by Dalton Johnson
Level of Difficulty
Day Hiking: Generally suitable for beginners or individuals with moderate fitness levels. Day hikes are less physically demanding and involve minimal risk, making them accessible for families and casual adventurers. They offer a great way to enjoy nature without significant physical or logistical challenges.
Backpacking: Requires a higher level of physical endurance and strength. Backpackers must be prepared for longer distances, heavier loads, and elevation changes. Conditioning and preparation play a significant role in a successful backpacking trip. Backpacking is often considered a stepping stone to more ambitious outdoor adventures like trekking or mountaineering.
Trekking: Demands exceptional fitness, stamina, and mental resilience. Treks often involve challenging terrains, unpredictable weather, and significant altitude changes, testing both physical and mental limits. Trekkers must be ready to face extended periods of physical exertion, often in remote and harsh environments.
Time Commitment
Day Hiking: A single-day activity, making it perfect for individuals with limited time or busy schedules. Many trails allow hikers to enjoy nature without dedicating extensive time to preparation or travel. This makes day hiking a flexible option for spontaneous adventures.
Backpacking: Involves a commitment of several days or weeks. This makes it ideal for those seeking a more immersive experience during vacations or breaks, allowing for deeper exploration of natural landscapes. Backpacking offers the chance to disconnect from daily life and embrace the solitude of the wilderness.
Trekking: Requires the most time, often spanning several weeks or months. Trekkers need to plan for extended periods away from home and may need to coordinate logistics like visas, permits, and resupply points. Long treks often become transformative journeys, offering both physical challenges and profound personal growth.

Regardless of hike, backpacking, or trekking the natural views are stunning. Photo by Dalton Johnson
Choosing the Right Adventure
Day hiking, backpacking, and trekking offer distinct outdoor experiences, each catering to different preferences, skill levels, and time commitments. Whether you prefer a shorter, accessible day hike, a self-sufficient backpacking journey, or an epic trekking expedition, consider the following factors:
Duration: How much time can you dedicate?
Gear Requirements: Are you equipped for overnight or extended stays?
Difficulty: What is your fitness and experience level?
Accessibility: How far are you willing to travel to reach the trailhead?
Time Commitment: Are you looking for a single-day outing or a long-term adventure?
Ultimately, the most important aspect of any outdoor activity is immersing yourself in nature, challenging your limits, and enjoying the incredible beauty of the outdoors. Each option offers unique rewards, so choose the adventure that best fits your lifestyle and aspirations. Remember that all three activities provide opportunities to reconnect with the natural world, build resilience, and create lasting memories. Whether you're starting small with day hikes or embarking on a life-changing trek, every step taken outdoors is a step toward adventure.


Day hikes can be short, like this one to the cliff at Sharkfin Cove in Santa Cruz, CA. Photo by Dalton Johnson
Day Hiking
A day hike is a perfect choice for beginners, people with limited time, or those seeking a shorter, more manageable outdoor experience. Day hikes involve setting out on a trail and completing it within a single day, returning to your starting point by evening. The distance can range from a few miles to a dozen, depending on trail difficulty and personal preference.
Pros of Day Hiking:
Accessibility: Day hikes are often near populated areas, making them easy to plan in local parks, nature reserves, or nearby mountain ranges.
Lighter Pack: You only need to carry essentials like water, snacks, a map, and extra clothing layers.
Flexibility: You can choose your pace, rest stops, and even alter plans mid-hike if necessary.
Ideal for Beginners: Day hikes allow newcomers to gain experience, build stamina, and enjoy the outdoors without committing to longer trips.
Cons of Day Hiking:
Limited Exploration: Since day hikes are time-constrained, you may not reach deeper, more remote wilderness areas.
Less Immersion: Returning to civilization by evening means missing out on the solitude and night-time ambiance of the wilderness.
Essential Gear for Day Hiking:
Comfortable hiking boots or shoes.
Weather-appropriate clothing.
A small backpack or daypack.
Water, snacks, a map, a compass, and a first aid kit.
Optional trekking poles for stability.
A lightweight rain jacket or windbreaker.

Backpacking in the High Sierra for a week. Photo by Dalton Johnson
Backpacking
Backpacking offers a more immersive outdoor experience by combining hiking with overnight camping. It involves carrying all necessary supplies, including camping gear, food, and water, in a backpack. Backpacking trips often cover longer distances and require careful planning and preparation.
Pros of Backpacking:
Wilderness Immersion: Explore remote areas and escape the crowds.
Extended Time in Nature: Enjoy multiple days and nights outdoors, including breathtaking sunrises, sunsets, and stargazing.
Sense of Accomplishment: Completing multi-day treks fosters self-reliance and provides a sense of achievement.
Cons of Backpacking:
Heavier Load: Carrying camping gear and supplies requires physical endurance and a larger backpack.
Planning and Logistics: Backpacking demands route planning, permits (if needed), and transportation arrangements.
Time Commitment: Multi-day trips require dedicating several consecutive days.
Essential Gear for Backpacking:
A sturdy and comfortable backpack.
Tent or hammock system with a rainfly.
Sleeping bag and sleeping pad.
Cooking equipment and lightweight food.
Water filtration or purification system.
Extra clothing layers for varying weather.
Navigation tools like a map, compass, or GPS.
Headlamp or flashlight.
Personal hygiene items and repair kits.

At a certain point, trekking starts to feel like living on the trail. Photo by Dalton Johnson
Trekking
Trekking is the ultimate outdoor adventure, involving long-distance journeys through challenging terrains. Trekking experiences can range from multi-day trips to expeditions lasting weeks or months. These trips push physical and mental boundaries, often taking place in remote regions with stunning landscapes.
Pros of Trekking:
Epic Adventure: Undertake extended journeys through diverse landscapes, crossing mountain passes and encountering unique cultures.
Stunning Scenery: Trekking routes showcase breathtaking scenery, including high peaks, valleys, and pristine lakes.
Personal Growth: Trekking tests resilience and adaptability, fostering self-discovery and growth.
Cons of Trekking:
Intense Physical Demands: Long distances and challenging weather require high fitness levels.
Extensive Preparation: Planning involves researching routes, selecting gear, and understanding safety measures.
Time and Resource Commitment: Trekking can span weeks or months, demanding significant time and financial investment.
Essential Gear for Trekking:
Durable trekking boots for rough terrains.
Lightweight, moisture-wicking clothing.
Trekking poles for stability.
Crampons and ice axes for icy or snowy conditions.
High-altitude gear for cold temperatures.
Climbing harnesses and ropes for technical sections.
Avalanche safety equipment if trekking in prone areas.
Supplies for altitude sickness prevention and treatment.
Day hiking to the summit of Mount Freel in Lake Tahoe. Photo by Dalton Johnson
Whether you opt for a day hike, backpacking adventure, or trekking expedition, each outdoor experience offers its own rewards and challenges. Consider your fitness level, time constraints, and personal preferences when making a choice. Remember, the journey itself matters as much as the destination, so embrace the opportunity to connect with nature and create lasting memories on your chosen adventure.
Discover more adventures
It’s Weird, I Know, But I Love Joshua Tree’s Backcountry
Exploring the backcountry of Joshua Tree National Park is an experience unlike any other. For some, the vast, barren desert might seem uninviting or even intimidating. But for me, it’s a place of serenity, creativity, and unmatched beauty. It may sound strange to some, but I genuinely love spending time in Joshua Tree’s backcountry, especially when I go solo. There’s something about being out there, surrounded by desert silence, that keeps calling me back.
Exploring the backcountry of Joshua Tree National Park is an experience unlike any other. For some, the vast, barren desert might seem uninviting or even intimidating. But for me, it’s a place of serenity, creativity, and unmatched beauty. It may sound strange to some, but I genuinely love spending time in Joshua Tree’s backcountry, especially when I go solo. There’s something about being out there, surrounded by desert silence, that keeps calling me back.
Watching the sunrise after a solo night in Joshua Tree’s backcountry.. Photo by Dalton Johnson
Is Backcountry Camping Allowed in Joshua Tree?
Yes, backcountry camping is allowed in Joshua Tree National Park, but there are some important guidelines to follow. Campers must park and register at one of the park’s 13 backcountry registration boards. From there, you’re required to hike at least one mile away from roads and established trails to set up camp. Staying within 500 feet of any water source is prohibited to protect the fragile desert ecosystem.
Backcountry camping in Joshua Tree is entirely primitive—no designated campsites, no water, and no facilities. This minimalist setup is one of the reasons I find it so rewarding. It’s just you, your gear, and the desert.

Packing a small bag before heading into Joshua Tree’s backcountry. Photo by Dalton Johnson
Why Joshua Tree’s Backcountry Feels So Special
I’ve done four backcountry overnights in Joshua Tree, and every trip leaves me eager for the next. There’s something about packing light and embracing the simplicity of cowboy camping under the stars. Without a tent, you’re fully immersed in the desert’s beauty. The light pollution is minimal, making it easy to spot the Milky Way and constellations while lying in your sleeping bag. It’s moments like these that remind me why I keep coming back.
Compared to other backcountry spots, Joshua Tree’s hazards are relatively manageable. Sure, you need to keep an eye out for snakes and always carry plenty of water to avoid dehydration, but otherwise, it’s a straightforward place to camp for a night or two. That simplicity makes it ideal for both seasoned adventurers and those looking to try backcountry camping for the first time.
Wandering and Writing in the Desert
One of my favorite things about Joshua Tree’s backcountry is how much freedom it offers. I usually bring a light pack with the essentials, plus a journal and my camera. From there, it’s all about wandering. The park’s iconic granite formations make it a playground for scrambling and exploring. Climbing to the top of one of these rock piles, you’re rewarded with panoramic views of the sprawling desert and distant mountains.
The desert sun can be brutal, but if you find a patch of shade, it transforms into the perfect spot to sit, write, or doodle. I’ve spent hours in these moments, watching how the sun’s angle changes the shadows on the rocks and the desert floor. It’s peaceful and strangely meditative—something I don’t get from any other type of camping.
The Challenges Are Part of the Charm
Backcountry camping in Joshua Tree does come with its challenges, but they’re part of what makes it special. The heat demands respect, and I always carry more water than I think I’ll need. There’s also the need to be mindful of the park’s delicate ecosystem—staying on durable surfaces and practicing Leave No Trace principles are crucial.
But once you’ve prepared for these elements, the backcountry becomes a haven. Its simplicity, beauty, and quiet make it feel like a world apart, even if you’re only a short hike from the main road.
Sleeping under the full moon while cowboy camping in Joshua Tree National Park. Photo by Dalton Johnson
Why I Keep Coming Back
For me, the backcountry of Joshua Tree is about more than just camping—it’s about connection. It’s where I can disconnect from the distractions of daily life and reconnect with myself. Whether I’m stargazing, journaling, or scrambling across boulders, I always feel a sense of clarity and renewal.
Every trip to Joshua Tree’s backcountry is different. The light changes, the landscape shifts, and each adventure feels like a new story waiting to be told. It might not be for everyone, but for me, it’s the perfect escape.
If you’ve ever considered backcountry camping in Joshua Tree, I can’t recommend it enough. Pack your gear, plan well, and prepare to experience a desert that’s as strange as it is magical. You might just find yourself falling in love with it, too.
Discover more Adventures

Why Is Nobody Talking About This Free Campsite Near Joshua Tree National Park?
If you’ve ever tried camping at Joshua Tree National Park, you know how competitive it can be to snag a campsite. With limited spaces at popular spots like Hidden Valley Campground and Jumbo Rocks, visitors often face the disappointment of finding every site full, even with early arrival and perfect timing. After years of visiting Joshua Tree for climbing and photography, I’ve learned that camping near the park doesn’t have to be this frustrating. There’s a hidden gem that few people seem to be talking about: the free Bureau of Land Management (BLM) land just outside the park.
If you’ve ever tried camping at Joshua Tree National Park, you know how competitive it can be to snag a campsite. With limited spaces at popular spots like Hidden Valley Campground and Jumbo Rocks, visitors often face the disappointment of finding every site full, even with early arrival and perfect timing. After years of visiting Joshua Tree for climbing and photography, I’ve learned that camping near the park doesn’t have to be this frustrating. There’s a hidden gem that few people seem to be talking about: the free Bureau of Land Management (BLM) land just outside the park.

Sipping coffee and enjoying the warmth of the morning sun while camping on Joshua Tree’s free BLM land. Photo by Dalton Johnson
Can You Camp for Free Near Joshua Tree National Park?
Yes, you can! While the park itself charges fees for camping, the BLM land adjacent to Joshua Tree offers a no-cost alternative for those willing to trade proximity for freedom. This land, managed by the Bureau of Land Management, is open to dispersed camping, meaning you can park your van or set up your tent in a variety of spots without the need for reservations or fees.
My Struggles with Camping in Joshua Tree
When I first started visiting Joshua Tree eight years ago, finding a campsite was an exhausting experience. The first-come, first-served system in the park means you either have to arrive at the crack of dawn or hope for a miracle when sites free up. I’ve tried it all—checking trailheads, rolling into campgrounds early, even camping near pullouts and hoping not to get the dreaded knock from a park ranger. Spoiler: It rarely worked.
Three years into my visits, I stumbled upon the nearby BLM land, and it changed everything. This wide-open desert landscape provides a stark yet stunning backdrop for a peaceful night under the stars. You can even have campfires, which isn’t always an option within the park itself. It felt like discovering a secret treasure—uncrowded, free, and simple.
The Pros of BLM Camping Near Joshua Tree
It’s Free
Camping on BLM land doesn’t cost a dime. For those traveling on a budget, this can save you $20-$25 per night compared to park campgrounds.No Reservations Needed
Dispersed camping on BLM land operates on a first-come, first-served basis, but you’re not confined to designated campsites. With plenty of open space, it’s unlikely you’ll have trouble finding a spot.Wide-Open Space
Unlike the crowded campgrounds inside the park, BLM land offers solitude and vast desert views. It’s perfect if you’re looking to escape the hustle and bustle of the main park.Campfires Allowed
While fire restrictions may apply during certain seasons, you can often enjoy a campfire on BLM land. This is a luxury compared to the restrictions within Joshua Tree’s campgrounds.

Commuting in and out of the park will rack up a gas bill, so this is one major downside of the free camping on BLM. Photo by Dalton Johnson
The Downsides of BLM Camping
Of course, this option isn’t perfect. The biggest drawback of staying outside the park is the extra driving time. Depending on where you camp, you might spend 20-40 minutes driving into the park each day. This can mean getting caught in traffic at the park entrances, especially during peak seasons like spring or fall.
Another downside is missing the sense of community that comes with staying at campgrounds like Hidden Valley. Inside the park, you’ll find other climbers, photographers, and outdoor enthusiasts swapping stories and tips. On BLM land, you’ll likely feel more isolated, which may or may not appeal to you.
How to Find This Free Campsite
The most popular BLM camping area near Joshua Tree is located north of the park, off Highway 62 near the towns of Joshua Tree and Twentynine Palms. Some well-known spots include:
BLM Land North of Joshua Tree: Accessible via Sunfair Road, this area is flat and spacious, with plenty of room for tents or vehicles.
Sheephole Valley Wilderness: A bit further out, but offers even more seclusion for those willing to drive.
Make sure to follow Leave No Trace principles, pack out all trash, and be mindful of fire regulations.
Dogs are very welcomed on the BLM when camping, unlike inside Joshua Tree National Park. Photo by Dalton Johnson
Is Free Camping Near Joshua Tree Worth It?
If you value solitude, flexibility, and saving money, camping on BLM land is absolutely worth considering. However, if you’re looking for convenience and a chance to connect with the vibrant community of climbers and adventurers, you might want to stick to the park’s campgrounds.
For me, this free camping spot has been a game-changer. While it doesn’t offer the same camaraderie as Hidden Valley, it provides an excellent backup plan when the park’s campgrounds are full. After all, there’s nothing quite like waking up to the quiet expanse of the desert, with the stars giving way to the morning light on Joshua Tree’s iconic boulders.
Next time you head to Joshua Tree National Park, consider giving BLM camping a try. It might just be the hidden gem that transforms your trip.
Discover more Adventures

Finding a Campsite in Joshua Tree Is Hard, But Here's How You Do It
If you’re planning to camp in Joshua Tree National Park, you’ve probably heard that finding a campsite can be a challenge. With a limited number of sites, high demand during climbing season, and no shortage of weekend warriors, competition is fierce. But don’t worry—I’ve been through it and learned a few tricks to help you secure your spot.
If you’re planning to camp in Joshua Tree National Park, you’ve probably heard that finding a campsite can be a challenge. With a limited number of sites, high demand during climbing season, and no shortage of weekend warriors, competition is fierce. But don’t worry—I’ve been through it and learned a few tricks to help you secure your spot.
Camping outside of the Joshua Tree National Park on BLM to avoid the crowds. Photo by Dalton Johnson
How to Reserve a Campsite in Joshua Tree National Park
The easiest way to guarantee a spot is by reserving a campsite in advance. You can book sites at popular campgrounds like Hidden Valley, Jumbo Rocks, and Ryan Campground through Recreation.gov. These sites often open for reservations six months in advance, so planning early is essential, especially if you’re visiting during peak climbing season or over a holiday weekend.
However, reservations aren’t always possible. Maybe you planned a last-minute trip or all the reservable sites were snatched up. Don’t panic—there are other camping options.
Option 1: Show Up Early
If you couldn’t reserve a site, your next best bet is to arrive early and start scouting for available spots. This strategy works best on weekdays or during the off-season, but if it’s a weekend or holiday, your chances are slim. Many of the campgrounds, especially Hidden Valley, fill up quickly because climbers often use a buddy system to rotate between sites and maximize their time in the park.
Pro Tip: Drive through campgrounds like Hidden Valley and Ryan right after checkout time (typically late morning) to see if anyone is leaving.
Option 2: Share a Campsite
If you’re comfortable asking around, finding someone to share a campsite with can be a great solution. Campground spots often have space for multiple tents, and if someone is camping solo, they might be open to splitting the cost. I’ve had good luck with this approach, and it’s led to some memorable conversations and new friends.
When approaching someone to share their site, be respectful and offer to pitch in with the fee or even share some snacks or firewood as a gesture of goodwill.
Option 3: Camp on BLM Land
If you’re striking out inside the park, BLM (Bureau of Land Management) land outside Joshua Tree offers free dispersed camping. Some popular areas include Sunfair Dry Lake Bed and the North Entrance BLM land. The main downside is that you’ll need to commute into the park each day, which can add up in gas if you’re driving a van like me. It’s less convenient, but the open desert views are stunning, and you can avoid the crowds.
Here are a few tips for camping on BLM land:
Arrive before dark. Finding a level spot in the desert can be tricky at night.
Pack it out. Leave no trace applies here, just like inside the park.
Know your limits. Some BLM areas have rough dirt roads, so ensure your vehicle can handle them.

The winter rock climbing in Joshua Tree is some of my favorite in all of the United States, which makes sense why finding a campsite is hard during climbing season. Photo by Dalton Johnson
What Doesn’t Work (Most of the Time)
The usual advice for finding a campsite—show up early, be patient, and drive through multiple campgrounds—isn’t always helpful in Joshua Tree. During climbing season, the park gets packed, and even the early birds may find themselves out of luck. That’s why I recommend thinking outside the box and being flexible with your plans.
Tips for Success
Avoid peak times. Midweek visits are less crowded, and you’ll have a better chance of scoring a site.
Consider the shoulder season. Late fall and early spring offer cooler weather and fewer crowds.
Scout multiple campgrounds. Don’t limit yourself to just one area—Jumbo Rocks and Ryan Campground are great options, but they’re not the only ones.
Playing a game of chess during the hot time of the day in HIdden Valley camp ground. Photo by Dalton Johnson
The Bottom Line
Finding a campsite in Joshua Tree takes planning, patience, and sometimes a little creativity. Whether you reserve a spot months in advance, share a site with a fellow camper, or head out to BLM land, there’s always a way to enjoy a night under the stars. With these tips in mind, you’ll be better equipped to tackle the challenges and make the most of your trip.
Discover more Adventures

Here's The Difference Between Backpacking and Camping
The allure of the great outdoors, with its untamed beauty and serenity, beckons adventure enthusiasts to seek solace beyond the urban hustle. Amidst the vast array of outdoor activities, backpacking and camping stand out as two distinct yet equally captivating choices. Both promise a rendezvous with nature, but their approaches, equipment requirements, and overall experiences set them apart. In this comprehensive guide, we will explore the nuances of backpacking and camping, helping you decipher the ideal outdoor adventure tailored to your preferences.
The great outdoors offers a perfect escape from city life, with backpacking and camping as two popular ways to experience it. While both bring you closer to nature, they each offer different experiences, gear needs, and approaches. This guide breaks down the key differences between backpacking and camping to help you choose the adventure that’s right for you.
Feeling small while backpacking in the High Sierra. Photo by Dalton Johnson
What is Backpacking?
Backpacking is an adventurous way to explore the outdoors by carrying everything you need in a single pack and journeying across remote landscapes. Unlike traditional camping, which often focuses on staying in one location, backpacking is about movement and discovery, challenging you to cover longer distances while relying on minimal gear. This section covers the core aspects of backpacking, from the necessary equipment and fitness requirements to the sense of adventure and skill it demands.
Adventure and Exploration: Backpacking encapsulates the thrill of venturing into the unknown. It involves strapping on a loaded backpack and setting off on a journey through the woods, desert, or mountains. The emphasis is on covering substantial distances (8 to 20 miles a day), embracing a nomadic lifestyle while immersed within nature, and reconnecting oneself in the raw beauty of nature.
Gear and Equipment: "Travel light, travel far" is the mantra of backpacking. Lightweight and compact gear are the staples, carefully chosen to prioritize functionality without compromising mobility. What we look for in backpacking gear is determined by where we are going and the needs of the trip, but a minimalist approach ensures every piece of equipment serves a purpose, facilitating endurance during long treks.
A few pieces of gear we love and use while backpacking:
High Above hip pack; perfect for day hiking around after setting up camp
Big Agnes Flycreek 2p; our favorite tent
Duration of Stay: Characterized by backpacking’s transient nature, backpacking involves continuous movement, covering significant distances over several days or weeks. The journey itself becomes an integral part of the adventure, with each day presenting new landscapes and challenges. Sometimes you hike 5-10 miles a day, other trips you spend 20-30 miles a day. That is your choice.
Skill Level and Fitness Requirements: Backpacking demands a higher level of fitness and outdoor skills than camping. Navigating challenging terrains, unpredictable weather conditions, and carrying a loaded backpack require physical endurance, survival skills, and a certain level of outdoor proficiency.
Comfort and Pace: Emphasizing a faster pace and a nomadic lifestyle, especially when doing a thru-hike like the Tahoe Rim Trail, backpacking encourages adventurers to explore new territories and adapt to the challenges of the trail.

Using a van to camp on BLM in Sedona, AZ. Photo by Dalton Johnson
What is Camping?
Camping is a way to connect with nature at a more relaxed pace, allowing you to set up a base camp and settle into a single area. Unlike backpacking, which involves covering long distances, camping provides the opportunity to enjoy a chosen spot and make it your own, often with more comfortable gear and amenities. This section will cover the essentials of camping, from setting up a cozy campsite to the accessibility and ease it offers for all kinds of outdoor enthusiasts, whether you're a beginner, family camper, or seasoned nature lover.
Adventure and Exploration: While camping also offers adventure, it often provides a more localized experience. Campers can establish a base camp, allowing for day hikes and exploration around a specific area. The focus is on enjoying the immediate surroundings with the option for shorter excursions. Some of the top adventures while camping include surfing, mountain biking, rock climbing, hiking, and photography.
Gear and Equipment: Campers enjoy the luxury of bringing larger and more comfortable gear, as they don't have to carry it over long distances. This includes spacious tents, comfortable sleeping pads, and more elaborate cooking setups, emphasizing a comfortable and enjoyable campsite for an extended stay.
A few pieces of gear we love and use while camping:
High Above hip pack; perfect for day hiking or mountain biking around your campsite
Solo Stove, great for campfires anywhere
DoD camping king; perfect for cooking meals while camping
Duration of Stay: Camping can range from a single overnight stay to an extended period, depending on the type of camping chosen. Campers have the flexibility to decide the duration of their stay, allowing for a more leisurely experience.
Skill Level and Accessibility: While camping also requires basic outdoor skills, it may be more accessible for individuals with varying fitness levels. Car camping, in particular, provides a comfortable experience without the physical demands of backpacking, making it suitable for families and beginners.
Comfort and Pace: Offering a slower pace and a more relaxed environment, camping allows individuals to set up a base camp, providing a comfortable space to unwind, enjoy nature, and engage in various activities without the need for constant movement.

Sleeping in a tent while on a backpacking trip around Lake Tahoe, CA. Photo by Dalton Johnson
What’s The Difference between Backpacking and Camping:
Adventure and Exploration:
Backpacking and camping offer distinct outdoor adventures, each with a unique approach to exploration. Backpacking is ideal for those seeking a more intense, dynamic experience, where the journey involves trekking through challenging, often remote terrains, embracing the thrill of distance and discovery along the way. On the other hand, camping provides a more localized adventure, allowing you to set up a base camp and explore nearby areas through day hikes and shorter outings. While both options offer a chance to connect with nature, backpacking emphasizes covering substantial ground, while camping focuses on enjoying a specific location and its immediate surroundings.
Backpacking: Ideal for the thrill-seekers and those craving the excitement of venturing into the unknown. Backpacking takes you on a journey through challenging terrains, where each step brings new discoveries and unforeseen challenges. The emphasis is on covering substantial distances and immersing yourself in the raw beauty of nature.
Camping: While camping can also offer adventure, it often provides a more localized experience. Camping allows you to establish a base camp, providing the opportunity for day hikes and exploration around a specific area. The focus is on enjoying the immediate surroundings with the option for shorter excursions.
Gear and Equipment:
Backpacking and camping differ greatly in terms of gear and equipment needs. For backpacking, the focus is on minimalism; backpackers select lightweight, compact gear to ensure mobility and endurance on long treks. Every item is chosen for functionality, keeping weight to a minimum while meeting essential needs. In contrast, camping allows for more comfort and convenience, with campers bringing larger, more luxurious items like spacious tents, cushy sleeping pads, and full cooking setups. Without the need to carry everything on their backs, campers can prioritize a comfortable, well-equipped campsite for a relaxed and extended stay.
Backpacking: The mantra here is 'travel light, travel far.' Backpackers carefully select lightweight and compact gear, emphasizing functionality without compromising mobility. A minimalist approach is crucial, ensuring that every piece of equipment serves a purpose while remaining manageable during long treks.
Camping: Campers have the luxury of bringing larger and more comfortable gear since they don't have to carry it over long distances. This includes spacious tents, comfortable sleeping pads, and more elaborate cooking setups. The emphasis is on creating a comfortable and enjoyable campsite for an extended stay.

Car camping at the beach in a roof top tent. Photo by Dalton Johnson
Duration of Stay:
Backpacking and camping offer different approaches to the duration of stay. Backpacking is typically transient, involving continuous movement across various terrains over several days or even weeks, with the journey itself as the main focus. Each day brings fresh landscapes and new challenges, keeping the experience dynamic and varied. Camping, however, is more flexible and can last from a single night to an extended stay, depending on personal preference. Campers can settle in one spot for a weekend or a longer vacation, enjoying a relaxed pace that allows them to fully immerse themselves in a specific location.
Backpacking: Characterized by its transient nature, backpacking involves continuous movement, covering significant distances over several days or weeks. The focus is on the journey itself, with each day bringing new landscapes and challenges.
Camping: Camping can range from a single overnight stay to an extended period, depending on the type of camping chosen. Whether it's a weekend getaway or a more extended vacation, campers have the flexibility to decide the duration of their stay, allowing for a more leisurely experience.
Skill Level and Fitness Requirements:
Backpacking and camping differ significantly in skill and fitness demands. Backpacking requires strong physical fitness and advanced outdoor skills, as it involves navigating challenging terrains, dealing with unpredictable weather, and carrying a heavy pack. These elements demand endurance, survival knowledge, and proficiency in the outdoors. Camping, on the other hand, is generally more accessible to a range of fitness levels and skill sets. Car camping, in particular, eliminates the need to carry gear long distances, offering a comfortable experience suitable for families and beginners, with only basic outdoor skills needed for an enjoyable trip.
Backpacking: Requires a higher level of fitness and outdoor skills. Navigating challenging terrains, unpredictable weather conditions, and carrying a loaded backpack demand physical endurance, survival skills, and a certain level of outdoor proficiency.
Camping: While camping also requires basic outdoor skills, it may be more accessible for individuals with varying fitness levels. Car camping, in particular, provides a comfortable experience without the physical demands of backpacking, making it suitable for families and beginners.
Comfort and Pace:
Backpacking and camping differ in comfort and pace, with each offering a distinct style of outdoor experience. Backpacking emphasizes a faster, more dynamic pace, encouraging a nomadic lifestyle where travelers are constantly moving, exploring new territories, and adapting to the challenges of the trail. In contrast, camping offers a more leisurely and relaxed experience. Campers can set up a base camp, allowing them to unwind, enjoy the surroundings, and engage in activities without the need for continuous movement, creating a comfortable and stable outdoor environment.
Backpacking: Emphasizes a faster pace and a more dynamic, nomadic lifestyle. Backpackers are always on the move, exploring new territories and adapting to the challenges of the trail.
Camping: Offers a slower pace and a more relaxed environment. Campers have the luxury of setting up a base camp, providing a comfortable space to unwind, enjoy nature, and engage in various activities without the need for constant movement.
Car camping near Bishop, CA. Photo by Dalton Johnson
The choice between backpacking and camping boils down to your personal preferences, fitness level, and the type of outdoor experience you seek. If you yearn for adventure, the thrill of exploration, and the challenge of the unknown, backpacking awaits. On the other hand, if you prefer a more relaxed, comfortable pace, and the freedom to savor nature at your own speed, camping beckons. Whichever path you choose, both backpacking and camping promise to deliver unforgettable moments and a deeper connection with the great outdoors.
Discover more Adventures
Jimmy Chin and Jim Morrison Return to Everest to Ski the Hornbein Couloir
In a bold and emotionally charged endeavor, renowned American ski mountaineer Jim Morrison, along with acclaimed filmmaker Jimmy Chin, is set to tackle one of the most challenging ski descents on Mount Everest: the Hornbein Couloir. This ambitious project, part of a multi-million dollar initiative funded by the National Geographic Society and The North Face, aims to pay tribute to Morrison’s late partner, Hilaree Nelson, who tragically died attempting a similar feat on Mount Manaslu in 2022.
In a bold and emotionally charged endeavor, renowned American ski mountaineer Jim Morrison, along with acclaimed filmmaker Jimmy Chin, is set to tackle one of the most challenging ski descents on Mount Everest: the Hornbein Couloir. This ambitious project, part of a multi-million dollar initiative funded by the National Geographic Society and The North Face, aims to pay tribute to Morrison’s late partner, Hilaree Nelson, who tragically died attempting a similar feat on Mount Manaslu in 2022.
Wikipedia
An Emotional and High-Stakes Project
The Hornbein Couloir, a notoriously difficult route named after Thomas Hornbein of the 1963 US Everest Expedition, will be the focus of this high-profile ski descent. The project is being closely monitored by the climbing community and adventure enthusiasts worldwide, with significant resources invested in ensuring its success.
Jimmy Chin, the Academy Award-winning director known for his work on Free Solo and The Rescue, is slated to film the descent under the National Geographic Society and The North Face's multi-million dollar project. "ABC is set up and the fixing team will soon head for the Hornbein Couloir route to fix the Camp I," sources confirmed. This extensive preparation highlights the complexities and risks involved in the descent.
Tribute to Hilaree Nelson
The endeavor is a heartfelt tribute to Hilaree Nelson, a celebrated extreme skier who, along with Morrison, made the first ski descent of Lhotse in 2021. Nelson’s tragic death while attempting to ski down from the summit of Mt Manaslu in 2022 cast a shadow over the climbing community. Morrison’s return to Everest, therefore, carries a deep personal significance, honoring Nelson’s legacy and the profound impact she had on the world of ski mountaineering.
Project Challenges and Preparations
The Everest Ski Project faced significant hurdles last year when Chinese authorities refused to issue necessary permits for the expedition. Despite these setbacks, Jimmy Chin's persistent lobbying with Chinese authorities has secured the Tibet entry permit for this season. However, the team still encountered obstacles, as Conrad Anker, the original expedition leader, was unable to join due to visa issues.
This season's team includes Morrison, Chin, and cinematographer Mark Fisher, who will be supported by a dedicated group of Sherpa climbers, including Mingma David Sherpa, co-owner of Elite Exped/Sherpa Extremes Pvt Ltd. These climbers have already reached base camp in Tibet to assist with ground preparations. A few Chinese members are also expected to join the guiding team, underscoring the collaborative effort involved in this challenging project.
As the team gears up for the descent, the Everest Ski Project promises to be a remarkable and emotional journey. The combination of high-altitude skiing, a tribute to a beloved climber, and the dramatic backdrop of Everest ensures that this project will be closely watched by the climbing community and outdoor enthusiasts alike.
The success of this endeavor will not only honor Hilaree Nelson’s memory but also highlight the incredible feats that can be achieved in the world of extreme sports. As preparations continue, all eyes will be on Everest to see if Morrison, Chin, and their team can accomplish their daring goal.
Discover more Adventures

Everyday Carry Is Just Better with These Case Knives
When it comes to everyday carry (EDC), having a reliable, high-quality knife in your pocket can make all the difference. Whether you’re tackling a quick fix around the house, heading into the great outdoors, or just getting through your daily tasks, Case Knives have you covered. Known for their craftsmanship and durability, Case Knives offer a perfect balance of form and function. Here’s a look at three standout options that will elevate your EDC game.
When it comes to everyday carry (EDC), having a reliable, high-quality knife in your pocket can make all the difference. Whether you’re tackling a quick fix around the house, heading into the great outdoors, or just getting through your daily tasks, Case Knives have you covered. Known for their craftsmanship and durability, Case Knives offer a perfect balance of form and function. Here’s a look at three standout options that will elevate your EDC game.
Bridgeline Knives: Lightweight and Ready for Anything
The Bridgeline series is a perfect addition to any EDC setup, blending modern design with practicality. These knives come in two designs—the Longhouse and Highbanks—both offering a variety of handle styles and colors to fit your personal taste.
Built with aluminum frames, they’re lightweight but tough enough to handle day-to-day tasks. Whether you’re cutting through rope, opening packages, or tackling weekend projects around the house, Bridgeline knives offer a sleek, dependable option. Their versatility makes them a must-have for anyone looking for a functional and stylish EDC knife.

CT Hunter: Your Go-To for Outdoor Adventures
For those who love to explore the outdoors, the CT Hunter is a powerhouse knife designed for rugged conditions. It’s built with a high-quality carbon steel blade that holds its edge, meaning you won’t be left dealing with a dull knife when you need it most.
The CT Hunter is ideal for everything from outdoor excursions to everyday utility tasks. This is the knife you want by your side whether you’re camping, hunting, or just making sure you’re ready for anything. Its durability and sharpness make it a top choice for EDC enthusiasts who need a blade that can handle the elements.

Peach Seed Jig Amber Bone Razor: Classic Style Meets Everyday Function
Looking for something that blends traditional craftsmanship with everyday practicality? The Peach Seed Jig Amber Bone Razor brings the best of both worlds. Its handle, crafted from cattle bone, is not only incredibly tough but also gives the knife a timeless look that fits into any EDC collection.
With two blades—the Razor blade and a Pen blade—this knife gives you options for handling a range of tasks. Whether you’re opening mail, trimming thread, or working on a more detailed project, the versatility of this knife makes it a perfect fit for everyday use. Plus, its classic amber bone handle gives it a grip that feels just right in your hand, ensuring every cut is precise.
Case Knives have a long-standing reputation for producing top-quality knives that last, and these three models—Bridgeline, CT Hunter, and Peach Seed Jig Amber Bone Razor—are no exception. They’re reliable, stylish, and built to perform, making them essential tools for anyone who values a solid EDC setup. Whether you’re an outdoors enthusiast, a DIYer, or someone who just appreciates having the right tool on hand, these Case Knives will have your back every day.
Discover More Gear


You Can Now Explore the Silk Route with Exodus Adventure Travels
The Silk Route, a network of ancient trade paths that connected the East and West, continues to captivate modern adventurers with its blend of history, culture, and breathtaking landscapes. For those eager to experience the rich legacy of the Silk Route, Exodus Adventure Travels offers an unforgettable journey through Kyrgyzstan, Kazakhstan, and Uzbekistan. This 16-day tour immerses travelers in the region’s diverse history, cultural encounters, and natural beauty, echoing the footsteps of explorers like Marco Polo while enjoying the comforts of modern travel.
The Silk Route, a network of ancient trade paths that connected the East and West, continues to captivate modern adventurers with its blend of history, culture, and breathtaking landscapes. For those eager to experience the rich legacy of the Silk Route, Exodus Adventure Travels offers an unforgettable journey through Kyrgyzstan, Kazakhstan, and Uzbekistan. This 16-day tour immerses travelers in the region’s diverse history, cultural encounters, and natural beauty, echoing the footsteps of explorers like Marco Polo while enjoying the comforts of modern travel.
In this article, we’ll dive into the highlights of this Silk Route adventure, detailing the key experiences, sights, and accommodations that make this trip an exciting opportunity for those looking to connect with Central Asia’s incredible heritage.
Discover the Historic Silk Road
The Silk Route has been a legendary trade path for centuries, connecting East and West through vast deserts, high mountain passes, and bustling cities. Exodus Adventure Travels brings this ancient route to life, providing travelers with guided access to iconic sites, vibrant bazaars, and the untouched beauty of Central Asia's rugged landscapes.
Starting in Bishkek, Kyrgyzstan's capital, travelers will traverse three countries over the course of two weeks. From the bustling markets of Almaty, Kazakhstan, to the ancient cities of Uzbekistan such as Samarkand and Bukhara, the tour combines cultural immersion with awe-inspiring landscapes, including hikes in the picturesque Ala Archa National Park.
A Fast-Paced Adventure with Exodus
This 16-day adventure is not for the faint-hearted. Graded as an Activity Level 3 (Moderate), participants can expect early starts, long days, and the need for a sense of flexibility. The tour involves some trekking, particularly in the scenic regions of Kyrgyzstan, such as the stunning Chon-Kemin and Djety Oguz. Additionally, travelers should be comfortable with long drives, including a six-hour journey from Karakol to Almaty.
Accommodations throughout the trip range from modest guesthouses to traditional yurts, where shared facilities add to the authentic experience. While comforts are sometimes basic, the journey rewards travelers with unforgettable insights into Central Asian life and a chance to explore one of the world’s most beautiful, lesser-known regions.
Train Journeys and Scenic Drives
One of the unique features of the Exodus Silk Route tour is the use of train journeys to cover vast distances. Train travel in Central Asia is both scenic and efficient, allowing travelers to experience the region's expansive landscapes. However, train tickets are in high demand, so it's recommended to book at least 45 days in advance to secure space.
A highlight of the journey includes a long overnight train ride from Almaty to either Shymkent or Tashkent, providing an authentic taste of local travel. For those joining the trip later, Exodus can accommodate last-minute bookings, subject to the availability of train tickets.
The Itinerary
Day 1: Arriving in Bishkek – Where Adventure Begins
Your adventure starts in Bishkek, the capital of Kyrgyzstan. Upon arrival, travelers are given time to check in and settle before embarking on a city tour to explore the rich history and culture of this dynamic city. Visits to landmarks such as Ala Too Square, the Lenin Statue, and the Manas Monument introduce you to the Kyrgyz culture and history that will be a key theme throughout the trip.
Accommodation in Bishkek is in a comfortable hotel, such as Hotel Garden, Hotel Bridges, or Hotel Plaza. These accommodations offer a relaxing base to rest and prepare for the journey ahead.
Day 2: Into the Heart of Kyrgyzstan – Chon-Kemin Gorge and Burana Tower
Leaving the city behind, the journey continues to Chon-Kemin Gorge, a tranquil valley surrounded by mountains and fir forests. On the way, you’ll stop at the Burana Tower, an 11th-century minaret that stands as a reminder of the ancient Karakhanid Empire. A UNESCO World Heritage site, the tower invites travelers to climb its steep and narrow stairs for a panoramic view of the surrounding area.
The day also includes a visit to the Ak Beshim ruins, the remnants of an ancient Silk Route city that includes rock paintings and burial mounds. Afterward, you’ll arrive at a guesthouse in Chon-Kemin National Park, where you can unwind with a pot of tea while taking in the valley’s breathtaking scenery.
Day 3: Discovering Issyk Kul Lake and Djety Oguz Gorge
On Day 3, the journey takes travelers to Issyk Kul Lake, the world’s second-largest salt lake. Nestled between the Tien Shan Mountains, the lake is a picturesque destination, known for its clear waters that never freeze, even in winter. Along the way, you can participate in an optional excursion at Bokonbaev village to witness traditional eagle hunting, an ancient nomadic practice that remains part of the region’s cultural heritage.
From Issyk Kul, the adventure continues to Barskaun Gorge, where a short hike leads to a waterfall, before heading to Djety Oguz Gorge, also known as the Valley of Seven Bulls due to its distinctive red rock formations. The night is spent in a yurt camp, offering an authentic experience of Central Asia’s nomadic lifestyle. Sleeping in traditional yurts, you’ll enjoy a blend of comfort and cultural immersion in this serene location.

Day 4: Walking through Djety Oguz and Exploring Karakol
The next day starts with a two-hour walk through Djety Oguz Gorge, where you can admire the stunning red rock formations and learn about the local legends surrounding the area. For the more adventurous, there’s an optional hike to a waterfall, although caution is advised on slippery terrain.
The group then continues to Karakol, a town on the eastern edge of Issyk Kul Lake, for a sightseeing tour that includes stops at Russian-style houses, a wooden Dungan mosque, and a Russian Orthodox church. In the evening, you’ll enjoy a home-cooked meal with a local Uygur or Dungan family, offering a glimpse into the daily life and traditions of these Central Asian communities.
Day 5: Crossing into Kazakhstan – Charyn Canyon and Almaty
On Day 5, the group crosses the Kyrgyz-Kazakh border and enters Kazakhstan, traveling through the Karkara Valley, known for its lush landscape and beekeeping traditions. The highlight of the day is a visit to Charyn Canyon, a geological wonder often compared to the Grand Canyon. With three hours to explore, you can hike down into the canyon or simply enjoy the panoramic views from the top.
The journey then continues to Almaty, Kazakhstan’s largest city, where the modern skyline contrasts with the surrounding mountain ranges. Accommodation in Almaty is in comfortable hotels like the Plaza Hotel or Kazzhol Hotel, where you can relax after a full day of exploration.
Day 6: Nature and History in Issyk and Turgen Gorge
The day begins with a trip to the Esik Burial Mounds and the Esik State Historical Museum, which houses artifacts from the Saka period, including the Golden Man, a Saka prince whose tomb was discovered in the region. This visit provides a fascinating insight into the ancient civilizations that once thrived along the Silk Route.
The journey continues to Turgen Gorge, famous for its scenic beauty and waterfalls. A short hike to Bear Waterfall offers an opportunity to stretch your legs and take in the peaceful surroundings. The day ends with a picnic lunch near Issyk Lake, an alpine lake surrounded by wildflower meadows and thick forests.
Day 7-16: Exploring Uzbekistan – Samarkand, Bukhara, and Khiva
The second half of the trip shifts focus to Uzbekistan, where the Silk Route truly comes to life with its legendary cities and architectural marvels. Samarkand, Bukhara, and Khiva are names that evoke images of bustling bazaars, intricate mosques, and grand palaces. These cities were once major stops for traders, and today, they remain vibrant hubs of culture and history.
Samarkand: Known for the stunning Registan Square and Shah-i-Zinda necropolis, Samarkand is a must-see for anyone interested in the rich history of Central Asia. The ancient city was a key hub on the Silk Route, and its impressive architecture reflects its historical significance.
Bukhara: This city is known for its well-preserved medieval architecture and cultural landmarks such as the Ark Fortress, the Poi Kalyan minaret, and the Bolo Haouz Mosque. Bukhara has been a center of learning and commerce for centuries, and its old town remains a UNESCO World Heritage site.
Khiva: The walled city of Khiva is a living museum, with its narrow streets and historical monuments seemingly untouched by time. Itchan Kala, the inner town of Khiva, is home to some of the finest examples of Islamic architecture in Central Asia, including the Kalta Minor Minaret and the Kunya Ark fortress.
These days are packed with guided tours, visits to bazaars, and opportunities to explore ancient caravanserais, madrassas, and mosques. The journey through Uzbekistan offers a deep dive into the cultural and historical legacy of the Silk Route.

The Exodus Adventure Travels Silk Route tour is more than just a vacation—it’s a journey through time, retracing the steps of ancient merchants, explorers, and nomads. From the towering mountains of Kyrgyzstan to the vast steppes of Kazakhstan and the architectural wonders of Uzbekistan, this 16-day trip offers a comprehensive exploration of one of the most legendary trade routes in human history.
While modern travelers enjoy the comfort of hotels, the convenience of transportation, and the expertise of local guides, they also have the chance to immerse themselves in the traditional lifestyles and breathtaking landscapes that have defined this region for centuries.
For adventurers looking to explore the Silk Route, this trip offers a perfect blend of cultural discovery, historical insight, and natural beauty. Whether it’s standing atop the Burana Tower, hiking through Charyn Canyon, or marveling at the grandeur of Samarkand, the Exodus Adventure Travels Silk Route journey promises an unforgettable experience in the heart of Central Asia.
Discover More Destinations
Is The Silk Route The Next Destination For Adventure Travelers
For centuries, the Silk Route was the lifeblood of global trade, connecting civilizations from the Mediterranean to the Far East. Among the many travelers who navigated its vast and treacherous expanse, Marco Polo stands as one of the most famous. His journeys from Venice to China in the late 13th century captured the imagination of his contemporaries and continue to inspire adventure seekers today. As modern explorers retrace parts of this legendary route, particularly with companies like Exodus Adventure Travels, the contrast between today’s adventurers and Marco Polo’s historic travels highlights both the continuity and the evolution of human curiosity and endurance.
For centuries, the Silk Route was the lifeblood of global trade, connecting civilizations from the Mediterranean to the Far East. Among the many travelers who navigated its vast and treacherous expanse, Marco Polo stands as one of the most famous. His journeys from Venice to China in the late 13th century captured the imagination of his contemporaries and continue to inspire adventure seekers today. As modern explorers retrace parts of this legendary route, particularly with companies like Exodus Adventure Travels, the contrast between today’s adventurers and Marco Polo’s historic travels highlights both the continuity and the evolution of human curiosity and endurance.
This article will take a closer look at the ways in which the experiences of modern travelers along the Silk Route mirror and diverge from Marco Polo’s epic journey, particularly focusing on the accessibility of travel today, the purpose of exploration, and the encounters with culture and nature along the way.
Travelers Then and Now: Routes and Accessibility
Marco Polo’s journey was one of monumental scale. Beginning in Venice in 1271, he traveled overland through the Middle East, across Persia, into Central Asia, and eventually to China, where he would spend years in the court of Kublai Khan. His route, fraught with peril, involved traversing deserts, navigating mountain ranges, and crossing vast, uncharted territories, all with the constant threat of illness, banditry, and treacherous terrain. The journey itself could take years, if not decades.
In contrast, today’s adventure travelers, particularly those on guided tours like Exodus Adventure Travels' 16-day Silk Route journey, can explore key sections of this ancient trade route with relative ease and comfort. A flight from any major city can take modern adventurers to Bishkek, the starting point of this particular tour, in mere hours—something Marco Polo couldn’t have dreamed of. Instead of riding horses or camels for weeks on end, travelers today enjoy buses, trains, and even 4x4 vehicles to cover long distances.
However, while the mechanics of travel have changed drastically, the sense of adventure remains intact. The Exodus Adventure Travels tour, for example, begins in the Kyrgyz capital of Bishkek and covers a rich tapestry of history and culture as it winds through Kyrgyzstan, Kazakhstan, and Uzbekistan. Stops at UNESCO World Heritage sites such as Burana Tower or the Charyn Canyon recall Marco Polo’s own experiences encountering new landscapes, yet today’s travelers experience them with the support of knowledgeable guides and well-marked paths.
Where Marco Polo had no maps or guidebooks, today’s adventurers are well-equipped with technology that allows for constant communication, navigation tools like GPS, and even the ability to share their journey with the world in real-time through social media. The landscapes may still be wild and remote in places, but travelers are no longer alone in their expeditions.
Commerce vs. Adventure
Marco Polo’s journey was primarily commercial. He and his family were merchants, venturing eastward in search of trade opportunities, particularly in the lucrative markets of silk, spices, and precious stones. His accounts of Kublai Khan’s court, the marvels of the Mongol Empire, and the wealth of Asia were written to inspire European merchants and adventurers to follow in his footsteps. For him, exploration was driven by profit and political intrigue.
Modern travelers, by contrast, are less likely to be motivated by commerce and more by a desire for adventure, discovery, and personal enrichment. The Exodus Adventure Travels tour offers an Activity Level 3 (Moderate), making it accessible to anyone with a thirst for adventure but without the years-long commitment and risks faced by Marco Polo. The purpose of today’s travels often revolves around cultural immersion, witnessing the natural beauty of remote areas, and gaining a deeper understanding of the history and people of these regions.
Chon-Kemin Gorge, for example, is a stop on this modern tour where travelers can appreciate the region’s serene beauty, framed by mountains and forests. While the Polos may have passed through similar areas in Central Asia with the goal of reaching a distant marketplace, today’s travelers seek out places like Chon-Kemin for their tranquility and scenic vistas, valuing the journey itself rather than any destination or economic exchange.
Foreign Lands, Shared Stories
One of the hallmarks of Marco Polo’s legacy is his detailed descriptions of the people and cultures he encountered along the way. From the grandiose palaces of Kublai Khan to the bazaars of Persia, Marco Polo was fascinated by the diversity of human life. He brought back stories that expanded the European understanding of Asia, painting a picture of vast empires, advanced technologies, and different religious and social customs. His observations were groundbreaking for a Europe that knew little of the East.
Modern travelers, too, are often motivated by the desire to learn about and engage with different cultures. The Exodus Adventure Travels tour provides numerous opportunities for meaningful cultural exchange, such as a visit to Karakol, where travelers can enjoy a home-cooked meal with a local Uygur or Dungan family. This personal connection is a far cry from the political diplomacy Marco Polo was often involved in, but it retains the same spirit of curiosity and respect for the ways of life that are different from one’s own.
At Bokonbaev village, where travelers have the option to witness traditional eagle hunting, they can observe a practice that has been passed down through generations. Marco Polo, too, would have seen many such customs throughout Central Asia, though today’s travelers are more likely to participate in them as honored guests rather than foreign emissaries.
The accommodations have also evolved significantly. Whereas Marco Polo and his family would have stayed in caravansaries or even camped in the wilderness, modern adventurers spend their nights in hotels or even yurt camps, as seen on the Exodus tour in Djety Oguz. Yurt camps, while basic, offer a unique opportunity to experience the nomadic lifestyle that persists in parts of Central Asia to this day, though with modern conveniences such as hot water, flush toilets, and electricity—luxuries that Marco Polo certainly did not enjoy.
Landscapes Unchanged by Time
While much has changed in terms of how we travel and why, the natural beauty of the Silk Route remains as awe-inspiring as it was in Marco Polo’s time. Many of the landscapes he described in his travelogue can still be seen today, relatively unchanged by the passage of time. Modern travelers can look out over the vast Issyk Kul Lake or hike through Djety Oguz Gorge, marveling at the same vistas that would have greeted Marco Polo as he traveled through the Tien Shan mountains.
One particularly striking natural landmark is the Charyn Canyon in Kazakhstan. Though Marco Polo did not specifically describe this canyon in his writings, the dramatic erosion of the Charyn River over millennia creates a landscape that embodies the wild, untamed beauty of Central Asia. Travelers on the Exodus Adventure Travels tour spend hours exploring this canyon, with the option to hike down into its depths or simply take in the view from the rim. For Marco Polo, such landscapes would have been both a challenge and a marvel, signaling the vast distances still to be traveled.
Challenges of the Silk Route:
Although modern adventurers have it much easier than Marco Polo, there are still challenges along the Silk Route that remind travelers of the hardships faced by their predecessors. While today’s travelers have access to vehicles, air conditioning, and reliable roads, there are still long days of driving and the occasional bumpy road to navigate. For instance, on the Exodus tour, the drive from Karakol to Almaty takes nearly six hours, with border crossings and customs procedures adding to the journey time—though nothing compared to the months it would have taken Marco Polo to cover the same distance.
The climate can also be an obstacle. Central Asia’s extreme weather, with hot summers and cold winters, would have posed significant threats to Marco Polo. Today, travelers can avoid the worst of the weather by choosing optimal travel seasons, but even in spring and autumn, conditions can change quickly, especially in the mountains. Modern adventurers might find themselves hiking in cooler weather in Turgen Gorge or bundling up for a night in the yurt camps, while Marco Polo would have had to endure these conditions with far less protection.
Both Marco Polo and modern travelers share a common thread—a deep desire to explore the unknown, to connect with different cultures, and to experience the grandeur of distant lands. While the conditions, motivations, and challenges of travel have evolved over the centuries, the spirit of adventure remains unchanged.
Today’s adventure travelers, particularly those embarking on tours like the Exodus Adventure Travels 16-day Silk Route journey, are the inheritors of Marco Polo’s legacy. They walk in his footsteps, albeit with the benefits of modern comforts, exploring the same regions he once described in awe-inspiring detail. In doing so, they keep alive the enduring human drive to discover the world’s hidden wonders, fostering a connection between the past and the present that transcends time and geography.
Discover More Destinations


12 Pro Tips for Beginner Bikepackers
Bikepacking combines the adventure of multi-day backpacking with the freedom and exhilaration of cycling, offering a unique way to explore the world. For those new to bikepacking, the idea of carrying all your gear on your bike and venturing into the wilderness can be both exciting and intimidating. This guide is designed to provide beginner bikepackers with 12 essential tips to ensure a safe, enjoyable, and successful journey. Whether you’re planning a weekend getaway or a cross-country trek, these tips will help you get started on the right foot—or pedal.
Bikepacking combines the adventure of multi-day backpacking with the freedom and exhilaration of cycling, offering a unique way to explore the world. For those new to bikepacking, the idea of carrying all your gear on your bike and venturing into the wilderness can be both exciting and intimidating. This guide is designed to provide beginner bikepackers with 12 essential tips to ensure a safe, enjoyable, and successful journey. Whether you’re planning a weekend getaway or a cross-country trek, these tips will help you get started on the right foot—or pedal.
Soaking in the New Zealand coastal landscape while bikepacking solo around the South Island. Photo by Dalton Johnson
Background:
Bikepacking has grown in popularity as more people seek to combine their love of cycling with the desire to explore remote areas and immerse themselves in nature. Unlike traditional cycle touring, which often follows paved roads and established routes, bikepacking typically involves off-road trails, gravel paths, and backcountry roads. This more rugged approach requires not only physical endurance but also careful planning and a spirit of adventure. While the concept is simple—pack your gear, hop on your bike, and ride—there’s much to learn to make your first bikepacking trip a success.
12 Pro Tips for Beginner Bikepackers:
1. Start Small and Build Up
For your first bikepacking trip, choose a route that’s manageable and close to home. A weekend trip of 20-30 miles a day is a great starting point. This allows you to get a feel for the experience without overcommitting. As you gain confidence and experience, you can gradually take on longer and more challenging routes. Starting small helps you learn the basics and builds your endurance without overwhelming you.
2. Know Your Route
Before setting out, thoroughly research your route. Familiarize yourself with the terrain, elevation changes, and potential obstacles. Use maps, apps, and local guides to understand what to expect along the way. Knowing your route helps you plan for water sources, resupply points, and campsites, and it ensures that you’re prepared for any challenges the trail might present.
3. Practice Bike Handling Skills
Bikepacking often involves navigating rough and technical terrain. Practice your bike handling skills on trails or gravel paths before your trip. Focus on balance, braking, and maneuvering over obstacles like rocks and roots. Being comfortable with off-road riding will boost your confidence and make your bikepacking adventure more enjoyable.
4. Pack Efficiently
When it comes to bikepacking, every ounce counts. Pack only the essentials, and distribute the weight evenly across your bike. Use lightweight, compact gear, and consider multi-use items to save space. Practice packing and repacking your bike to ensure everything fits securely and doesn’t affect your balance or handling. Efficient packing helps you travel more comfortably and reduces strain on your bike.
5. Prepare for Weather Changes
Weather can be unpredictable, especially in remote areas. Check the forecast before your trip, but be prepared for sudden changes. Pack clothing that can be layered, and include waterproof gear, such as a rain jacket and rain pants. Staying warm and dry is crucial for your comfort and safety, especially when camping in the backcountry.
6. Focus on Nutrition and Hydration
Fueling your body properly is key to maintaining energy and stamina on a bikepacking trip. Plan your meals and snacks to provide a balance of carbohydrates, protein, and fats. Pack high-energy foods that are easy to eat on the go, such as energy bars, nuts, and dried fruit. Hydration is equally important—carry enough water and know where you can refill along your route. Proper nutrition and hydration will keep you going strong throughout your journey.
7. Pace Yourself
Bikepacking is a marathon, not a sprint. It’s important to pace yourself, especially on longer trips. Listen to your body and take breaks when needed. It’s better to ride at a steady pace that you can maintain over the course of several days than to push too hard and risk burnout or injury. Remember, the goal is to enjoy the journey, not just reach the destination.
8. Respect the Environment
Leave no trace is a key principle in bikepacking. Pack out all your trash, avoid disturbing wildlife, and stick to established trails and campsites. Be mindful of your impact on the environment and do your part to preserve the natural beauty of the places you visit. Respecting the environment ensures that future generations can enjoy these wild places too.
9. Know Basic Bike Repair
Mechanical issues can happen, especially on rough terrain. Learn basic bike repair skills, such as fixing a flat tire, adjusting your brakes, and repairing a broken chain. Carry a small repair kit with the necessary tools and spare parts. Knowing how to handle common bike issues will give you peace of mind and keep you moving forward if something goes wrong.
10. Plan for Campsites
Whether you’re wild camping or staying in established campgrounds, plan where you’ll camp each night. Consider factors like access to water, safety, and legality. If you’re camping in the backcountry, follow local regulations and practice leave-no-trace principles. Planning your campsites in advance helps you stay on track and ensures a safe and restful night’s sleep.
11. Build Mental Resilience
Bikepacking can be physically and mentally challenging. You may face tough climbs, bad weather, or moments of self-doubt. Building mental resilience is key to overcoming these challenges. Focus on the positives, break the journey into smaller, manageable goals, and remind yourself why you’re doing this. Mental strength will carry you through the tough times and make your accomplishments even more rewarding.
12. Embrace the Adventure
Finally, remember that bikepacking is about adventure and discovery. Embrace the unknown, enjoy the journey, and don’t stress about things not going perfectly. Some of the best experiences come from unexpected detours and unplanned moments. Stay open to the adventure, and you’ll come away with memories and stories that last a lifetime.
Mid trip selfie while bikepacking along Highway 395. Photo by Dalton Johnson
Bikepacking offers a unique and rewarding way to explore the world, combining the thrill of cycling with the adventure of backcountry travel. By following these 12 pro tips, beginner bikepackers can embark on their first journey with confidence and enthusiasm. Whether you’re heading into the mountains, across the desert, or along the coast, bikepacking is an adventure like no other. So pack your gear, hop on your bike, and pedal your way into the great unknown—the adventure is just beginning!
Discover more Adventures
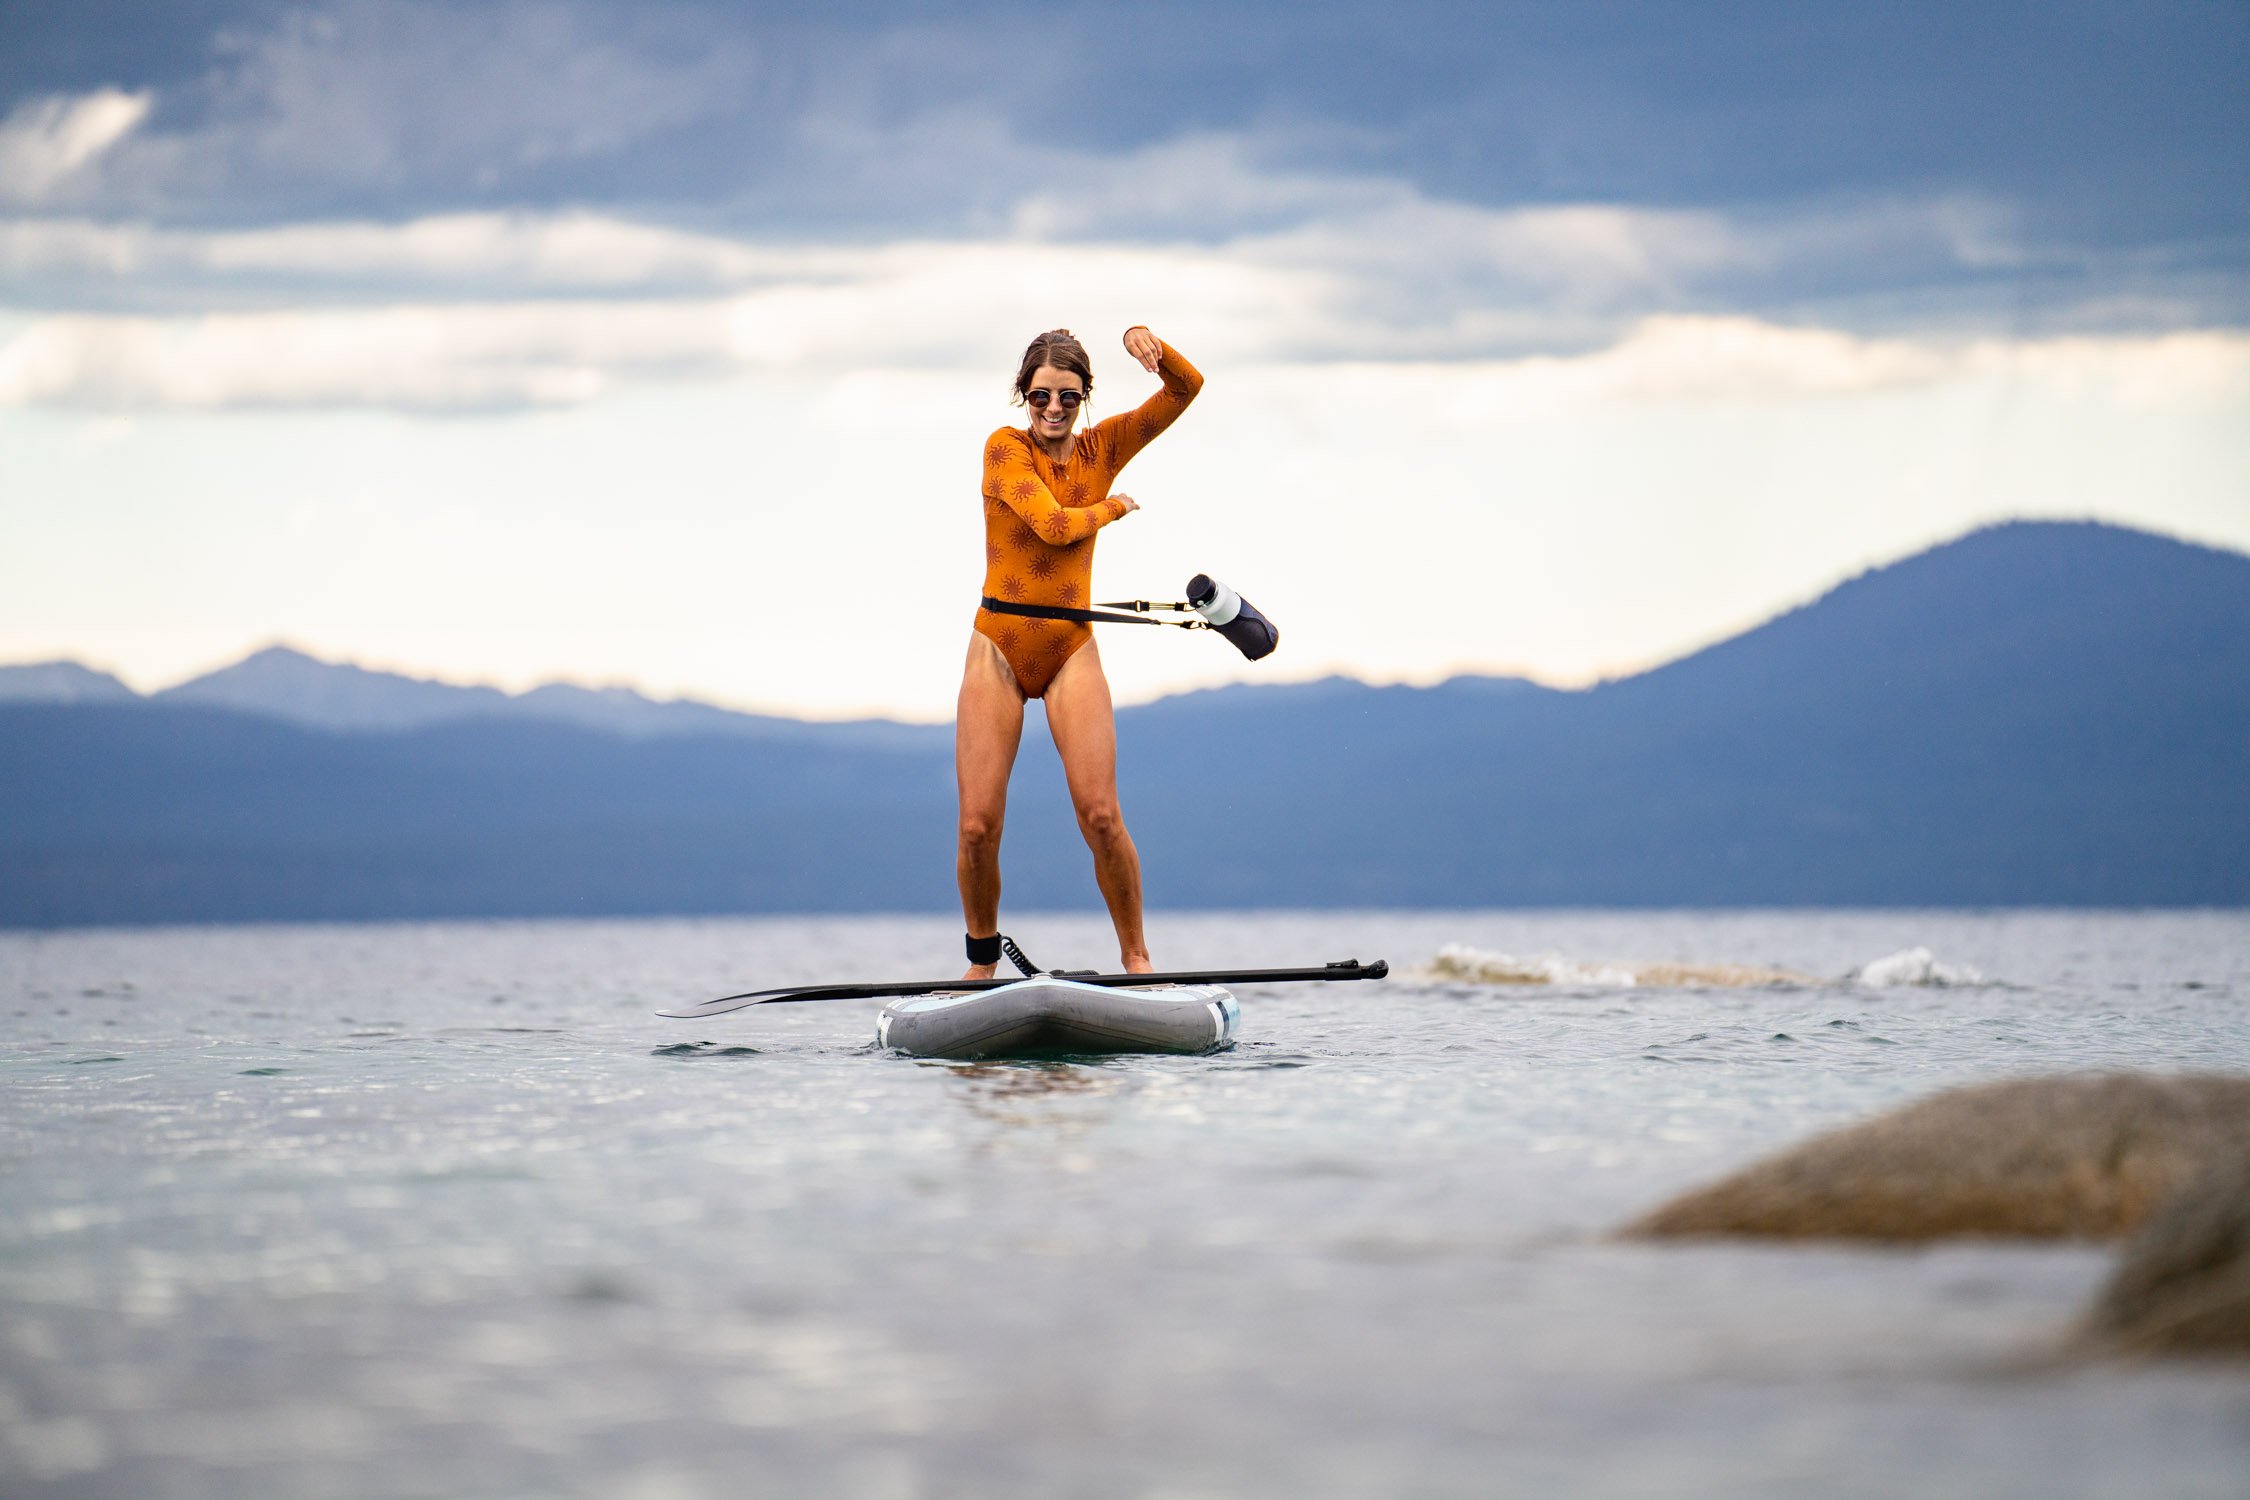
12 Pro Tips for Beginner Stand-Up Paddleboarders
Stand-up paddleboarding (SUP) has rapidly grown in popularity as one of the most accessible and enjoyable water sports. Combining the tranquility of being on the water with a full-body workout, SUP offers a unique way to explore lakes, rivers, and coastal waters. For those new to paddleboarding, it may seem intimidating at first, but with the right guidance, you can quickly find your balance and begin to glide across the water with ease. This article covers 12 essential tips for beginners, helping you build confidence and make the most of your SUP experience.
Stand-up paddleboarding (SUP) has rapidly grown in popularity as one of the most accessible and enjoyable water sports. Combining the tranquility of being on the water with a full-body workout, SUP offers a unique way to explore lakes, rivers, and coastal waters. For those new to paddleboarding, it may seem intimidating at first, but with the right guidance, you can quickly find your balance and begin to glide across the water with ease. This article covers 12 essential tips for beginners, helping you build confidence and make the most of your SUP experience.
Kristin testing her balance while on a paddle board. Photo by Dalton Johnson
Background:
SUP originated in Hawaii as an offshoot of surfing, where surfers would stand on their boards and paddle to stay close to the wave lineup. Over time, it evolved into a sport of its own, with people paddleboarding on flat water, catching small waves, and even competing in SUP races. Unlike surfing, SUP doesn’t require waves, making it a versatile activity that can be enjoyed on a variety of water bodies. It’s a fantastic way to engage with nature, offering both a peaceful escape and a challenging workout.
12 Pro Tips for Beginner Stand-Up Paddleboarders:
1. Start on Calm Water
When you're first learning to paddleboard, choose a calm, flat body of water like a lake or a slow-moving river. Calm water allows you to focus on your balance and paddling technique without worrying about waves or strong currents. Starting in a controlled environment will help you build confidence and get comfortable on the board before venturing into more challenging waters.
2. Choose the Right Board
While this article doesn’t focus on gear, it’s important to know that different types of SUP boards cater to different activities, such as touring, yoga, or surfing. For beginners, wider and more stable boards are easier to balance on. When renting or borrowing a board, opt for one that’s recommended for beginners to ensure you have a stable platform to practice on.
3. Learn How to Stand Up Properly
Standing up on a paddleboard for the first time can be tricky. Start by kneeling on the board in the center, where it is most stable. Place the paddle across the board in front of you for support. When you’re ready, slowly stand up one foot at a time, keeping your feet parallel and shoulder-width apart. Look ahead at the horizon to maintain your balance and avoid looking down at your feet.
4. Focus on Your Stance
Once you’re standing, your stance is crucial for maintaining balance and control. Keep your knees slightly bent, and your feet flat on the board. Distribute your weight evenly between both feet, and engage your core to stay centered. Avoid locking your knees, as this can make you more prone to losing your balance. A relaxed but engaged posture will help you react to any shifts in the board.
5. Hold the Paddle Correctly
Many beginners instinctively hold the paddle incorrectly. The correct way to hold it is with the blade angled forward (away from you). When paddling, place one hand on the top of the paddle (the T-grip) and the other hand lower on the shaft. This grip gives you better leverage and control over your strokes, allowing you to paddle more efficiently.
6. Practice Falling and Getting Back On
Falling off your board is a natural part of learning to paddleboard, and knowing how to get back on is essential. Practice falling in shallow water to get comfortable with it. When you fall, try to fall away from the board to avoid injury. To get back on, swim to the center of the board, grab the handle or edge, and pull yourself up onto your stomach. Then, crawl back into a kneeling position before standing up again.
7. Master Basic Paddle Strokes
There are a few basic paddle strokes every beginner should learn. The forward stroke propels you through the water, while the reverse stroke helps you slow down or stop. The sweep stroke is used for turning the board. Practice these strokes on both sides to build a balanced technique. Remember to use your core muscles to power your strokes, rather than relying solely on your arms.
8. Look Where You Want to Go
Keeping your eyes on the horizon rather than your feet will help you maintain better balance and direction. Your body tends to follow where your eyes go, so looking ahead will naturally guide your board in that direction. This tip is especially useful when you’re paddling towards a specific destination or navigating around obstacles.
9. Respect the Wind and Water Conditions
Wind and water conditions can significantly impact your paddleboarding experience. Wind can create choppy water and make paddling more difficult, especially for beginners. Check the weather forecast before heading out, and if it’s windy, start your session paddling into the wind. This way, you’ll have an easier time paddling back when you’re tired. Always be aware of your surroundings and adjust your plans accordingly.
10. Stay Close to Shore
As a beginner, it’s wise to stay close to the shore, especially in open water or unfamiliar areas. This ensures that you can quickly get to safety if you get tired or encounter challenging conditions. Paddle along the shoreline rather than heading straight out to deep water, where the wind and currents may be stronger.
11. Practice Turning Techniques
Turning your board is a fundamental skill that will give you more control and confidence on the water. Practice turning using the sweep stroke, which involves a wide, sweeping motion with your paddle. You can also practice pivot turns by stepping back on the board to lift the nose out of the water, making the board easier to spin around. These techniques will help you navigate more effectively and avoid obstacles.
12. Embrace the Learning Process
Like any new sport, paddleboarding comes with a learning curve. Don’t get discouraged if you fall off the board or struggle with your balance at first. Embrace the process of learning, and celebrate the small victories along the way. With practice, you’ll improve your skills and start to enjoy the experience even more. Remember, every paddle session is an opportunity to learn and grow as a paddleboarder.
Stand Up Paddleboarding at sunset on Lake Tahoe. Photo by Dalton Johnson
Stand-up paddleboarding offers a fantastic way to connect with nature, stay active, and enjoy time on the water. By following these 12 pro tips, beginners can build a strong foundation for their paddleboarding journey, gaining the skills and confidence needed to explore new waters safely and enjoyably. Whether you’re paddling on a serene lake or along a coastal shoreline, SUP provides endless opportunities for adventure and relaxation. So grab a paddle, hit the water, and start your paddleboarding adventure today!
Discover more Adventures

Experience Arches National Park Like a Local Adventurer
Arches National Park, a land sculpted by wind and time, is a natural wonderland that beckons adventurers from around the globe. With over 2,000 natural stone arches, towering pinnacles, and massive rock fins, this iconic park in Utah offers a playground for those who crave the thrill of exploration. Whether you’re navigating the park’s rugged trails, capturing the perfect sunrise shot, or climbing the red rock formations, Arches provides endless opportunities to connect with the raw beauty of the American Southwest. This guide will show you how to experience Arches National Park like a local adventurer, uncovering the top outdoor activities and hidden gems that make this place truly special.
Arches National Park, a land sculpted by wind and time, is a natural wonderland that beckons adventurers from around the globe. With over 2,000 natural stone arches, towering pinnacles, and massive rock fins, this iconic park in Utah offers a playground for those who crave the thrill of exploration. Whether you’re navigating the park’s rugged trails, capturing the perfect sunrise shot, or climbing the red rock formations, Arches provides endless opportunities to connect with the raw beauty of the American Southwest. This guide will show you how to experience Arches National Park like a local adventurer, uncovering the top outdoor activities and hidden gems that make this place truly special.
Canyoneering in Arches National Park. Photo by Dalton Johnson
Why an Adventure Traveler Should Visit Arches National Park
Arches National Park isn’t just about seeing the sights—it’s about immersing yourself in a landscape that feels both ancient and alive. For adventure travelers, this park offers a unique blend of challenge and reward. The park’s natural formations, carved by millions of years of geological activity, create a dramatic backdrop for outdoor pursuits. Whether you’re hiking through desert terrain, scaling sandstone walls, or navigating narrow canyons, Arches offers experiences that push your limits and deepen your appreciation for the natural world.
One of the park’s greatest appeals is its accessibility. While it’s home to some of the most stunning natural features in the U.S., Arches is relatively compact, making it easy to explore multiple areas in a single trip. Adventure travelers will find a variety of trails and activities that cater to all skill levels, from easy walks to challenging climbs. Plus, with its close proximity to Moab—a hub for outdoor enthusiasts—you can easily combine your visit with other adventure-filled activities in the region.
Top Adventures You Don't Want to Miss
Hiking
Delicate Arch: The most famous arch in the park, Delicate Arch is a must-see for any visitor. The 3-mile round-trip hike is moderately strenuous, with a steep uphill section, but the view at the end is worth every step. The arch stands alone on a red rock bluff, framing the distant La Sal Mountains—a perfect spot for sunrise or sunset.
The Devil’s Garden Trail: For those seeking a more challenging adventure, the Devil’s Garden Trail offers a longer hike with the opportunity to see multiple arches, including Landscape Arch, the longest natural arch in North America. The full loop is about 7.8 miles and includes some rock scrambling, making it ideal for experienced hikers looking to explore the park’s more remote areas.
Park Avenue: This easy 2-mile round-trip hike takes you through a canyon flanked by towering rock formations that resemble a city skyline, hence the name “Park Avenue.” It’s a great option for a quick hike with stunning scenery.
Rock Climbing
The Three Penguins: Located near the park entrance, these towering rock formations offer some of the best climbing in Arches. The routes here range from beginner to advanced, providing options for climbers of all levels. The sandstone spires are a classic challenge and offer panoramic views of the surrounding desert.
The Owl: This lesser-known climbing spot offers a more secluded experience. The climb is a bit more technical, but the effort is rewarded with breathtaking views and the satisfaction of conquering one of the park’s unique formations.
Stargazing
Windows Section: Arches National Park is a designated International Dark Sky Park, making it one of the best places in the country for stargazing. The Windows Section, with its expansive views and minimal light pollution, is a prime spot for setting up a telescope or simply lying back and enjoying the night sky. On a clear night, you can see the Milky Way stretching across the horizon.
Panorama Point: Another excellent stargazing location, Panorama Point offers unobstructed views of the sky. It’s also a great place to catch a meteor shower or watch the moon rise over the distant peaks.
Delicate Arch: For a truly unforgettable experience, hike to Delicate Arch after dark. The arch, illuminated by the glow of the stars, creates a surreal and awe-inspiring scene. Just be sure to bring a headlamp for the hike back down!
Camping
Devils Garden Campground: The only campground within Arches National Park, Devils Garden offers 51 sites surrounded by stunning scenery. Staying here allows you to experience the park’s beauty in a more intimate way, with the added bonus of being able to explore the trails early in the morning or late in the evening, when the crowds are thin. The campground is particularly popular, so reservations are highly recommended.
Backcountry Camping: For those seeking solitude, backcountry camping in Arches is an option, though it requires a permit. The park’s rugged backcountry offers a more challenging experience, with opportunities to discover less-visited areas and enjoy the silence of the desert night.
Dispersed Camping Near Moab: If you prefer a more flexible camping experience, there are numerous dispersed camping areas on BLM land near Moab. These spots offer a true wilderness experience, often with fewer amenities but more freedom to choose your perfect campsite.
Canyoneering
Fiery Furnace: Canyoneering in the Fiery Furnace is one of the most unique and exhilarating experiences in Arches National Park. This labyrinth of narrow canyons and towering sandstone fins offers an adventure unlike any other. Navigating through the Fiery Furnace requires a permit or a guided tour, as the maze-like terrain can be challenging. Expect to scramble, squeeze through tight spaces, and explore hidden corners that few visitors ever see.
Lost Spring Canyon: Located in the northern part of the park, Lost Spring Canyon offers a quieter canyoneering experience. The slot canyon features narrow passages, beautiful rock formations, and the chance to see desert wildlife. It’s an off-the-beaten-path adventure that rewards those willing to explore the lesser-known areas of Arches.
Flat Water Kayaking and SUP
Colorado River: While not technically within the park, the Colorado River runs just outside Arches and offers excellent opportunities for flat-water kayaking and stand-up paddleboarding (SUP). Launch from the Moab Boat Ramp and paddle through the stunning scenery of the Moab Valley, with views of towering red cliffs and desert landscapes. This stretch of the river is relatively calm, making it perfect for beginners or those looking for a relaxing adventure on the water.
Ken’s Lake: A bit further afield but still worth the trip, Ken’s Lake provides a tranquil setting for kayaking and SUP. Surrounded by the La Sal Mountains, this lake is a peaceful retreat where you can paddle at your own pace and enjoy the serene environment.
Backpacking
Salt Valley Road to Tower Arch: For an overnight adventure, consider backpacking from Salt Valley Road to Tower Arch. This 7-mile route offers a mix of challenging terrain and stunning vistas, culminating in the impressive Tower Arch, one of the park’s hidden gems. The area around Tower Arch is often less crowded, providing a more solitary experience where you can truly connect with the wilderness.
Klondike Bluffs: Another fantastic backpacking option is the Klondike Bluffs area. This region of the park sees fewer visitors, offering a more remote and wild experience. The trails here wind through rocky bluffs, offering stunning views of the surrounding landscape, and the chance to see dinosaur tracks embedded in the rock.
Other Highlights of the Area
Places to Eat
The Broken Oar: A local favorite, The Broken Oar offers hearty American cuisine perfect for refueling after a day of adventure. Their patio dining area is a great spot to relax and enjoy the evening.
Moab Brewery: For those who enjoy a craft beer after a long day on the trails, Moab Brewery is the place to be. With a range of locally brewed beers and a menu filled with comfort food classics, it’s a great spot to unwind.
Must-See Spots
Dead Horse Point State Park: Just a short drive from Arches, Dead Horse Point offers some of the most breathtaking views in the region. The overlook provides a panoramic view of the Colorado River and the vast canyons below.
Canyonlands National Park: While Arches is known for its arches, nearby Canyonlands National Park offers a different kind of adventure with its vast canyons and mesas. The Island in the Sky district, in particular, is known for its stunning overlooks and challenging hikes.
Photo Locations
Delicate Arch: No trip to Arches is complete without a photo of Delicate Arch. The arch is particularly stunning at sunrise and sunset when the light makes the red rock glow.
The Windows Section: This area of the park is home to several arches that are perfect for photography, including the North and South Window Arches.
Best Sunset Locations
Panorama Point: As the name suggests, Panorama Point offers expansive views of the park, making it an ideal spot for watching the sunset.
Balanced Rock: This iconic formation is another great spot to catch the sunset, as the golden light casts dramatic shadows on the rock.
Cultural Highlights
Moab Museum: To get a deeper understanding of the area’s history, visit the Moab Museum, where you can learn about the region’s Native American heritage, early settlers, and the development of outdoor recreation.

The Milky Way passing through Landscape Arch in Arches National Park. Photo by Dalton Johnson
Arches National Park is more than just a collection of stunning rock formations—it’s a destination that invites you to challenge yourself, explore new terrains, and connect with nature in a profound way. Whether you’re hiking to iconic arches, scaling sandstone walls, or navigating the park’s canyons and trails, every moment in Arches is an adventure waiting to happen. The park’s accessibility, combined with its awe-inspiring beauty, makes it a must-visit for any outdoor enthusiast. Beyond the arches and the red rock landscape, the nearby areas of Moab and Canyonlands offer even more opportunities to extend your adventure, ensuring that your time in this remarkable part of Utah is nothing short of unforgettable.
Discover More Destinations


12 Pro Tips for Beginner Flatwater Kayakers
Flatwater kayaking is a peaceful and accessible way to explore lakes, rivers, and calm coastal areas. Whether you're looking to enjoy a leisurely paddle or start a new adventure hobby, flatwater kayaking offers a great introduction to the world of water sports. These 12 pro tips will help you get started, from mastering basic paddling techniques to understanding water safety. With these insights, you'll be ready to embark on your flatwater kayaking journey with confidence and ease.
Flatwater kayaking is a peaceful and accessible way to explore lakes, rivers, and calm coastal areas. Whether you're looking to enjoy a leisurely paddle or start a new adventure hobby, flatwater kayaking offers a great introduction to the world of water sports. These 12 pro tips will help you get started, from mastering basic paddling techniques to understanding water safety. With these insights, you'll be ready to embark on your flatwater kayaking journey with confidence and ease.
Sunset kayaking on Lake Tahoe. Photo by Dalton Johnson
Background:
Kayaking has ancient roots, with origins in the indigenous cultures of the Arctic. Traditionally used for hunting and transportation, kayaks were designed to navigate the calm and rough waters alike. In modern times, flatwater kayaking has become a popular recreational activity, allowing people of all skill levels to enjoy the tranquility of nature from the water. Flatwater kayaking is ideal for beginners, as it takes place on calm waters with minimal currents, making it easier to learn and enjoy.
12 Pro Tips for Beginner Flatwater Kayakers:
1. Start with the Right Kayak
Choosing the right kayak is essential for a positive experience. For flatwater kayaking, a recreational or touring kayak is often the best choice. These kayaks are stable, easy to maneuver, and designed for comfort. If you’re just starting, consider renting or borrowing a kayak before making a purchase to see what type suits you best.
2. Learn Basic Paddling Techniques
Mastering basic paddling techniques will make your kayaking experience more enjoyable and efficient. Focus on learning the forward stroke, sweep stroke, and reverse stroke. Practice proper hand placement on the paddle and use your core muscles to generate power. These fundamentals will help you navigate smoothly and prevent fatigue.
3. Practice Getting In and Out of the Kayak
Getting in and out of a kayak can be tricky for beginners. Practice entering and exiting from a dock or shallow water to build confidence. Keep your weight low and centered, and use your paddle for balance. Being comfortable with this process reduces the risk of tipping over and makes your outings more enjoyable.
4. Wear Appropriate Safety Gear
Safety should always be a priority when kayaking. Always wear a properly fitted personal flotation device (PFD) and consider wearing a helmet if you’re paddling in areas with obstacles. Dress appropriately for the water temperature, and bring a whistle or other signaling device for emergencies.
5. Understand Water Conditions
Before heading out, familiarize yourself with the water conditions. Check the weather forecast and be aware of wind speeds, as high winds can make paddling difficult. Understand the characteristics of the water body you’re kayaking on, such as potential currents, tides, and any hazards like rocks or submerged objects.
6. Start in Calm Waters
For your first few outings, choose calm, sheltered waters like small lakes or slow-moving rivers. These environments provide a safe and stable setting for practicing your skills. Avoid large bodies of water or fast-moving currents until you’re more experienced.
7. Practice Proper Posture
Maintaining good posture in the kayak is important for balance and paddling efficiency. Sit up straight with your back supported by the seat, and keep your knees slightly bent and pressed against the sides of the kayak. Proper posture helps you paddle more effectively and reduces strain on your back.
8. Learn to Self-Rescue
Knowing how to perform a self-rescue is crucial in case you capsize. Practice techniques such as the wet exit, where you safely exit the kayak after capsizing, and the paddle float rescue, which helps you re-enter the kayak from the water. Practicing these skills will give you confidence to handle unexpected situations.
9. Develop a Rhythm
Paddling with a steady rhythm helps you conserve energy and cover more distance efficiently. Focus on smooth, even strokes, and avoid overexerting yourself by paddling too fast. A consistent rhythm keeps you moving forward and allows you to enjoy the scenery without tiring quickly.
10. Respect Wildlife and Nature
As you explore waterways, remember to respect wildlife and the natural environment. Keep a safe distance from animals and avoid disturbing their habitats. Follow Leave No Trace principles by not littering and minimizing your impact on the environment. Responsible kayaking ensures that these beautiful places remain pristine for future adventurers.
11. Paddle with a Partner
Kayaking with a partner is safer and more fun, especially for beginners. A paddling partner can assist in case of an emergency and share in the experience. It’s also helpful to have someone to practice skills with and to provide motivation as you build your confidence on the water.
12. Enjoy the Experience
Flatwater kayaking is a fantastic way to unwind and connect with nature. Take time to soak in the scenery, listen to the sounds of the water, and enjoy the peacefulness that comes with being on the water. Whether you’re paddling alone or with others, the experience is about more than just reaching your destination—it's about enjoying the journey.
Headed out for a kayak adventure in the Grand Teton National Park . Photo by Dalton Johnson
Flatwater kayaking offers an incredible opportunity to explore the outdoors from a unique perspective. By following these 12 pro tips, you'll be well-prepared to start your kayaking adventures with confidence and ease. Remember to prioritize safety, respect the environment, and take the time to enjoy every moment on the water. With the right preparation and mindset, flatwater kayaking can become a lifelong passion that brings you closer to nature and the serenity of the water.
Discover more Adventures

Experience Moab Like a Local Adventurer
Moab, Utah, is a desert wonderland that draws adventurers from around the globe. Known for its breathtaking red rock landscapes, Moab is a mecca for thrill-seekers and outdoor enthusiasts. Whether you're scaling towering cliffs, navigating the Colorado River, or exploring the vast desert on foot, Moab offers an unparalleled range of activities that let you immerse yourself in the raw beauty of the American Southwest. This guide is your key to experiencing Moab like a local adventurer, with insider tips and top adventure spots that will make your trip unforgettable.
Moab, Utah, is a desert wonderland that draws adventurers from around the globe. Known for its breathtaking red rock landscapes, Moab is a mecca for thrill-seekers and outdoor enthusiasts. Whether you're scaling towering cliffs, navigating the Colorado River, or exploring the vast desert on foot, Moab offers an unparalleled range of activities that let you immerse yourself in the raw beauty of the American Southwest. This guide is your key to experiencing Moab like a local adventurer, with insider tips and top adventure spots that will make your trip unforgettable.
Rock climbing on Wall Street just outside of Moab, UT. Photo by Dalton Johnson
Why an Adventure Traveler Should Visit Moab
Moab is more than just a gateway to two of Utah's most iconic national parks—Arches and Canyonlands. It's a destination that epitomizes adventure, offering a unique combination of awe-inspiring natural beauty and diverse outdoor activities. The striking red rock formations, expansive desert landscapes, and the powerful Colorado River provide a perfect playground for those looking to push their limits and experience nature's extremes. Whether you're an adrenaline junkie or someone who simply loves the outdoors, Moab's varied terrain and endless adventure possibilities make it a must-visit location.
Top Adventures You Don't Want to Miss
1. Rock Climbing
Moab is famous for its world-class rock climbing, with routes that challenge even the most experienced climbers. The towering sandstone cliffs and unique rock formations make it a climber's paradise.
Where to Do It:
Indian Creek: Known for its splitter cracks and challenging routes, Indian Creek is a bucket-list destination for serious climbers.
Wall Street: Easily accessible and perfect for both beginners and advanced climbers, Wall Street offers a variety of routes along the Colorado River.
The Fisher Towers: For those seeking a real adventure, the Fisher Towers offer some of the most iconic and challenging climbs in Moab.
Insider Tips: Early morning climbs are ideal to avoid the intense midday heat. Make sure to bring plenty of water and check route conditions before heading out.
2. Hiking
From short, scenic walks to challenging backcountry trails, Moab has hiking options for every skill level. The landscape's vivid contrasts—red rock formations, green riverbanks, and clear blue skies—create an unforgettable hiking experience.
Where to Do It:
Delicate Arch Trail: This 3-mile round-trip hike in Arches National Park leads to the iconic Delicate Arch, offering breathtaking views along the way.
Fiery Furnace: A labyrinth of narrow canyons and arches, Fiery Furnace in Arches National Park is best explored with a guide due to its complex terrain.
The Needles District: Located in Canyonlands National Park, this area offers a variety of trails that showcase stunning rock formations and expansive views.
Insider Tips: The desert heat can be intense, so hike early in the morning or late in the afternoon. Permits are required for Fiery Furnace, so plan ahead.
3. Mountain Biking
Moab is one of the world's premier mountain biking destinations, with trails that cater to all skill levels. The combination of slickrock, singletrack, and breathtaking scenery makes for an exhilarating ride.
Where to Do It:
Slickrock Trail: This 10.5-mile loop is one of the most famous mountain biking trails in the world, offering challenging terrain and incredible views.
The Whole Enchilada: An epic, all-day ride that descends over 7,000 feet, taking you from the high alpine down to the desert floor.
Klondike Bluffs: Ideal for intermediate riders, this trail system offers a mix of slickrock and singletrack with stunning views of Arches National Park.
Insider Tips: Make sure your bike is in top condition, as the rugged terrain can be tough on equipment. Spring and fall offer the best riding conditions.
4. Flat Water Kayaking
The Colorado River provides a serene setting for flat water kayaking, with calm stretches that are perfect for taking in the dramatic scenery of the surrounding canyonlands.
Where to Do It:
Colorado River - Moab Daily: This stretch offers gentle rapids and flat water sections, ideal for a relaxing paddle with beautiful views of the red rock cliffs.
Stillwater Canyon: A more remote option, this section of the Colorado River is perfect for multi-day kayaking trips, offering solitude and stunning landscapes.
Green River - Labyrinth Canyon: Known for its towering canyon walls and tranquil waters, Labyrinth Canyon is a peaceful paddling destination.
Insider Tips: Bring plenty of water and sun protection, as the desert sun can be intense. Consider a guided tour if you're unfamiliar with the river's conditions.
5. Backpacking
Moab's vast wilderness offers endless opportunities for backpacking, from desert canyons to high alpine trails. The remote landscapes provide a true escape into nature.
Where to Do It:
Canyonlands National Park - The Needles District: Explore the intricate network of trails and campsites in this remote area, where you can find solitude and stunning vistas.
Arches National Park - Devils Garden Primitive Loop: A challenging but rewarding backpacking route that takes you through the heart of Arches, offering close-up views of its famous formations.
Grandstaff Canyon: A less crowded option, this canyon offers a beautiful overnight hike with plenty of shade and a refreshing creek.
Insider Tips: Permits are required for backcountry camping in the national parks, so plan ahead. Be prepared for limited water sources and pack accordingly.
6. Peak Bagging
For those who love a challenge, Moab offers several peaks that are perfect for bagging, with stunning views awaiting at the top.
Where to Do It:
Mount Peale: The highest peak in the La Sal Mountains, Mount Peale offers a strenuous hike with rewarding views of the surrounding desert and mountains.
Castleton Tower: A challenging climb that combines peak bagging with rock climbing, Castleton Tower is one of Moab's most iconic formations.
Mount Waas: Another peak in the La Sal Mountains, Mount Waas provides a less crowded but equally rewarding hike.
Insider Tips: The La Sal Mountains can experience snow well into the summer, so check conditions before you go. Bring plenty of layers, as temperatures can vary significantly.
7. Stargazing
Moab's remote location and clear desert skies make it a prime spot for stargazing. With minimal light pollution, the stars here shine brighter than almost anywhere else.
Where to Do It:
Dead Horse Point State Park: This park is renowned for its dark skies and offers several designated stargazing areas.
Canyonlands National Park: Known for some of the darkest skies in the U.S., Canyonlands is ideal for observing constellations, planets, and the Milky Way.
Arches National Park: The unique rock formations in Arches provide a stunning foreground for night sky photography.
Insider Tips: Check the moon phase before you go—new moon nights are best for stargazing. Bring a star chart or use a stargazing app to identify constellations.
8. Camping
Moab offers a variety of camping options, from established campgrounds to remote backcountry sites. There's nothing like spending the night under the stars in this rugged landscape.
Where to Do It:
Devils Garden Campground (Arches National Park): A popular spot with stunning views and easy access to some of the park’s best hikes.
Willow Flats Campground (Canyonlands National Park): Offering solitude and panoramic views, this campground is perfect for those looking to escape the crowds.
Goose Island Campground: Located along the Colorado River, this campground offers easy access to both Arches and Moab’s famous rock climbing spots.
Insider Tips: Campsites in national parks can fill up quickly, so book well in advance. If you're camping in the backcountry, practice Leave No Trace principles to preserve the natural environment.
Other Highlights of the Area
Places to Eat
The Broken Oar: A local favorite for its rustic, laid-back atmosphere, The Broken Oar serves up hearty American fare perfect for refueling after a day of adventuring. Try their famous ribs or the Moab burger for a true taste of the Southwest.
Desert Bistro: For a more upscale dining experience, head to Desert Bistro, where you’ll find a menu inspired by regional flavors. The chef’s specials, like the elk tenderloin or the pecan-crusted trout, are not to be missed.
Quesadilla Mobilla: If you’re looking for a quick, delicious bite, this food truck is a Moab staple. Their inventive quesadillas, packed with fresh ingredients and bold flavors, make for the perfect lunch on the go.
Must-See Spots
Dead Horse Point State Park: Just a short drive from Moab, this state park offers some of the most breathtaking views in the region. The overlook provides a panoramic view of the Colorado River winding through towering red cliffs—perfect for sunrise or sunset.
Arches National Park: Home to over 2,000 natural stone arches, this iconic park is a must-visit. Don’t miss Delicate Arch, the park’s most famous formation, and make sure to explore some of the lesser-known trails for a more secluded experience.
Canyonlands National Park: Divided into four districts, this vast park offers diverse landscapes, from towering mesas to deep canyons. The Island in the Sky district is particularly popular for its stunning overlooks and challenging hikes.
Photo Locations
Delicate Arch: As one of the most iconic landmarks in Utah, Delicate Arch is a prime spot for photography, especially during the golden hour when the arch glows in the sunlight.
The Windows Section: Located within Arches National Park, this area features multiple arches, including the North and South Window Arches, which frame the landscape perfectly for dramatic photos.
Corona Arch: Often less crowded than other arches, Corona Arch is a fantastic photo spot. The massive arch offers a striking contrast against the blue sky and red rock landscape.
Best Sunset Locations
Dead Horse Point: This spot is a sunset favorite, offering expansive views of the canyonlands below. The play of light on the red rocks as the sun sets creates a mesmerizing sight.
Mesa Arch: Although popular at sunrise, Mesa Arch also offers incredible sunset views. The arch acts as a natural frame for the canyon below, making it a great location for capturing the setting sun.
The Needles Overlook: Located in the Needles district of Canyonlands National Park, this overlook provides a sweeping view of the area’s unique rock formations, which glow vibrantly at sunset.
Great Places to Swim
Ken’s Lake: Just a short drive from Moab, Ken’s Lake is a popular spot for swimming, fishing, and kayaking. The cool waters offer a refreshing break from the desert heat.
Mill Creek: This local swimming hole is a hidden gem. The trail to the creek winds through a canyon, leading to a series of pools and waterfalls that are perfect for a relaxing swim.
Colorado River: While the river is better known for rafting, there are also calmer sections where you can take a dip. Head to Moab’s Lions Park area for a riverside picnic and a swim in the cool waters.
Cultural Highlights
Moab Museum: Dive into the rich history of the area at the Moab Museum. Exhibits cover everything from the region’s Native American heritage to its uranium mining past and role in the development of outdoor recreation.
Moab Art Walk: Held on select Saturdays throughout the year, the Moab Art Walk is a great way to explore the local art scene. Galleries and shops open their doors to showcase works from local artists, including paintings, sculptures, and photography.
Hole N" the Rock: This quirky attraction is a 5,000-square-foot home carved into a rock, complete with a gift shop and a collection of antique items. It’s a fun stop that adds a bit of offbeat charm to your Moab adventure.
Morning glow upon the structures of Arches National Park. Photo by Dalton Johnson
Moab, Utah, is a destination that truly embodies the spirit of adventure. With its vast, otherworldly landscapes and a wealth of outdoor activities, it’s a playground for those who crave excitement and the great outdoors. Whether you're scaling towering red cliffs, navigating the winding Colorado River, or simply taking in the breathtaking views, Moab offers endless opportunities for exploration and thrill. Beyond the adrenaline-pumping adventures, the area’s unique dining spots, cultural experiences, and stunning natural landmarks add depth to your journey, making every moment in Moab unforgettable. Pack your gear, embrace the wild beauty of the desert, and immerse yourself in the adventures that make Moab one of the most iconic outdoor destinations in the world.
Discover More Destinations

12 Pro Tips for Beginner Grand Adventurers
Embarking on a grand adventure is a thrilling step into the unknown, whether it’s trekking through remote wilderness, exploring a new country, or setting out on a multi-day road trip. These experiences push you out of your comfort zone, offering a blend of challenge, discovery, and growth. For beginners, the idea of a grand adventure might feel overwhelming, but with the right mindset and some expert advice, you’ll be well-prepared to take on the journey of a lifetime. Here are 12 pro tips to help you start your grand adventure with confidence and excitement.
Embarking on a grand adventure is a thrilling step into the unknown, whether it’s trekking through remote wilderness, exploring a new country, or setting out on a multi-day road trip. These experiences push you out of your comfort zone, offering a blend of challenge, discovery, and growth. For beginners, the idea of a grand adventure might feel overwhelming, but with the right mindset and some expert advice, you’ll be well-prepared to take on the journey of a lifetime. Here are 12 pro tips to help you start your grand adventure with confidence and excitement.
Commuting between camp 2 and camp 3 on Denali in Alaska. Photo by Dalton Johnson
Background:
The concept of a "grand adventure" has long captured the human imagination, from the epic tales of ancient explorers to modern-day thrill-seekers setting out to conquer new heights. These adventures are about more than just the destination—they’re about the experiences, the people you meet, and the memories you create along the way. While planning a grand adventure can seem daunting, especially for beginners, breaking it down into manageable steps can make it an achievable and deeply rewarding pursuit.
12 Pro Tips for Beginner Grand Adventurers:
1. Define Your Adventure
The first step in any grand adventure is to define what "adventure" means to you. Are you seeking the thrill of summiting a mountain, the cultural immersion of exploring a foreign city, or the solitude of a long-distance hike? Understanding your motivations and goals will help you choose the right adventure and set realistic expectations. Take time to reflect on what excites you and what you hope to gain from the experience.
2. Start with What You Know
While it’s tempting to dive headfirst into something entirely new, it’s wise to start with what you know and gradually expand your comfort zone. If you enjoy hiking, begin with a well-known trail before tackling a multi-day trek. If travel is your passion, consider exploring a nearby country before venturing to more remote destinations. Building on familiar activities allows you to develop skills and confidence that will serve you well on more challenging adventures.
3. Plan, But Don’t Over-Plan
One of the joys of a grand adventure is the spontaneity it allows. While planning is essential—especially for logistics like transportation, accommodations, and safety—it’s important not to over-plan every detail. Leave room for flexibility and unexpected detours, as these often lead to the most memorable experiences. Embrace the uncertainty, knowing that not everything will go according to plan, and that’s okay.
4. Prioritize Safety
Safety is paramount on any grand adventure. Before you set out, research the potential risks associated with your chosen activity or destination. Whether it’s understanding local customs, preparing for extreme weather, or knowing how to navigate unfamiliar terrain, being well-informed will help you mitigate risks. Always have a backup plan and let someone know your itinerary. Carry essential items like a first-aid kit, emergency contact information, and, if applicable, a map or GPS device.
5. Learn Basic Survival Skills
Even if your adventure doesn’t involve extreme conditions, it’s wise to learn basic survival skills. Knowing how to start a fire, purify water, build a shelter, or navigate using a map and compass can be invaluable in unexpected situations. These skills not only enhance your safety but also deepen your connection with the environment, giving you the confidence to tackle more remote and challenging adventures in the future.
6. Embrace the Physical Challenge
Grand adventures often come with physical demands, whether it’s hiking for hours, carrying a heavy backpack, or enduring long travel days. Preparing your body through regular exercise and conditioning can make a significant difference in your experience. Focus on building stamina, strength, and flexibility, and be mindful of your limits. Remember, it’s okay to take breaks, slow down, and listen to your body—it’s all part of the journey.
7. Pack Light, But Smart
When embarking on a grand adventure, packing light is key, but it’s also important to pack smart. Focus on versatility and functionality—choose clothing that can be layered and serve multiple purposes, and pack only the essentials for your specific adventure. Consider the climate, terrain, and duration of your trip, and resist the urge to bring unnecessary items that will only weigh you down. Remember, you can often pick up supplies along the way if needed.
8. Cultivate a Resilient Mindset
The mental challenges of a grand adventure can be just as demanding as the physical ones. Cultivating a resilient mindset is crucial for overcoming obstacles, dealing with uncertainty, and staying positive even when things don’t go as planned. Practice mindfulness, stay focused on your goals, and remind yourself why you set out on this adventure in the first place. Embrace discomfort as part of the growth process, and remember that every challenge is an opportunity to learn and improve.
9. Connect with Locals
One of the most enriching aspects of a grand adventure is the opportunity to connect with locals. Engaging with the people who live in the areas you’re exploring can provide valuable insights, enhance your cultural understanding, and lead to unique experiences you wouldn’t find in a guidebook. Be open, respectful, and curious—ask questions, share stories, and be willing to step outside your comfort zone to build meaningful connections.
10. Document Your Journey
Documenting your adventure through photos, journaling, or blogging can be a wonderful way to capture memories and reflect on your experiences. It also allows you to share your story with others, inspiring them to embark on their own adventures. However, be mindful not to let documentation take away from being present in the moment. Strike a balance between capturing memories and fully immersing yourself in the experience.
11. Stay Present and Savor the Moments
In the midst of a grand adventure, it’s easy to get caught up in the logistics, the challenges, and the desire to reach the next milestone. However, it’s important to stay present and savor the small moments—the sunrise over a mountain peak, the quiet of a remote forest, or the taste of a simple meal after a long day. These moments are the essence of adventure, and they’re what you’ll remember long after the journey is over.
12. Reflect and Celebrate Your Accomplishments
After completing your grand adventure, take time to reflect on what you’ve achieved. Whether it was conquering a fear, overcoming a physical challenge, or simply stepping outside your comfort zone, every accomplishment is worth celebrating. Reflecting on your experience can also provide valuable insights for future adventures, helping you grow as a traveler and as a person. Celebrate your journey, share your story, and start planning your next adventure.
Taking a break and soaking in the sights while bikepacking around the South Island of New Zealand. Photo by Dalton Johnson
Embarking on a grand adventure is more than just ticking off a bucket list item—it’s about embracing the unknown, challenging yourself, and growing in ways you never imagined. By following these 12 pro tips, you’ll be well-equipped to start your journey with confidence and enthusiasm. Remember, every grand adventure begins with a single step, and each step takes you closer to discovering new possibilities, both within the world and within yourself. So gear up, step out, and let the adventure begin.
Discover more Adventures

12 Pro Tips for Beginner Campers
Camping is one of the most rewarding ways to connect with nature, offering a unique escape from the hustle and bustle of everyday life. Whether you're planning your first weekend in the woods or gearing up for a more extended adventure, camping can seem daunting at first. But with the right mindset and a few insider tips, you'll find that camping is not only doable but also deeply enjoyable. This guide will walk you through 12 pro tips that will set you up for a successful and memorable camping experience.
Camping is one of the most rewarding ways to connect with nature, offering a unique escape from the hustle and bustle of everyday life. Whether you're planning your first weekend in the woods or gearing up for a more extended adventure, camping can seem daunting at first. But with the right mindset and a few insider tips, you'll find that camping is not only doable but also deeply enjoyable. This guide will walk you through 12 pro tips that will set you up for a successful and memorable camping experience.
Camping in Desolation Wilderness just outside of Lake Tahoe, CA. Photo by Dalton Johnson
Background:
Camping has been a favored pastime for centuries, tracing back to the early explorers and pioneers who relied on outdoor survival skills to traverse new territories. Over time, what began as a necessity evolved into a recreational activity enjoyed by millions worldwide. Today, camping is more accessible than ever, offering everyone from seasoned adventurers to first-time campers the opportunity to experience the great outdoors. However, while camping might seem simple on the surface—just a tent and a sleeping bag—there’s a lot more to it than meets the eye, especially if you’re new to the experience.
12 Pro Tips for Beginner Campers:
1. Start Small and Close to Home
For your first camping trip, it’s best to choose a location that’s close to home. Starting with a nearby campground or a state park will allow you to familiarize yourself with the process without the added stress of being too far from home. If anything goes awry, you're just a short drive away from familiar territory, and you can easily return home if necessary. This approach lets you practice setting up camp, managing your time, and getting used to the outdoor environment with minimal pressure.
2. Choose the Right Campsite
Not all campsites are created equal, and choosing the right one can make a huge difference in your experience. Look for a site with amenities like restrooms, running water, and flat terrain for setting up your tent. Research the area beforehand to ensure it matches your comfort level. Some campsites cater to families and beginners, offering easy access to trails, picnic areas, and ranger stations, making them ideal for your first camping adventure.
3. Plan Your Meals in Advance
Meal planning is a crucial aspect of camping that often gets overlooked. Plan simple meals that are easy to prepare and require minimal cleanup. One-pot meals, pre-made sandwiches, and snacks like trail mix are great options. Prepping and packing your food at home will save you time and reduce the chances of forgetting essential ingredients. Remember, camp cooking should be enjoyable, not stressful, so keep it simple and fun.
4. Practice Setting Up Your Tent
Before you head out, practice setting up your tent at home. This will save you time and frustration when you arrive at the campsite, especially if you’re racing against the clock to set up before dark. Understanding your tent's components and how they fit together will give you confidence and ensure you’re not caught off guard by any missing parts or tricky assembly instructions.
5. Arrive Early to Set Up Camp
One of the most common mistakes beginners make is arriving at their campsite too late in the day. Aim to arrive early so you have plenty of daylight to set up your tent, organize your gear, and get acquainted with your surroundings. Setting up camp in the dark can be challenging and may lead to a less comfortable night’s sleep if you’re unable to properly prepare your space.
6. Keep Your Camp Organized
An organized campsite is a safe and stress-free campsite. Designate specific areas for cooking, sleeping, and storing your gear. Keeping your site tidy will not only make it easier to find things but will also help you avoid attracting wildlife. Use storage bins or bags to keep items like food, clothing, and camping tools in order. This way, you'll spend less time searching for things and more time enjoying your surroundings.
7. Respect Wildlife and Follow Leave No Trace Principles
Part of the beauty of camping is being immersed in nature, and it’s important to respect the wildlife that calls the area home. Never feed animals, keep a safe distance, and store food securely to avoid attracting curious critters. Additionally, adhere to the Leave No Trace principles, which include packing out all trash, minimizing campfire impact, and leaving nature as you found it. This ensures that the environment remains pristine for future campers.
8. Dress in Layers
Weather in the outdoors can be unpredictable, so dressing in layers is key to staying comfortable. Even in summer, temperatures can drop significantly at night, so be prepared with a base layer, mid-layer, and outer layer. This system allows you to add or remove clothing as the temperature changes, keeping you warm or cool as needed. Choose moisture-wicking fabrics that dry quickly to keep sweat from making you cold.
9. Stay Hydrated
It’s easy to get dehydrated while camping, especially if you’re active during the day. Always bring plenty of water and make sure you’re drinking regularly. If you’re camping in an area without access to potable water, bring a water filter or purification tablets. Remember, staying hydrated is crucial not just for comfort but also for safety, particularly if you’re hiking or exerting yourself physically.
10. Embrace the Campfire
For many, the campfire is the heart of the camping experience. It’s where stories are told, meals are cooked, and warmth is shared. However, building and maintaining a safe campfire requires some knowledge. Use only established fire rings, never leave your fire unattended, and fully extinguish it before going to bed or leaving the site. Embracing the campfire can enhance your camping experience, making it cozy and memorable.
11. Be Prepared for Emergencies
While camping is generally safe, it’s important to be prepared for emergencies. Carry a basic first-aid kit, know the location of the nearest medical facility, and inform someone of your plans before you leave. Familiarize yourself with the area’s potential hazards, such as wildlife, weather changes, or rough terrain. Being prepared helps ensure that you can handle unexpected situations calmly and effectively.
12. Take It Slow and Enjoy the Experience
Finally, remember that camping is about slowing down and enjoying the experience. Don’t rush through your activities or stress about doing everything perfectly. Take time to appreciate your surroundings, breathe in the fresh air, and disconnect from the digital world. Camping offers a unique opportunity to recharge and connect with nature, so savor every moment, and don’t be afraid to relax and take it all in.
Watching the sunset and city lights of South Lake Tahoe turn on while sleeping on top of Mount Tallac. Photo by Dalton Johnson
Camping is a journey that starts with small steps. By following these 12 pro tips, you’ll be well on your way to becoming a confident and capable camper. Remember, every camping trip is a learning experience, and the more you camp, the more you’ll refine your skills and preferences. So pack your sense of adventure, embrace the unknown, and enjoy the simple, satisfying joys of camping.