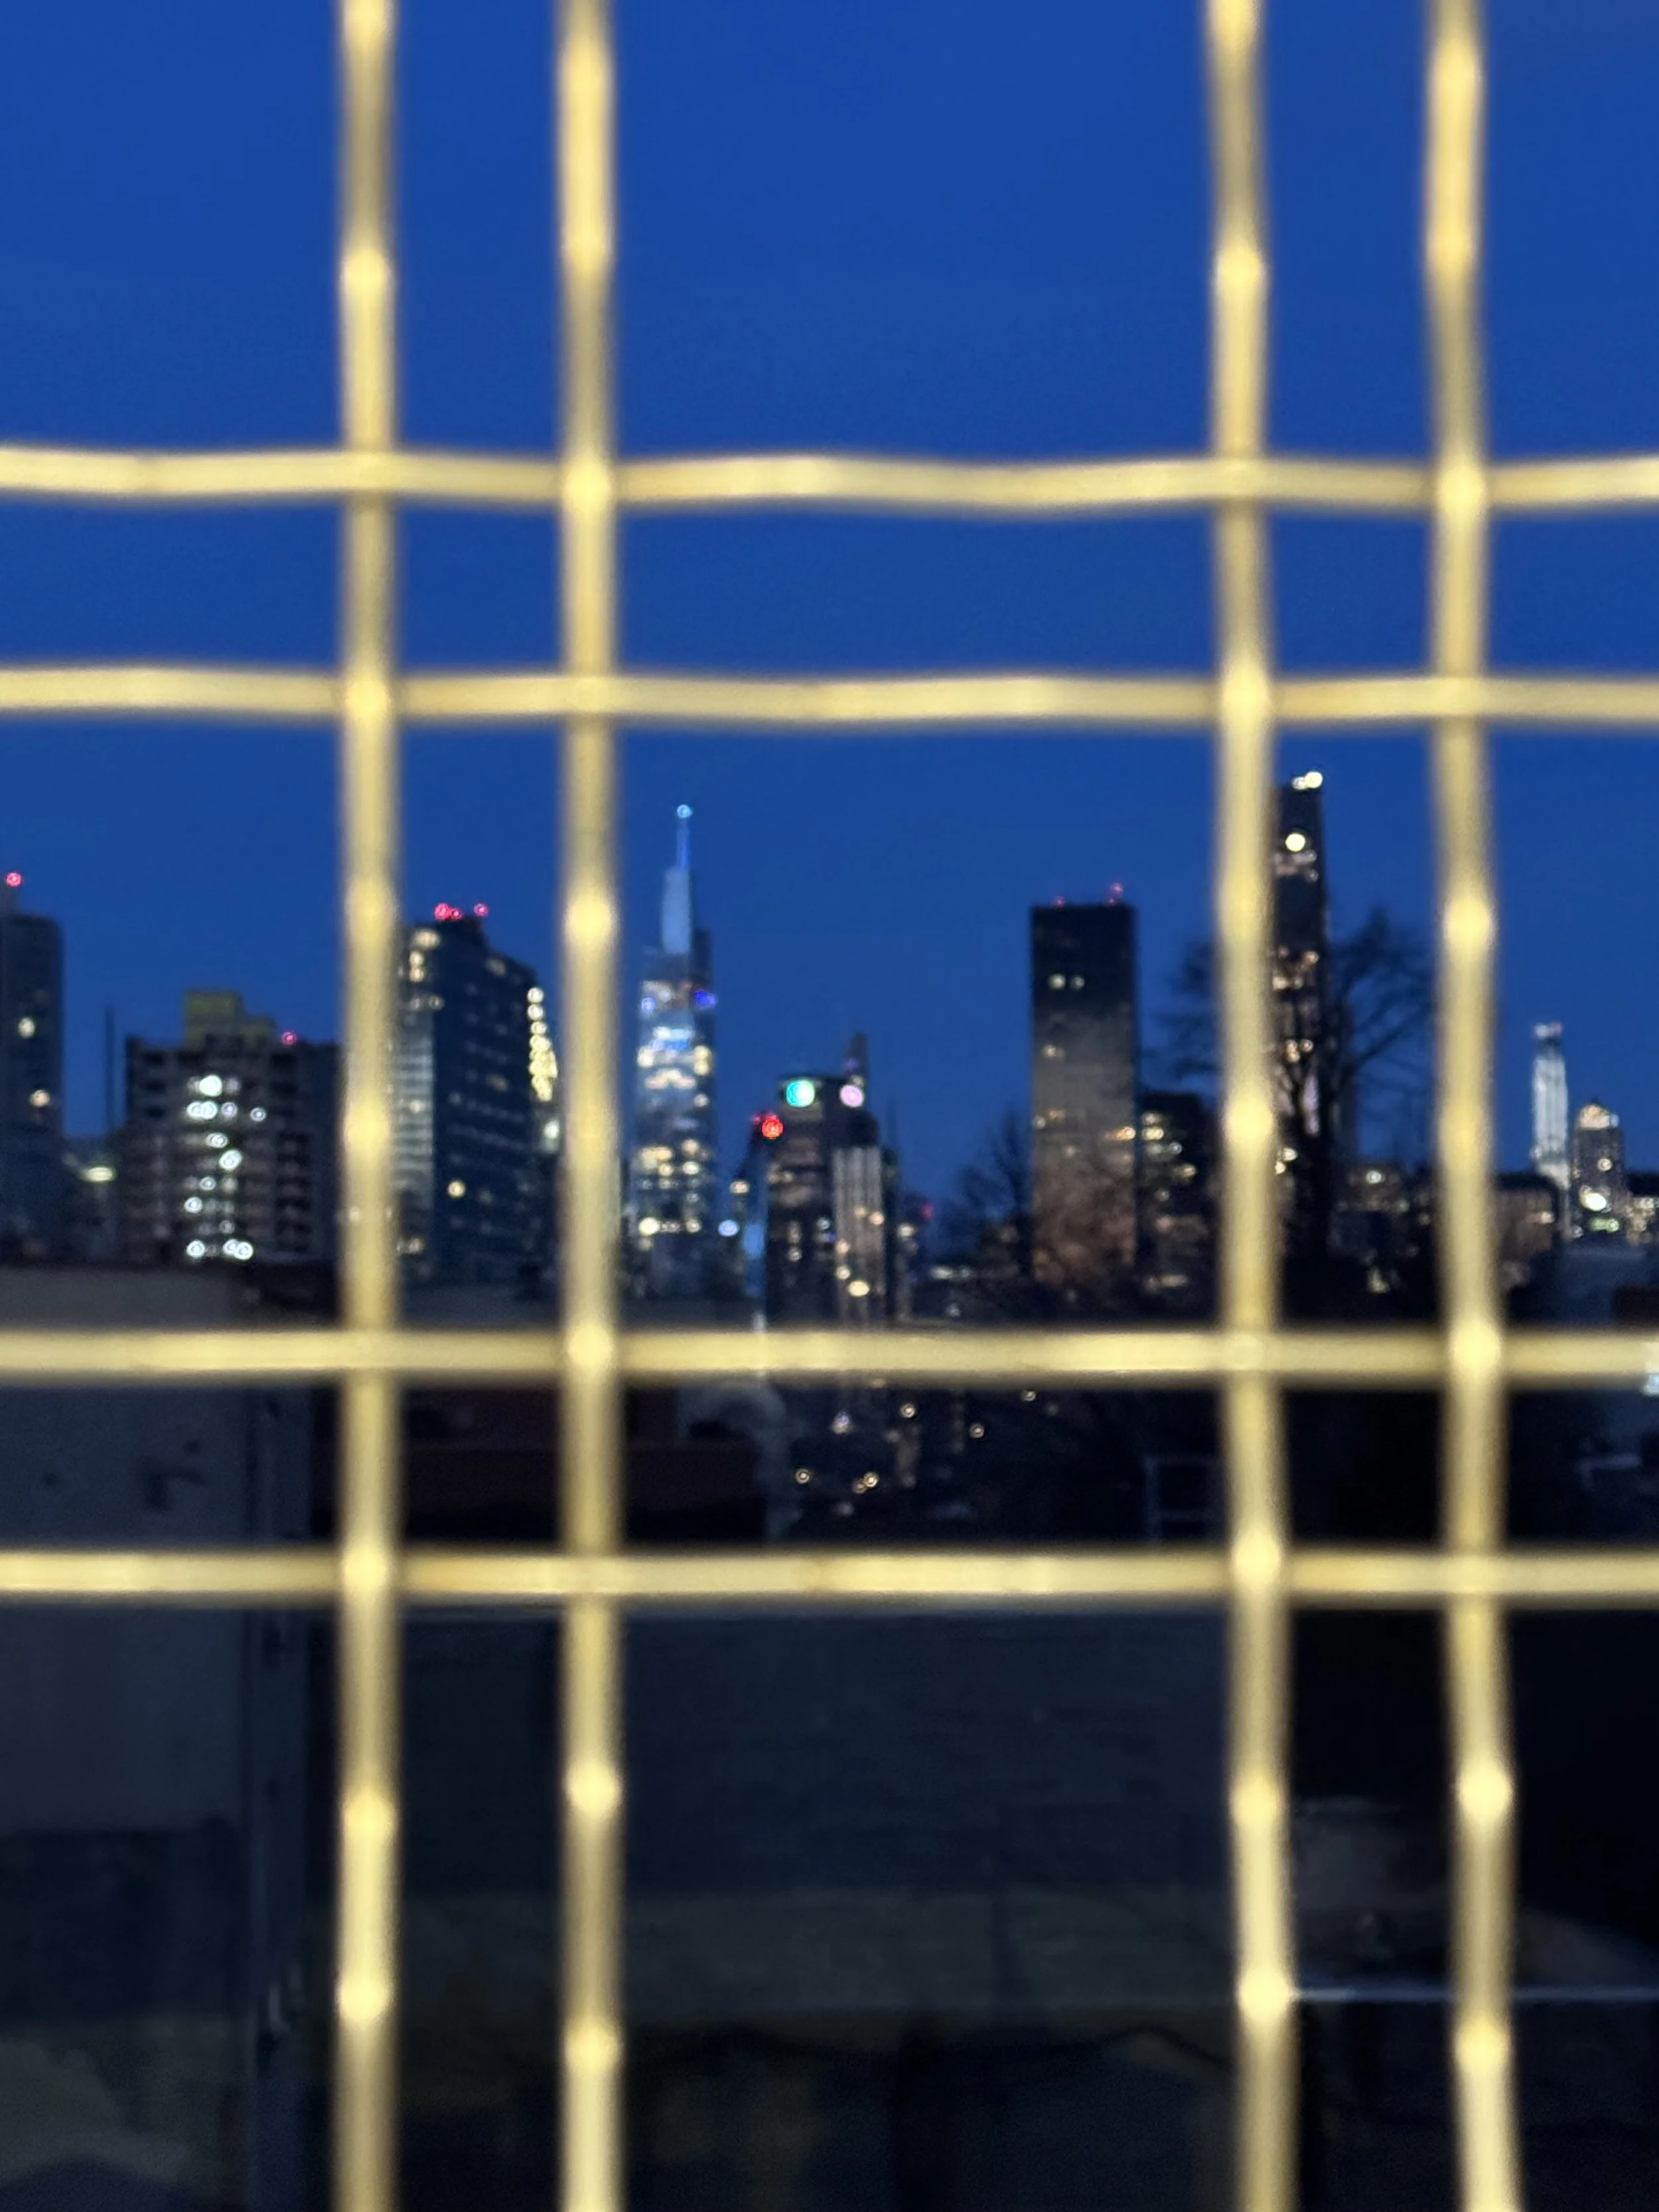
I'm regretting coming to NYC without a camera...
Right now, I am in NYC for a few marketing/networking meetings, so I left the camera in Baja. It's bulky and I figured an iphone would do. It doesn't 🤷♂️ sorry for calling you out Apple.
However, yesterday I met with 30-ish brands/tourism boards/hotels at IMM by TravMedia
I'm buzzing.
January 23, 2025
as always, the full gallery is at the bottom, so skip there if you don’t care about the words
Right now, I am in NYC for a few marketing/networking meetings, so I left the camera in Baja. It's bulky and I figured an iphone would do. It doesn't 🤷♂️ sorry for calling you out Apple.
However, yesterday I met with 30-ish brands/tourism boards/hotels at IMM by TravMedia
I'm buzzing.
The meetings were short, 15-minutes a pop, but the story ideas that now fill the pages of my notebook light me up from the inside out. Why?
Well, I have always dreamed of sitting down and sharing how I love to tell stories, but felt I never really had access. Then yesterday happened.
Each meeting, I explained how I prefer telling stories and I could see the eyes of people on the other side of the table lighting up.
My preference: start with a relatable human story that is kinda quirky then zoom out to why it matters for the general population.
During those meetings we brainstormed people and stories that are fun, energetic, and visually appealing. Think:
documenting the sea to table movement following a lobster fisherman
reclaiming the connection to the land via foraging tours
stargazing with an astronomer to tell the story of dark skies
Now, the hard part is in front of me, turning these ideas into a reality. Which means:
pitching
fund raising
pre-production work
production
editing
distributing
No doubt, it all can't be done in a single year, however I would love to try.
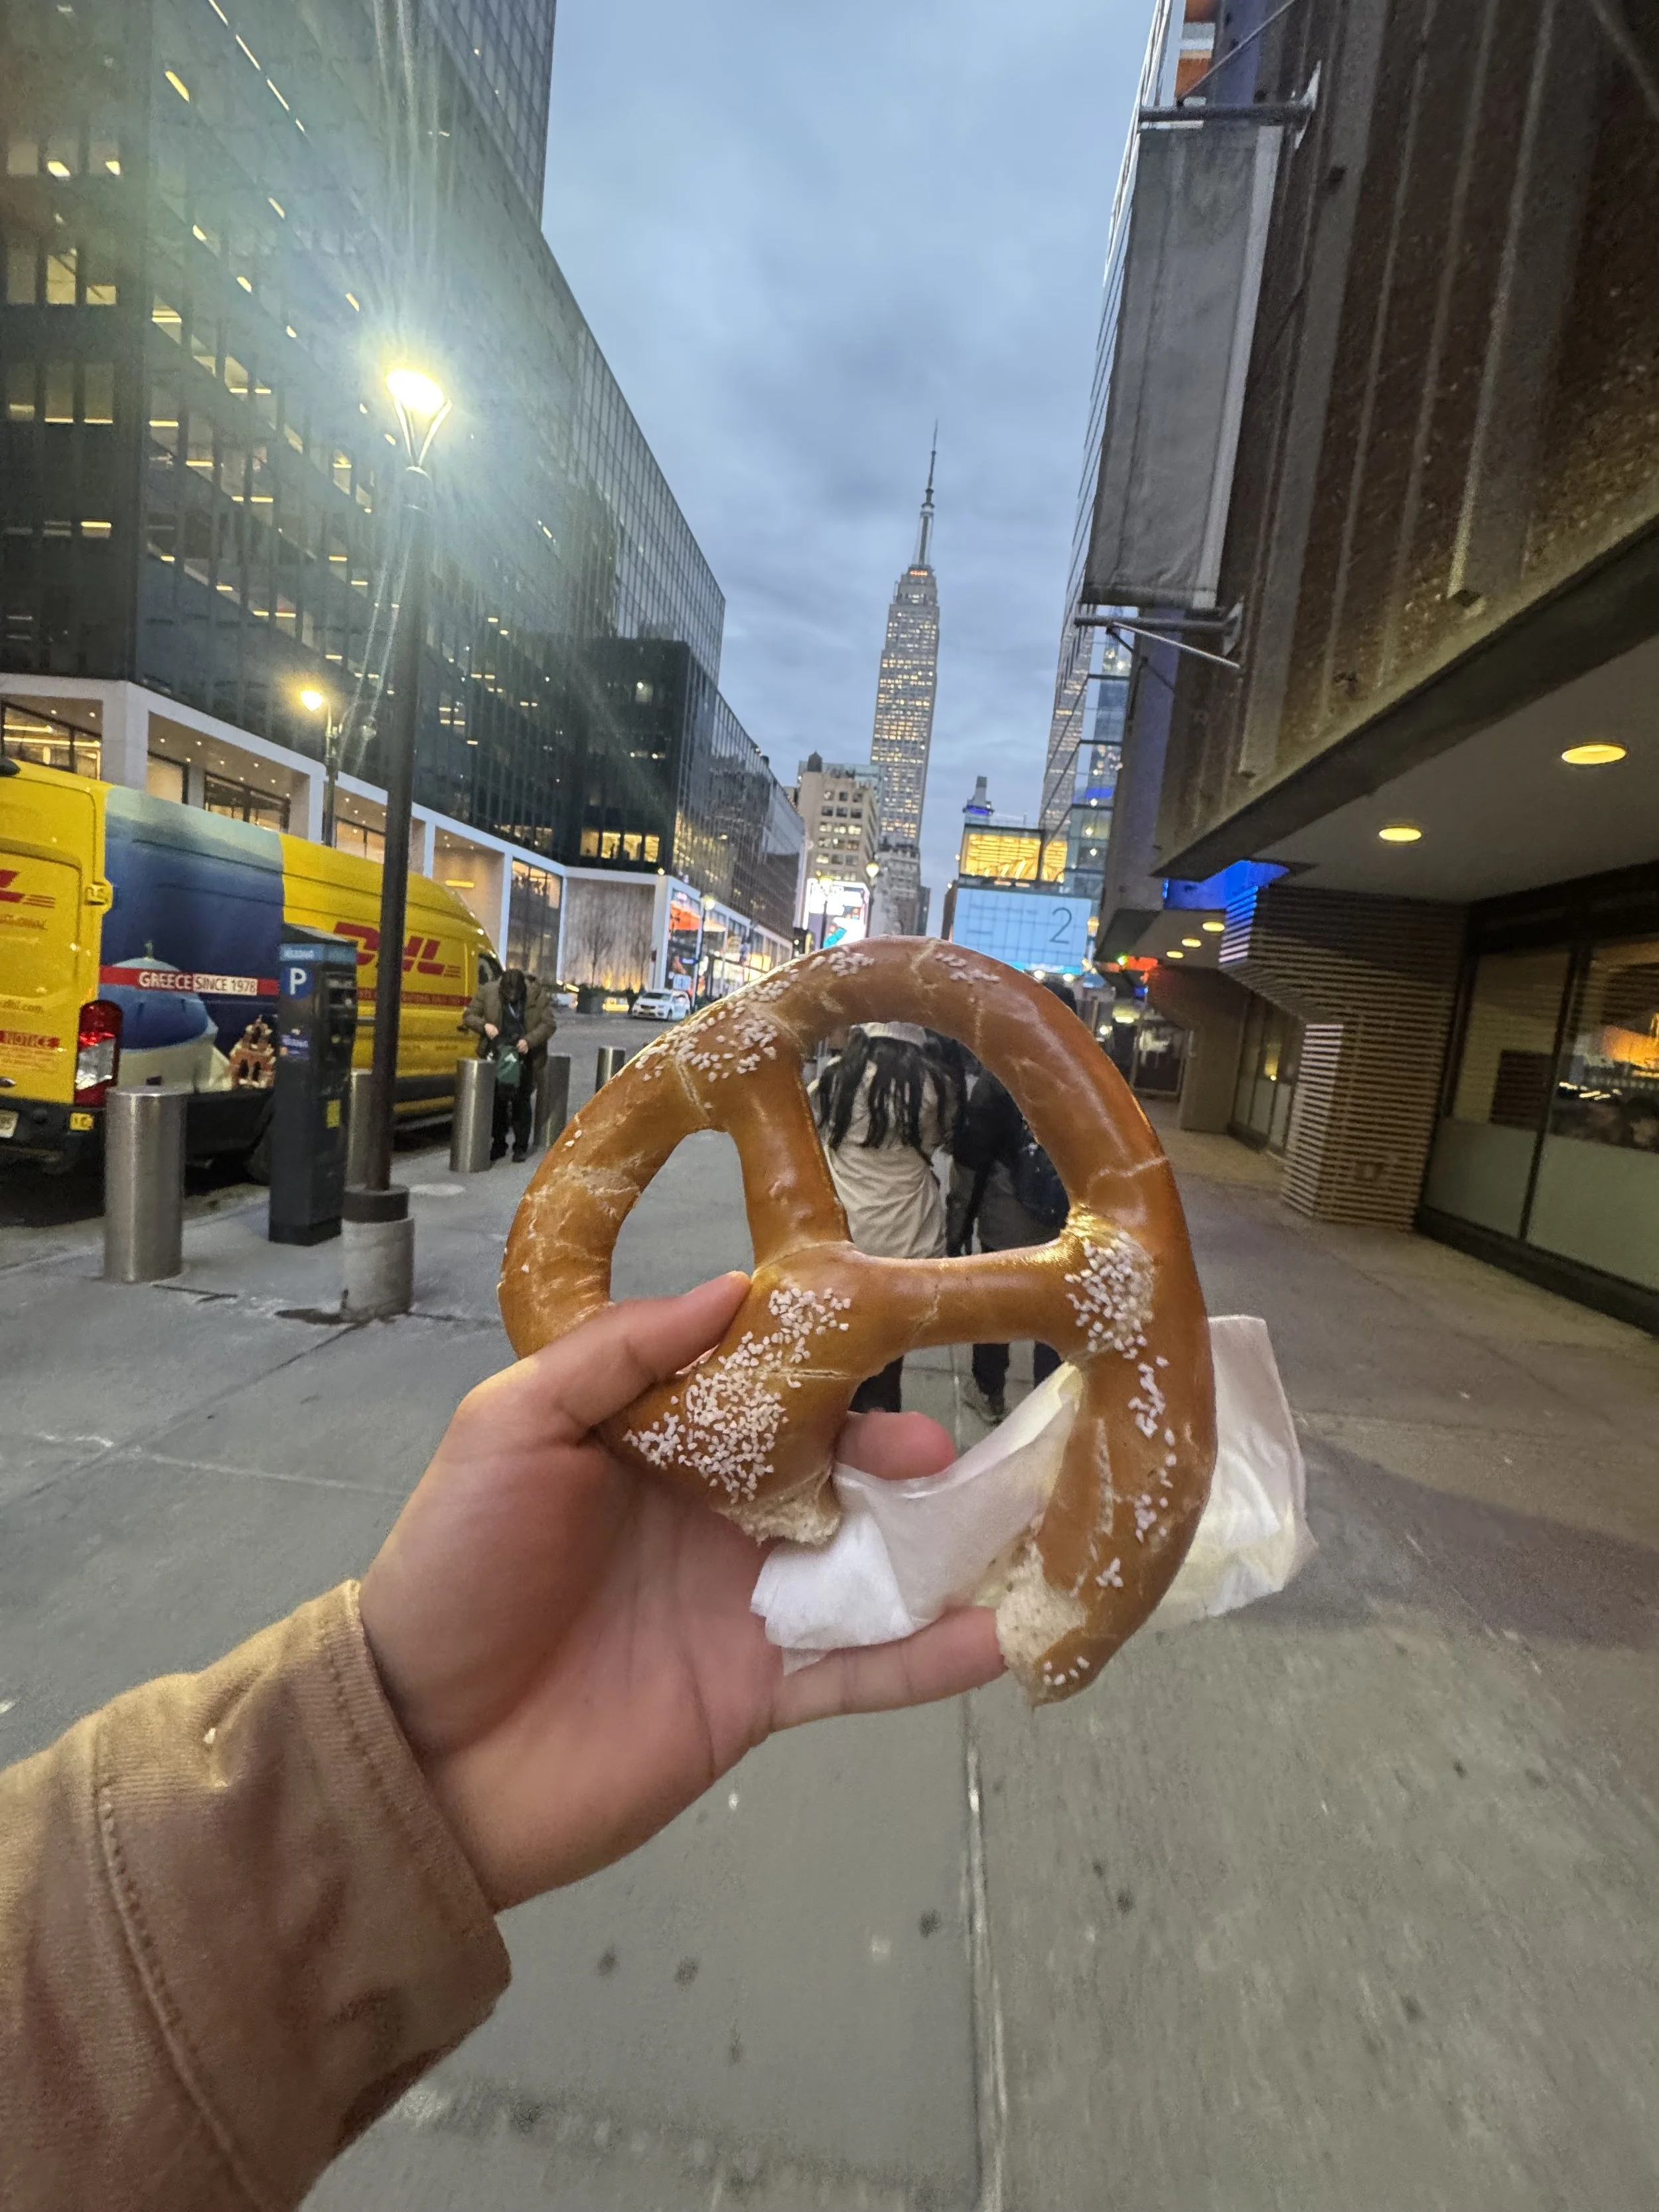
Thanks for reading and looking at some blurry iphone snaps ✌️
What I Brought On Today’s Photo Walk:
iPhone
The Day’s Gallery
About Dalton:

Dalton Johnson is a photographer, filmmaker, and writer.
Over the last 10 years, Dalton’s creative work has taken him to every continent, above the arctic circle, and below the antarctic circle.
His travels are documented in a free, weekly newsletter called UnBound, which is written for those daring to build their dream life.

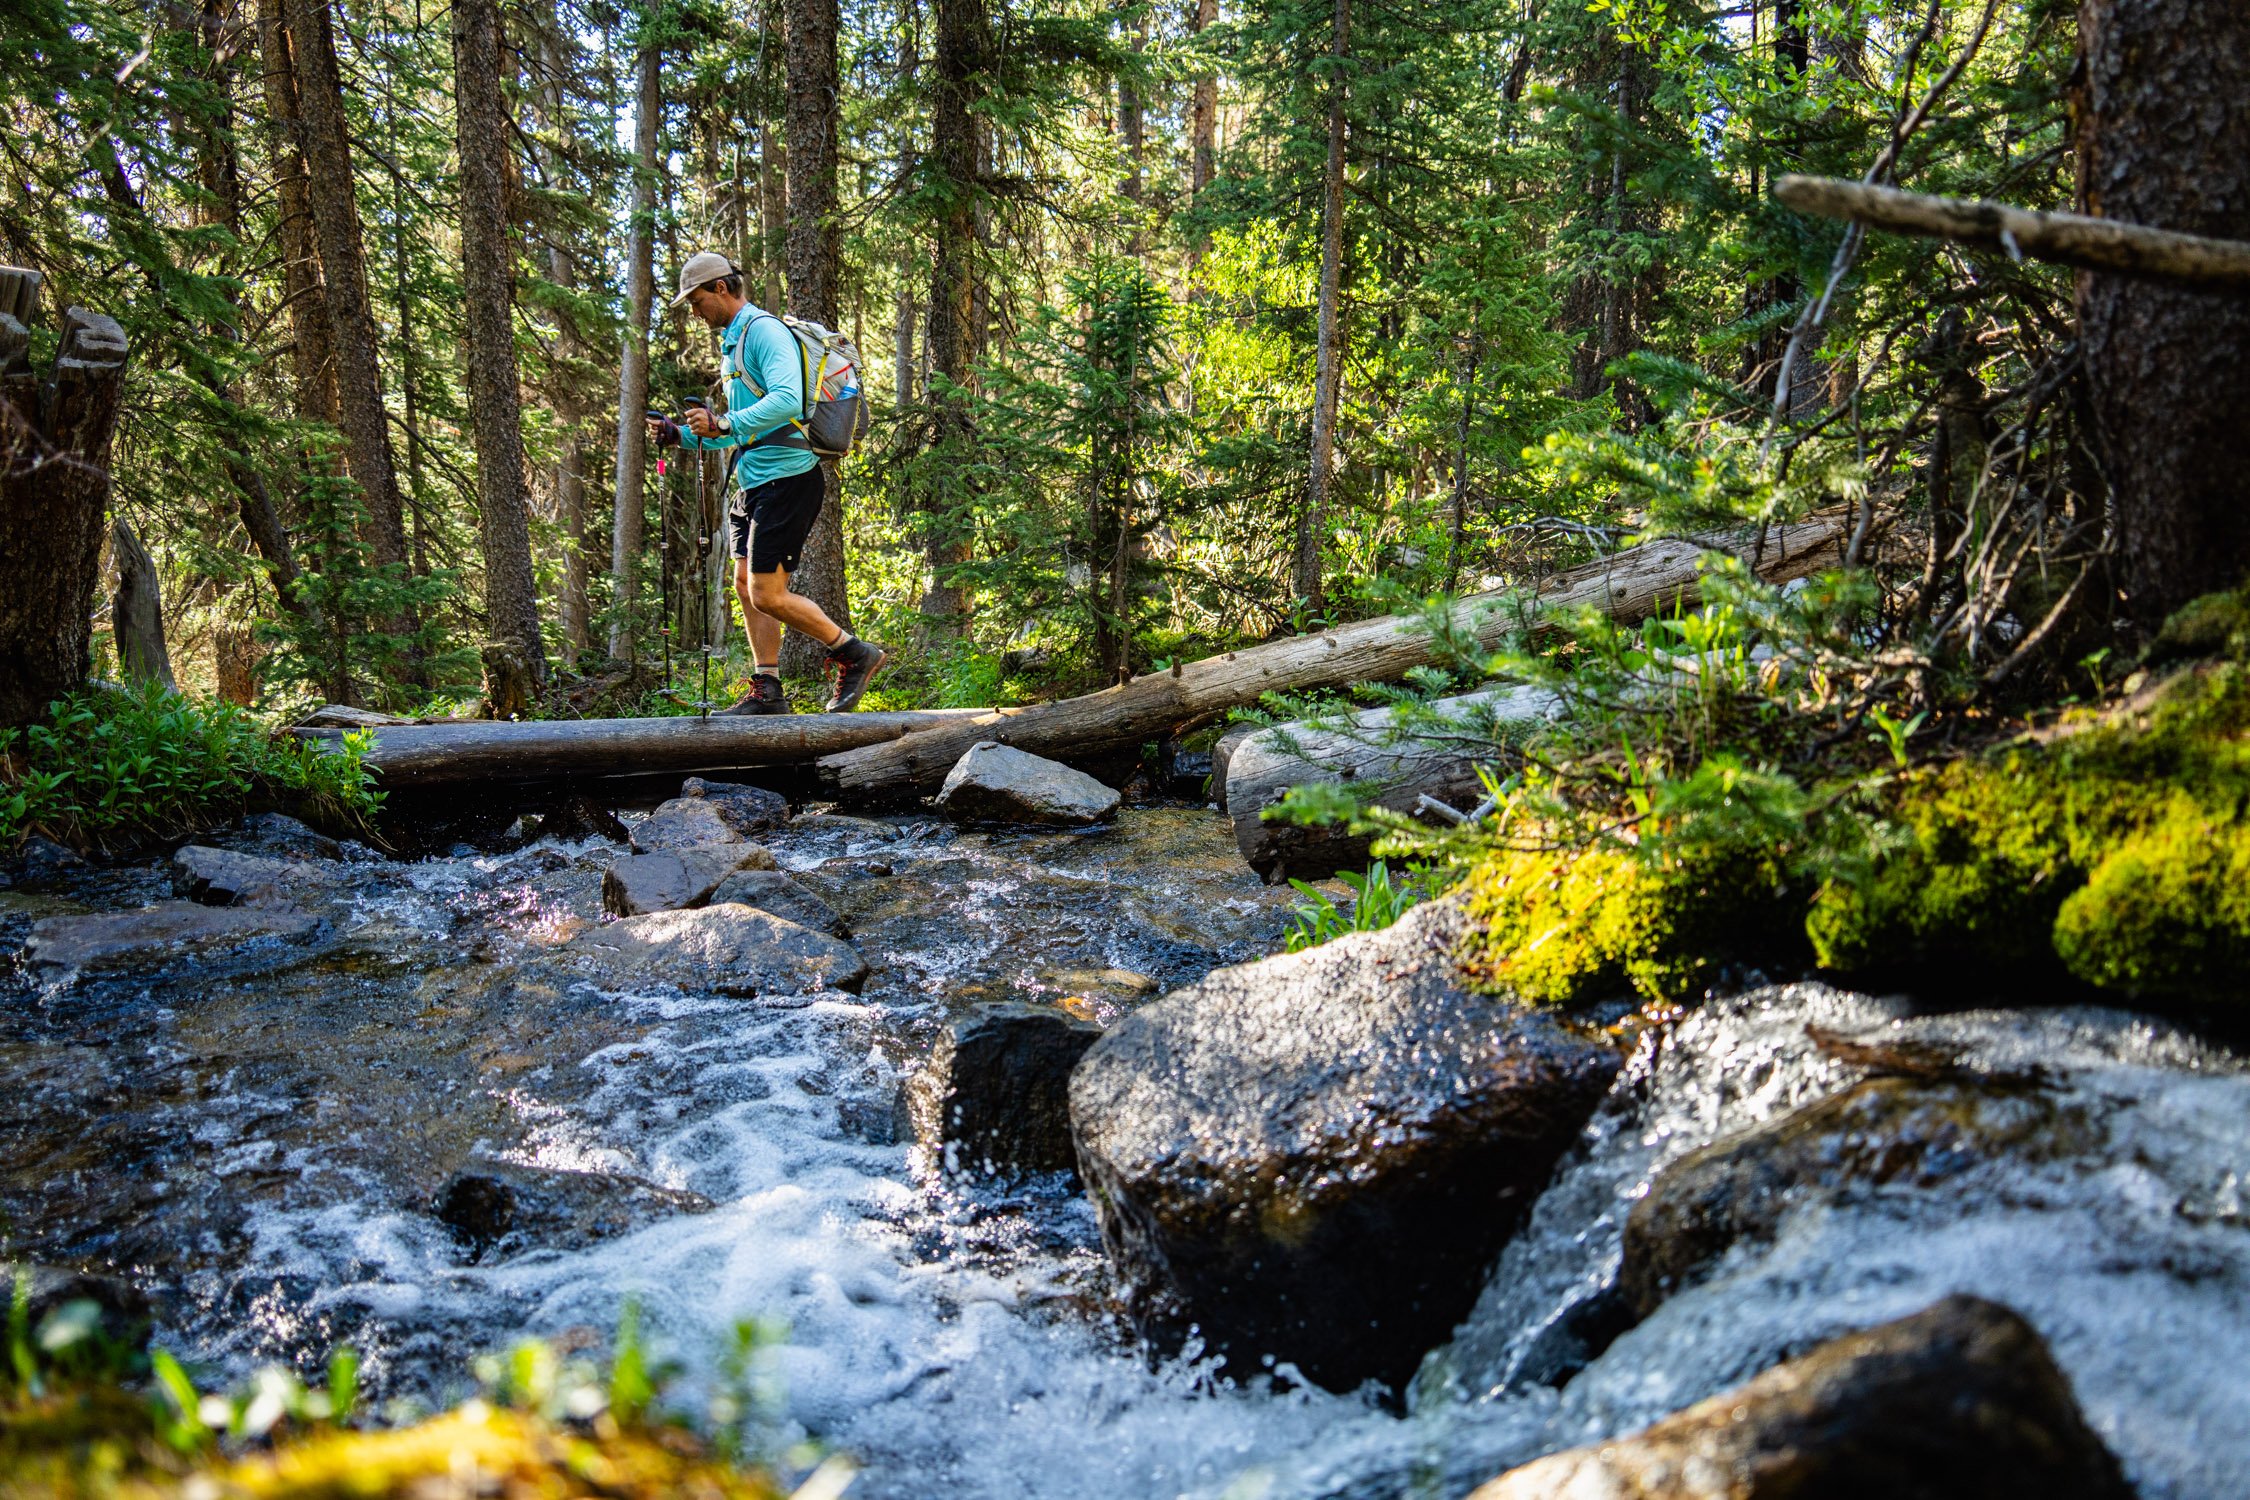
Never Skip a Meal With Friends in the Dirt
Partially rehydrated bites of pad thai crunch between my teeth. If I was Alex Honnold, I’d use the the word, “mastication” but I’m just a simple outdoors guy who enjoys hanging with friends and eating food in the dirt. I mean, what more could you ask for than pretty view, some dirt under the nails, and a good night sleep under the stars?
Partially rehydrated bites of pad thai crunch between my teeth. If I was Alex Honnold, I’d use the the word, “mastication” but I’m just a simple outdoors guy who enjoys hanging with friends and eating food in the dirt. I mean, what more could you ask for than pretty view, some dirt under the nails, and a good night sleep under the stars?
Honestly, I could think of a few things, but let’s not get ahead of ourselves as your next meal with friends should be right around the corner. If you are anything like me, you’re probably asking yourself what you’re going to cook, so here are a few camping meals that I have enjoyed over the years.

Pre-surf breakfast burritos in San Juanico, Baja. Follow Dalton Johnson on Instagram for more stunning images & stories
The Perfect Breakfast Burrito
Now, there is no “right way” to make a breakfast burrito, but there surely is a wrong way. So, let me just establish some of those faux paws:
not heating up your tortilla
only having eggs and cheese in your burrito
a poorly wrapped torilla
forgetting the salsa
forgetting the avocado
the burrito not feeling heavy in your hand
cold eggs
While it doesn’t take a foody to know the difference between a good breakfast burrito and an average breakfast burrito, if you are camping, a breakfast burrito can fuel your full day adventure. As an avid remote surfer, especially when surfing in Baja, here’s how I think you make the best breakfast burrito:
STEP 1: skillet your veggies in oil; onions, bell peppers, jalapeños (if you like it spicey)
STEP 2: mix with eggs (add salsa to eggs for more flavor/fluff) into your veggies
STEP 3: add cheese
STEP 4: heat tortilla on separate pan until soft
STEP 5: add scramble to burritos and wrap
STEP 6: cook the full burrito on all sides until crispy
That final step makes the burrito next level.
Taking a break to fill the belly while bikepacking outside of Phoenix, AZ. Follow Dalton Johnson on Instagram for more stunning images & stories
The Classic Dehydrated Meal (hopefully spiced up a little)
Boring without a doubt, but there are a few tricks to make your dehydrated, or freeze dried food, better. Obviously, every meal has it’s own additions that are worth add, but here is a general rule of thumb:
hot sauce
condiments, ideally ones that come in packet form
veggies, pre-sliced if you are a hero
Also, dehydrated food has come a long ways in terms of flavor and options, so don’t just grab the tried and true lasagna. Here are few meals to try out that I have enjoyed recently:
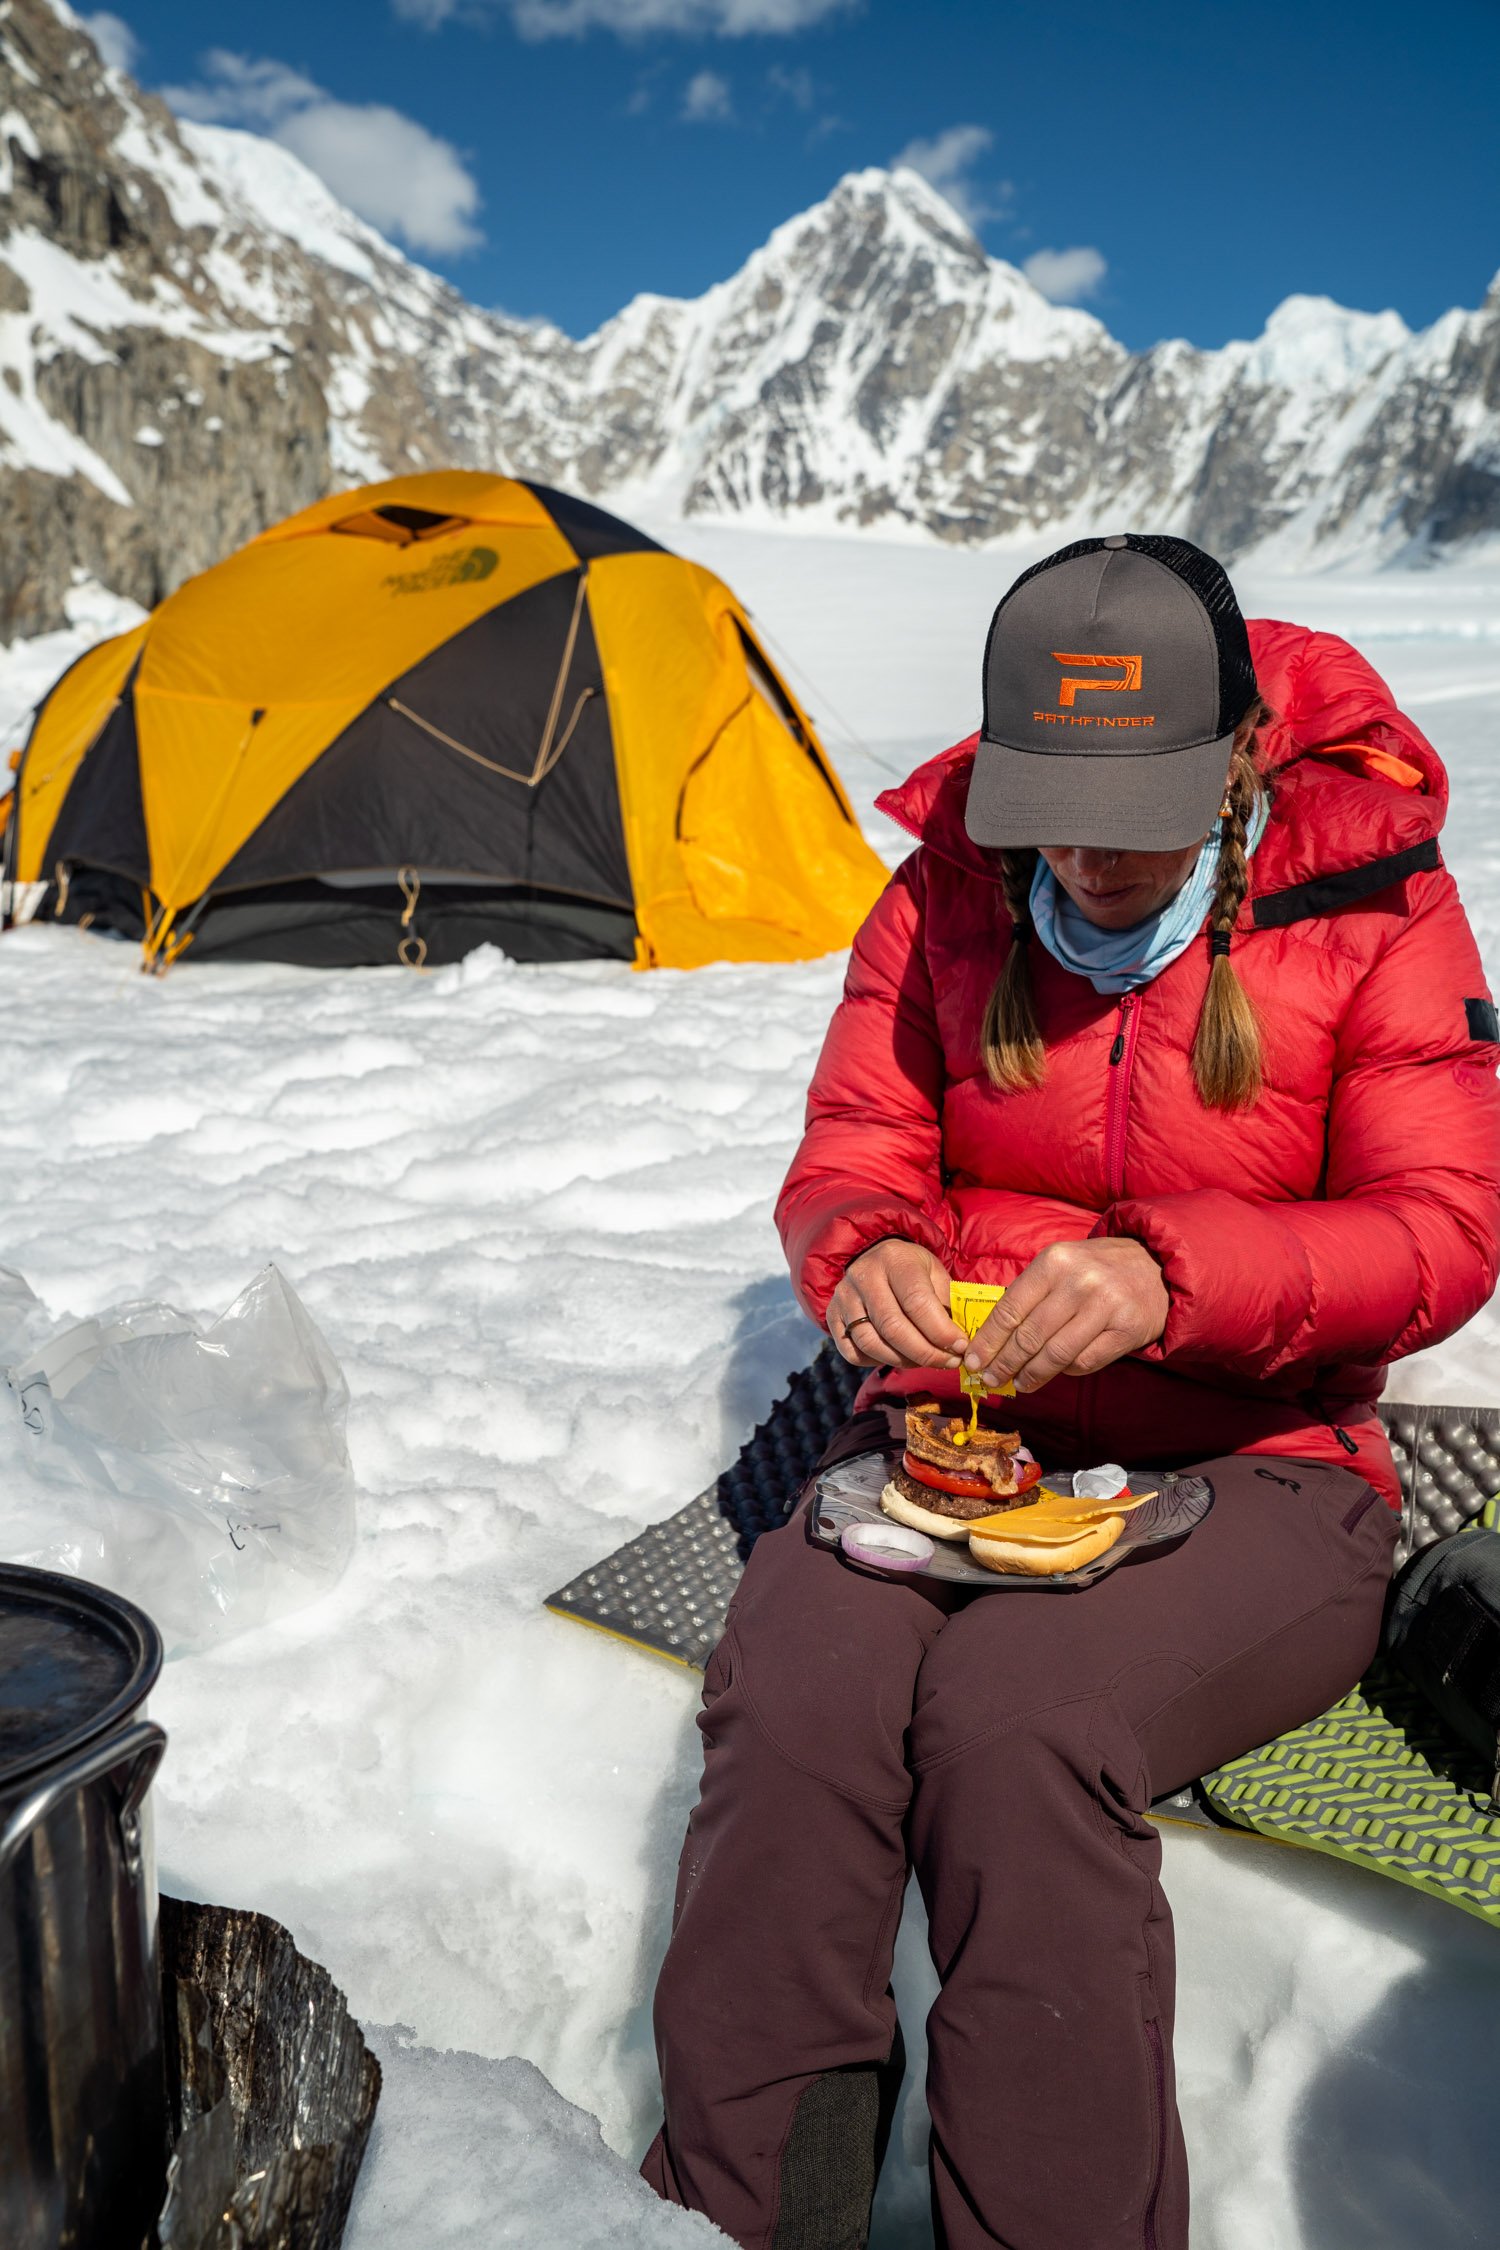
Day one burgers on the glacier are the perfect way to send off on an expedition to climb Mount Denali. Follow Dalton Johnson on Instagram for more stunning images & stories
Burgers at Basecamp (don’t forget to bring the mustard)
While burgers may seem like the impossible food to bring on most camping trips, they really aren’t. You just need to eat them early in the trip or go to a really cold place, like a glacier. While filming a documentary on Denali (you can watch it for free on PBS, click here) we had burgers on day one. If you are car camping, just use a cooler and some ice to keep your meat cold. If you are backpacking… well, I wouldn’t suggest it.
Burgers don’t have to be complicated to taste really freak’n good, but here are some tricks to make your friends wanting more:
add some fajita spice to the meat
make your patties thick and char the outside for an added flavor
bring along cheese and not that Craft singles cheese, but real cheese
invest in good buns, this goes a long ways!
make sure to have some veggies like lettuce, onions, tomatoes

Katy cooking up some pasta during a vanlife meet up. Follow Dalton Johnson on Instagram for more stunning images & stories
The Ever Classic Pasta
Lame as it sounds, pasta is a classic. Sure, most people will think of pasta as a camping food that is easy to make and keeps forever, but doing pasta right will raise any and all spirits on the trail or at the campsite. Here are my tricks to making good pasta:
cook till al dente, then add the sauce to finish cooking
make a great sauce and add extra cheese
did I say cheese, yes, add more please
salt and pepper
try this before saying no… add mushrooms chopped up small. I started to do this and it levels up the pasta

You know they are a good friend when they offer you the last slice of pizza. Follow Dalton Johnson on Instagram for more stunning images & stories
Pizza Over The Fire
True friends will give you last slice a pizza. I don’t when this started, but I cook a backcountry pizza whenever I go backpacking with a stove. When I say “have a stove” I mean with a whisperlite stove and some pots. While these stoves are notorious for being scary to cook over your first time, they offer a lot of versatility for a cook in the backcountry. Cobbler, scrambles, pizza, calzones, pasta, cake, brownies, oat meal, you name it, it can most likely be cook with a whisperlite.
Pizza is hard to make, but it doesn’t have to be. In the backcountry use a whisperlite and at a campsite use your campfire. Here’s the easy button for pizza:
Trader Joe’s pizza mix
Cheese, lots of cheese
Red sauce
Pepperoni, mushrooms, bell peppers, whatever you want
The trick to cooking a great pizza is to almost finish the crust before adding any toppings. I know this sounds strange, but your fire or stove isn’t going to be hot enough, so cook and flip your crust like a pancake, then top it.
I Failed By Day Three, So Here's a Flashback to Greece
Day three of my personal challenge to create a photo essay everyday I’m not on production came and went. Turns out, to create a photo essay in a single day, plus write a story about it takes about 2 to 3 hours and somedays I just don’t have that much time. A prime example, today.
But, who really cares? Let’s blow this popsicle stand and head to the Greek Island of Mykonos.
December 2, 2025
as always, the full gallery is at the bottom, so skip there if you don’t care about the words
Day three of my personal challenge to create a photo essay everyday I’m not on production came and went. Turns out, to create a photo essay in a single day, plus write a story about it takes about 2 to 3 hours and somedays I just don’t have that much time. A prime example, today.
While my excuse for not getting out is “valid” it doesn’t really matter why. However, my ego wants me to defend myself, so here it is: I was getting a new sliding glass door installed and the contractor needed my help, so, I was lending a hand until 6pm. Sunset is roughly 4:38 pm these days. Aka not a chance of a sunset photoshoot.
Zipping up a large puffy jacket, I headed into the dark with a headlamp to walk the dog. Under the night sky, I considered taking astro photography, but the clouds were thick overhead and the moon, when I could see it, was bright. So, my final option for a photo essay didn’t work.
Walking in the dark, I thought about what I could do and the answer was obvious, but I just didn’t want to admit it to myself. So, Chestnut ran around me in the dark, lit up by the headlamp around his neck, for about an hour. Then, I accepted the obvious: I have thousands of unedited images, why not look through those and write somthing?
With that said, let’s blow this popsicle stand and head to the Greek Island of Mykonos.
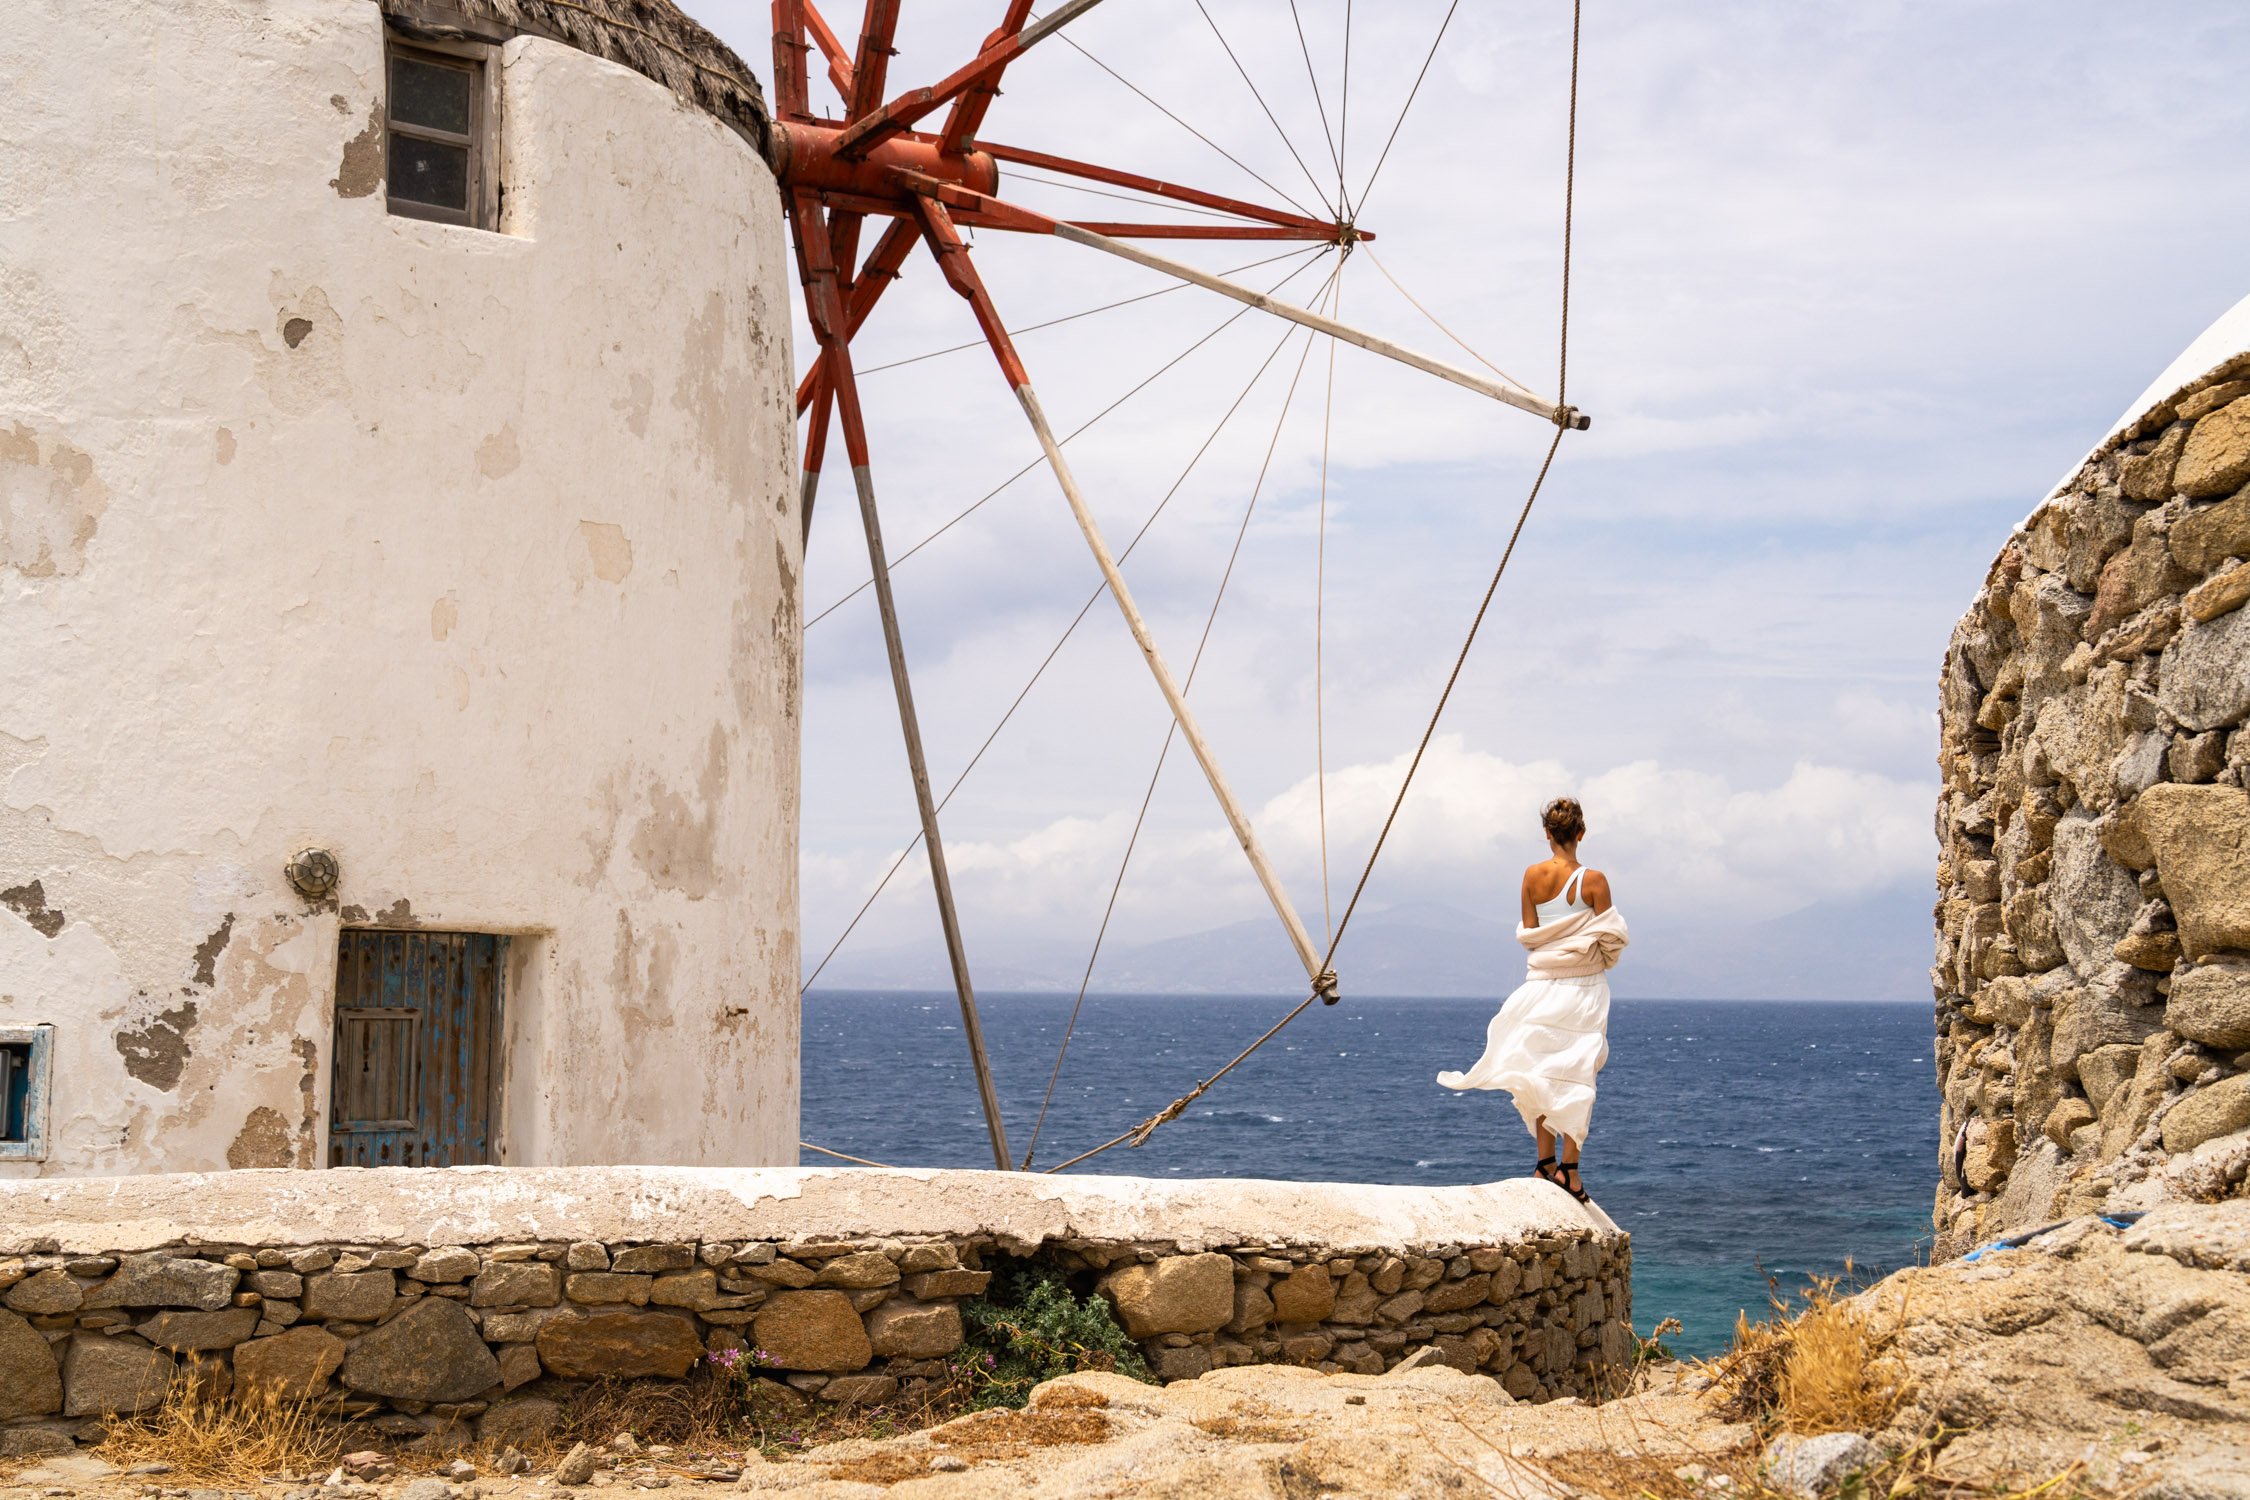
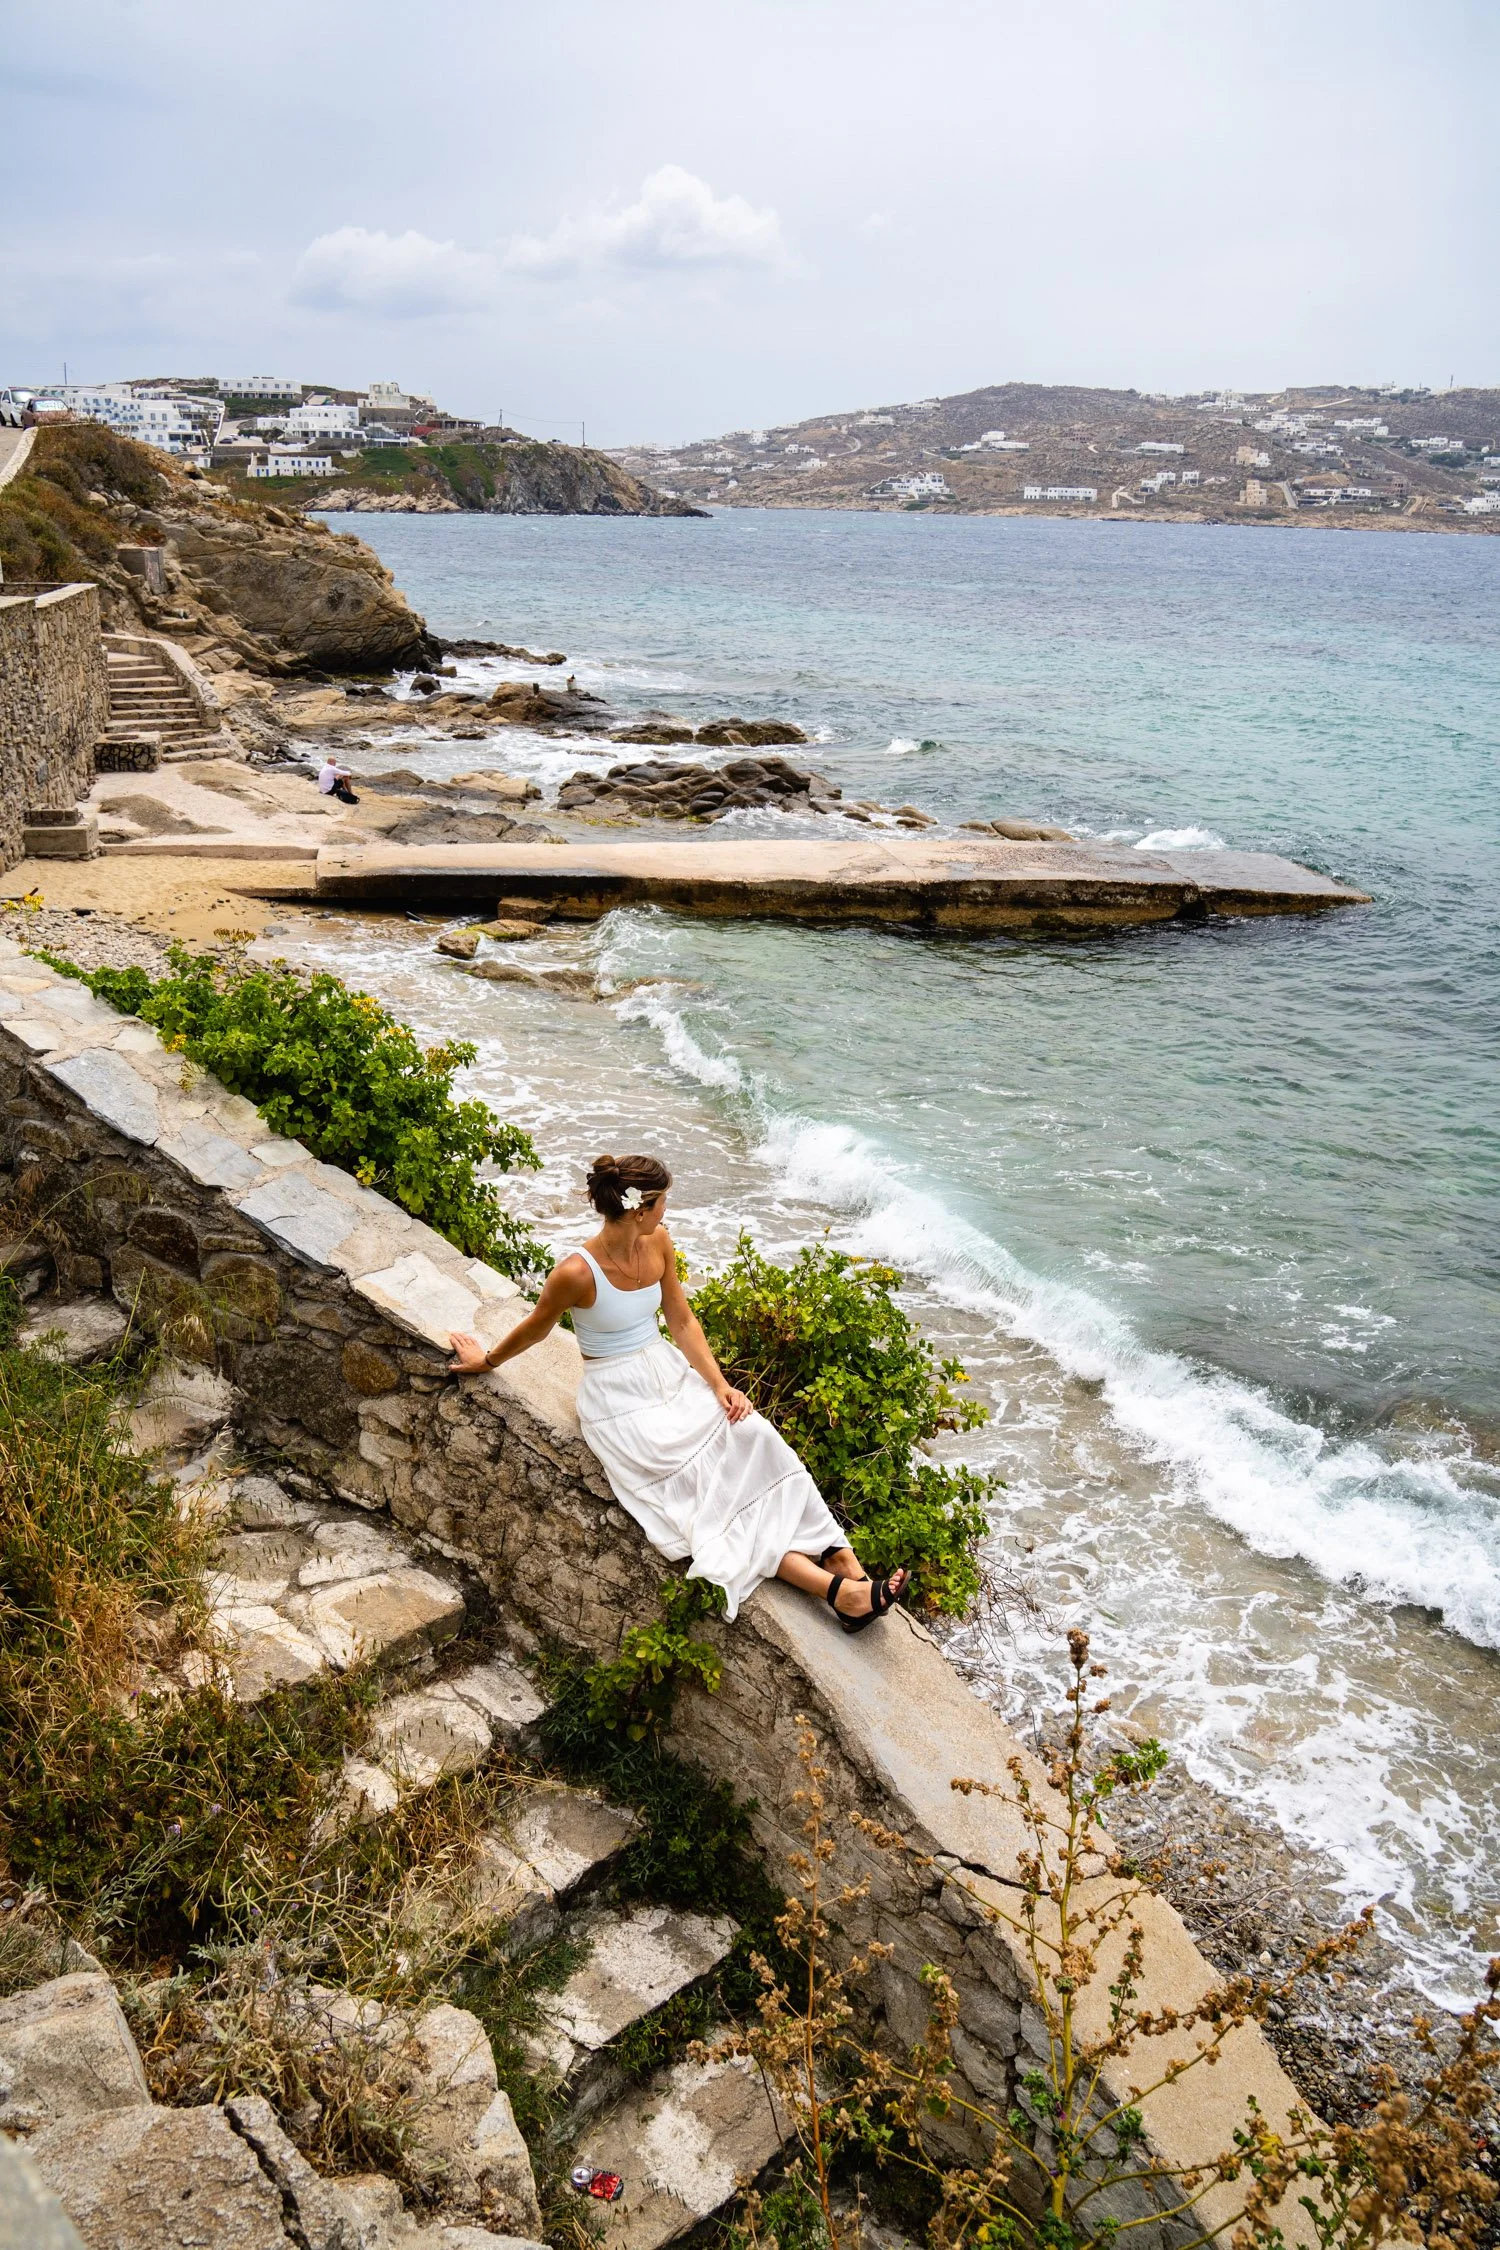
Kristin looking like an actress waiting for her long lost lover to return and sweep her off her feet (hopefully that is me 😉😅). Follow Dalton on your favorite platform: @storiesbydalton
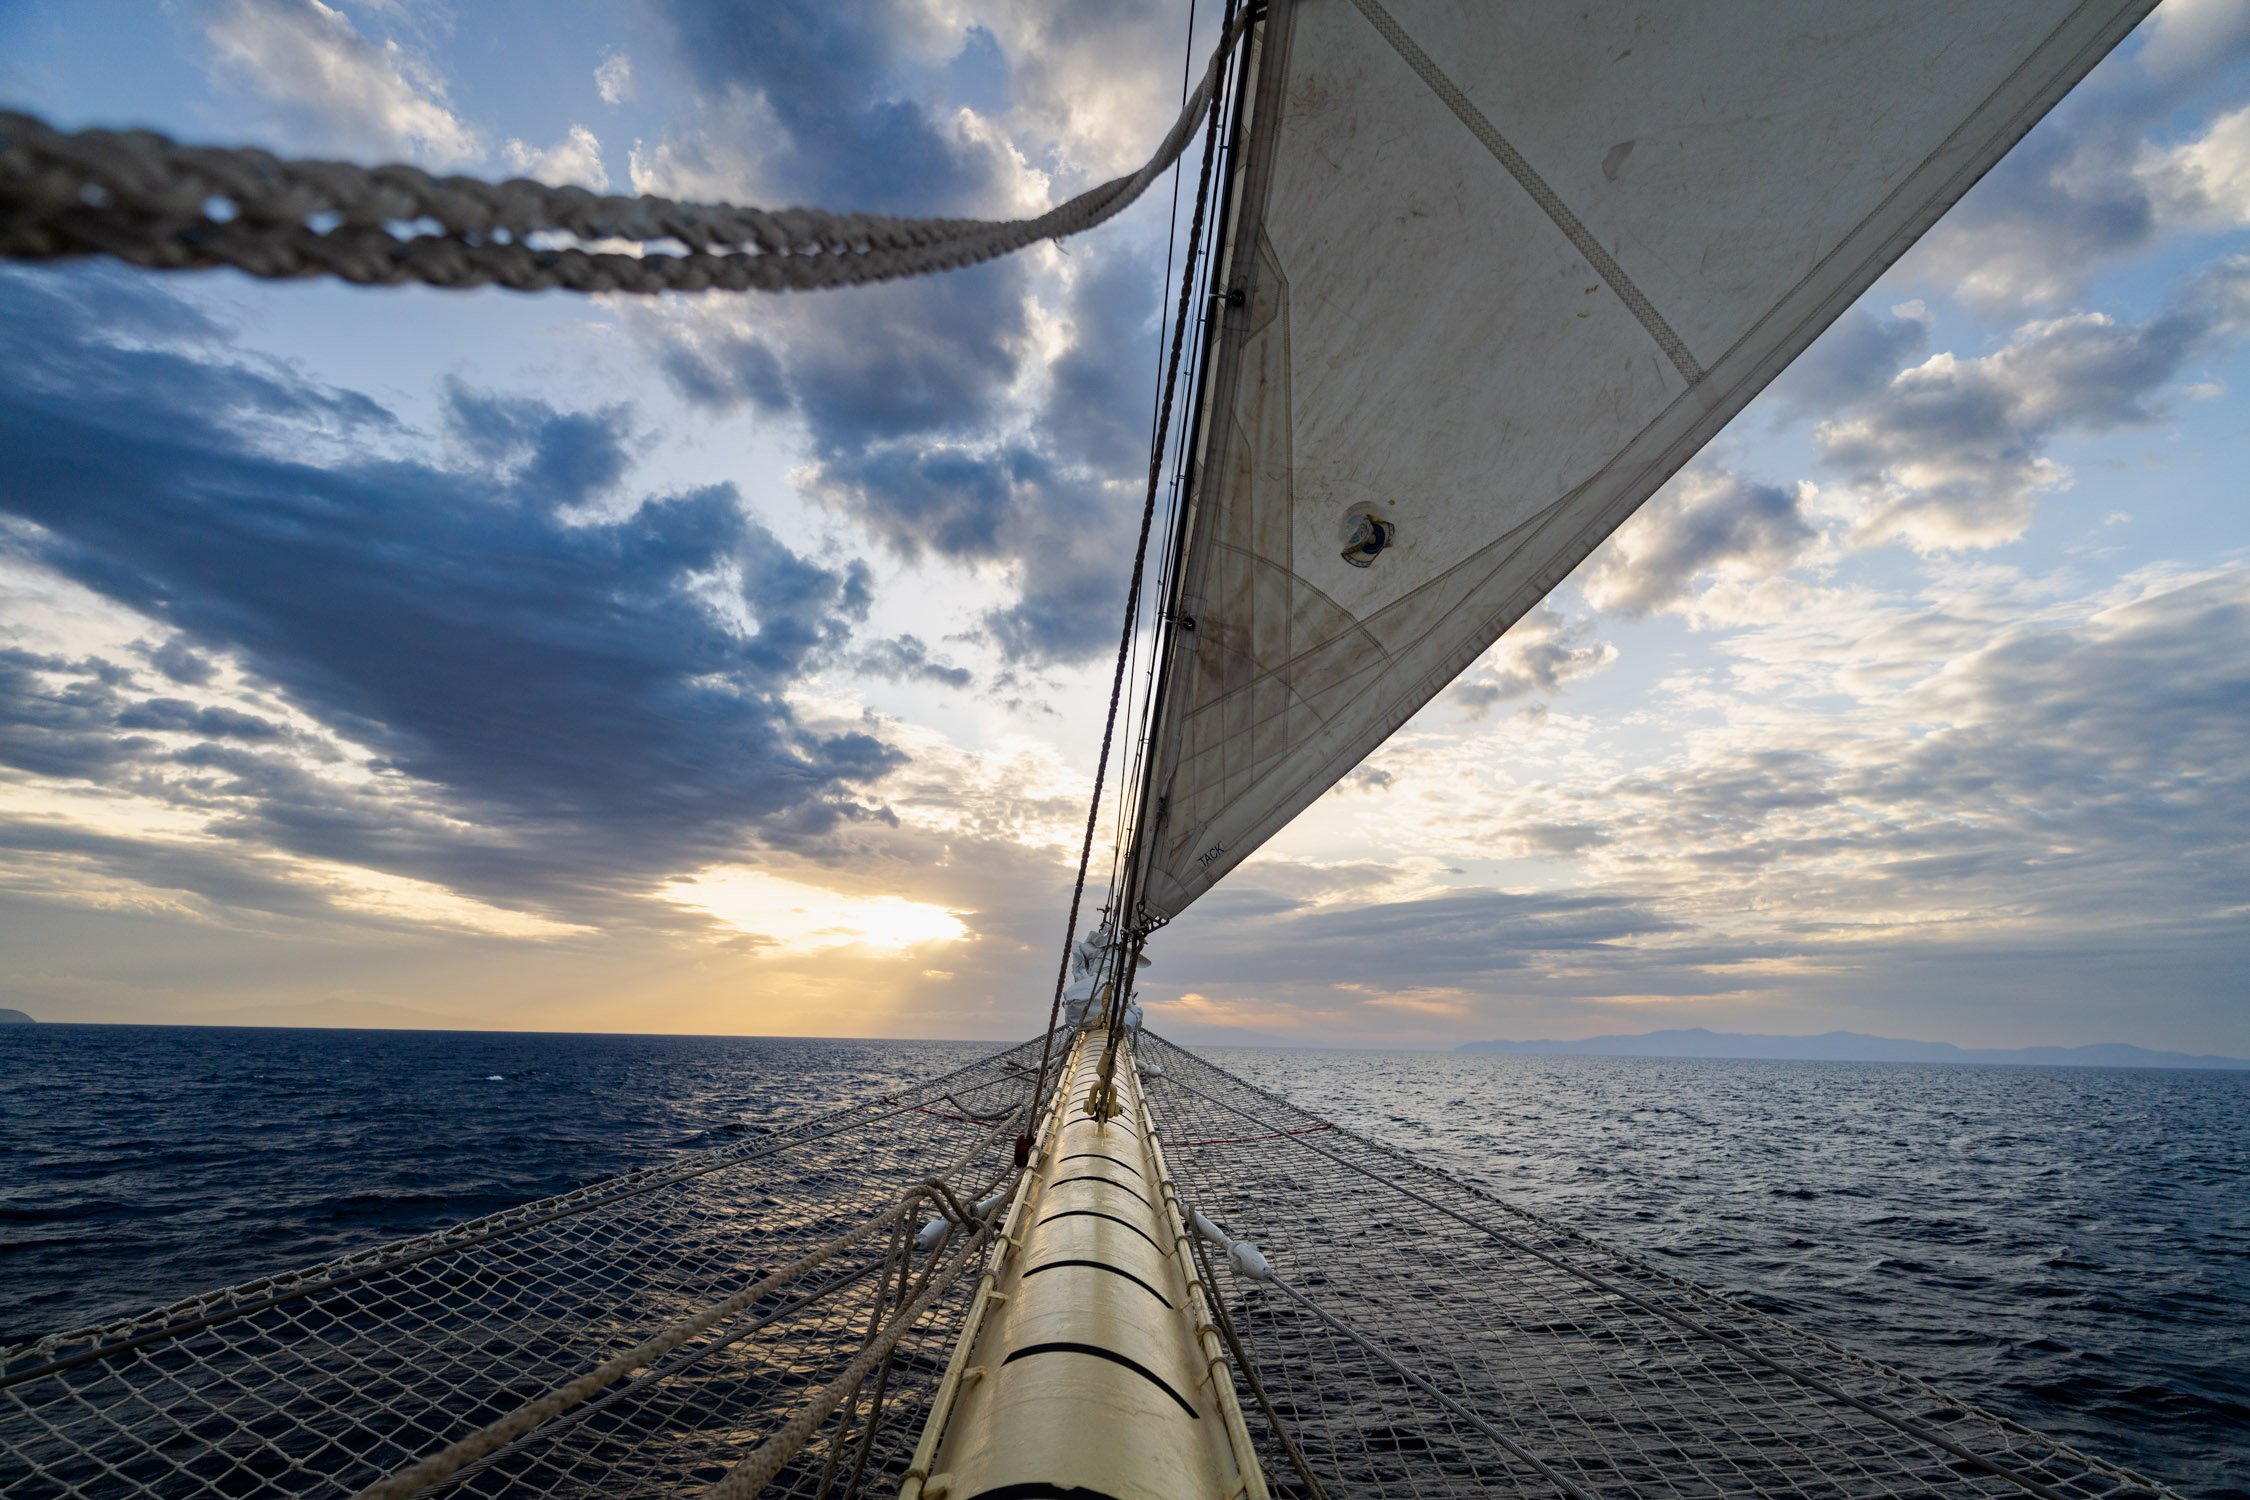
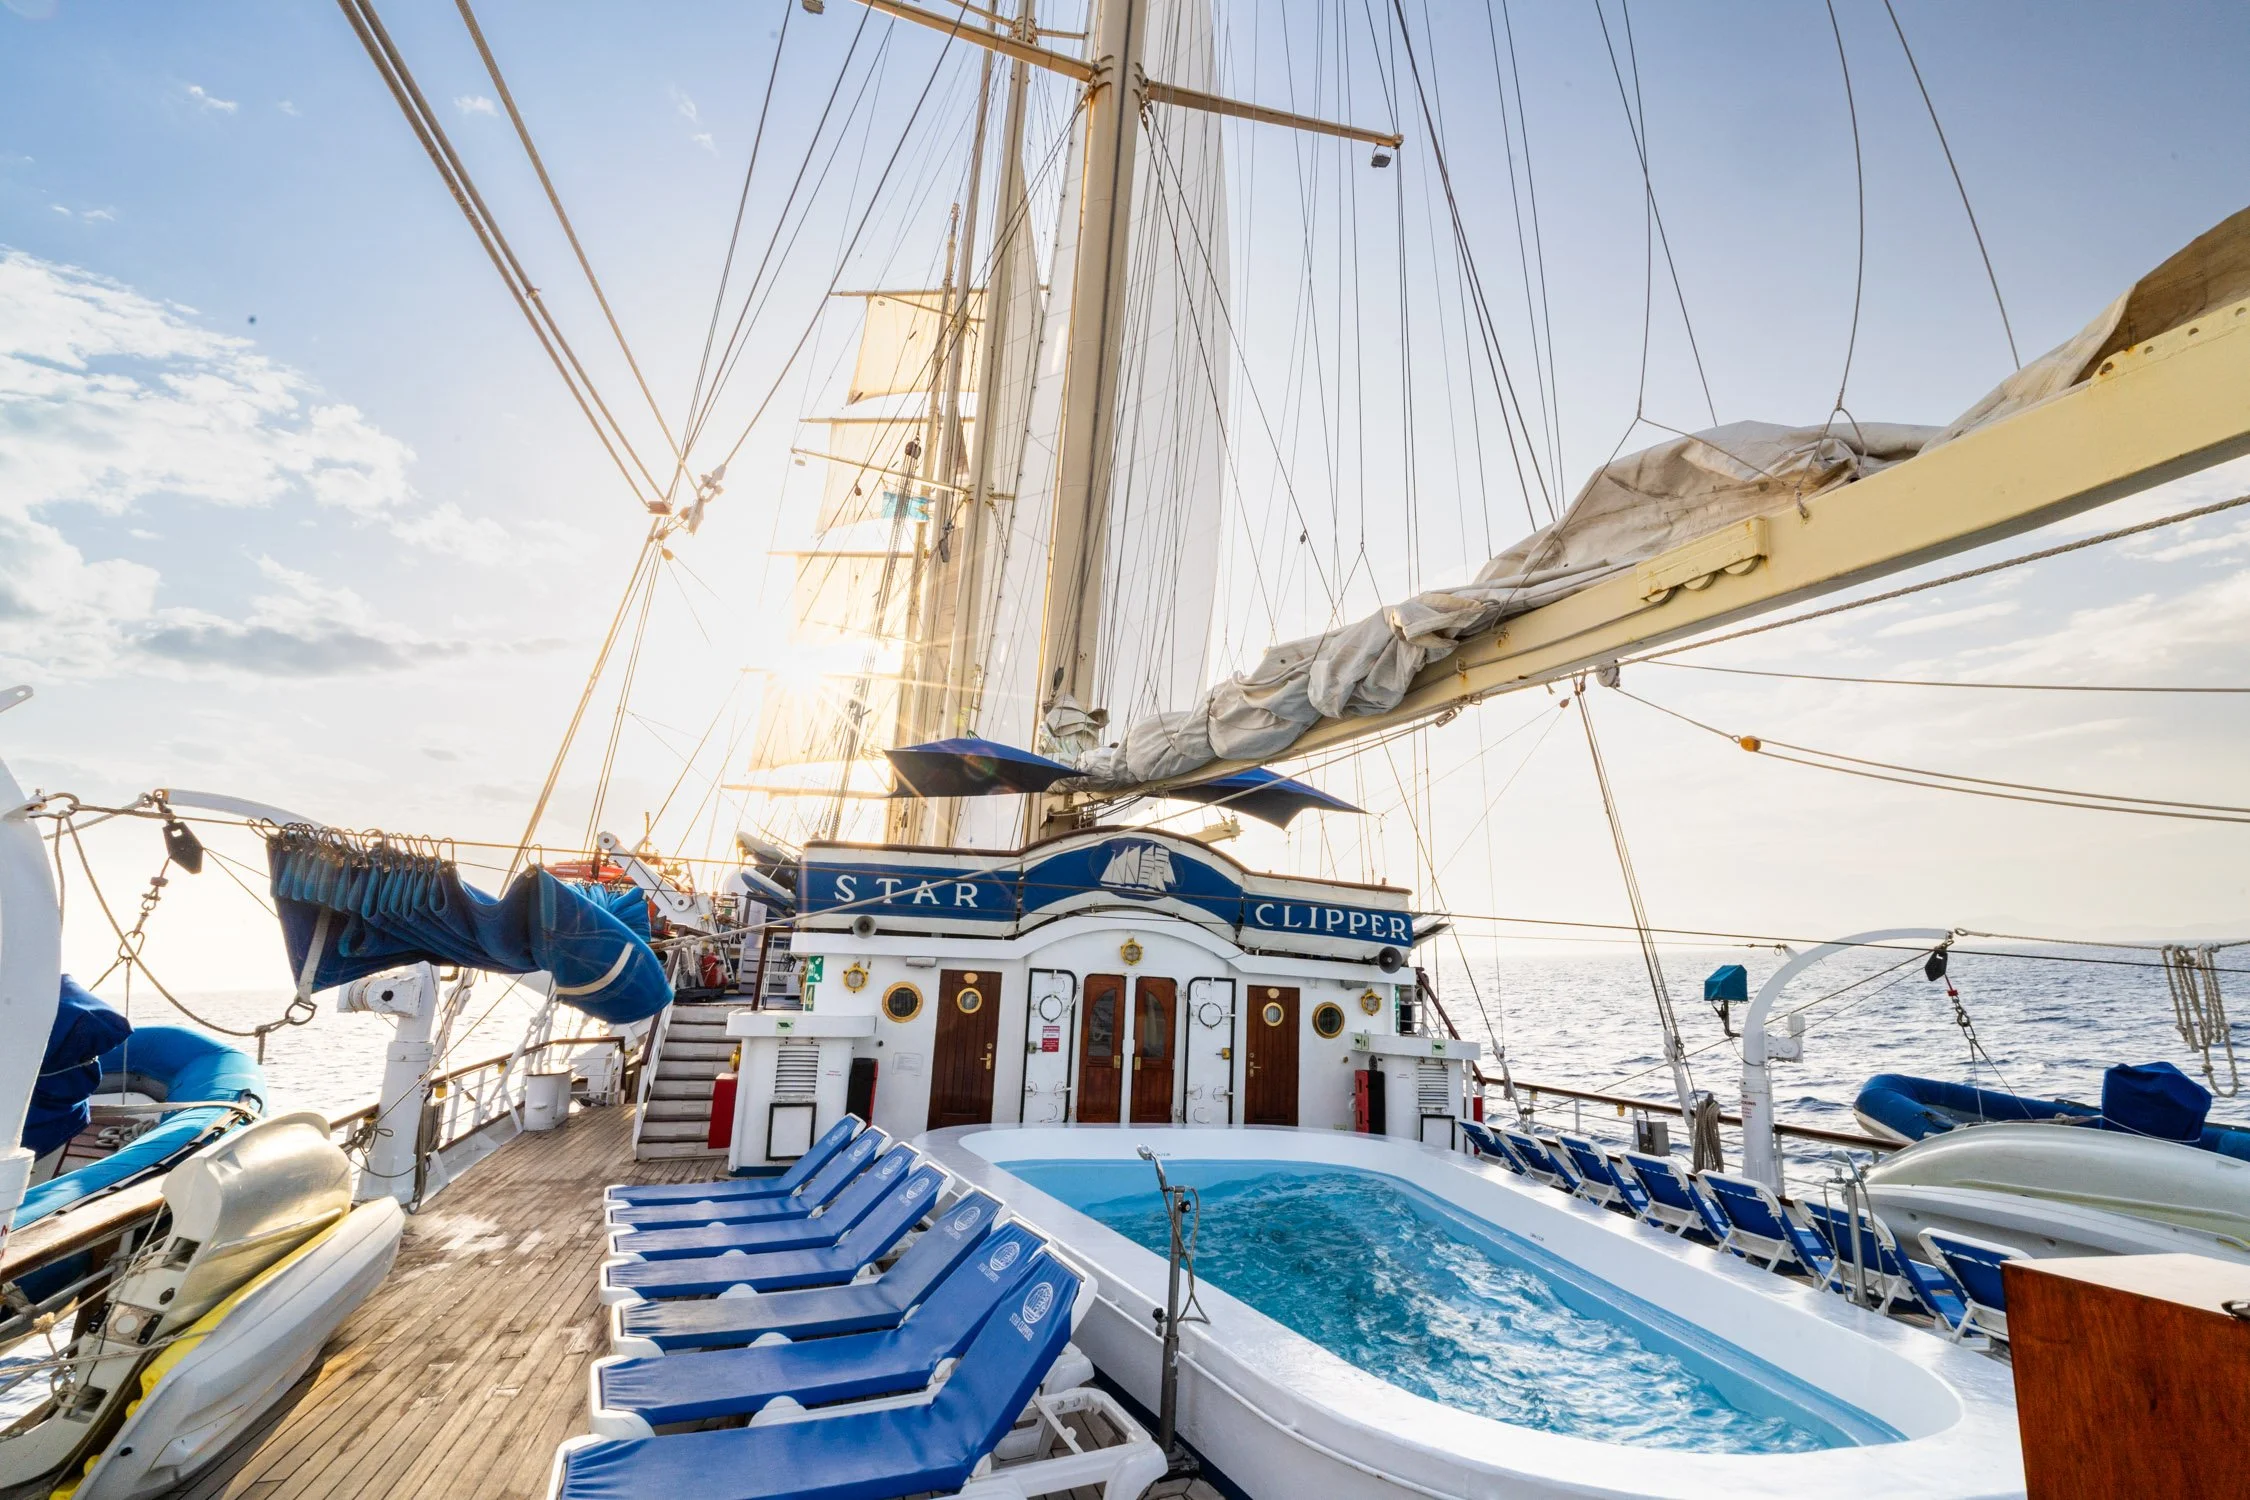
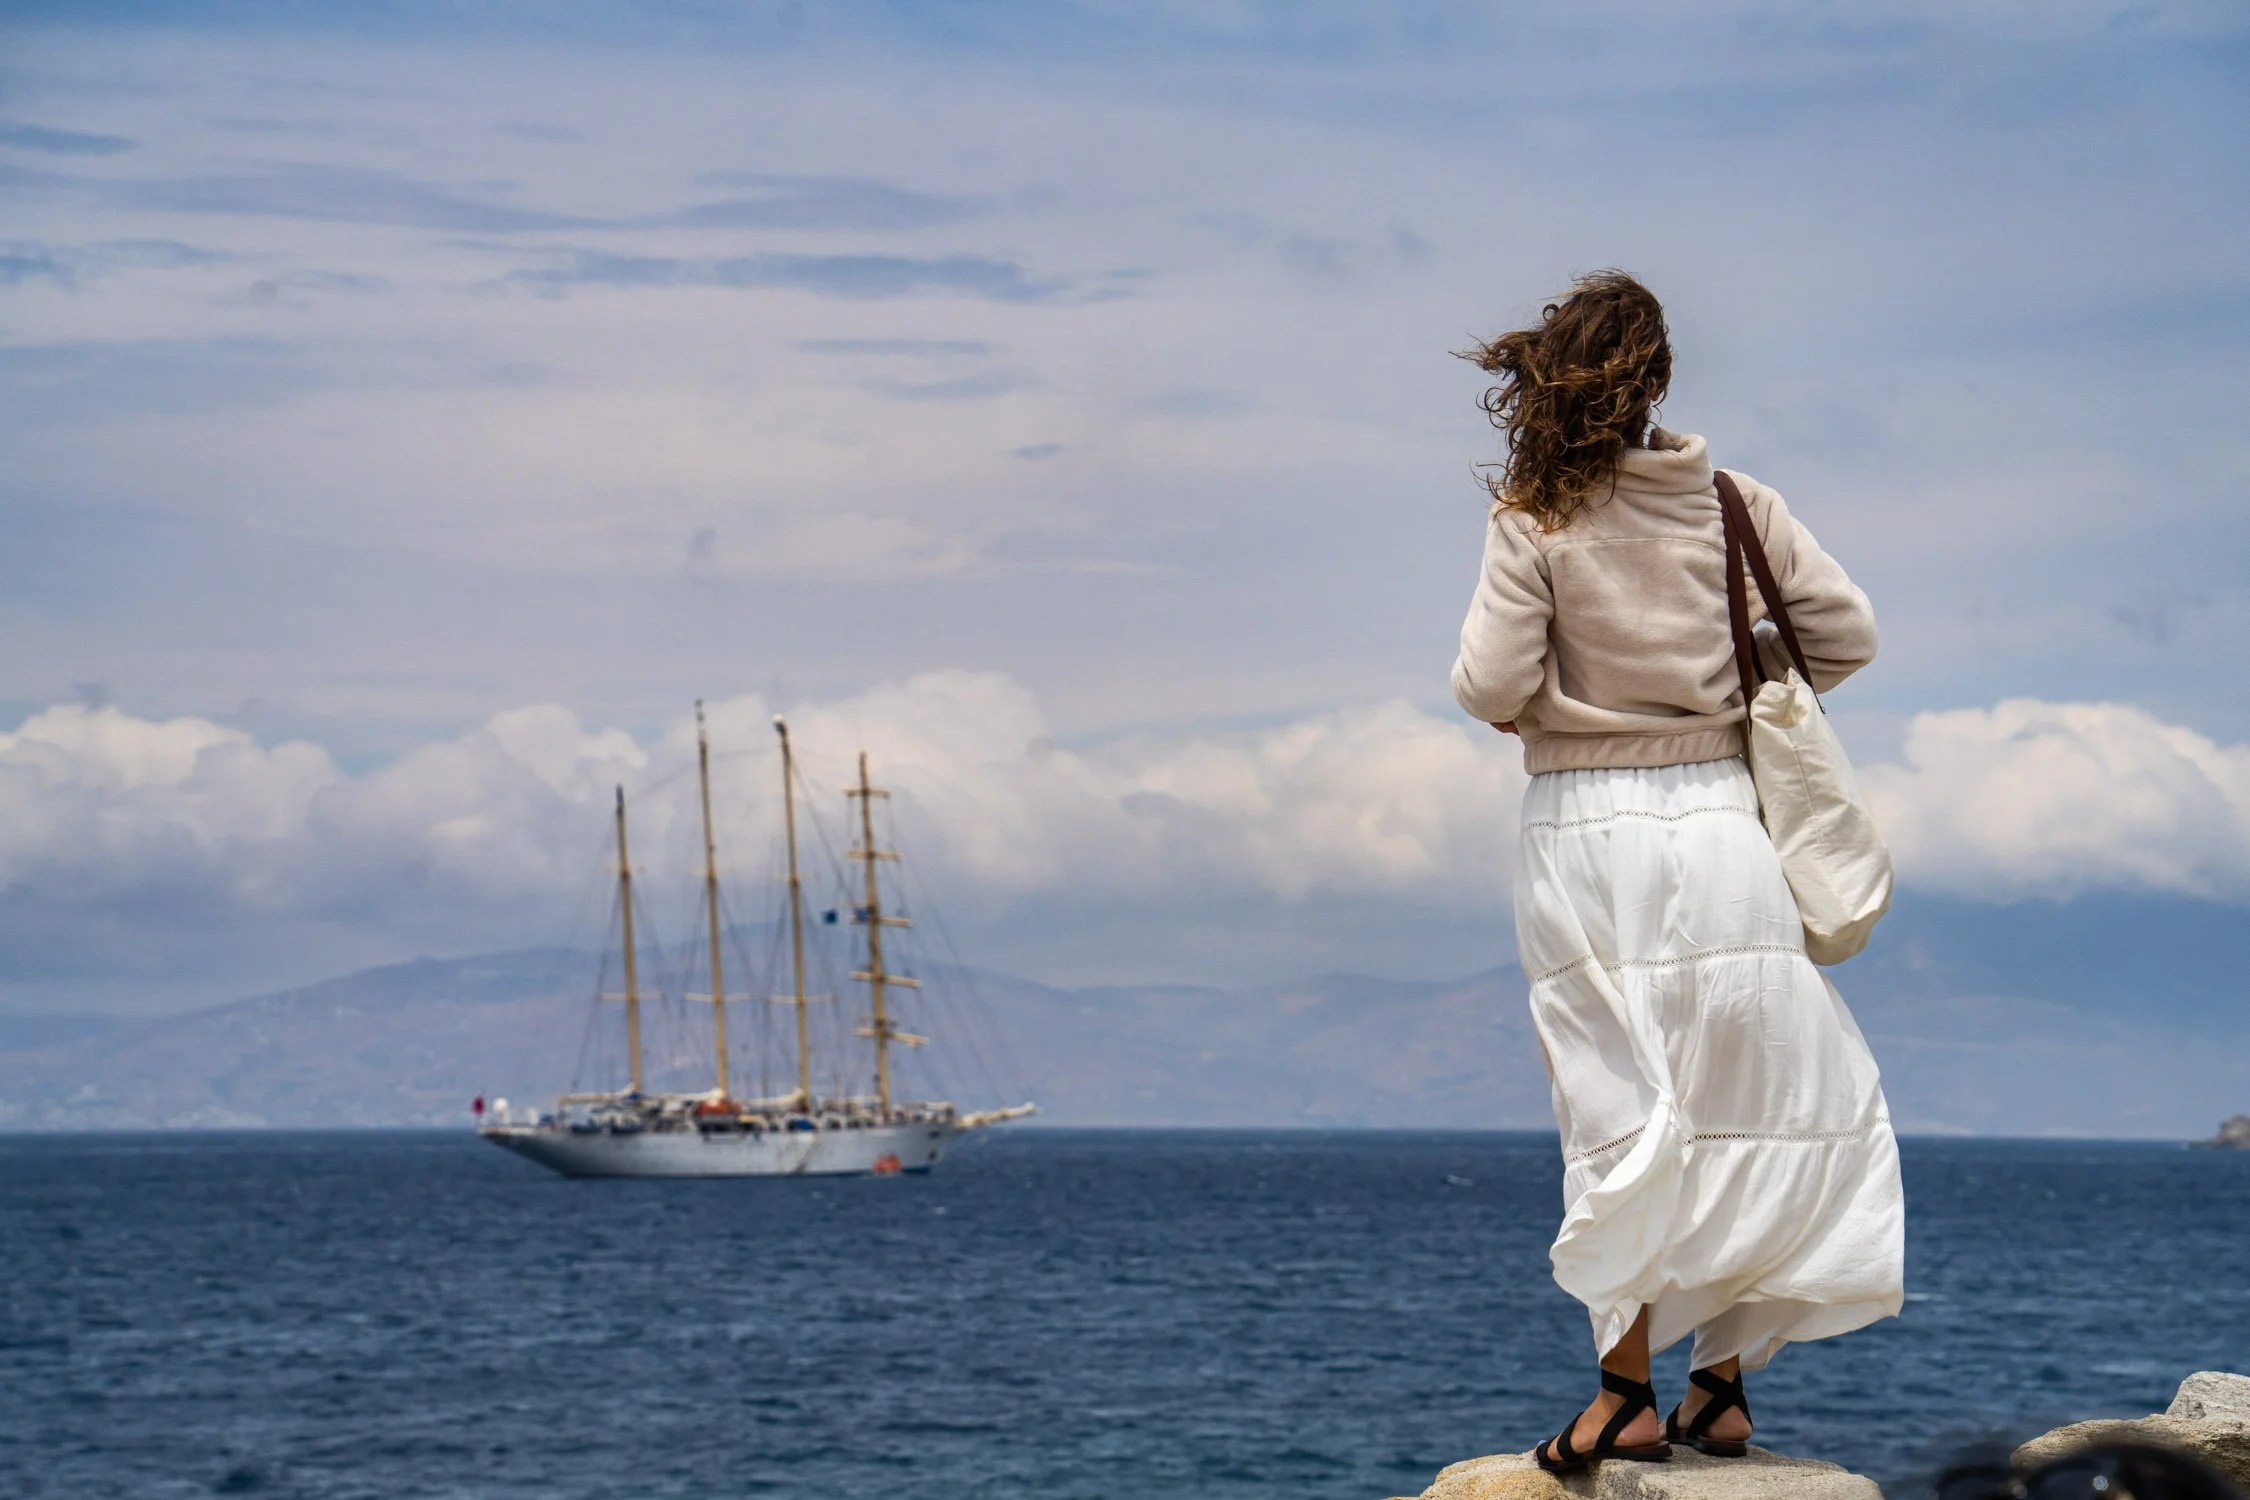
As if out of a movie, Kristin and I landed a dream job, the summer of 2024, aboard Clipper Cruises Greek Island hopping voyage. Kristin would be working on some social media marketing projects and I would be creating images and videos about the trip from Athens to Istanbul, with several stops along the way. While I have delivered the project, there are still a little more than 1,000 selects sitting in my archive unedited from this trip.
In many ways the unedited images drive me bonkers because they are good enough for the world to see, maybe even for somebody to license or add to my portfolio, but there is no obvious incentive to edit them. So, they sit on a hard drive and collect dust like a distant memory.
Thankfully, today I was given the reason to off load some of these images. So, thank you to everyone who looks at these images and reads this.
After leaving Athens, Greece, the ship headed for Mykonos’s. A party island, is what I was told. For the most part I knew very little about the Greek islands other than historical accounts and word of mouth. So, I was excited to see what the white building, blue roofed island was actually like. Spoiler, we didn’t find any parties.
For the most part, the island was filled with tourist, but still gave off a slow vibe.
Yes, there was a strip for shopping, but once you left the main corridor that had fantastic gyros and greek salads, the neighborhoods were quiet, navigated by cats, and friendly locals.
What I Brought On Today’s Photo Walk:
Tamron 28-200mm all-in-one zoom (they have launched a newer model of this, but haven’t tried it yet)
Tamron 17-28mm f/2.8 zoom (they now have an updated version of this lens that I like more)
Peak Design Lite strap (I was lucky enough to get the camo version from the Sitka collab that sold out in less than 24 hours and feel cool about that)
Like most tourist, Kristin and I started our Mykonos wanderings at the Venetian Windmills not far from the port. This spot overlooks the ocean and invokes that sense of wonder I assume most would have felt who grew up on this island; What else is out there? I’m not sure why, but there is something inside of me burning with that question. That desire to see what else is there. Satisfied, that for the most part, over that hill is just another hill, then another. Yet, each time I get to explore, the elation of joy bubbles up.
Looking for a little something more, we walked into the center of town, hoping to get lost enough to find some of the heart of Mykonos.
Windmills, wine, lemons, and food. We hopped for some iced coffee, but if anyone has been to Europe, they know from experience that doesn’t exist.
Along the walk, I surprisingly started to fall in love with the island. I say, “surprisingly” because there is no nature to be found where we walked. Everything is manicured. Everything is a dusty white. Everything has a place.
Surely, we were out of place, but isn’t that the roll of tourists?

Like all good tourists, we posed for photos in front of blue doors. Follow Dalton on your favorite platform: @storiesbydalton
Camera in hand, we looked for places to snap images like:
doors
staircases
overlooks
And, I’ll admit, Mykonos has a surplus of all the above. The challenge became finding the “right door”, the “right staircase”, or the “right overlook”. In the end, it didn’t matter. What mattered was spending this time together, wandering the streets of Mykonos in a bit of disbelief that we were both here for work. Traveling together and seeing a place like this.
The only thing that could have made it better would have been some iced coffee while we played a game of chess in some random amphitheater.
Again, thank you to anyone and everyone reading this. If you have enjoyed this journal entry, shoot me an email to say hey: dalton@dalton-johnson.com
✌️
The Day’s Gallery


About Dalton:
Dalton Johnson is a photographer, filmmaker, and writer.
Over the last 10 years, Dalton’s creative work has taken him to every continent, above the arctic circle, and below the antarctic circle.
His travels are documented in a free, weekly newsletter called UnBound, which is written for those daring to build their dream life.

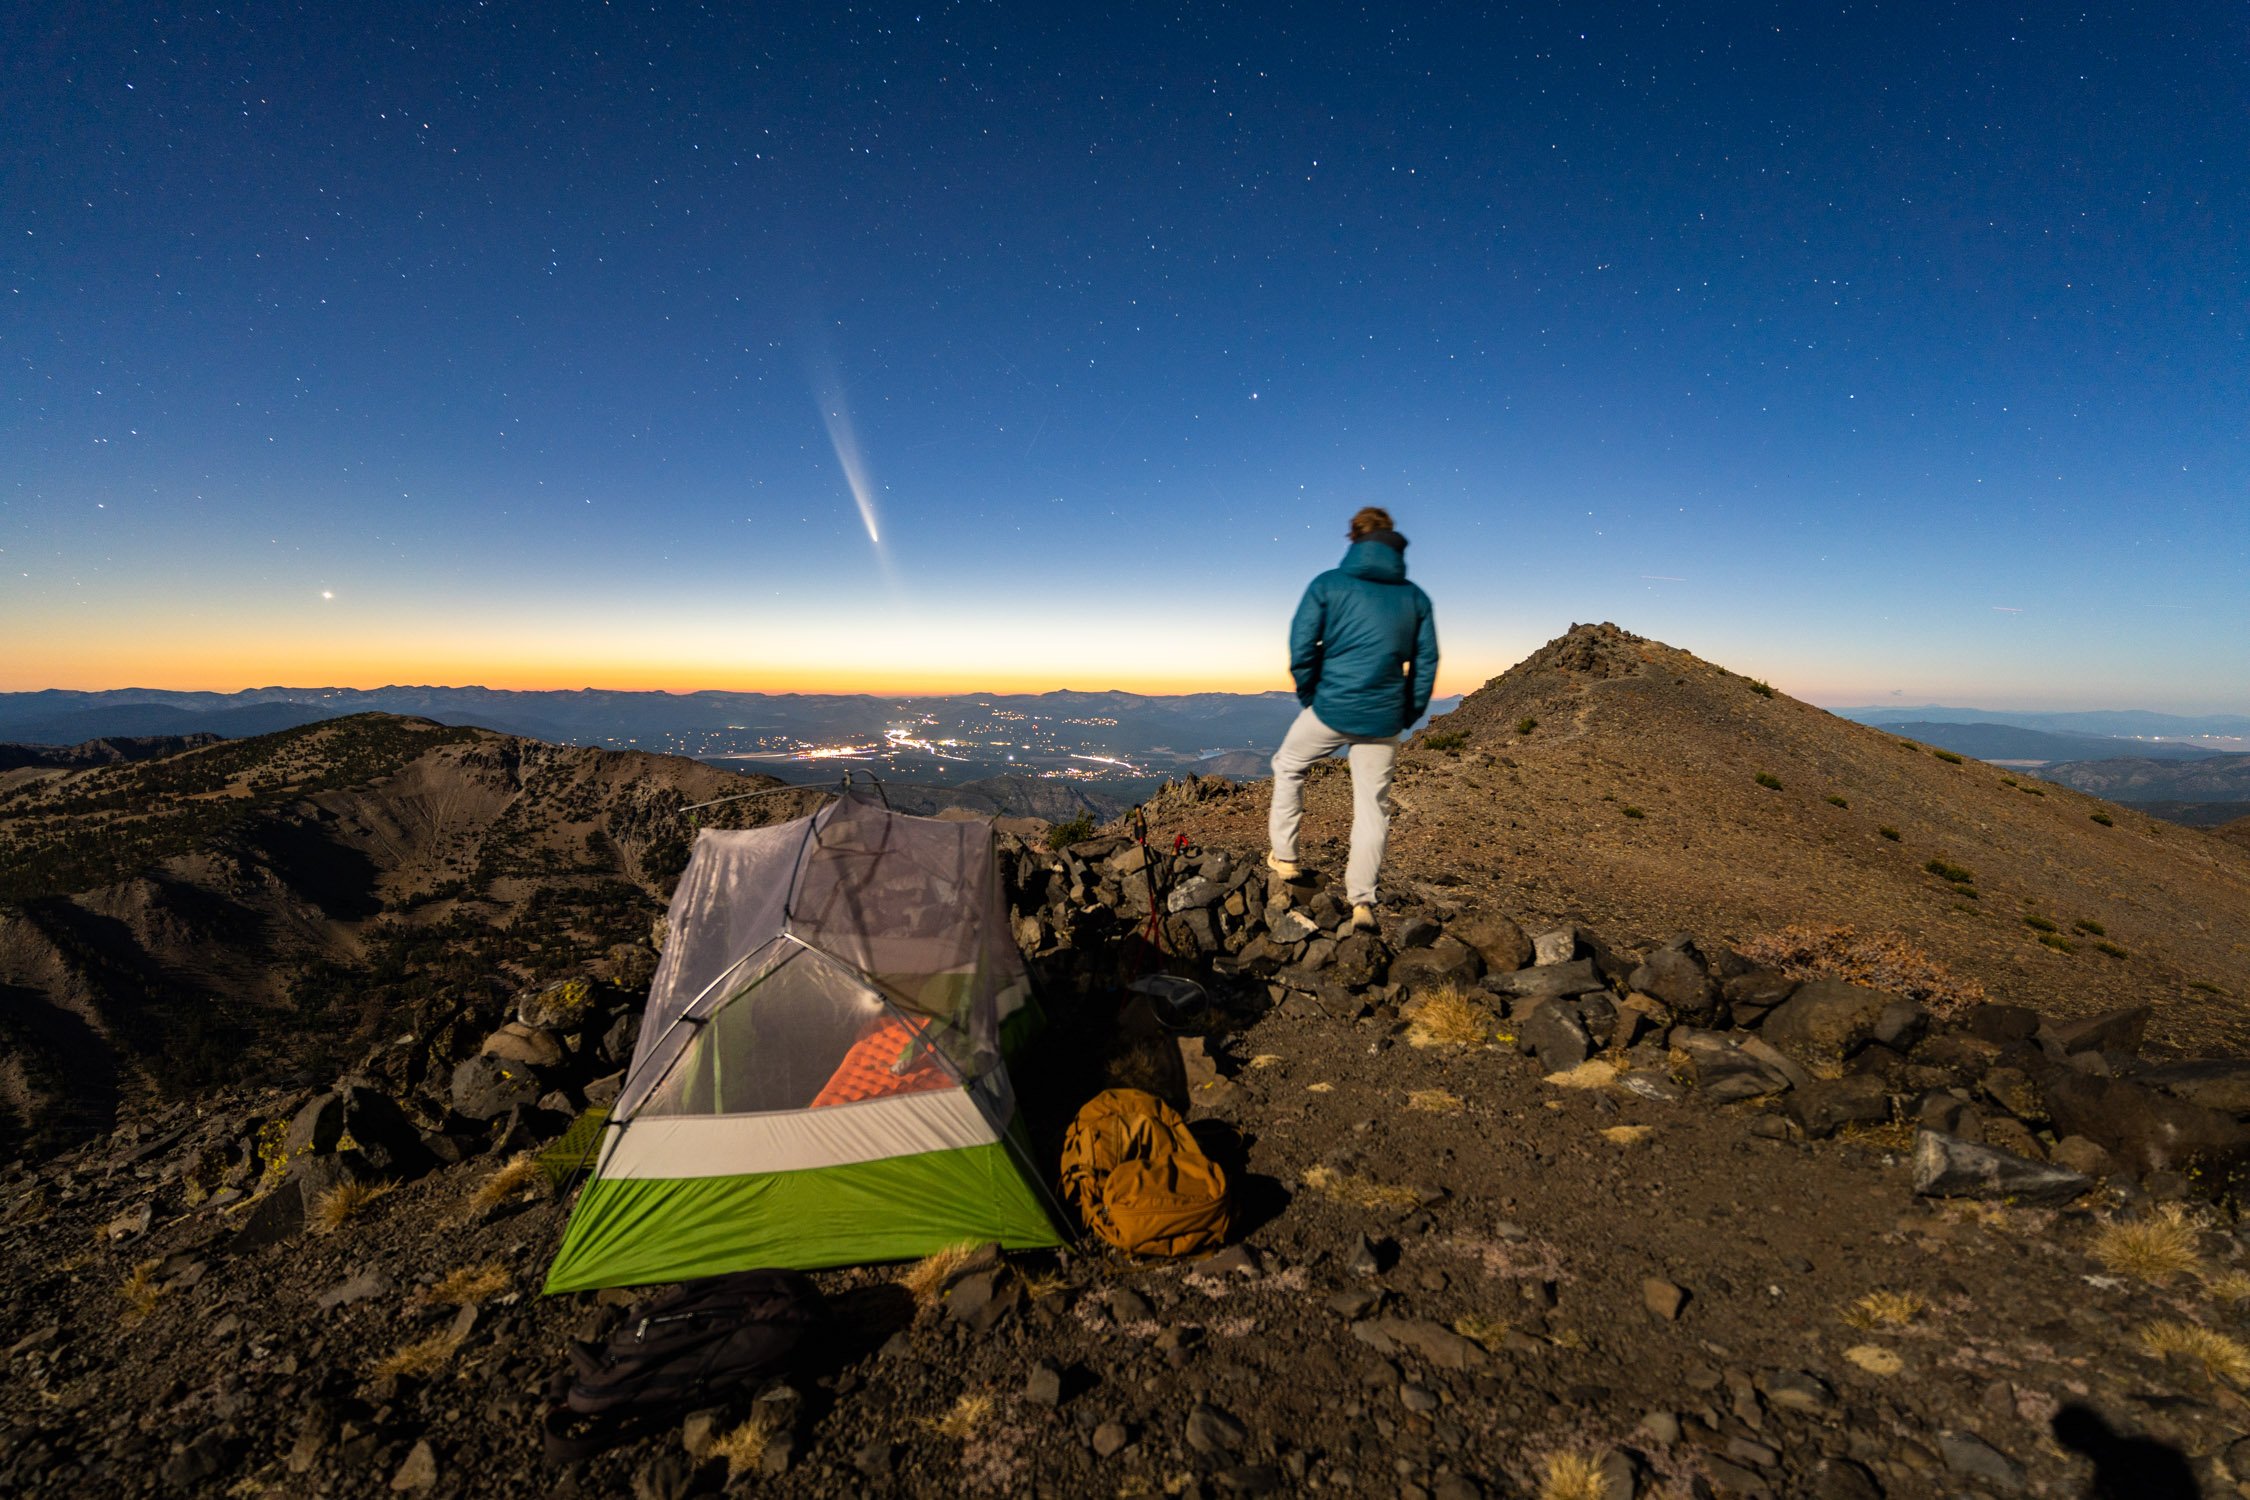
I Should Be On Everest Right Now, But I’m In Las Vegas
I am supposed to be on Everest, right now, the broken record in my head repeats. Why am I standing on top of my van watching the sunrise from Las Vegas?
I am supposed to be on Everest, right now, the broken record in my head repeats. Why am I standing on top of my van watching the sunrise from Las Vegas?

Waiting for the rising sun to come with its much needed blanket of warmth. Connect with Dalton on your favorite social media: @storiesbydalton
Have you ever end up somewhere and you just don’t understand how you got there? The confusion hits hard, you want to make the best of your focus, and yet all you can do is dream of being somewhere else. Well, this was one of those times for me.
It was April 2023 and I was supposed to be on Everest, filming a documentary about a blind veteran climbing the tallest peak in the world, not for himself, not to see what the view is like (I hope the oxymoron gives you a chuckle), but to challenge the status quo around blindness and give other wounded solders a role model to say, “yes, I can do thing I thought impossible.”
His name: Lonnie Bedwell
We met on Denali about a year before, while I was filming the award-winning short documentary Climbing For Furley, and as time passed he reached out with a last minute invitation to come film the trip and hopefully make a documentary if the trip is a success.
In many ways, this was a dream assignment of dream assignments. Lonnie’s story is great, the setting couldn’t be more stunning, and I have a personal goal of creating something on all seven summits.
However, with the last minute nature of the trip, bringing me on board 10 days before the expedition left, not all the boxes were checked.
When I arrived at the airport ready to leave, I was denied. My passport, while valid for the next 7 months, did not meet all the requirements. The Nepal Tourism requires all travelers to a passport valid for 6 months after their return date. I was one week shy of that requirement.
My trip ended before it started.
I was devastated.
For 48 hours, I tried to get a new passport, but, the passport office was overwhelmed with 10x the normal inquiries and even with a Congressional push to get me an overnight passport, I still could not.
Breaking the news to the team, I didn’t know what to do with my two month open schedule. So, I packed the van and headed to the desert to lick my metaphorical wounds.


In 2023, I had been in this career for almost 8 years, yet I considered myself a young-gun in the industry. With lots of lessons, like this, still to learn and never repeat, I was in a rut. I was angry. For the most part, I was a climbing dirtbag with a camera, so when the bureaucracy of paperwork held me back, I couldn’t accept my failure.
The time in the desert was a warming respite from the cold I often endure in my career, but I couldn’t get out of my own head.
Kristin, my girlfriend, tried everything she could to cheer me up, but I was in an unbreakable mood. I felt bad she had to experience my mood. I wanted to let her go enjoy herself, but we were traveling in a van together, so she would have had to leave me behind. In many ways, that sounded nice, but I didn’t really want to shrivel up like a piece of jerky out here in the desert.
So, we pushed on together. Driving through Alabama Hills, Death Valley, Valley of Fire, and towards Lake Mead.


A few weeks into the trip, still being a sourpuss, I wanted to turn the corner. Let things go. But, how?
The mishap was out of my control and that is what I needed to accept.
At least, from all of my travel the major lesson I have learned has been: When things are not going your way and the results are out of your control, you need to let it go. I believe this concept is coined “The Traveler’s Mindset”
So, one of the evenings sitting alone lake side, I intentionally watched the light show on the mountains acting as the backdrop to Lake Mead change from a washed out daytime blue to orange to purple to a black bright with stars seeking an internal silver lining.
For the rest of this trip, seeking that silver lining would become my north star, but, it wouldn’t come on this trip. In fact, I would have to wait until June, just when I would have been coming home from Everest, to find my silver lining, which would literally take me around the world.

I sit quietly looking out at the calm waters, trying to make sense of everything that had happened. Connect with Dalton on your favorite social media: @storiesbydalton
The Small Things That Help
Thank you for taking the time to read UnBound. I hope the images and stories have scratched your mid-week wanderlust itch. If they have, would you please consider forwarding this newsletter to a friend?
If you haven’t done so already, consider following me on your favorite social platform:
Related Reads:

Top Destination We Are Drooling Over This Week
Finding new destinations can be hard in today’s digital world where everyone is trying to sell you on something “new”. So, here at UnBound, we have created this space to highlight the best destinations we have explored. These destinations can be far fetched locations that we have fallen in love with, or, backyard hot spots that we just want to share with everyone.
Regardless of the location, these destinations are all places we have personally visited and think you should consider when planning your next trip.
Without further adieu, we give you the top destinations we are drooling over this week:
Our standards for testing and reviewing at UnBound:
UnBound requires first person experience to review and recommend any product, destination, experience, etc. In other words, you’ll never read about a place or product that we have not touched, used, or experienced personally.
In the case a recommendation is sponsored, it will be clearly marked. With that said, sponsored reviews remain honest and true to editorial review. Meaning we share both, the good and the bad.
If you have any questions, or comments, about the product reviews, you can write me at:
dalton@dalton-johnson.com
Trailborn Rocky Mountain - Hotel Review

Rock climbing with KMAC guides at the Fins. Photo by Dalton Johnson
Adventure and hotel don’t belong in the same sentence, so why am I calling Trailborn Rocky Mountain the basecamp for adventurers? The answer I’m crazy. Just kidding. This adventure-forward hotel fosters a sense of community and encourages adventure. A steep task they have taken on, if I say so myself, but here’s how they do it.
First, their lobby feels more like a mountain cafe that you want to sit back and enjoy a book. Speaking of books, they have several picture books (ahem, they are called coffee table books) lining the walls inviting you to grab one and start dreaming. Some of the books are local adventures and others are far flung idea generators from around the world.
We had a rainy day and spent a lot of time in the lobby, drinking lattes, reading books, and enjoying the fireplace.
Second, s’mores. Every night, Trailborn Rocky Mountain cranks the heat on the outdoor fire pit and supplies the s’mores essentials. For Kristin and I, this was a great place to unwind while sharing a beverage and chatting. One of the nights, the fire pit was “crowded” and we struck up some great conversations with other travelers who shared beta for great hikes in the area.
…
Rancho Santana Nicaragua - Surf Escape

The main break just steps from our room. Photo by Dalton Johnson
The Perfect Week In Paradise (At Least In My Opinion)
My girlfriend and I had planned a week-long trip to Rancho Santana and, I might be bias as I share our adventure-packed trip itinerary, but, our trip was one for the record books! Rancho Santana is a paradise escape to a country not overrun by tourism. Promising a perfect blend of relaxation in the sun and adventure.
Itinerary:
Day 1: Arrival, Ocean Time, and a Dinner to Remember
Day 2: Exploring the Beauty of Rancho Santana
Day 3: Surfing, Mountain Biking, and Sunset Views
Day 4: Mombacho, Lake Nicaragua, Granada, and Volcano Masaya
Day 5: Farm Tour and Sunset Horseback Ride
Day 6: Catamaran Adventure
Day 7: Departure – Until Next Time!
…
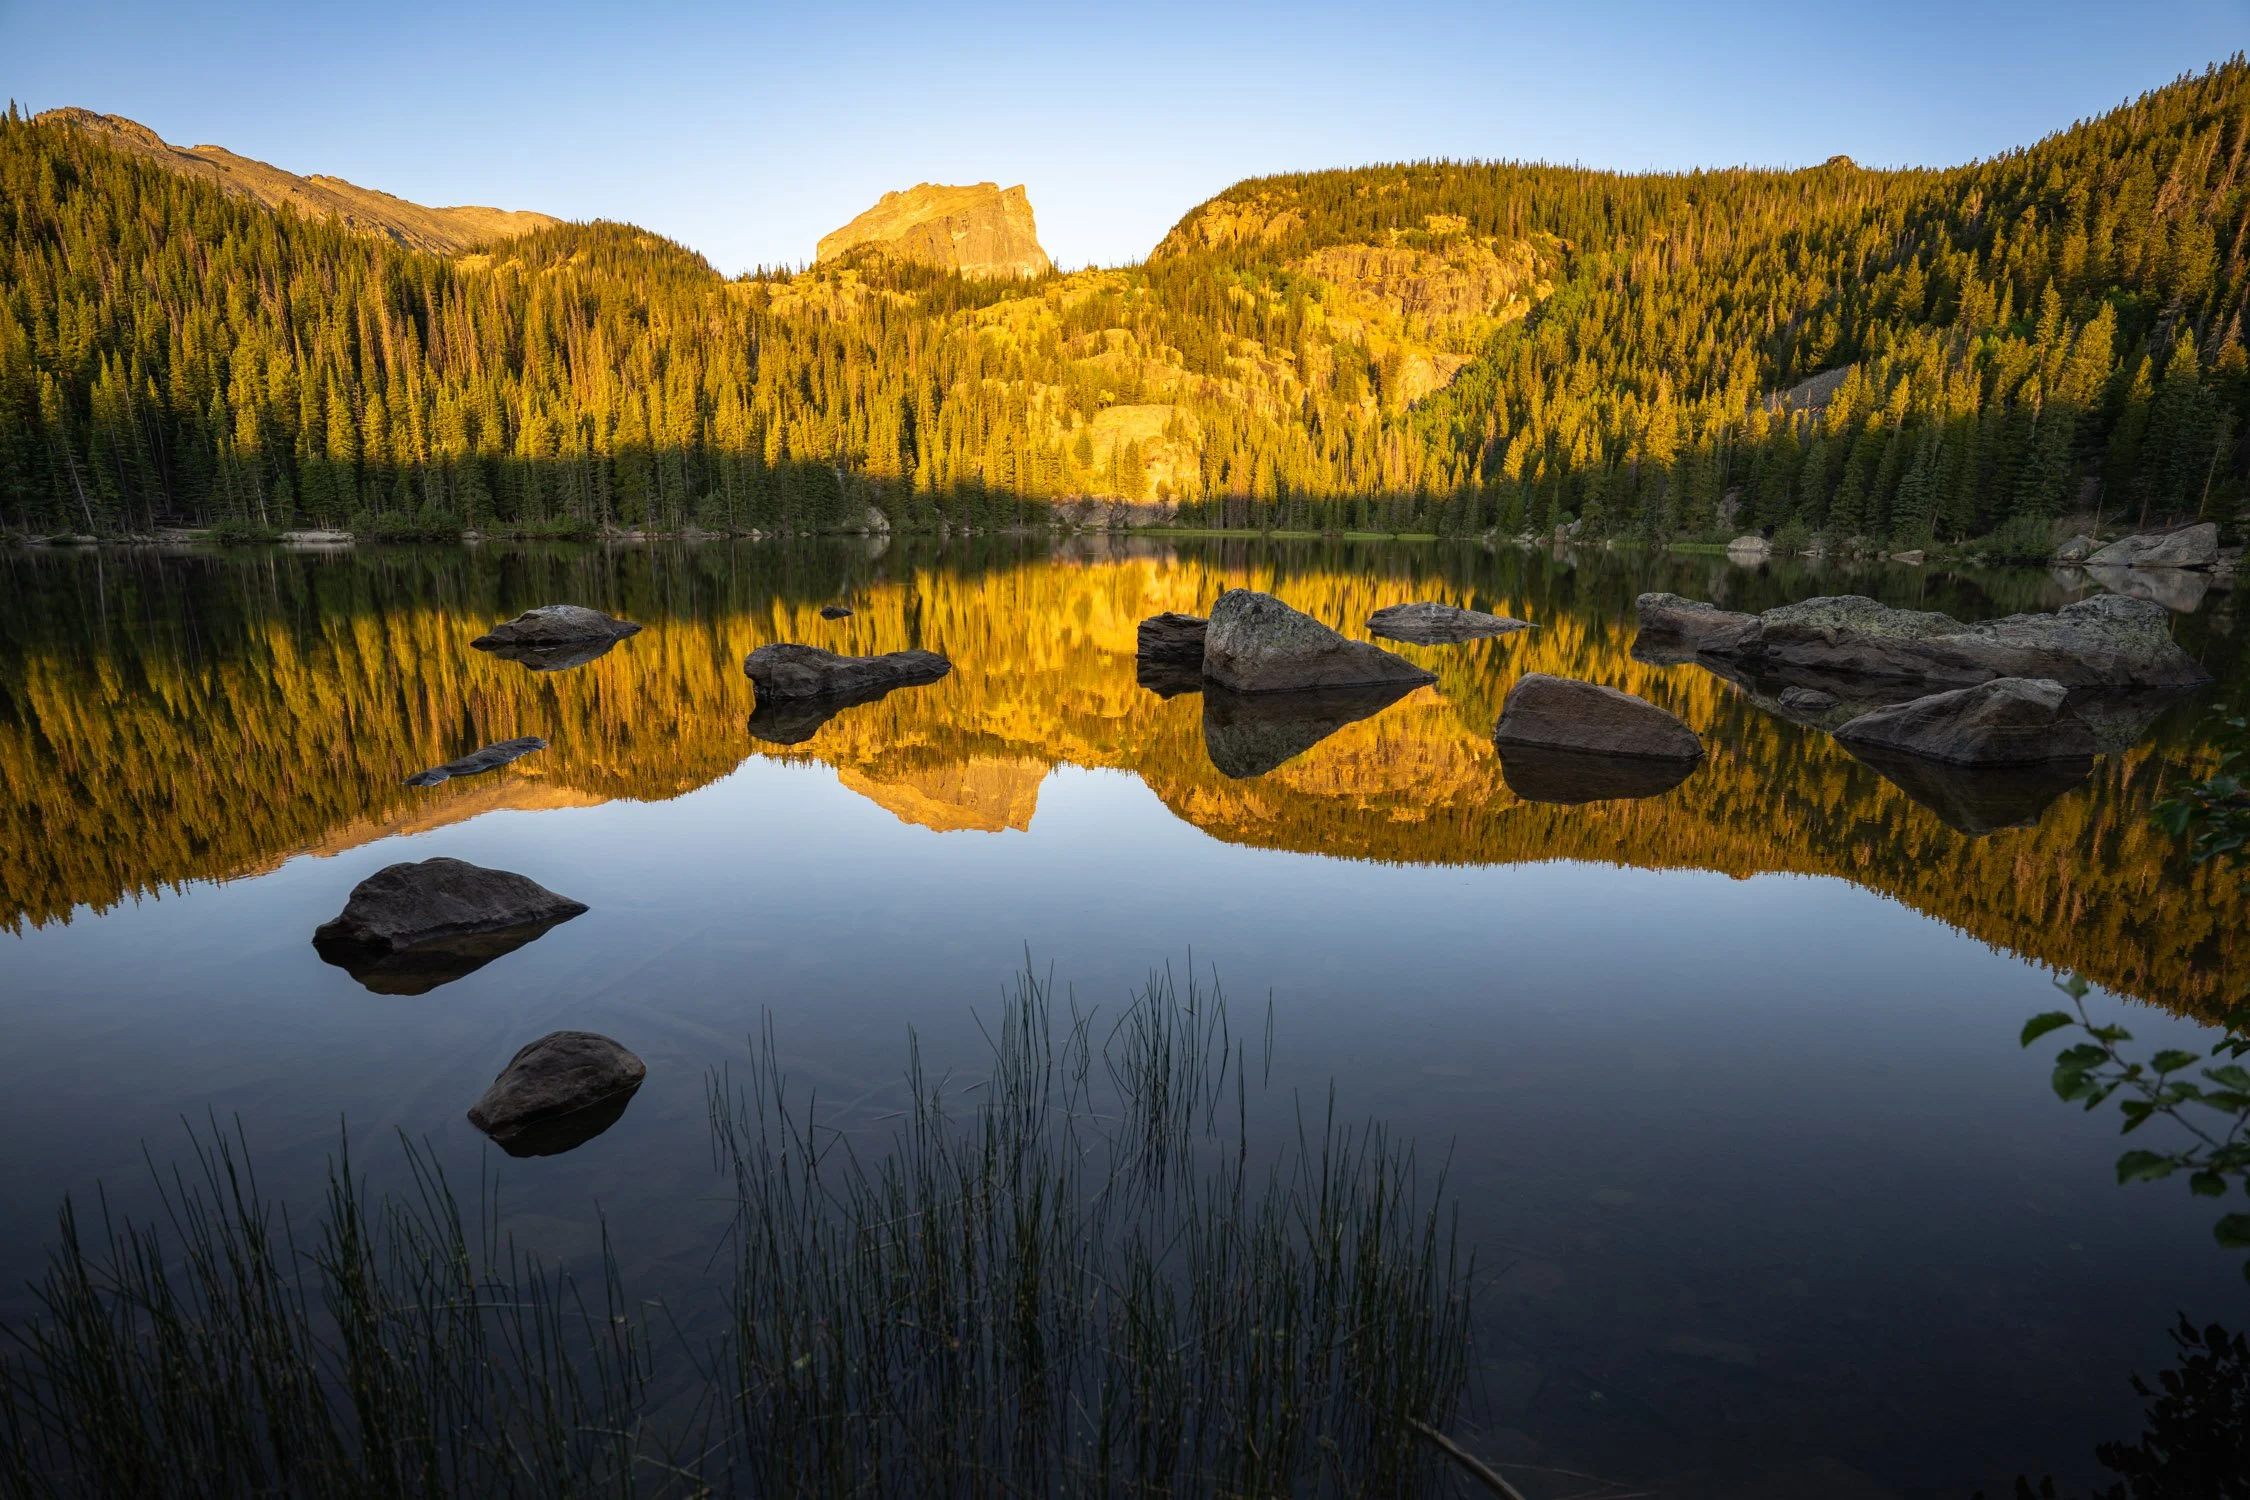
Bear Lake in Rocky Mountain National Park

Sunrise at Bear Lake, CO. Photo by Dalton Johnson
With the timed entry into Rocky Mountain National Park, access to Bear Lake at sunrise takes a little bit of planning. While there are day of permits available, they seem to be impossible to land. So, if you are making the trek out to Rocky Mountain National Park, I suggest you secure your entry permit months beforehand.
With that said, Kristin, my partner, was able to land an entry permit for the morning slot, the night before, during late-summer in the middle of the week. I think we were lucky, but who really knows?!
Now that your permit is secured, it’s time to set your alarm the night before and try to sleep, crossing your fingers you wake up to an early alarm, drive through the dark to the trailhead, and walk the .5 of a mile to Bear Lake.
Yup, the walk is very short, so no need to rush.
I suggest bringing a warm beverage to keep you warm, even if it is the summer as the lake sits at 9,449 feet. From there, set up your camera, enjoy the alpine glow on the cliffs, and push that shutter button.
You can walk around the lake to create different images, I liked the alpine glow in the morning from the eastern bank of the lake and the northern bank of the lake around mid-morning when most of the lake was in full sun.
The above image was snapped from the northern bank of the lake.
If you are a camera-lover, here’s some of the data about the image above:
Camera: Sony a7r4
Lens: Tamron 16-30 f/2.8 G2
Focal length: 30mm
Aperture: f/5.0
Shutter-Speed: 1/320 second
ISO: 250
Beachside Hot Springs in La Ventana, BCS

Photo by Dalton Johnson
Hot springs on the beach sound like a dream, but in La Ventana, they’re a reality. Just north of this kite-surfing addicted city of Baja Sur lies Playa Agua Caliente, a unique beach where you can soak in natural hot springs at low tide along the Sea of Cortez. These hidden treasures bubble right out of the sand, offering an unforgettable experience for those who make the trip north. The trifecta of secluded beach, desert landscape, and floating islands makes this spot dreamy, at least that is how I felt.
Glacier Point in Yosemite National Park

Dancing on the diving board at Glacier Point in Yosemite National Park. Photo by Dalton Johnson
There is an age old debate if Glacier Point is said to be better at sunrise or sunset. My personal preference as a photographer is sunrise, but I would rather you head to Glacier Point and find our for yourself.
On a deeper note, than an endless debate, is the fact that Glacier Point was one of the locations that John Muir brought President Roosevelt to wow the president into turning Yosemite into a National Park. There is an iconic photo of the two standing on the edge of Glacier Point with Yosemite Falls pouring in the background. When I stand in that exact location at Glacier Point, I like to think of this image and thank John Muir for his dedication to this land and conservation. Without him, who knows what Yosemite would be.
Soldier Pass Cave in Sedona, Arizona
Sedona has a city I have returned to several times. I am not sure what exactly draws me back to this town of red dirt, but I find myself here at least once a year. On a recent visit, I hiked the Seven Sacred Pools just after a rain and continued my hike onward to the Soldier Pass Cave. After clinging for dear life on the side of a muddy hill, I finally made it to this cave that everyone rants and raves about on social media and Reddit threads. While I am typically not one to seek out social media spots, Solider Pass Cave caught my eye.
Once I reached the base of this cave, I realized just how massive it really is. Two large opening, one is accessible to scale inside, the other one might require a rope. While I am a rock climber, I opted for the easy scramble inside of the cave. Since I forgot my tape measure, I’ll eyeball and say this cave was 40 to 50 feet tall and 200 feet long. Massive! The entrance crack runs right through the middle of it and there is a “window” you can sit in. This seemed to be the social media photo glamour spot, so I didn’t last long.
Avoiding the crowds, I wandered to the other side of the cave and found a way to scramble to the top. Nobody was up here. Quick note: If you are not a confident rock climber, please don’t scramble to the top, it was dangerous. Soaking in the view from the top and the sun that was breaking through the clouds, I sat and smiled.
This was worth the hike.
Luxor, Egypt
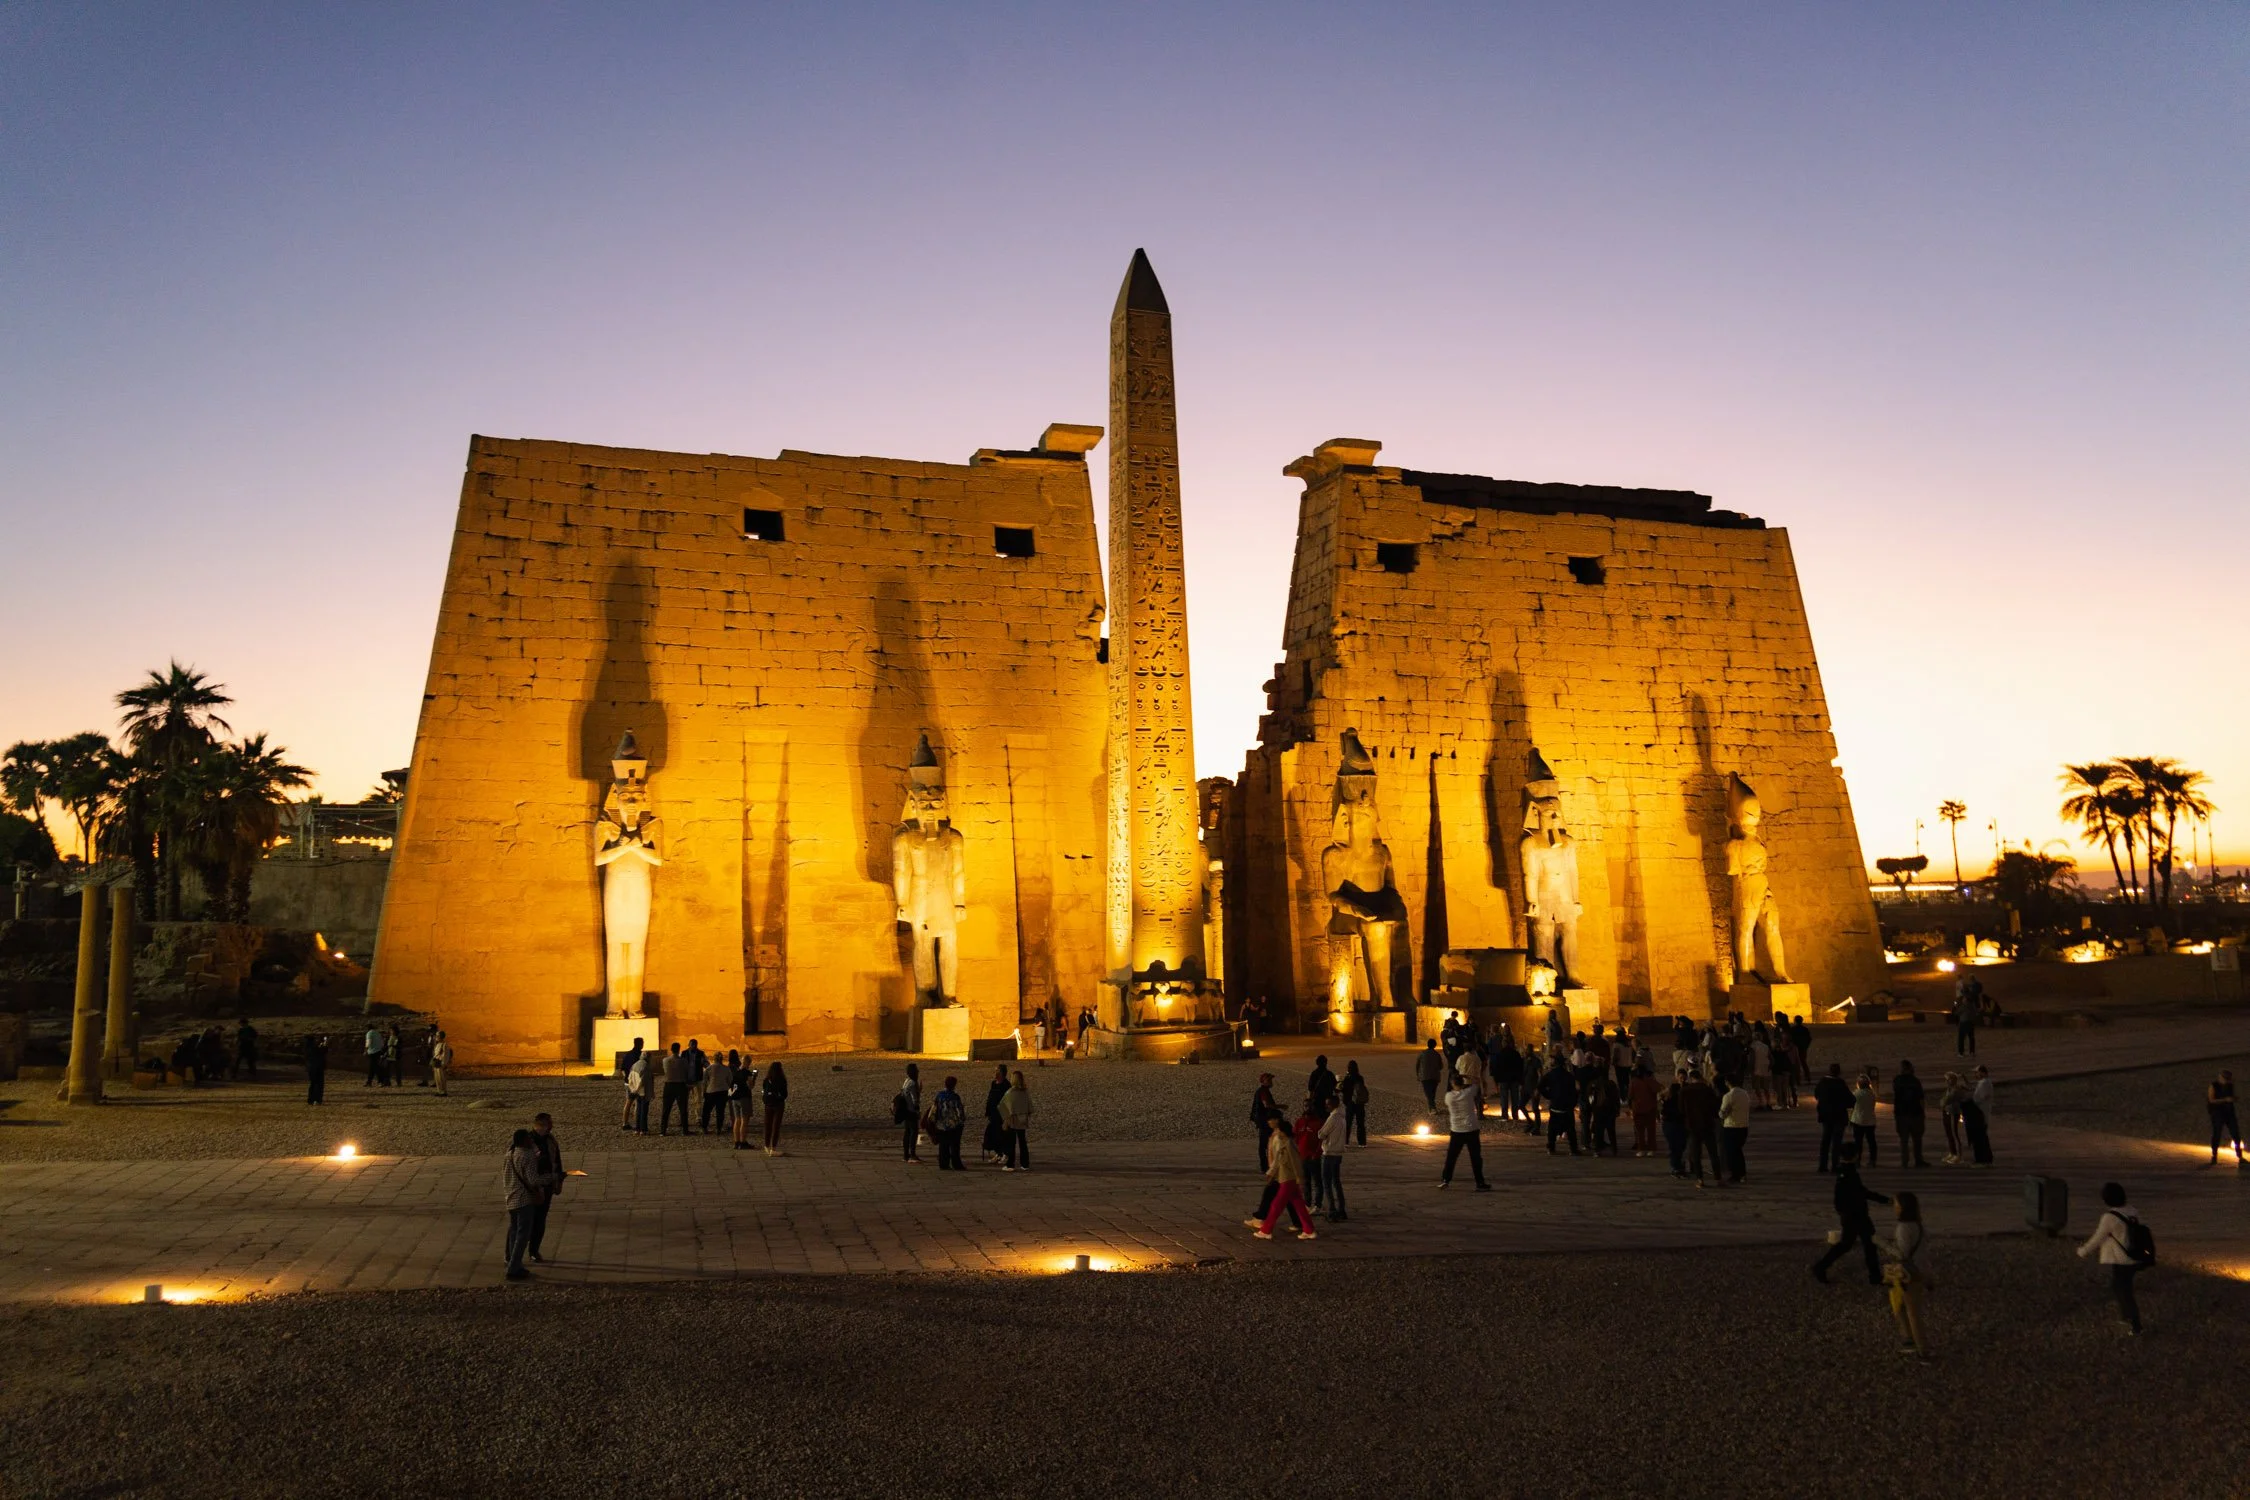
The Luxor Temple glowing at sunset and lit up with lights for a night time tour. Photo by Dalton Johnson
Luxor is a “small town” with ancient roots. When you think about ancient Egypt, you are thinking about the ancient sites of Luxor like the Valley of Kings, Valley of the Queens, the Luxor Temple, the Avenue of Sphinxes, and the Temple of Karnak, just to name a few. This ancient holy site has enough to see along the Nile river that you could easily spend five days exploring the sites and feel as though you have not scratched the surface.
We chose Luxor, Egypt this week for our top destination for that very reason. The history. Known as Thebes during the Roman and Greek reigns of Egypt, this vast area will leave your mind itching to return to fifth grade to relearn your Egyptian history.
While there is not much pure adventure to be found in Luxor, you can get your heart rate to spike as you make your way underground at the Valley of the Kings and Queens exploring the excavated tombs. When here, make sure to soak in the fact that the paint you are looking at could be as old as 3,500 years. Yet, it looks as though it was painted last week.
Our founding editor, Dalton Johnson, just got back from a 10-day river cruise along the Nile and here is what he had to say about the trip with Abercrombie and Kent, “It’s hard to comprehend the timeline and scale of Egypt. The temples tower over you and as you look at the hyrogylphics you realize the temple took 180-200 years to build. It’s mind bending. However, if I didn’t have Mohamed Rehim as my Egyptologist guide, explaining what I was looking at, I don’t think I would have appreciated the temples and tombs as much because I just would not understand.”
Do you have an adventure worth sharing?
If so, reach out to us and pitch your ideas: Pitch Us
Discover more Adventures

Every Adventurer's Basecamp Is Just Outside of Rocky Mountain National Park at Trailborn Rocky Mountain
Adventure and hotel don’t belong in the same sentence, so why am I calling Trailborn Rocky Mountain the basecamp for adventurers? The answer I’m crazy. Just kidding. This adventure-forward hotel fosters a sense of community and encourages adventure. A steep task they have taken on, if I say so myself, but here’s how they do it.
Adventure and hotel don’t belong in the same sentence, so why am I calling Trailborn Rocky Mountain the basecamp for adventurers? The answer I’m crazy. Just kidding. This adventure-forward hotel fosters a sense of community and encourages adventure. A steep task they have taken on, if I say so myself, but here’s how they do it.
Kristin and I soaking in the apline glow at Bear Lake in Rocky Mountain NP. Photo by Dalton Johnson.
First, their lobby feels more like a mountain cafe that you want to sit back and enjoy a book. Speaking of books, they have several picture books (ahem, they are called coffee table books) lining the walls inviting you to grab one and start dreaming. Some of the books are local adventures and others are far flung idea generators from around the world.
We had a rainy day and spent a lot of time in the lobby, drinking lattes, reading books, and enjoying the fireplace.
Second, s’mores. Every night, Trailborn Rocky Mountain cranks the heat on the outdoor fire pit and supplies the s’mores essentials. For Kristin and I, this was a great place to unwind while sharing a beverage and chatting. One of the nights, the fire pit was “crowded” and we struck up some great conversations with other travelers who shared beta for great hikes in the area.
What Are The Rooms Like?
The rooms are newly renovated, to a modern minimalism look and feel. By no means am I an architect, so I can’t name styles, but I can say the room was functional, enjoyable to stay in, and had plenty of storage for our clothing. Also, Chestnut, our dog, had plenty of room to lounge around.
Favorite parts:
They had a window seat that was perfect for sitting and reading, especially on a rainy day.
Our dog could stay in the room and they gave us dog bowls for Chestnut.
The shower was HOT and held the steam inside of the room well.
The complementary coffee and tea was on point! Way better than any other hotel I’ve stayed.
Some improvements/critiques I’d suggest:
The bed could still use an upgrade, I’m not sure what was going on, but ours was kind lumpy.
I’m a huge couch guy and the couch they built was funky. However, the window couch was AMAZING!
The TV is massive, which most people like, but I would have appreciated more art and less TV. I know this is me being picky and not liking TV.
Hotel Preview (Part 1):
Hotel Preview (Part 2):
We Got The Fetch & Stay Package:
Not many hotels allow you to have a dog in Estes Park, CO, so Trailborn Rocky Mountain has leaned into their dog friendly rooms providing a package that levels up the dog’s experience at the hotel. Now, that is a sentence I never imagined writing, but, hey, it’s 2025.
With the Fetch & Stay package your pup gets a bandana, dog bowls in your room, and some CBD treats for your dog. Chestnut was hesitant around the CBD treats but eventually he ate one and really mellowed out. Since this was a first for us and him, we watched him carefully. Nothing happened, thankfully.
The next day, Kristin and I gave him another one and waited for the treat to kick in. Then, we slipped out the door for a day long adventure in the National Park (where dogs are not allowed).
Learn more about the Fetch and Stay package: https://www.trailborn.com/rocky-mountains/outpost-offers/
Estes Park Must Do Adventures:
Rock Climb
Hike to Bear Lake for sunrise (you need a permit, I show you how in the linked article)
Trail Run in Rocky Mountain National Park. I ran the Cub Lake loop and really enjoyed it, despite getting lost and adding 5 miles.
Drive the old fall river road
Run around lake Estes in the rain… only kidding about the rain because we got caught in a summer rain storm. What the video here: https://youtu.be/wbJgUebvZqw
Hike / Climb Longs Peak
A day out climbing at the Fins with KMAC guides in Estes, Park. Photo by Dalton Johnson
Like I said at the start of this article, Trailborn Rocky Mountain has taken on a bold stance to become the basecamp for all adventurer’s coming to Estes Park, CO and I must say, they are off to a good start. Sure, they have some more tweaks to make, but all great things come with time. My guess, in five years their brand will expand and become synonyms with adventure.
So, if you are looking for a dog friendly place to call basecamp, give Trailborn Rocky Mountain a try.

I Was The First Tester for Big Agnes's Newest Bikepacking Tent
Earlier this year, Big Agnes called me with a desire to create their release promos for a new bikepacking tent, but, if you know anything about Big Agnes, they don’t like fake. So, the plan was to meet in Phoenix/Scottsdale for the Queen’s Ransom bikepacking loop.
Earlier this year, Big Agnes called me with a desire to create their release promos for a new bikepacking tent, but, if you know anything about Big Agnes, they don’t like fake. So, the plan was to meet in Phoenix/Scottsdale for the Queen’s Ransom bikepacking loop.
Quick note: by no way is this a sponsored post, Big Agnes doesn’t even know this article is being written.
The crew didn’t have enough time to complete the full route, but we had three days. Which was enough to hit the trail, test the tents, and shoot the required photo & video assets for the launch of this new tent.
So, let’s dive into the good, the bad, and the indifferent.
The Good:
Fits on your handle bars and/or front fork
Second generation of this style, with several upgrades, including the bag with integrated straps for easy attachment
Large vestibule, easy to cook and store gear
The ability to use my bike as a stake, adds a bit of safety knowing I’ll wake up if somebody is trying to grab my bike
Daisy chains for my stinky clothing to dry
The Bad:
I want more pockets. There are already enough pockets, but I’m a pocket guy in a tent, especially if I am sharing a tent
The Indifferent:
The colors. Overall, I’m used to Big Agnes having tents that pop and these tents are more stealth. The crew loved the color, but I was indifferent
My Actual Thoughts:
Who Is The Big Agnes Bikepacking Tent For?
The first question that came to mind when I grabbed this tent was, “Do I really need a separate tent for bikepacking since I already have three other tents?”
Honestly, no.
Why?
I only bikepack one, maybe two times a year so dropping $500-something on a fourth tent for two long weekends a year isn’t worth it to me. However, if I were to go on a long bikepacking trip, say a 30-60 day trip again — I cycled around New Zealand, partway across the US, and a few other longer trips — I would invest in a this tent. Having a tent made for a bike just makes sense.
Knowing this tent exists, when I plan that next big trip, which is brewing in the back of my mind, I would get this tent. Most likely the Tiger Wall UL2.
If you are buying this tent, bikepacking is you main activity or you’re headed out on a longer trip.
Will The Tent Hold Up?
After three days in the desert, I can’t fully answer this question. With that said, every Big Agnes tent I have owned, which I think is roughly 10 or 11 at this point, has lasted several seasons of wear and tear, crazy storms, and harsh ground that would tear most tent bottoms (I’m not a fan of ground traps unless I am cowboy camping).
Also, Big Agnes has a great warranty/repair program, so if something does happen, they got your back.
Final Thoughts
If you are in the market for a tent and love bikepacking, this should be at the top of your list. Very few competitors come close to the comfort this tent provides. Sure there are a few lighter tents on the market, but you will sacrifice comforts like bug net, vestibule, daisy chains to air your gear, etc. While those seem like little things that don’t matter, trust me they make a world of difference!
Bugs suck, it’s nice to escape them and get a good night sleep.
Vestibules are critical for storing gear when it rains as well as cooking in non-ideal weather
Daisy chains… just think about putting on wet gear, from your sweat the day before, that has sat in a bundle in the corner of your tent. Rash-city-baby!
The 5 Stages of Visiting Bear Lake in Rocky Mountain National Park
With the timed entry into Rocky Mountain National Park, access to Bear Lake at sunrise takes a little bit of planning. While there are day of permits available, they seem to be impossible to land. So, if you are making the trek out to Rocky Mountain National Park, I suggest you secure your entry permit months beforehand.
Before diving into the 5 stages of Bear Lakes, here’s a little backstory you should know before visiting Bear Lakes for yourself:
With the timed entry into Rocky Mountain National Park, access to Bear Lake at sunrise takes a little bit of planning. While there are day of permits available, they seem to be impossible to land. So, if you are making the trek out to Rocky Mountain National Park, I suggest you secure your entry permit months beforehand.
With that said, Kristin, my partner, was able to land an entry permit for the morning slot, the night before, during late-summer in the middle of the week. I think we were lucky, but who really knows?!
Now that your permit is secured, it’s time to set your alarm the night before and try to sleep, crossing your fingers you wake up to an early alarm, drive through the dark to the trailhead, and walk the .5 of a mile to Bear Lake.
Yup, the walk is very short, so no need to rush.
I suggest bringing a warm beverage to keep you warm, even if it is the summer as the lake sits at 9,449 feet. From there, set up your camera, enjoy the alpine glow on the cliffs, and push that shutter button.
You can walk around the lake to create different images, I liked the alpine glow in the morning from the eastern bank of the lake and the northern bank of the lake around mid-morning when most of the lake was in full sun.
Now, let’s explore the 5 stages of visiting Bear Lakes:
1) Arriving In Pitch Black Wondering Where Bear Lake Is At

Camera: Sony a7r4
Lens: Tamron 28-75 f/2.8 G2
Focal length: 44 mm
Aperture: f/5.0
Shutter-Speed: 1/40 second
ISO: 400
2) Patiently Waiting For The Alpine Glow To Start

Camera: Sony a7r4
Lens: Tamron 16-30 f/2.8 G2
Focal length: 16 mm
Aperture: f/2.8
Shutter-Speed: 1/30 second
ISO: 400
3) Standing In Excitement The Glow Has Arrived, But Also Realizing You Are Cold From Sitting To Long
Camera: Sony a7r4
Lens: Tamron 16-30 f/2.8 G2
Focal length: 16 mm
Aperture: f/2.8
Shutter-Speed: 1/100 second
ISO: 400
4) Realizing There Is More To Bear Lake And Start Walking Around, Feeling Hard Core FOMO You Didn’t Do This Before
Camera: Sony a7r4
Lens: Tamron 16-30 f/2.8 G2
Focal length: 16 mm
Aperture: f/2.8
Shutter-Speed: 1/320 second
ISO: 250
5) Looking Over Your Shoulder And Thinking, “Dang! Bear Lake has it going on!”

Camera: Sony a7r4
Lens: Tamron 16-30 f/2.8 G2
Focal length: 30mm
Aperture: f/5.0
Shutter-Speed: 1/320 second
ISO: 250
People Care About You and Your Work, If They Know You
"At the end of the day, nobody cares about you"
False.
It's the opposite. If you don't let people know you exist they don't care about you because they don't know you.
"At the end of the day, nobody cares about you"
False.
It's the opposite. If you don't let people know you exist they don't care about you because they don't know you.
When you are hidden away in the dark, nobody can even care about you because they don't know you. That means two things:
First, you can do whatever you want because your actions don't really have consequences. So, go create whatever you want!
Second, you can't land jobs if nobody knows who you are or what you do. So, go create something to make a name for yourself, make some money using your camera, and turn that "dream job" into your "real job".
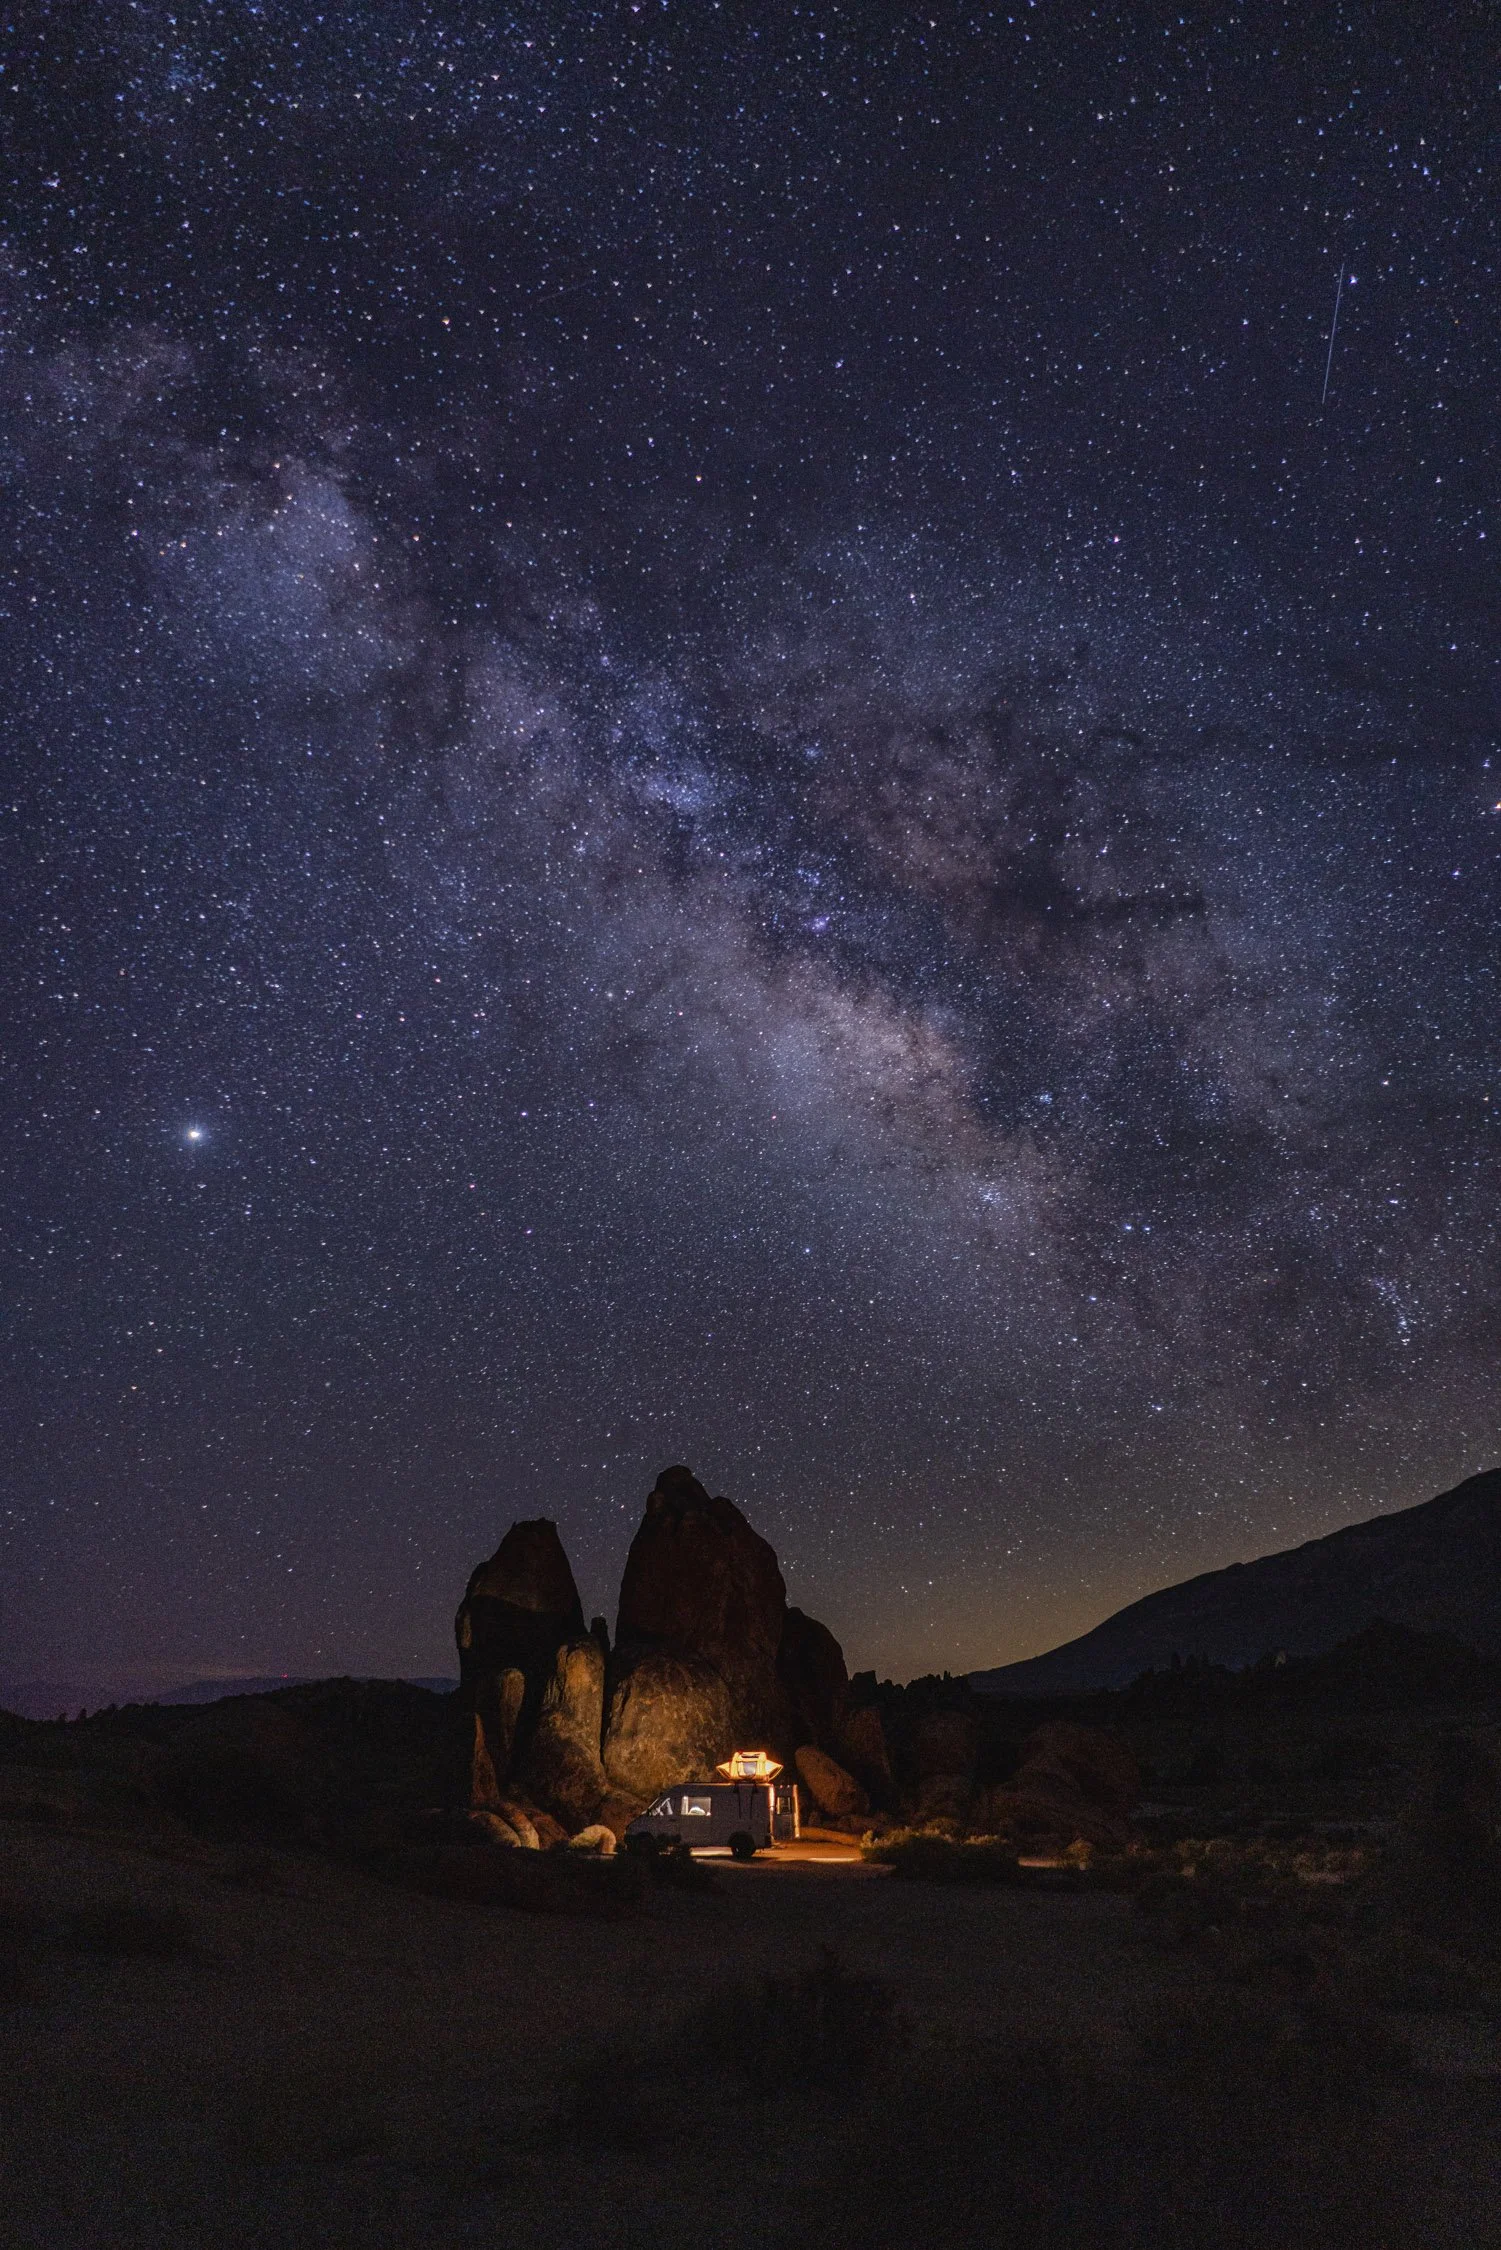
Yes, this is a bit preachy, but that's because these images come from July 7th, 2020 when I almost exclusively photographed on spec for outdoor brands and played in the mountains every day. At the time, that is what I needed and wanted. However, over the years my goals changed from summiting mountains to using my camera as a key to unlock new places in this world, like Antarctica.


BTW this is the summit of Mount Mallory in the High Sierra of CA. A mostly unknown peak directly across from Mount Whitney. The night time images are from Alabama Hills. If my memory serves me right, some rental car company picked up the glowing van shot with the milky way overhead.
Lastly, if you are like "how they heck do I start this type of career?" I wrote an ebook and it's only 10 bucks. Which is incredibly affordable because I want every who wants to be in this industry to learn what they need to learn to succeed!

The Adventure Photographer’s Playbook is an e-book created by full-time photographer Dalton Johnson to help new photographers go from nothing to booked in the adventure photography space.
This adventure photography e-book goes over the business and what “making it” as a photographer in the outdoor space requires. Covering topics such as pricing, marketing, building a body of work, reflection questions, and everything you need to know to make a career out of adventure photography.
Updated: June 2025
The Weekend Guide to Half Moon Bay
Looking for the perfect weekend escape from the hustle and bustle of the Bay Area? Nestled just 29 miles south of San Francisco lies Half Moon Bay, a charming coastal town that often flies under the radar but packs a punch when it comes to weekend adventures. Whether you're a surfer, poet, hiker, nature lover, or simply seeking a relaxing coastal getaway, Half Moon Bay has something for everyone.
Looking for the perfect weekend escape from the hustle and bustle of the Bay Area? Nestled just 29 miles south of San Francisco lies Half Moon Bay, a charming coastal town that often flies under the radar but packs a punch when it comes to weekend adventures. Whether you're a surfer, poet, hiker, nature lover, or simply seeking a relaxing coastal getaway, Half Moon Bay has something for everyone.

Additional Information:
Please allow 5-10 days for printing and shipping.
I have the ability to print custom sizes and material (like wood, gatorboard, etc.). If this interests you, please reach out to dj@dalton-johnson.com for a free quote with the size and material you desire.
PROS:
Stunning Coastal Beauty: Half Moon Bay boasts a breathtaking coastline with rugged cliffs, pristine beaches, and dramatic ocean views, making it a paradise for nature lovers and photographers.
Outdoor Activities: From surfing and paddleboarding to hiking and beachcombing, Half Moon Bay offers a wide range of outdoor activities for adventure seekers and leisurely explorers alike.
Laid-back Atmosphere: Despite its proximity to San Francisco, Half Moon Bay maintains a relaxed and laid-back atmosphere, perfect for unwinding and escaping the hustle and bustle of city life.
Charming Downtown: The town's charming downtown area is lined with boutique shops, art galleries, and eateries, offering a delightful experience for visitors looking to explore local culture and cuisine.
Sustainable Practices: Half Moon Bay is committed to sustainability and environmental conservation, ensuring that visitors can enjoy its natural beauty responsibly.
CONS:
Crowded During Peak Season: Like many coastal destinations, Half Moon Bay can get crowded during peak tourist seasons, especially on weekends and holidays, which may detract from the tranquility of the experience.
Limited Public Transportation: While Half Moon Bay is easily accessible by car, public transportation options to the area are limited, making it more challenging for visitors without a vehicle to explore the region.
Weather Variability: The coastal weather in Half Moon Bay can be unpredictable, with foggy mornings and cool evenings even during the summer months, so visitors should be prepared for potential weather changes.
Higher Costs: Accommodation and dining options in Half Moon Bay, particularly those with ocean views or upscale amenities, can be more expensive compared to inland areas or less touristy destinations.
Limited Nightlife: While Half Moon Bay offers a relaxing and laid-back atmosphere, it may not be the ideal destination for those seeking vibrant nightlife or a bustling entertainment scene.

A surfer dropping in on a massive wave at Mavericks. Photo by Dalton Johnson, follow him on Instagram
Why Visit Half Moon Bay?
Half Moon Bay beckons with its breathtaking coastline that's nothing short of a nature lover's paradise. The rugged cliffs stand sentinel against the crashing waves of the Pacific, creating a dramatic and awe-inspiring vista. These cliffs not only add to the visual appeal but also provide fantastic vantage points for panoramic ocean views, perfect for those Instagram-worthy moments or simply to pause and take in the sheer grandeur of the seascape.
The beaches in Half Moon Bay are more than just sandy stretches; they are tranquil havens where the rhythmic lull of the waves invites relaxation and contemplation. Whether you're lounging on the soft sands, taking a refreshing dip in the ocean, or indulging in a leisurely beach walk, the pristine beaches of Half Moon Bay offer a serene escape from the hustle and bustle of city life.
What sets Half Moon Bay apart is its ability to maintain a laid-back atmosphere despite its proximity to the bustling metropolis of San Francisco. Here, time seems to slow down, allowing visitors to disconnect from the stresses of daily life and reconnect with nature. The town's charming streets lined with quaint shops, cafes, and art galleries exude a welcoming vibe, inviting exploration and leisurely strolls.
Moreover, Half Moon Bay's natural beauty isn't just a backdrop; it's an integral part of the town's identity. The community takes pride in preserving its coastal heritage and protecting the local environment. This commitment to sustainability ensures that visitors can experience the beauty of Half Moon Bay without compromising its future.
In essence, Half Moon Bay offers more than just a weekend getaway; it's an opportunity to immerse yourself in the wonders of nature, rejuvenate your senses, and create lasting memories against the stunning backdrop of the California coast.

The swell was projected 30-40 feet with the wind in its favor, I’d say the projection was right! Here is Mavericks, shot from the cliffs, with a gentle off-shore wind. If you look close enough, there is a surfer inside the barrel! What a swell to remember December 8, 2020.
Additional Information:
Please allow 5-10 days for printing and shipping.
I have the ability to print custom sizes and material (like wood, gatorboard, etc.). If this interests you, please reach out to dj@dalton-johnson.com for a free quote with the size and material you desire.
Surfing and Water Activities
For surfers, Half Moon Bay is a mecca during the winter months when powerful swells roll in from the Pacific Ocean. Mavericks, one of the most famous big-wave surf spots in the world, attracts experienced surfers from far and wide. Even if you're not ready to tackle the massive waves of Mavericks, there are plenty of other surf breaks along the coast suitable for surfers of all skill levels.
If surfing isn't your thing, fear not—Half Moon Bay offers a range of water activities, including paddleboarding, kayaking, and beachcombing. Rent a paddleboard and explore the calm waters of Pillar Point Harbor, or join a guided kayaking tour to get up close and personal with the marine life that calls the bay home.
Hiking and Outdoor Exploration
Beyond the beaches, Half Moon Bay boasts an array of hiking trails that showcase the area's natural beauty. The coastal bluffs offer panoramic views of the ocean, while inland trails wind through redwood forests and meadows teeming with wildflowers. Popular hiking spots include the Purisima Creek Redwoods Preserve, where you can wander amidst towering redwoods, and the coastal trail that stretches from Half Moon Bay to nearby Montara.


Weekend Itinerary For Half Moon Bay
Here's a suggested itinerary for a memorable weekend in Half Moon Bay:
Day 1: Arrival and Beach Day
Arrive in Half Moon Bay and check into your accommodations, whether it's a cozy beachside inn or a vacation rental with ocean views.
Spend the afternoon exploring Half Moon Bay State Beach or Francis Beach, where you can sunbathe, swim, or take a leisurely stroll along the shoreline.
Enjoy a seafood dinner at one of the town's many restaurants, featuring fresh catches from the nearby waters.
Day 2: Outdoor Adventures
Start your day with a hearty breakfast at a local cafe before embarking on a hiking adventure. Choose a trail that suits your skill level and preferences, whether it's a coastal hike or a trek through the redwoods.
After your hike, cool off with some water activities. Rent a paddleboard or kayak and explore the calm waters of Pillar Point Harbor.
In the evening, unwind with a beach bonfire (where permitted) or enjoy dinner at a waterfront restaurant with sunset views.
Day 3: Explore and Departure
Before heading home, take some time to explore Half Moon Bay's charming downtown area. Browse the boutiques, art galleries, and local shops for unique souvenirs.
If time allows, visit the historic Pigeon Point Lighthouse or take a scenic drive along Highway 1 for more breathtaking coastal views.
Depart Half Moon Bay feeling refreshed and rejuvenated from your coastal getaway.
Is Half Moon Bay Worth Visiting?
Absolutely! Half Moon Bay offers a perfect blend of natural beauty, outdoor activities, and coastal charm that make it an ideal weekend escape from the Bay Area. Whether you're seeking adventure on the waves, peaceful hikes in nature, or simply a relaxing beach getaway, Half Moon Bay has something special to offer every visitor.
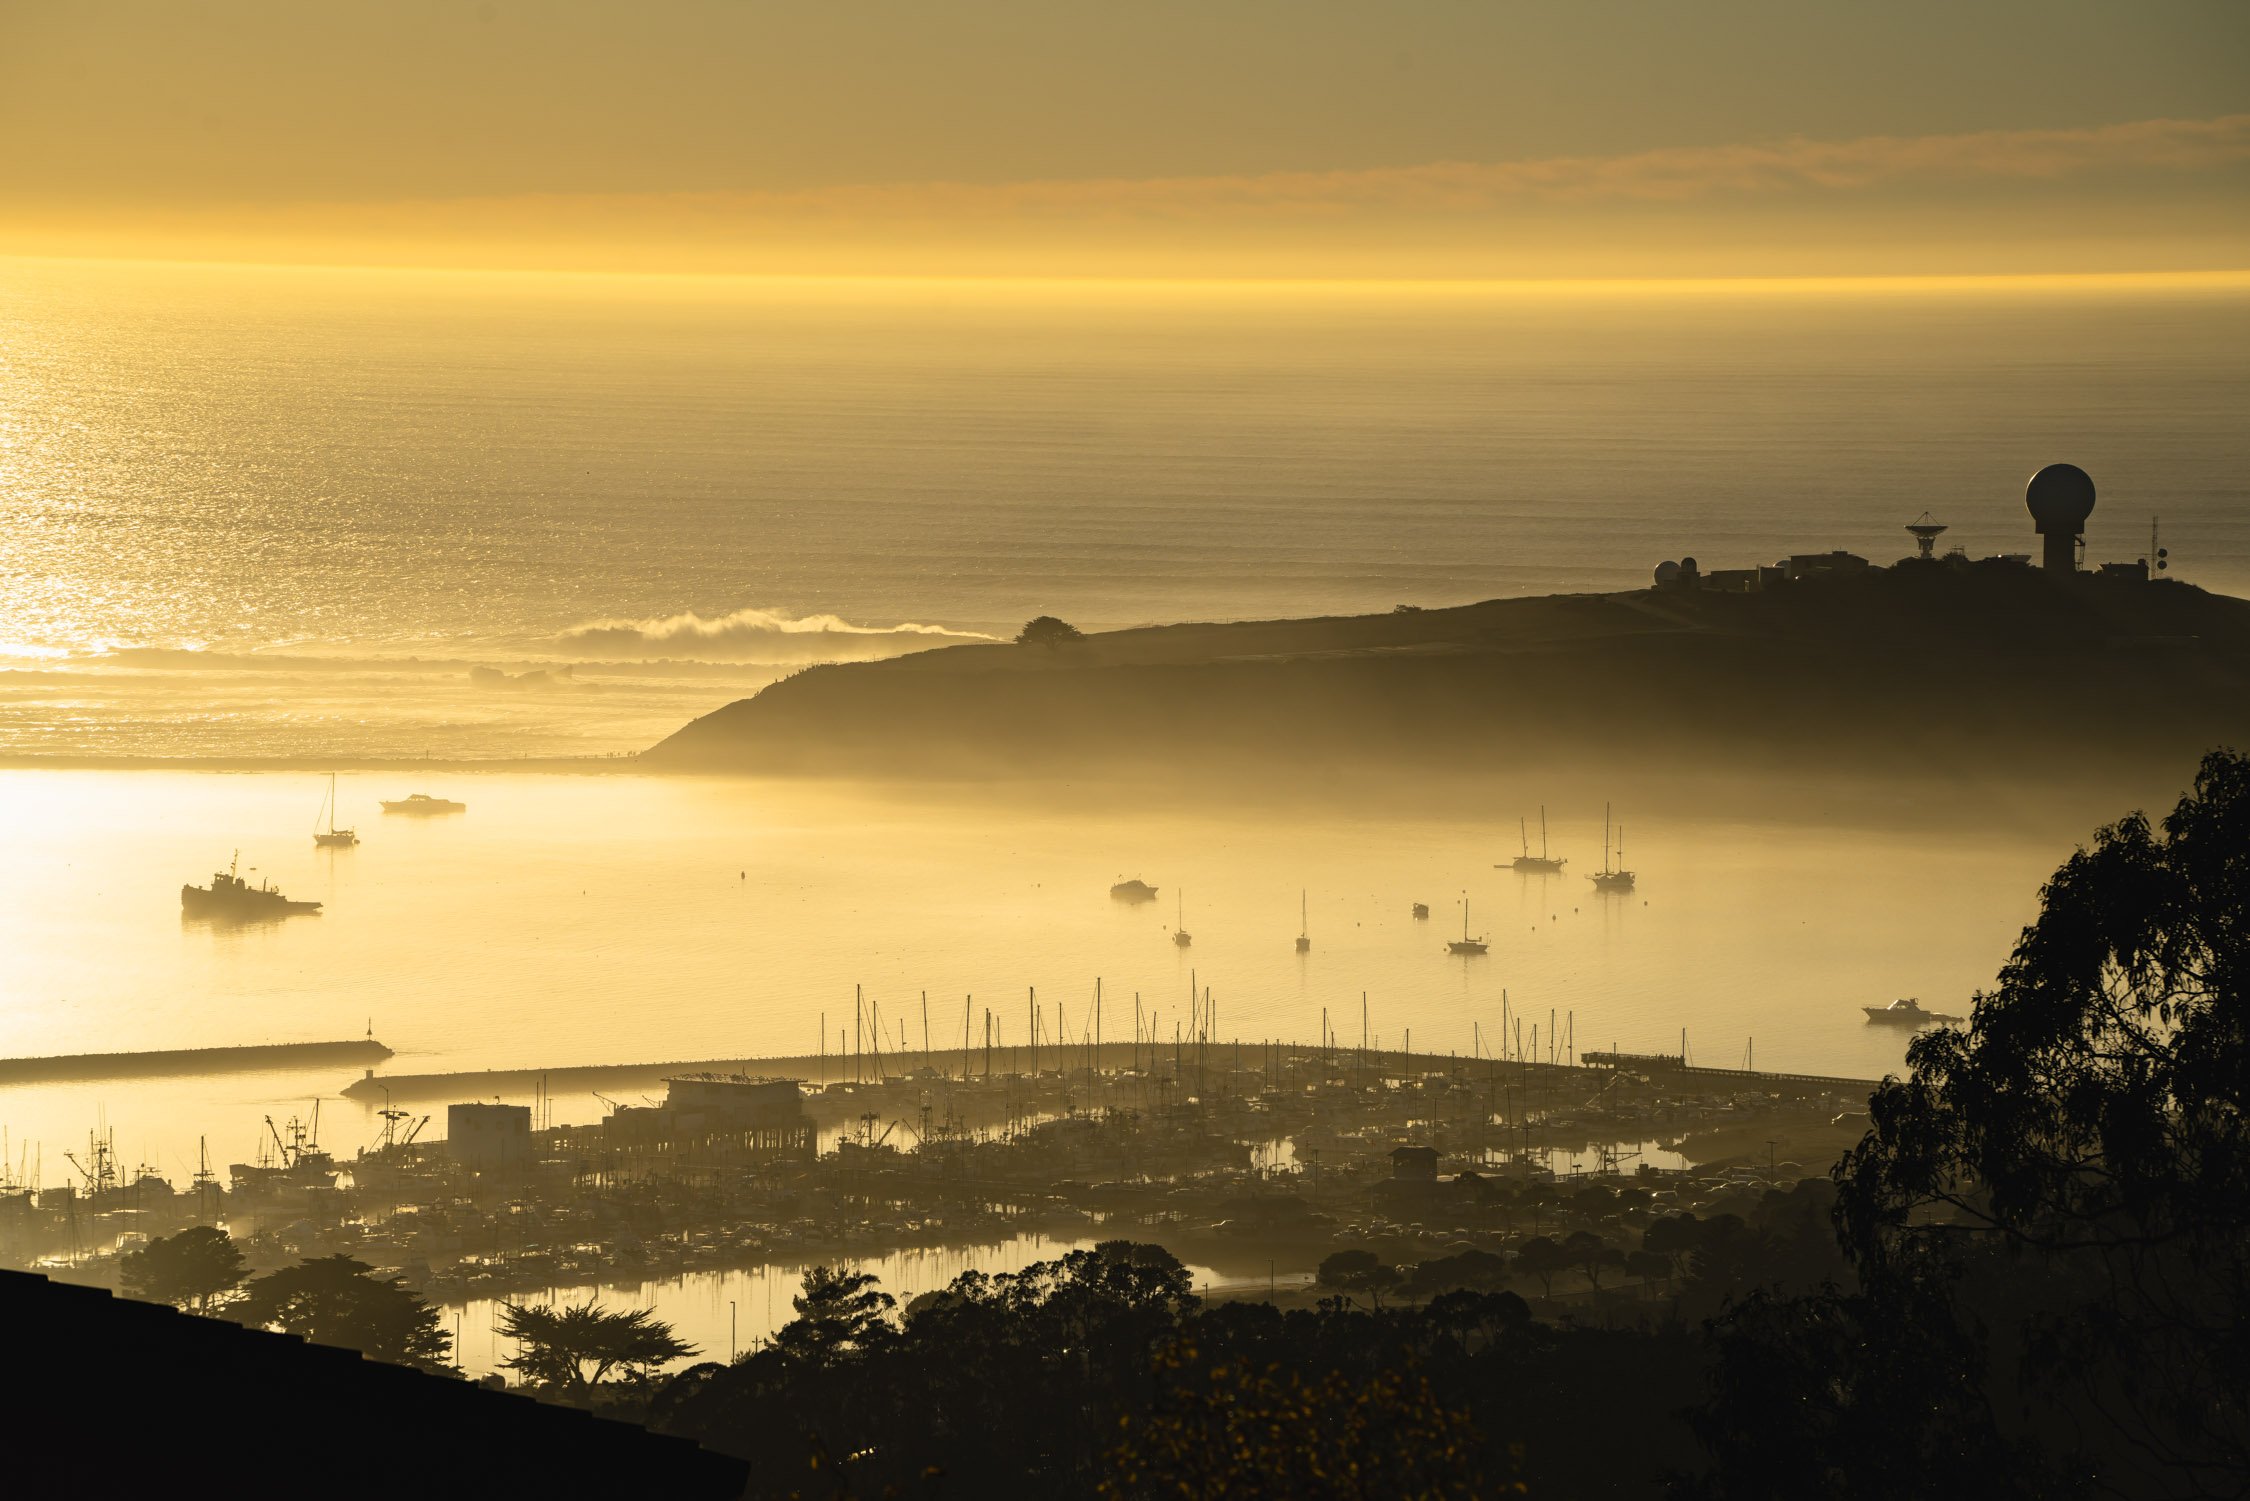
The sunset haze over the marina of Half Moon Bay. Photo by Dalton Johnson, follow him on Instagram
Half Moon Bay stands as a testament to the natural beauty and laid-back charm that defines California's coastal treasures. Its rugged cliffs, pristine beaches, and array of outdoor activities make it a haven for weekend adventurers and those seeking a peaceful retreat from city life. While it may have its challenges, such as peak season crowds and limited public transportation, the pros of visiting Half Moon Bay far outweigh the cons. Whether you're surfing the waves, hiking the coastal trails, or simply soaking in the stunning ocean views, Half Moon Bay offers an unforgettable experience that leaves a lasting impression on every visitor. So pack your bags, hit the road, and discover why Half Moon Bay is a hidden gem worth exploring along the majestic California coastline.
Discover More In Half Moon Bay
As A Kid, My Dream Was To See The World
As a kid, my dream was to see the world. My oldest core memories come from road trips with my family growing, which is why I think I love them so much still to this day. Every year, I try to take at least 3 or 4 "big" road trips to new places. However, whenever I can return to a location that blew my mind, I get very happy. And, I must say Monument Valley is one of those locations.
As a kid, my dream was to see the world. My oldest core memories come from road trips with my family growing, which is why I think I love them so much still to this day. Every year, I try to take at least 3 or 4 "big" road trips to new places. However, whenever I can return to a location that blew my mind, I get very happy. And, I must say Monument Valley is one of those locations.

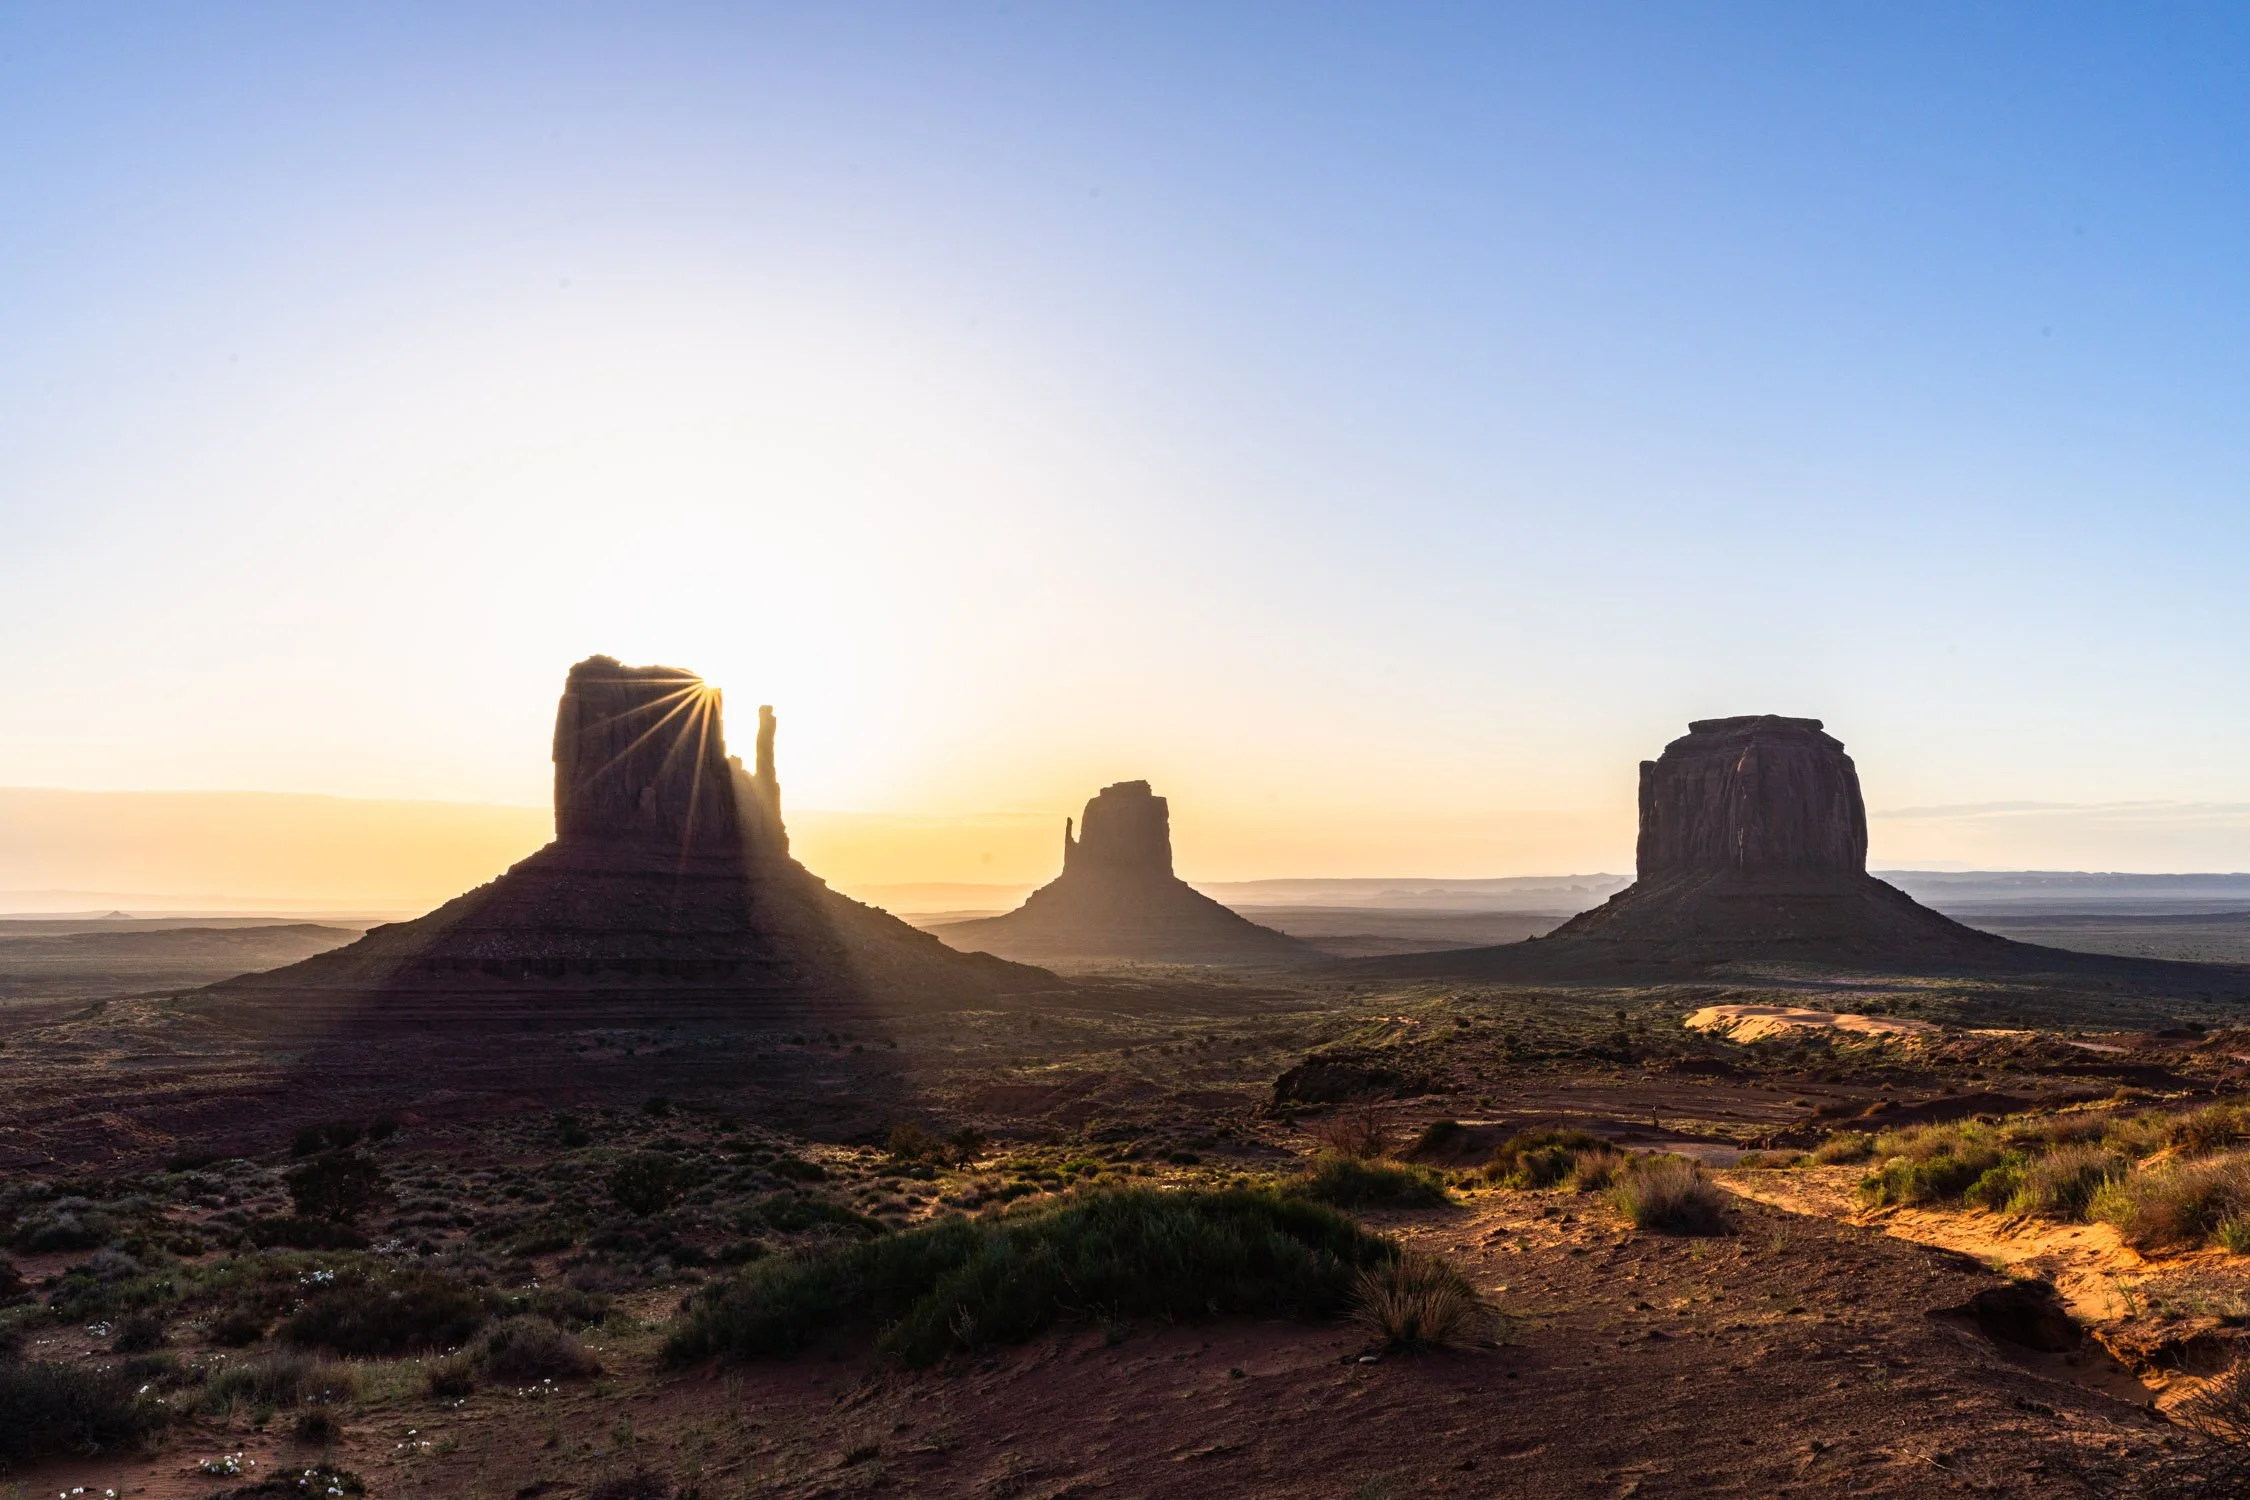
On a chilly morning in Monument Valley, I embarked on a photography adventure that I will forever cherish. The air was crisp, and a light layer of frost adorned the landscape, creating a breathtaking winter wonderland. As the sun began to rise, casting a golden hue across the majestic rock formations, I couldn't resist the urge to capture the magic of the moment.
Wrapped in multiple layers to shield myself from the cold, I positioned my camera on a sturdy tripod and carefully composed the frame. The iconic Mittens stood tall in the distance, their peaks glowing with the warm morning light. I adjusted the exposure settings, wanting to capture every intricate detail of the snow-dusted landscape.
As I clicked the shutter, the quietness of the morning was momentarily disrupted. My breath fogged the air, a visual testament to the frigid temperatures. Yet, I was completely immersed in the beauty surrounding me. Monument Valley, usually known for its arid desert charm, had transformed into a winter paradise, and I felt like a witness to a hidden gem.
In that frozen moment, as I captured the photograph, I couldn't help but feel a deep sense of gratitude. Nature had unveiled a side of Monument Valley that few had witnessed, and I was fortunate enough to freeze that fleeting beauty in time. That photograph serves as a reminder of the awe-inspiring moments that nature gifts us, even in the most unexpected and inhospitable conditions.
Additional Information:
Please allow 5-10 days for printing and shipping.
I have the ability to print custom sizes and material (like wood, gatorboard, etc.). If this interests you, please reach out to dj@dalton-johnson.com for a free quote with the size and material you desire.
On my second trip to Monument Valley, the flowers were blooming, wild horses were grazing, and I was with the love of my life. Sharing a place as magical as this was a treat I hope I can share with my kids one day. But, what made it special?
From the 10,000 foot level Monument Valley is just a desert with some towers. But, that isn't how this place feels. When my feet landed in the sand and my face was warmed by the sun, I couldn't help but feel something special about this place. A sense of calm. A sense of belonging. A sense of struggle. A sense of perseverance.
The towers made me feel small and the dryness of the desert made me feel the ephemerality of life.
My mind tries to transport me back in time, but I can’t because it hurts. The history of this land in the not-so-far-back history is one of cruelty that I do not understand and will never understand. Even if I pretend to understand, it is a lie because the mindsets of both groups were so vastly different and conversations were not possible as a global mindset wasn’t around to aid in communication.
Going back farther in time, the landscape was likely very different. Water was more present and the area had far more predators and prey. Hunting would have looked different, the towers would look different, it all would be different.
I wish I could sit and understand, but I honestly don’t know where, or how, to start. So, on this trip, I drove the path and remained stunned by the natural beauty of the place. Snapped images and let the landscape sink into me. Laughed with Kristin and were goofy together.


The loop isn’t that long in distance and the 2WD van made the journey just fine, but we took our time. Starting at the famous Mitten towers we rattled down the dirt road and to the “back” at the Totem Pole. From here, we took a lunch break and walked around for a while. Not far away some like minded individuals pulled out a table and made lunch.
My belly was hungry and Kristin kept eyeing their food, so we made some ourselves.
I can’t recall if we had breakfast this morning because we woke up so early to arrive at the Mittens for sunrise. Something I recommend everyone do! So, the simple food we made of veggies was a delight.
Together, we sat on the roof of the van and stared out at the Totem Pole. What a sight!
I can see why movies have been filmed here. I just wonder what this place looked like 5,000 years ago.
A few of these images are available as prints, check them out in my store:
https://dalton-johnson.com/prints/monument-valley
If you are planning a road trip to Monument Valley, I've got you covered, read all about the area:

An Evening Surf With Santa Cruz Local Pro Austin Smith Ford And Dermatone
Without much daylight left, local surf-pro, Austin Smith-Ford, waxes his board for an evening of surf a few miles north of Santa Cruz, CA. A local’s only spot where you’ll surely be yelled at if you can’t say “hey” to at least a few surfers in the line up.
Sunscreen… check
Wetsuit… check
Surfboard… check
Waves… check
Sunset… soon to come
Without much daylight left, local surf-pro, Austin Smith-Ford, waxes his board for an evening of surf a few miles north of Santa Cruz, CA. A local’s only spot where you’ll surely be yelled at if you can’t say “hey” to at least a few surfers in the line up.
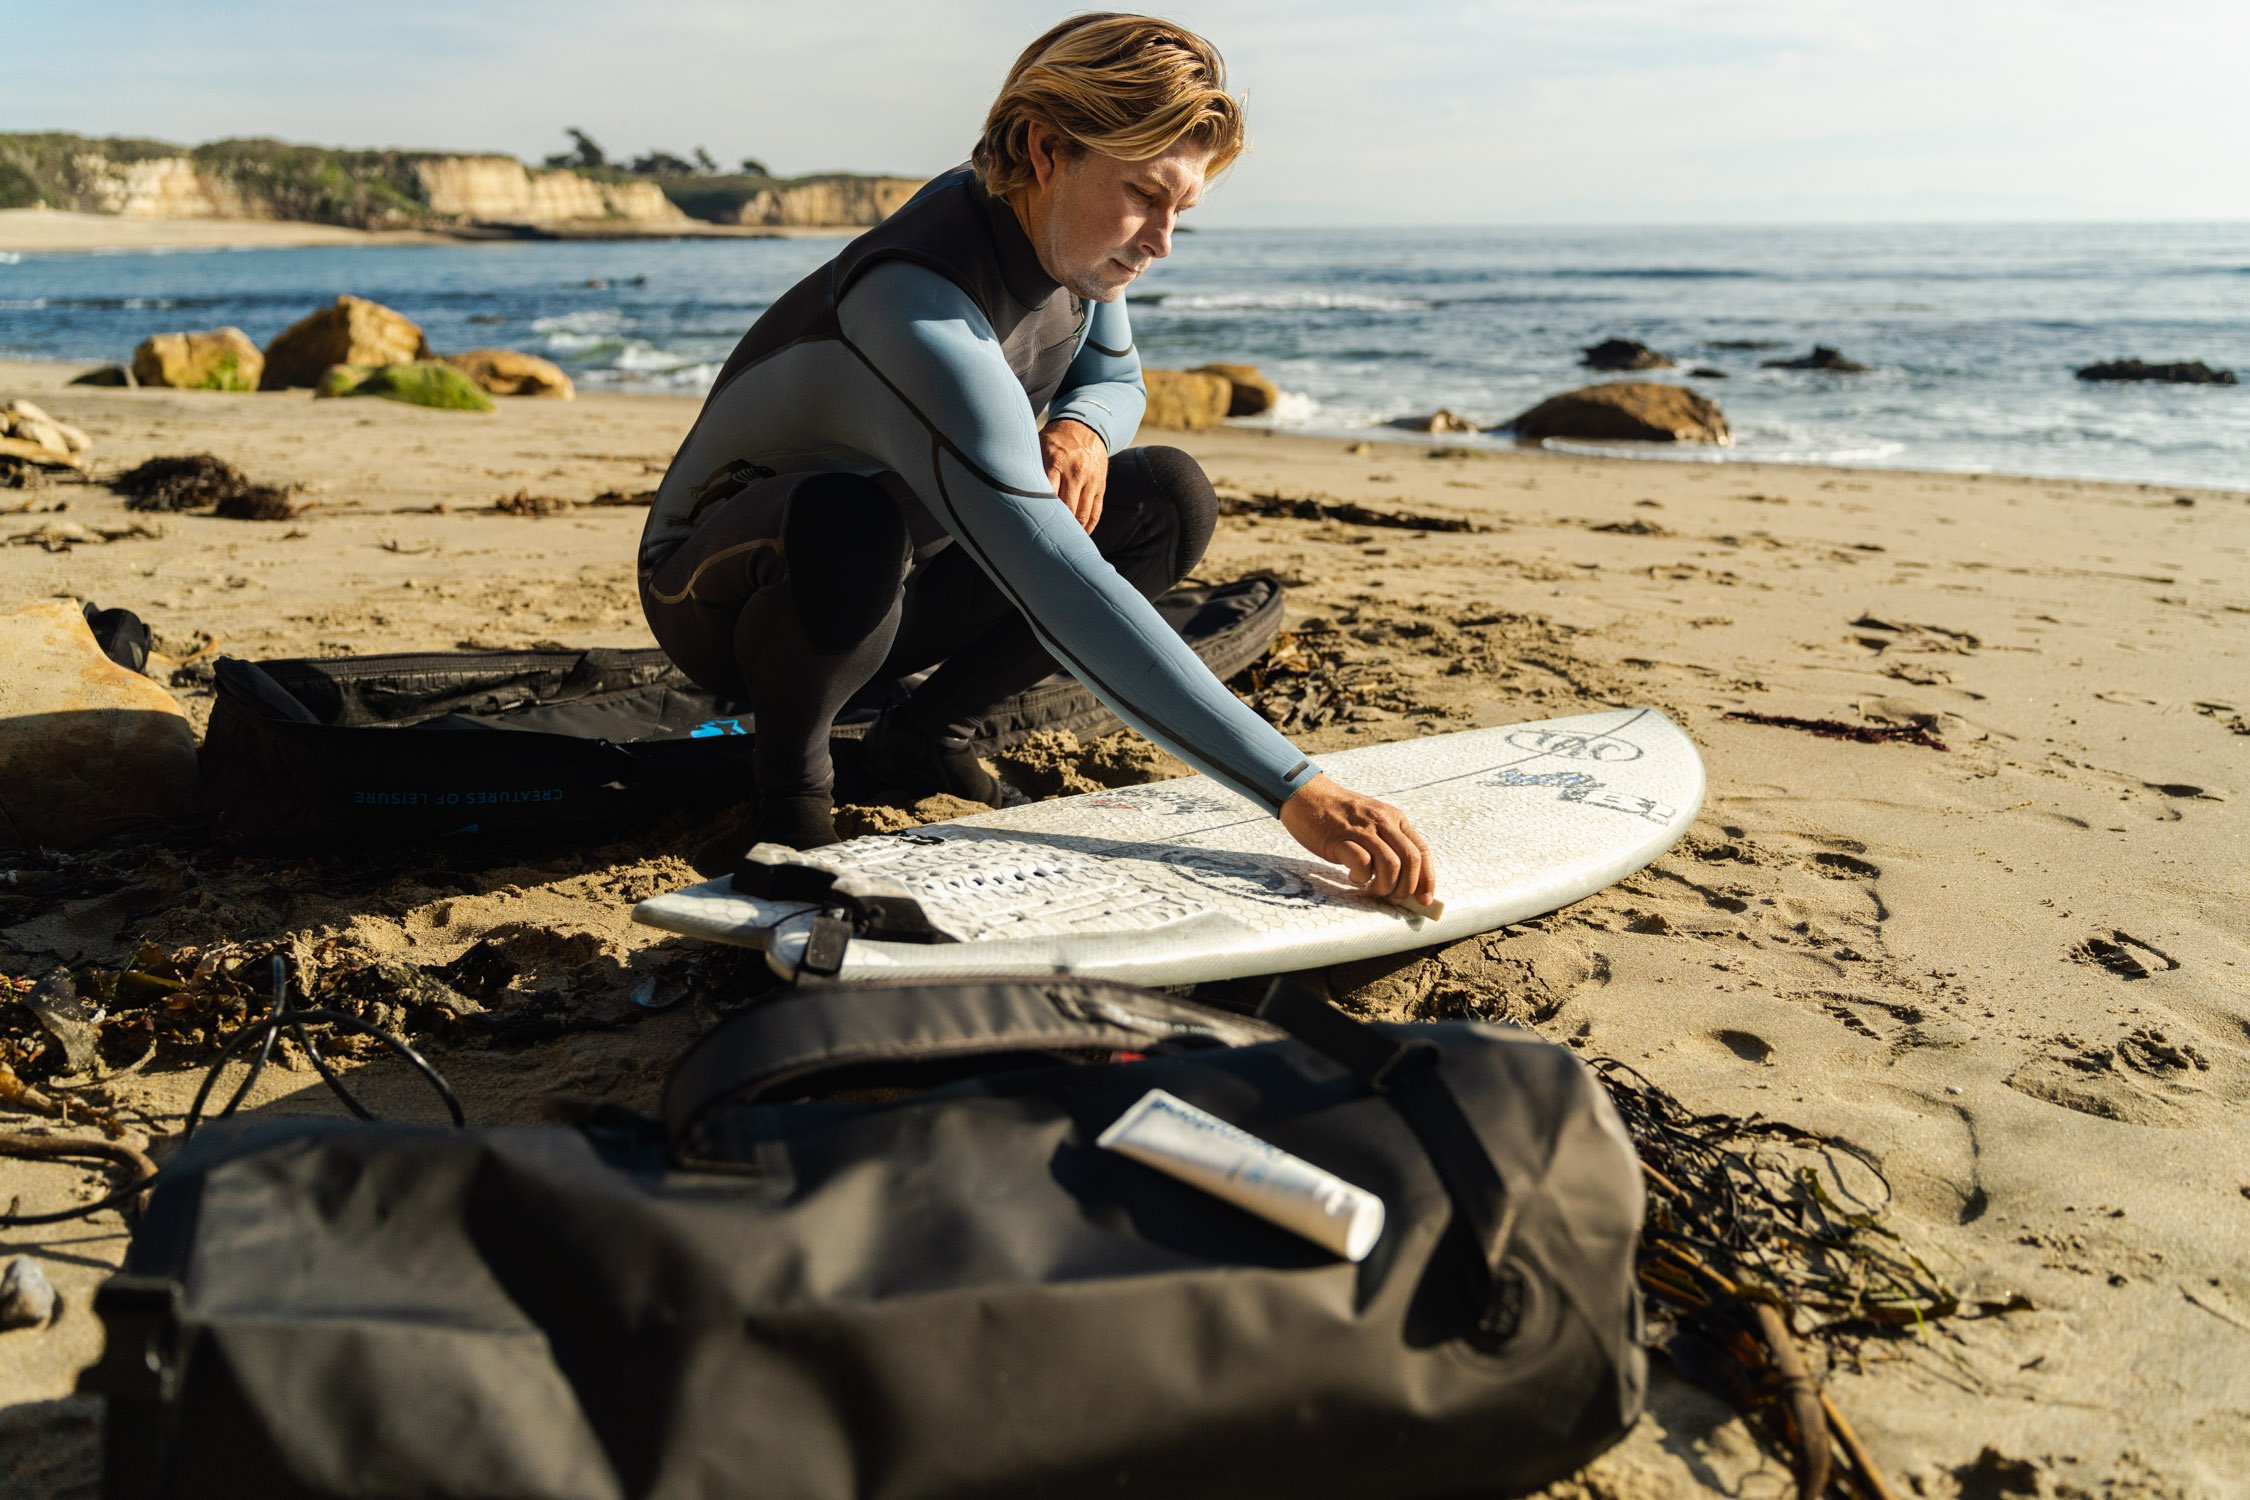
Austin Smith-Ford waxing his surfboard before heading into the ocean to surf. Photo by Dalton Johnson, follow him on IG


Product image of Dermatone Sunscreen, the sponsor of this adventure photography shoot. Photo by Dalton Johnson, follow him on IG

Austin taking in the sunset views between sets of waves, he’s the last one out. Photo by Dalton Johnson, follow him on IG


Staying late rewarded Austin with stellar golden light. Photo by Dalton Johnson, follow him on IG
One final wave to catch before nightfall. Photo by Dalton Johnson, follow him on IG


The motion of the ocean over 1 second. Photo by Dalton Johnson, follow him on IG

The Coolest Adventures We Found This Week
Adventure comes in all shapes and sizes, yet, we feel it is hard to discover new adventures. So, the editors at The Adventure Travel Network have teamed up to create a space highlighting the best adventures we have heard about each week. Without further adieu, we give you the coolest adventures we found this week:
Adventure comes in all shapes and sizes, yet, we feel it is hard to discover new adventures that are actually worth considering. So, the editors at The Adventure Travel Network have teamed up to create a space highlighting the best adventures we have heard about each week. These can be micro-adventures fit for your backyard to grand-adventures we aspire to achieve years down the road. Without further adieu, we give you the coolest adventures we found this week:
Our standards for testing and reviewing at The Adventure Travel Network:
Here at The Adventure Travel Network we have a dedicated group of testers who are required to live the experiences and adventures to be allowed to recommend them. Our recommendations are not sponsored, unless noted, and speak from the heart about every experience. Our aim is to share both the good and the bad so you understand what the experience would be like if you decide to partake. The only exception to this rule is if it is a news story, but then the writer will interview the person who did the adventure.
If you have any questions or comments about the products or reviews, you can write us at editors@the-adventure-travel-network.com
Week of January 20th, 2025

Photo by Dalton Johnson
Kayaking Lake Tahoe’s Dreamiest Destinations In A Single Day
Kayaking on Lake Tahoe turned out to be one of the most rewarding spontaneous adventures Kristin and I have ever planned. Starting our day at 3:30 a.m., we set out to explore three of the lake’s most iconic spots: Emerald Bay, Bonsai Rock, and Zephyr Cove. We began at Emerald Bay, paddling out to Fannette Island before the crowds arrived. The peaceful water, the historic teahouse, and even a fun cliff-jumping experience made it an unforgettable morning. After a quick hike back to the van, we drove around the lake, stopping for burritos on the way to Bonsai Rock. The crystal-clear water and submerged granite boulders at Bonsai Rock created a dreamlike kayaking experience, leaving us in awe of Tahoe’s natural beauty. By evening, we reached Zephyr Cove just in time for a breathtaking sunset paddle. Watching the sky shift through shades of gold, pink, and purple while gliding across the still waters was the perfect way to end the day.
The trip was ambitious, involving an early start, hours of paddling, and navigating challenging hikes to launch points, but every effort was well worth it. From serene morning waters to the rhythmic strokes of kayaking over submerged boulders, and finally, the tranquility of paddling at sunset, the day captured the magic of Lake Tahoe. Each spot offered its own unique perspective of the lake, and the combination of adventure, natural beauty, and quiet moments with Kristin made the experience unforgettable. For anyone considering a full day of kayaking, Lake Tahoe is the perfect destination to create memories that will last a lifetime.
Week of January 6th, 2025

Watching the alpine glow creep down the mountains surrounding Convict Lake, CA. Photo by Dalton Johnson
Kayak Convict Lake Along Highway 395 in California
The cool morning air wakes us up as we carry the Oru Kayaks to the side of the water. Arriving early to set up these foldable kayaks, Kristin and I hit slid onto the glassy waters of Convict Lake making sure we disturbed the reflection on the lake as little as possible. We are on a road trip down Highway 395 learning how to kayak. Neither of us had done so before this trip and we were slowly falling in love with the added access flatwater kayaking provided us. Very different than hiking and climbing, kayaking allows you to sit in the stillness that flatwater exudes. At least that is what I tell myself as shiver in my kayak, staring at the morning light creep down the mountain side.
Convict Lake is more than just a spot to kayak, the lake is tucked away from Highway 395 and provides great access to the Sierra Nevada mountains for backpacking, hiking, mountain biking, backcountry skiing, and rock climbing. In other words, Convict Lake makes for a great stop when road tripping Highway 395.

Kristin watching the sun set into the Pacific Ocean hoping to see the green flash. Photo by Dalton Johnson
Hike to the abandoned Sugar port in Todos Santos
Rarely do we highlight a single hike, however, when that hike leads to an abandoned sugar port and stunning views of the Pacific Ocean, we think it is worth mentioning here on our “Coolest Adventures of the Week”. Todos Santos, a small town north of Cabo San Lucas on the Pacific Coast, is often overshadowed by Cabo, but in the last five, maybe seven, years this town is starting to gain notice again. After the sugar industry left this area, the town became more of a local town than a tourist area. Right now, it’s still that way. But, Todos Santos offers great hiking, like the abandoned sugar port, which is perfect at sunset.
As someone who has spend over two years exploring Baja, I can confidently say, the cliff above the abandoned sugar port is one of the best places to watch the sunset in all of Baja.
Week of Dec. 30th, 2024
Skiing and Sailing the Antarctic Peninsula
When I first saw Of A Lifetime pop up on my computer screen, I figured I’d give it a quick watch. Five minutes in, I realized this was no ordinary ski video. This was something special. I paused, headed to my TV, and settled in to experience the full 44 minutes on the biggest screen in my house. It was the best decision I made all week.
But this video isn’t just about big lines and even bigger adventures. It’s a story of connection. A father and daughter bond through their shared love of skiing, and their relationship evolves over the course of their Antarctic journey. Watching this dynamic unfold hit me on a deeply personal level. Having spent 18 days in Antarctica with my mom, I know how rare and special it is to share such a life-changing experience with a parent. The way Of A Lifetime highlights that bond is as powerful as the skiing itself.

Andrew searching for some fish to spear. Photo by Dalton Johnson
Spearfishing In Baja
When the cold months rolled in at home in Lake Tahoe, California, we decided to head south in search of adventure, warm waters, and fresh seafood we speared ourselves. Baja's rugged coastline and endless opportunities seemed like the perfect place to spend a winter chasing fish beneath the waves.
Our convoy—a van built for living and a Ford Bronco—was packed to the brim with spearfishing gear, surfboards, and the essentials for beachside camping. With three people and a dog, we were ready for anything the Baja peninsula could throw our way. Every mile south spiked our curiosity, from bustling towns like Guerrero Negro to remote beaches like El Canejo that felt like they belonged to us alone. The freedom of the open road was omnipresent, and the promise of the ocean’s bounty—of fish or waves—kept our spirits high.
We were road tripping the Baja Peninsula in search of the best spearfishing spots.
Week of Dec. 23rd, 2024
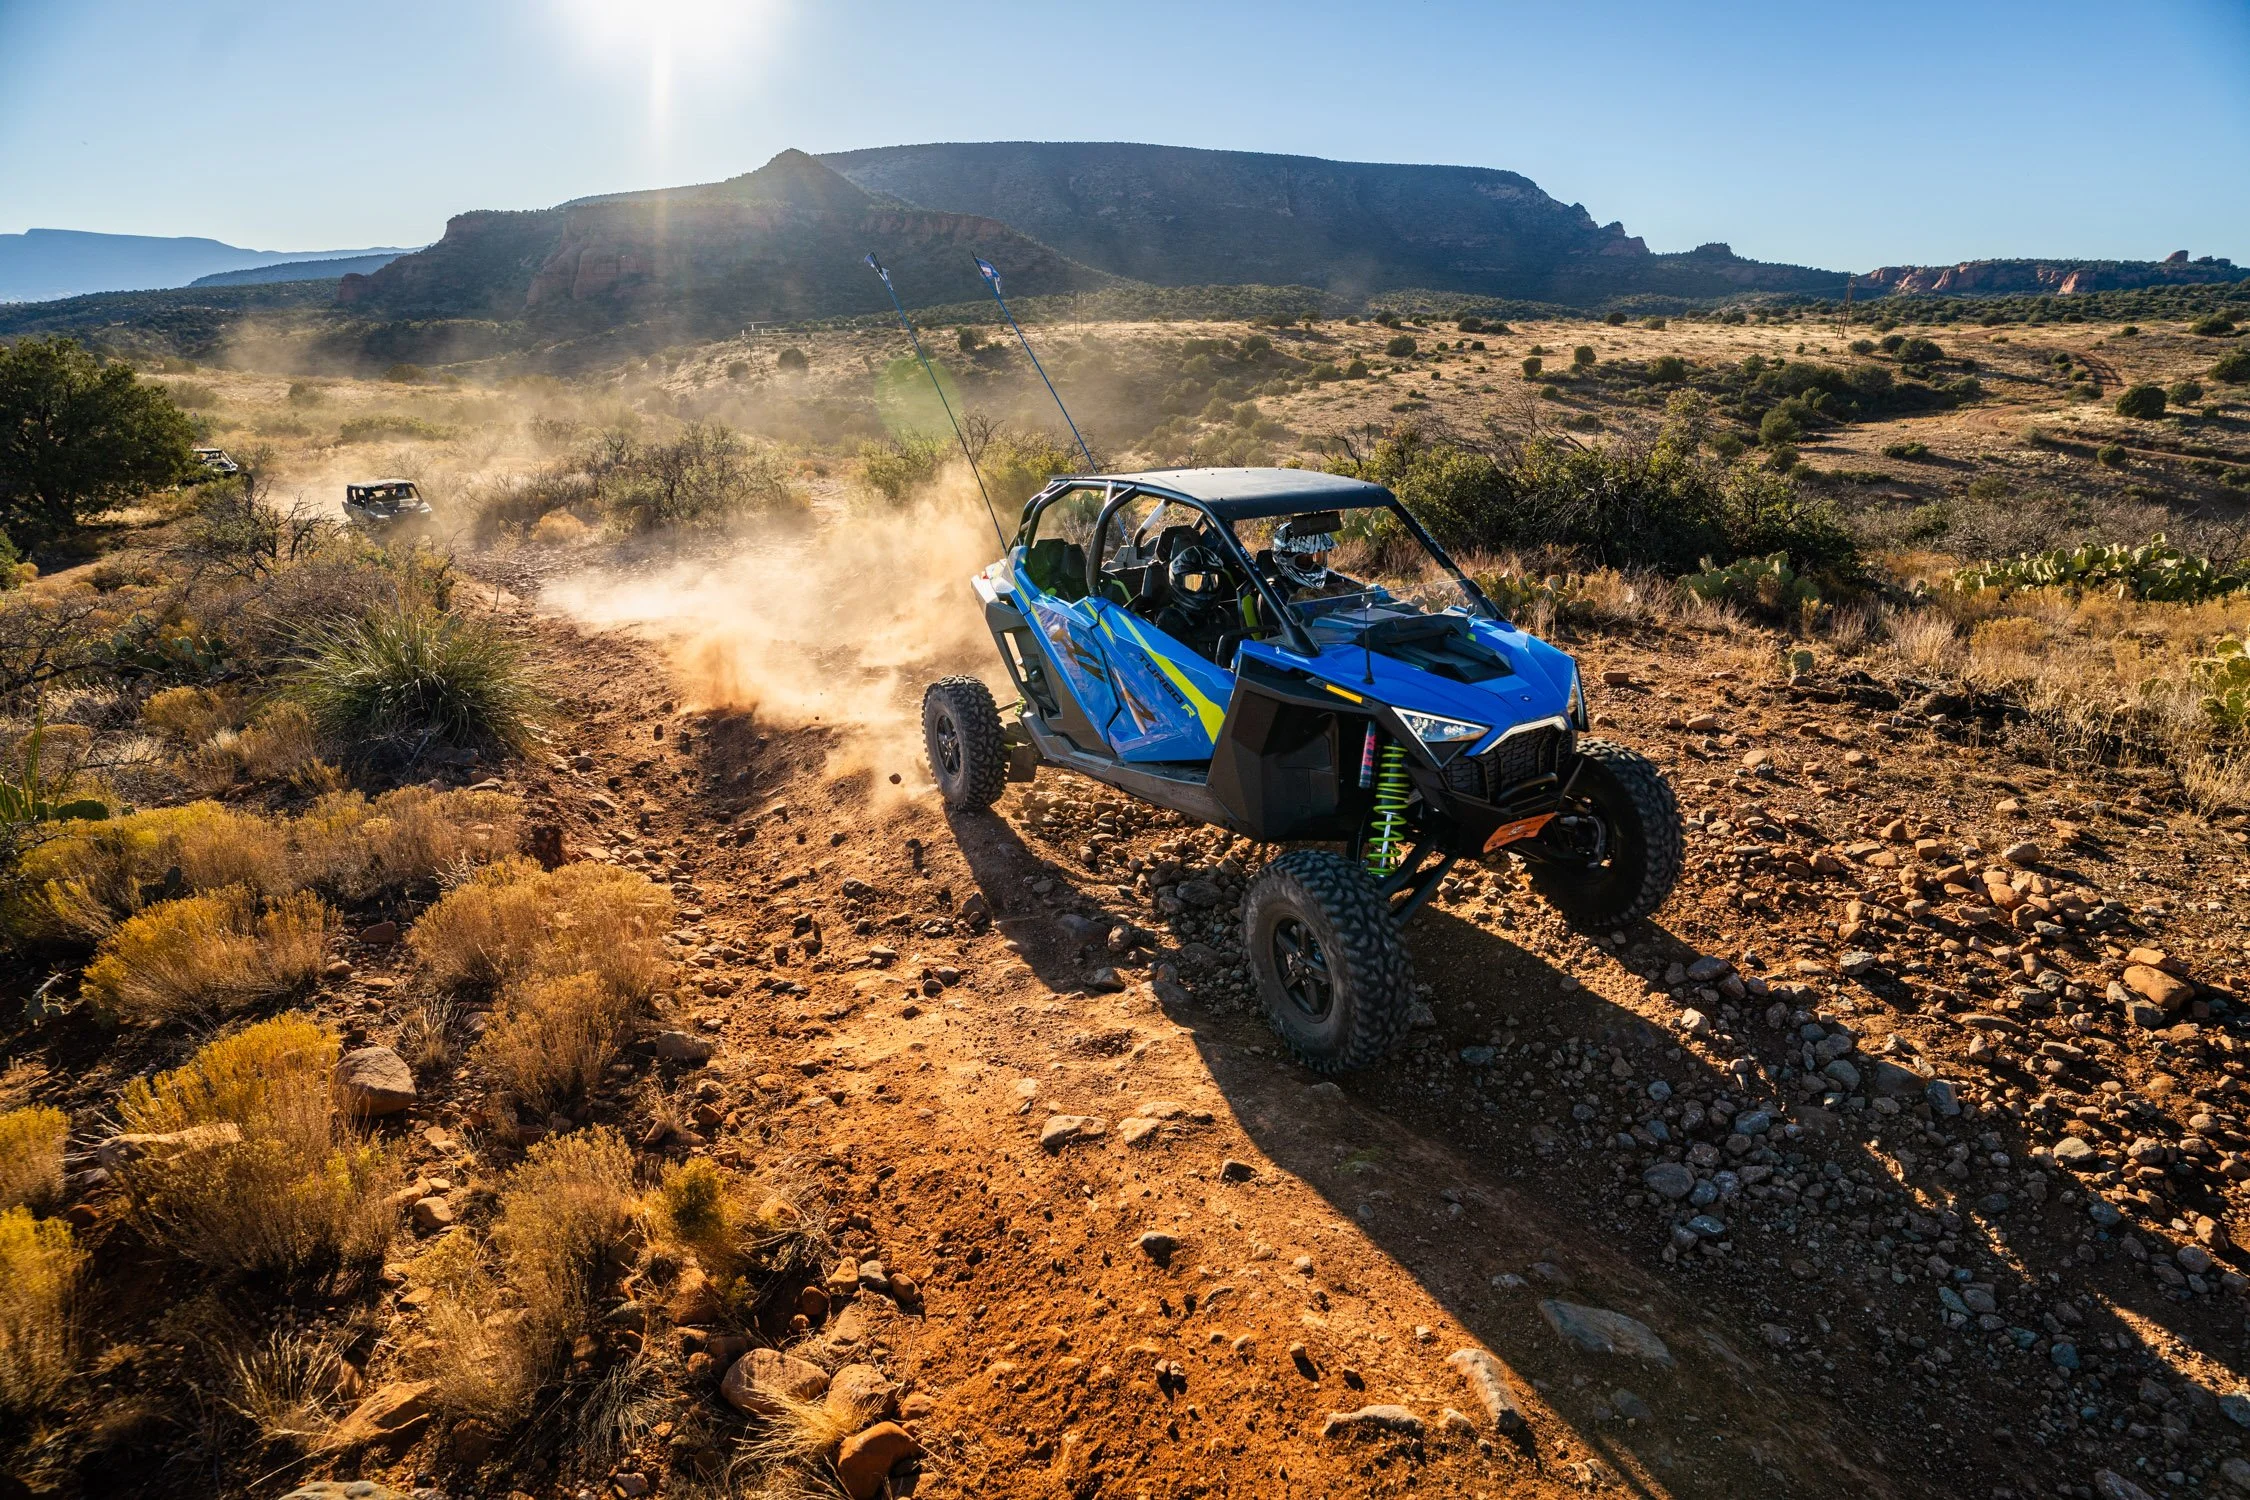
Leaving a trail of dust as we drive on the OHV trails of Sedona, AZ. Photo by Dalton Johnson
Rent a UTV and Rip Around the Desert Trails of Sedona, AZ
Sedona, AZ is one of our favorite places to adventure because it offers almost everything you could ask for; hiking, mountain biking, rock climbing, stunning views, vortexes, great food… the list goes on and on. Yet, this past year we had the opportunity to experience Sedona in a new way, trail riding in a UTV. I have to say, what a treat!
Don’t worry, you don’t have to own a side-by-side to enjoy this adventure, you can rent one from any of the local shops, we rented from Polaris Adventures, as long as you have an American driver’s license. Let me just pause here, being able to rent a side-by-side UTV without any off road experience is going to blow you mind and I really do not know how they allow you to do this!
Once you have made it through the pre-checks and clicked your seat belt, it is time to hit the trail.
For most, a half day of terrorizing the trails of Sedona on your rented UTV will leave your body sore from the thrashing you receive when going fast and your adrenal glands empty. I can say from experience, clocking in at 72 mph on a trail that twists and turns requires laser focus and a quick reaction time. Maybe I should put a disclaimer here saying “don’t try this at home” but I want you all to give this adventure a go.
If I could afford to own one of these adventure mobiles, I would. For now, I’ll stick to renting.
Do you have an adventure worth sharing?
If so, reach out to us and pitch your ideas: Pitch Us
Discover more Adventures

Common Mistakes to Avoid When Climbing Mount Massive
Mount Massive, Colorado’s second-highest peak, is the often overlooked step-sibling to the highest peak in Colorado, Mount Elbert, just across the valley. However, climbing this iconic mountain comes with its challenges, and mistakes can quickly turn an enjoyable trek into a tough lesson. Based on personal experiences, here are the top mistakes to avoid when tackling Mount Massive, so you can have a safer and more rewarding adventure.
Mount Massive, Colorado’s second-highest peak, is the often overlooked step-sibling to the highest peak in Colorado, Mount Elbert, just across the valley. However, climbing this iconic mountain comes with its challenges, and mistakes can quickly turn an enjoyable trek into a tough lesson. Based on personal experiences, here are the top mistakes to avoid when tackling Mount Massive, so you can have a safer and more rewarding adventure.
Crossing the first creek of Mount Massive. Photo by Dalton Johnson
1. Starting Too Late
One of the biggest mistakes you can make when climbing Mount Massive is starting too late. Afternoon thunderstorms are a well-known hazard in Colorado’s high country, and lightning strikes above the treeline can be deadly. An early start—ideally around 4:00 or 5:00 a.m.—gives you plenty of time to summit and descend before the storms roll in. On one of my hikes, I started later than planned and spent the entire ascent worrying about the clouds forming in the distance. Don’t let poor timing overshadow your experience.
Late starts also mean dealing with higher temperatures as the day progresses. Even at altitude, the sun’s intensity can be draining, especially on exposed sections of the trail. Early morning climbs offer cooler conditions, making the hike less physically demanding and more enjoyable. Additionally, starting early ensures that you’re not rushing your descent as daylight fades, reducing the risk of hiking in the dark.
For those aiming to beat the crowds, an early start has the added benefit of quieter trails. Mount Massive is popular among hikers, and trailheads can get busy by mid-morning. An early departure gives you a head start on parking and a more peaceful experience on the trail.

Shorts and a sun hoodie might not be the go to on Mount Massive, but that was what I did. Photo by Dalton Johnson
2. Overlooking Proper Layering
Weather on Mount Massive can change rapidly, and improper layering can make or break your hike. On one trip, I packed a thick Gore-Tex jacket and a fleece layer but skipped a lightweight windbreaker. As a result, I was either sweating in my heavy jacket or shivering in the wind when wearing just the fleece.
The key to staying comfortable is using a layering system that includes a moisture-wicking base layer, an insulating mid-layer, and a lightweight windproof or waterproof outer layer. This setup allows you to adjust to varying conditions without carrying unnecessary weight. Remember, it’s better to shed a layer than to not have the right one when you need it.
Another common mistake is neglecting to pack gloves and a warm hat. Even in the summer, temperatures at the summit can be freezing, and exposed skin loses heat quickly in strong winds. Keeping your extremities protected is just as important as layering your core. Take the time to research the weather forecast and pack accordingly to prepare for any sudden changes.

Getting a glimpse of the summit from below while climbing Mount Massive. Photo by Dalton Johnson
3. Forgetting Sunscreen
At high elevations, the sun’s rays are more intense, and forgetting sunscreen can lead to painful burns. The trail to Mount Massive is largely exposed after you leave the treeline, making it essential to protect your skin. On one hike, I forgot to reapply sunscreen and ended up with a sunburn that made the descent miserable.
To avoid this, apply a high-SPF sunscreen before you start your hike and reapply throughout the day, especially on sunny, cloudless mornings. Don’t forget areas like your ears, the back of your neck, and the tops of your hands—these spots are often overlooked. Additionally, wearing a wide-brimmed hat and UV-protective clothing can provide extra protection against the sun’s harmful rays. Sunglasses are also a must, as they reduce glare and protect your eyes from UV exposure at high altitudes.
4. Underestimating the False Summit
Mount Massive is known for its deceptive false summit, which can be a mental challenge for even experienced hikers. After hours of climbing, you’ll crest what appears to be the peak, only to see the true summit looming further ahead. This can be disheartening if you’re not prepared for it.
When I first climbed Mount Massive, the sight of the false summit nearly broke my resolve. But knowing this feature is part of the journey helps you mentally prepare. Keep a steady pace and remember that the extra effort will be worth it once you’re standing on the true summit, taking in the breathtaking views.
One way to avoid disappointment is by studying the route beforehand and setting realistic expectations. Many trail descriptions and maps highlight the false summit, so familiarize yourself with what to expect. Break the hike into manageable segments and celebrate milestones along the way to keep your morale high.

Hiking up the trail on Mount Massive. Photo by Dalton Johnson
5. Failing to Pack the Essentials
While it’s easy to focus on the big items like boots and jackets, neglecting smaller essentials can lead to unnecessary challenges. Always carry plenty of water to stay hydrated—dehydration at high altitudes can creep up quickly. A mix of snacks with carbohydrates and electrolytes will help you maintain your energy levels throughout the hike.
Additionally, a map, compass, or GPS device is critical for navigation. Trails can sometimes be poorly marked, and it’s easy to veer off course, especially in rocky sections. A first-aid kit, emergency blanket, and multi-tool are also valuable additions to your pack in case of unexpected situations. Don’t forget a headlamp, even if you plan to finish in daylight—delays can happen, and having a reliable light source is crucial for safety.
Getting silly just before the summit. Photo by Dalton Johnson
Tips for a Successful Climb
Avoiding these common mistakes will go a long way toward ensuring a safe and enjoyable hike up Mount Massive. Here are a few additional tips to keep in mind:
Acclimate to Altitude: Spend a night at a higher elevation before your hike to minimize the effects of altitude sickness.
Use Trekking Poles: These can provide extra stability on loose rock and reduce strain on your knees during the descent.
Stay Hydrated: Drink water consistently throughout the hike to avoid dehydration.
Monitor Weather Changes: Pay close attention to cloud formations and be prepared to turn back if conditions worsen.
Climbing Mount Massive is an unforgettable experience, but avoiding these common mistakes will make your adventure far more enjoyable. By starting early, dressing in proper layers, protecting yourself from the sun, and preparing for the false summit, you’ll be ready to tackle this incredible 14er with confidence.
Take the time to prepare, embrace the challenge, and savor every step of the journey to one of Colorado’s most iconic peaks. With careful planning and the right mindset, your trek up Mount Massive will be a memory you cherish for years to come.
Discover more Adventures
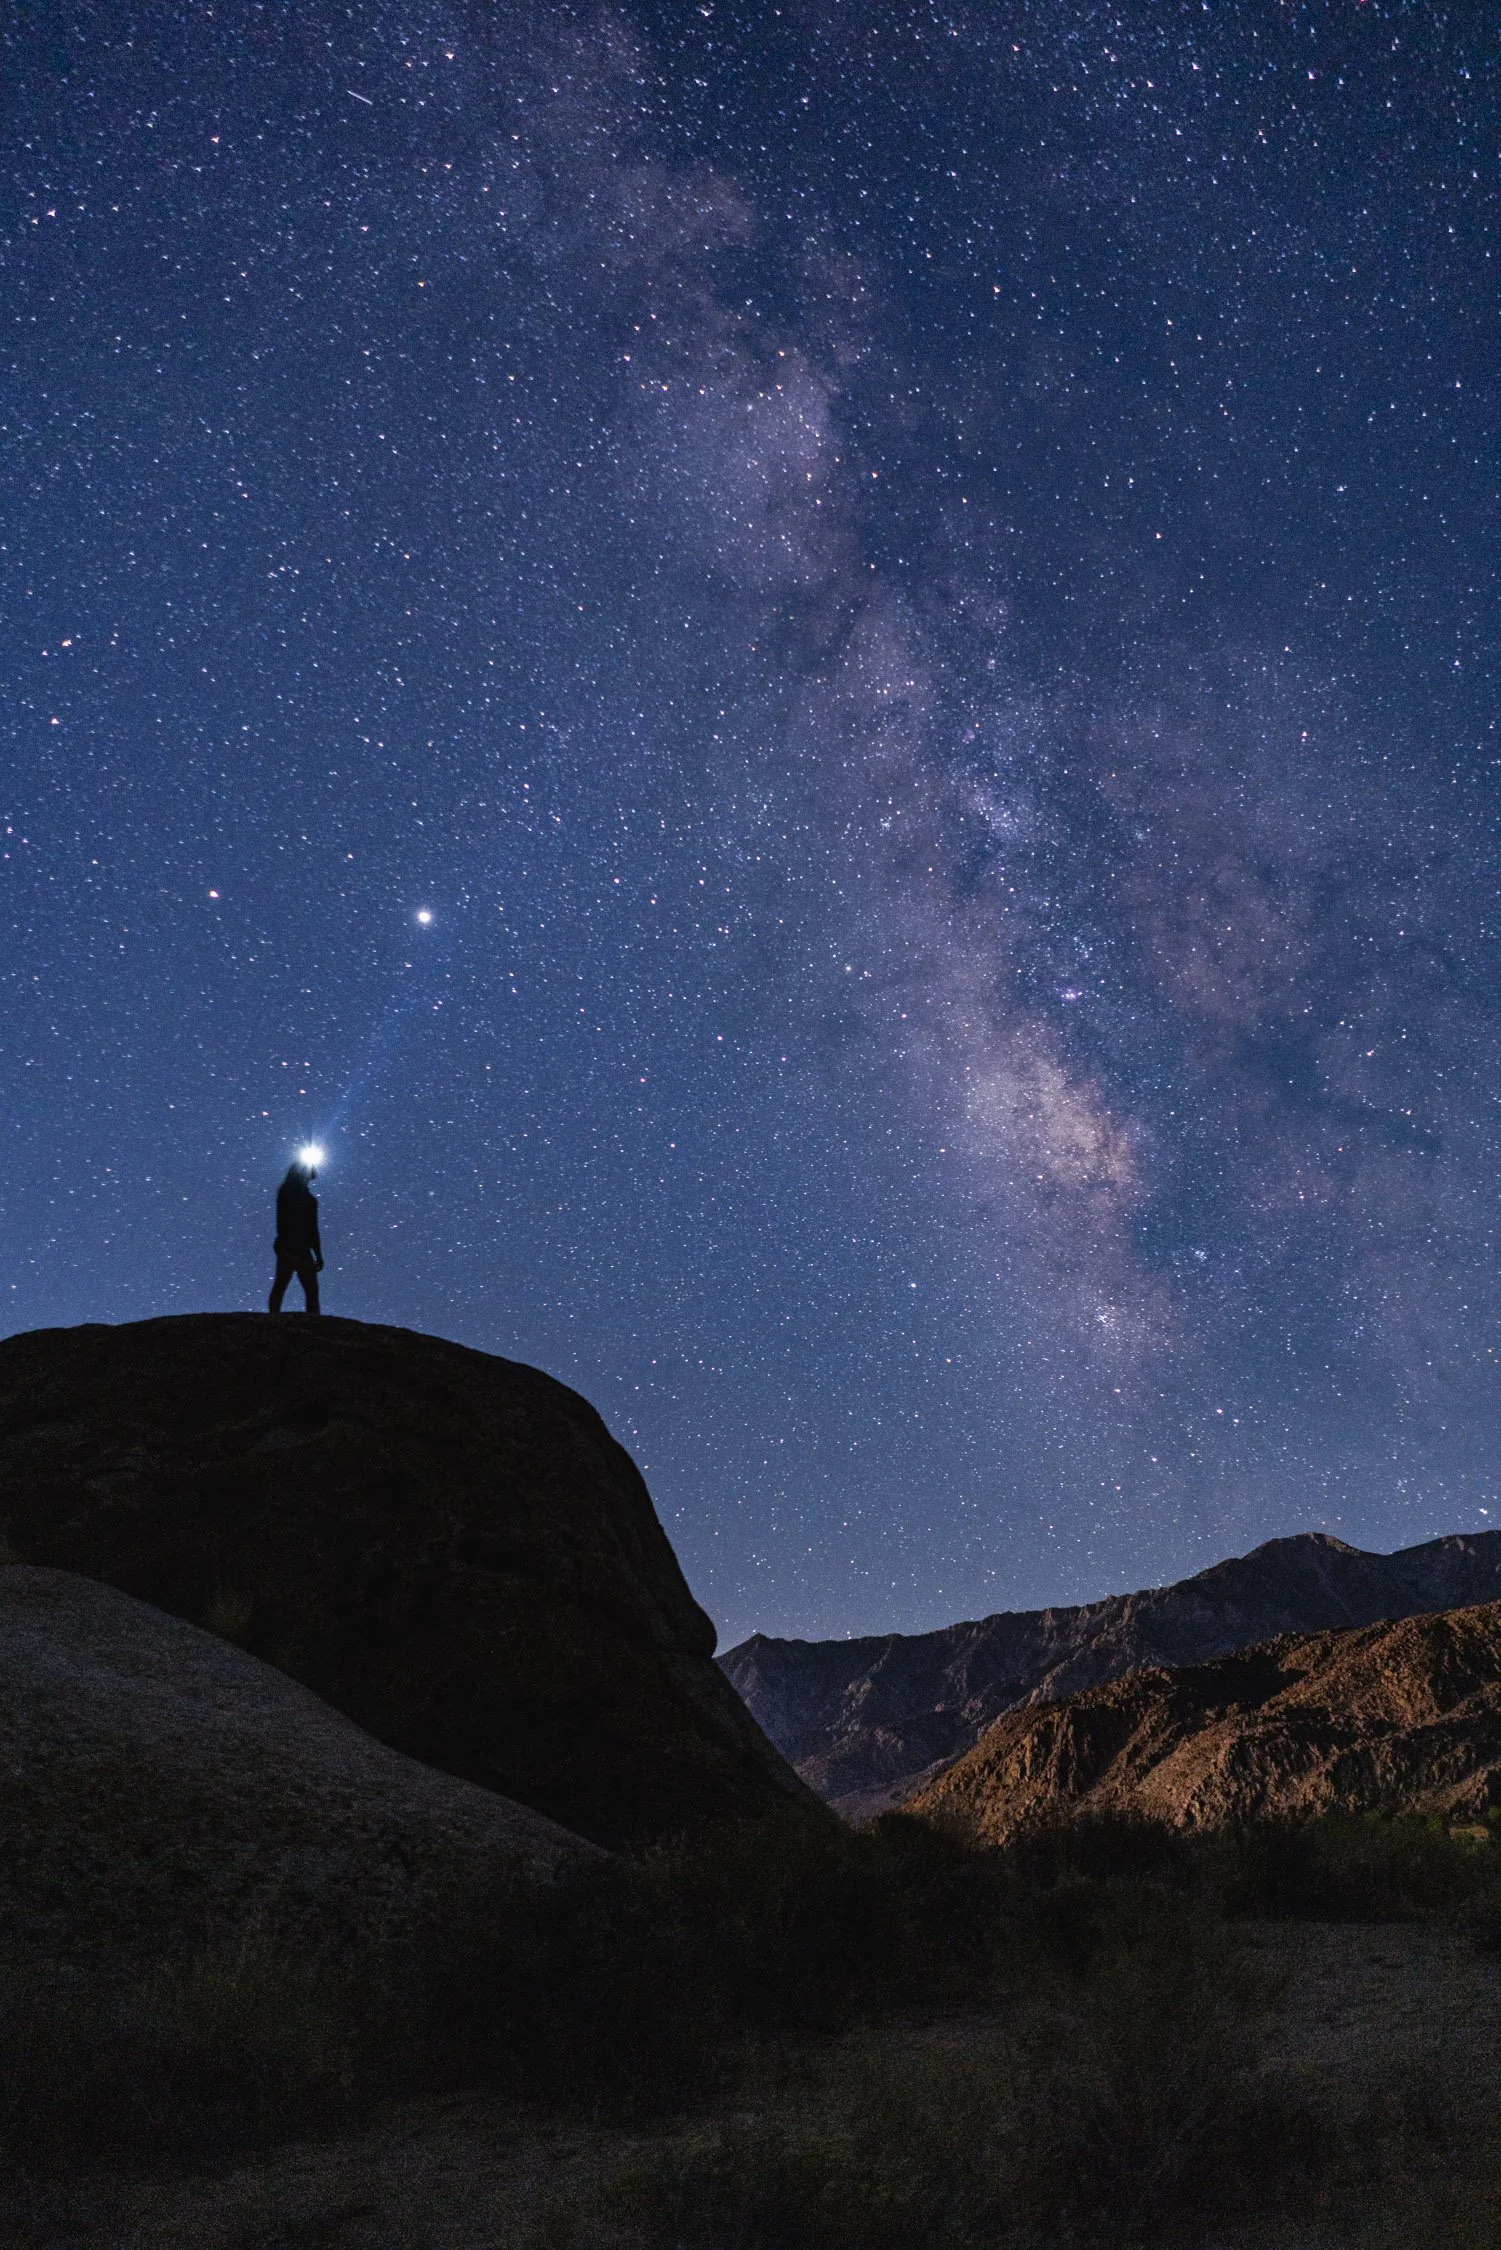
How to Avoid Common Mistakes as a Beginner Stargazer
My passion for stargazing started on a 30-day backpacking trip with friends through Escalante National Monument. Each night, after long days of hiking through the desert, we’d pull out a night sky book and try to identify new stars and constellations. Lying in our sleeping bags, we watched the stars slowly move across the sky, talking and pondering the vastness of space. Those late nights sparked my love for the night sky that has stayed with me for over a decade. Since then, stargazing has become a way for me to connect with nature, friends, and the immense beauty of the universe.
My passion for stargazing started on a 30-day backpacking trip with friends through Escalante National Monument. Each night, after long days of hiking through the desert, we’d pull out a night sky book and try to identify new stars and constellations. Lying in our sleeping bags, we watched the stars slowly move across the sky, talking and pondering the vastness of space. Those late nights sparked my love for the night sky that has stayed with me for over a decade. Since then, stargazing has become a way for me to connect with nature, friends, and the immense beauty of the universe.
Over the years, I’ve learned how to make stargazing an enjoyable experience while avoiding common beginner mistakes. If you’re just starting out, here’s what you need to know to make the most of your nights under the stars.

Camping under the stars is the best way to access the night sky. Photo by Dalton Johnson
1. Dress for the Weather
One of the easiest ways to ruin a stargazing night is not dressing warmly enough. You're not going to think straight if you are shivering. Even in the summer, nights can get chilly, especially in open areas like deserts or mountains. On my backpacking trips, layering up became second nature, often having my sleeping bag ready for extra warmth. Now, I always bring extra blankets and hand warmers when stargazing with friends or family, to make sure everyone is comfortable. It’s better to overprepare than to cut your night short because you’re too cold.
Pro Tip: A thermos of hot tea, hot chocolate, or coffee can make all the difference on those colder nights. Pair it with a comfortable chair and a cozy blanket for an even better experience.
2. Start with a Plan
When I first started stargazing, we relied on a simple night sky book to guide us. It was exciting but often frustrating when we couldn’t find what we were looking for. Now, I use apps like PhotoPills, which is a game-changer for photography. Its AR viewing feature helps me line up shots of the Milky Way at the exact time and location I want. Planning your night can save you frustration and make the experience more rewarding. Research celestial events, like meteor showers or eclipses, and use stargazing apps to identify constellations and planets in advance.
Tip: Create a small checklist of essentials—star maps, a flashlight with a red filter, binoculars, snacks, and a comfortable setup to ensure you have everything you need.

Taking in the Milky Way from the summit of Tallac in Lake Tahoe, CA. Photo by Dalton Johnson
3. Choose the Right Location
Light pollution is one of the biggest barriers to seeing the night sky clearly. If you can, visit a designated dark-sky area. Some of my favorites include Moab, Yosemite National Park, and spots across the American Southwest. These places offer incredible views that make the effort worth it. The fewer city lights, the more stars you’ll see.
Tip: Use a light pollution map online to find the darkest skies near you. Arrive before sunset to scout out a good spot and let your eyes adjust to the dark naturally.
The Milky Way creeping our from behind Landscape Arch in Arches National Park. Photo by Dalton Johnson
4. Be Patient
One mistake I’ve seen time and again is impatience. Beginners often expect to find constellations or spot shooting stars right away. But stargazing is a slow process. It takes time for your eyes to adjust to the dark, and finding constellations requires practice. I’ve also learned to start with the easiest constellations first—Orion and the Big Dipper are great ones to begin with. Once you’ve mastered the basics, you can work on identifying more complex formations.
Tip: Don’t forget that constellations change with the seasons and your location. If a constellation isn’t visible, it’s not your fault—it’s just not the right time of year or hemisphere.
5. Bring the Right Gear
You don’t need an expensive telescope to start stargazing. For years, I used just my eyes and a pair of binoculars. Binoculars are a great starting point because they’re portable and can give you a closer view of the moon and larger celestial objects. As a photographer, I now rely on tools like PhotoPills and sturdy tripods for night photography. But even with advanced gear, basics like a blanket, folding chair, and bug spray can make or break the experience.
Tip: If you’re thinking of investing in gear, start with binoculars. They’re much easier to use than telescopes when you’re beginning and can open up a whole new level of detail in the night sky.

A Milky Way bow, which can be captured during Nov - April in North America. Photo by Dalton Johnson
6. Pick the Right Time
One mistake I made early on was stargazing during a full moon. A bright moon can wash out faint stars, making it harder to see constellations. Now, I always check the lunar calendar and aim for nights around the new moon. Meteor showers and special celestial events are also fantastic times to plan your outing. Timing is everything when it comes to stargazing—you’ll get the best results when the conditions are optimal.
Tip: If you’re planning to photograph the stars, timing is everything. Use apps to track the Milky Way’s position for the best results, and plan your night accordingly.
7. Learn the Basics First
I’ll admit, when I started, I got overwhelmed trying to find advanced constellations or identify faint stars. What I’ve learned is that stargazing is much more fun when you start with the basics. Learn to identify a handful of bright stars or constellations, and build from there. Don’t rush into complicated star charts—keep it simple and enjoy the process of discovery.
Tip: Apps like SkySafari and Star Walk are beginner-friendly and can guide you through the sky step by step. They’ll even show you which stars and planets are visible from your location and time.
The milky way over my van in the Alabama Hills of CA. Photo by Dalton Johnson
Stargazing is one of the simplest joys in life, but it does take a bit of preparation and patience to fully enjoy it. Whether you’re lying under the stars in a dark desert or snapping photos of the Milky Way, the key is to approach it with curiosity and an open mind. After all, the night sky is always full of surprises—if you know how to look. So grab a blanket, head to a quiet spot, and let the stars remind you of the beauty and vastness of our universe.
Discover more Adventures
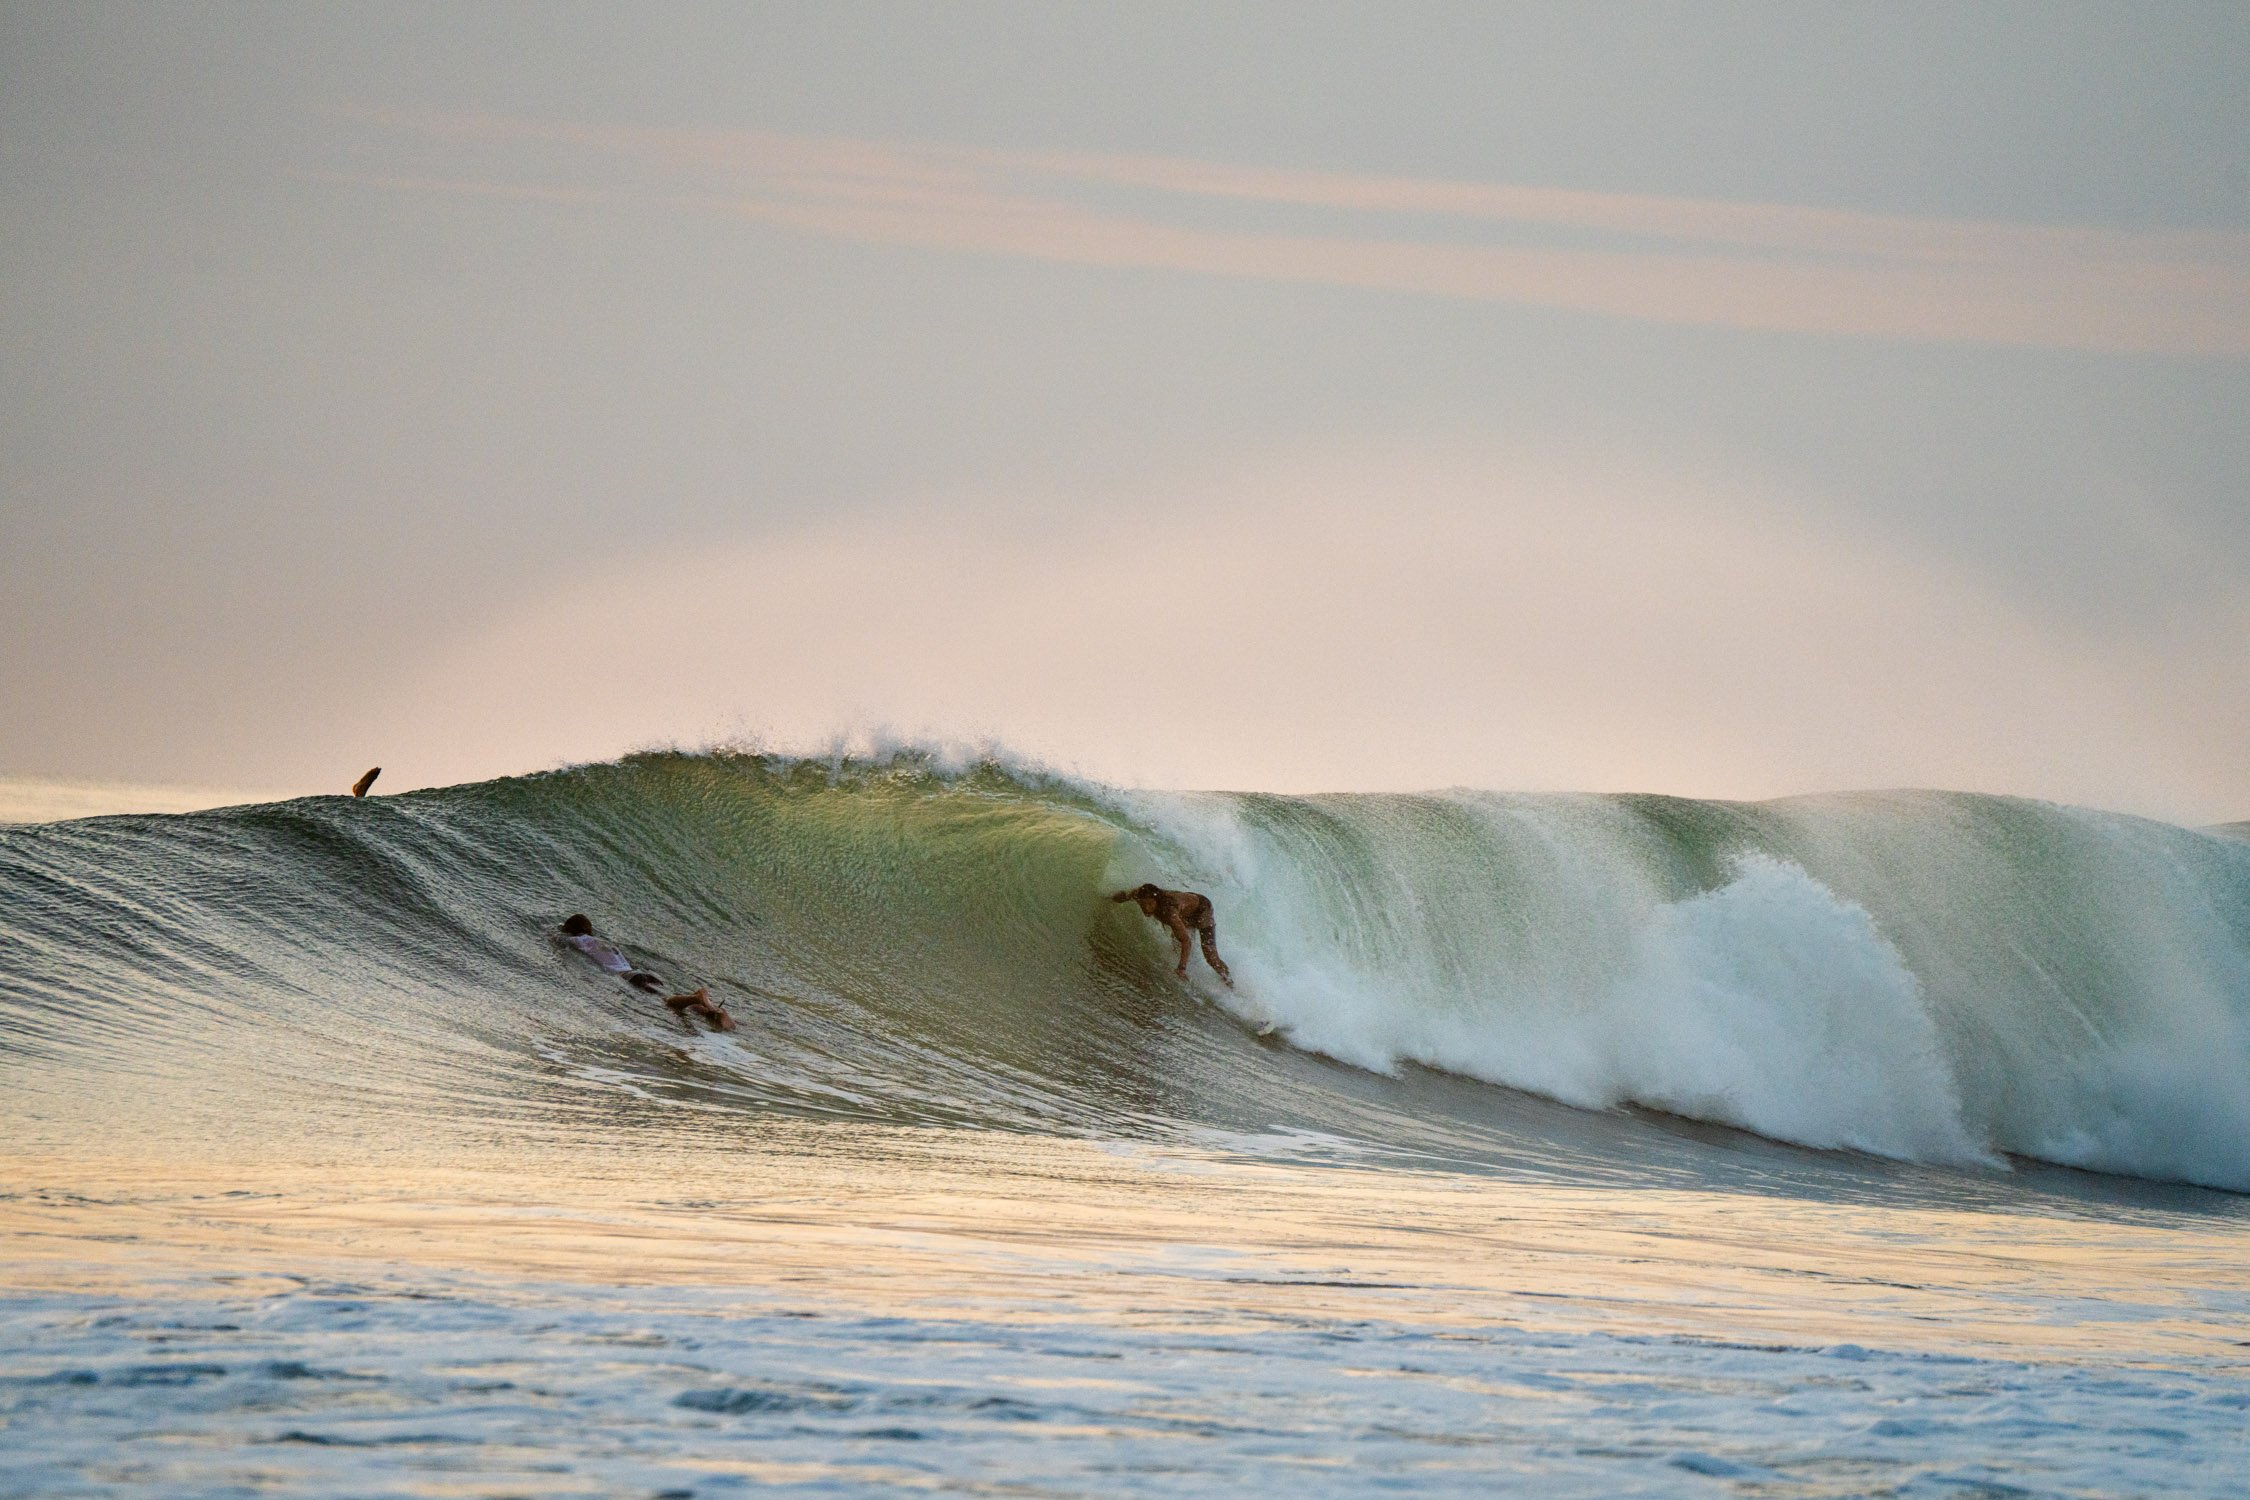
I Caught My First Barrel Surfing Rancho Santana Nicaragua — And You Can Too
When I visited Rancho Santana, Nicaragua, I had one clear goal: surf a barrel. Despite almost 15 years of surfing experience, I had never successfully ridden inside a barrel and been spit out. Surfing Northern California's point breaks rarely presented opportunities for barrel riding, so this felt like my moment. To give myself the best shot, I enlisted the help of a surf instructor. Here’s how it all unfolded.
When I visited Rancho Santana, Nicaragua, I had one clear goal: surf a barrel. Despite almost 15 years of surfing experience, I had never successfully ridden inside a barrel and been spit out. Surfing Northern California's point breaks rarely presented opportunities for barrel riding, so this felt like my moment. To give myself the best shot, I enlisted the help of a surf instructor. Here’s how it all unfolded.
Barrels at the main break of Rancho Santana. Photo by Dalton Johnson
Day One: A Humbling Start
From the first wave, I realized this wasn’t going to be easy. The steep drops were relentless. Sometimes I’d make it to my feet, only to flip upside down and start the session tumbling through the washing machine. My surf instructor quickly identified areas for improvement.
“Use your front foot to steer over the boil,” he suggested. Wipeout.
“Tuck more — these waves aren’t that big,” he coached. Wipeout.
“Find the peak, then drop,” he emphasized. Another wipeout.
By midday, I was exhausted from the endless cycle of paddling, wiping out, and paddling back out. For someone used to long rides and carving turns, barrel riding was an entirely new challenge. It required flexibility, quick reflexes, and a willingness to get thrashed. Fortunately, Rancho Santana’s pool and hot tub offered a relaxing reward for my sore muscles after a tough day.

Scouting the break and showing Kristin where I am surfing. Photo by Dalton Johnson
Day Two: Finding My Groove
Determined to improve, I decided to surf solo the next day. Rancho Santana boasts five beaches, with two prime surfing spots and a few panga drop-off locations. I opted for one of the local breaks, enjoying the vastness of the property. The shuttle rides between beaches highlighted just how expansive and self-contained Rancho Santana is — more like a community than a resort.
Once at the break, I spent another hour getting pounded by waves. But something started to click. My positioning improved, and I began to understand the rhythm of the waves. It wasn’t perfect, but progress was progress.
In the afternoon, my girlfriend and I took a break from surfing and went mountain biking. Rancho Santana’s single-track trails wound through the property, offering scenic routes and thrilling descents. We pedaled to the highest point on the property, then raced downhill, zigzagging through a mix of terrain. By the end, we were both exhausted but exhilarated. After a quick nap, I paddled out for a mellow sunset surf in front of the property. It was the perfect end to the day — easy waves and a breathtaking view.
Day Three: Achieving the Goal
Refreshed and ready, I returned to the original spot with my surf instructor. This time, I felt more prepared. A hearty breakfast and strong coffee had me energized as we paddled out to the peak. I noticed another surfer effortlessly catching barrels; he only had one leg. Inspired, I focused on making it happen.
Wave one: I nose-dived and got a sinus rinse.
Wave two: I stood up but got tomahawked by the lip.
Wave three: A complete disaster.
Then, on wave four, everything clicked. I stood up, angled my board toe-side, and tucked down, dropping my back knee. As the wave curled over me, I found myself inside the barrel. Time seemed to slow down as I sped through the tunnel, and then, just like that, I was spit out. I’d done it — I rode my first barrel.
I kept trying for the rest of the session, but nothing matched that initial success. While I wasn’t catching barrels left and right, breaking the ice gave me the confidence and knowledge to improve.
Almost getting clocked by a surfboard, but catching a barrel at Rancho Santana Nicaragua instead.. Photo by Dalton Johnson
Why Rancho Santana?
Rancho Santana is the ideal place to chase barrels. The variety of breaks ensures waves for all skill levels, and the surf instructors are invaluable for shortening the learning curve. Beyond surfing, the property offers a range of activities, from mountain biking to dining, making it a perfect destination for surf trips and beyond.
If barrel riding is on your bucket list, I can’t recommend Rancho Santana enough. With patience, practice, and a good instructor, you’ll be riding inside the tube in no time. Who knows? Maybe you’ll catch your first barrel here too.
Discover more Adventures
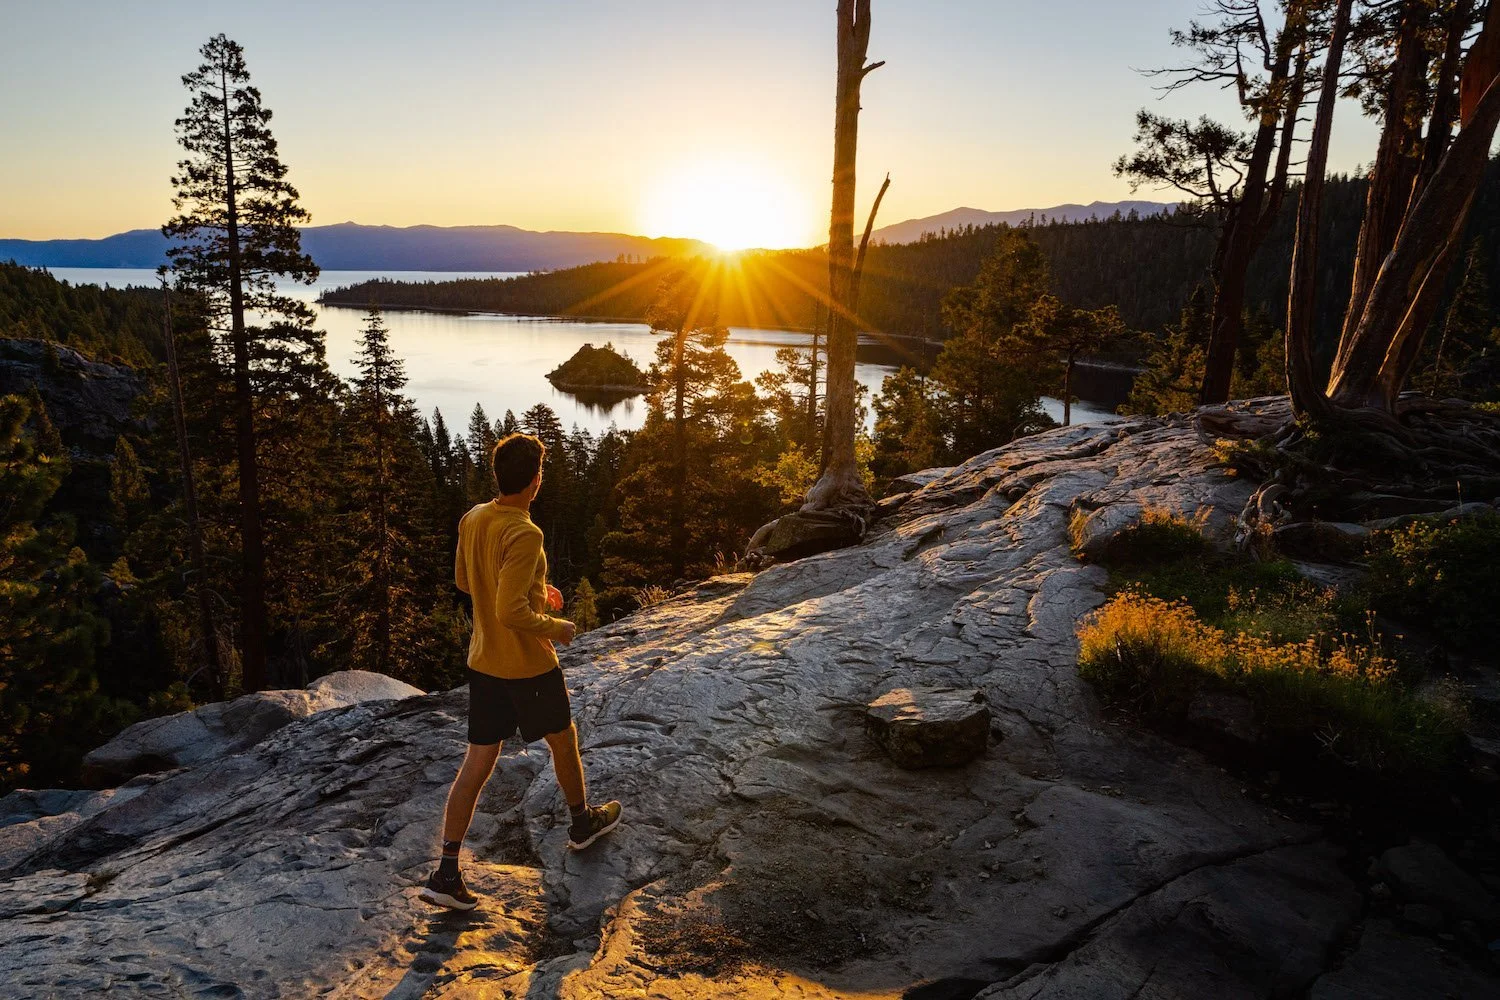
What's The Difference: Day Hike vs. Backpacking vs. Trekking
Embarking on an outdoor adventure is a wonderful way to disconnect from the bustling city life, reconnect with nature, and challenge yourself physically and mentally. When it comes to exploring the great outdoors, day hikes, backpacking trips, and trekking expeditions are popular choices. Each option offers a unique experience, catering to different preferences, skill levels, and time commitments.
When I got into the outdoors I started to hear terms like day hikes, backpacking trips, and trekking. Honestly, I had no idea what people were talking about and found it hard to understand. So, I wrote this article for you all in the same position, wondering, what the heck is the difference between day hikes, backpacking trips, and trekking.
The short answer to the question, “What really is the difference between day hiking, backpacking, and trekking?” Day hiking involves completing a trail within a single day, covering shorter distances and requiring minimal gear. Backpacking, on the other hand, includes spending one or more nights in the wilderness, carrying camping gear and supplies for longer trips. Trekking is a more intense and extended form of hiking, often lasting weeks or months, covering extensive distances, and involving challenging terrains and higher physical demands.
However, there is more to the story, so below you will find the differences between day hikes, backpacking, and trekking.
Backpacking in Washington. Photo by Dalton Johnson
What Really Are the Differences?
While day hiking, backpacking, and trekking all involve outdoor exploration, key differences set these activities apart. Understanding these distinctions can help you choose the adventure that aligns with your goals, preferences, and abilities. Each offers unique challenges and rewards, making them suitable for various fitness levels, time commitments, and personal goals.
Duration and Distance
Day Hiking: Typically completed within a single day, these excursions cover shorter distances ranging from a few miles to a dozen miles. They are ideal for quick getaways or testing your fitness without extensive preparation. Day hikes are great for exploring local trails, enjoying a scenic spot, or introducing beginners to outdoor activities.
Backpacking: This involves spending one or more nights in the wilderness, often covering longer distances that can span multiple days. Backpacking trips can range from a weekend adventure to a week-long journey, depending on the destination and itinerary. Multi-day hikes allow for deeper immersion in nature and the opportunity to explore remote areas that day hikers cannot reach.
Trekking: These are longer and more demanding journeys that can last for weeks or even months. Treks often cover extensive distances, traversing rugged terrains such as mountain ranges, deserts, or jungle trails. Treks like the Appalachian Trail or Everest Base Camp require sustained endurance, planning, and often a deep appreciation for cultural and environmental exploration.

Backpacking in Lake Tahoe, CA. Photo by Dalton Johnson
Self-Sufficiency and Gear
Day Hiking: Requires carrying essential items like water, snacks, a first-aid kit, and extra layers. Day hikers rarely need camping gear or extensive supplies, keeping their packs light and manageable. This simplicity makes day hikes an accessible option for individuals of all experience levels.
Backpacking: Necessitates carrying all the gear required for overnight stays, including a tent, sleeping bag, cooking equipment, and sufficient provisions. Backpackers must also consider weather conditions and prepare accordingly with items such as rain gear, thermal clothing, or navigation tools. A well-packed backpack can make the difference between a comfortable adventure and a challenging one.
Trekking: Similar to backpacking but may involve additional specialized equipment depending on the terrain, altitude, and climate. For example, trekkers in high-altitude areas might need crampons, trekking poles, or portable oxygen systems. Some treks also involve logistical support such as porters or guides, which can influence the type and amount of gear carried.
Accessibility and Location
Day Hiking: Day hikes are often located near populated areas, with accessible trails in local parks, nature reserves, or nearby mountain ranges. These trails are designed to be beginner-friendly and convenient for quick escapes into nature. Some popular day hiking spots even offer well-marked paths and facilities like restrooms and parking.
Backpacking: This activity can take place in a variety of settings, including designated backpacking routes, national parks, or remote wilderness areas. Backpackers often seek trails that provide a balance between challenge and scenic rewards. National parks frequently have dedicated backpacking routes with established campsites, offering both adventure and safety.
Trekking: Treks often occur in remote and less-accessible regions. Locations such as high mountain passes, deep forests, or isolated villages provide unique cultural and natural experiences. Trekkers may need to rely on guides, porters, or pre-arranged logistical support. Iconic trekking destinations often combine challenging routes with opportunities to experience local traditions and breathtaking landscapes.

Day hike in Sedona, AZ to a cave. Photo by Dalton Johnson
Level of Difficulty
Day Hiking: Generally suitable for beginners or individuals with moderate fitness levels. Day hikes are less physically demanding and involve minimal risk, making them accessible for families and casual adventurers. They offer a great way to enjoy nature without significant physical or logistical challenges.
Backpacking: Requires a higher level of physical endurance and strength. Backpackers must be prepared for longer distances, heavier loads, and elevation changes. Conditioning and preparation play a significant role in a successful backpacking trip. Backpacking is often considered a stepping stone to more ambitious outdoor adventures like trekking or mountaineering.
Trekking: Demands exceptional fitness, stamina, and mental resilience. Treks often involve challenging terrains, unpredictable weather, and significant altitude changes, testing both physical and mental limits. Trekkers must be ready to face extended periods of physical exertion, often in remote and harsh environments.
Time Commitment
Day Hiking: A single-day activity, making it perfect for individuals with limited time or busy schedules. Many trails allow hikers to enjoy nature without dedicating extensive time to preparation or travel. This makes day hiking a flexible option for spontaneous adventures.
Backpacking: Involves a commitment of several days or weeks. This makes it ideal for those seeking a more immersive experience during vacations or breaks, allowing for deeper exploration of natural landscapes. Backpacking offers the chance to disconnect from daily life and embrace the solitude of the wilderness.
Trekking: Requires the most time, often spanning several weeks or months. Trekkers need to plan for extended periods away from home and may need to coordinate logistics like visas, permits, and resupply points. Long treks often become transformative journeys, offering both physical challenges and profound personal growth.

Regardless of hike, backpacking, or trekking the natural views are stunning. Photo by Dalton Johnson
Choosing the Right Adventure
Day hiking, backpacking, and trekking offer distinct outdoor experiences, each catering to different preferences, skill levels, and time commitments. Whether you prefer a shorter, accessible day hike, a self-sufficient backpacking journey, or an epic trekking expedition, consider the following factors:
Duration: How much time can you dedicate?
Gear Requirements: Are you equipped for overnight or extended stays?
Difficulty: What is your fitness and experience level?
Accessibility: How far are you willing to travel to reach the trailhead?
Time Commitment: Are you looking for a single-day outing or a long-term adventure?
Ultimately, the most important aspect of any outdoor activity is immersing yourself in nature, challenging your limits, and enjoying the incredible beauty of the outdoors. Each option offers unique rewards, so choose the adventure that best fits your lifestyle and aspirations. Remember that all three activities provide opportunities to reconnect with the natural world, build resilience, and create lasting memories. Whether you're starting small with day hikes or embarking on a life-changing trek, every step taken outdoors is a step toward adventure.


Day hikes can be short, like this one to the cliff at Sharkfin Cove in Santa Cruz, CA. Photo by Dalton Johnson
Day Hiking
A day hike is a perfect choice for beginners, people with limited time, or those seeking a shorter, more manageable outdoor experience. Day hikes involve setting out on a trail and completing it within a single day, returning to your starting point by evening. The distance can range from a few miles to a dozen, depending on trail difficulty and personal preference.
Pros of Day Hiking:
Accessibility: Day hikes are often near populated areas, making them easy to plan in local parks, nature reserves, or nearby mountain ranges.
Lighter Pack: You only need to carry essentials like water, snacks, a map, and extra clothing layers.
Flexibility: You can choose your pace, rest stops, and even alter plans mid-hike if necessary.
Ideal for Beginners: Day hikes allow newcomers to gain experience, build stamina, and enjoy the outdoors without committing to longer trips.
Cons of Day Hiking:
Limited Exploration: Since day hikes are time-constrained, you may not reach deeper, more remote wilderness areas.
Less Immersion: Returning to civilization by evening means missing out on the solitude and night-time ambiance of the wilderness.
Essential Gear for Day Hiking:
Comfortable hiking boots or shoes.
Weather-appropriate clothing.
A small backpack or daypack.
Water, snacks, a map, a compass, and a first aid kit.
Optional trekking poles for stability.
A lightweight rain jacket or windbreaker.

Backpacking in the High Sierra for a week. Photo by Dalton Johnson
Backpacking
Backpacking offers a more immersive outdoor experience by combining hiking with overnight camping. It involves carrying all necessary supplies, including camping gear, food, and water, in a backpack. Backpacking trips often cover longer distances and require careful planning and preparation.
Pros of Backpacking:
Wilderness Immersion: Explore remote areas and escape the crowds.
Extended Time in Nature: Enjoy multiple days and nights outdoors, including breathtaking sunrises, sunsets, and stargazing.
Sense of Accomplishment: Completing multi-day treks fosters self-reliance and provides a sense of achievement.
Cons of Backpacking:
Heavier Load: Carrying camping gear and supplies requires physical endurance and a larger backpack.
Planning and Logistics: Backpacking demands route planning, permits (if needed), and transportation arrangements.
Time Commitment: Multi-day trips require dedicating several consecutive days.
Essential Gear for Backpacking:
A sturdy and comfortable backpack.
Tent or hammock system with a rainfly.
Sleeping bag and sleeping pad.
Cooking equipment and lightweight food.
Water filtration or purification system.
Extra clothing layers for varying weather.
Navigation tools like a map, compass, or GPS.
Headlamp or flashlight.
Personal hygiene items and repair kits.

At a certain point, trekking starts to feel like living on the trail. Photo by Dalton Johnson
Trekking
Trekking is the ultimate outdoor adventure, involving long-distance journeys through challenging terrains. Trekking experiences can range from multi-day trips to expeditions lasting weeks or months. These trips push physical and mental boundaries, often taking place in remote regions with stunning landscapes.
Pros of Trekking:
Epic Adventure: Undertake extended journeys through diverse landscapes, crossing mountain passes and encountering unique cultures.
Stunning Scenery: Trekking routes showcase breathtaking scenery, including high peaks, valleys, and pristine lakes.
Personal Growth: Trekking tests resilience and adaptability, fostering self-discovery and growth.
Cons of Trekking:
Intense Physical Demands: Long distances and challenging weather require high fitness levels.
Extensive Preparation: Planning involves researching routes, selecting gear, and understanding safety measures.
Time and Resource Commitment: Trekking can span weeks or months, demanding significant time and financial investment.
Essential Gear for Trekking:
Durable trekking boots for rough terrains.
Lightweight, moisture-wicking clothing.
Trekking poles for stability.
Crampons and ice axes for icy or snowy conditions.
High-altitude gear for cold temperatures.
Climbing harnesses and ropes for technical sections.
Avalanche safety equipment if trekking in prone areas.
Supplies for altitude sickness prevention and treatment.
Day hiking to the summit of Mount Freel in Lake Tahoe. Photo by Dalton Johnson
Whether you opt for a day hike, backpacking adventure, or trekking expedition, each outdoor experience offers its own rewards and challenges. Consider your fitness level, time constraints, and personal preferences when making a choice. Remember, the journey itself matters as much as the destination, so embrace the opportunity to connect with nature and create lasting memories on your chosen adventure.
Discover more adventures
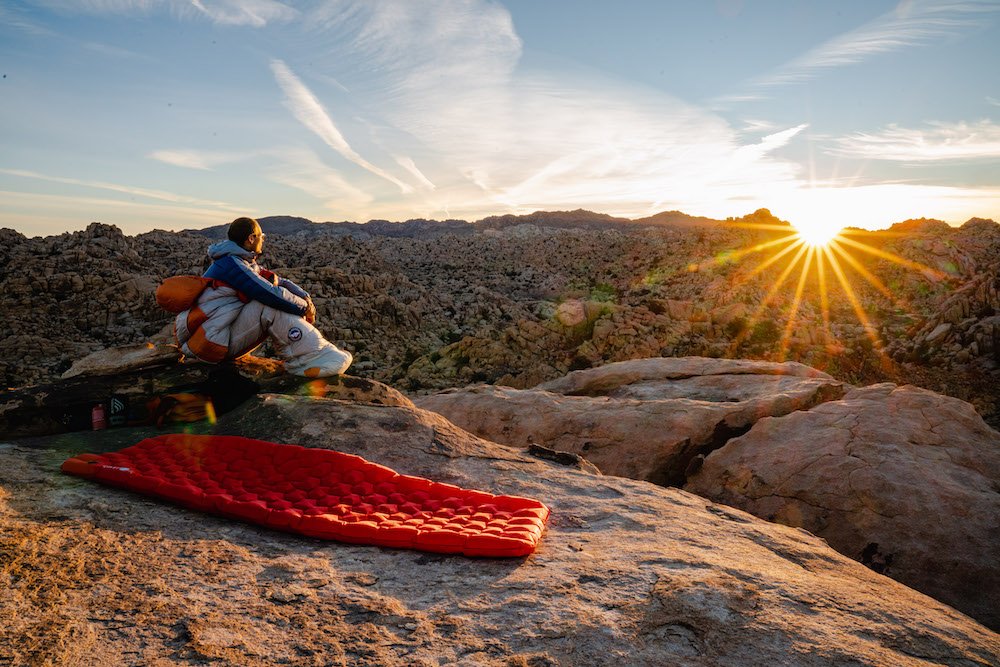
It’s Weird, I Know, But I Love Joshua Tree’s Backcountry
Exploring the backcountry of Joshua Tree National Park is an experience unlike any other. For some, the vast, barren desert might seem uninviting or even intimidating. But for me, it’s a place of serenity, creativity, and unmatched beauty. It may sound strange to some, but I genuinely love spending time in Joshua Tree’s backcountry, especially when I go solo. There’s something about being out there, surrounded by desert silence, that keeps calling me back.
Exploring the backcountry of Joshua Tree National Park is an experience unlike any other. For some, the vast, barren desert might seem uninviting or even intimidating. But for me, it’s a place of serenity, creativity, and unmatched beauty. It may sound strange to some, but I genuinely love spending time in Joshua Tree’s backcountry, especially when I go solo. There’s something about being out there, surrounded by desert silence, that keeps calling me back.
Watching the sunrise after a solo night in Joshua Tree’s backcountry.. Photo by Dalton Johnson
Is Backcountry Camping Allowed in Joshua Tree?
Yes, backcountry camping is allowed in Joshua Tree National Park, but there are some important guidelines to follow. Campers must park and register at one of the park’s 13 backcountry registration boards. From there, you’re required to hike at least one mile away from roads and established trails to set up camp. Staying within 500 feet of any water source is prohibited to protect the fragile desert ecosystem.
Backcountry camping in Joshua Tree is entirely primitive—no designated campsites, no water, and no facilities. This minimalist setup is one of the reasons I find it so rewarding. It’s just you, your gear, and the desert.

Packing a small bag before heading into Joshua Tree’s backcountry. Photo by Dalton Johnson
Why Joshua Tree’s Backcountry Feels So Special
I’ve done four backcountry overnights in Joshua Tree, and every trip leaves me eager for the next. There’s something about packing light and embracing the simplicity of cowboy camping under the stars. Without a tent, you’re fully immersed in the desert’s beauty. The light pollution is minimal, making it easy to spot the Milky Way and constellations while lying in your sleeping bag. It’s moments like these that remind me why I keep coming back.
Compared to other backcountry spots, Joshua Tree’s hazards are relatively manageable. Sure, you need to keep an eye out for snakes and always carry plenty of water to avoid dehydration, but otherwise, it’s a straightforward place to camp for a night or two. That simplicity makes it ideal for both seasoned adventurers and those looking to try backcountry camping for the first time.
Wandering and Writing in the Desert
One of my favorite things about Joshua Tree’s backcountry is how much freedom it offers. I usually bring a light pack with the essentials, plus a journal and my camera. From there, it’s all about wandering. The park’s iconic granite formations make it a playground for scrambling and exploring. Climbing to the top of one of these rock piles, you’re rewarded with panoramic views of the sprawling desert and distant mountains.
The desert sun can be brutal, but if you find a patch of shade, it transforms into the perfect spot to sit, write, or doodle. I’ve spent hours in these moments, watching how the sun’s angle changes the shadows on the rocks and the desert floor. It’s peaceful and strangely meditative—something I don’t get from any other type of camping.
The Challenges Are Part of the Charm
Backcountry camping in Joshua Tree does come with its challenges, but they’re part of what makes it special. The heat demands respect, and I always carry more water than I think I’ll need. There’s also the need to be mindful of the park’s delicate ecosystem—staying on durable surfaces and practicing Leave No Trace principles are crucial.
But once you’ve prepared for these elements, the backcountry becomes a haven. Its simplicity, beauty, and quiet make it feel like a world apart, even if you’re only a short hike from the main road.
Sleeping under the full moon while cowboy camping in Joshua Tree National Park. Photo by Dalton Johnson
Why I Keep Coming Back
For me, the backcountry of Joshua Tree is about more than just camping—it’s about connection. It’s where I can disconnect from the distractions of daily life and reconnect with myself. Whether I’m stargazing, journaling, or scrambling across boulders, I always feel a sense of clarity and renewal.
Every trip to Joshua Tree’s backcountry is different. The light changes, the landscape shifts, and each adventure feels like a new story waiting to be told. It might not be for everyone, but for me, it’s the perfect escape.
If you’ve ever considered backcountry camping in Joshua Tree, I can’t recommend it enough. Pack your gear, plan well, and prepare to experience a desert that’s as strange as it is magical. You might just find yourself falling in love with it, too.